 Thanks: 0
 Likes: 0
 Dislikes: 0
-
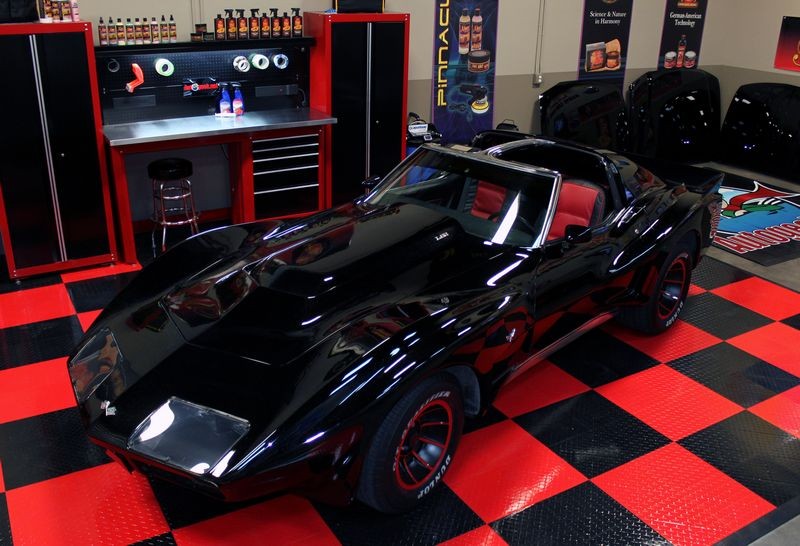
Autogeek Eye Candy
Autogeek Eye Candy
Autogeek's Car of the Week!

The below posts are just excerpts from the complete write-ups for each of the cars that we've put through our Autogeek's Car of the Week" program. Most of the actual write-ups have around 100 pictures or more...
If you want to check out the complete write-ups for any of the cars in this thread you can click the links below.
Autogeek Eye Candy - Autogeek's Car of the Week Projects - 2011
About a year ago I had this idea for Autogeek's Car of the Week but just couldn't start it up at the time. This last summer was busier than any other previous summer but I decided that come what may... I needed to get it going...
We have just too cool of facilities and there are just too many cool cars that need a little help to not bring the two components together to use in a way to share products, process and results...
While our first car under the Autogeek's Car of the Week banner was done in August of 2011, there's actually been a lot of cars I've brought to Autogeek since joining the AG Team that fit into this category so I'm going to include them also...
To start with however, here's a pictorial history of the cars we've worked on since starting "Autogeek's Car of the Week".
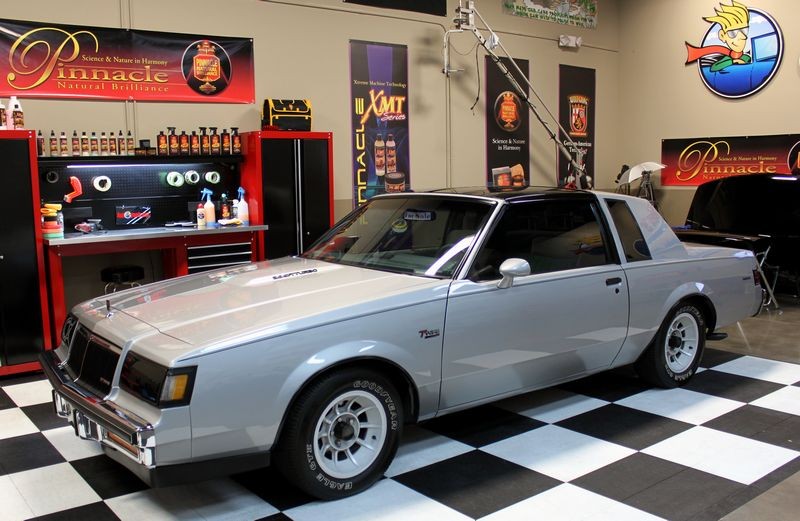
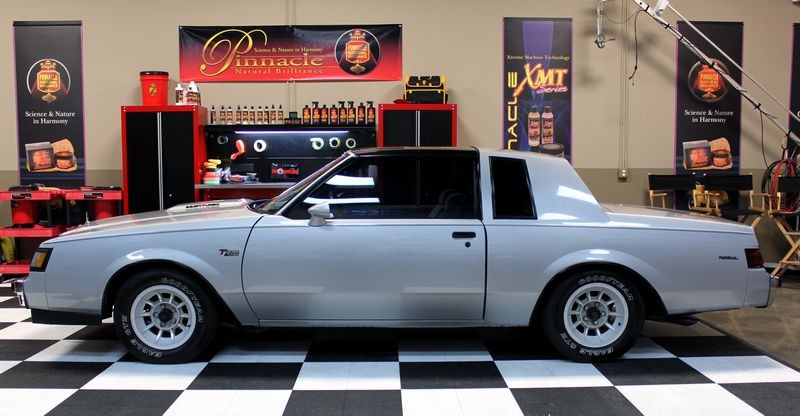
First up was my friend Bob's 1986 Buick Regal T-Type...
1986 Buick Regal T-Type Turbo
Bob, the owner of this car purchased this car brand new and has kept meticulous care of it ever since. It's all original and in mint condition. It's also for sale, anyone interested I can put you in touch with Bob who's a very good friend of mine and Autogeek.
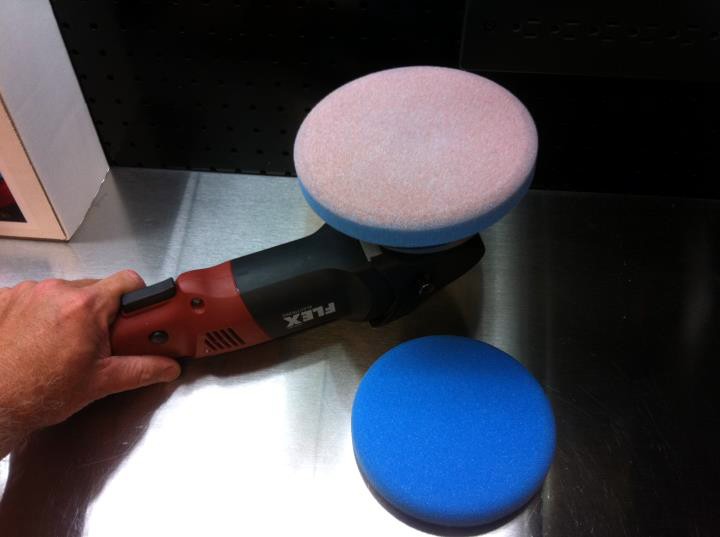
For this project we showcased the new 4" Flex 3401 backing plates - these will be available in January at Autogeek.net.
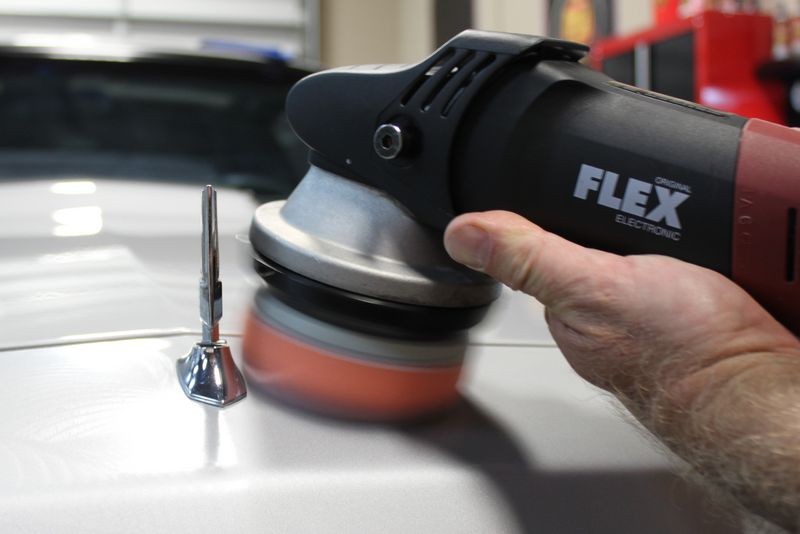
The new 6" and 4" backing plates for the Flex 3401

And Bob, the owner, learned how to polish and wax his own car by machine!
Bob using a PC 7424XP to remove swirls...

Bob getting ready to machine apply wax to the paint...

After
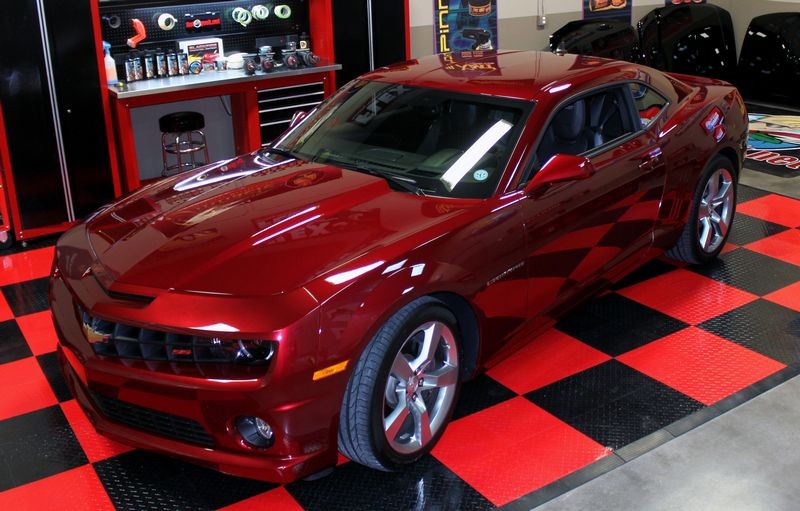
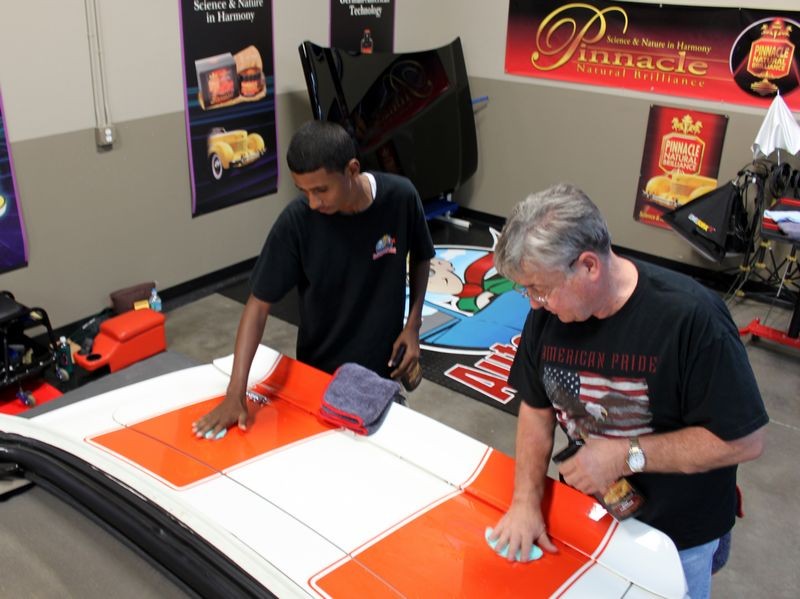
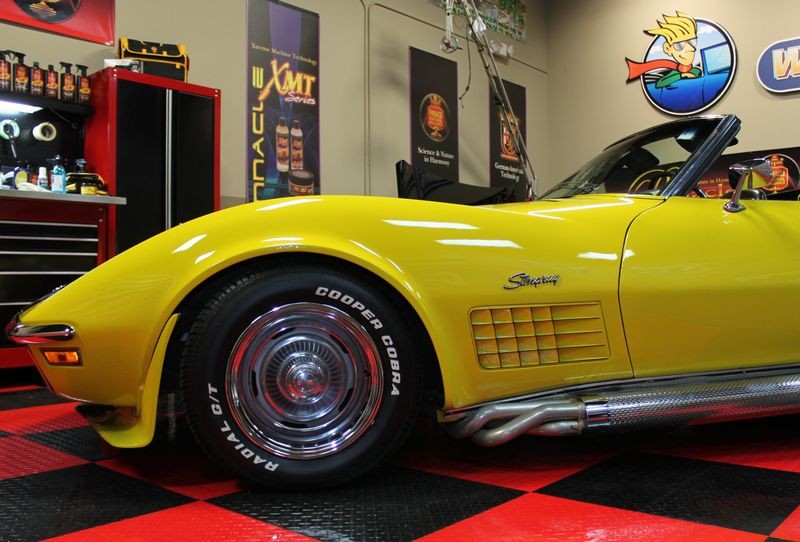
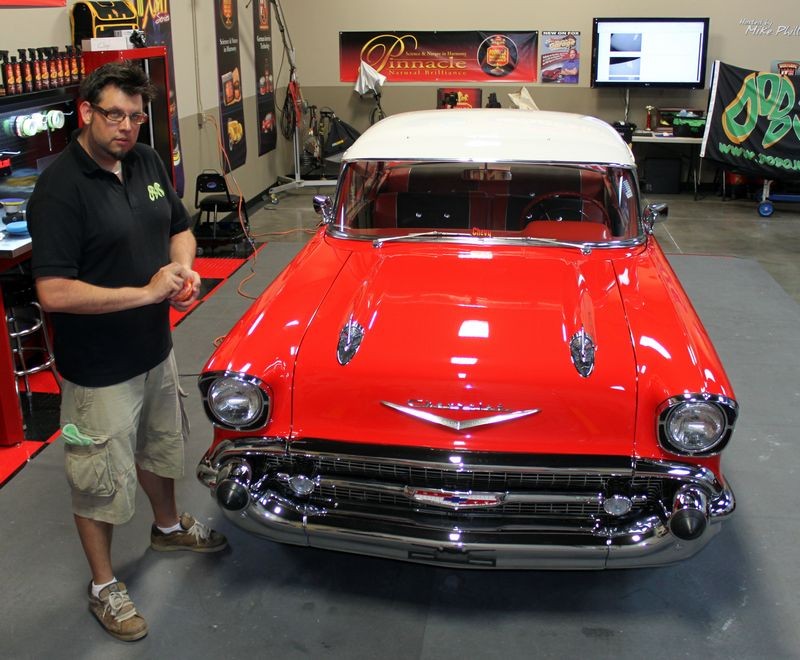
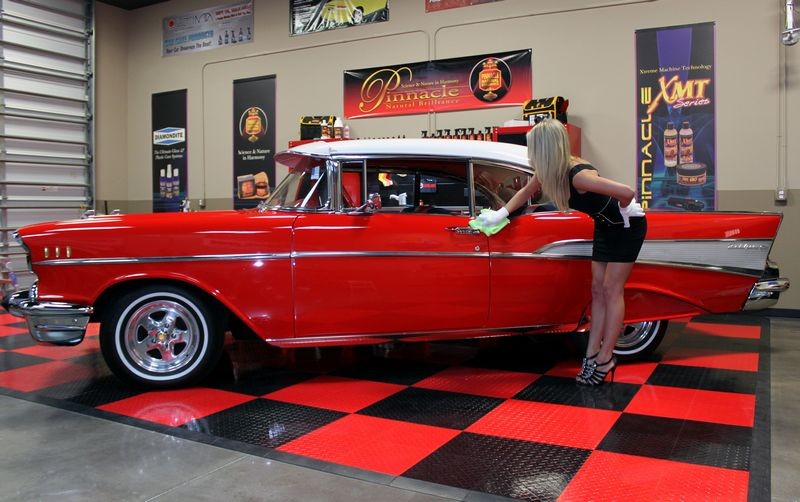
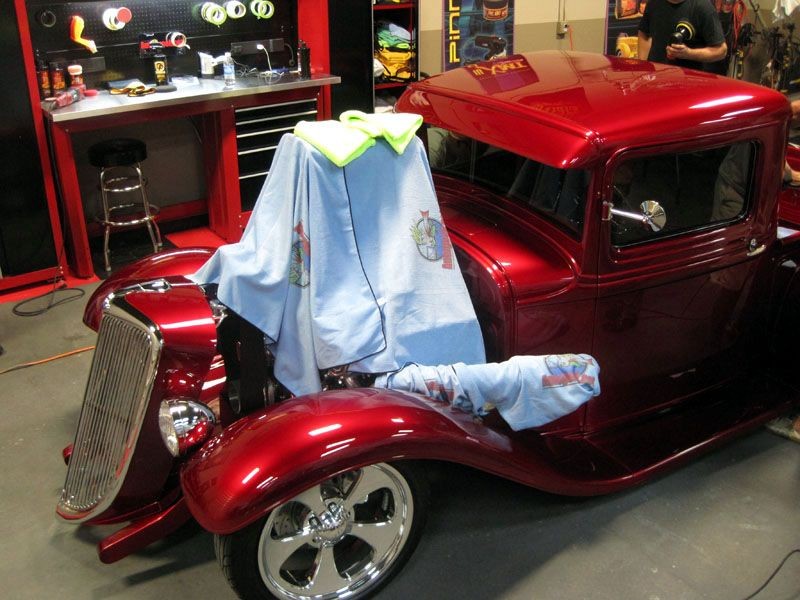
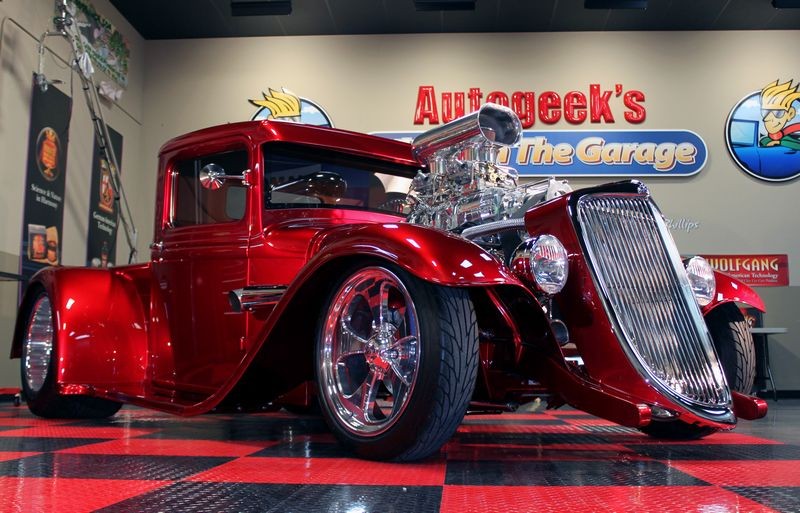
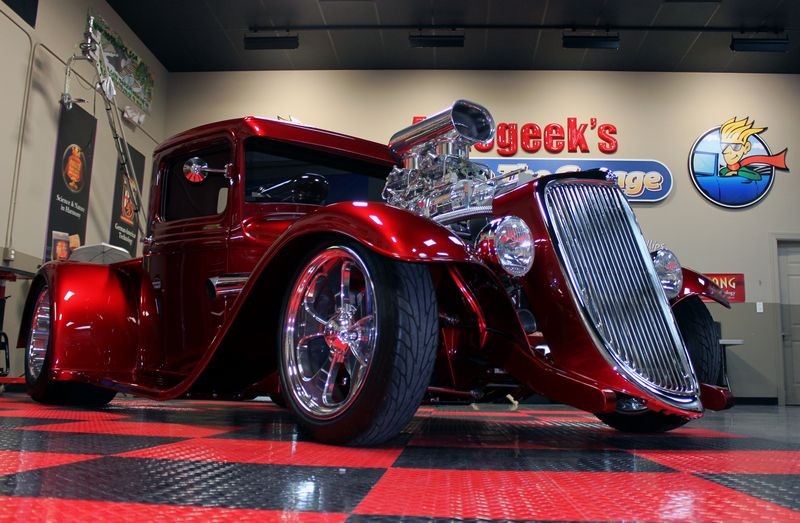
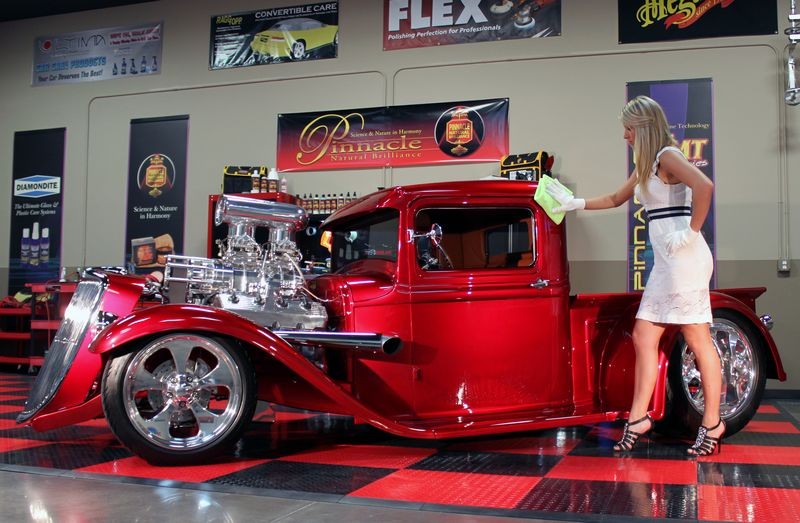
Next we worked on Rene's 2011 Red Jewel Tint Camaro.
2011 Camaro - Modeled by Amy
I met Rene over the phone as he was looking for help to remove the etchings left by some Bird Droppings. The next day I was scheduled to shoot a series of how-to videos with my friend Matt Steel one of the co-hosts of Truck U and of TrucksGoneWild.com fame and we needed a "cool" car.
I floated the idea to Rene about letting us use his car in the videos and then afterwards I promised to help him learn how to machine polish paint and bring his car back for a Show Car Makeover. To my surprise... he took me up on his offer. We shot the video, he brought his car back and I've been good friends with Rene and his wife Sheila ever since.
You can check out Rene's car with Matt and myself here,
Pinnacle Wax Complete Automotive Detailing How-to
Here's Rene using Blackfire Clay and Blackfire Clay Lubricant to clay the paint...

Robert does a Test Spot on the hood to dial-in the process the rest of us will duplicate over the rest of the car. For this he's using the Flex 3401 with a Cyan Hydro-Tech Cutting Pad and the Blackfire Scratch Resistant Compound. This combination of products on the 5.0 Speed Setting removed all but the deepest RIDS
Here you can see the tint in the tinted clear coming off the car as we compound it and onto the face of the pad. This is nothing to worry about, keep in mind when you're doing any correction work on a clearcoat paint system you too are removing paint that is building up on the face of your buffing pad but because the paint is clear you won't see it build-up on the face of your pad.
See this article,
Why it's important to clean your pads often...
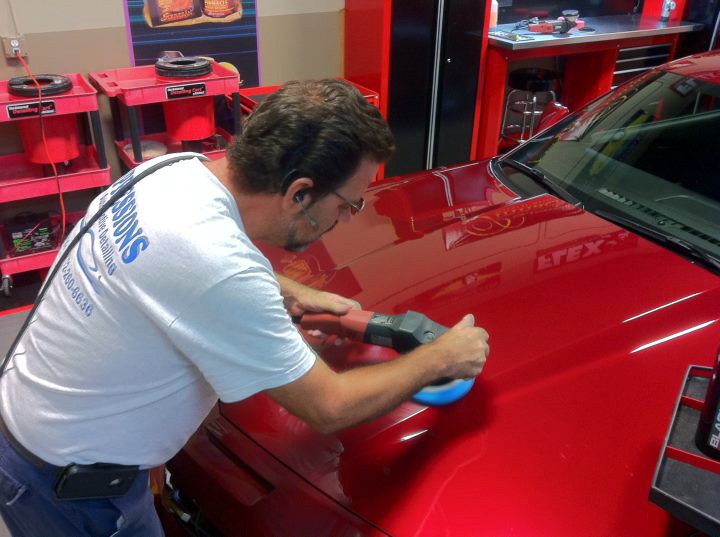
That's me compounding the lower rear quarter panel, if it has paint it gets polished...

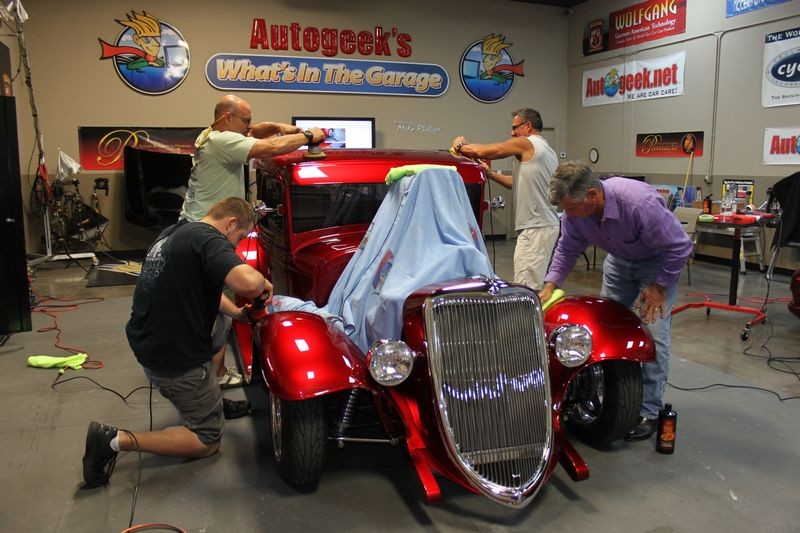
Todd Helme gets ready to start on the passenger side...

Teamwork...

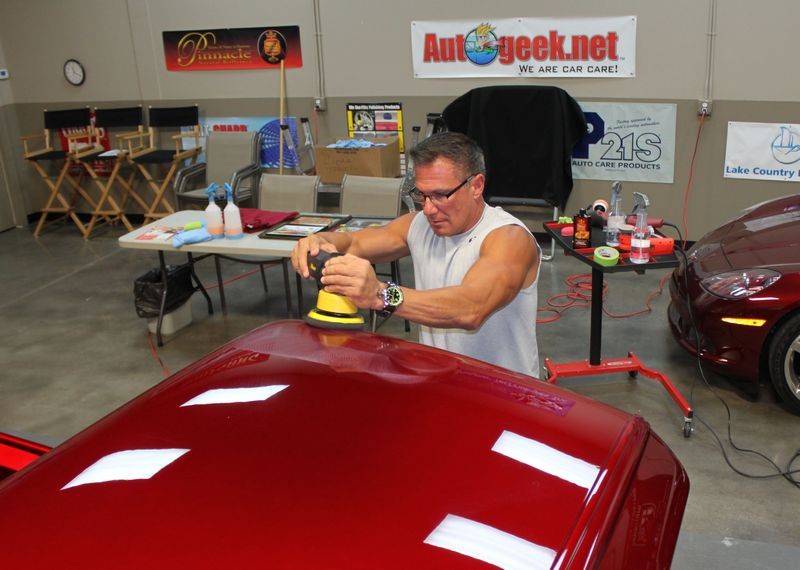
At this point we're machine polishing the paint using the Flex 3401 with Crimson Hydro-Tech Finishing Pads and Blackfire Scratch Resistant Clear Finishing Polish.

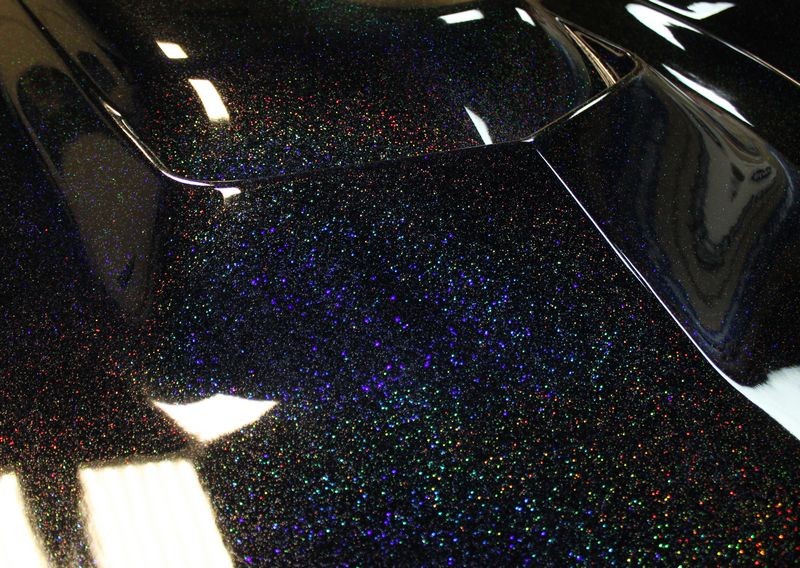
Beauty Shots
And here's his beautiful car after we machine polished and machine waxed the paint using the Blackfire line of products.
Beauty and the Beast...
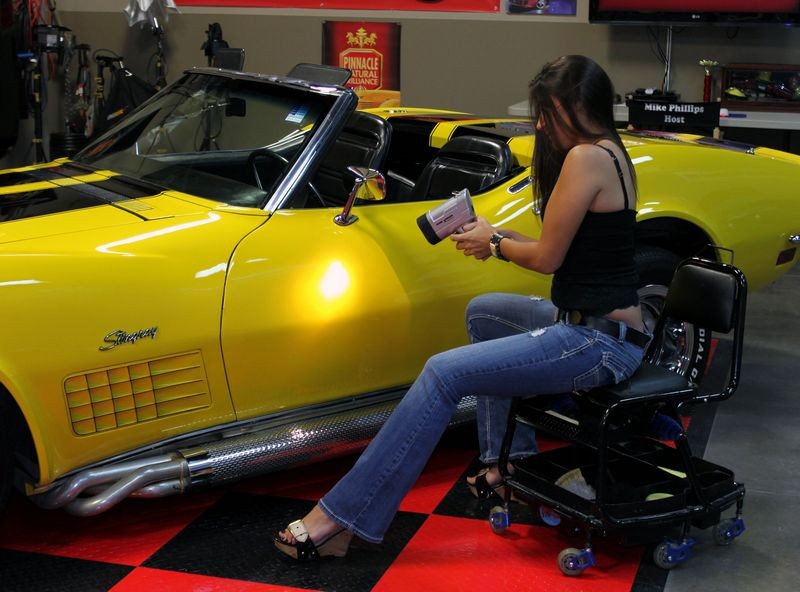
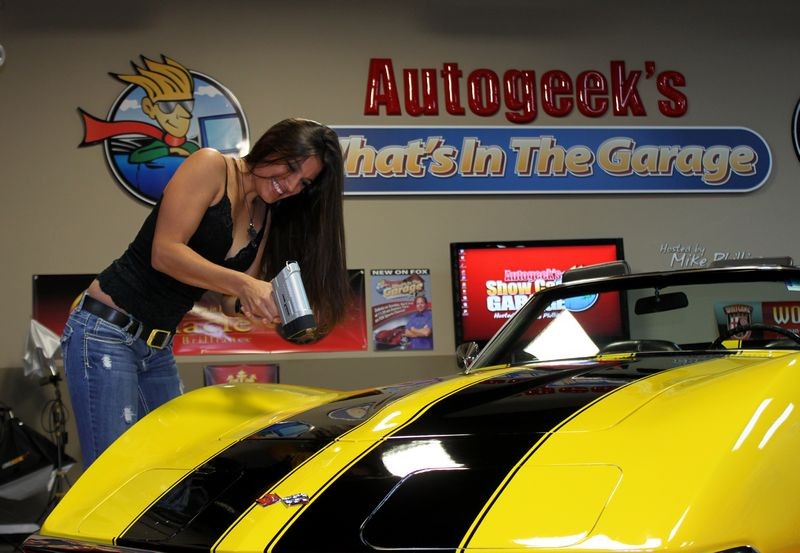
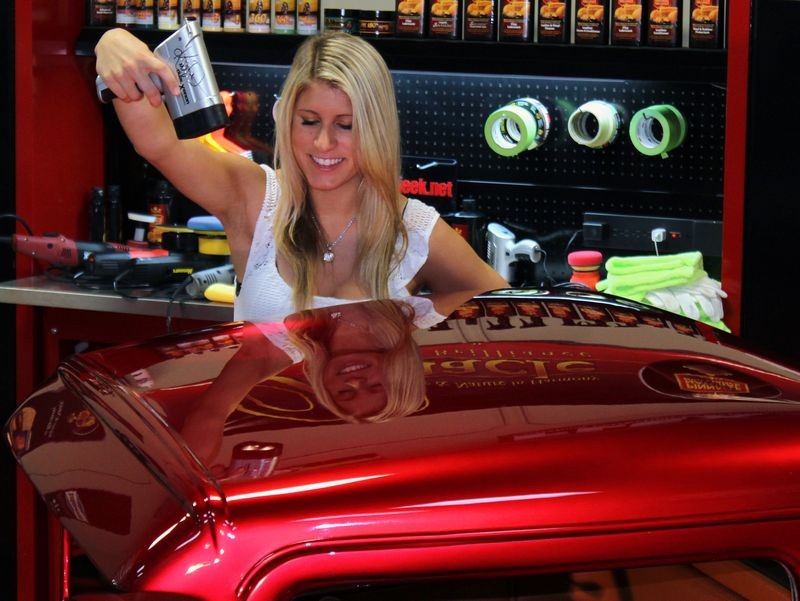
This was also the second time in my entire detailing career that I incorporated a lovely model to showcase the finished results...
These new microfiber towels are thick and plush and perfect for wiping off any wax or paint sealant... Here Amy's using the technique I wrote about in this article,
How to correctly fold and use a Microfiber Towel


More to come...

-
Re: Autogeek Eye Candy
Continued...
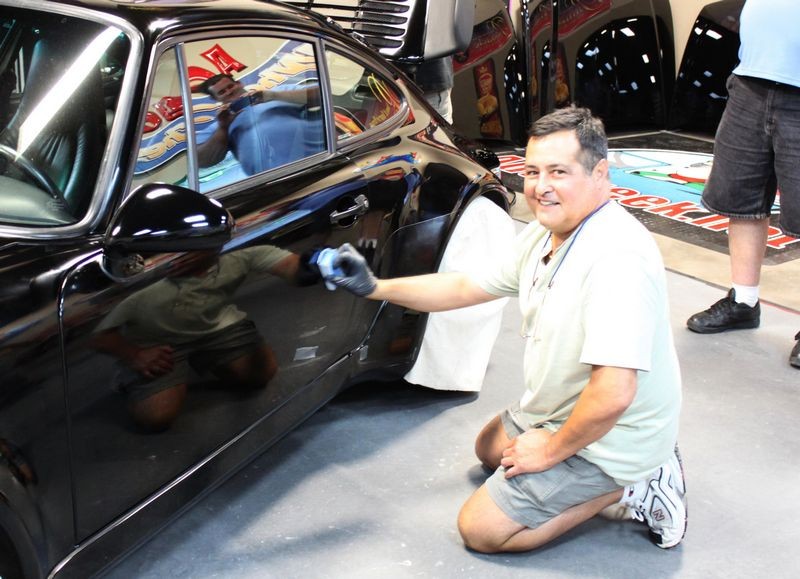
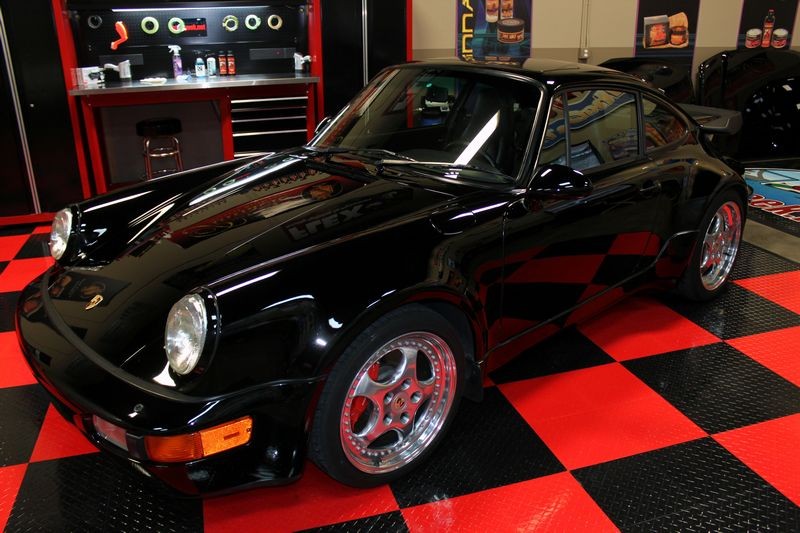
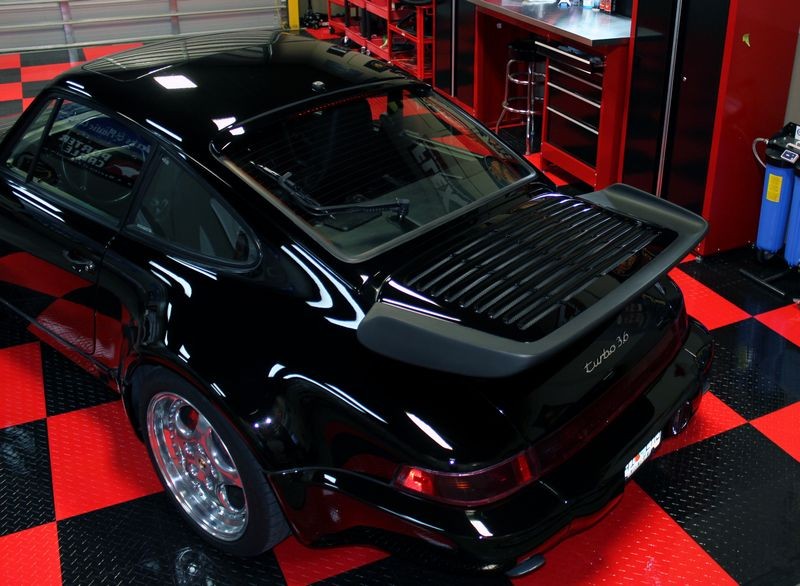
Next was my good friend Sam's very rare Porsche 964 Turbo 3.6
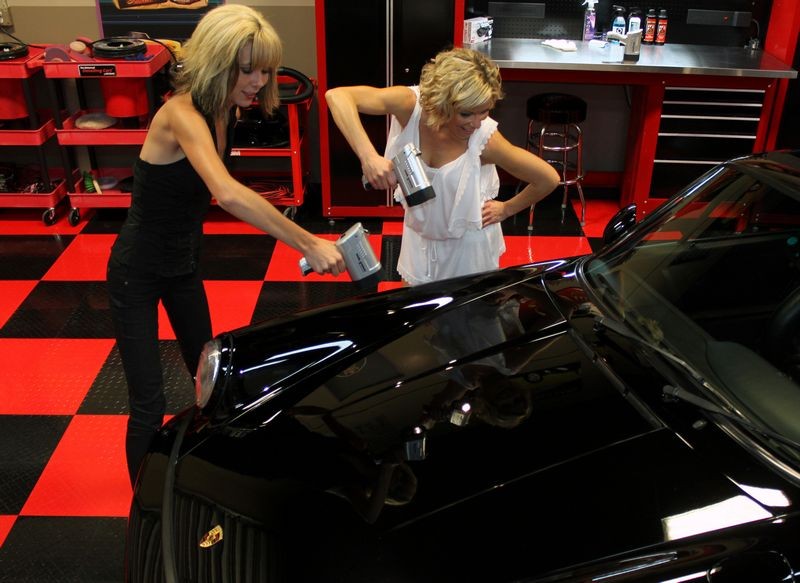
1994 Porsche 964 Turbo 3.6 - Modeled by Janna and Amy
This was the first car I ever used a model with when I buffed it out about a year earlier, you can check out the pictures from that project here.
1994 Porsche Detailed for "Operation Comfort" Modeled by Brittany from Stuart, Florida
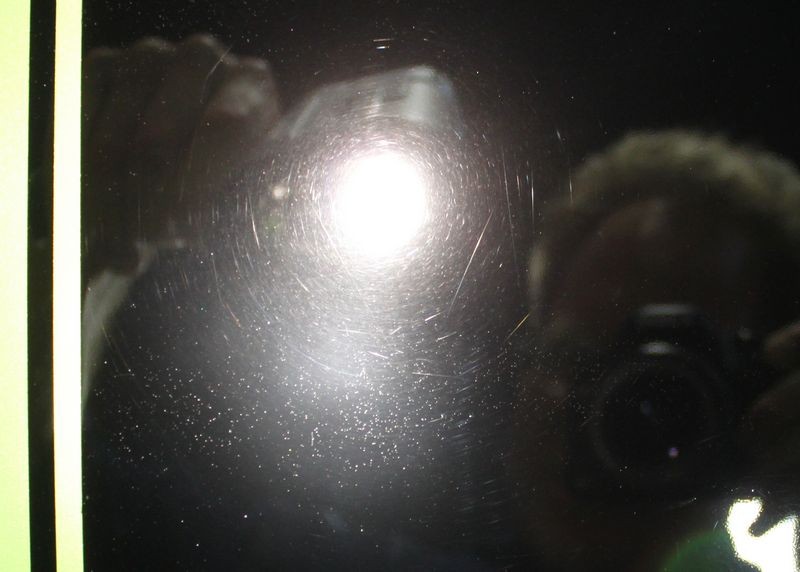
Need a mirror?

Sam's a true car enthusiast but not so good at maintaining a black finish. Since buffing it out the first time a new category of products has been introduced called Paint Coatings. You can read more about them here,
3-Categories: Waxes, Paint Sealants and Coatings
I told Sam about this new paint coating called CQuartz and offered to machine polish and then apply CQuartz to the paint and he was all for it...
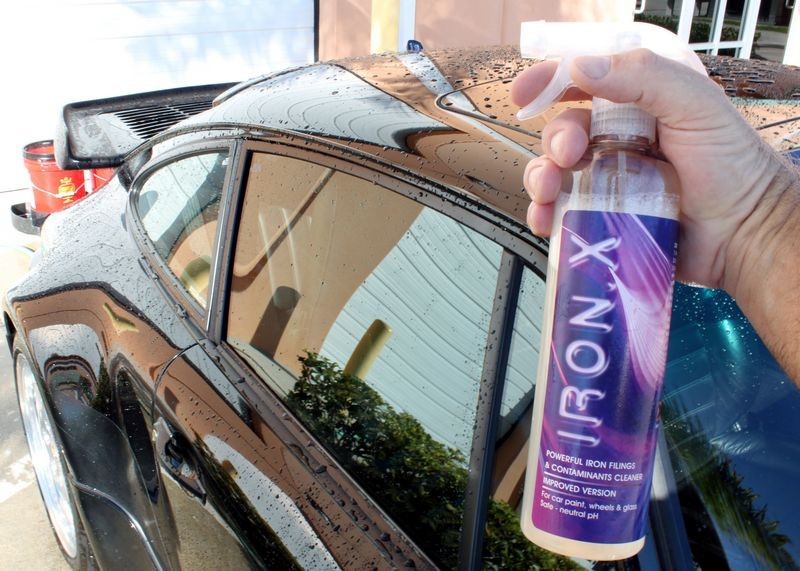
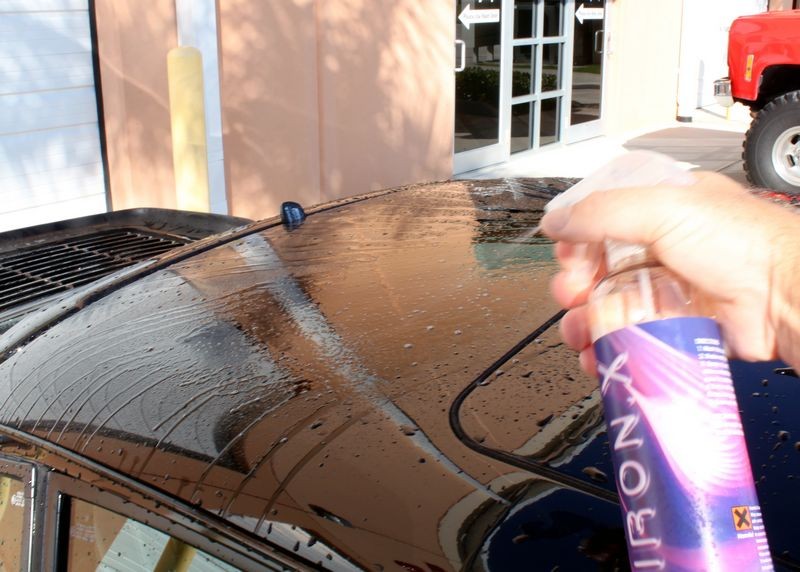
Showcase CarPro's Iron X
Before machine polishing to remove scratches I washed the car thoroughly and also used a brand new product on the market called Iron X, which also just won 3 Awards.
Iron X Won the 2011 Detailing World Awards - Triple Win!
Sprayed on Iron X and let dwell, as you can see the wheels were actually pretty free of any iron contamination... that's a good thing although I know everyone wants to see a lot of color running off the rim... (that would mean the wheel was in fact embedded with iron filings.

After agitating I rinsed...

Perfectly clean and contamination free... I repeated the same procedure to the other three wheels and tires...

Next up... decontaminate the body panels using Iron X
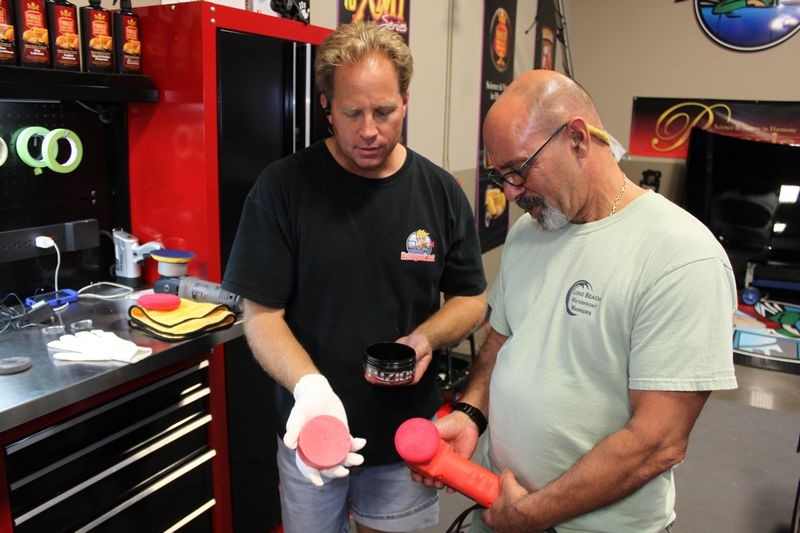
Here's Sam the owner using a DA Polisher for the first time...

We also taught more people how to machine polish paint for this project... pretty cool, learning how to machine polish for the first time on a RARE BLACK Porsche! Where else in the world do people get these kinds of opportunities besides Autogeek.net ? 
In the below picture, the student, (Rene), has now become the teacher!
Here's Rene giving Seth some hand-on training... this was Seth's first time machine polishing...

Here's Chevron also using a DA Polisher for the first time...

And everyone had the opportunity to apply the new CQuartz Paint Coating...


And oh man... did it come out looking sweeeet.....


Here's the Transformation Team, from left to right...
Chavron, Sam, Pete, Tom, Mark,
Seth, Rene

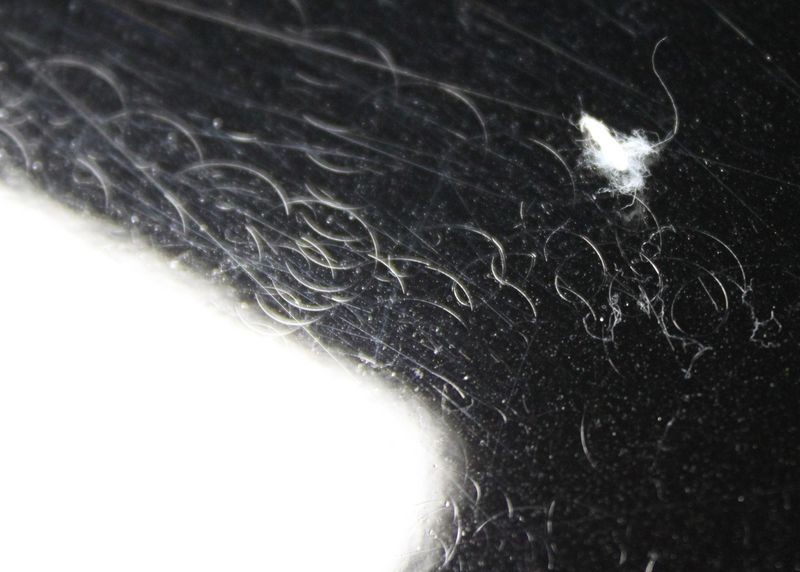
And then I introduced the term Swirl Girl as Autogeek carries a very cool tool that I use and show others all the time called the Brinkmann Swirl Finder Light also called The Cruel Master. This handy handheld light works like the Sun to reveal swirls without having to back your car outside into the sun. Assuming it's a sunny day...
Janna and Amy the first two Swirl Girls...

The Brinkmann Swirl Finder Light at Autogeek.net
Be sure to read my article on the Brinkmann Swirl Finder Light which also includes the history of where it came from...
Mike Phillips Review - Brinkmann Swirl Finder Light
More to come...
-
-
Re: Autogeek Eye Candy
Continued...
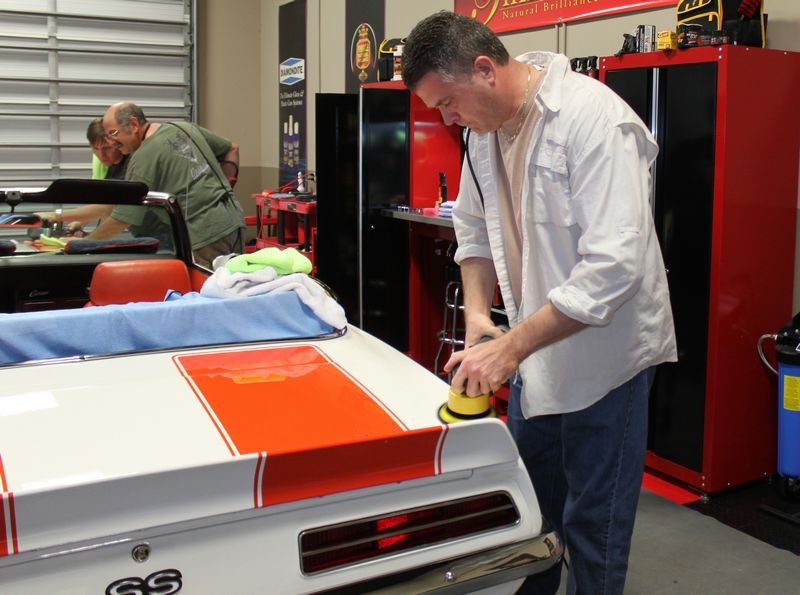
Next up is my friend Tommy's incredibly cool and rare 1970 1/2 Split Front Bumper Camaro...
Tommy is another Car Guy I met at the Gold Coast Corvette Club - First Annual Car Show as I walked around taking pictures of all the cars.
Here's a shot of it from the above thread,

While I was there I didn't inspect the paint because there were too many clouds blocking the sun light. I also figured no matter what the condition of the paint, at a minimum you can always freshen up a car with a new coat of wax. So I talked to Tommy about bringing his car to Autogeek and gave him my card and left it up to him to contact me.
Surprise surprise... he called me! (most people I've talked to at shows don't?) So we scheduled a Thursday for him to bring us his car. Tommy told me he had never used a machine to polish paint before but was excited to learn. He also asked if he could bring his daughter Nicole because she's a "Car Girl".
When the car arrived I took the below shot... most people just would die to have a custom paint job this nice....

But the Brinkmann Swirl Finder Light reveals the true condition of the paint and that is a surface filled with,
- Swirls
- Scratches
- Pig Tails
- RIDS
- Tracers
- Micro-marring also called DA Haze
You can find a definition for all of the above in either my e-book or in this article here,
Tracers Tracers - RIDS - Pigtails - Cobweb Swirls - Rotary Buffer Swirls - Holograms - Water Spots - Bird Drooping Etchings - Micro-Marring
Check it out...
Pig Tails
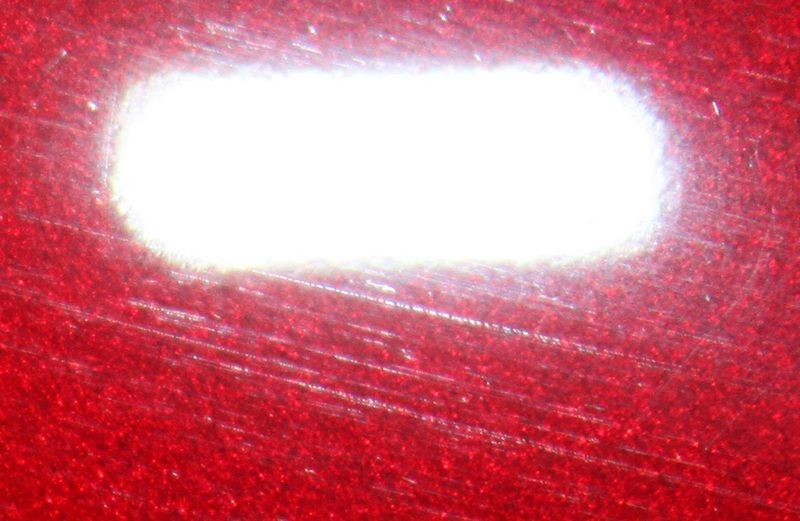
If you look closely you can see a scratch that looks like the letter e in cursive writing running horizontally across the paint, this is called a Pig Tail and it generally comes from an abrasive particle that gets trapped between the paint and a sanding disc when machine sanding. The entire finish had Pig Tails plus Tracers randomly dispersed...

Micro-marring also called Tick Marks or DA Haze
The millions of tiny, small scratches highlighted by the Brinkmann Swirl Finder Light are caused by improperly worked abrasives when using a DA Polisher like the Porter Cable 7424XP, Meguiar's G110v2, Griot's Garage 6" ROP or Shurhold DA Polisher. These types of scratches are through out the entire car but you can really only see them on the black stripes not the metallic green paint. The point is that even though your eyes can't see them on the lighter colors they still cloud and dull the finish and keep you from seeing the beautiful color and/or metallic finish under the clear. These have to go!
RIDS - Random, Isolated Deeper Scratches
These types of scratches come from normal wear and tear and don't have any pattern to them thus the use of the word random in the description.

More information on RIDS here...
RIDS - The Definition of RIDS and the story behind the term...
Swirls and Scratches
What I see here is a combination of RIDS, swirls, DA Haze and Arc Scratches probably caused by wiping but they are also caused by improper use of a rotary buffer.

My eyes hurt after looking at the above pictures!
For my how-to book I needed to create a list of categories that would describe the condition of a car's paint AFTER you first wash and dry the car.
That list can be found starting on page 30 of the e-book. After evaluating the condition of the paint on this Camaro I would place it into the category 3 Good Condition as it has way too many below surface defects to fall into category 1 Show Car Quality or category 2 Excellent Condition
We did a Test Spot and dialed-in a process to undo the damage and restore a show car finish...
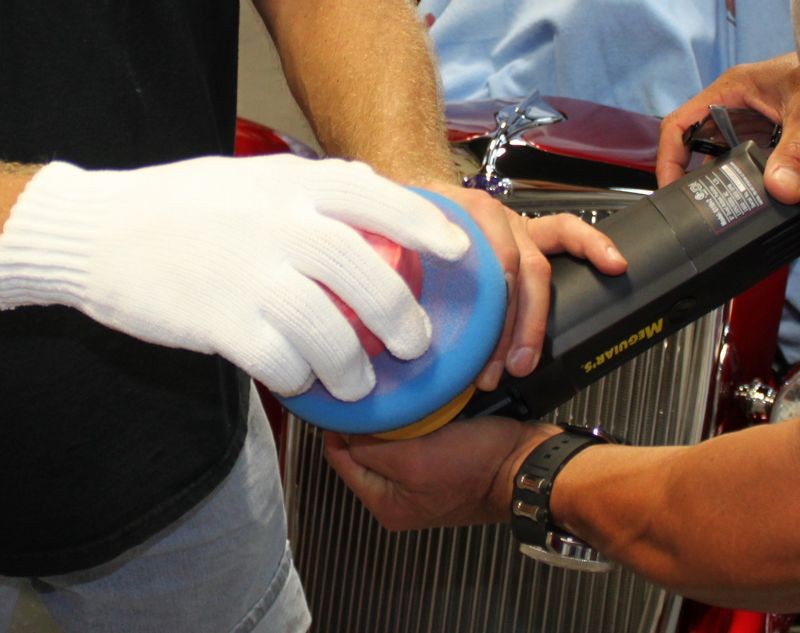
Being new to machine polishing Thomas and his daughter Nicole learned very quickly and were both buffing like pros after just a panel or two...

Here's Nicole priming her pad...
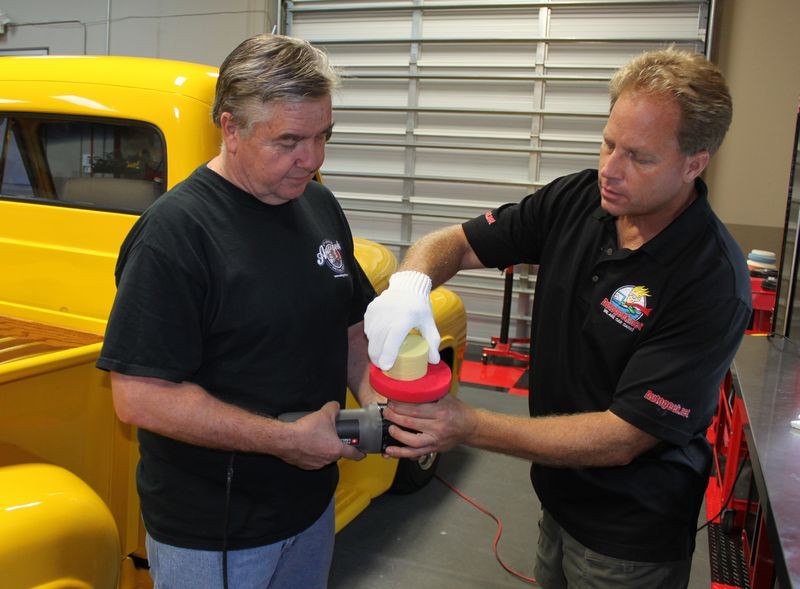
How to prime a foam pad when using a DA Polisher

A little hands-on training to get a feel for how hard to push down, how fast or s-l-o-w-l-y to move the DA Polisher and the pattern to use for consistent, repeatable results...

Having fun at Autogeek's Garage!

Polishing like a Pro!


And of course we had a little help from our friends...
Adam using a Rotary Buffer with 3" pads
Focusing on the task at hand especially when using a rotary buffer for isolated defects as you have to be careful you don't get the paint too hot...

Adam using a Porter Cable to ensure zero swirls...

Rotary Buffer for removing serious paint defects
Todd breaks out a wool pad with a Makita Rotary Buffer to remove some of the Pig Tails on the roof. Just to note, this car is actually a great candidate for dampsanding to level the paint and in the process remove all the deeper Pig Tails, Tracers and Orange Peel in the paint but that's another project and another day...

Later after all the machine polishing and machine applying the wax Tommy and Nicole put on the Microfiber Gloves and begin wiping the wax off...

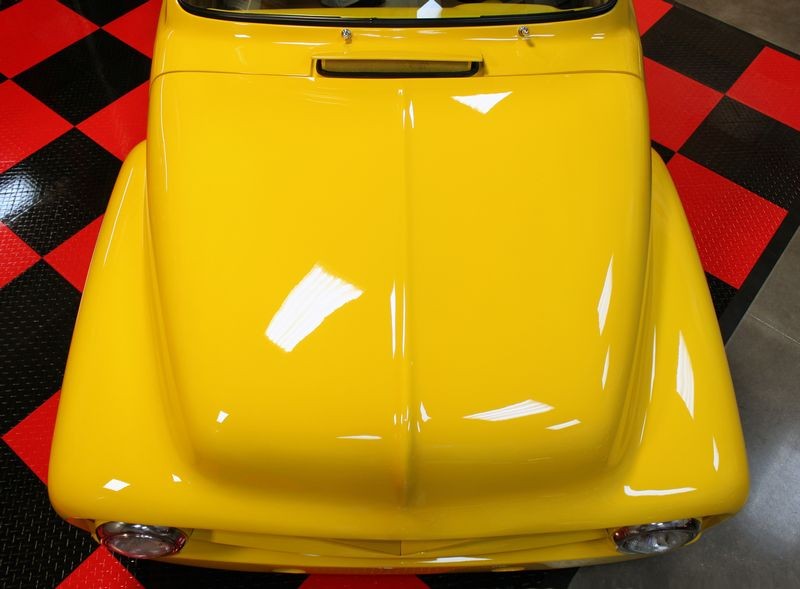
The Camaro looked "good" when it arrived... now it looks PHENOMENAL!
Classic Camaro with a glassy wet-looking finish created entirely by machine and finished off using Pinnacle Souveran Paste Wax...


Amy stopped by to inspect our work...


More to come...

-
Re: Autogeek Eye Candy
Continued...
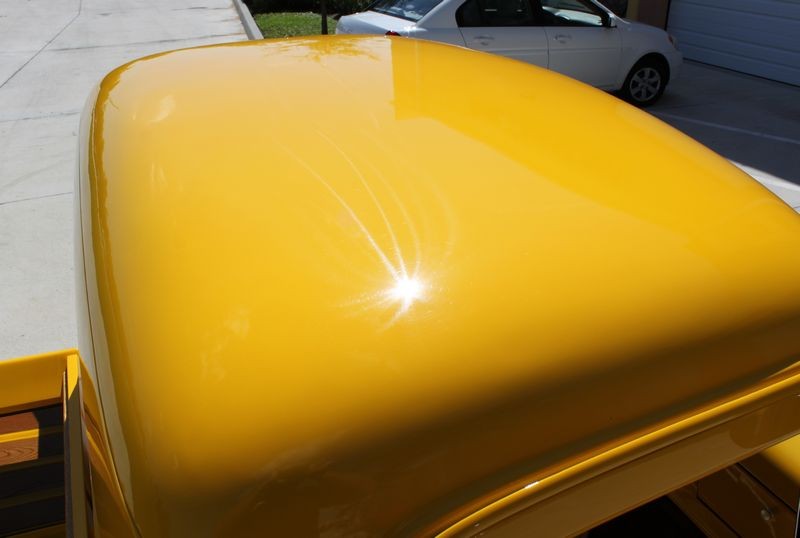
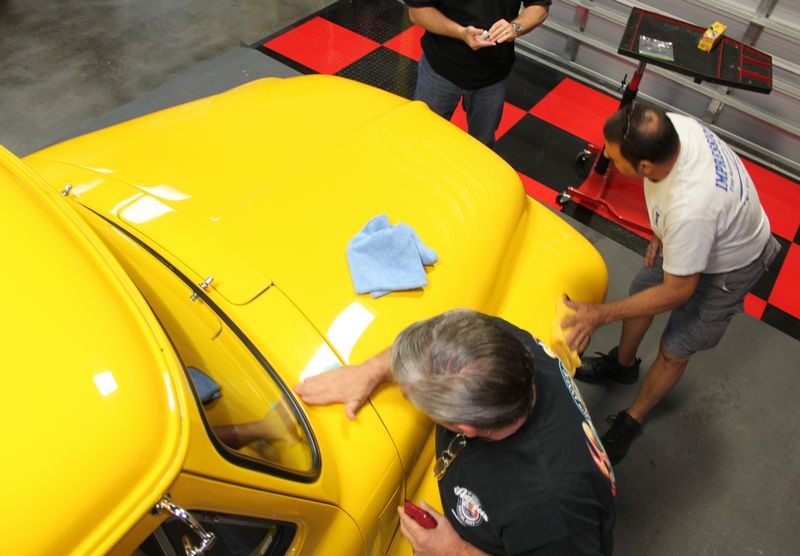
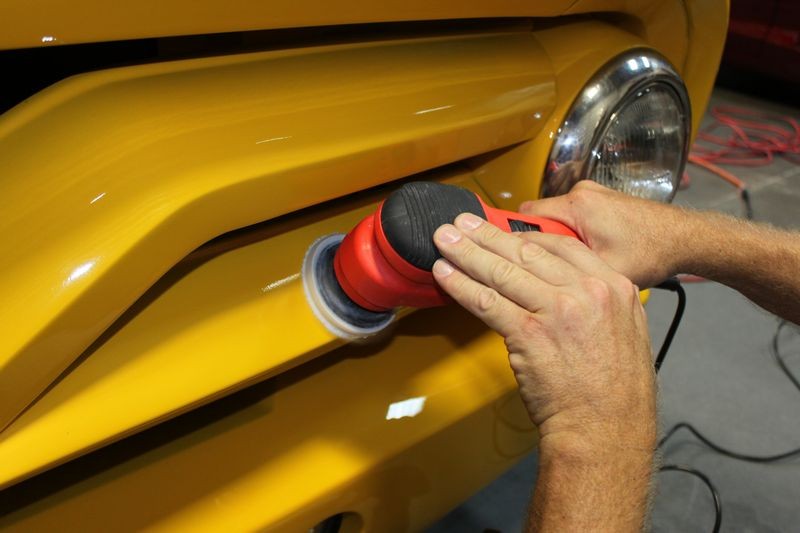
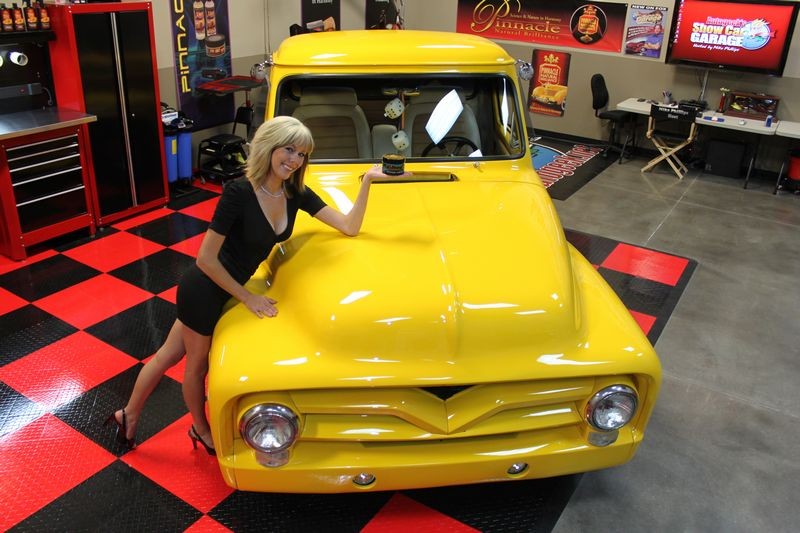
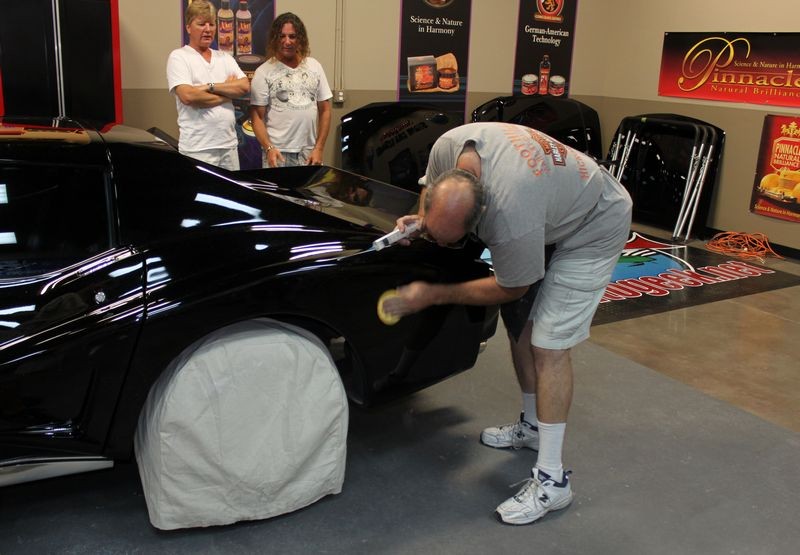
Next up is my friend Glen's Custom 1954 Ford F-100 Fat Fendered Truck with a Tilt-Frontend...
1954 Ford F-100 - Extreme Makeover - Process and products used
When Glen arrived I had him drive his truck into the studio so we could give it a quick wipe-down. While the paint looks great in the below picture,

I moved the truck outside and used bright, overhead sunlight to show the true condition of the finish.
True Condition


The roof is the same way as are the vertical panels...
Now I've moved the Ford F-100 back into the studio with the mats down to protect the floor from polish and wax splatter while we perform the extreme makeover.

It's a little trickier to capture light or shallow swirls and scratches on light colored paints but here's what I could get in the studio...
Big Picture
The big picture is that while this truck looks incredible, that is shiny and beautiful, a Pro Detailer doesn't see it as it is... they see what it can be...
While in the picture it can look like the scratches are isolated to a section of the picture that's actually not the case, the scratches you see are throughout 100% of the surface it's just hard to capture on camera...

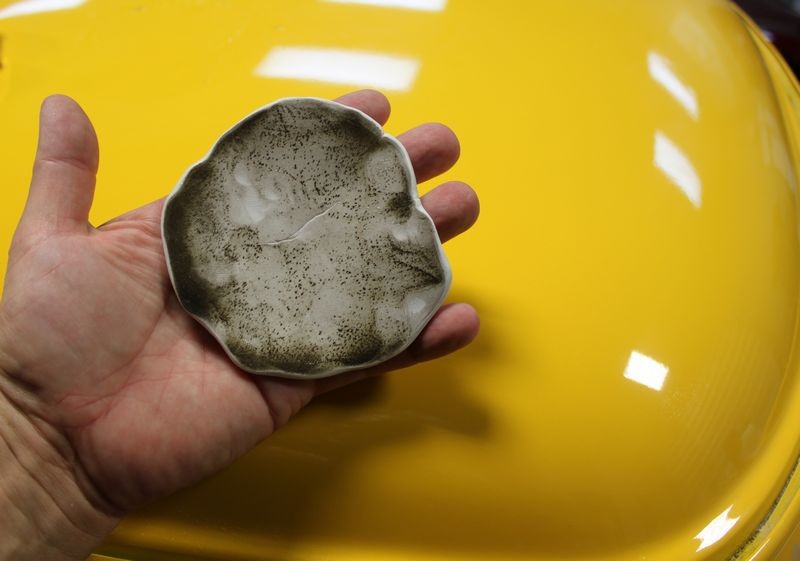
Restoring smoothness by claying the paint
Here's Glen the owner of the truck claying just in front of the windshield for the very first time..
This truck was re-painted approximately one year ago but just from exposure to the outdoors has made the paint vulnerable to air-borne contaminants...
This shot was taken with my trusty, dusty Canon Rebel with the flash on after claying the roof...
Without the flash on here's what the clay looks like and this is what it looked like in person... The roof and the other horizontal panels pretty much felt like sandpaper before we started.
Ewww....
Onto Machine Polishing but first one comment on the rotary buffer swirls...
This truck was painted by a custom painter and we don't blame him for the swirls. The fact is, it's not how GREAT the painter is... it's the guy that does the wetsanding, cutting and buffing that makes or breaks the end-results.
It looks like the guy that did the sanding and buffing used a rotary buffer and likely a wool finishing pad for his last machine step.
This is the norm for the kind of work done at the majority of body shops across the world. Most people getting their car painted have no idea as to what to ask for and just take what they get when they pick up their freshly painted car.
Most body shops only use a rotary buffer for all their buffing work and don't charge enough money to cover the cost for extra steps whether they be doing a final rotary buffing step using a foam finishing pad and an ultra fine cut polish or using a DA Polisher to ensure the swirls are all removed. The the swirls I documented in this custom paint job or the norm for this industry. That's okay as it give Pro detailers plenty of work undoing the damage.
For our Test Spot we're hoping to use Optimum's brand new Microfiber Finishing Pads with the Optimum Hyper-Polish on DA Polisher. This is keeping with the philosophy of,
Use the least aggressive product to get the job done which is also covered in my e-book on page 84 of both the e-book and the paperback version of The Art of Detailing and how to do a Test Spot starts on page 94
Doing a Test Spot
Here's Robert spraying Hyper-Polish onto a brand new, clean Optimum Microfiber Pad on a Porter Cable 7424XP

Note that Robert is using some painter's tape to make a tape-line on a horizontal panel and then only buffing on one side of the tape line. By doing this he will make it real easy to inspect the results on other side he's buffing on and compare it to the "control" side to gage the effectiveness of this combination of pad, product, tool and of course his expert technique.

After performing the Test Spot we inspect the results and the combination of Optimum Hyper-Polish with the new Optimum Microfiber Finishing Pads on the Porter Cable on the 6.0 speed setting removed 99.9% off all the swirls and scratches and left the paint simply AMAZING looking with no micro-marring even after chemically stripping the paint with IPA.
Since our Test Spot confirmed our process everyone joined in using the same combination of pads and product with various DA Polishers including the Porter Cable 7424XP, Meguiar's G110v2 and the Griot's Garage DA Polisher.
These are are the same "type" of tool in that they all use a Free Floating Spindle Assembly for a drive mechanism but they each have different power configurations. Not that it's a HUGE deal but here are the speed settings we used for the different tools with the microfiber pads....
Porter Cable 7424XP = 6.0 Meguiar's G110v2 = 5.0 Griot's Garage = 5.0 Robert from Impression's Detailing
Here's Robert with the PC tackling the rest of the hood... Robert is booked all the time doing show car work and his shop in in Palm City, Florida called Impression's Detailing. I often get asked by locals for a true professional to both detail their car and to also maintain it and I know I can always trust Robert to completely take care of all his customer's needs.

Jeff
Here's Jeff using the Porter Cable 7424XP to tackle the rear passenger fender, Jeff works in our Tech Support division and is a true car guy owning 2 Mustangs and a classic 1978 El Camino

Glen
Here's Glen using a Meguiar's G110v2 to remove the swirls out of the tailgate. This is the first time Glen has ever used a machine to polish paint and he did a superb job!

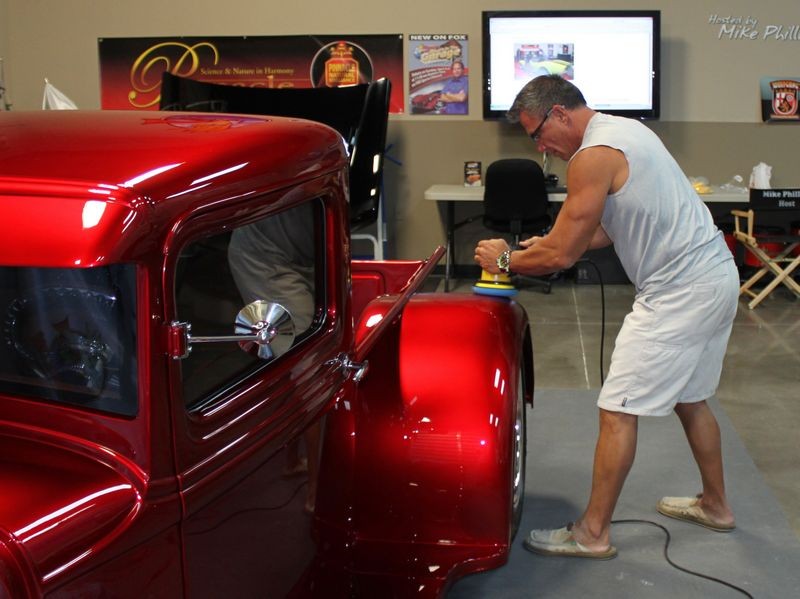
Me using the Griot's Garage 6" Random Orbital Polisher

Rene tackling the running boards, door and rear fender...
Griot's 3" Mini Polisher
This is me tackling the iconic front grill using the Griot's Garage 3" Mini Polisher using an Optimum 3.25" Microfiber Pad with Hyper-Polish.
I now the question everyone wants to ask and here is the answer...
YES the 3" Mini Polisher was able to maintain pad rotation. I started with the upper potions and worked downward and wiped the residue off as I worked... look how shiny and glossy the paint is after using the 3" Mini Polisher. The 3" Mini Polisher also makes a great Dampsander for spot repair.
After Machine Polishing...
Next up we machine wax the paint using Pinnacle Signature Series II
For this we're going to use Lake Country Red Low Profile Ultrasoft Wax or Sealant Pads on our DA Polishers on the 3-4 Speed Setting
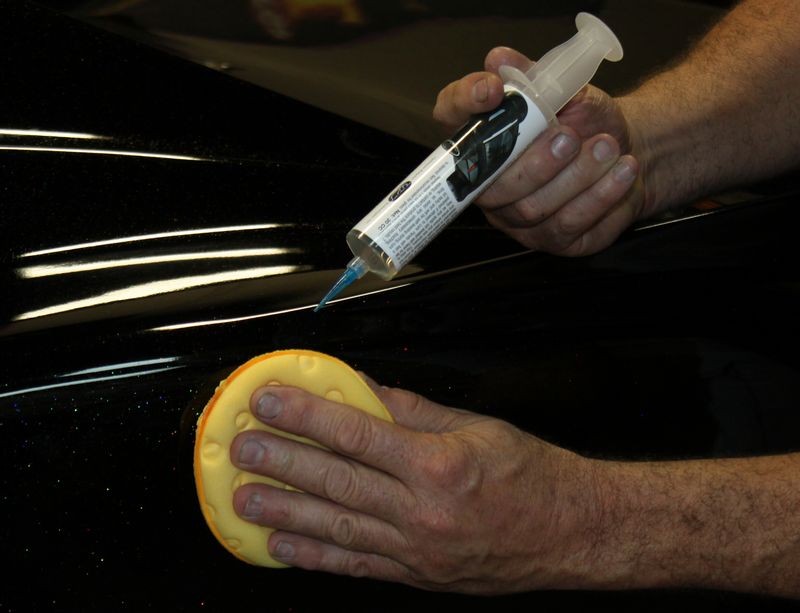
With the Pinnacle Signature Series II Paste Wax you can gently knock the wax out of the jar and then wearing a Microfiber Glove make a few swipes across the face of the pad and you're ready to start machine waxing using a paste wax.

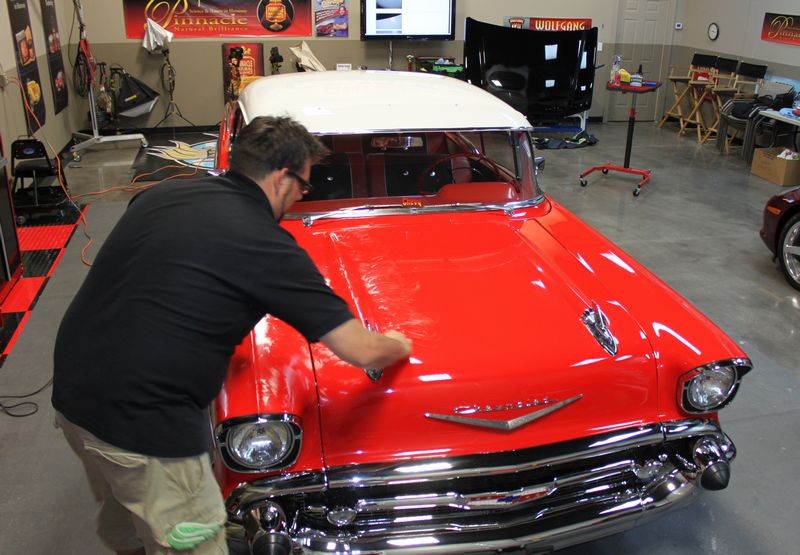
Machine waxing with a DA Polisher is a lot more effective than applying wax by hand and in my opinion safer to the paint and faster...

With Pinnacle Signature Series II Paste Wax you don't have to let the wax dry before removing it, so as Robert and Glen apply the wax, Adam and Rene follow them and carefully wipe the wax off.

Beauty Shots...


For this project, Janna came by to inspect our work...


More to come...
-
-
Re: Autogeek Eye Candy
Continued...
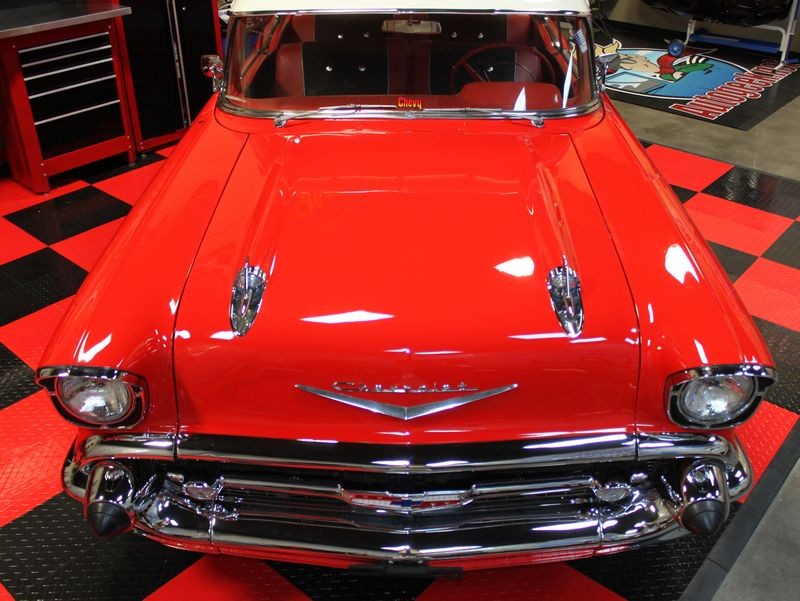
Next up is a classic Restorod 1857 Chevy Bel Air with SINGLE STAGE PAINT!
1957 Chevrolet Bel Air - Remove Swirls - Modeled by Kristin
Working on single stage paint is very unique in this day and age as there's just not many cars left to polish that have this kind of paint especially classic Detroit Iron like this as by the time these cars get built they are usually sprayed with a basecoat/clearcoat system.
The paint on this car was completely swirled out by the mis-use of a rotary buffer, kind of like the 1954 Ford F-100 plus it had water spots and medium oxidation over the entire finish.


Getting Started...
First thing we did was to wipe the car clean using Detailer's Pro Series Waterless Auto Wash.

Note: Anytime you're working on an antique, classic or rare special interest car it's a good best practice to avoid washing the car using a normal car wash as you will introduce water to places you cannot reach and dry and this can promote rust. Instead use a Waterless Wash to carefully wipe the paint and exterior clean.
After we wiped the car clean next up we inspected the paint to see if it needed to be clayed. We did this with our sense of touch and also by using The Baggie Test

The paint felt as rough as 80 grit sandpaper so claying was in order... for this we used Pinnacle Ultra Poly Clay with Pinnacle Clay Lubricant.

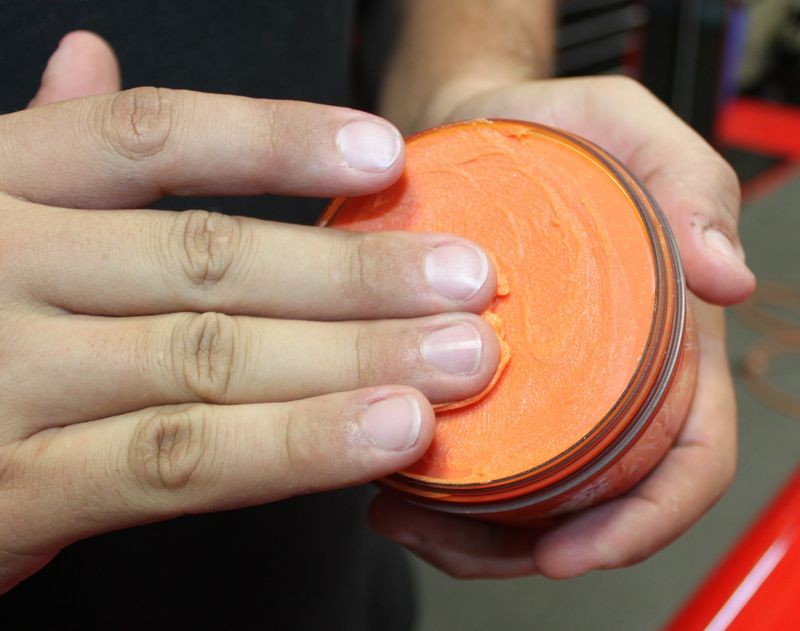
Here's a piece of clay formed into a wafer or patty about 4 to 5 inches in diameter to fit across the width of my 4 fingers... like this...

The contaminants you see on the clay came from just a small section of paint on the hood. If you look closely you can see a tint of red on the clay and this is overspray paint...

Test Spot
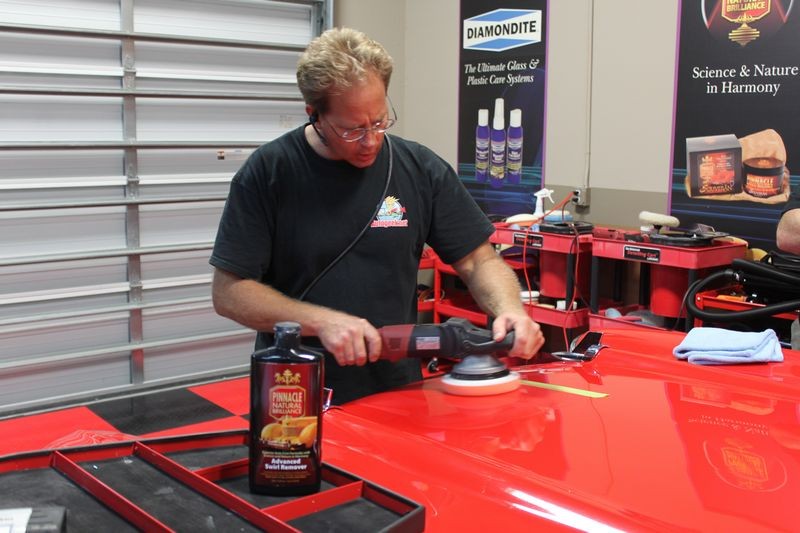
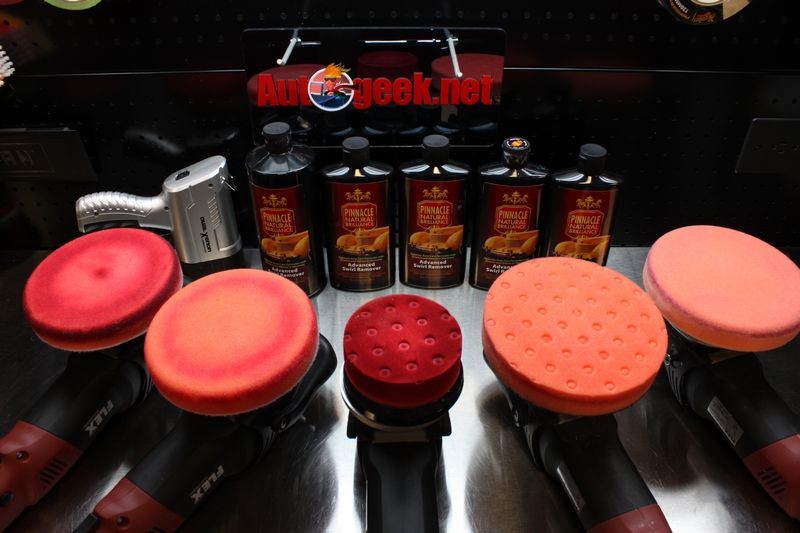
After claying next we wanted to test and see what ti would take to remove the majority of the swirls, scratches and water spots. For this we used the Pinnacle Advanced Swirl Remover with a Lake Country 6.5" CCS Orange Cutting Pad on a Flex 3401. The tape-line is to make it easy to judge the results between before and after.

Before I start, here's the swirls as captured by the flash of my camera...

Here's the swirls as captured by the Brinkmann Swirl Finder Light...

At the time I started the test spot we didn't know the paint was single stage, it can be hard to tell between single stage and basecoat/clearcoat just by looking at the car, the best way it to do a test like I outline on page 10 and 11 of my how-to book, either the print version or the e-book version.
Another way to test for a single stage or basecoat/clearcoat is to do a test spot... start buffing on the paint and then turn your buffing pad over and inspect...
Yep... we're working on red single stage paint as you can see by the red pigment transferring to the face of the buffing pad.

After working the Test Spot for about 6-8 Section Passes here's the results... about 95% correction... there were some deeper RIDS everywhere in the paint throughout the car but we don't focus on removing each and every single scratch because we don't know the history of the paint job. Too much risk.

I removed the painter's tape and used the flash of my camera to light up the paint...

The hundreds of thousands of scratches in the paint dulls the appearance by giving the finish a hazy appearance. By removing the swirls, scratches and oxidation will restore the full richness of color with a high gloss shine...

Time to get busy...
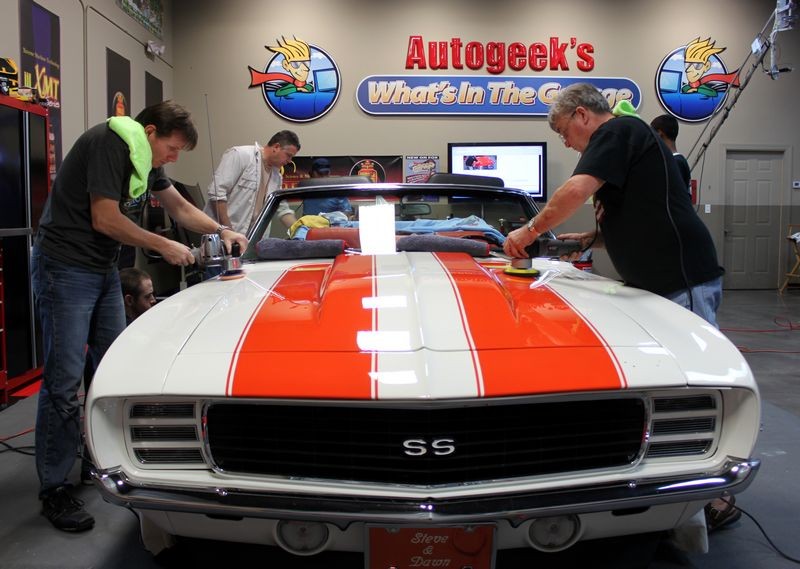
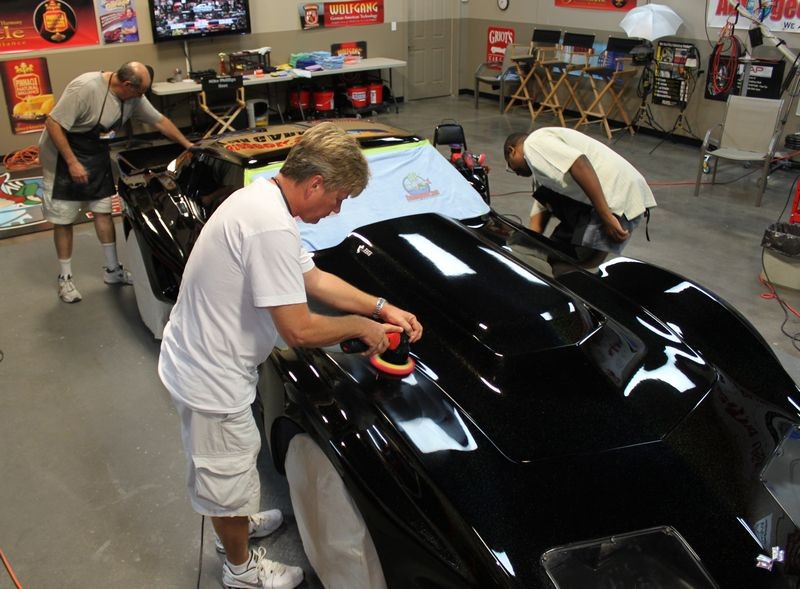
When you get 5 polishers all buzzing on the car it doesn't take long to get the correction step finished.

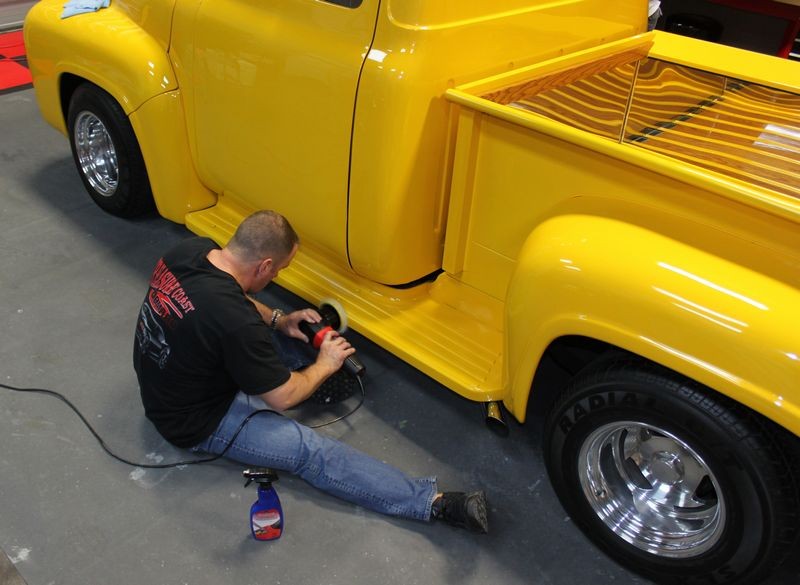
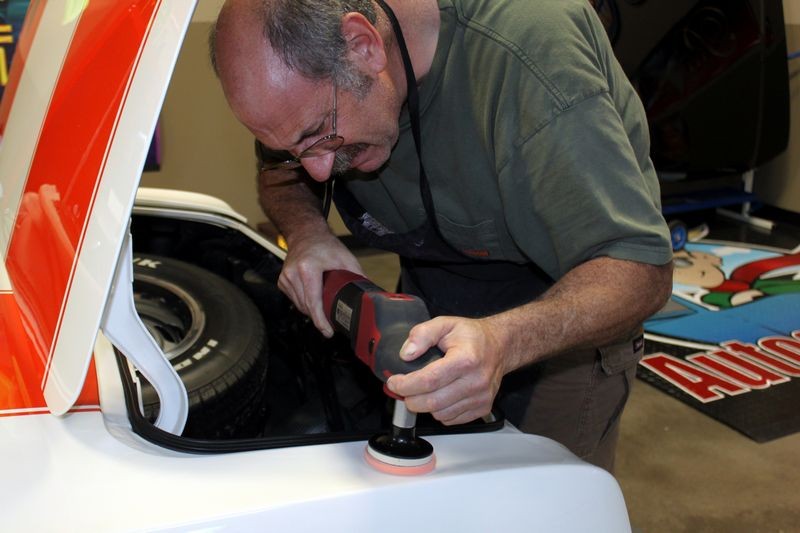
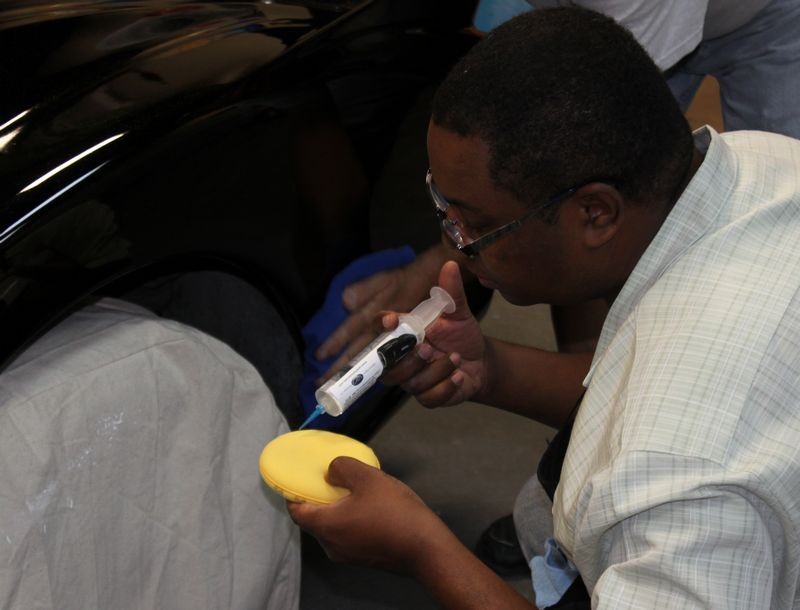
Here's Adam using the Flex 3401 with a 4" backing plate and a 4" Orange CCS Spot Repair pad.

Here's Kyle tackling the roof and back clip of car...
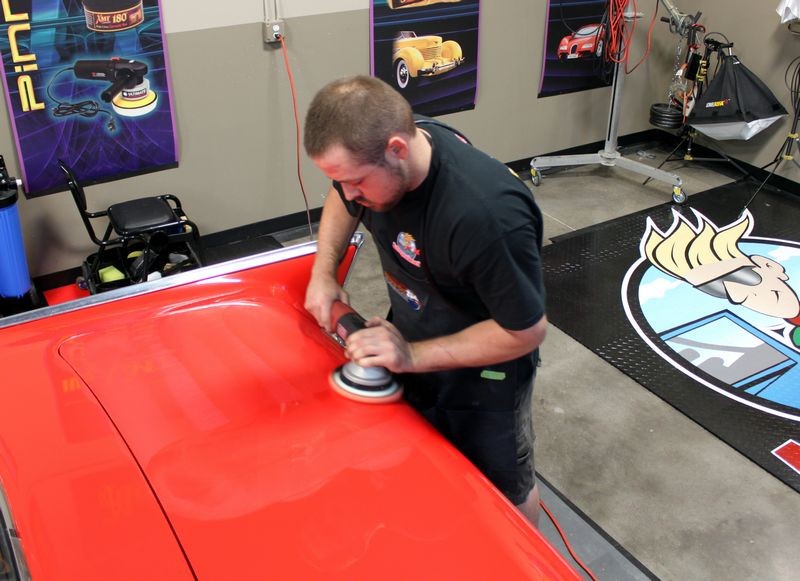
Pinnacle Advanced Swirl Remover, Lake Country Orange Foam Cutting Pads and Flex 3401 Forced Rotation Dual Action Polishers make quick work of removing the defects and creating a clear, smooth surface perfect for final polishing.
More to come...
-
-
-
Re: Autogeek Eye Candy
Continued....
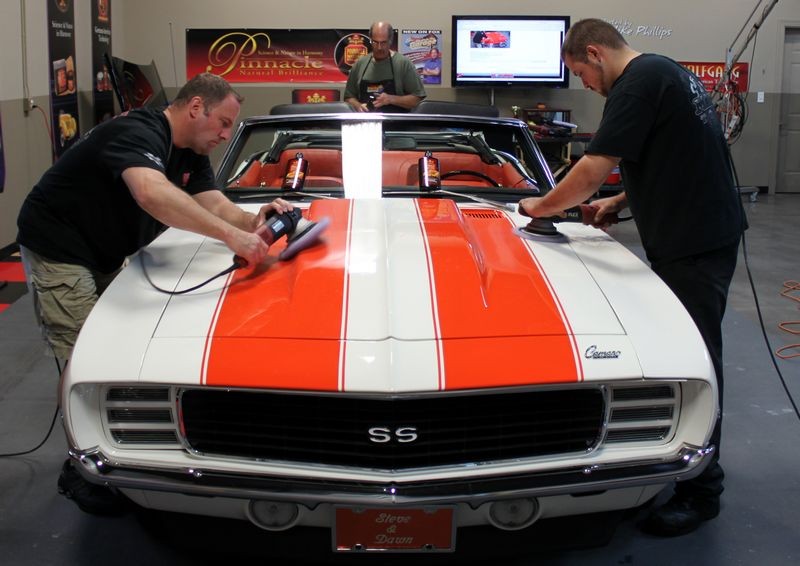
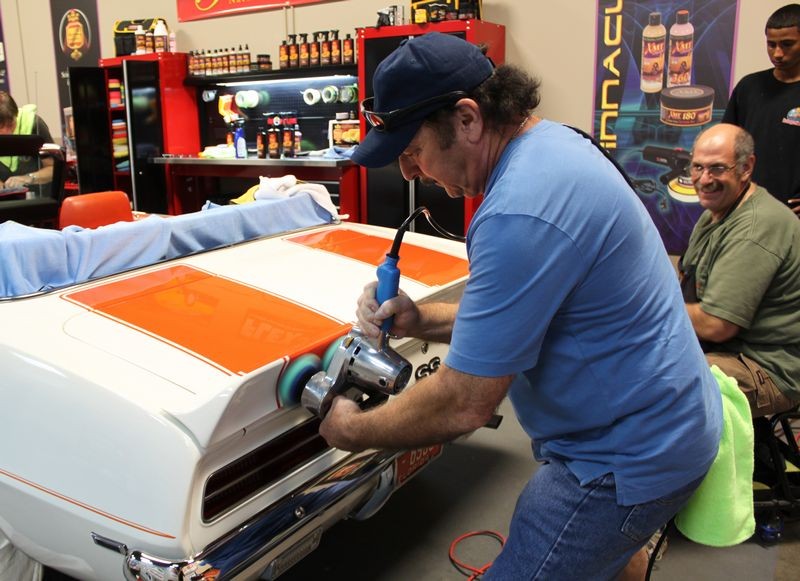
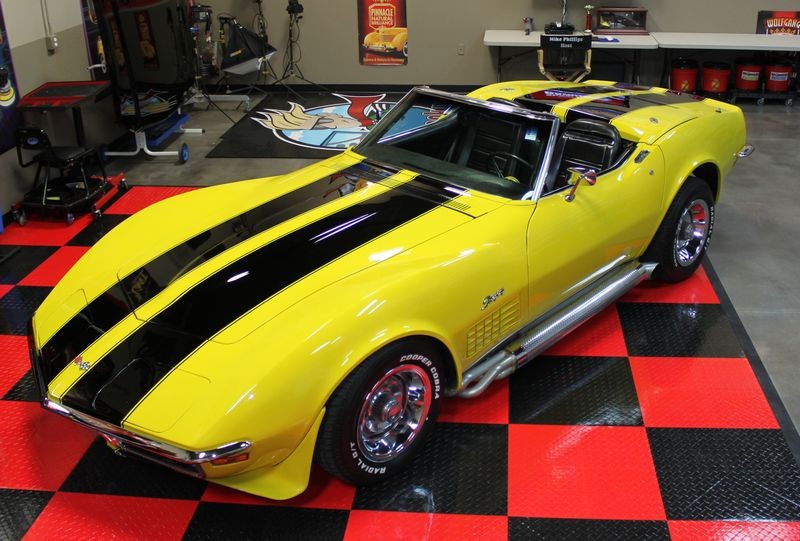
Next up... Steve's pristine and very rare 1969 Camaro Pace Car!
1969 Camaro Pace Car - Show Car Makeover - Modeled by Michelle
Steve just arrived with his Camaro and the sun is sitting low in the sky but I was able to get a few pictures to show the condition of the paint...
Here's how low the sun was in the sky...

Best Sun Swirl Shots I could get...


Here's how the paint looks using the Brinkmann Swirl Finder Light

Here I'm using the camera flash to light up the swirls and scratches...

Close-up: There's scratches and general surface imperfections throughout the finish...

Close-up of the paint on the hood...

Claying the paint
Next up we wiped the car clean using Detailer's Pro Series Waterless Auto Wash and Pinnacle Clay Lubricant, which can be used to remove light dust, smudges and fingerprints.
In this shot, Rene is sharing some tips and techniques on how to carefully wipe a car down... (Thanks Rene!)

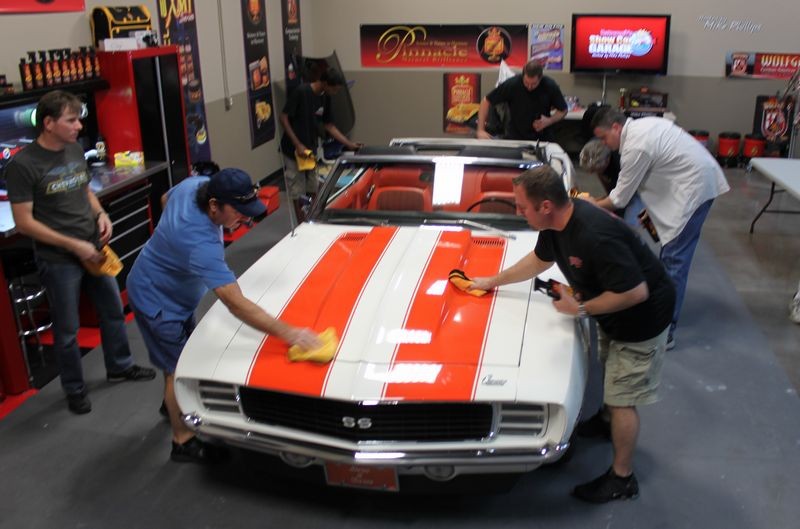
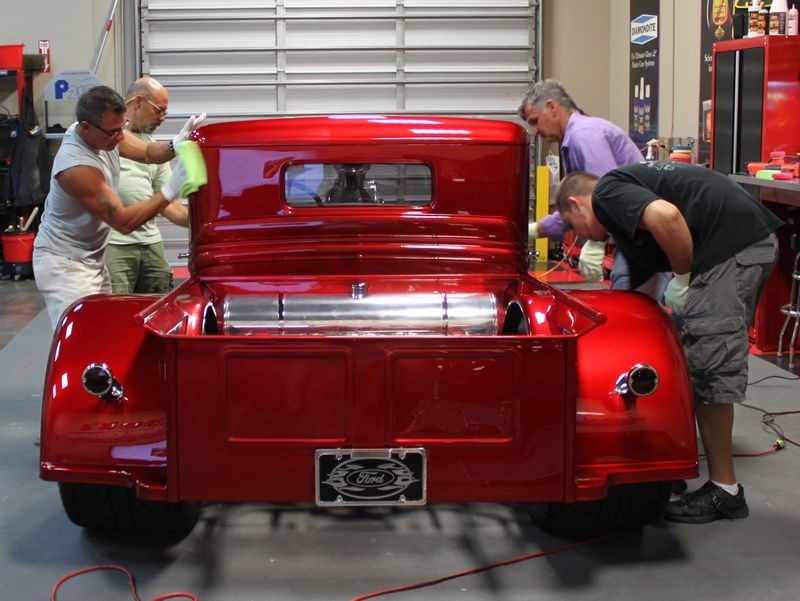
It doesn't take long to wipe a car clean with 7 guys...

After wiping the car clean, we felt the paint with our bare hands and also using the baggie test and the paint felt pretty rough so we went ahead and clayed each panel using Pinnacle Clay Lubricant and Pinnacle Ultra Poly Clay.
Same thing... it doesn't take long to clay an entire car with 8 guys claying the paint...

In this picture, Robert from Impressions Fine Auto Detailing and a regular here at our weekly projects shares with Ron, (in the blue shirt), how to use detailing clay the right way. These projects are a great way to learn about products and techniques by guys that have been doing this for years...

Here's Hector and Glen claying the rear clip of the Camaro... Hector is going to be one heck of a Pro Detailer if he keeps attending our weekly projects plus he's going to get to work on a lot of really cool cars. Glen is to the right helping with the claying step.
Pictured with the green microfiber towel over his shoulder is Steve the owner. I want to thank Steve for trusting Autogeek with his precious car... you're in good hands at Autogeek...

The Major Correction Step
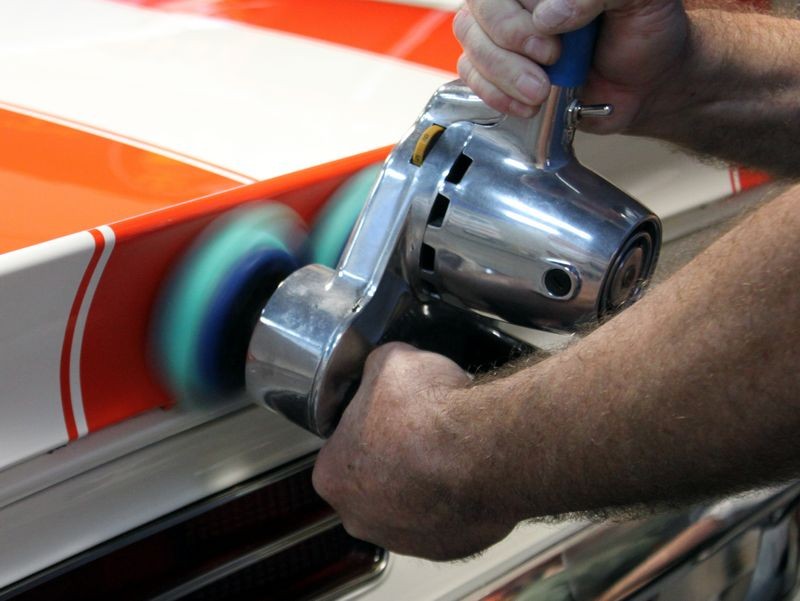
We tested was Purple Foamed Wool pads with Pinnacle Advanced Swirl Remover wit the Flex 3401 and this combination easily removed 98% of the swirls and scratches while leaving the finish incredibly glossy...
Here's Rene and Kyle working on the hood...
While they tackled the hood I knocked out the panel in front of the hood and some of the tops of the fenders...

Meanwhile Adam is using a 3" pad on the Flex PE14 to work out scratches from thinner panels on the Camaro...

The Polishing or Minor Correction Step
After we removed all the defects we moved onto machine polishing the paint to a high gloss, for this we switched over to DA Polishers and the Cyclo Polisher.
Here's Steve the owner of the Camaro testing out a Porter Cable 7424XP on the hood; this is the first time he's ever machine polished and after a few minutes of machine polishing he agrees it's the only way work on clear coat paints...

Here's Glen polishing with the Porter Cable 7424XP

Steve decides to give the Cyclo a try...

On the back rear fender, Hector is using the Cyclo to polish the paint to a clear, high gloss... this guy has only been to a couple of our Thursday night projects and he's already becoming very good at machine polishing paint.

Scott tests out the Meguiar's G110v2, this is also his first time machine polishing...
Ron is da man! Check out how he flips the Cyclo vertically to tackle the back face of the rear spoiler...
This is the new Cyclo Mark 5 Variable Speed Polisher which you can tell by the variable speed dial just below his right hand...
More to come...
Similar Threads
-
By Wills.WindowsAndWheels in forum Show N' Shine
Replies: 7
Last Post: 08-25-2014, 09:10 PM
-
By Marius@F40 in forum Show N' Shine
Replies: 14
Last Post: 04-29-2014, 04:49 PM
-
By Marius@F40 in forum Show N' Shine
Replies: 12
Last Post: 04-27-2014, 11:43 AM
-
By IID in forum New Car Care Products
Replies: 107
Last Post: 11-17-2010, 09:12 PM
-
By White95DodgeRam in forum Off-Topic
Replies: 13
Last Post: 10-18-2006, 06:56 PM
 Members who have read this thread: 0
There are no members to list at the moment.
Posting Permissions
- You may not post new threads
- You may not post replies
- You may not post attachments
- You may not edit your posts
-
Forum Rules
|
| S |
M |
T |
W |
T |
F |
S |
| 31 |
1
|
2
|
3
|
4
|
5
|
6
|
|
7
|
8
|
9
|
10
|
11
|
12
|
13
|
|
14
|
15
|
16
|
17
|
18
|
19
|
20
|
|
21
|
22
|
23
|
24
|
25
|
26
|
27
|
|
28
|
29
|
30
| 1 | 2 | 3 | 4 |
|


 Reply With Quote


Bookmarks