 Thanks: 0
 Likes: 0
 Dislikes: 0
-
Video: The Flex 3403 Rotary Buffer How to remove Sanding Marks after Dampsanding Orange Peel
Video: The Flex 3403 Rotary Buffer – How to remove Sanding Marks after Dampsanding Orange Peel
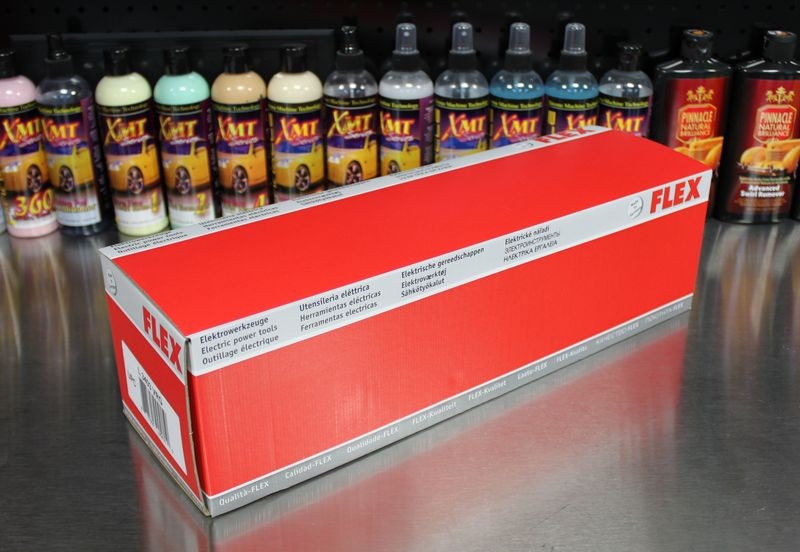
Flex 3403 Lightweight Rotary Buffer
11.5 Amps
1100 to 3700 RPM
5 Pounds
1 Year Limited Warranty
The Flex 3403 Lightweight Rotary Buffer [ame=http://www.youtube.com/watch?v=hVm_IJuXNc0]YouTube - Mike Phillips Showcases the Flex 3403 Lightweight Rotary Buffer[/video]
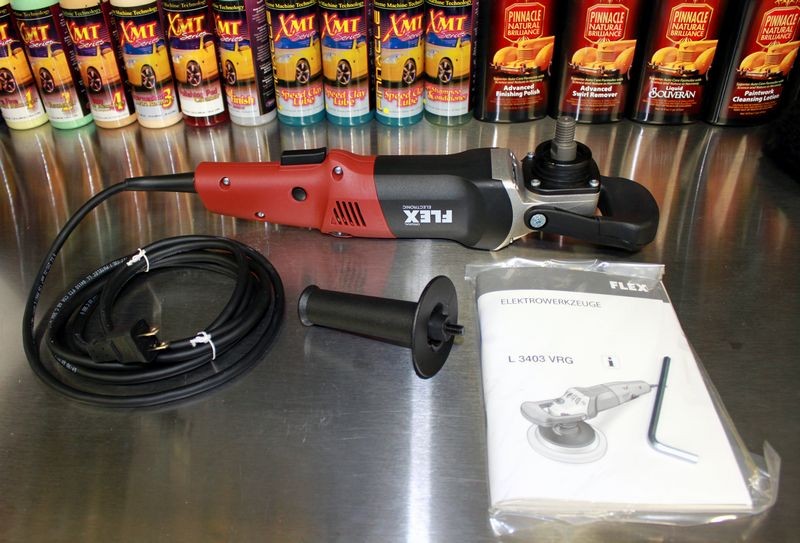
What's in the box?
Well packaged and wrapped tool...

Out of the box you get the Flex 3403 Lightweight Rotary Buffer, two types of handles, a Stick Handle and a forward Bale Handle, owners manual and Allen wrench to remove or replace the forward grip handle.
The forward Bale Handle has an ergonomic design and give you excellent control and leverage over the Flex 3403 Lightweight Rotary Buffer.
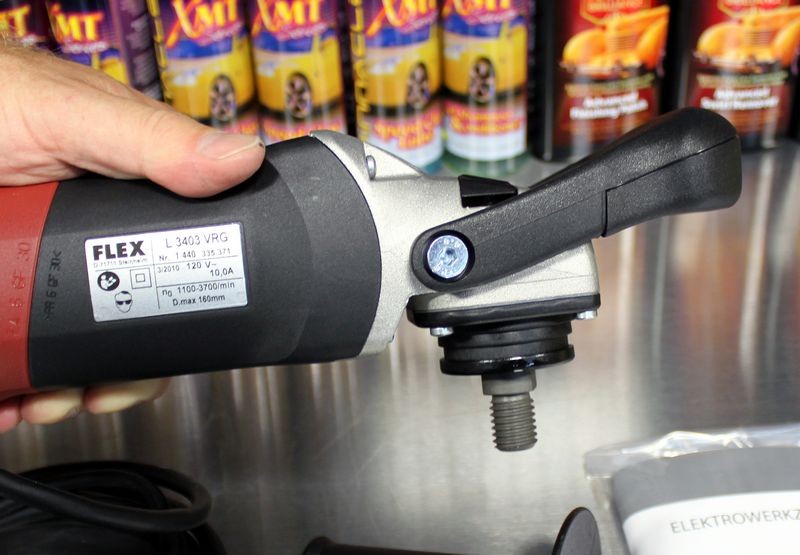
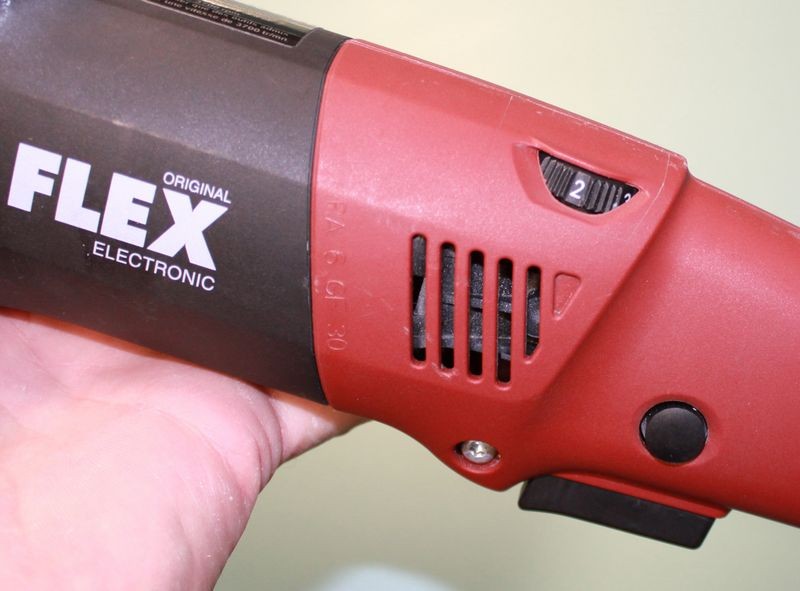
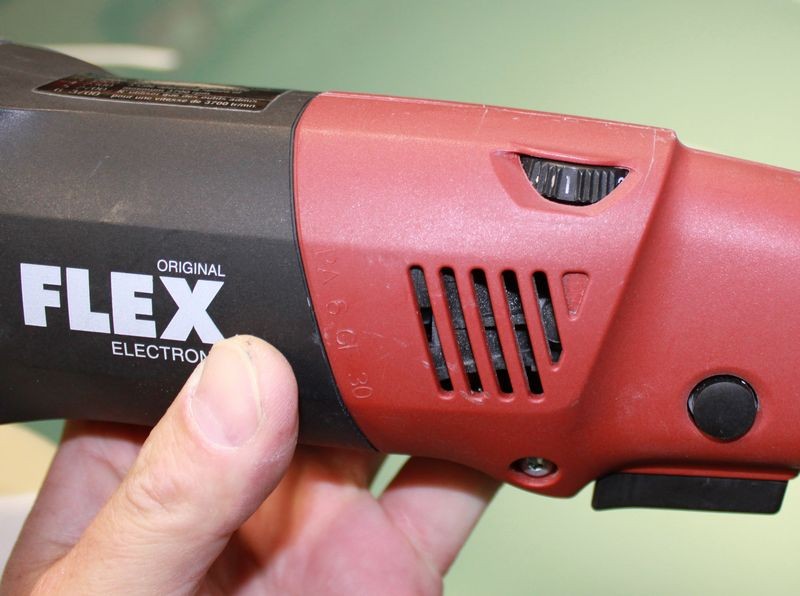
The black button you see in the head housing is a gear lock button to lock-up the gears to keep the spindle from rotating so you can remove or install backing plates or attachments without the spindle rotating.
Comfortable Forward Bale Handle comes pre-installed.
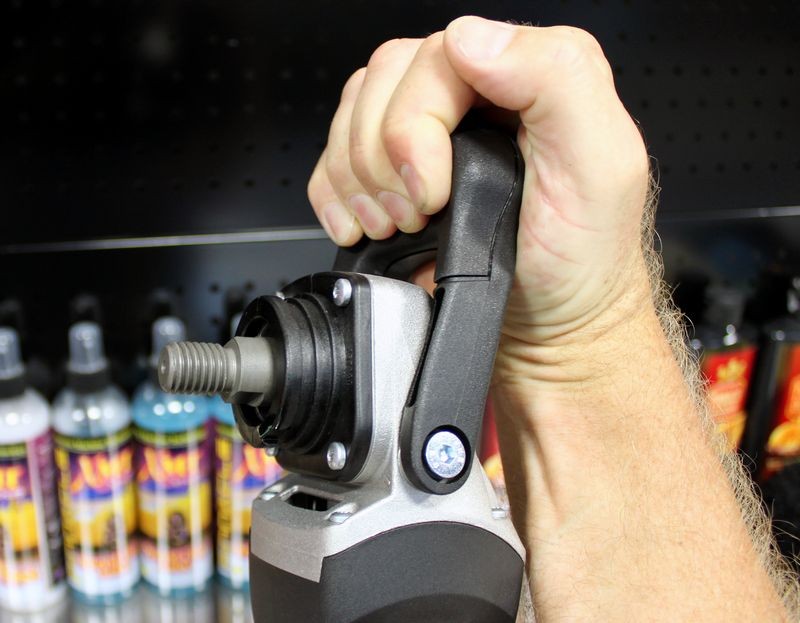
Industry standard 5/8" Course Thread Spindle accepts most professional grade backing plates.

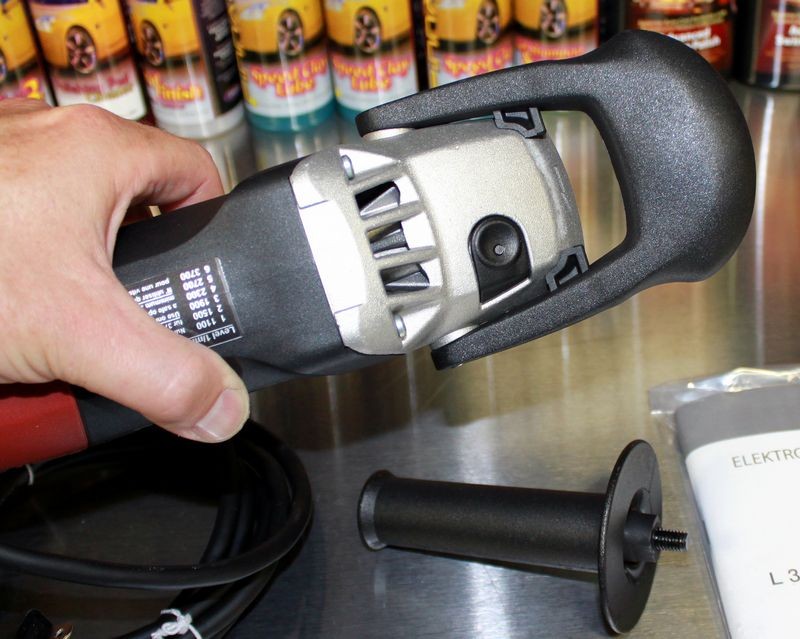
Here's the Flex 3403 with the Forward Bale Handle removed and the factory Stick Handle installed.

It can be used on either side of the rotary buffer depending upon your personal preference or the design of the body panels.

There's an optionalThe FLEX Grip Side Handle which reduces vibration during operation.

The Flex Grip Handle is a few inches longer than the factory plastic stick handle.

The Flex Grip Handle appears and acts like a handle inside a handle with a rubber liner to separate the two components and provide the vibration reduction.


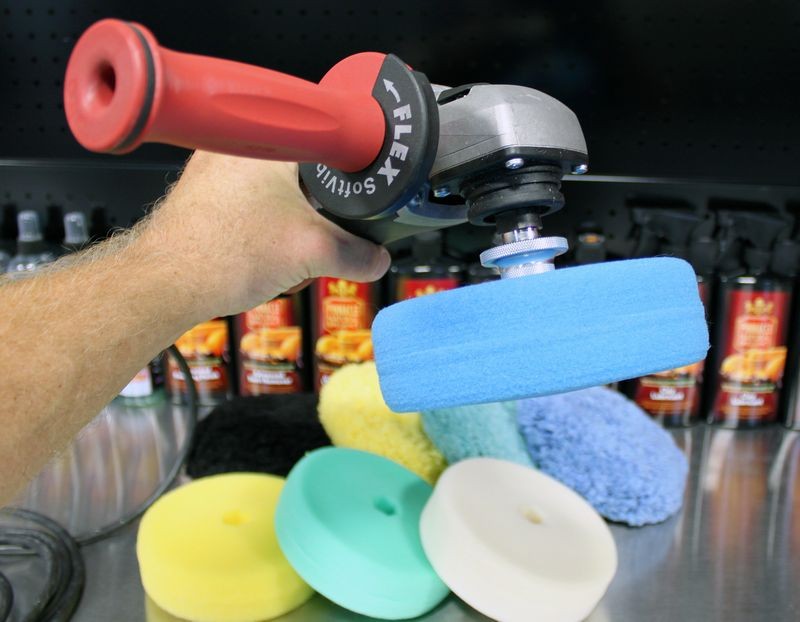
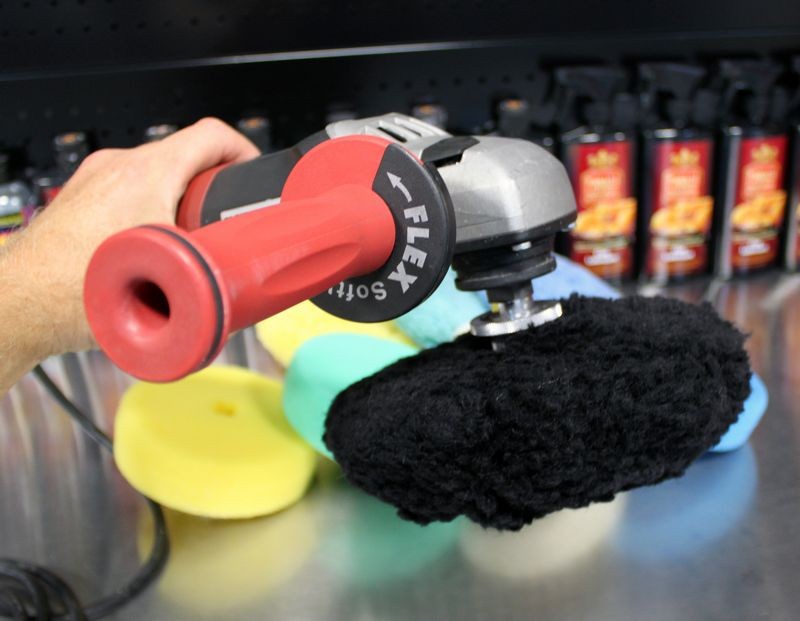
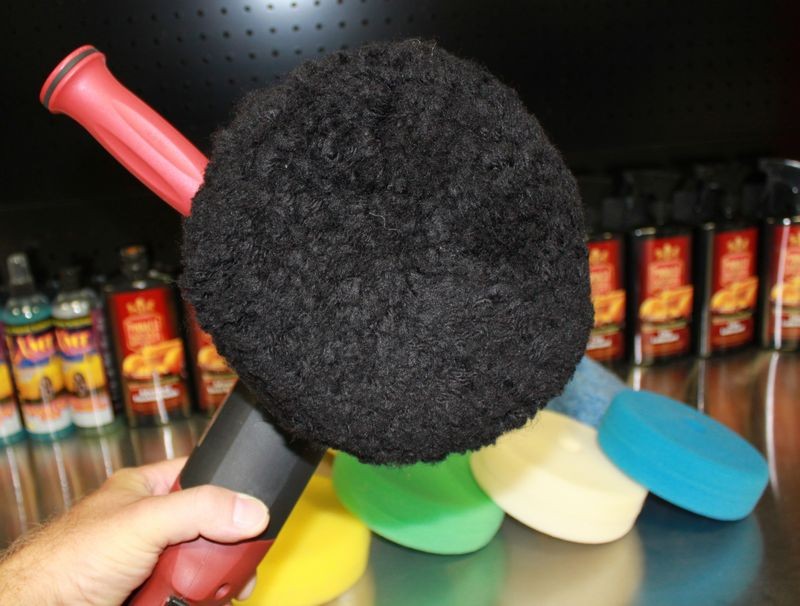
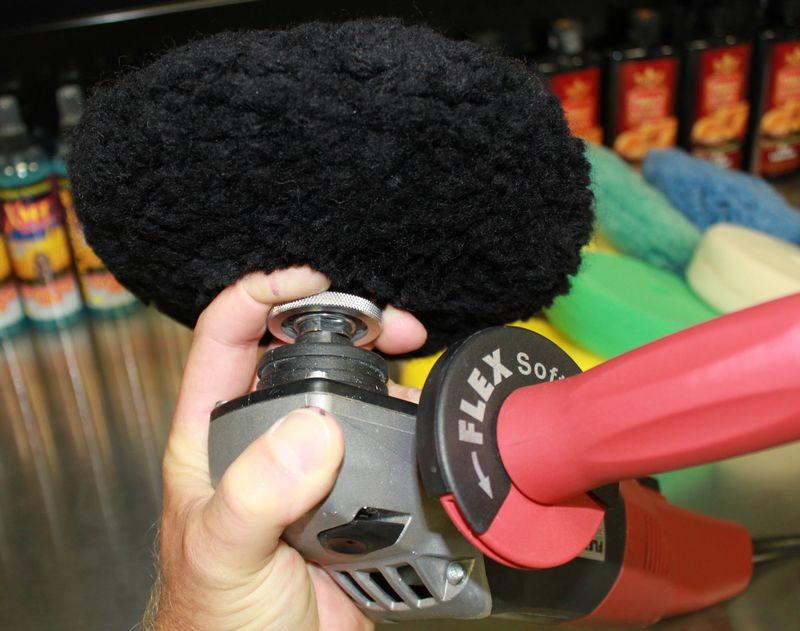
The Edge 2000 6" Wool Buffing Pads and the Edge 2000 Foam Buffing Pads are about as large in diameter as you want to go with the Flex Lightweight Rotary Buffer.
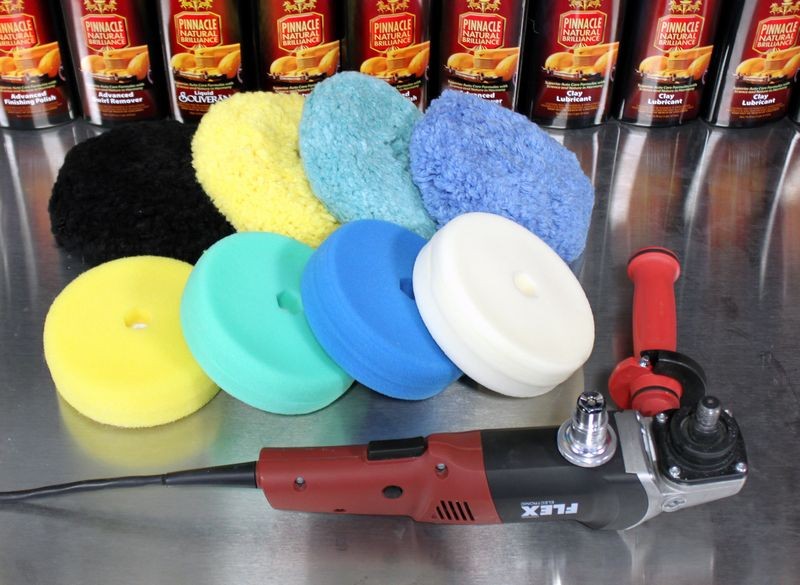
The Edge 2000 6" series buffing pads require the 3M Quick Release Adaptor to attach to the 5/8" Spindle.

One side of the adaptor threads on to the spindle and then the internal backing plate snaps onto the other end and one of the benefits is a perfectly aligned and thus balanced pad.

Here's the Edge 2000 Blue Finishing Pad attached to the 3M Adapter to give you a size reference and general all over view.


Here's the Edge 2000 Black Heavy Cut Wool Cutting Pad.

To remove a pad simply pull back on the release lever and the buffing pad will pop-off...
To clean wool pads you can use a Spur...

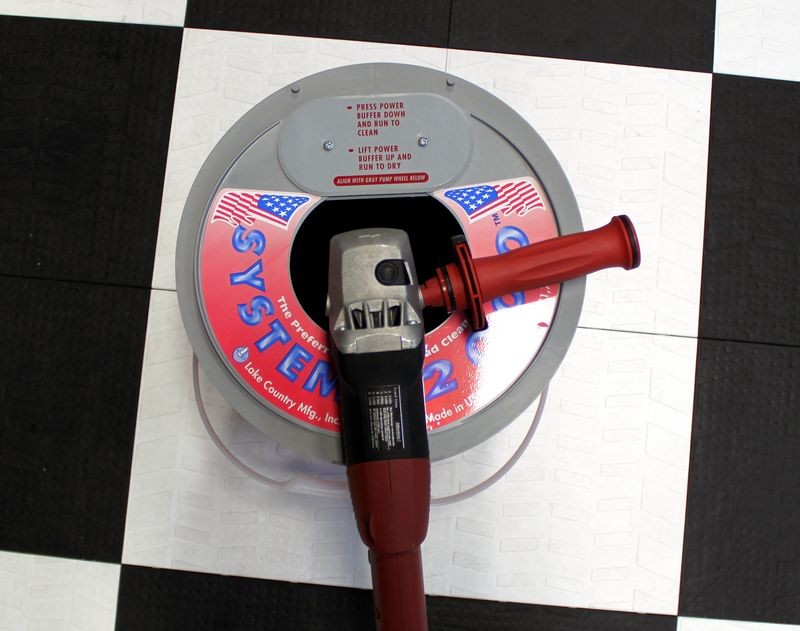
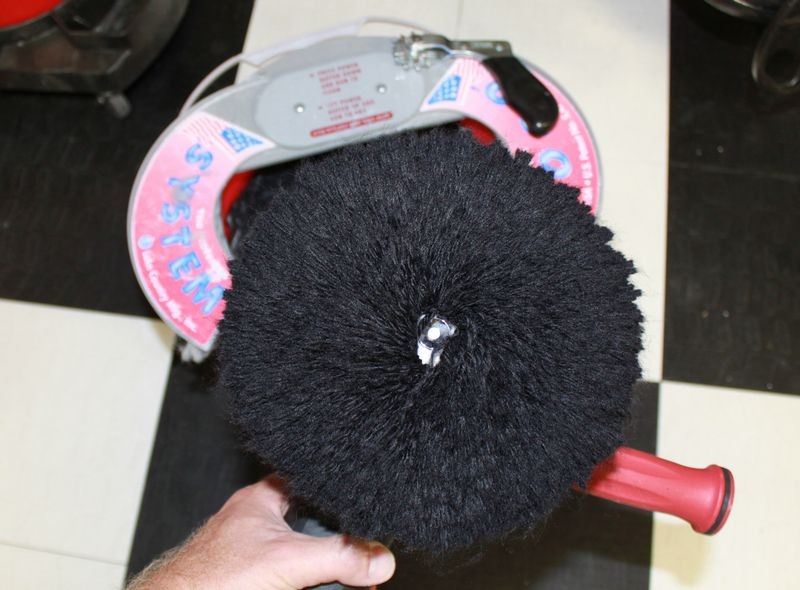
Or a Pad Washer like the Autogeek System 2000 Pad Washer
To clean a foam buffing pad you can use a Foam Pad Conditioning Brush

You can also use a Grit Guard Universal Pad Washer

In my article, "How to choose the right polisher for your detailing project" I gave the Flex 3403 and "Ease of Use Ranking" of 4, see the blue portion in the excerpt below from that article for the reason why...
 Originally Posted by Mike Phillips
How to choose the right polisher for your detailing project
Rotary Buffers are the tool of choice for professionals in the refinishing industry, (body shops where new paint is sprayed), and the reconditioning industry, (car detailing both mobile detailers and fixed locations.
Rotary Buffers, also referred to as Circular Polishers use powerful electric motors to power direct drive gear systems that force a spindle to rotate in one circular direction. When you place a backing plate and a buffing pad onto the spindle you now have a tool that offers the most correction ability out of all the tools listed here. Another way of saying this is a rotary buffer has the ability to remove a lot of paint fast.
Now I know that never sounds good but remember the industries this tool is targeted at and designed for and that's body shops and detail shops.
In a body shop situation, often times after a car is sprayed with fresh paint, after the paint dries it may be wet-sanded or color sanded to remove Orange Peel by sanding the textured surface flat. After the finish is sanded flat the next step is to remove the sanding marks which is requires a polisher that has a lot of power to cut into the paint and level it thus removing the sanding marks or sanding scratches.
In the detailing industry, a lot of seasoned professional detailers will want to use a rotary buffer for the same reason, that is they want to use a tool to remove a lot of paint quickly only instead of removing a controlled pattern of sanding marks they want to remove uncontrolled or random deeper defects like swirls, scratches, etching and water spots.
The other tools listed above like the dual action polishers, the Cyclo Polisher and the Hybrid Flex 3401 can all remove these types of deeper, serious defects but just not as quickly as they don't have the same type of power.
This power is a double-edged sword as it enables the user to quickly remove serous paint defects but if the user is not careful they can also heat up the paint on a high point or body line and actually burn or grind through the paint to expose the underlying layer of paint and in some cases the actual metal that makes up a panel.
So with greater power comes the responsibility to master the tool so you don't make mistakes.
Now listed this category as having both an Ease of Use Ranking of 4 and 5 because in this category there is a smaller, lightweight rotary buffer and its small size and lightweight make it dramatically easier to control and mastering a rotary buffer is matter of learning to control a rotary buffer.
The full size traditional models weigh more and their physically larger size just makes them a couple ticks more difficult to learn to control and to actually control when buffing out complete cars.
The learning curve of mastering a rotary buffer is the steepest and longest of all these tools and the tired and true way to learn the way of the rotary buffer is with a combination of education, hands-on training and real-world experience, lots of real-world experience.
Some other pads that work well with the 3403 are the,
Meguiar's W-7006, W-8006 and W-9006
Lake Country 5.5" foam flat pads
The 6" Kompressor Pads
Lake Country Hydro-Tech Low Profile 5 1/2 x 7/8 Inch Foam Pads
Griot's Garage 3 Inch Orange Polishing Foam Pad
Pads smaller in diameter allows the tool to work easier...
The Edge Wool and Foam Pads actually buff real nice on the 3403 plus they are perfectly centered.

-
-
Re: Video: The Flex 3403 Rotary Buffer How to remove Sanding Marks after Dampsanding Orange Peel
Continued...
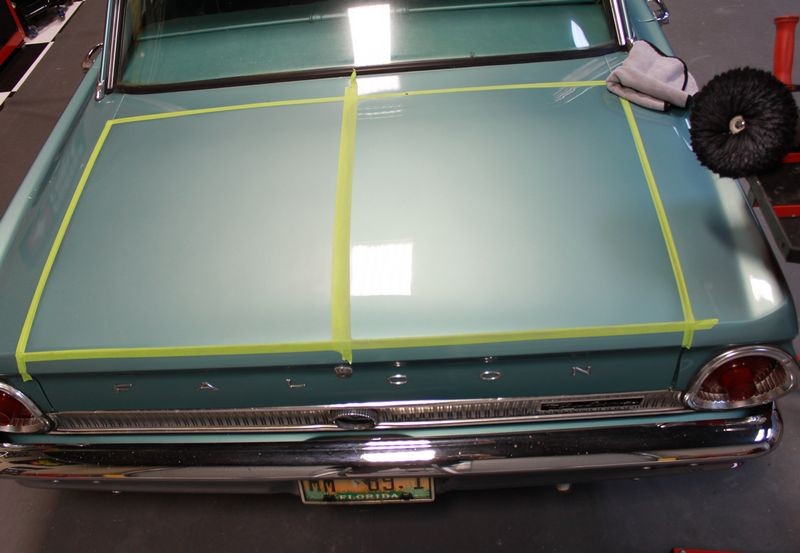
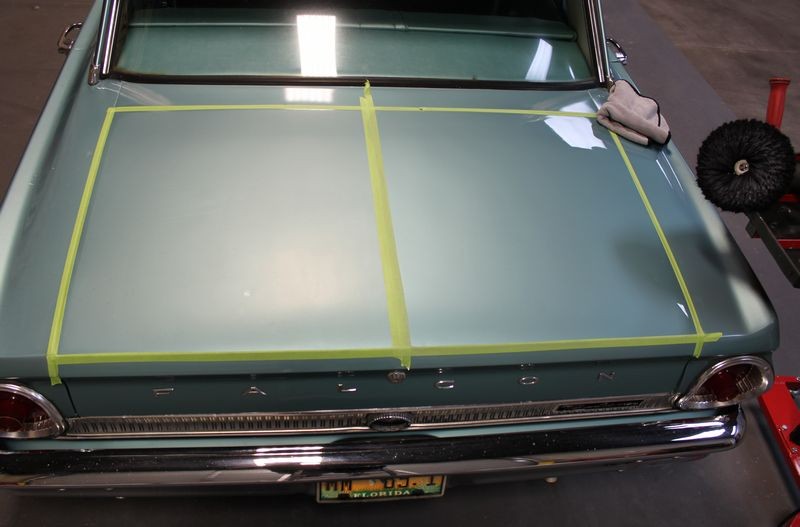
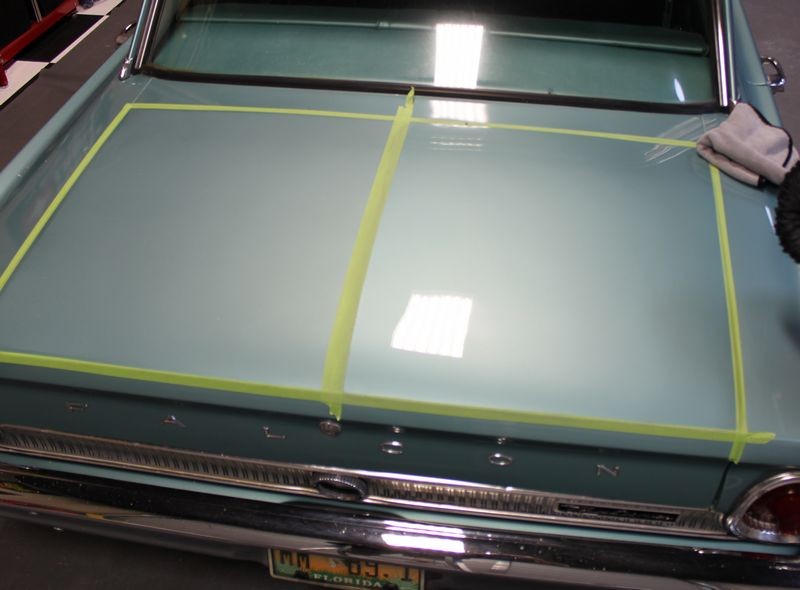
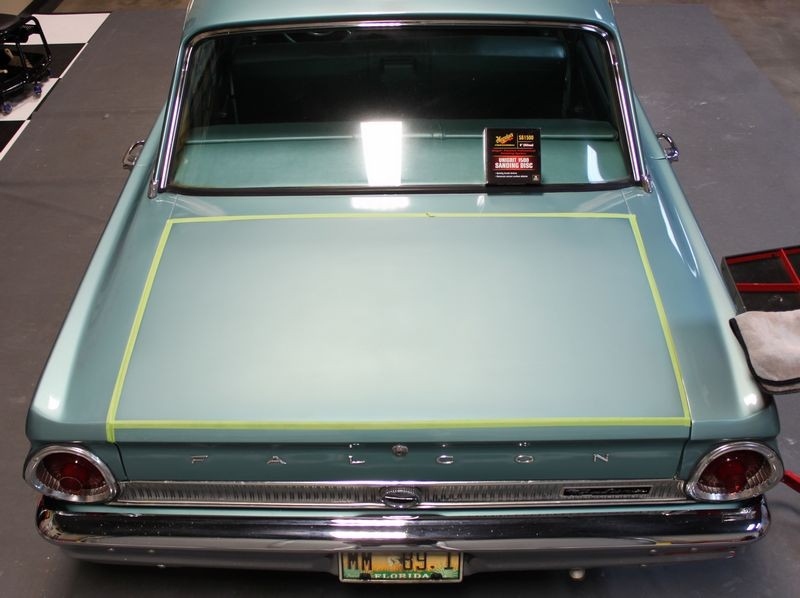
It's best to stick with smaller pads when using the Flex 3403 Lightweight Rotary Buffer, to this point I'm going to use the Edge 2000 Series 6" Wool Cutting pads to remove the sanding marks and then the Edge 2000 Series 6" Foam Pads to remove any swirls left by the compounding step and polish to a high gloss.
This is the Black, Heavy Cut Wool Buffing pad. Brand new wool pads will loose some fibers as they break in and this will create Wool Dust Bunnies all over the floor in your shop, one way to reduce the amount of fibers on the floor is to trap them in a Pad Cleaner by cleaning the pad before you use it.
Here I've cleaned the pad inside the Autogeek System 2000 Pad Cleaner and the working face of this buffing pad is ready to go to work.
I've set the speed setting to the 2 position and this equals 1500 RPM. I do almost all my cutting at 1400 to 1500 RPM, I rarely and probably never go over 1500 RPM unless I'm working on some old lacquer or a gel-coat finish. Modern clear coat paints don't like heat...
This is called a "bead" or "strip" of product, it's actually M105 Ultra Cutting Compound. I'll use two beads like this for one half of the trunk lid. I'll use the 10 @ 10 Technique to pick up my bead and then buff out just one half of the trunk lid.

Here's the results after removing the sanding marks with the Flex 3403 Rotary Buffer
This shot is just to show there is no gloss or reflectivity on the sanded side.
Gloss is restored to the compounded side.
Anytime you're using any kind of abrasive product to remove defects you're going to end up with two substances on the face of your pad.
- Removed paint
- Spent product
It's important to remove the buffing residue off the buffing pad often to enable you to "Work Clean" and this reduces the potential for instilling swirls while compounding plus makes buffing easier.

Let's pull the tape line off and inspect the results close-up...

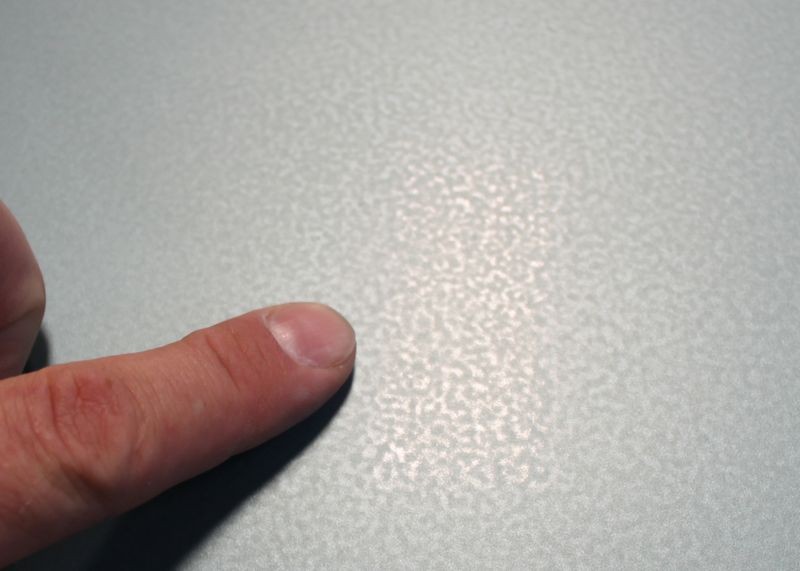
Here you can see before and after results... often times you'll see my finger in pictures and the reason for this is it quickly gives the camera something to focus on as explained in this article.


Comments:
I found the Edge Black Heavy Cut Wool pad to be one of the most aggressive and fastest cutting wool pad I've ever used... this pad will make removing sanding marks or other below surface defects quick and easy with minimal heat build-up.
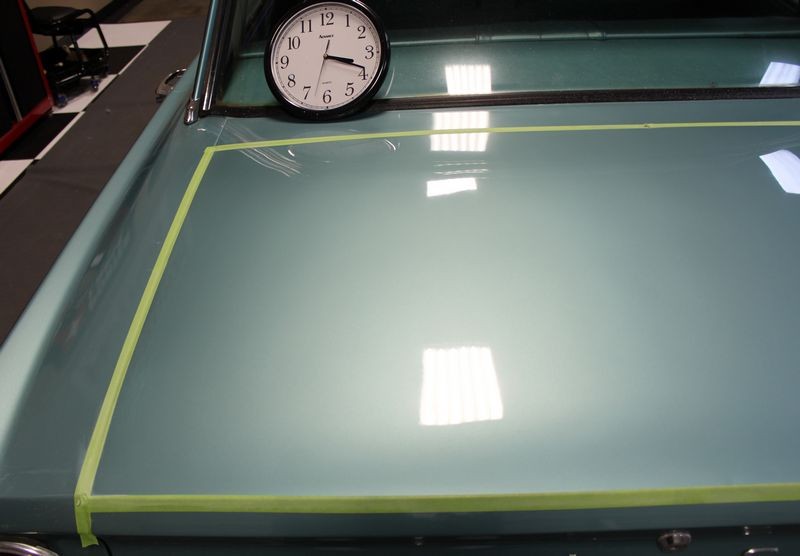
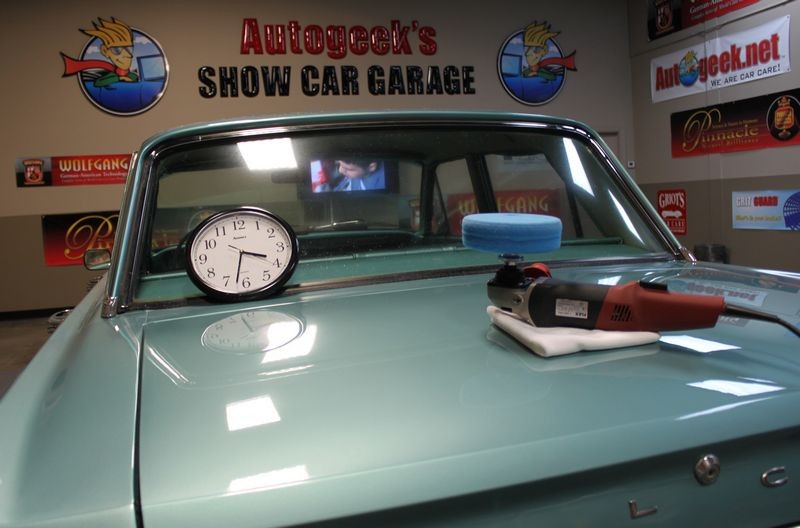
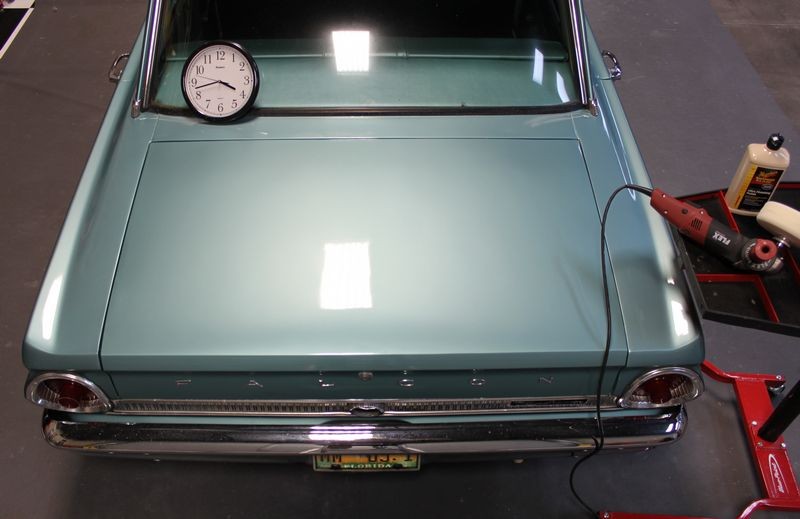
Time to remove the sanding marks from the other side, I've taped a clock to the back window just to give some kind of indicator as to how long some of these procedures took but it's not real exact because there's always interruptions, like the battery in my camera dying and then having to walk back to the office to get a fresh battery in-between steps...

For this side I'm going to switch to the Yellow Medium Cut Edge 2000 6" pad. This isn't quite as aggressive as the black pad but still an aggressive cutting pad. In this picture I've already cleaned it in the pad washer and spurred the working face of the pad so it's ready to go to work.

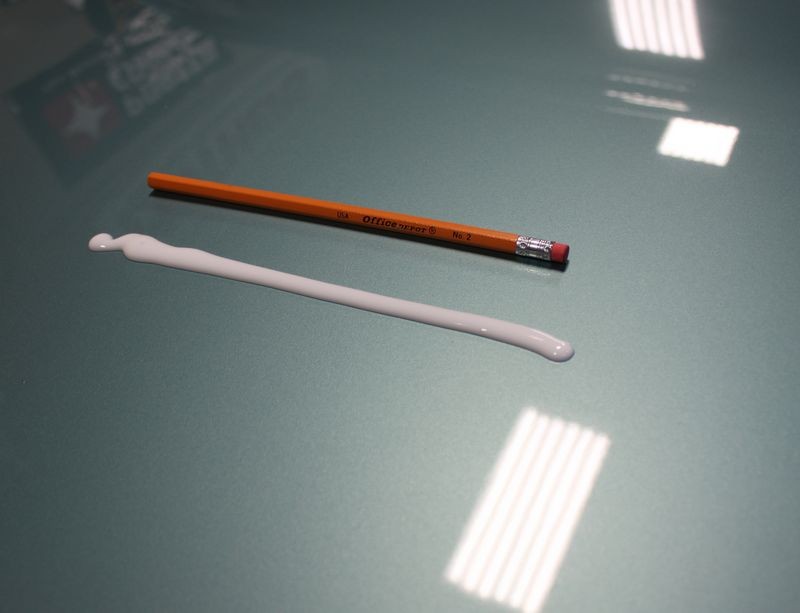
To give you a visual reference as to how long of a bead to lay down, I've "gently" placed a new pencil along side my bead of product.

One bead for the top portion of this half...

A second bead of compound for the other portion of this half of the trunk lid...

Sanding marks are gone, the Flex 3403 cut them out without flinching...
All the sanding marks have been removed and the results actually look like I've already polished the paint but I haven't, that's next.

Again, anytime you're abrading paint you have spent product and removed paint building up on the face of you're buffing pad and you want and need to remove this with either a pad washer or a spur or in a perfect world both.
First use the pad washer to wash the residue off and then use the spur to further separate and fluff the fibers. If you don't own a spur and you're using wool pads to compound, then invest in a spur, they are very affordable and much better for the life of the pad than using the Caveman method of using a screwdriver.
Yes I've used screwdrivers when that's all I've had to clean a pad but a spur is safer for you and better for the pad.

In this picture I've actually removed the previous tape around the trunk lid and here's why... by removing the tape I can remove the compounding residue that build-up along the tape line. This is key because you don't want any spent compound residues or removed paint particles entering into your polishing step.
I've also replaced the tape with fresh tap but moved it close to the edge so more of the panel will now get polished. It's these little details that enable you to work clean and have the most control over your polishing process.
Here's another quote for you when it comes to creating a show car finish...
"Sometimes the little things are the big things"
To remove any swirls left by the compound process and the fibers of the wool cutting pads, I've switched over to the Blue Edge 2000 6" Finishing pad. This is a great all around polishing pad. Im also using the M205 as it's designed to be used after the M105.

Like the compound, I'm going to place a bead of product onto the surface of the paint and then use the 10 @ 10 Technique to pick up my bead and machine polish the paint with the Flex 3403
-
-
Re: Video: The Flex 3403 Rotary Buffer How to remove Sanding Marks after Dampsanding Orange Peel
The last step... applying your LSP or Last Step Product...
At this time there as been no wax or paint sealant applied to the trunk lid of the Ford Falcon. In the real world, most wetsanding, colorsanding or dampsanding is done to fresh paint after a car or a portion of the car is painted.
In these situations you want to follow your painter's advice as to how soon you should wait before you seal the paint with a wax or paint sealant. Most painters will tell you to wait approximately 30 days for any outgassing to take place.
See this article,
Don't wax your car for at least 30 days!
Since the paint on this car is a few years old, it's okay to seal the paint so the next step would be to put the frosting on the cake...
Frosting on the cake
Copyright ©PBMA - AutogeekOnline.net® All Rights Reserved
After all the hard work of claying, compounding and then polishing your car's paint to perfection is over... it's time to put the frosting on the cake...
Taking your car's finish to it's maximum potential
Assuming the paint on your car is truly in excellent condition, a finishing wax, sealant or hybrid will take your cars paint to it's highest level or it's maximum potential.
An analogy would be,
Like frosting is to cake a finishing wax, sealant or hybrid is to a highly polished automotive finish...
Cake is good, but frosting on cake is better. It's the finishing touch or last step which creates a work of art to gaze upon and a taste of heaven that's sweet and delicious... See these related article...
The Benefits of using a Car Wax or Paint Sealant
Sacrificial Barrier Coating = The purpose of a wax or synthetic paint sealant
How to break open a coating of wax and remove it by creeping out...
The Difference Between a Cleaner/Wax and a Finishing Wax
Which products need to dry The Car Wax Mentality
LSP - The definition and the story behind the term
-
Junior Member

Re: Video: The Flex 3403 Rotary Buffer How to remove Sanding Marks after Dampsanding Orange Peel
That was so much fun to read. I love the results, unreal! Everytime I see you use a certain product/pad combo I want to run out and get it to achieve the same results. I know, I know, user experience, conditions etc... all affect it but what you do to cars is awesome! Thanks for the great tutorials, and PLEASE keep em coming! 
-
Super Moderator

Re: Video: The Flex 3403 Rotary Buffer How to remove Sanding Marks after Dampsanding Orange Peel
Very nice Mike, that is one of the only rotary polishers I will use. Very lightweight and easy to work with. That paint on Harvey never looked so good!
-
Super Member

Re: Video: The Flex 3403 Rotary Buffer How to remove Sanding Marks after Dampsanding Orange Peel
Very nice write up, I especially like the close-up detail of the "tops knocked off" on the orange peel. 
I can definitely vouch for the Flex L3403 and sanding mark removal. I just did some damp sanding orange peel removal yesterday, via 6" trizact discs on my Flex 3401. Then compounded with Menz Power Gloss on 6.5" LC Yellow, my L3403 tore right through the sanding marks leaving only light rotary holograms. Being the first time that I have removed sanding marks via Rotary, I was amazed at how fast this combo achieved near perfect results (even though I've already found the paint on this car to be very "workable"). I was very happy with the performance of the machine.
I highly recommend the L3403 to anyone in the market for a lightweight rotary, such a pleasure to use!
-
Super Member

Re: Video: The Flex 3403 Rotary Buffer How to remove Sanding Marks after Dampsanding Orange Peel
Thanks for all the great information on this Mike! I very much enjoyed the "unpacking pictures" and the read.
:dancebanana:
Sky's the Limit Car Care
-
Super Member

Re: Video: The Flex 3403 Rotary Buffer How to remove Sanding Marks after Dampsanding Orange Peel
Love this machine. Great write up Mike
Similar Threads
-
By Mike Phillips in forum How to articles
Replies: 57
Last Post: 03-19-2021, 03:45 PM
-
By Mike Phillips in forum PICTURES: 3-Day CAR Detailing Bootcamp Classes
Replies: 5
Last Post: 02-03-2019, 12:30 AM
-
By Wills.WindowsAndWheels in forum Show N' Shine
Replies: 50
Last Post: 06-28-2013, 02:58 PM
-
By Labster in forum Flex Polishers
Replies: 0
Last Post: 08-07-2012, 11:13 AM
 Members who have read this thread: 0
There are no members to list at the moment.
Posting Permissions
- You may not post new threads
- You may not post replies
- You may not post attachments
- You may not edit your posts
-
Forum Rules
|
| S |
M |
T |
W |
T |
F |
S |
| 31 |
1
|
2
|
3
|
4
|
5
|
6
|
|
7
|
8
|
9
|
10
|
11
|
12
|
13
|
|
14
|
15
|
16
|
17
|
18
|
19
|
20
|
|
21
|
22
|
23
|
24
|
25
|
26
|
27
|
|
28
|
29
|
30
| 1 | 2 | 3 | 4 |
|


 Reply With Quote


Bookmarks