 Thanks: 0
 Dislikes: 0
-
How to upload a photo into your Autogeek Photo Gallery
How to upload a photo into your Autogeek Photo Gallery
This how-to article will show you how to upload a photo on your computer into your photo gallery that you get with your Autogeek discussion forum membership.
It's important to resize your pictures first in an effort to be a good steward of the Autogeek resources; we'll write a how-to article for that in the near future.
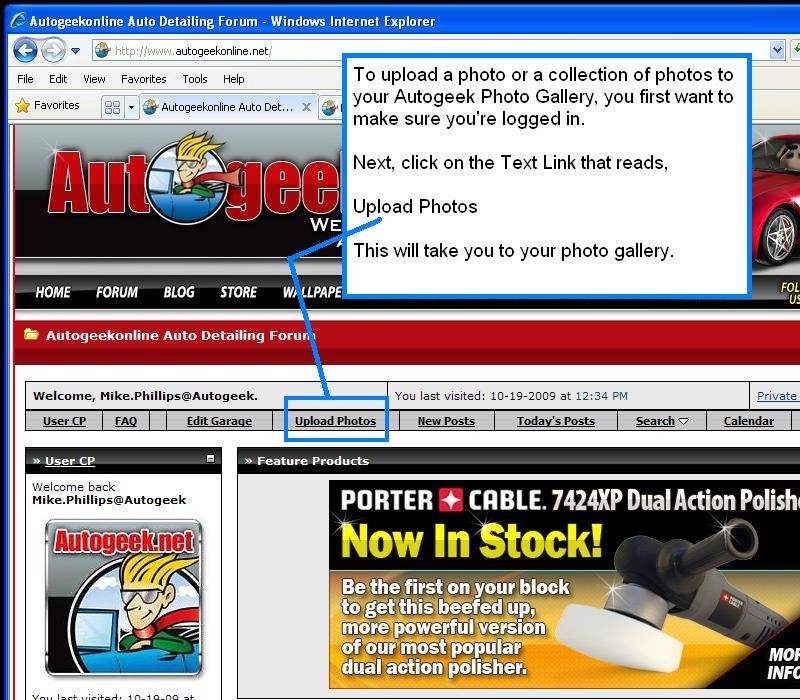
First, make sure you're logged-in to the Autogeek forum. If you're not sure how to tell if you're logged in, here's an article that will show you how to tell.
How to tell if you're logged into the forum?
Next, locate the text link in the gray horizontal navigation bar that runs across the top of every page of the forum and >click< on it.
Next, you need to know where your photos are on your computer that you want to upload. This may seem like a no-brainer but sometimes Newbies to computers and digital cameras know their photos are on their computer, but they don't know where.

So make sure you know the location of the folder that holds the photos you want to upload because you're going to need to tell the PhotoPost Gallery where the photos are stored by browsing to them.
After clicking to your gallery, you'll see a screen that looks like this,
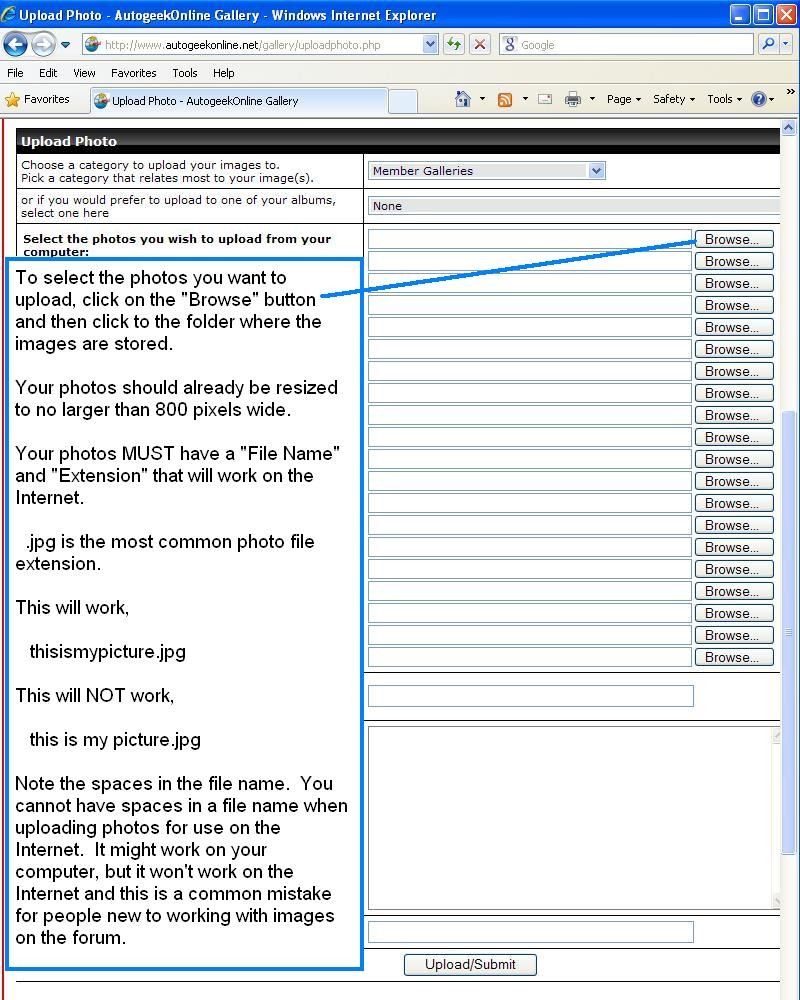
If you have more than one photo to upload, continue to >click< on the Browse button and select another photo. Remember which photos you have added and try not to select the same photo twice.
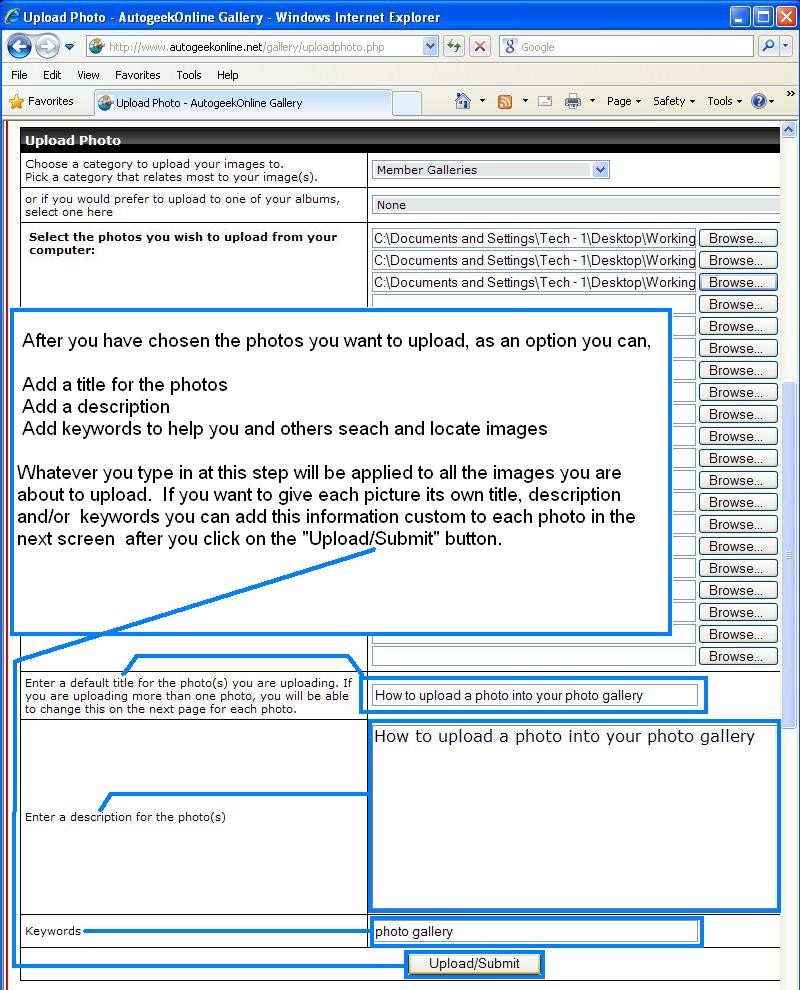
Next, add a title, description and keywords for your photos and then >click< on the Upload/Submit button. If you want to add different titles, descriptions and keywords for each photo you will have a chance to do this in the next screen when uploading multiple pictures.
Ta da! That's it, you have just successfully uploaded your photos into your photo gallery here on the Autogeek Online Discussion Forum.
Next we'll take a look at how to insert your photos into your messages.

Similar Threads
-
By LSNAutoDetailing in forum Customer Comments
Replies: 1
Last Post: 09-18-2017, 06:01 PM
-
By Mantilgh in forum Off-Topic
Replies: 5
Last Post: 11-05-2015, 07:00 PM
-
By Yancy in forum 2014 Autogeek Detailfest
Replies: 7
Last Post: 03-19-2014, 05:17 AM
-
By mtnbiker in forum Ask your detailing questions!
Replies: 6
Last Post: 08-14-2010, 05:35 AM
-
By img in forum Auto Detailing 101
Replies: 0
Last Post: 12-28-2008, 08:46 PM
 Members who have read this thread: 0
There are no members to list at the moment.
Posting Permissions
- You may not post new threads
- You may not post replies
- You may not post attachments
- You may not edit your posts
-
Forum Rules
|
| S |
M |
T |
W |
T |
F |
S |
| 28 | 29 | 30 |
1
|
2
|
3
|
4
|
|
5
|
6
|
7
|
8
|
9
|
10
|
11
|
|
12
|
13
|
14
|
15
|
16
|
17
|
18
|
|
19
|
20
|
21
|
22
|
23
|
24
|
25
|
|
26
|
27
|
28
|
29
|
30
|
31
| 1 |
|


 Likes:


 Reply With Quote
Bookmarks