 Thanks: 0
 Likes: 0
 Dislikes: 0
-
Newbie Member

First Time...cut & buff
I'm working on my 2006 Mitsubishi eclipse and I have never done anything to it except washing. lol
I noticed a lot of swirl marks and decided to take the plunge.
I have a DA and bought wolftgang swirl remover.
We already have Meg. Ultimate Compound
Meg. mirror glaze cleaning was
Meg. show car glaze
I did the hood using the CCS orange pad and the wolftgang.
It does look a lot better.
My car has some scratches (some deep)
scuff marks
as well as other older car body issues.
I'm just wanting to make her shine without spending a lot of money...or taking it to a body shop.
What products do I need?
Can I use what I already have on-hand?
What are the necessary steps for me to do...that will just bring back some of her luster?
O, and please understand that I have never done this before. I won't understand any shorthand usage for products and tools.
Thanks!!!

-
Re: First Time...cut & buff
Mike Phillips has a great thread on DS polishing in the Detailing How-To's linked at the top of the page
Ultimate Compound on an Orange Pad is usually effective for swirls and scratches
On some paints, you may need to follow-up with a lighter polish and a less aggressive pad
What you have now is fine. If the UC/Orange is leaving behind a haze or you think higher shine might be achieved by a polishing step...do a Test Spot with Total Swirl Remover/White Pad
If it were me, I would wax it with Meguiar's Ultimate Paste Wax. Available OTC, durable, great shine, easy to apply and remove. One can will last the lifetime if this car
-
Super Member

Re: First Time...cut & buff
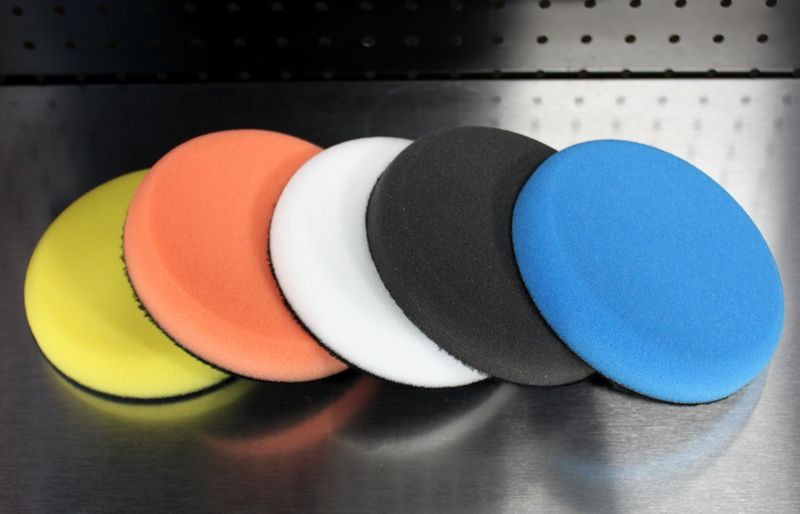
Kendra. If you have a autozone or advance auto parts or harbor freight you can pick up a bottle of meguiars ultra cut compound 105. If you want to get a better cutting ability you may want to place an order for menzerna fast gloss 400 or meguiars foam cut compound. But if you use 105 re that can be bought locally for about 30 dollars it will take out a lot more. Then follow up with the wolfgang you have. What ccs pads are you using? White? Orange? Yellow?
Detailing in Colorado since 2001
-
Re: First Time...cut & buff
M105 is not "Beginner Friendly", in my opinion
If you already got good results with the TSR on an Orange Pad, you may be done
I would do at Test Spot with the TSR on a White Pad to see if it makes a noticeable improvement
-
Newbie Member
Re: First Time...cut & buff
 Originally Posted by allenk4

Mike Phillips has a great thread on DS polishing in the Detailing How-To's linked at the top of the page
Ultimate Compound on an Orange Pad is usually effective for swirls and scratches
On some paints, you may need to follow-up with a lighter polish and a less aggressive pad
What you have now is fine. If the UC/Orange is leaving behind a haze or you think higher shine might be achieved by a polishing step...do a Test Spot with Total Swirl Remover/White Pad
If it were me, I would wax it with Meguiar's Ultimate Paste Wax. Available OTC, durable, great shine, easy to apply and remove. One can will last the lifetime if this car
I'm using a orange and white pad.
I did watch his video right before I did my hood.
-
Newbie Member
Re: First Time...cut & buff
Originally Posted by allenk4
M105 is not "Beginner Friendly", in my opinion
If you already got good results with the TSR on an Orange Pad, you may be done
I would do at Test Spot with the TSR on a White Pad to see if it makes a noticeable improvement
The hood looks much better after I used the TSR and orange pad. (now I can see all the chips...lol)
My guy informed me that Now, I need to do the rest of the car. Wait, what....one does the whole car?
Is the TSR harsher then the UC?
Do I just wax after?
Thanks
-
Re: First Time...cut & buff
Hi Kendra,
The TSR is a medium cut compound and the UC is a true compound. Both work great but the UC has the "ability" to remove paint faster and that's what you're doing is removing paint and leveling the surface.
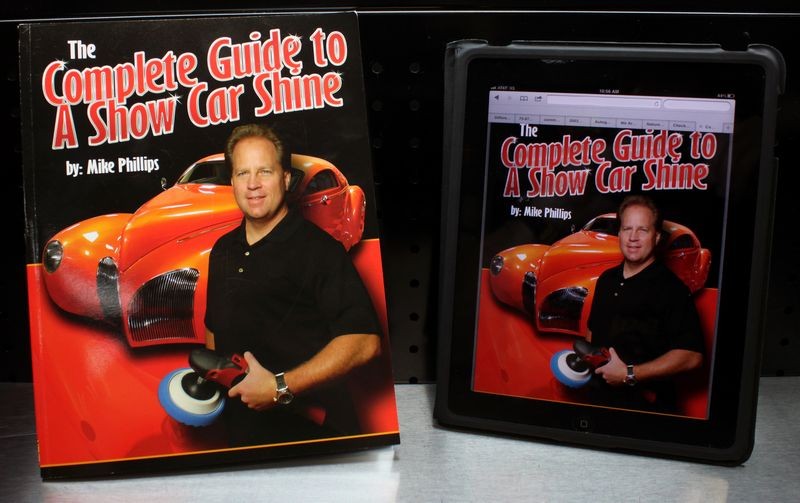
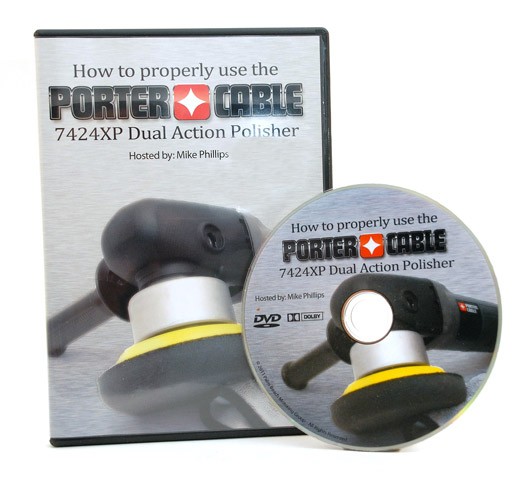
If you're new to machine polishing, I'd highly recommend reading the article I've included below and make sure you're not making any of the common mistakes people make, like speed, working too large an area, moving the polisher too fast over the paint.
Just ONE of these techniques is enough to have a huge impact on your results.

-
Re: First Time...cut & buff
DA Polisher Trouble Shooting Guide
When you're first starting out machine polishing and learning to use a DA Polisher it's common to have questions about your results and your results are directly tied to your technique.
Here's a list of the most common problems,
1. Trying to work too large of an area at one time.
2. Moving the polisher too fast over the surface.
3. Using too low of speed setting for removing swirls.
4. Using too little downward pressure on the head of the polisher.
5. Using too much downward pressure on the head of the polisher so the pad quits rotating.
6. Not holding the polisher in a way to keep the pad flat while working your compound or polish.
7. Using too much product or using too little product.
8. Not cleaning the pad often enough. Here's a list of the solutions in matching order,
1. Trying to work too large of an area at one time.
Shrink the size of your work area down. You can't tackle to large of an area at one time. The average size work area should be around 20" by 20". Most generic recommendations say to work an area 2' by 2' but for the correction step, that's too large. You have to do some experimenting, (called a Test Spot), to find out how easy or how hard the defects are coming out of your car's paint system and then adjust your work area to the results of your Test Spot. The harder the paint the smaller the area you want to work.
2. Moving the polisher too fast over the surface.
For removing defects out of the paint you want to use what we call a Slow Arm Speed. It's easy and actually natural for most people new to machine polishing to move the polisher quickly over the paint but that's the wrong technique. One reason I think people move the polisher too quickly over the paint is because they hear the sound of the motor spinning fast and this has psychological effect which causes them to match their arm movement to the perceived fast speed of the polisher's motor.
Another reason people move the polisher too quickly over the paint is because they think like this,
"If I move the polisher quickly, I'll get done faster"
But it doesn't work that way. Anytime you're trying to remove swirls, scratches, water spots or oxidation using a DA Polisher you need to move the polisher s-l-o-w-l-y over the paint.
3. Using too low of speed setting for removing swirls.
When first starting out many people are scared of burning or swirling their paint, so they take the safe route of running the polisher at too low of a speed setting but this won't work. The action of the polisher is already g-e-n-t-l-e, you need the speed and specifically the pad oscillating and rotating over the paint as well as the combination of time, (slow arm speed), together with the abrasives, the pad aggressiveness, and the downward pressure to remove small particles of paint which is how your remove below surface defects like swirls or scratches.
Removing below surface defects is a leveling process where you need the abrasives to take little bites out of the paint and to get the abrasives to take these little bites with a tool that uses a Free Floating Spindle Bearing Assembly you need all of the above factors working for you including a high speed setting.
4. Using too little downward pressure on the head of the polisher.
For the same reason as stated in #3, people are scared, or perhaps a better word is apprehensive, to apply too much downward pressure to the polisher and the result of too little pressure is no paint is removed thus no swirls are removed.
5. Using too much downward pressure on the head of the polisher so the pad quits rotating.
If you push too hard you will slow down the rotating movement of the pad and the abrasives won't be effectively worked against the paint. You need to apply firm pressure to engage the abrasives against the paint but no so much that the pad is barely rotating. This is where it's a good idea to use a permanent black marker to make a mark on the back of your backing plate so your eyes can easily see if the pad is rotating or not and this will help you to adjust your downward pressure accordingly.
Correct technique means finding a balance of applying enough downward pressure to remove defects but not too much downward pressure as to stop the rotating movement of the pad.
This balance is affected by a lot of factors like the lubricity of the product you're using, some compounds and polishes provide more lubrication than others and this makes it easier to maintain pad rotation under pressure.
Another factor that can affect pad rotation are raised body lines, edges and curved surfaces as anytime you have uneven pressure on just a portion of the face of the pad it can slow or stop pad rotation. This is where experience comes into play and experience comes from time spent behind the polisher.
6. Not holding the polisher in a way to keep the pad flat while working your compound or polish.
Applying pressure in such a way as to put too much pressure to one edge of the pad will cause it to stop rotating and thus decrease abrading ability.
7. Using too much product or using too little product.
Too much product hyper-lubricates the surface and the result is that abrasives won't effectively bite into the paint but instead will tend to skim over the surface. Overusing product will also accelerate pad saturation as well increase the potential for slinging splatter onto adjacent panels.
Too little product will means too little lubrication and this can interfere with pad rotation.
Again there needs to be a balance between too much product and too little product and finding this balance comes from reading articles like this one, watching videos an most important, going out into the garage and putting in time behind the polisher and as you're buffing with specific product and pad combinations, pay attention to pad rotation.
8. Not cleaning the pad often enough.
Most people simply don't clean their pad often enough to maximize the effectiveness of their DA Polisher. Anytime you're abrading the paint you have two things building up on the face of your buffing pad,
As these to things build up on the face of the pad they become gummy and this has a negative affect on pad rotating plus makes wiping the leftover residue on the paint more difficult. To maintain good pad rotation you want to clean your pad often and always wipe-off any leftover product residue off the paint after working a section. Never add fresh product to your pad and work a section that still has leftover product residue on it.
Pad Cleaning Articles
How to clean your foam pad on the fly
Why it's important to clean your pads often...
-
Re: First Time...cut & buff
-
Newbie Member
Re: First Time...cut & buff
Thanks for all the great information. I got most of the car done using UC and the orange pad over the weekend. It did help a lot. I think there is only so much I can do for the eclipse without going to get some body work on her. I ordered some Collinite Liquid Insulator Wax #845 to finish it off.
Similar Threads
-
By Bdubbs in forum Auto Detailing 101
Replies: 21
Last Post: 06-18-2020, 09:06 AM
-
By mad666max_ in forum Auto Detailing 101
Replies: 7
Last Post: 04-14-2011, 09:55 AM
-
By Mark Preus in forum Ask your detailing questions!
Replies: 11
Last Post: 02-04-2010, 09:18 AM
-
By unclestu in forum Wolfgang Car Care
Replies: 16
Last Post: 10-07-2009, 07:20 PM
 Members who have read this thread: 0
There are no members to list at the moment.
Posting Permissions
- You may not post new threads
- You may not post replies
- You may not post attachments
- You may not edit your posts
-
Forum Rules
|
| S |
M |
T |
W |
T |
F |
S |
| 28 | 29 | 30 |
1
|
2
|
3
|
4
|
|
5
|
6
|
7
|
8
|
9
|
10
|
11
|
|
12
|
13
|
14
|
15
|
16
|
17
|
18
|
|
19
|
20
|
21
|
22
|
23
|
24
|
25
|
|
26
|
27
|
28
|
29
|
30
|
31
| 1 |
|


 Reply With Quote
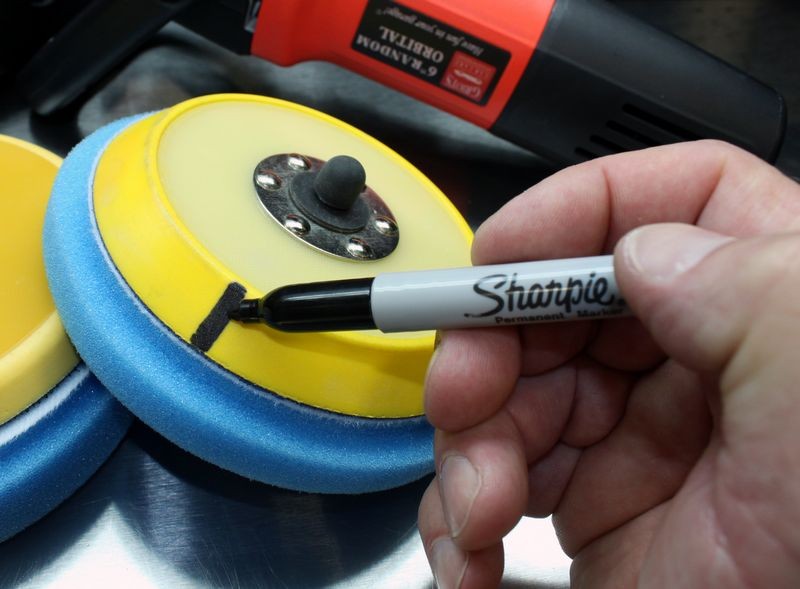


Bookmarks