 Thanks: 0
 Likes: 0
 Dislikes: 0
-
Pads and Process for Glass Polish with Rupes DA
Hey All!
Want to use my Rupes LHR15 Mark II polisher with some Wolfgang Perfekt Vision Glass Polish to polish out my windshield. Was hoping someone could give some pad and process recommendations. Also what's the best way to prime the pad for this kind of work? I've used this polish by hand before but I know it's a lot of work so hoping to let the machine to most of it. 
Thanks in advance!
-Al
-
Re: Pads and Process for Glass Polish with Rupes DA
-
Super Member

Re: Pads and Process for Glass Polish with Rupes DA
Don't know if Wolfgang glass polish contains cerium oxide. This what glass polishing guys use to polish glass. A rayon pad is used with cerium oxide. Car Pro has both pad and polish and can be found here on AG.
-
Re: Pads and Process for Glass Polish with Rupes DA
This goes over topical polishing as well as trying to remove defects with subsurface polishing. But you’ll need something with cerium oxide if you want to remove scratches. And a lot of time even with a machine.
How to do Topical Glass Polishing with Diamondite Glass Polish by Mike Phillips
-
Re: Pads and Process for Glass Polish with Rupes DA
No it’s just topical polishing without cerium oxide. No scratches. Looking for the right pad. Thanks.
-
Re: Pads and Process for Glass Polish with Rupes DA
Mike used the Rupes Coarse Wool pad and that is what I plan to get for normal/topical glass polishing.
-
Re: Pads and Process for Glass Polish with Rupes DA
First...
Great questions.... 
 Originally Posted by skyace888

Hey All!
Want to use my Rupes LHR15 Mark II polisher with some Wolfgang Perfekt Vision Glass Polish to polish out my windshield.
Was hoping someone could give some pad and process recommendations.
Topical Glass Polishing is really quite simple. Treat like you are doing paint correction.
The key thing is to tape-off any surrounding trim or material that could be stained from the polish. Mostly just any pebble textured black plastic trim and this is usually around the wiper arms.
My personal preference is to do topical glass polishing BEFORE washing a car and then you can wash any splatter around the window frames off as you wash the car. But you can certainly do it to a car that's already clean.
As for pads and process?
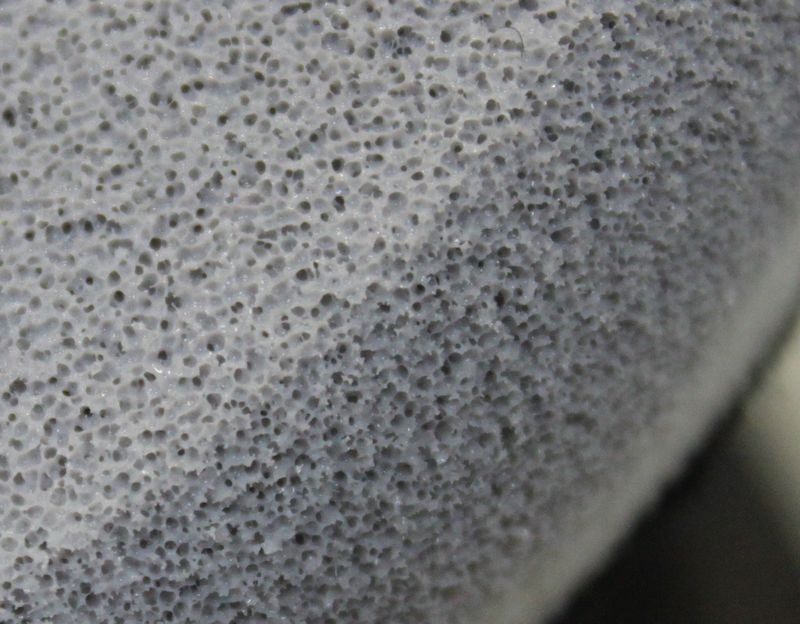
Any type of foam cutting pad tends to work but note that the product itself tends to eat up the foam. So don't be surprised if the foam looks like it's mottled or even melting after use. I have know idea of what chemical is in the polish that does this but I see it with multiple glass polishes. What I do is after using a foam polishing pad for glass polishing is
A: Wash it right away.
B: Dedicated it to just future glass polishing.
Remember - the glass won't care if the foam isn't pretty.
As for process, just apply some product to the face of the pad, like 3 Nickel sized drops and the using a medium speed, spread the product out over half the windshield or if side glass you can usually tackle the entire window, then turn your speed up to the 5-6 setting and start making overlapping passes in a crosshatch pattern.
If you know you have a film on the glass, if you look very carefully you can often times see it during the initial passes. As the polish removes the film the film will disappear and the glass surface will look clean and clear.
Here's a recent article I wrote to share/educate what this road film can look like from the driver's point of view. Note you can often see this film when you WIPE the outside glass with any glass cleaner. For a BRIEF moment as you make the initial wipe the thin film of liquid glass cleaner reveals the film and then as the glass cleaner evaporates the film disappears. Try it and see.
Begin copy and paste
~~~~~~~~~~~~~~~~~~~~
Pictures: Traffic Road Film on Glass
I forget what I was driving, but I remember taking these pictures to show what road film looks like on your windshield from the driver's point of view. This showed up at night while sitting at red lights at an intersection. The FILM creates GLARE and this is dangerous.
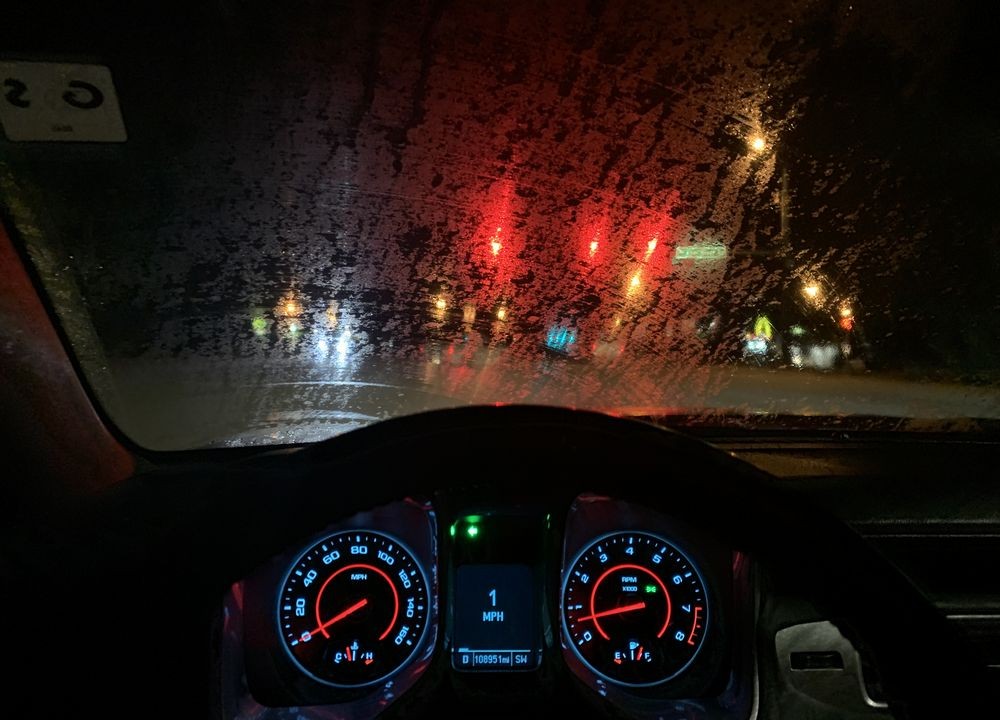

And this is why every car I detail includes machine polishing all the glass using whatever my first step process product is or a dedicated glass polish.
~~~~~~~~~~~~~~~~~~~~
End of copy and paste
Originally Posted by skyace888
Also what's the best way to prime the pad for this kind of work? I've used this polish by hand before but I know it's a lot of work so hoping to let the machine to most of it.
Thanks in advance!
-Al
For this type of work it's not rocket science, just keep it simple. Here's an article from 2011 that shows what to do if using foam pads
How to prime a foam pad when using a DA Polisher
Here are 3 ways to apply product to your pad.
1. Priming the pad then adding product to work with
Priming a clean, dry pad is considered the best approach for using a DA Polisher because it ensures that 100% of the working surface of the pad is wet with product and working at maximum efficiency when you turn the polisher on. I originally learned of this technique from my friend Kevin Brown.
Priming the pad also ensures that you don't have any dry portion of the pad working over the paint un-lubricated. This really isn't a risk because since you're just starting out you're going to be removing defects a lot more serious than would be caused by any portion of the pad that is dry and spinning against the paint.
Plus, after just a few passes, the product you apply to specific areas of the face of the pad will migrate over the entire face of the pad and it will do this rather quickly when you're on the higher speed settings.
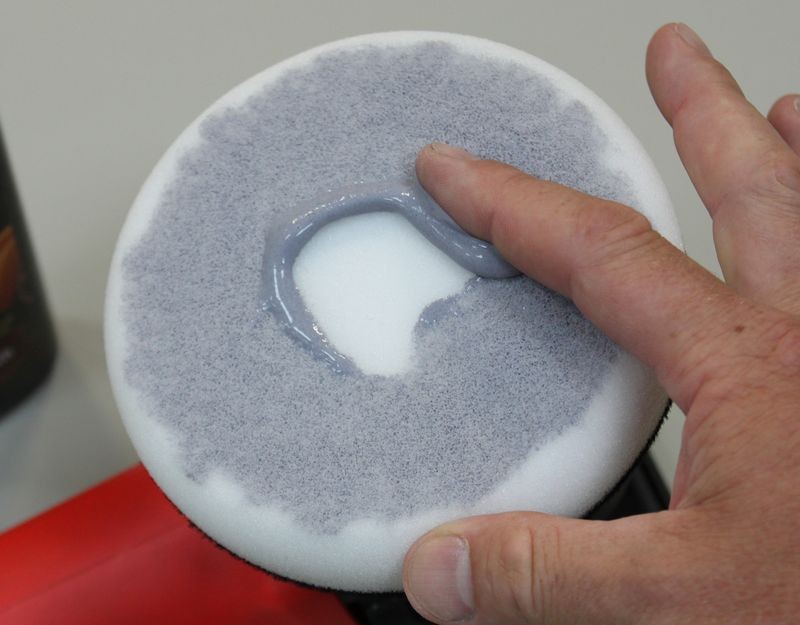
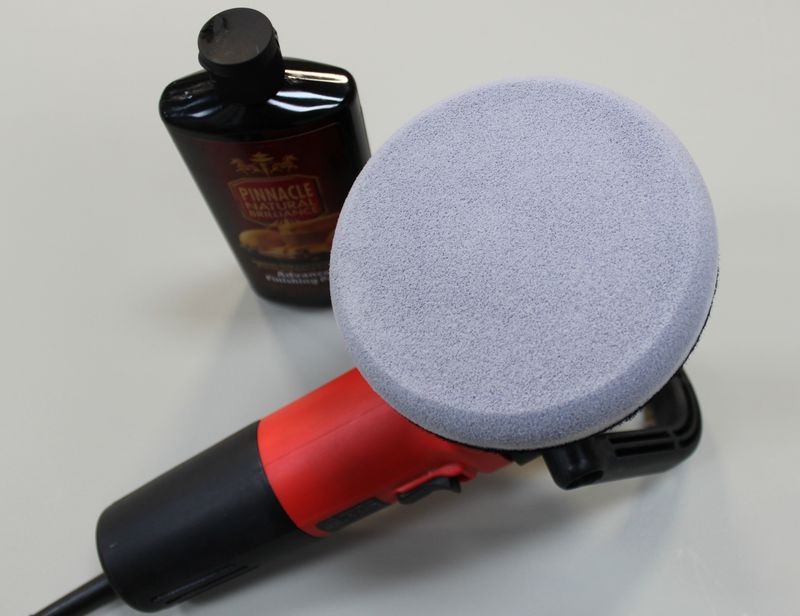
Priming the Pad - For clean, dry pads
Start with a clean, dry pad and add some fresh product to be spread out to the face of the pad. Using your finger, spread the product out over the pad and then using your finger work it into the pores of the pad. Don't saturate the pad, just use enough product to make sure that 100% of the working face of the pad has product coverage.


Work the product around the face of the pad and into the pores
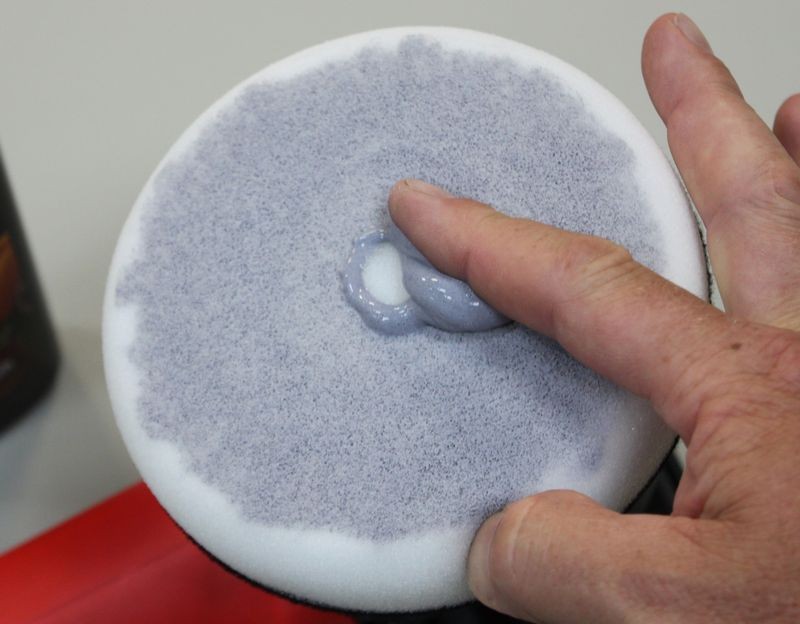
Any extra, take and apply to the outer edge until 100% of the working face of the pad is primed with product.

As an option you can also prime the outer edge. This helps if you're buffing around convex curves or around panels that the edge of your buffing pad may come into contact with, like spoilers, side mirror housings, curved panels etc.

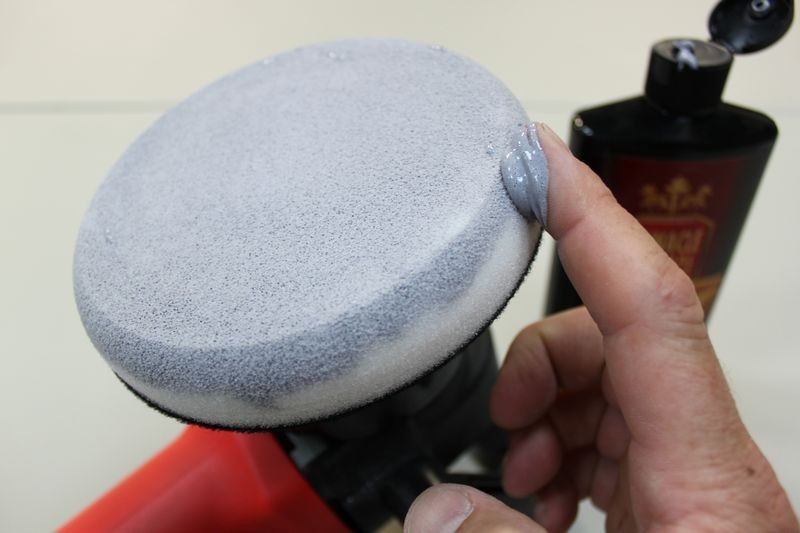
Primed and ready to add "Working Product" to.
Adding "Working Product" to the primed pad
Some people will recommend 3 to 4 pea size drops of product as the proper amount of product to use and this can be correct for concentrated products or working small sections and if you follow this advice make sure you are not under-lubricating the surface being worked.
Pea size drops of product

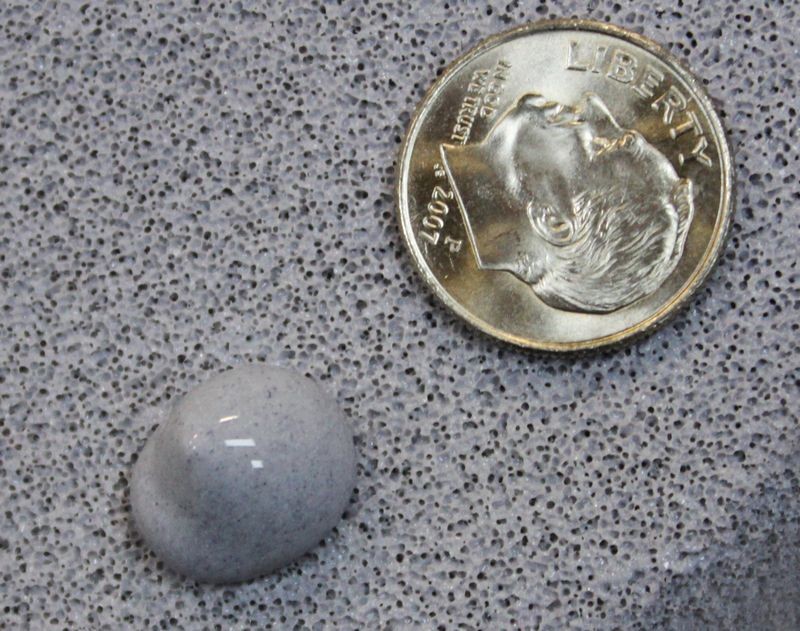
For some products and paint conditions, you may want more product on the surface working for you. Here's an example of dime size drops of product.
Dime size drops of product


How much product to use after priming
Ample
You want an AMPLE amount of product when first starting out because you pad is dry and some of the product is going to seep into the pad leaving less on the surface to LUBRICATE and ABRADE the paint
Cut down on the amount of product AFTER pad is broken-in...
After your pad is broken in with product, clean your pad after each section pass and when you apply fresh product you can cut down on the amount of product you actually apply to the face of your pad.
Too Little Product
Under-using product reduces lubricity and will make it more difficult for your pad to rotate efficiently.
Too Much Product
Using too much product will hyper-lubricate or over-lubricate the pad and will interfere with the abrasives ability to abrade the paint.
Keep in mind that you want enough product on the surface so you have,
- Abrasives working for you.
- A lubricating film between the paint and the pad.
Often times if you don't have enough product to work with you'll end up buffing to a dry buff. When you lose lubrication, friction increase and this can lead to micro-marring or hazing.

-
Re: Pads and Process for Glass Polish with Rupes DA
More...
Originally Posted by Rsurfer
Don't know if Wolfgang glass polish contains cerium oxide.
Nope.
My guess is any product on the market that actually does contain Cerium Oxidie is going to BOAST about this feature on the front label. Cerium Oxide is a Rare Earth Mineral. It's a unique abrasive set for abrading glass to remove defects without leaving any of it's own defects during the process. How it work? I have know idea.
Originally Posted by Rsurfer
This what glass polishing guys use to polish glass. A rayon pad is used with cerium oxide. Car Pro has both pad and polish and can be found here on AG.
This is true and the above is for what I call
Sub-Surface Glass Polishing
This means removing defects that are IN the glass. Topical Glass Polishing is when you're removing substances ON the glass.
Originally Posted by skyace888
No its just topical polishing without cerium oxide. No scratches. Looking for the right pad. Thanks.
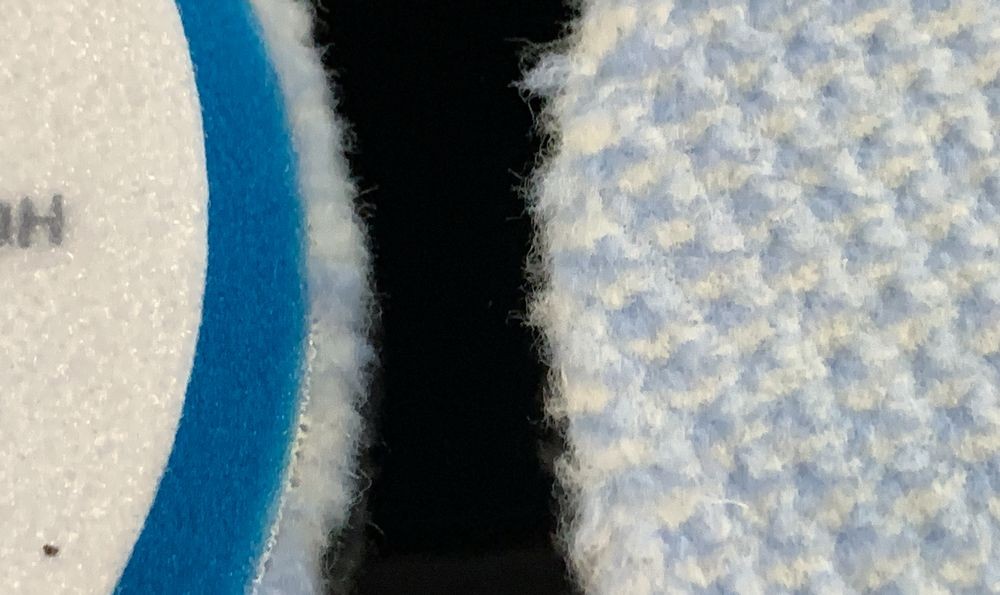
Either a foam cutting pad or any short fiber pad will do the job.
In this recent video on Topical Glass Polishing I show using the RUPES Coarse Wool Polishing Pad. There's pictures of this pad and the link to it on the AG store in this write-up.
Mike Phillips recommended foam pads for the FLEX Family of BEAST 8mm Gear-Driven Orbital Polishers
Here's a screenshot,

Here's the video - I show the pad and talk about pads for topical glass polishing in general starting at the 14 minute time stamp.
More info including hand polishing the INSIDE of glass here,
LIVE Detailing Class Today at 3:00pm Eastern Time!
-
Re: Pads and Process for Glass Polish with Rupes DA
-
Re: Pads and Process for Glass Polish with Rupes DA
Thanks Mike! I will use a coarse foam or wool pad with my DA as you describe.
Similar Threads
-
By fuchsjhf in forum RUPES BigFoot Oribital Polishers
Replies: 2
Last Post: 12-09-2020, 03:25 AM
-
By JustJesus in forum Off-Topic
Replies: 0
Last Post: 08-17-2020, 11:15 AM
-
By gecceanduana in forum RUPES BigFoot Oribital Polishers
Replies: 20
Last Post: 04-09-2019, 07:07 AM
-
By Toolhead in forum Auto Detailing 101
Replies: 8
Last Post: 12-29-2018, 09:43 AM
-
By joleyred in forum Auto Detailing 101
Replies: 4
Last Post: 05-27-2018, 10:18 PM
 Members who have read this thread: 1
Posting Permissions
- You may not post new threads
- You may not post replies
- You may not post attachments
- You may not edit your posts
-
Forum Rules
|
| S |
M |
T |
W |
T |
F |
S |
| 31 |
1
|
2
|
3
|
4
|
5
|
6
|
|
7
|
8
|
9
|
10
|
11
|
12
|
13
|
|
14
|
15
|
16
|
17
|
18
|
19
|
20
|
|
21
|
22
|
23
|
24
|
25
|
26
|
27
|
|
28
|
29
|
30
| 1 | 2 | 3 | 4 |
|


 Reply With Quote

Bookmarks