Concrete overspray

esv5454

New member
Apr 30, 2007
71
0
How To Remove Concrete Overspray off car paint


Hey guys I have a customer who owns a demolition company and recently had the cab of his hauling truck covered in concrete overspray. I've never encountered anything like this before so I was wondering if anyone has any advice on removing it. It is on all panels of the cab including the windows. I got a couple of pictures on my phone to give some perspective..


Any advice would be greatly appreciated.
 
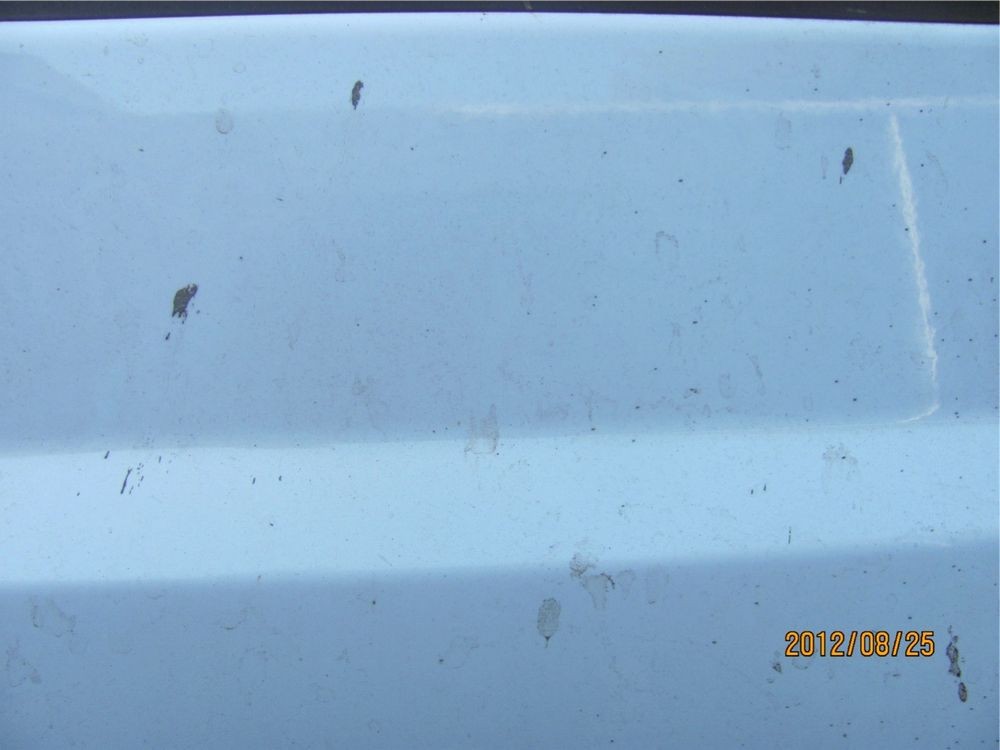
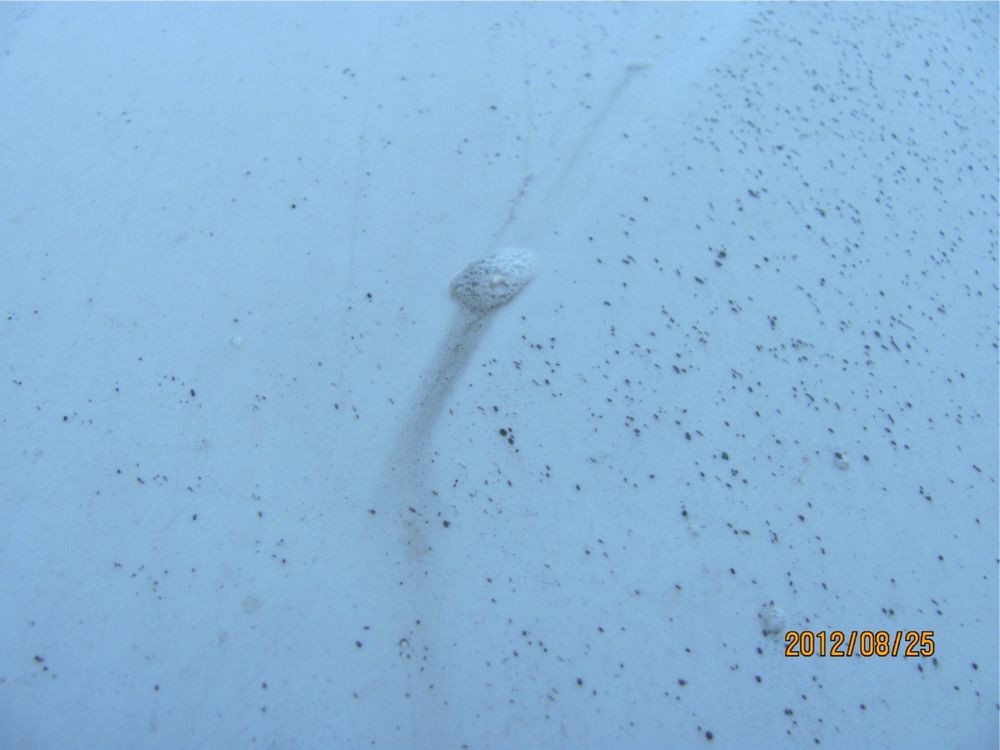
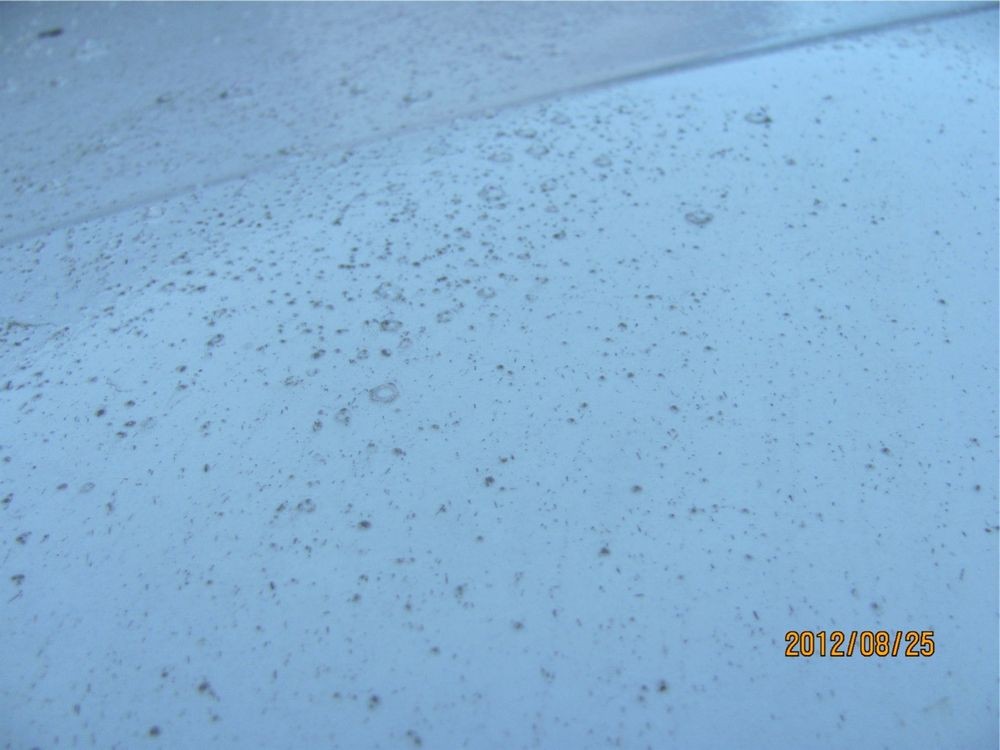
Check out this thread, Richy mentions a product somewhere that is supposed to be for removing concrete or cement off paint.

http://www.autogeekonline.net/forum/show-n-shine/53606-2012-a7-cement-splatter-road-paint.html


The other options that come to mind would be the usual claying or using a nylon rasor blade to scrape it off and then polish afterwards.

Or maybe try this,


Stoner XENIT Natural Citrus Mold Cleaner


Xenit.jpg


Stoner XENIT Natural Citrus Mold Cleaner removes resins, carbon deposits, silicones, and contaminants from molds. You’ll never again be frustrated trying to remove tough gunk and grime in your home, office, garage or car. Natural citrus XENIT by Stoner removes tacky, grimy dirt so well, in most cases you can simply “wipe it away.”

Xenit is a natural precision mold cleaner used as a degreaser in the plastics and rubber molding industries. It contains Citrus 66, a highly refine extract of citrus fruit. This powerful ingredient removes greasy soil and stains that can't be removed by soap and water.

Use XENIT to quickly permanent marker, crayon and lipstick “accidents” in the car and around the home. It removes release agents, resins, carbon deposits, and other contaminants left in mold cavities.

Xenit contains more than five, different, high performance cleaners. Unlike most water-based citrus cleaners that are designed to lift and carry dirt, XENIT is formulated to break down the complex molecules found in sticky materials. This MicroActive cleaning action gives XENIT unequaled abilities to loosen and dissolve difficult grime like tar, grease, gum and adhesives. It even removes dried latex paint if accidentally dripped on carpet, flooring, or furniture. Xenit removes shoe scuffs and heel marks from from vinyl panels and greasy dirt from fabrics and upholstery.

Save yourself hours of agony trying to remove sticky stuff with standard cleaners. Avoid wasted time spent laboring with inferior water-based products. XENIT is formulated to evaporate and dry completely, leaving behind no sticky residues or streaky soaps.

10 oz. aerosol.


:)
 
Thank you Mike. I will give these a try and post an update. I appreciate your help!
 
***Update***


After getting some product recommendations from Mike for concrete removal I set out to order both XENIT and Back Set and do some comparisons. Unfortunately I was unable to get XENIT as it is not allowed to be sold in or shipped to California so I immediately placed an order for Back Set.

It arrived a week later and I was able to try it out over the weekend. I had doubts about being able to safely remove all of this concrete overspray but the Back Set produced amazing results with little effort. As per the directions I applied the Back Set to a dry surface with a chemical sprayer and let it soak for 15 minutes.


BEFORE

Concrete splatter on white paint.

F650_00001.jpg


F650_00002.jpg


F650_00003.jpg


F650_00004.jpg


F650_00005.jpg


F650_00006.jpg


F650_00007.jpg


F650_00008.jpg


F650_00009.jpg


Upon applying the second coat the concrete was already breaking down and starting to rinse off with just the pressure from the sprayer alone. After letting the second pass soak for about ten minutes the concrete was pretty much broken down so I pressured washed everything off and the concrete just rinsed right off with no trace of it left behind.

F650_00014.jpg


F650_00015.jpg


F650_00016.jpg


F650_00017.jpg


F650_00018.jpg


F650_00019.jpg


F650_00020.jpg


F650_00021.jpg


AFTER

After pressuring washing and giving the truck a final wash the results were amazing.

F650_00028.jpg


F650_00029.jpg


F650_00030.jpg


F650_00031.jpg


F650_00032.jpg


F650_00033.jpg


F650_00034.jpg


F650_00035.jpg


F650_00036.jpg


F650_00037.jpg


F650_00038.jpg


F650_00039.jpg


Interior before and after

The interior of this thing hadn't been cleaned in years and was a mess so I also detailed the interior. A few before and afters:


BEFORE

F650_00010.jpg


F650_00011.jpg


F650_00012.jpg


F650_00013.jpg


AFTER

F650_00022.jpg


F650_00023.jpg


F650_00024.jpg


F650_00025.jpg


F650_00026.jpg


F650_00027.jpg


:)
 
Awesome and Amazing!


Thank you so much for following through with this project and I personally thank you even more for the follow-up post showing your results.

Any detailing job takes longer when the person doing the work STOPS what they are doing to grab their camera and document before, process and after shots.

Then, AFTER the hard work, to take the pictures and process them on your computer, upload them to a gallery and insert them and add text is so very much appreciated.


Thank you.


:dblthumb2:
 
Great job there. That job that Mike referenced seemed to have more road paint than concrete. I was the owner telling me it was concrete. The Back Set helped a lot, but I still needed to do steps to remove the road paint. Did you find the Back Set really stinky stuff to work with? I was down low spraying the bottom of the doors and it was really making me cough.
 
Awesome and Amazing!


Thank you so much for following through with this project and I personally thank you even more for the follow-up post showing your results.

Any detailing job takes longer when the person doing the work STOPS what they are doing to grab their camera and document before, process and after shots.

Then, AFTER the hard work, to take the pictures and process them on your computer, upload them to a gallery and insert them and add text is so very much appreciated.


Thank you.


:dblthumb2:

Mike,

Thank you for taking the time to give me advice on this project and for your response to my follow up. I truly appreciate it. I was very happy with the results and this project was one of my most gratifying to date. The owner hasn't seen the truck yet since I finished but I'm expecting him to be as ecstatic as I am.

I will be attending your boot camp next month and can't wait to meet everyone and have a great time.

-Eric

Great job there. That job that Mike referenced seemed to have more road paint than concrete. I was the owner telling me it was concrete. The Back Set helped a lot, but I still needed to do steps to remove the road paint. Did you find the Back Set really stinky stuff to work with? I was down low spraying the bottom of the doors and it was really making me cough.

Thanks for the response Richy. The Back Set has a pretty offensive smell to it but not quite as bad as IronX in my opinion. When I was standing on the steps spraying down the top of the truck it was blowing back in my face the whole time which made me pretty aggravated since I couldn't hold my breath long enough to finish. With how well this stuff works putting up with the smell is definitely worth it :D
 
Mike,

Thank you for taking the time to give me advice on this project and for your response to my follow up. I truly appreciate it. I was very happy with the results and this project was one of my most gratifying to date.

This is what a good forum is all about...


I will be attending your boot camp next month and can't wait to meet everyone and have a great time.

You're going to learn a lot and have a good time too!


The owner hasn't seen the truck yet since I finished but I'm expecting him to be as ecstatic as I am.

Any updates?

How did the owner react when you returned to him the keys to a shiny, white truck without any concrete splatter?


:xyxthumbs:
 
Just a shout-out to Eric!

It was great meeting you and having you in my recent detailing class...

Pictures & Comments from September 2012 Detailing Boot Camp

SeptCerts007.jpg


Claying the 1940 Ford Coupe...
1940Ford004.jpg


Wiping the paint clean using Gtechniq Panel Wipe...
1940Ford045.jpg


1940Ford046.jpg


1940Ford052.jpg


Here's Eric working out the swirls and scratches next to the raised body line and curved area on the panel behind the where the convertible top attaches...
TrainingVette050.jpg


Then around the edge of the convertible top...
TrainingVette051.jpg


Then along the back edge...
TrainingVette052.jpg


After edging the panel he knocks out the flat, major portion of this panel and ties all his work together with a few cover passes...
TrainingVette053.jpg


1966VetteAfter002.jpg


1966VetteAfter003.jpg


1966VetteAfter001.jpg


Here's Eric cleaning a wool pad in a pad washer...

BootCampSanding034.jpg


After cleaning the pad, Eric is back at work...

BootCampSanding037.jpg


Dueling Rotary Buffers!


BootCampSanding038.jpg


:dblthumb2:
 
Just a shout-out to Eric!

It was great meeting you and having you in my recent detailing class...

Pictures & Comments from September 2012 Detailing Boot Camp


:dblthumb2:


Mike,

Thank you for taking the time to post all of these pictures and give me a shout out! Being able to attend your class was a dream come true. After spending so much time on here reading all of your articles and watching your videos it meant a lot to have the opportunity to receive hands on training from you.

I learned so much over the weekend and it was nice getting a lot of tips on little things that have enabled me to speed up my detail process. The cars you got for us to work on were amazing and getting the chance to use so many top notch tools and products made it even that much better. A big thank you to you and the rest of the AutoGeek staff that made this possible.
 
Mike,

Thank you for taking the time to post all of these pictures and give me a shout out! Being able to attend your class was a dream come true. After spending so much time on here reading all of your articles and watching your videos it meant a lot to have the opportunity to receive hands on training from you.

I learned so much over the weekend and it was nice getting a lot of tips on little things that have enabled me to speed up my detail process. The cars you got for us to work on were amazing and getting the chance to use so many top notch tools and products made it even that much better. A big thank you to you and the rest of the Autogeek staff that made this possible.


Hi Eric,

Thanks for the kind words and also thank you for trying out the Back Set referenced in this thread to remove concrete overspray.

Since you tested out and posted your success story and pictures of removing concrete overspray, I've shared this thread with at least 2 other people dealing with concrete overspray on paint and I'm sure I'll be sharing the link to this thread with even more people into the future...

That's the power of a forum and good forum friends...


:dblthumb2:
 
I just received an e-mail from a guy asking

What to use to remove concrete splatter


I always point people to this thread. Now the pictures have disappeared. The info is still good but still...


:bump:


GREAT NEWS!

Eric sent me the original pictures for this concrete removal detail job. I've uploaded them and then inserted them into Post #6 of this thread.


Thanks Eric!


I know this will help others and give them the confidence to take-on any concrete removal detailing jobs using the Back Set by RoMix.


:dblthumb2:
 
Back
Top