 Thanks: 0
 Likes: 0
 Dislikes: 0
-
Super Member

Re: First shot at fixing the black Vette
Very nice work on that fender John. How did you like working with the microfiber pads? Did you over saturate any of them and did they separate between the microfiber and foam, or between the velcro and foam? Were they Meguiar's MF pads or another brand? Less is more when working with the microfiber pads. I destroyed a bunch these pads until I finally learned how little product should be used and how long at what speeds to work it at. It's a real balancing act that sometimes changes with paint hardness.
Now....About that wristwatch.....What's up with that?  
Seriously though, unless the watch laying directly on the paint was part of your photography technique....you really should work on breaking the habit of sitting "anything" on your paint.
Great job so far and keep on posting as you have time. TD
-
Re: First shot at fixing the black Vette
Dave, I have not even used the microfiber pads yet, but I believe they are Lake Country. I figured there might be a tad of a learning curve with them, so I will save them for this weekend. I may go after one of the doors with one, that way I have a large, more flat area to work with. Less variables if ya get my drift. The fender was not easy to do because the thing is so curvy. I really had to change my plan of attack in order to get it done, and like I said in the last reply, I even had to do some hand compounding in polishing. The machine will not reach everything.
The watch and wedding ring were removed because I was touching the paint so much with my hands (on the fender). Remember, the hood is still in question and that's the reason those things are sitting on it. Trust me, I thought about it, and I don;t just toss stuff up there..It is just not really a concern right now because I know the hood will require more work than anything in the entire project.
-
Super Member
Re: First shot at fixing the black Vette
 Originally Posted by J S Machine

Dave, I have not even used the microfiber pads yet, but I believe they are Lake Country. I figured there might be a tad of a learning curve with them, so I will save them for this weekend. I may go after one of the doors with one, that way I have a large, more flat area to work with. Less variables if ya get my drift. The fender was not easy to do because the thing is so curvy. I really had to change my plan of attack in order to get it done, and like I said in the last reply, I even had to do some hand compounding in polishing. The machine will not reach everything.
With the MF disks being much flatter and thinner than foam pads, there is quite a learning curve involved. The key is to not over saturate them with product and to use only light to medium pressure. More pressure can be applied if needed but the more saturated the pad is with product, the more the likelihood of heat and moisture causing a pad failure is. Keep a good focus on how much heat is being generated in the pad and if it's getting hot, switch to a new pad and work with less product and less pressure. You should initially prime the entire face of the MF pad with a very thin layer of M-105 to ensure that 100% of the face of the pad is working for you and just add small dots of M-105 as needed from there on out. Spin the pad clean with compressed air if you have it available. If not, clean with a stiff bristled brush often.
The watch and wedding ring were removed because I was touching the paint so much with my hands (on the fender). Remember, the hood is still in question and that's the reason those things are sitting on it. Trust me, I thought about it, and I don;t just toss stuff up there..It is just not really a concern right now because I know the hood will require more work than anything in the entire project.
I was (for the most part) just ribbing you about the watch. 
-
Originally Posted by tuscarora dave
With the MF disks being much flatter and thinner than foam pads, there is quite a learning curve involved. The key is to not over saturate them with product and to use only light to medium pressure. More pressure can be applied if needed but the more saturated the pad is with product, the more the likelihood of heat and moisture causing a pad failure is. Keep a good focus on how much heat is being generated in the pad and if it's getting hot, switch to a new pad and work with less product and less pressure. You should initially prime the entire face of the MF pad with a very thin layer of M-105 to ensure that 100% of the face of the pad is working for you and just add small dots of M-105 as needed from there on out. Spin the pad clean with compressed air if you have it available. If not, clean with a stiff bristled brush often.
i just ordered some MF LC pads n a little bit of d300 to keep the 105 from dusting as heavily. good tips
great thread. been working on correcting my black CTS-V and feel your frustration OP but looks like its getting easier for you with each session you put in
-
Re: First shot at fixing the black Vette
Nice work John. Factory clear on that fender, huh? If that's the case you can almost bet you have plenty of clear on the areas that were repainted. You said you felt comfortable with the amount of clear in those areas and now you've got an indicator. Still using Trizac 3000?
Did the light change make a difference for you compared to the light that you had made? Care to elaborate on your experience polishing in the dark, as well as the light change?
Also, after seeing how much hand sanding you have done, I think you can see where a Griot's 3" polisher with sanding discs would save you tons of time. You could sand the entire panel with it, finish necessary areas by hand, and still have less time in it than you have. I'm pretty much convinced after seeing that fender that I'm going to buy the 3" Griot's polisher and related sanding items. I've got a black hood that's far worse than what you're working on and I think the Griot's unit and sanding discs are going to save me a ton of time. It's bad enough that if I break through that it isn't a big deal because a repaint was needed in the first place. Going to be taking photo's and video of it today.
-
Re: First shot at fixing the black Vette
Originally Posted by Hoytman
Nice work John. Factory clear on that fender, huh? If that's the case you can almost bet you have plenty of clear on the areas that were repainted. You said you felt comfortable with the amount of clear in those areas and now you've got an indicator. Still using Trizac 3000?
Did the light change make a difference for you compared to the light that you had made? Care to elaborate on your experience polishing in the dark, as well as the light change?
Also, after seeing how much hand sanding you have done, I think you can see where a Griot's 3" polisher with sanding discs would save you tons of time. You could sand the entire panel with it, finish necessary areas by hand, and still have less time in it than you have. I'm pretty much convinced after seeing that fender that I'm going to buy the 3" Griot's polisher and related sanding items. I've got a black hood that's far worse than what you're working on and I think the Griot's unit and sanding discs are going to save me a ton of time. It's bad enough that if I break through that it isn't a big deal because a repaint was needed in the first place. Going to be taking photo's and video of it today.
Yes still using that same Trizac pad. It will probably last the entire car, although I may pick up another.
The light change was simply because the plug in light has a base, you may be able to see it on the bucket that it is sitting on. Plus I can bend the little stem and point it all different ways. My other light works great, but as I had told you, I built it and it gets very hot. That is alot of power in that little LED star and the aluminum housing gets pretty warm. Heat is an LED's worst enemy. It is night riding season for mountain bikes, and I strapped it back on my helmet wednesday night for a ride. While riding the light stays cool from the cold air passing it. Holding it still by the car, I have to turn it on and off and limit it's use to keep it cool...
Working in the dark is ok, but I would much rather have natural light. It just seems easier when I can see everything. I don't have much of a choice though now since the time changed..
And yes, I would probably come out better or just as quick sanding the entire panel in some places on the car, like with this fender, lol.
-
-
Re: First shot at fixing the black Vette
I'm still working on the back bumper cover. I got the compounding step done sunday, but had some other obligations so I had to stop. Still need the swirl removal, polish, and paint sealant step on that.
I had my second 3" hydro tech pad blow up and tear apart while in use. I won't be buying anymore of those. I don't understand why they don't make any 3" flat pads..Those would be perfect..
It was raining when I got home yesterday so maybe I can pick up on it today.
-
Re: First shot at fixing the black Vette
Great work so far. The car has come a long way since you first asked for help.
2003 Ford Lightning #3836
2011 BMW 335i coupe
-
Re: First shot at fixing the black Vette
Originally Posted by slapshot
Great work so far. The car has come a long way since you first asked for help.
Thanks. I appreciate it. It has been very hard, time consuming work.
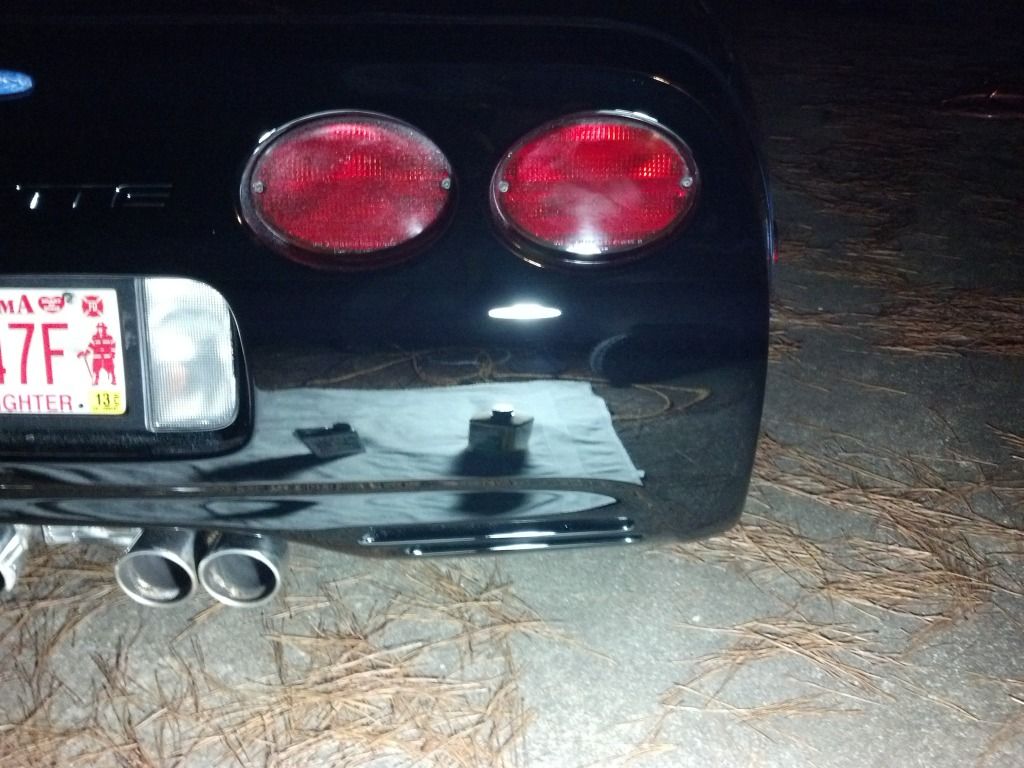
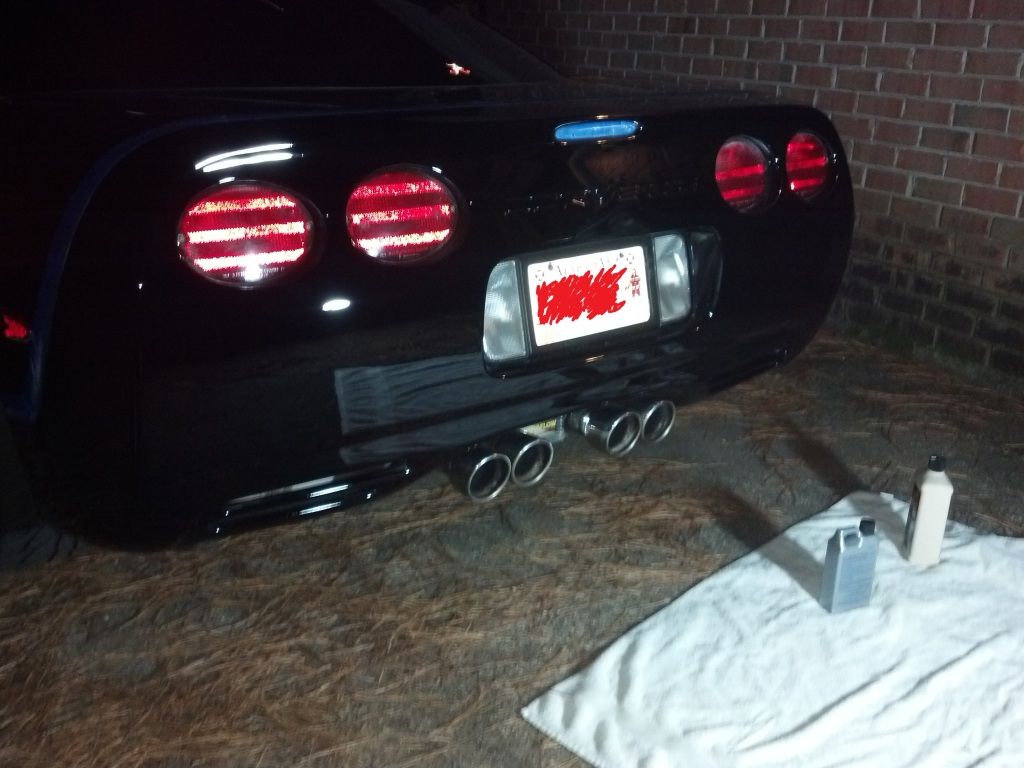
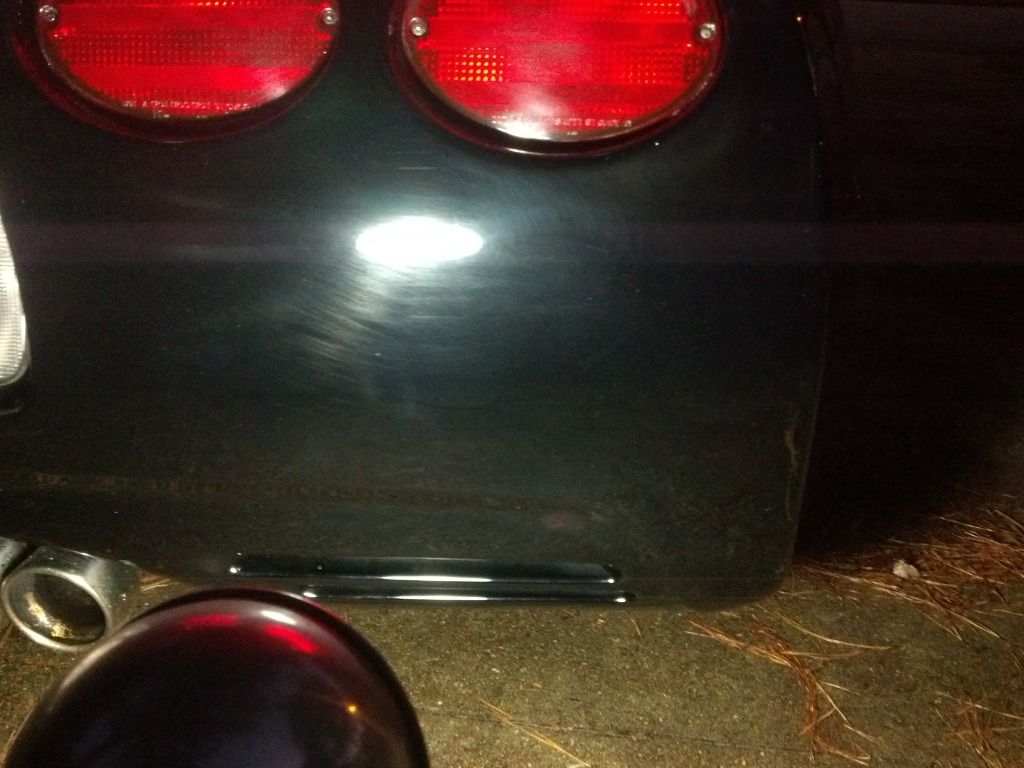
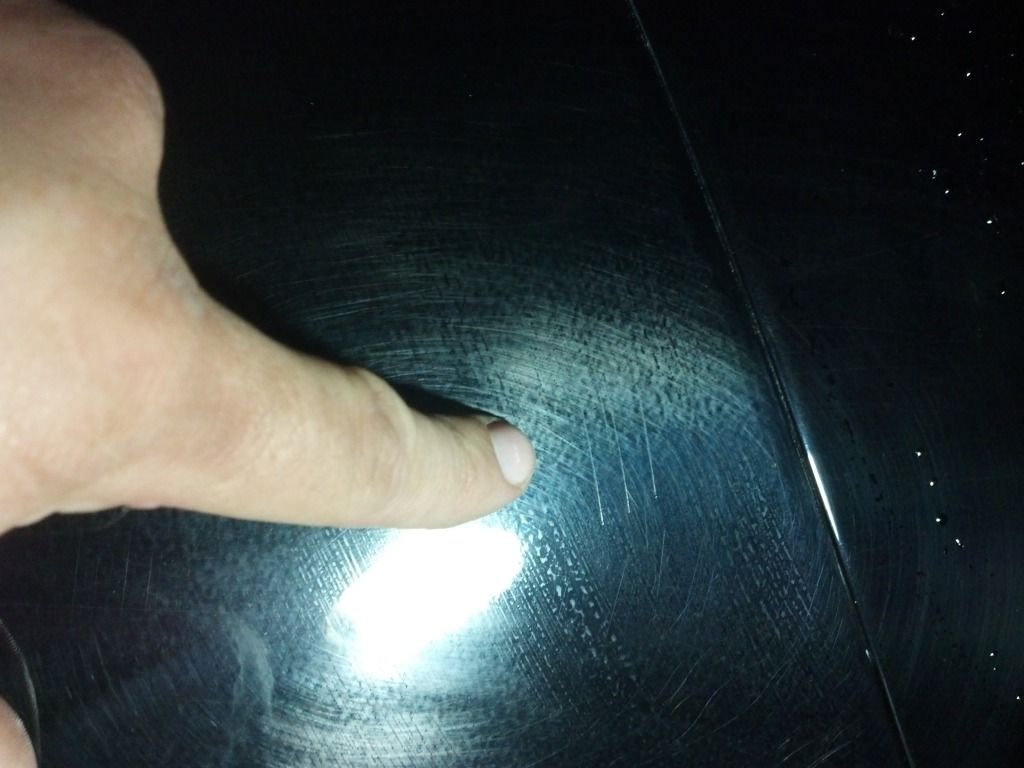
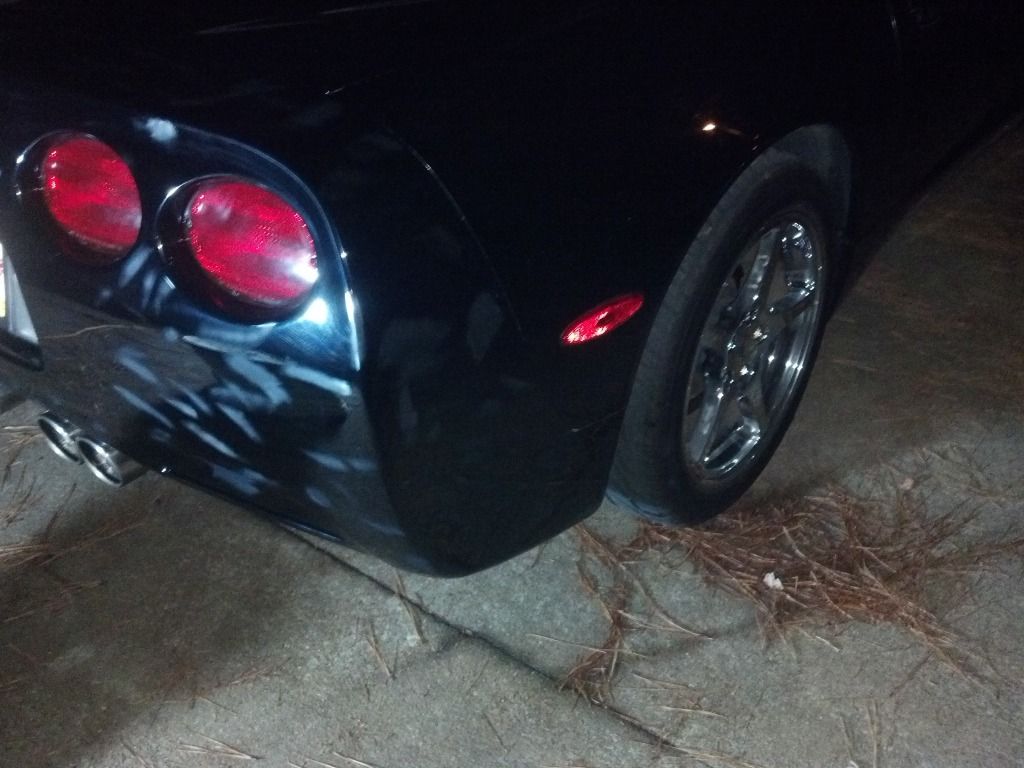
I finally got the back bumper cover finished. It was truly too big of a job to take on as a whole panel. I should have either divided it in half, or maybe quarters. I've noticed that depending on how big the area is I'm working on, it increases my chances of slipping up, or not doing as good of a job. I eneded up re-doing several steps, because I was moving to fast in an effort to get it done. I did divide it up into smaller areas as I was doing section passes, simply because I could not stretch the compound too far..but still, when it takes 10 different areas individually to do an entire panel, it takes an hour for each step..I'm sure you get my drift..
Here are some pictures of the back. Finished up at about 9pm last night. 26 hours into the correction now.
Similar Threads
-
By shad2fast4u in forum Show N' Shine
Replies: 4
Last Post: 04-20-2015, 09:20 PM
-
By Siorus in forum Auto Detailing 101
Replies: 4
Last Post: 08-01-2012, 05:32 PM
-
By shadybreal in forum Show N' Shine
Replies: 21
Last Post: 12-02-2007, 11:34 PM
-
By DantheMan in forum Show N' Shine
Replies: 12
Last Post: 05-17-2007, 04:30 PM
-
By Totoland Mach in forum Show N' Shine
Replies: 18
Last Post: 02-15-2007, 07:38 PM
 Members who have read this thread: 2
Posting Permissions
- You may not post new threads
- You may not post replies
- You may not post attachments
- You may not edit your posts
-
Forum Rules
|
| S |
M |
T |
W |
T |
F |
S |
| 28 | 29 | 30 |
1
|
2
|
3
|
4
|
|
5
|
6
|
7
|
8
|
9
|
10
|
11
|
|
12
|
13
|
14
|
15
|
16
|
17
|
18
|
|
19
|
20
|
21
|
22
|
23
|
24
|
25
|
|
26
|
27
|
28
|
29
|
30
|
31
| 1 |
|


 Reply With Quote
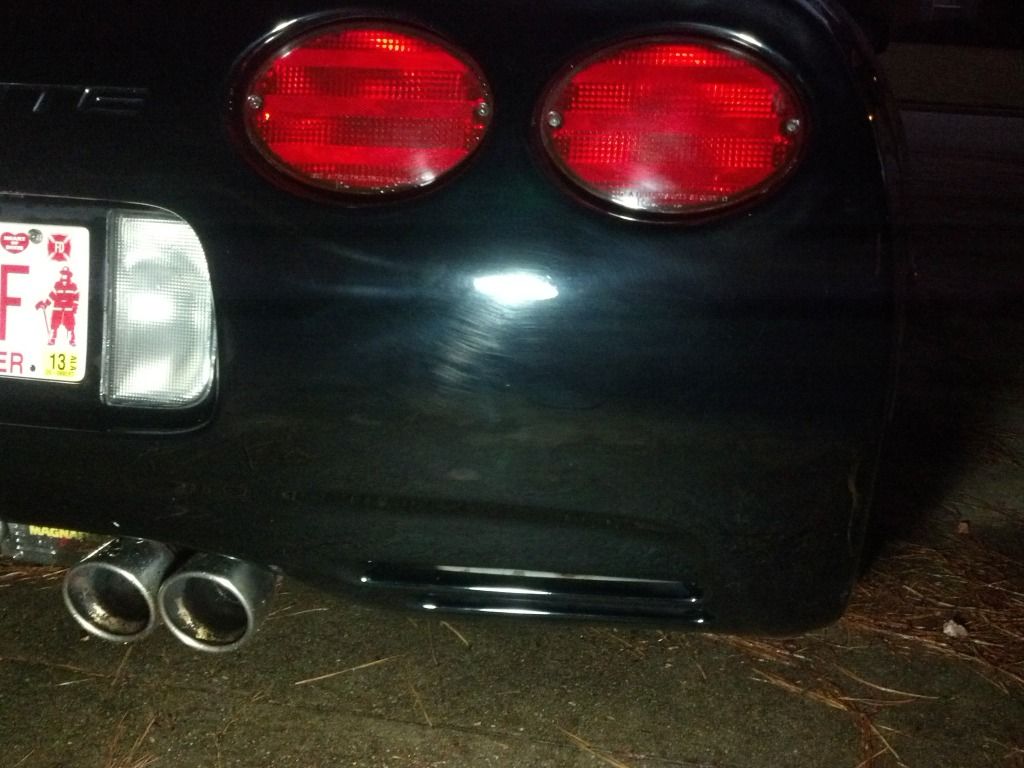


Bookmarks