 Thanks: 0
 Likes: 0
 Dislikes: 0
-
Super Member

2013 Honda Civic Full Detail + PBL Coating + Coating Booster
Dear Friends,
This was an extensive detailing work, but I'll try to be brief with text and jump right into the pictures for an easy follow up on the process.
Customer scheduled his '13 Silver Honda Civic for Coating and bring the car the night before for convenience.
As soon as I could, I started inspecting the finish to see how I should follow to get this car to a better than new condition.
Needless to say, looking for some distance, car was looking good overall:

But a closer inspection started showing the flaws...
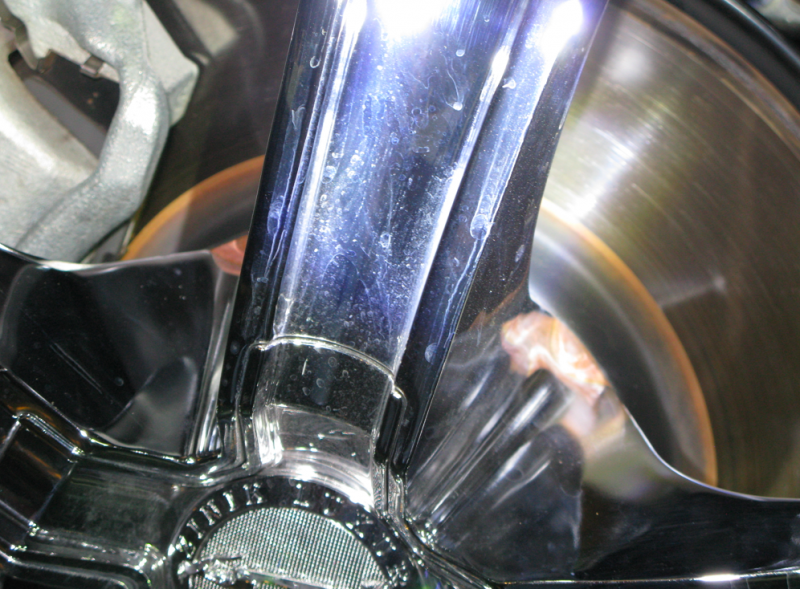
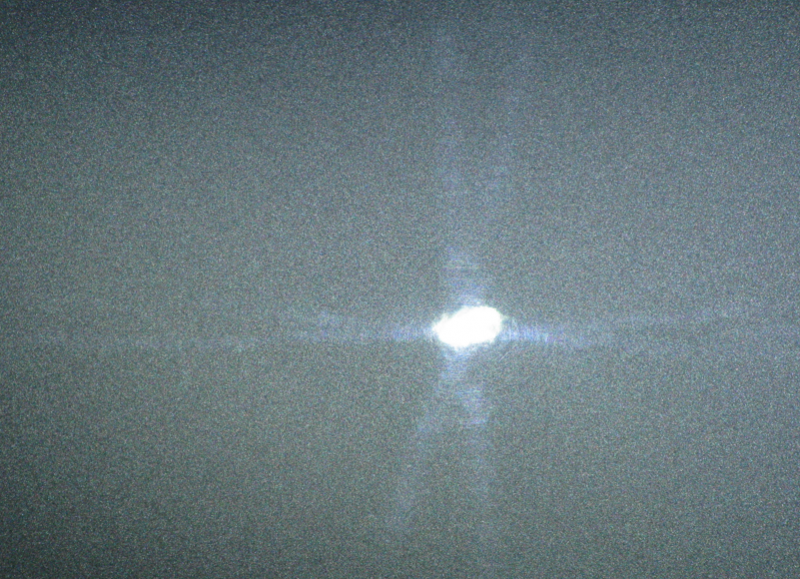
Using my swirl finder light I was able to detect fine swirls and halos that I was not able to fully characterize as holograms, but they were there making the paint looking far from it's best:


Closer look from the above section

Although it's difficult to spot and capture swirls on a silver car on camera, they were pretty evident 'looking personally', so were the halos


far look

closer look

everywhere I looked, the same kind of defects...

Starting to detail
The following day I've started washing the car by the morning.
Like we (me and my partner) generally do, the wheels are cleaned first:

Those big daytona brushes are perfect for those wheels with big openings, and also gentle to the chromed surface.
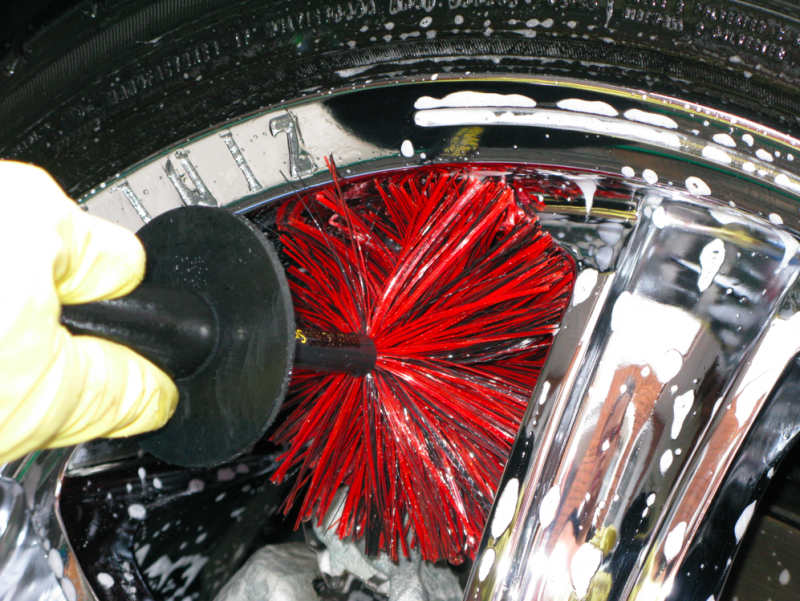
Used everywhere they fitted

We use a large soft brush for the wheel wells

And decided to use a soft brush for the low profile tires instead of a stiffer brush to avoid any risk of scratching the wheel finish

This was followed by foaming the car, rinsing it thoroughly, and then using the buckets for a safe wash.

I fill the rinse bucket with plain water

And using the CarPro wool wash mitt, promoted a luxurious, safe and effective washing.

Following that, I've gently and slowly clayed the car using Nanoskin fine grade mitt since I was not willing to deal with more defects than what was still on the paint.
While I was claying, customer was passing by and decided to enter and see how everything was going on (no pics on claying stage).
It was great that he came by since he was able to feel the contaminants and better, feel them being removed as the surface was becoming slick after some passes.
**If you have any question regarding claying process using nanoskin, please, feel free to ask.
He never saw that 'claying thing' before and become very excited his car was undergoing that process.
Polishing to swirl free, glossy finish
They say Honda Paint is soft... so am I! A gray/black hybrid finishing pad, Menzerna SF4000 (a finishing polish) and a soft, Wolfgang's MF towel.

Chose a spot on the hood,

Speed 5 on the Flex

Using the Smack's Technique, I've worked product for 6-8 passes, reducing pressure on the last few passes. This way I work product until a thin film is left on the paint, which is a breeze to remove:

I bet one can scratch or mar a soft paint with those towels... downside is they may lint a bit, however it has many advantages that I can deal with small lint to keep using them.

Here are the results of the test spot:

This process was then reproduced on entire car, always checking results after every section.
I like to tape work area, work it, and remove tape just after for buffing polish residue.

Then I tape another area, and work it the same way. Here I've taped the front bumper part for polishing

Some more pictures of finished polishing results


Pre-Coating Process
I polish glass using an orange pad and PBL cleansing polish. This is sufficient to remove waterspots and road film in more than 90% of cases I've done that, avoiding the need for a dedicated glass polish / cleaner or a glass polishing step. (pretty obvious, but it's important to state this will not remove any scratch in glass)
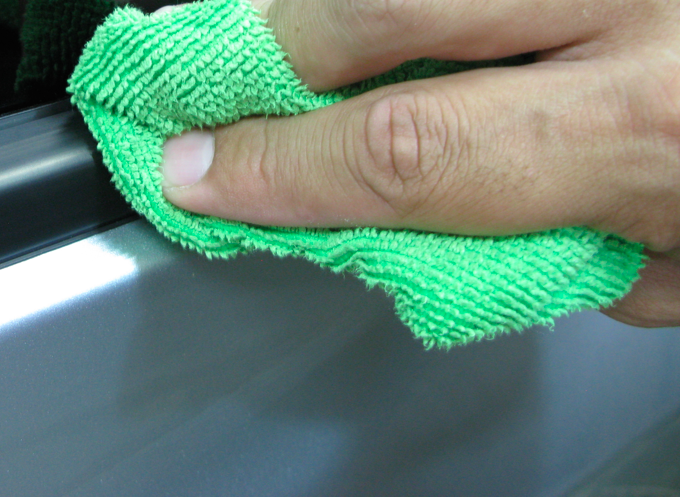
Then I spread PBL cleansing polish over paint by hand using a soft foam applicator, and wipe it off using a soft MF towel.
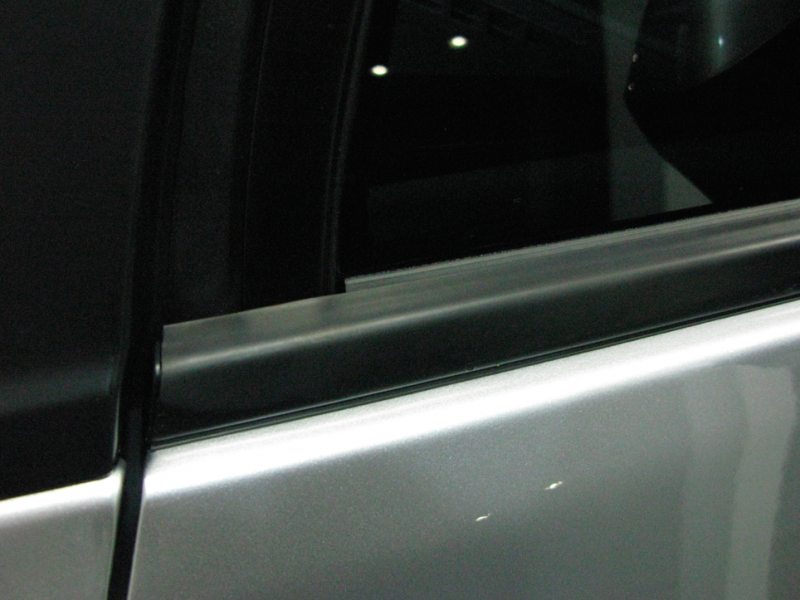
I also coat external trim. Since I can't use the same PBL cleansing polish (beware this will stain trim hardly!, mainly porous trim), I use Meguiar's #39 for thorough trim cleaning during preparation.
My bottle of #39 came out with some leaking and I had to transfer it contents to a new bottle. The label was damaged after 're-glueing it', but that don't affect product effectivity...

Some stains were already on trim when car arrived...

Getting rid of it
Looks like brand new trim that's going to be coated for protection and longevity.
Here...

Everywhere!

This product works better if you wipe it dry after 'soft scrubbing', I mean, spreading it to clean the trim.
I like the cleaner aspect of trim more than the 'dressed' aspect, but that's just me...

Be sure to remove any TOGWA left because they may show up like a sore thumb when you finish a work like this...
Before:

After:

Now that I have a polished, black label cleansed paint, glass and trim cleaned with #39, it's time for the last wash.
The last wash
I start rinsing the car down to start removing all dusting polishing stage may have left.

Then, using Hyper-Wash...

I foam the entire car

And using a dedicated Gold Plush Wash Mitt (this is used only for this step of my process), I make 'like a' final wipe to guarantee the most clean finish possible.

After thorough drying (including vacuuming the crevices and crannies), I re-inspect the finish to confirm the consistency of my results, also if there was no marring caused by my gentle wash method.

Flawless. That's the way I like to have the finish ready to be coated.
Overwhelming for some, I'm adapted doing this way. After coating I get the just wash and 'waxed' look, and while coating, no dust left, a very clean and fresh finish to work on.
I've inspected the whole car again but couldn't find any imperfection worth of any concern (OCD! hahah).


Nature is pleased with simplicity. And nature is no dummy 
― Isaac Newton
-
Super Member
Re: 2013 Honda Civic Full Detail + PBL Coating + Coating Booster
Coating Time
I have many PBL coatings here (paint, glass, wheels, and surface). Although I apply every 'dedicated' coating to it's parts, I like Surface Coating better than the others.
This way, I apply PBL Surface to painted surfaces, windshield and trim, Paint Coating to the Bumpers and inside doors, wheel coating to the wheels and glass coating to the side/rear glass.
I like to use soft foam wax applicator more than the coating applicators, and a soft towel for leveling after application.

The bellow picture is merely illustrative, this was just prior starting to coat. I had to left camera down and start working since product may dry fast if you don't pay enough attention to what you're doing.

Men and Women are different... since I don't like Coating Applicator to apply coating, my partner (which you'll know from now on by 'Tata') just uses it!

She applies paint coating to bumpers and inside doors painted parts, wheel coating to the wheels, surface coating to the trim, while I coat the remaining exterior paint and glass. She does a lot more in our detailing business, but that's subject for another thread. Needless to say, I'm nothing without her huge help, detailing talent and care.
I've stopped for a break and took a picture of this coated section.

The car was left overnight for coating cure.
The last day
Next day by the morning, car was rapidly dusted and fully inspected for any streaking or high points left, I may say there were 2 or 3 areas that needed a towel wipe to remove excess residue.
After that (more than 12h after coating), PBL Coating Booster was applied to all painted surfaces prior delivery to customer.
(The Bellow Picture is from another Thread of mine, but exactly the same setup) - I also have a guideline for Booster application, if needed, please, ask.

Coating booster, again, increased gloss and slickness to the next level.
Let's see what we have under the sun:
Trunk lid

Roof
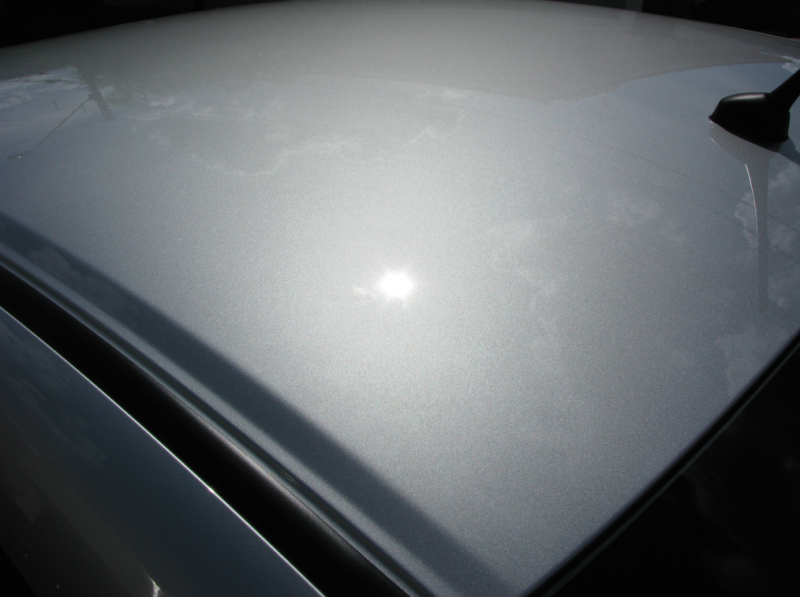
I'll try a new approach to zoom those pictures, let's see if it works.

Hood

Overall look

From back

to Front

Wheels were coated with 2 coats of wheel coating 24h apart, and tires dressed with CG New Car Shine Dressing.

... and a last shot before customer left with the car

That's it!
I have many more pictures and some steps missing pictures, I admit this work was so meticulous I had difficult putting everything together.
Example are the under the hood pictures, just have the before's, but customer will be watching this thread and he's sure everything was properly detailed!
By the way, I hope you enjoy watching as I've enjoyed working on this one.
Please, feel free to ask, criticize, comment, suggest, !
Thank you very much in advance,
Kind Regards.
Nature is pleased with simplicity. And nature is no dummy
― Isaac Newton
-
Super Member

Re: 2013 Honda Civic Full Detail + PBL Coating + Coating Booster
-
Super Member

Re: 2013 Honda Civic Full Detail + PBL Coating + Coating Booster
 Originally Posted by VISITOR

+1 looks great. Good job 
Art
-
Super Member

2013 Honda Civic Full Detail + PBL Coating + Coating Booster
Incredible work! I like the zoom pic with the original "picture in picture" style.
Sent from my iPad using Tapatalk
-
Regular Member

Re: 2013 Honda Civic Full Detail + PBL Coating + Coating Booster
Just wondering, why would you apply a booster to a freshly coated surface?
I was under the impression that a booster is not needed until further down the road to revitalize the coating.
-
Super Member

Re: 2013 Honda Civic Full Detail + PBL Coating + Coating Booster
Exceptional work and documentation Rafael 
-
Super Member

Re: 2013 Honda Civic Full Detail + PBL Coating + Coating Booster
2013 Accord V6 coupe 6MT San Marino Red
-
Super Member
Re: 2013 Honda Civic Full Detail + PBL Coating + Coating Booster
Originally Posted by VISITOR
Originally Posted by hernandez.art13
+1 looks great. Good job
Art
Thanks Art.
Originally Posted by ekennett
Incredible work! I like the zoom pic with the original "picture in picture" style.
Sent from my iPad using Tapatalk
Thank you for kind works. I also appreciate your feedback on the 'PIP', I was looking forward to hear about it from someone.
Originally Posted by valleyrider
Just wondering, why would you apply a booster to a freshly coated surface?
I was under the impression that a booster is not needed until further down the road to revitalize the coating.
Thanks for question.
Since I've started coating vehicles here in Brazil, I'm trying to optimize the process and offer the best finish to my customers.
For some customers, I've already used an approach which is described at PBL Surface coating page:
'Diamond Surface Coating was formulated so it can be topped with your favorite Pinnacle paste wax'.
I was using souveran wax to top the coating on high end details and for those customers, this was the most important part of the process since the slickness provided always made everyone who touches it swear...
Some time ago I've received my PBL Booster bottle from AG, and that was exactly in a time where I was going to apply Carnauba Wax on top of an AIO, like I do often on more simple details (AIO+Wax).
That said, I've started trying the booster and when I realized I've 'boosted' the entire AIO car, and that was not just slick, but looked gorgeous.
I've done that based on the back label of Booster, that says it can be used as a stand alone protection with up to 6 months durability. That means, instead of waxing, I've decided to use an 'easier' yet effective approach to top my AIO work. You know, time is money, and a quality work means also money.
Then, I went to Booster page at AG and found the following:
'Use Black Label Diamond Coating Booster as a topper for freshly applied coatings to amplify the glassy shine!'
Willing to try it, I've contacted Nick and we discussed which would be the better time to use it on freshly coated vehicle, etc.
I don't doubt it sounds overwhelming. However, the day after coating I always go after any streaking or high spots because we all know, even if we do our very best, we may achieve 98-99% of precision when coating. I always find at least 2 or 3 spots that needs attention the day after for a flawless finish.
That said, being the booster absolutely compatible with the coating, and can be used as a topper for the freshly applied coating, I've found a Win/Win/Win scenario on this combination.
While applying the booster (which is true, only takes minutes to apply) I go after high spots (if any), and the slickness provided while applying makes leveling the surface a breeze, and safe.
The results are awesome, since we bring the car to the sun and tried all the time to find a flaw, modesty apart, we couldn't find any.
...and all said above, that's why I've decided to 'boost' this coating.
Hope I've answered your question.
Originally Posted by 281
Exceptional work and documentation Rafael
Great to hear from you James, really glad you enjoyed!
Originally Posted by LatinFG2
Awesome work!
Great comment, made me happy to hear from you!
Thank you everyone for input,
Kind Regards.
Nature is pleased with simplicity. And nature is no dummy
― Isaac Newton
-
Super Member

Re: 2013 Honda Civic Full Detail + PBL Coating + Coating Booster
Beautiful work with an incredible writeup. Thanks for sharing and posting. Keep up the great work.
Similar Threads
-
By KirkH in forum Show N' Shine
Replies: 6
Last Post: 08-21-2017, 09:27 AM
-
By emmjay in forum Show N' Shine
Replies: 31
Last Post: 09-17-2016, 04:16 PM
-
By Tato in forum Show N' Shine
Replies: 24
Last Post: 02-18-2015, 11:01 AM
-
By AutoHeed in forum Show N' Shine
Replies: 12
Last Post: 12-11-2013, 12:21 PM
-
By vinharski in forum Show N' Shine
Replies: 16
Last Post: 03-23-2013, 07:08 PM
 Members who have read this thread: 0
There are no members to list at the moment.
Posting Permissions
- You may not post new threads
- You may not post replies
- You may not post attachments
- You may not edit your posts
-
Forum Rules
|
| S |
M |
T |
W |
T |
F |
S |
| 31 |
1
|
2
|
3
|
4
|
5
|
6
|
|
7
|
8
|
9
|
10
|
11
|
12
|
13
|
|
14
|
15
|
16
|
17
|
18
|
19
|
20
|
|
21
|
22
|
23
|
24
|
25
|
26
|
27
|
|
28
|
29
|
30
| 1 | 2 | 3 | 4 |
|


 Reply With Quote
Bookmarks