 Thanks: 0
 Likes: 0
 Dislikes: 0
-
Super Member

My first paint correction on a 01 Corvette went well
Did a 2 step paint correction on a friends 01 corvette quarter panel and rear bumper. It was poorly resprayed with single stage paint, and it's showing really bad oxidation. He decided he wanted to keep it until the summer so I told him what his options were, and we decided a coating was the best choice to prevent the oxidation from reoccuring.
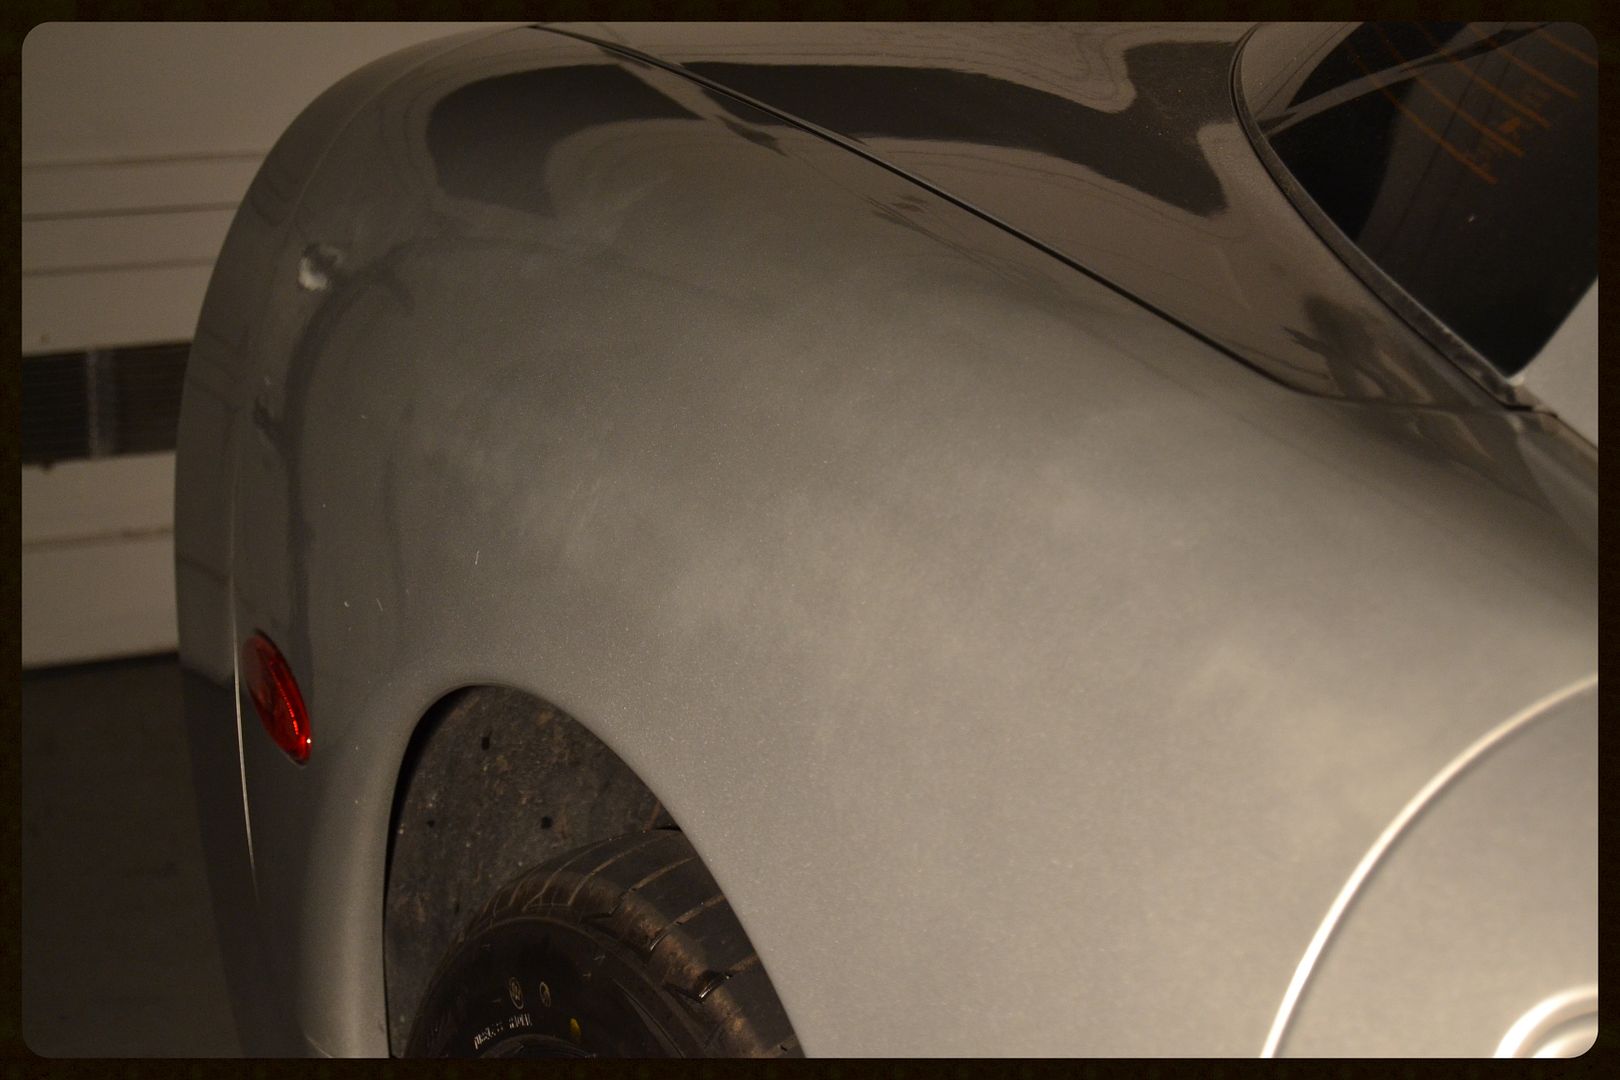
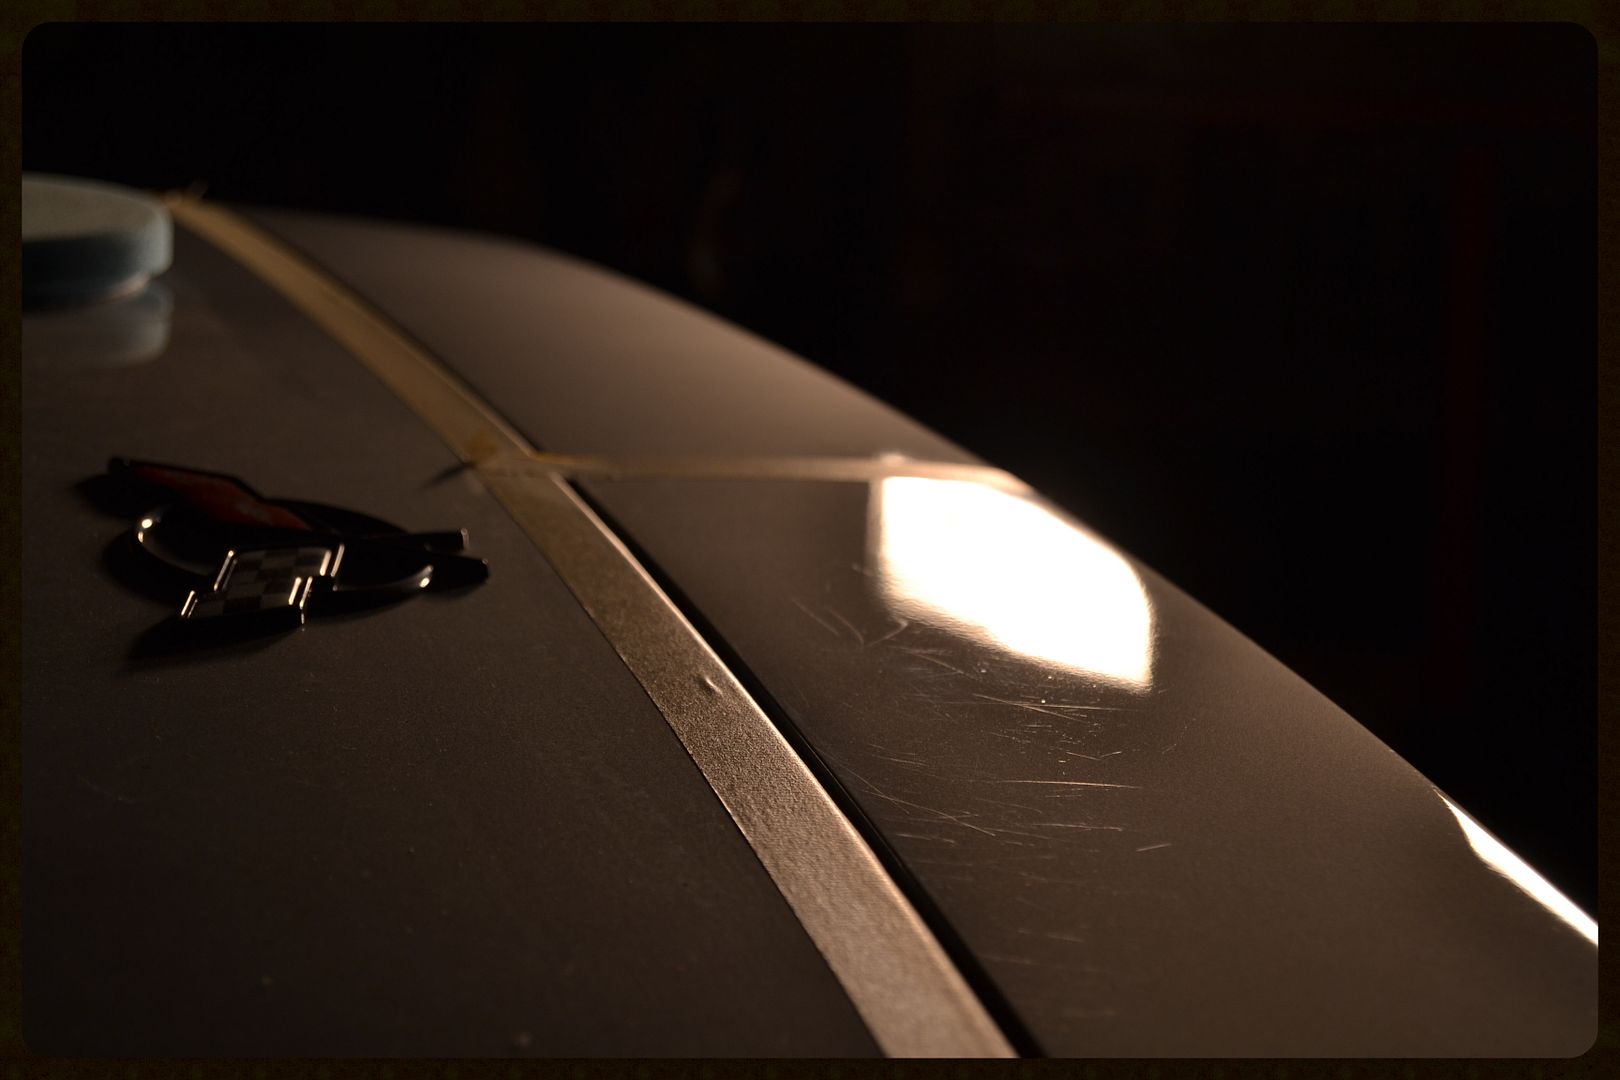
Here's what I had to work with

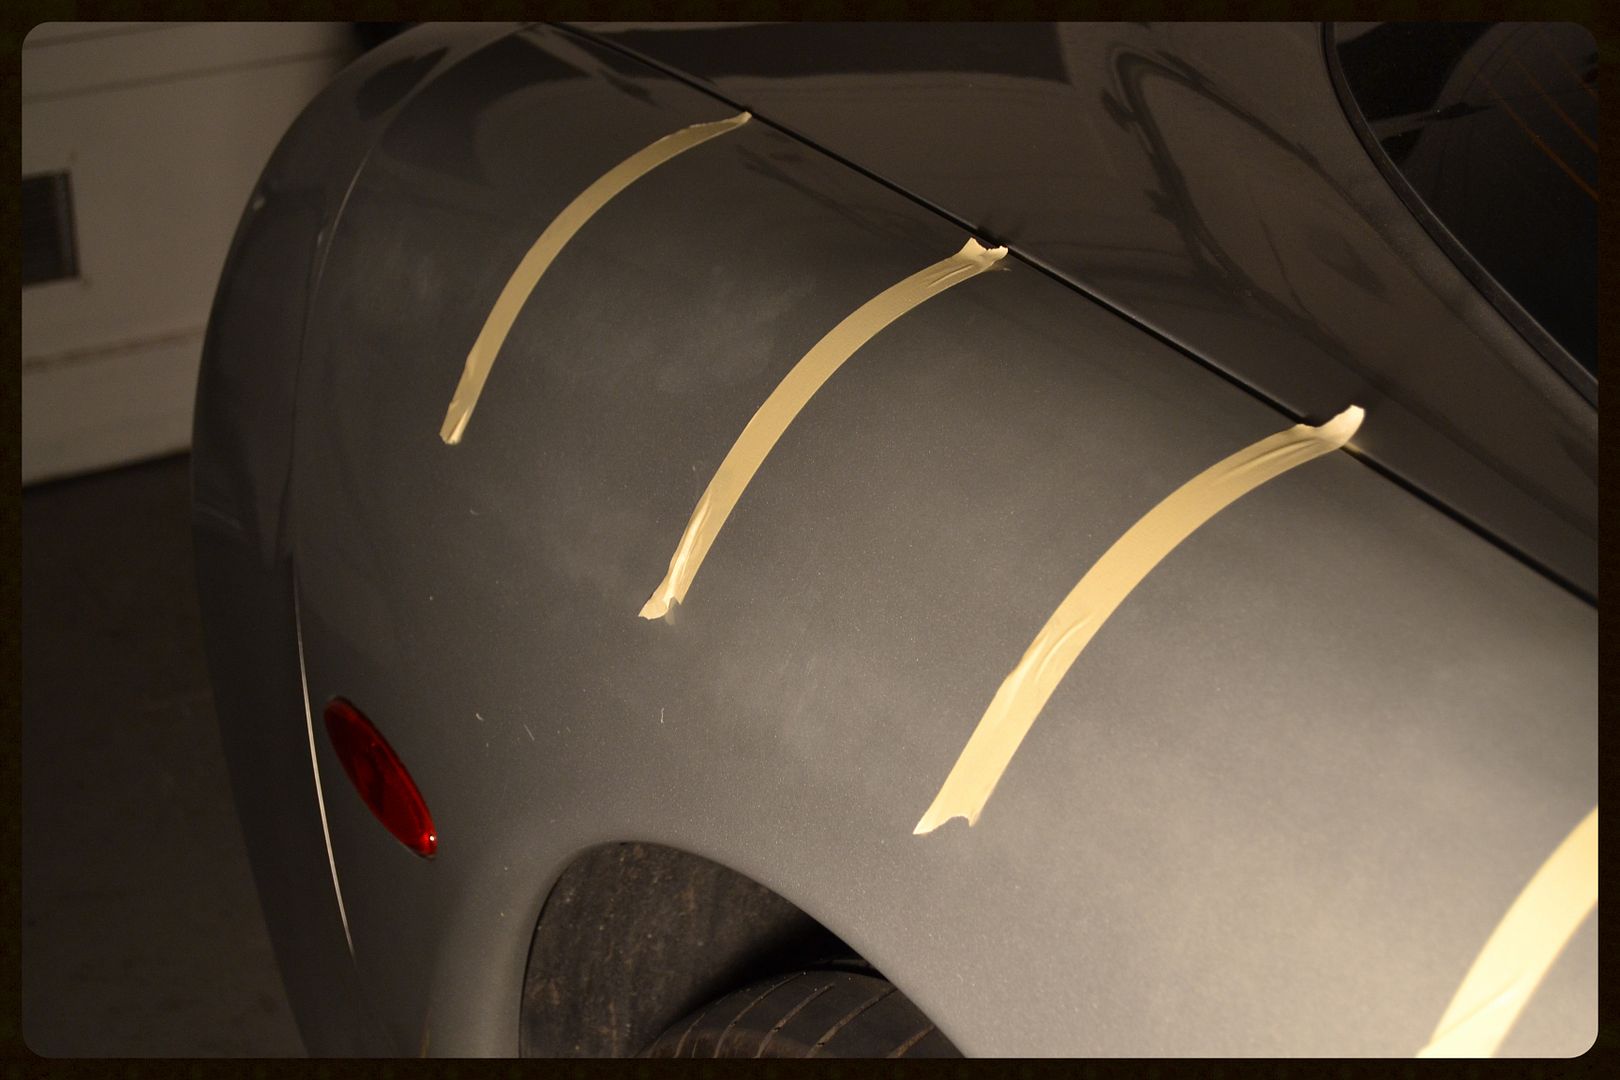
Setting up my test panel to see which combination would yield the results I am looking for
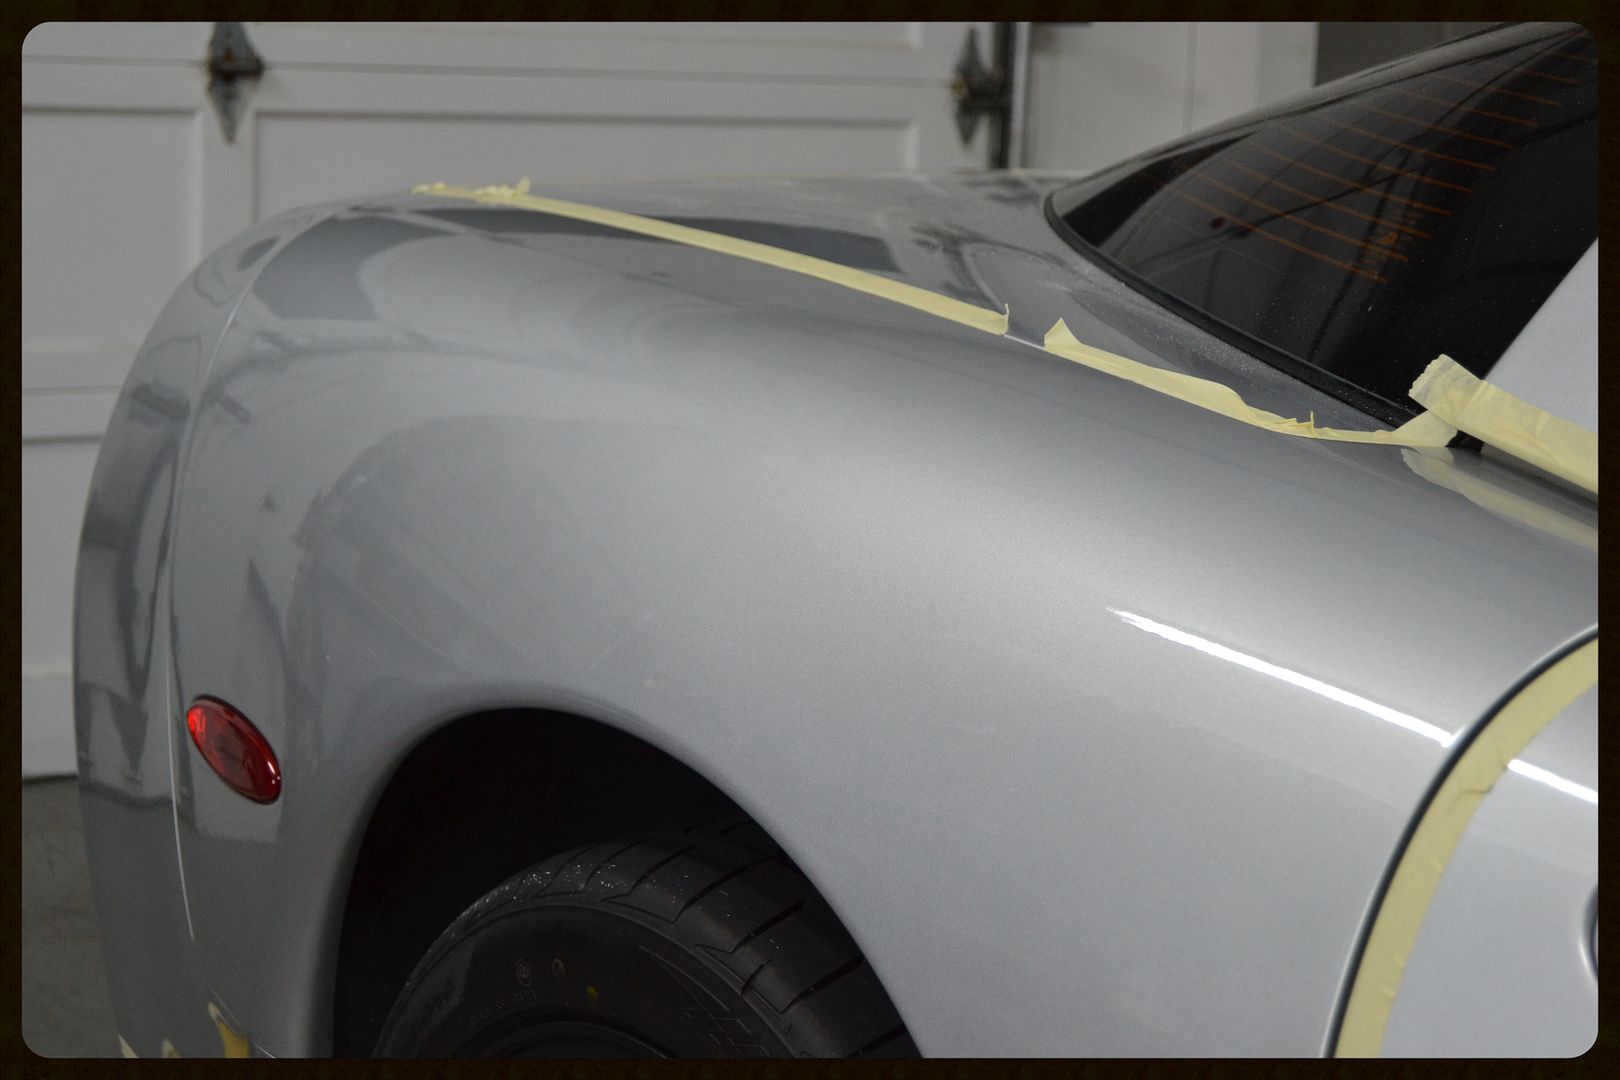
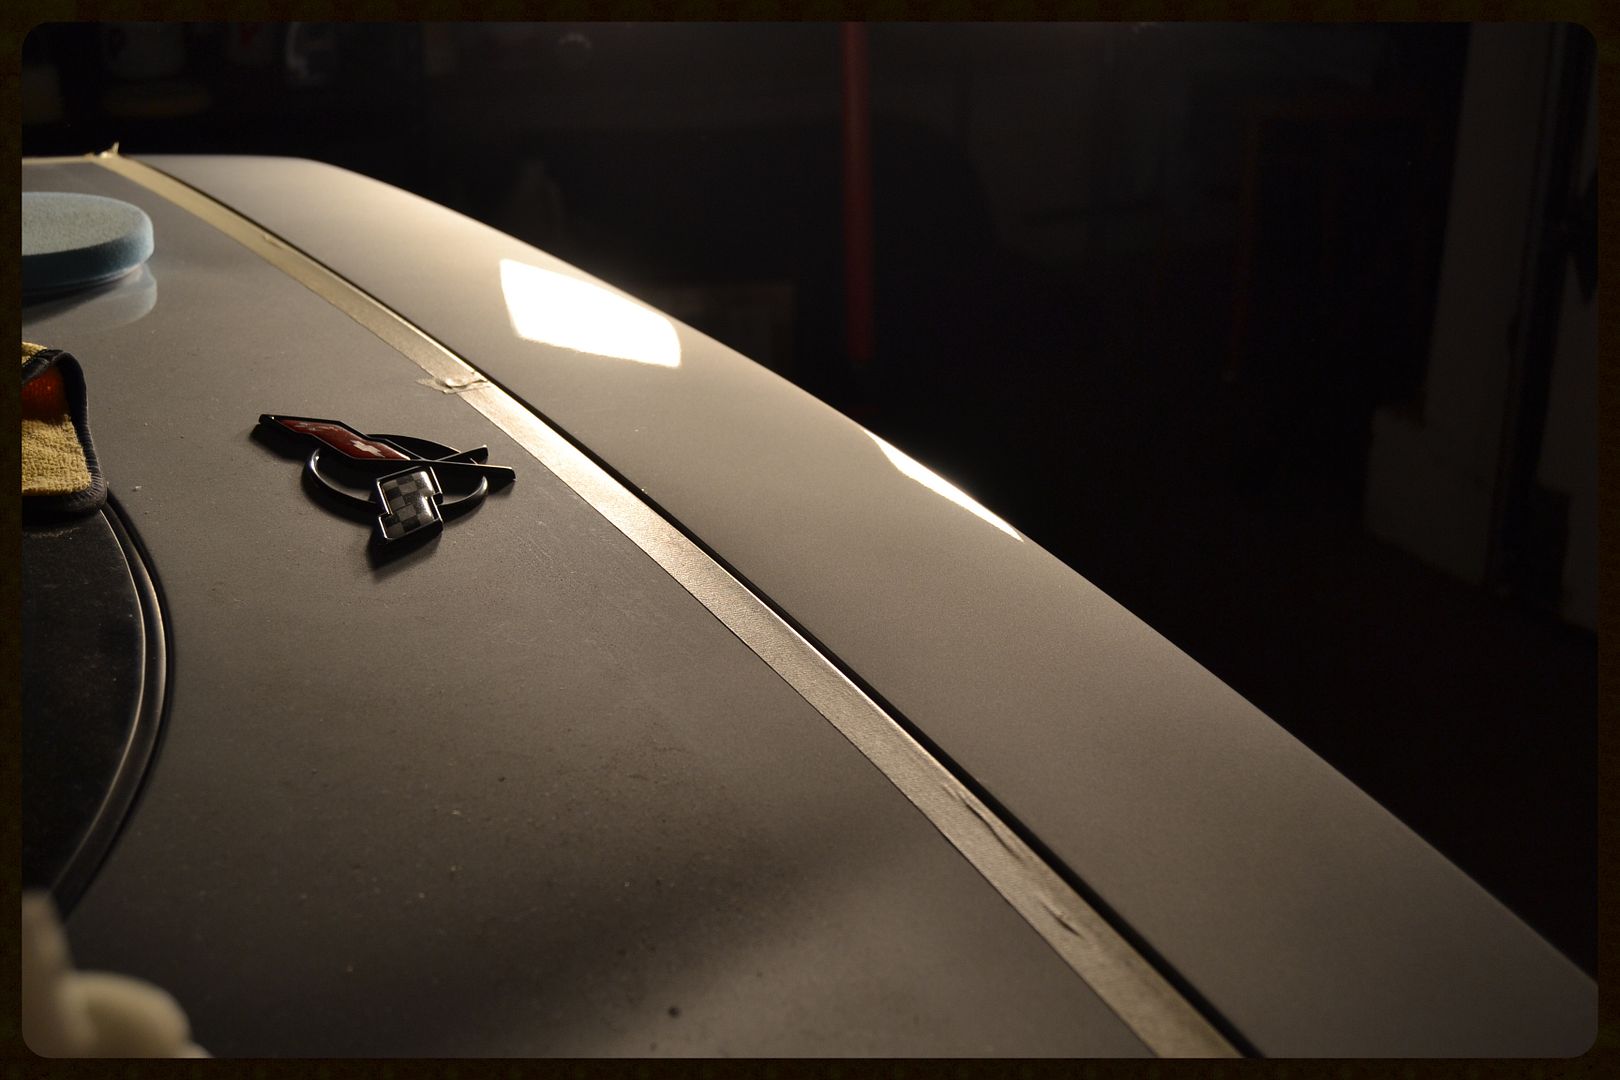
Settled on a 2 step paint correction. 50/50. Gloss & Shine is coming back

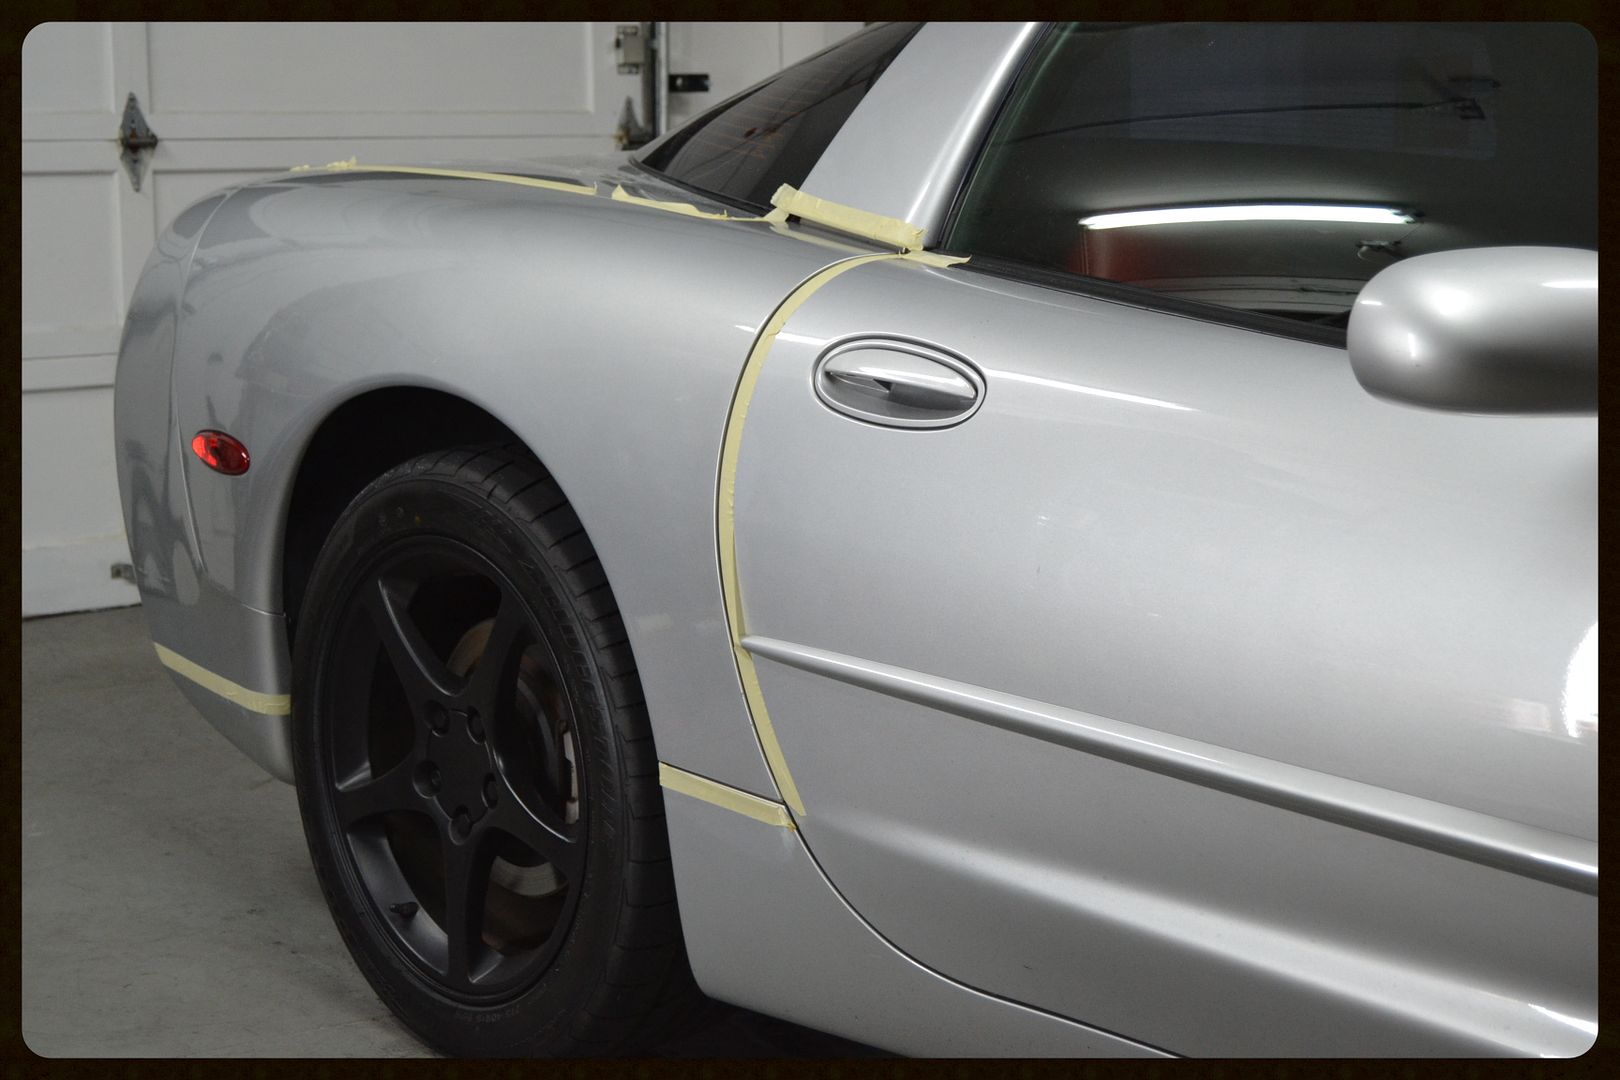
Finished up and coated with Opti Coat 2.0 Letting it cure for 12 hours before letting it be exposed to the elements
Process:
Wipedown with Optimum No Rinse
Clayed with Nanoskin Fine grade sponge w/ONR as clay lube
Meguiars DA/Menzerna Super Intensive Polish/Cyan Cutting Pad
Meguiars DA/Menzerna Power Finish/White Foam Pad
Carpro Eraser for wipedown to remove all silicone, and oils from polish prior Opti Coat
Apply Opti Coat
(Total Time Spent):1hr 30mins
Finished Part 2 of polishing this morning with the rear bumper. The clear was much harder on the rear bumper so I had to adjust the aggressiveness on this panel. OEM clear coats on corvette are known to be rock hard, and it requires a more aggressive approach to level the paint, and will take much more section passes to correct compared to soft clear coat like Hondas.
Starting with the top of the bumper
Done
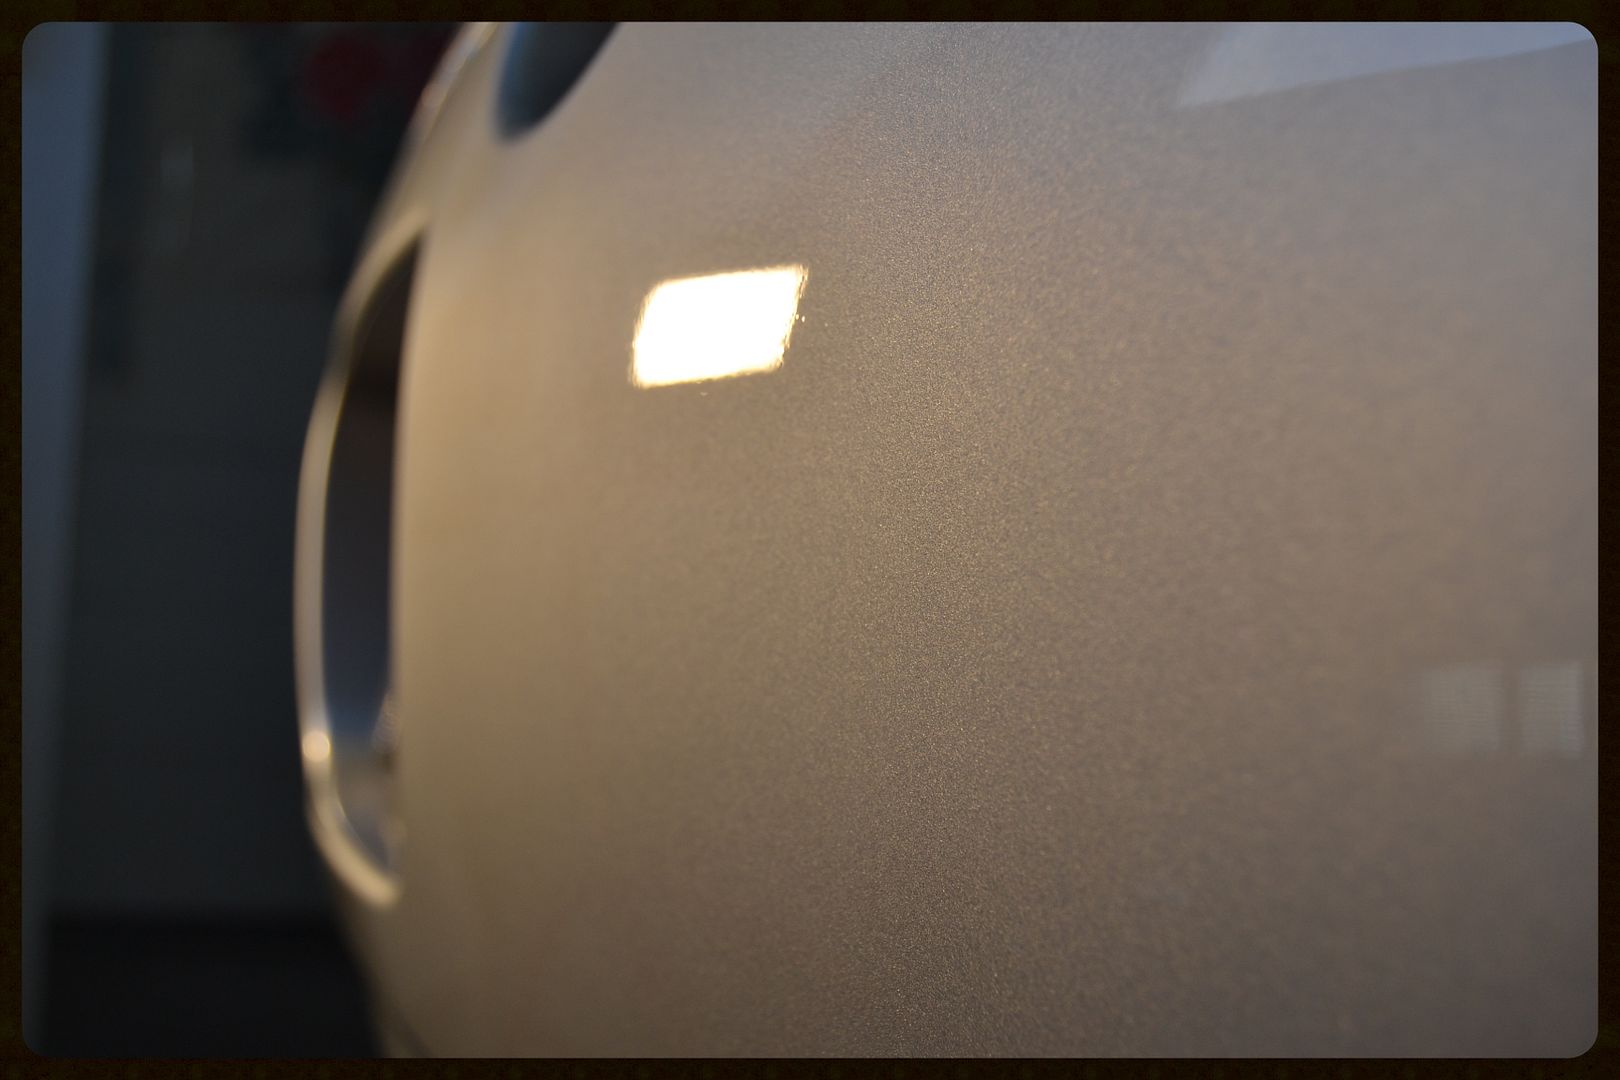
On this silver metalic color, it was very hard to capture defects with my camera so I only have this finished picture of the rear bumper
Very nice pop from the flakes
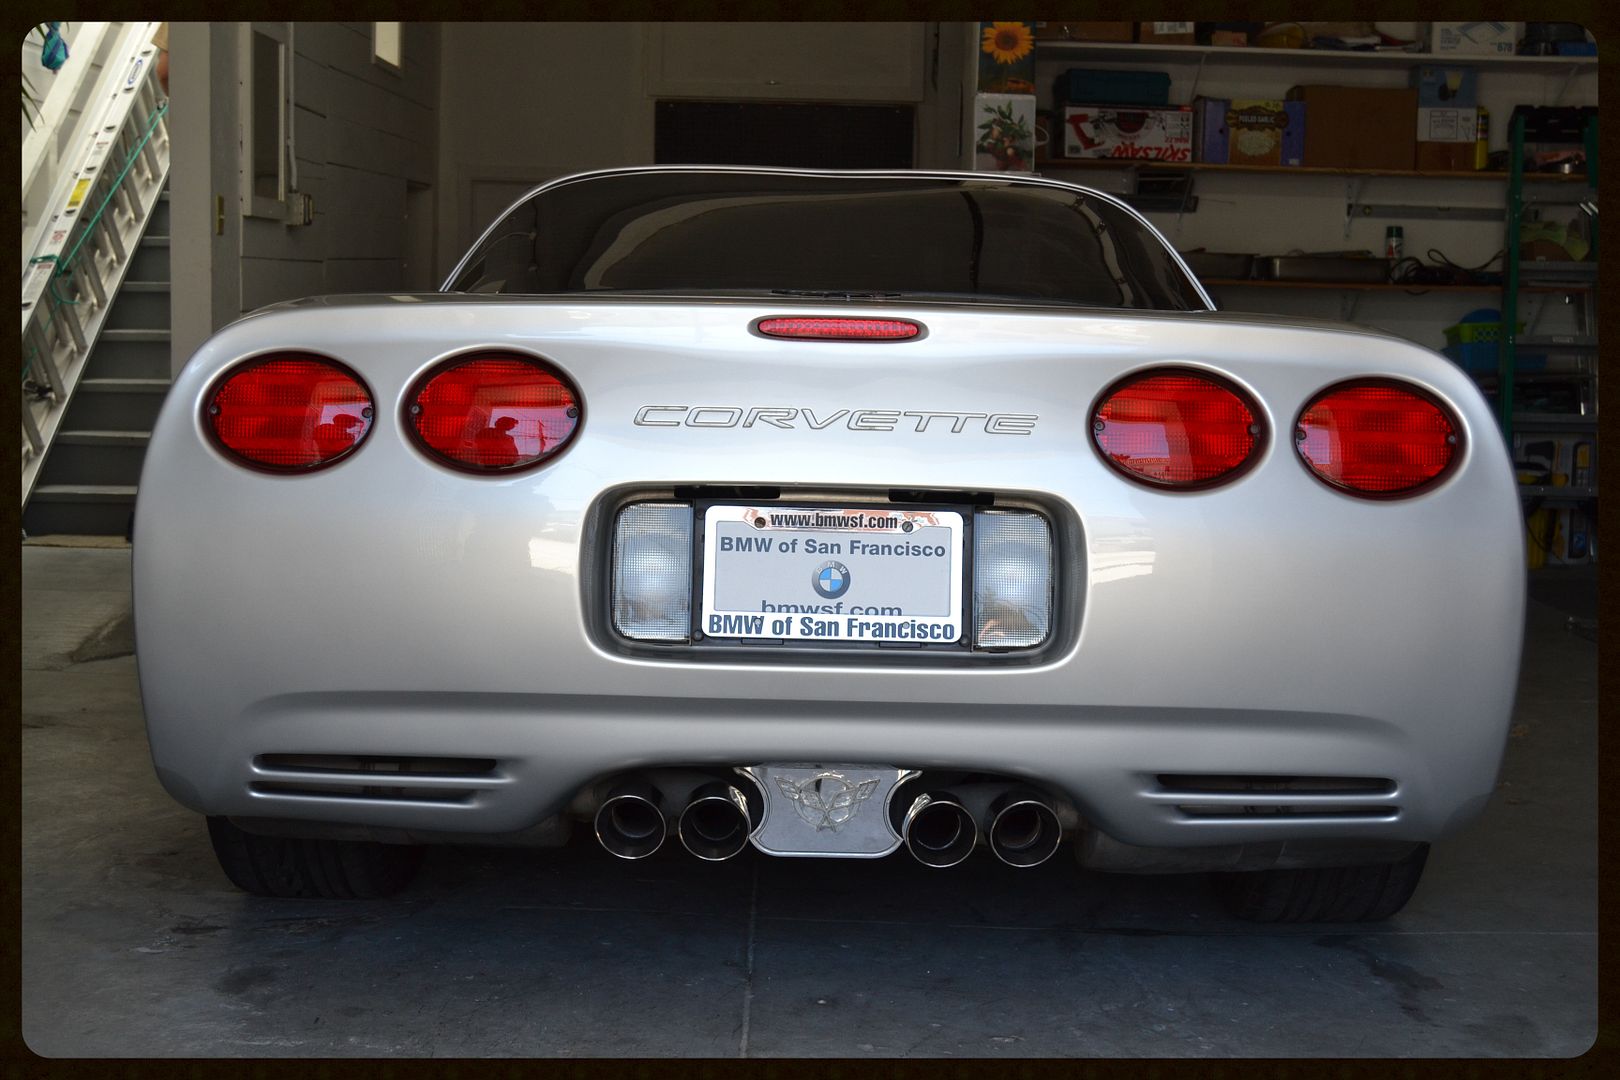
Completed rear end
Process used:
Wipedown with Optimum No Rinse
Clayed with Nanoskin Fine grade sponge w/ONR as clay lube
Meguiars DA/Meguiars M101 compound/Meguiars Microfiber cutting pad
Meguiars DA/Menzerna Power Finish/White Foam Pad
Carpro Eraser for wipedown to remove all silicone, and oils from polish prior Opti Coat
Apply Opti Coat
(Total Time Spent):3hrs
Any comments, questions, or suggestions, feel free to leave a remark. Thank you for viewing.
 Click on image to view work
-
Regular Member

Re: My first paint correction on a 01 Corvette went well
-
Super Member

Re: My first paint correction on a 01 Corvette went well
Great save
Nicely done!
-
Super Member

Re: My first paint correction on a 01 Corvette went well
 Originally Posted by Cg6LeMoN

Did a 2 step paint correction on a friends 01 corvette quarter panel and rear bumper.
It was poorly resprayed with single stage paint
Finished Part 2 of polishing this morning with the rear bumper.
The clear was much harder on the rear bumper
so I had to adjust the aggressiveness on this panel.
On this silver metalic color
Somebody actually re-sprayed the quarter panel of this Corvette with SS silver-metallic paint!! 
{Yet I read where you say that
the rear clip's CC was harder.  } }
Bob
"Be wary of the man who urges an action in which he himself incurs no risk."
~Joaquin de Setanti
-
Regular Member

Re: My first paint correction on a 01 Corvette went well
Thomason Car Care (423) 883-5944
-
Super Member

Re: My first paint correction on a 01 Corvette went well
For your first paint correction you sure did a excellent job
-
Super Member
 Re: My first paint correction on a 01 Corvette went well Re: My first paint correction on a 01 Corvette went well
Originally Posted by LandOfLinkin
Fine job indeed!
Thank you.
Originally Posted by HateSwirls
Great save
Nicely done!
Thanks. My friend was happy with the outcome.
Originally Posted by FUNX725
Somebody actually re-sprayed the quarter panel of this Corvette with SS silver-metallic paint!!
{Yet I read where you say that
the rear clip's CC was harder. }
Bob
Hey Bob! The paint on this corvette was just really weird and abnormal. The story behind this one is that when he purchased the car it looked much worse so he brought it over to have me inspect it. He rubbed some compound and the majority of the oxidation went away. He was happy with it because he will only keep it until summer. Fast forward to a month later he tells me all the oxidation came back. I told him to let me decontaminate it and let me inspect its true finish. It was indeed a respray because of a bad color match, plenty of dirts, some fish eyes, and orange peel texture was different compared to the adjacent panels. Now I'm thinking if the quality of the work was this bad no way it was a legit 3 stage spray with metallic. Initially I thought it was clear coat failure on OEM paint but it was not the case. This is a by product of an aftermarket refinish. Now I'm thinking the shop had to have most likely mixed the base with little clear and metallic as one and just shot it. Another reason why the job was shady is because on the top of the rear bumper it was resprayed BUT only with clear because of a blend line and the color matched the rest of the car. The middle to bottom portions were untouched that's why my initial combo did Not work and I had to readjust. Bob thanks for the morning excersise with using my brain.
Originally Posted by ThomasonCarCare
Nice work!
Thank you thomason.
Originally Posted by jamesboyy
For your first paint correction you sure did a excellent job
Sorry james. Title was a bit unclear. I meant to say this was my first Corvette.
Click on image to view work
-
Super Member
Re: My first paint correction on a 01 Corvette went well
Originally Posted by Cg6LeMoN
Hey Bob! The paint on this corvette was just really weird and abnormal. The story behind this one is that when he purchased the car it looked much worse so he brought it over to have me inspect it. He rubbed some compound and the majority of the oxidation went away. He was happy with it because he will only keep it until summer. Fast forward to a month later he tells me all the oxidation came back. I told him to let me decontaminate it and let me inspect its true finish. It was indeed a respray because of a bad color match, plenty of dirts, some fish eyes, and orange peel texture was different compared to the adjacent panels. Now I'm thinking if the quality of the work was this bad no way it was a legit 3 stage spray with metallic. Initially I thought it was clear coat failure on OEM paint but it was not the case. This is a by product of an aftermarket refinish. Now I'm thinking the shop had to have most likely mixed the base with little clear and metallic as one and just shot it. Another reason why the job was shady is because on the top of the rear bumper it was resprayed BUT only with clear because of a blend line and the color matched the rest of the car. The middle to bottom portions were untouched that's why my initial combo did Not work and I had to readjust. Bob thanks for the morning excersise with using my brain.
Thanks for the feedback, Limny.
I knew it had to be something waaaay out of the ordinary.
Glad you got it figured out.
The results speak for themselves! 
Bob
"Be wary of the man who urges an action in which he himself incurs no risk."
~Joaquin de Setanti
Similar Threads
-
By Mike Phillips in forum Product Reviews by Mike Phillips
Replies: 33
Last Post: 09-26-2020, 07:18 PM
-
By Understated in forum Show N' Shine
Replies: 14
Last Post: 05-19-2016, 04:10 PM
-
By cousineau18 in forum Ask your detailing questions!
Replies: 0
Last Post: 01-20-2015, 01:43 PM
-
By Corey@OptimalDetailing in forum Show N' Shine
Replies: 8
Last Post: 07-30-2013, 07:34 AM
-
By rider9195 in forum Show N' Shine
Replies: 6
Last Post: 06-25-2011, 06:59 PM
 Members who have read this thread: 0
There are no members to list at the moment.
Posting Permissions
- You may not post new threads
- You may not post replies
- You may not post attachments
- You may not edit your posts
-
Forum Rules
|
| S |
M |
T |
W |
T |
F |
S |
| 26 | 27 | 28 | 29 | 30 | 31 |
1
|
|
2
|
3
|
4
|
5
|
6
|
7
|
8
|
|
9
|
10
|
11
|
12
|
13
|
14
|
15
|
|
16
|
17
|
18
|
19
|
20
|
21
|
22
|
|
23
|
24
|
25
|
26
|
27
|
28
|
29
|
|
30
| 1 | 2 | 3 | 4 | 5 | 6 |
|


 Reply With Quote
Bookmarks