 Dislikes: 0
-
03-29-2024, 03:41 AM
#1361
Super Member

Re: DFB's Garage
Glad to see you enjoyed using hyper wash. How much did you use in the bucket? I found the 1:400 ratio to be the sweet spot which works out to around 1 oz to 3 gal. The 1 oz to 5 gal recommendation on the container lacks the lubrication I desire. I usually fill up my bucket with 2.5 gal of water, add 1 oz of hyper wash, toss in my mitts, then hit it with a strong jet of water until the I see the suds reach the top of the bucket.
-
Post Thanks / Like - 0 Thanks, 1 Likes, 0 Dislikes
 DFB
DFB liked this post
-
03-29-2024, 04:18 AM
#1362
Super Member

Re: DFB's Garage
 Originally Posted by SNP209

Glad to see you enjoyed using hyper wash. How much did you use in the bucket? I found the 1:400 ratio to be the sweet spot which works out to around 1 oz to 3 gal. The 1 oz to 5 gal recommendation on the container lacks the lubrication I desire. I usually fill up my bucket with 2.5 gal of water, add 1 oz of hyper wash, toss in my mitts, then hit it with a strong jet of water until the I see the suds reach the top of the bucket.
As I outlined in a previous post, I don't use the two-bucket method. Instead, I use the foam cannon to apply soap directly to the paint. I then have one singular "rinse" bucket to which I add a slug of soap onto the wash media, then any remaining soap from the foam cannon.
I mention that because I don't really measure out a soap quantity for the bucket, and I'm probably too liberal with my foam cannon dilution too.
-
03-29-2024, 04:58 AM
#1363
Super Member

Re: DFB's Garage
Being a little liberal with your soap never hurt anyone. Thats how I am with my foam gun. Gets me the results I want.
Treat it like it's the only one in the world.
-
Post Thanks / Like - 0 Thanks, 2 Likes, 0 Dislikes
-
03-29-2024, 05:47 AM
#1364
Super Member
Re: DFB's Garage
Originally Posted by Bill D
Being a little liberal with your soap never hurt anyone. Thats how I am with my foam gun. Gets me the results I want.
My thoughts exactly.
-
04-01-2024, 11:49 PM
#1365
Super Member
Re: DFB's Garage
The First Oil Change
Contrary to Breaks & Scrapem’s advice, you actually DO need to change the oil!


Some time ago, Briggs & Stratton determined that consumers don’t like changing the oil on their gas-powered lawn equipment. In fact, I would be willing to bet that 90% of gas-powered lawn mowers never get an oil change in their life. According to Briggs and Stratton, because of the advancements in oil technology and engine design, the engines run cooler and negate the need for regular oil changes. Those changes include improved air filters and oil filler seals, which limit the chance of debris entering the oil system. The subsequent tag line being “No Oil Change Required, Just Check and Add”.
Just Check & Add™ | Briggs & Stratton
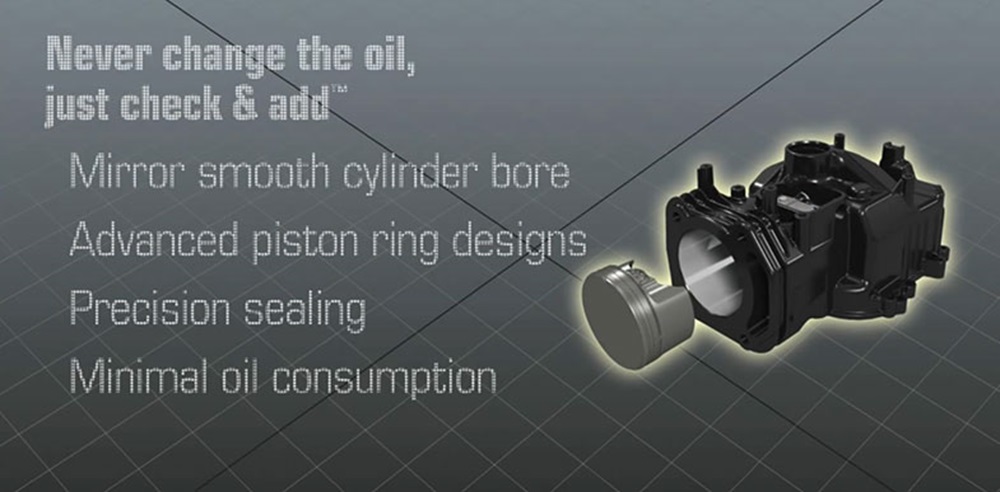
Briggs & Stratton even make note of the environmental savings made by not generating waste oil. I guess they have a point, but if the engine blows up because of degraded or a lack of oil, then I can guarantee Briggs’s would happily sell you another engine that took a lot of energy and natural resources to manufacture. Go figure.
Needless to say, if you want the engine on your lawn mower to go the distance, please change the oil!
When I first took delivery of the Victa Commercial 21-inch, I filled the engine with the recommended SAE-30 mineral oil.


Having outlined the "No Oil Change Required" above, that actually doesn’t apply to the 850-series engine. I would suspect that relates to these engines being primarily for commercial users, meaning they are being used far beyond the average domestic lawn mower engine. As such, Briggs recommend the first oil change on the 850-series be at 5 hours of use, then every 50 hours or annually going forward. The oil filter replacement is also at 50 hours.
After the first oil change at 5 hours, I go a bit more conservative in doing oil changes at 25 instead of 50 hours. I would normally switch to 10w-30 semi-synthetic at the first change, but I've decided to run SAE-30 mineral for another set.
For oil filters, I do them every second oil change for a couple of reasons. Firstly, the filters are $20 each, which is quite expensive for such a small filter. Secondly, I just don't see the need considering the frequency of oil changes.
Engine Oil Capacity – 540 to 590 ml (wet fill)
Oil Filter P/N - 795 990 https://bwmachinery.com.au/product/b...filter-795990/
The first step in changing the oil on a small engine is to warm it up beforehand, thus allowing the oil to drain more effectively. While the engine is warming up, I get my oil pan ready and measure out the replacement oil.

These engines can be drained from above or below, but I have always drained them from the dipstick tube to avoid taking off the blade carrier. Make sure to clean around the dipstick tube beforehand, which you should be doing anyway when checking oil levels. All waste oil is put in an empty bottle and disposed of at the council collection point.

Once drained, the mower is flipped back up and the new oil added, reserving about 100ml. I then check the dipstick, adding the final 100ml in steps to the correct level is achieved. If the oil filter is changed, make sure to check the oil after a quick test run and add more oil if needed.
As a way of keeping track, I put the date on the oil filter to indicate when the last oil change was.

I actually rinsed the mower down prior to the oil change, the ceramic coating easily shed the dust debris that was clinging to the deck. See, there was method in my madness! 
I’m loving this mower by the way……………..and a lot of that is the 850-series engine.
1 - It’s easier to pull over the Krohler or Honda. The Krohler feels very heavy, like it doesn’t have a compression release. The Honda’s rope is too short, meaning it doesn’t permit a zone starter and it reaches the end of the travel on each tug.
2 - It can power through thick Kikuyu that has the Honda or Krohler bogging down.
3 - The quick release air filter cover allows for more convenient filter cleaning. I like to tap the filter out after a big day, something that is discouraged on the Honda and Krohler arrangements.
4 - Even though I have it revving harder than standard, the 850 is quieter than the Krohler and Honda, in particular producing less high frequency muffler noise across the rev range. The Honda does idle quieter, but only because of a slower idle speed. This will sound deranged, but I actually love how this engine responds to a rapid full throttle action, it has such a rorty sound to it.
The 850's only major failing is its thirst for fuel, exaggerated by the extra revs I have it at, but in every other way it’s the perfect modern lawn mower engine.
-
Post Thanks / Like - 0 Thanks, 2 Likes, 0 Dislikes
-
04-05-2024, 04:11 AM
#1366
Super Member
Re: DFB's Garage
Got my first chance to use the M18 Surge today, making treated pine backing boards for Elkhorn and Staghorn ferns. Wow, this thing is so smooth, easily the best impact driver I have used to date. Granted, treated pine is not a great challenge, but I love how you can creep up on the fastener rather that pounding it into submission.

-
Post Thanks / Like - 0 Thanks, 3 Likes, 0 Dislikes
-
04-08-2024, 01:24 AM
#1367
Super Member
Re: DFB's Garage
Kranzle Check Valve Repair / Service
After nearly four years of flawless hard work, my German tank failed me last week. I bought this Kranzle K1152 TST (1122 TST in the US) in mid-2020, a sight unseen purchase that was a go-big-or-go-home type of deal. Apart from the stout water flow, low noise and high-quality construction, the main benefit of a Kranzle is the ability to service and repair these machines as needed. The pumps are fully serviceable or completely replaceable, a contrast to the throw away type of deal with cheaper pressure washers. The hoses, fittings, pressure gauges and oil are all replaceable as needed, even the electrical circuitry.
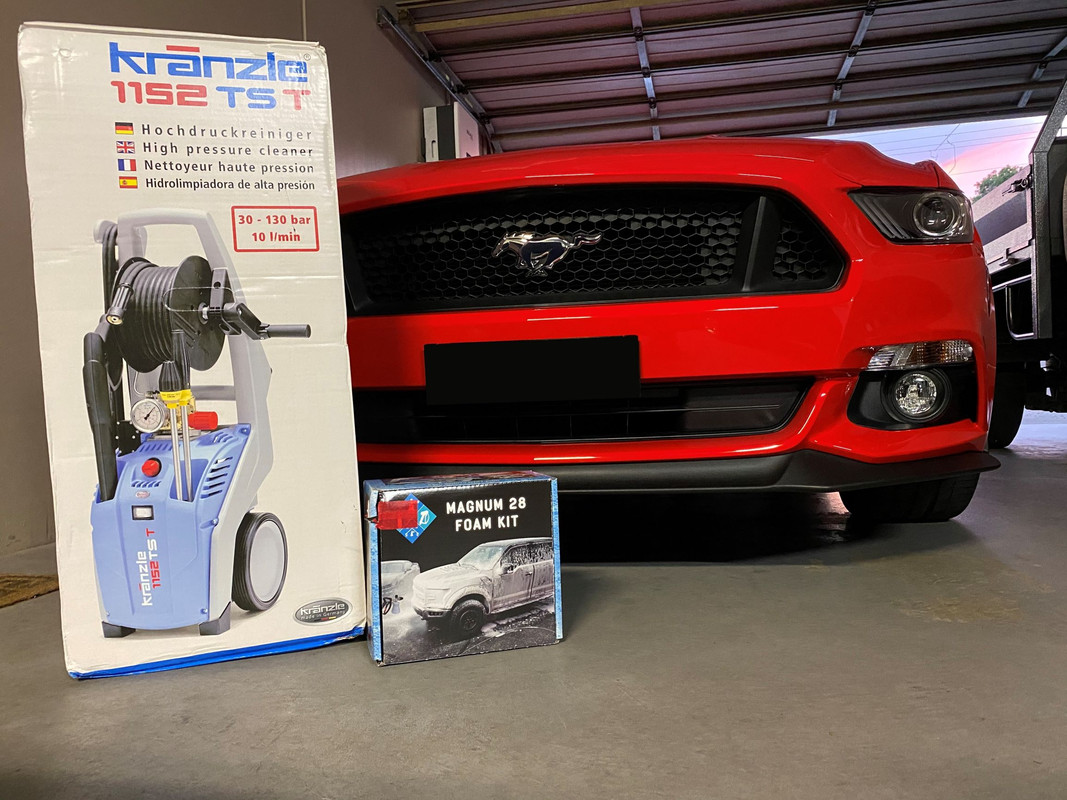
After sitting for more than 6 months unused, I took the Kranzle to work on Wednesday to wash the two delivery vans. I connected the hose and turned on the tap to purge the lines, but nothing came out. Apart from a tiny trickle, water was not flowing through the pump. I checked the inlet screen and the nozzles for blockages, but all was good on that front. I later discovered the glycerin filled pressure gauge was leaking fluid. I ended up having to wash the vans with a garden hose, further diagnosis would have to wait.

A quick Google and further discussion with PowerBlast, the Australia service and parts agent for Kranzle, the issue would be a stuck check valve, of which there are seven on the AZ pump. The first 6 valves are accessed by a brass plug, the exception being the valve below the pressure gauge, which needs to be removed to gain access.
Upper outlet valves -

Lower inlet valves -

The seventh valve is the final release valve and is accessed behind the larger cap highlighted below. This is not the same arrangement as the red plastic check valves in that the cap acts against a spring and ball bearing. The ball bearing can weld to the seat and cause a blockage. I actually removed this valve first but found everything to fine, the ball bearing free and clean.


Its recommended to start by removing the three top (outlet) valves, of those the central pressure gauge and valve cap should be first to allow clear access to the outer two valves. The three lower (inlet) valves are then removed, starting with the two outer caps to allow access to the central one. Most will remove the hose reel for better access, but it can be done with it in place like I did here.


The first three outlet valve came out free and easy, the springs moving within the housing just fine. However, all three lower valves came out with the spring frozen to the seat. In this case, I mostly likely didn't purge water from the pump after use. As it sat for so long, the minerals in the water calcified around the spring and freeze it in place.

According to PowerBlast, the valves often free up after being removed, which was the case here. Using a pick, gentle pressure freed the spring from the seat, working it several times to dislodge any build up. I then followed by sprayed the valves with IPA and wiped them clean. I also cleaned each valve cap, including a light go over the threads with a wire brush to remove any thread locker used during manufacture. There are also o-rings at the base of each check valve channel, but I didn't want to mess with those.
To reinstall the valves, simply slide the valve back into the channel and replace the cap. Start with the central top valve and cap, then the two outers. You can then re-install the pressure gauge. The lower valves, again start with the central, followed by the outers. Despite what is shown in some of the below videos, I do not recommend using a power tool on these brass pumps, just run them down by hand until you feel resistance, then nip them up with a socket or wrench. It would be all too each to destroy one of these $1000+ pump housings by smashing a cap home with an impact gun.
Once I had the pump back together, I went out and connected the water, purged the lines and then fired the unit up. Success! 
You will notice that the pressure gauge is not working, which I had expected. The bubble in the gauge is normal by the way. I have ordered a replacement gauge, along with a check valve kit which includes 6 new valves and 12 new o-rings to have in stock.
Check Valve Kit - 41.648
https://www.powerblast.com.au/produc...valves-az-pump
Pressure Gauge - 15039
https://www.powerblast.com.au/search...-gauge-3625psi
Through all of this, I discovered that PowerBlast have a distributor local to me. While they don't stock spares, they can get them in for me.
Normally, something like this would have freaked me out. In fact, Detailing Shed suggested I just send it to PowerBlast. If it was the plungers, from what I have seen they can be tricky to seat properly. But the check valves were a piece of cake. As such, I'm so glad I did this myself and learnt more about these awesome machines.
Video Resources
No Flow Diagnosis -
Check Valve Replacement
Check Valve Sequence
Valve, Seal and Oil Replacement -
-
Post Thanks / Like - 1 Thanks, 4 Likes, 0 Dislikes
-
04-08-2024, 02:13 AM
#1368
Super Member
Re: DFB's Garage
Expanding The Spare Parts Department
Last year, I bought a Milwaukee Pack-Out unit to store various spare parts for my equipment. This was set up within one of my cabinets, allowing it to be out of sight but still easily accessible.


This setup has been working very well, but.........................I was running out of room! The beauty of the Pack-Out system is the modularity, meaning you can easily add to the setup and have it all lock together. So, adding another unit was a natural decision.
Milwaukee now offer 2, 3 and 4-drawer configurations, but I decided to stay with the 3-drawer unit. Because I had a store credit, I again bought this from Total Tools, but the same units at Sydney Tool's right next door are noticeably cheaper. That's strange because typically Milwaukee has their prices standardized from store to store.
MILWAUKEE PACKOUT™ 3-Drawer Tool Box | Total Tools
Sydney Tools

Blades...................

Spark plugs, chassis and carburetor parts..................

Air filters.......................

Fuel line and starter rope.......................

Oil filters, chains and belts........................

Various used parts.........................

The blue folder sitting next to the drawers is used to catalog the various owner's manuals, ideal for quick and easy reference when I'm not in front of my computer.
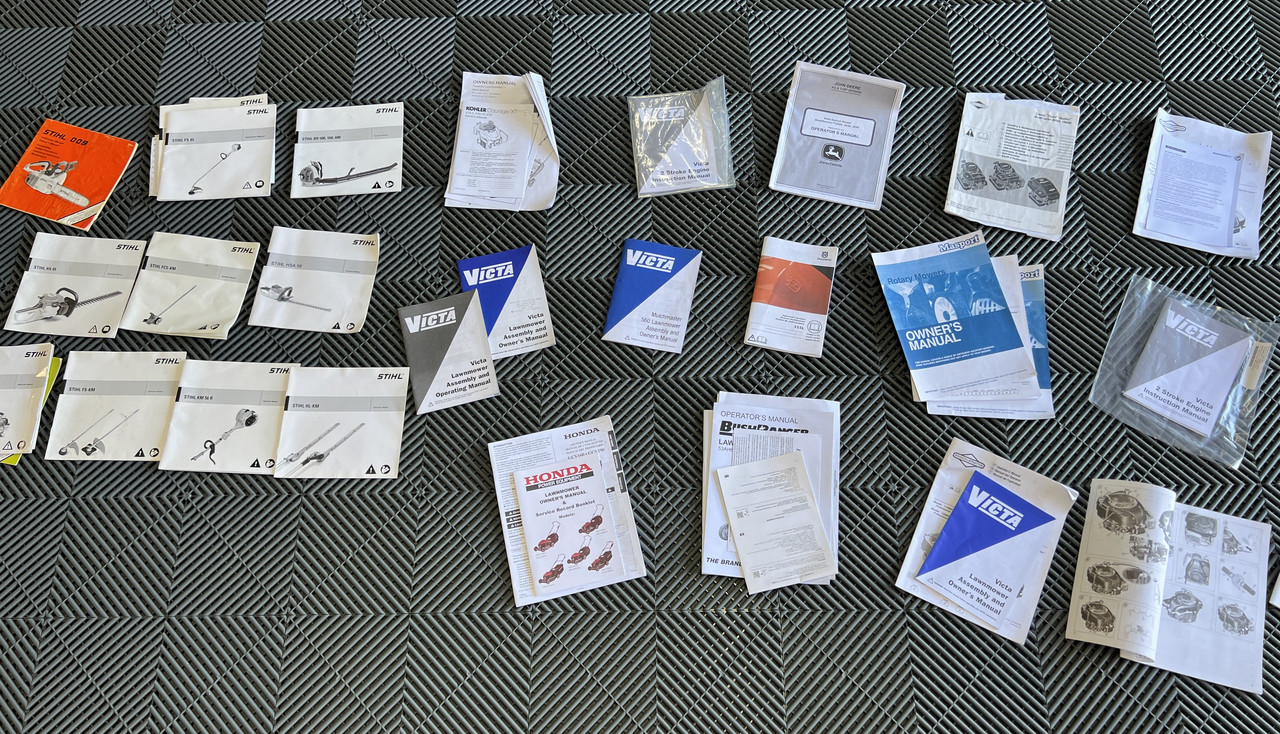

Organizational Bliss! 
-
Post Thanks / Like - 0 Thanks, 3 Likes, 0 Dislikes
-
04-08-2024, 02:58 AM
#1369
Super Member
-
Post Thanks / Like - 0 Thanks, 3 Likes, 0 Dislikes
-
04-08-2024, 07:33 PM
#1370
Super Member

Re: DFB's Garage
Originally Posted by DFB
Capping off my day pottering in the garage, the Mustang got a "sanity wash".

The wheels and paint were cleaned using Opti-Coat M-Wash. I also gave the exhaust tips a once over with P21S Polishing Soap.

After drying, glass, tyre dressing, interior wipe down and vac, I went over the exhaust tips with two layers of Dr. Beasly's Metal Coat.
I then had a delivery arrive, of which the bottle of Frostbite was only unveiled in the USA this time last week, so it's quite unusual to get a just released product so soon in Australia.

Looking forward to your Frostbite review Deyon 
As far as DIY Detail waterless wash...AWESOME product, performs and I know you like scents, AWESOME there as well ️ ️
Sent from my SM-G991U using Tapatalk
2022 Elantra N Cyber Gray
Some say..."He likes Swedish fish because they're made with caranuba wax"
-
Post Thanks / Like - 0 Thanks, 1 Likes, 0 Dislikes
DFB liked this post
Similar Threads
-
By Matador in forum Auto Detailing 101
Replies: 7
Last Post: 08-11-2021, 06:22 PM
-
By Nick McKees37 in forum How to Articles
Replies: 3
Last Post: 02-17-2015, 11:14 AM
-
By Mike Phillips in forum Off-Topic
Replies: 5
Last Post: 09-17-2010, 09:47 PM
-
By Mike Phillips in forum PICTURES: 3-Day CAR Detailing Bootcamp Classes
Replies: 20
Last Post: 06-28-2010, 03:05 PM
-
By Mike Phillips in forum How to articles
Replies: 3
Last Post: 06-23-2010, 01:00 PM
 Members who have read this thread: 84
- rmtaylor51,
- RPPM,
- KirkH,
- cb804,
- ev780,
- Dyerlog,
- mikeinauburn,
- GrnEyeDog,
- AMarkham40,
- BTW574,
- FocusSTguy,
- melF1fan,
- jstollar,
- PaulMys,
- Gridlink,
- barryscott,
- Dynoguy,
- The Guz,
- Jplouch,
- ellens2,
- no cigar,
- Bosko,
- D.BRITT,
- cyclops,
- delt1964,
- tradecraft1,
- chris87,
- vaced,
- John U,
- jrose0070,
- Danube,
- aannatshlzea6696,
- ollever,
- 02whitetundra,
- VISITOR,
- Rsurfer,
- 11Silverado,
- Desertnate,
- Ace22,
- damonb10,
- JSkibisky,
- georgia boy,
- gregory1420,
- chris12,
- larr12,
- gibby68,
- filhotran,
- TroyScherer,
- Awickedtruth,
- Alansr,
- DG3.7,
- eveausasdy529,
- Wknd Dtlr,
- pdl2mtl90,
- Mklauss,
- T-STeve,
- msharpe785,
- Setec Astronomy,
- chilly,
- ajdavies91,
- Silly Rabbit,
- Thunderchicken,
- 2FORDS,
- oneheadlite,
- DanaDetailingPros,
- SNP209,
- Dirty Harry,
- Vegas1,
- bapatickmjnra7168,
- bill walsh,
- Tasmania,
- DFB,
- dbeng,
- Prange,
- brianshaeffer,
- Azure,
- hansen97,
- Karl_in_Chicago,
- Odrapnew,
- kappy,
- WillSin865,
- wierdkid,
- Texchappy,
- chefwong
Posting Permissions
- You may not post new threads
- You may not post replies
- You may not post attachments
- You may not edit your posts
-
Forum Rules
|
| S |
M |
T |
W |
T |
F |
S |
| 31 |
1
|
2
|
3
|
4
|
5
|
6
|
|
7
|
8
|
9
|
10
|
11
|
12
|
13
|
|
14
|
15
|
16
|
17
|
18
|
19
|
20
|
|
21
|
22
|
23
|
24
|
25
|
26
|
27
|
|
28
|
29
|
30
| 1 | 2 | 3 | 4 |
|


 Thanks:


 Reply With Quote
Bookmarks