 Dislikes: 0
-
10-03-2023, 12:45 AM
#1011
Super Member

Re: DFB's Garage
Mini Holiday Project 1 - Windscreen Wiper Restoration.
With the XR6 turning 15 this year, I feel it's time to give it a little love in a couple of key areas. The first of which is addressing some fading of the windscreen trim panel and wiper arms.
Granted, being garaged all day for the last 13 of those 15 years had meant that the black plastic trim panel had fared better than most. The extent of the fading was limited to the exposed sections, the part covered by the hood was absolutely fine.
The restoration of these plastic parts could have been done while still attached to the car, but knowing how fiddly this would be, I decided to remove the two-piece scuttle panel. These are held down by 5 Christmas Tree fasteners, one each side by the bonnet hinges, two mounted to the scuttle and one that secures the two pieces together in the middle. As I don't currently have trim removal tools, these were a touch fiddly to remove.


The next step was to remove the wiper arms to allow the two plastic panels to lift away from the windscreen and scuttle. For the right side, I needed a shallow socket to gain access, and a long socket for the left side.


The wiper arms for the most part were in good condition, however the old-style suspenders were letting the side down. These have never been changed in 15 years of ownership and are a known area to degrade on Falcon's. More on this shortly.


A little bit of fettling had the two plastic scuttle trims removed, the left side first, the right side next. You also need to disconnect the rubber washer jet hoses before lifting away from the car. The Milwaukee M18 Heat Gun came in handy softening the rubber before removing the hose, last thing I wanted was to break something that is now NLA!

Check out the date codes, 22.04.08, surely one of the first to be made. I love stuff like this, the little clues hidden all over the car painting a picture of its creation.

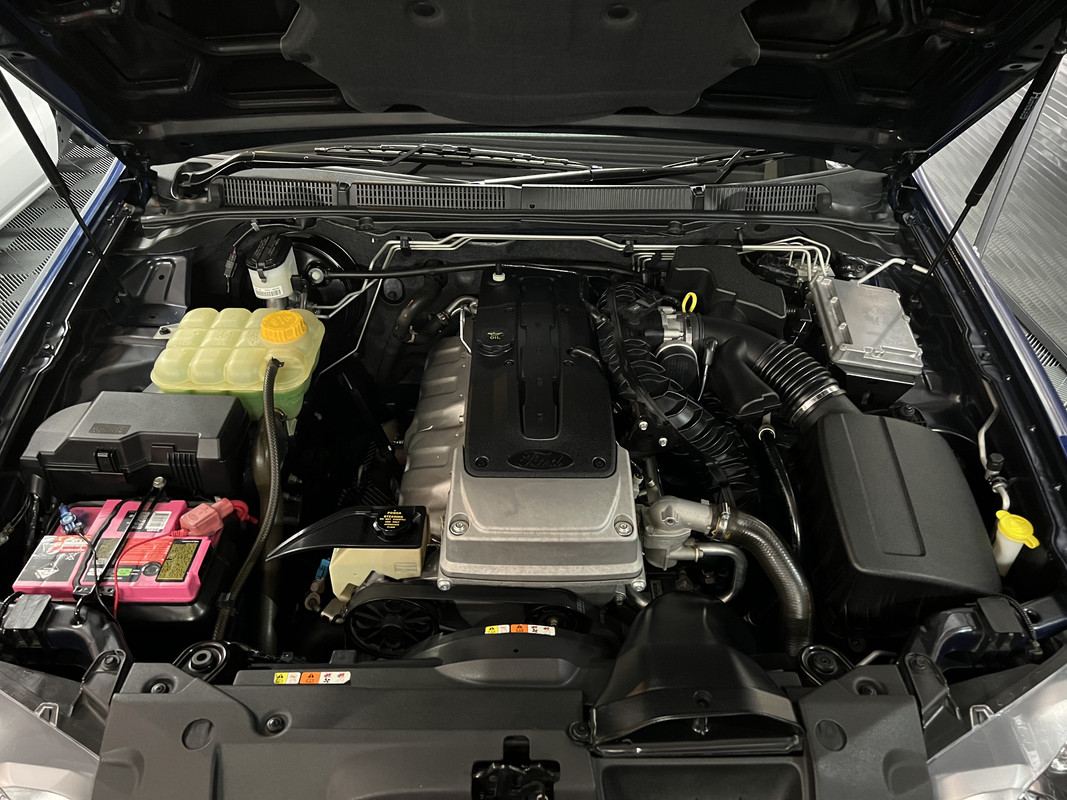
I was expecting worse, but this is what was underneath the plastic trim............


I cleaned up these areas with ONR and a towel.


Next, it was over to the sink for some cleaning, in this case KCx Green Star and a brush to deep clean the surfaces and remove any previously applied drying aid. In this case, I removed the rubber seal which is attached to the trims via push-in clips.

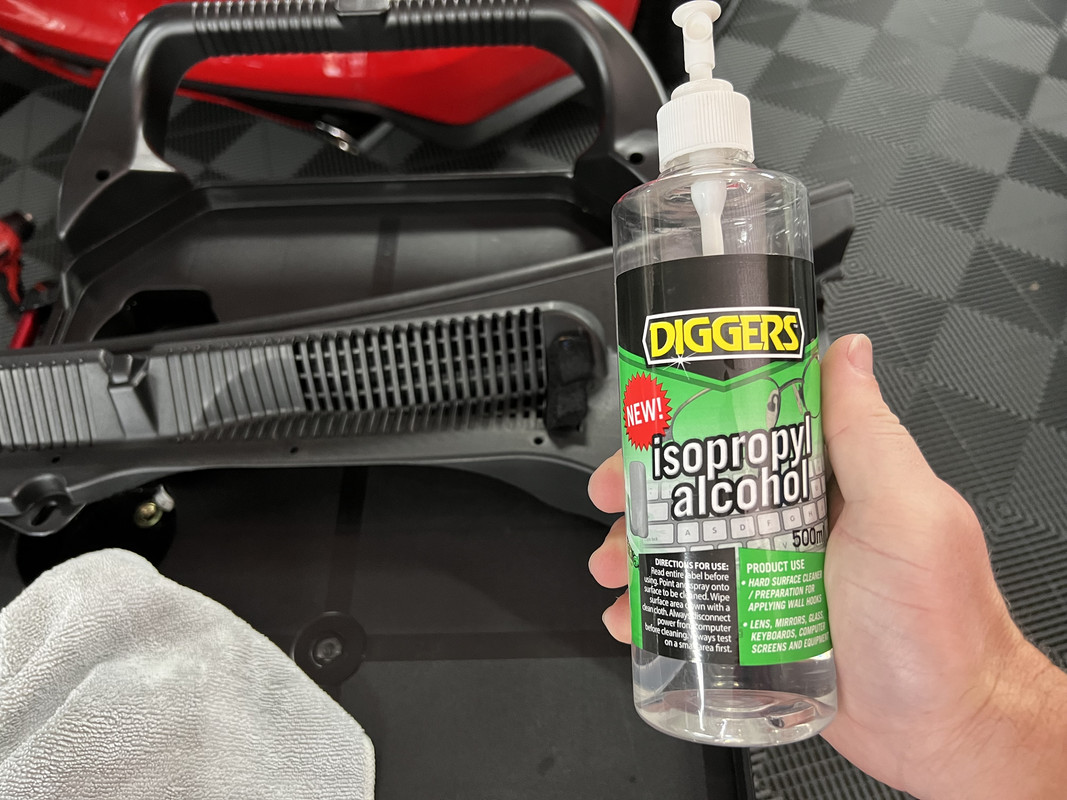
After a rinse, it was then a liberal bath in Eraser, then a final wipe over with IPA.

With these two pieces cleaned and prepared, it was time for some product. There are numerous trim restoration products on the market. Having used simple dressings like 303 or Perl in the past, these just don't last long enough. I have used Carpro DLUX in the past but have sort of cooled on that in recent times. I've had good results from using Carpro Reload on black plastic surfaces, but that is more of a light enhancement rather than a restorative type of product. Which led me to this...................

In truth, I've had this bottle of Solution Finish in the cabinet for a while now, so it sort of made sense to use this. Solution Finish is described as a "semi-permanent" trim restorer, lasting 12+ months compared to a few weeks from a trim dressing. Considering my usage patterns with this car, I'm expecting at least a couple of years out it. Solution Finish is silicone-free and uses natural oils to penetrate and then bond to the plastic, delivering a non-greasy OE level finish. The product comes in two different variations, the one here has the black finish, but there is also a grey tinted version.
Application is simple, shake the bottle, apply a SMALL amount of product to an applicator (in my case a foam block and craft brush), then start working it into the plastic. A little goes a long way and coverage is exceptional. Be sure to get into all the crevices, untreated areas will be highly obvious. Allow the product to sit for a short period, then follow up with a towel to level it down. Choose wisely with the towel, the black die will ruin it. I also decided to treat the rubber seal I removed earlier, as well as the Christmas tree clips.

PRO TIP - put the lid back on the bottle so that you don't knock it over and spill the precious liquid all over your work surface............I mean, who would do that......................

With both trim pieces treated, it was time to reinstall back onto the car. Retrace the removal steps by starting with the right-hand side, then the left, connecting the washer hoses before seating everything down. Resecure the clips and rubber seal.
At this point I will highlight how much I appreciate auto-workers fitting this stuff on a production line, the stars all need to align for it to fit and seat properly. Reconnecting the washer hoses, then snapping the edge back under the windscreen, while making sure to not pinch the rubber seals took some time to perfect.


For the wipers, I ordered a set of Ford OEM wiper blades and rubber suspenders. These were used on later FG-X models and eliminate the steel suspenders that had deteriorated on mine.
https://www.ebay.com.au/itm/255034969203
After cleaning the carry over parts, the new rubber items clip straight on. I'm pretty sure the wiper blades I removed today were the originals from 2008!

I then refitted the wiper arm assemblies, a fiddly process that requires a little fenagling to get correct. And yes, I did look up the torque spec for the wiper arms, 22 Nm to be precise. See, I do use my fancy tools!

With everything buttoned up and the rest of the engine bay plastics coated with Reload, it was job done!

When I started to plan this little task, I was prepared to simply replace these two trim pieces and the whole wiper arm assemblies. A little research revealed the newer FG-X wiper blade and suspender were a straight swap. And the two scuttle trims are now NLA.
So today, I learnt how to remove and reinstall these parts of the car, while learning how to use Solution Finish. Including a few shop supplies, total cost was just under $100 plus a couple of hours of my time.
Next, something a little more involved.............a lot more involved. Wish my poor back luck.
-
Post Thanks / Like - 0 Thanks, 5 Likes, 0 Dislikes
-
10-03-2023, 04:22 AM
#1012
Super Member

Re: DFB's Garage
Nice job Deyon, I'm thinking of doing a similar project. The vents and trim pieces just in front of the windscreen on the FJ always fade very quickly, and they're a real pain to do. The vents come out easily, I haven't tried to get the trim pieces, the ones where the wipers bolt on , out before, but I'm sure it'll be on YT somewhere. But rather than treating them with something, I was thinking about spraying them with black Plastidip. That stuff doesn't seem to fade at all.
Sent from my motorola edge 20 fusion using Tapatalk
-
Post Thanks / Like - 0 Thanks, 1 Likes, 0 Dislikes
 DFB
DFB liked this post
-
10-04-2023, 12:57 AM
#1013
Super Member
Re: DFB's Garage
Mini Holiday Project 2 - XR6 Wheel Renovation & Coating
Before I start this post, I will point out these wheels are 15 years old and have a few nicks here and there. None caused by me by the way, let's just say that I hate handing my cars over to someone else's "care". Sometimes we have to learn to just let things go. I would love to have these restored, but the diamond face requires specialist attention. I considered replacing them, but at $1200 EACH!, that won't be happening for a while. As such, this is my attempt to give them a spring clean and a new lease on life.
So, up on jack stands the car went. While I have used the trolley jack before, I've never used jack stands. To complicate matters, I needed to account for the flooring by placing a rubber mat underneath to prevent the stands from sliding or damaging the tiles. This stuff is actually gym matting cut into square tiles, the remaining material used under the jack.


I'm actually splitting this project in two, working on the right-hand side today. This is for two reasons, there was a lot of ground to cover today and a fair bit of heavy lifting. I'm also really, really nervous about putting the car up on jack stands at all four corners. Baby steps.
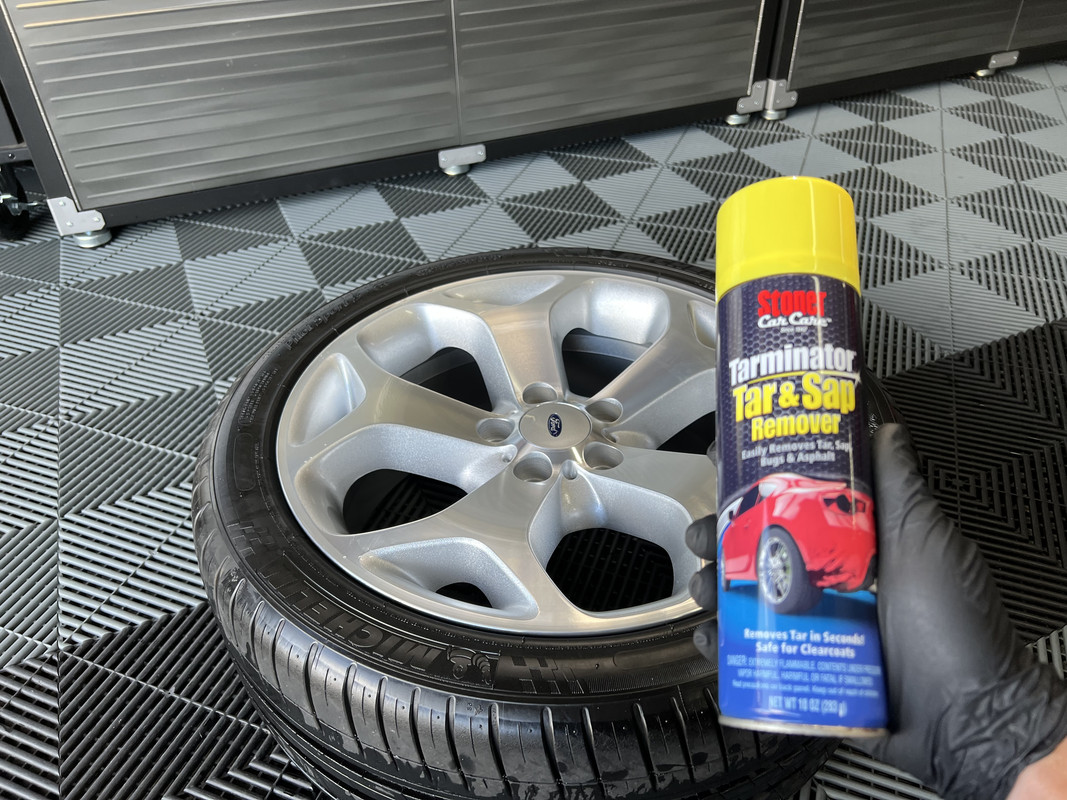
With the wheels removed, it was time to decontaminate them. The wheels were already "clean" from the previous wash, this was more about removing any remaining protection and an accumulation of tar deposits. I don't have many action shots of this, I was in the zone with a big job ahead of me. Annoyingly, my week's leave coincided with three days of heavy rain predicted. Typical.

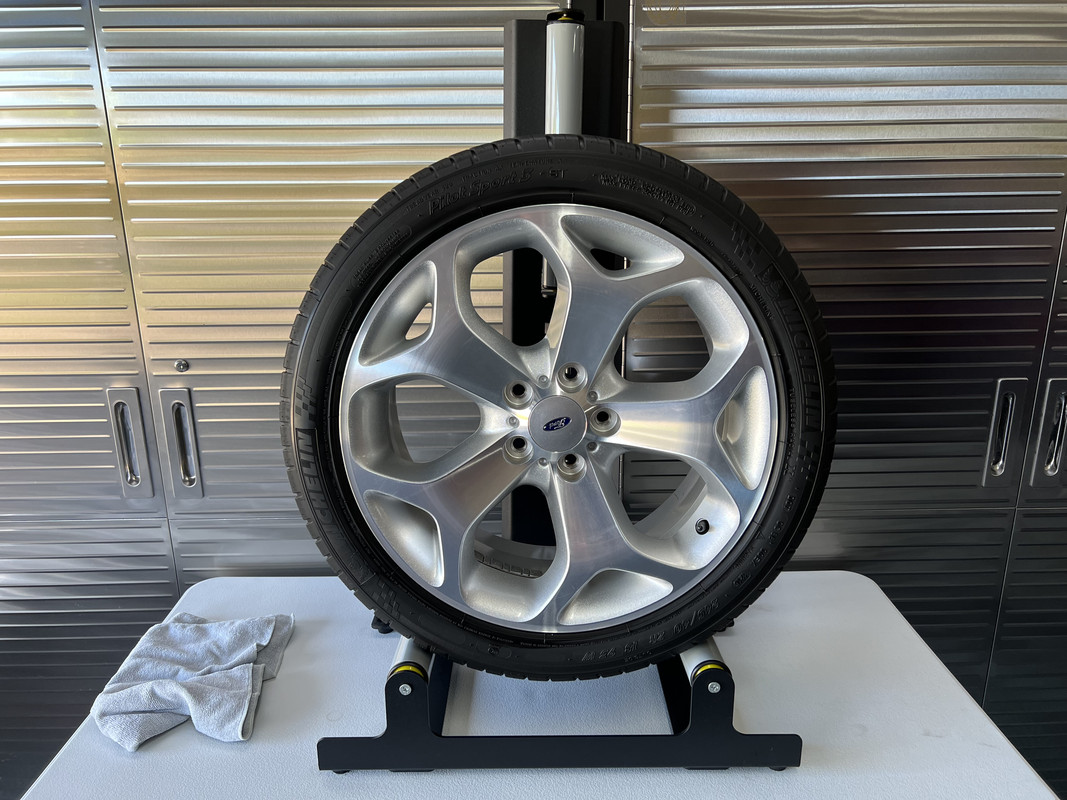
In terms of the process here, I hit the tyres front and back with Carpro ReTyre. I have mentioned this numerous times, but these tyres resist nearly every attempt at stripping them back to natural rubber. I actually had to get the Tarminator out afterwards to get them properly bare. For the wheels, I started with Brake Buster undiluted to clean and strip, rinsed and then applied NV Purify, which provided the lubricant for the clay bar. I haven't used a real clay bar in years! After another rinse, I applied Carpro TarX and used a plastic razor to lift off the baked-on tar deposits. I also needed to use KCx Eulex to remove some wheel weight adhesive residue and a couple of more stubborn tar spots. The wheel was then rinsed and dried with the Big Boi.
As planned, the next step was to polish the wheels. I wasn't going for perfection here, just an enhancement using Sonax Perfect Finish on a Rupes yellow. I stared out using the D/A backing plate, but switched to the rotary function for better control and precision. This is the first time I had used the extension shaft on the iBrid, which allows a little more clearance for tighter spots. The barrels were given a pass over with my 3-inch ShineMate and a yellow ShineMate pad.

Today was also my first try of the new Rupes prep sprays, Reveal Lite and Revel Strong. For some reason, none of the detailing suppliers in Australia have this in their stores, so I had to get it from an online tool supplier. Go figure.
RUPES REVEAL Lite Residue Remover 750mL
https://www.autogeek.net/rupes-revea...ver-750ml.html

In this case, I used Reveal Lite for the polish residue wipe down. Lite can be used more generously, able to be applied directly to the surface if needed.

Reveal Strong is best used as the final wipe down and used with care. Do not apply this directly to the surface, rather spray into a towel and wipe. This stuff flashes very fast.

These two products are very nice to use, the Lite version smells delightful, while the Strong does have some potency to it. My favorite products in this space are Gyeon Prep and Carpro Eraser. The Rupes duo seem more potent than those, even the Lite version. The faster flash time of Strong could be a time saver for the pros.
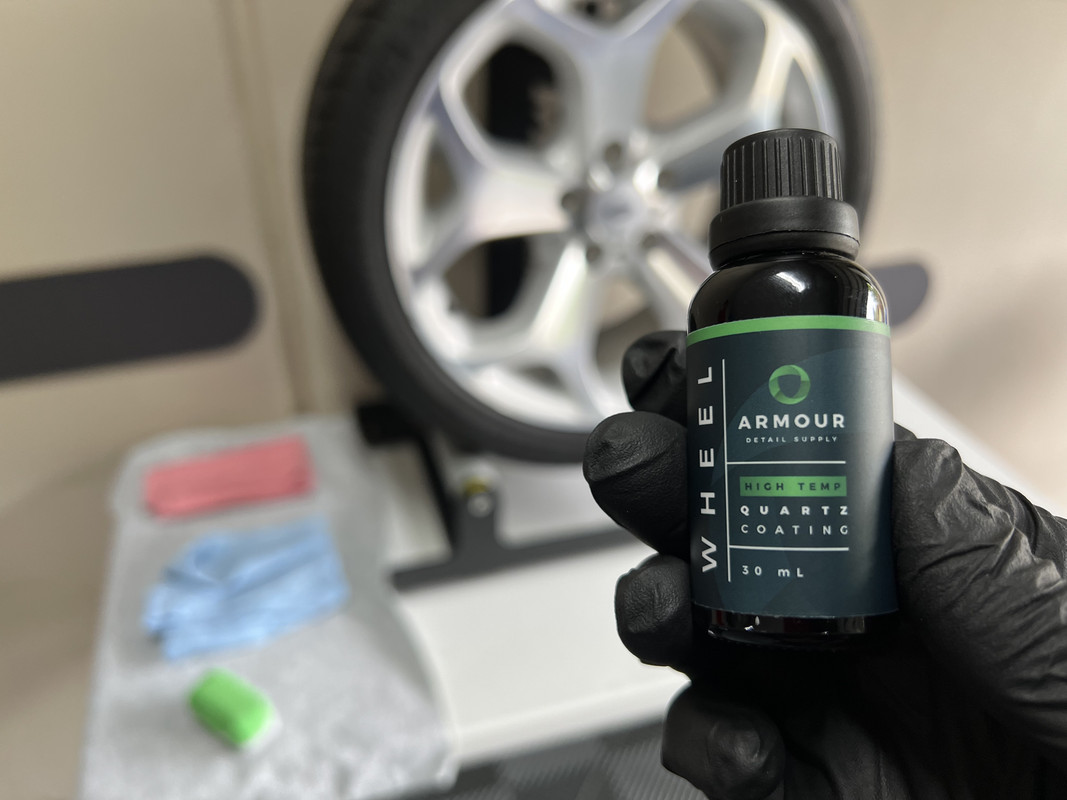
With the two wheels clean, polished and prepped, it was time to apply the coating.
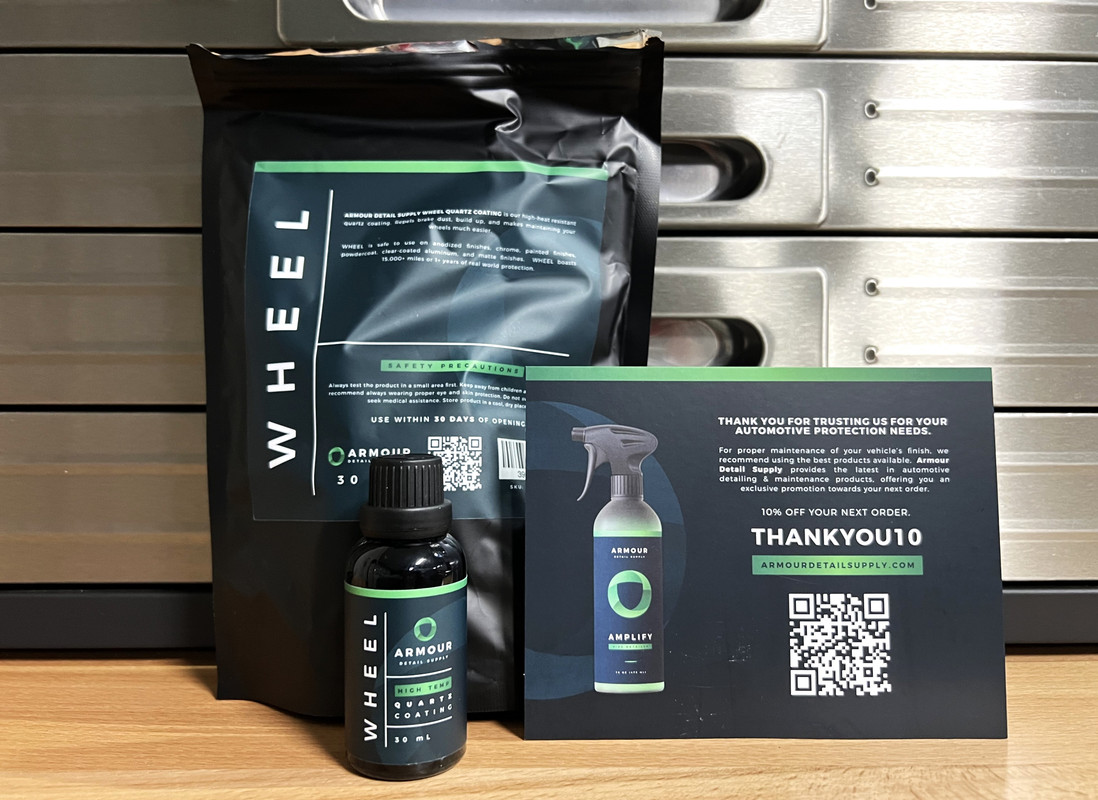
I had to order this from the USA, Armour Detail Supply Wheel Coating offers superior water beading and slickness, something that is often missing from other high-temp wheel coatings. It's also a single layer coating, which suits me just fine!
Due to the very high solids content, this coating is very grabby on the initial leveling wipe but smooths out to a slick finish with the secondary wipe.
With the two wheels coated, I directed some attention to the wheel arches. Not that they were too bad, but while the wheels were removed, I decided to make the most of it.

In this case, I applied some APC, blasted with the Tornador, then doused down with ONR and dried with a towel. I've used this sort of method on engine bays before and it worked just fine here too.

I also gave the calipers a quick once over with some metal polish. I didn't bother coating them, they are not painted and these brakes are not all that dusty. Original OE rotors and pads by the way. I note I need to replace the bump stops on the rear suspension though.


No idea what "49" means, just another little artifact of the cars birth.

In preparation for this project, I ordered a set of NOS lug nuts. I actually tried to get these from Ford Spares, but they are now obsolete and could only supply me a grand total of 6. I even had to explain what "lug nuts" were to the parts guy.
I also took the opportunity to replace the factory supplied locking lug nuts for regular ones, I've always been nervous about those things.

With the wheels back on and the car lowered back down, the lugs were then torqued to 130 Nm. Factory spec is pretty vague, listing 115 to 155 Nm in the owner's manual...............yes, I read the owner's manual. 

Now to repeat all of that again tomorrow on the left side set. I wish I had a lift!
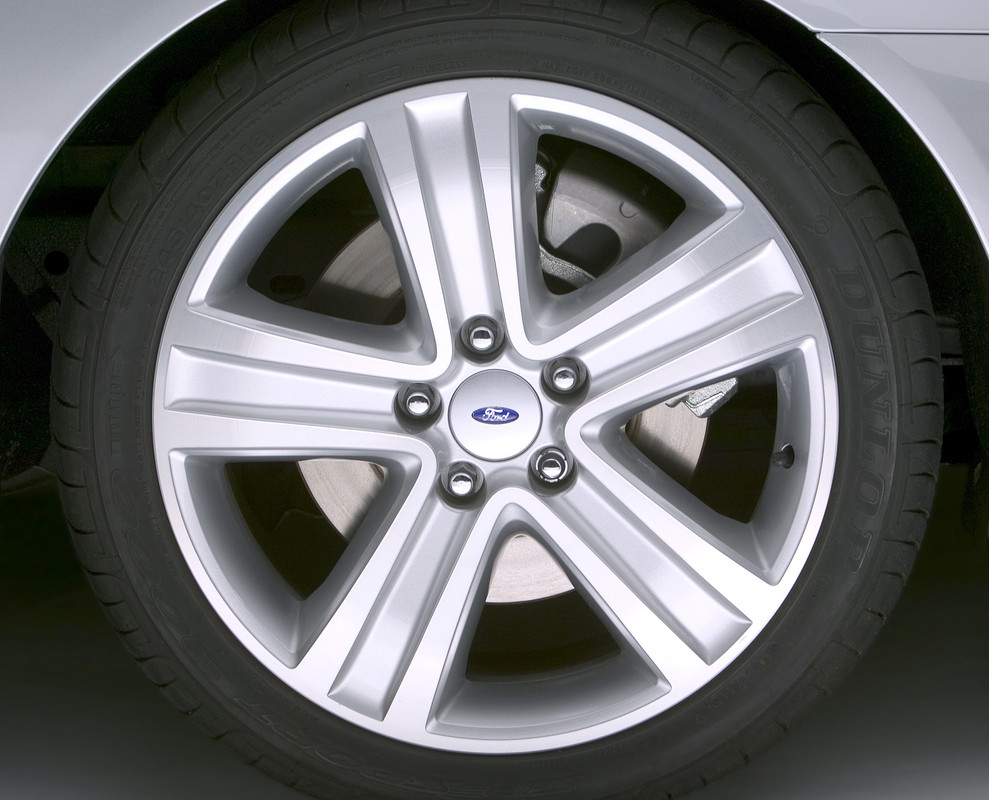
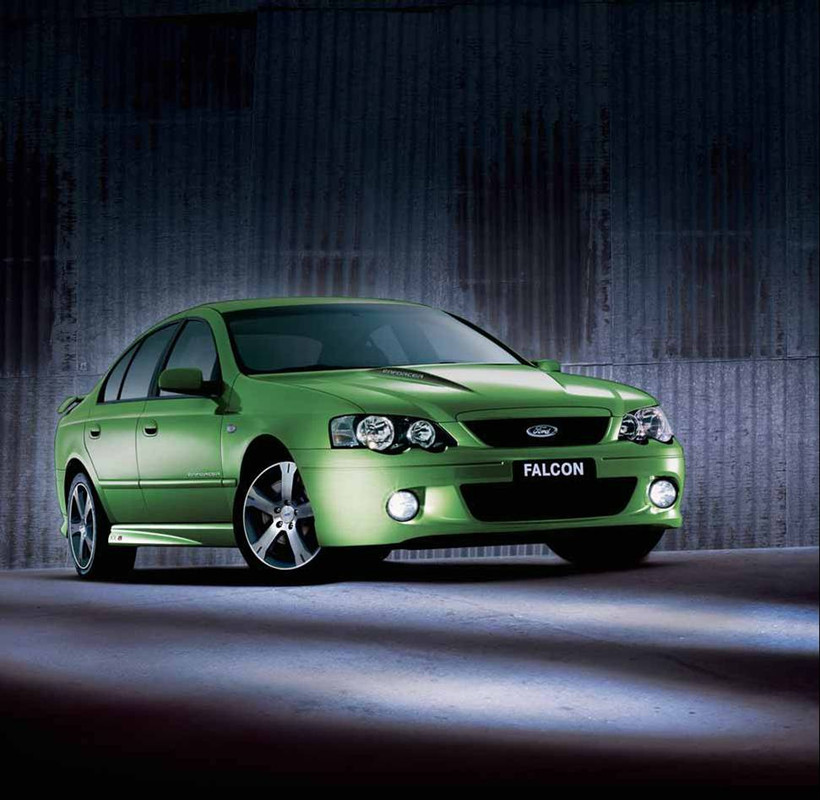
These are still one of my favorite Falcon wheels of all time, they really suited the FG styling theme and tied into the wider Ford lineup at the time. I wish they had explored the design a little more and made a 19" version for other models in the lineup.
I remember when the FG was unveiled with carry over wheels on the FPV models and the plain looking 19" XR option being very disappointing. As such, the 18" "Snowflake" or Y-Spoke wheels were the ones to have, standard on XR6 Turbo and XR8 sedans, optional on XR6 sedan and all XR Utes.
I actually ordered my XR6 with the ugly standard 17-inch wheels, but an hour later I called the salesman to add the 18-inch wheels for an additional $1000 to my order. My only stuff up was not paying the nominal $250 for the matching spare wheel, so an ugly space saver resides in my boot, never used by the way. Keep in mind I was 21 years old at the time, you really don't have much rational thinking at that age.
-
Post Thanks / Like - 0 Thanks, 4 Likes, 0 Dislikes
-
10-04-2023, 01:15 AM
#1014
Super Member
Re: DFB's Garage
Still my favourite Falcon wheel, I still see the occasional one around with those on, but sadly they're usually trashed now.
FYI, the FJ'S lug nuts tighten to 113Nm, with 60Nm for the spare hanging on the back door, it's fixed in my memory now.
Sent from my motorola edge 20 fusion using Tapatalk
-
Post Thanks / Like - 0 Thanks, 1 Likes, 0 Dislikes
DFB liked this post
-
10-04-2023, 04:05 AM
#1015
Super Member

Re: DFB's Garage
I too think those wheels look great, don't know what the other Falcons had over time but THOSE look amazing
Sent from my SM-G991U using Tapatalk
2022 Elantra N Cyber Gray
Some say..."He likes Swedish fish because they're made with caranuba wax"
-
Post Thanks / Like - 1 Thanks, 0 Likes, 0 Dislikes
 DFB
DFB thanked for this post
-
10-04-2023, 05:09 AM
#1016
Super Member
-
Post Thanks / Like - 1 Thanks, 0 Likes, 0 Dislikes
-
10-04-2023, 05:21 AM
#1017
Super Member
Re: DFB's Garage
 Originally Posted by DFB

These were the two other options for XR models back in 2008...................
I never liked the 17-inch wheels, they were fussy looking and were dwarfed by the bigger body of the FG.


On the other hand, the 19-inch option was very boring, at least it filled up the guards better.


Comparison...............

Well...I agree with you 100% on the 17's...Zzzzzz but disagree 100% on those 19's, that's a great looking 5 spoke design. There's something about a classic 5 spoke, simple in design but not easy to get right all the time, I like them
Btw, LOVE the color options, what a concept...colors, not black, white, gray and silver
Sent from my SM-G991U using Tapatalk
2022 Elantra N Cyber Gray
Some say..."He likes Swedish fish because they're made with caranuba wax"
-
10-04-2023, 05:37 AM
#1018
Super Member
Re: DFB's Garage
Originally Posted by Klasse Act
Well...I agree with you 100% on the 17's...Zzzzzz but disagree 100% on those 19's, that's a great looking 5 spoke design. There's something about a classic 5 spoke, simple in design but not easy to get right all the time, I like them
Btw, LOVE the color options, what a concept...colors, not black, white, gray and silver
Sent from my SM-G991U using Tapatalk
Ford gave that wheel a makeover for the 50th Anniversary XR6 Turbo, giving it a lot more character. They are hard to find now.

I also loved these ones, especially with the grey accent...............

It was a glorious era for color on Falcon's and Commodores, from 2002 through to about 2010/11 when clearly some decisions had been made about local production and the rationalization began.


-
Post Thanks / Like - 0 Thanks, 3 Likes, 0 Dislikes
-
10-04-2023, 05:42 AM
#1019
Super Member
Re: DFB's Garage
Yeah adding the gray to the wheel I like REALLY looks awesome, adding the gray to that 2nd wheel saves it a little 
Sent from my SM-G991U using Tapatalk
2022 Elantra N Cyber Gray
Some say..."He likes Swedish fish because they're made with caranuba wax"
-
Post Thanks / Like - 0 Thanks, 1 Likes, 0 Dislikes
DFB liked this post
-
10-05-2023, 12:35 AM
#1020
Super Member
Re: DFB's Garage
Mini Holiday Project 2 - XR6 Wheel Renovation & Coating (PART TWO)
With a process in place from yesterday, today's progress was smoother.

(Pre-cleaning)
You know, at the time (and now I guess) the media and general public panned the FG Falcon for being a carry-over platform or "top hat" exercise compared to the VE Commodore. The thing is, the Commodore needed to be all new, the previous model loosely based on something that came out in the late 1970's, so they had a lot of ground to make up.
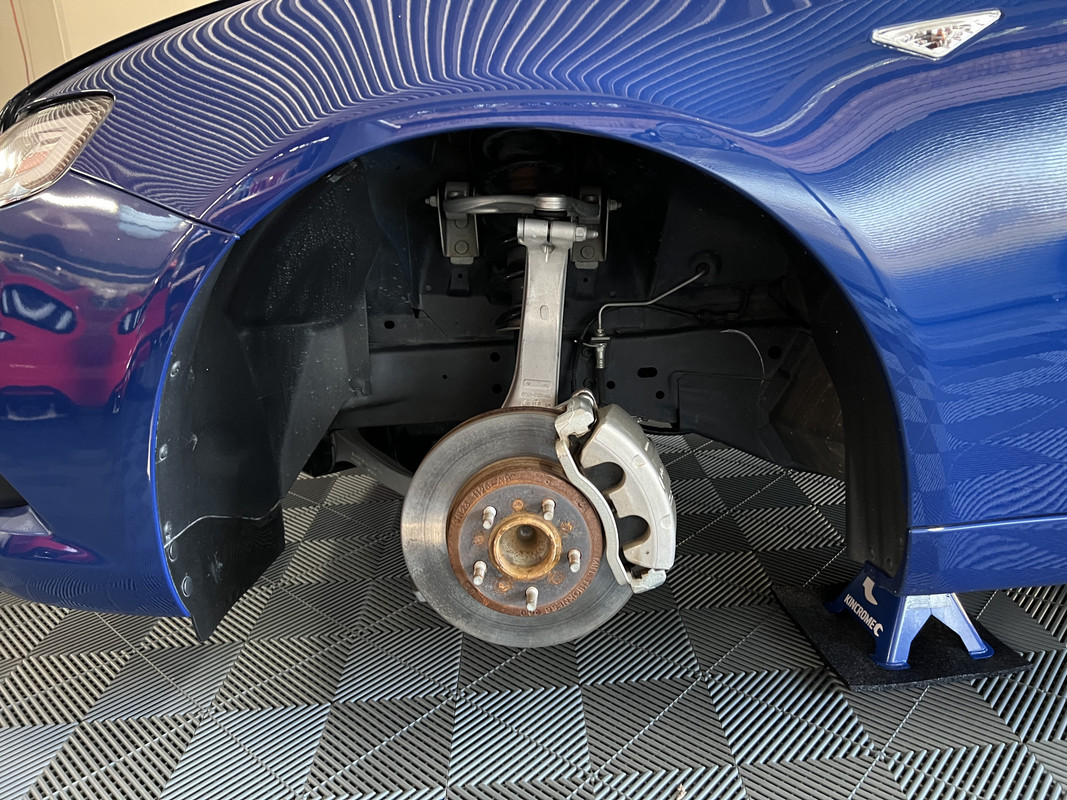
The BA Falcon was in some ways that moment for Ford, the difference being that those major upgrades were out of sync with the life cycle of the Falcon at the time. What I mean by that is going by the typical 8 - 10 year model cycles of previous models, the BA didn't get an all-new body to go with the major mechanical updates. That was obviously addressed with the FG a few years down the track. The thing is, because AU was such a disaster, Ford had to make an impact with the BA Falcon, but because the body shell needed to make another 6 years, they went for mechanical improvements instead. That sort of took some of the gloss out of the FG when it arrived in 2008 compared to the truly all-new VE Commodore.
I mention all that because the FG Falcon did in fact offer some significant upgrades save for the new sheet metal wrapping around the familiar mechanical package. The most obvious being the front suspension and steering. Where AU, BA and BF's had a similar double-wishbone layout, it was all cast iron. As seen above, the spindle, upper A-arm and split lower A-arm were all made of aluminum on FG. I remember it being one of the first things I noticed when I got the car.
Anyway, history lesson over.
And thankfully, it wasn't raining for today's efforts, although it was very windy. With cleaning and decontamination moved out into the driveway, I followed the same process as yesterday. Having done similar jobs like this before, having the right chemicals on hand makes it a walk in the park.
Once again, those bloody PS3's wouldn't let go of the dressing. Even with a sledgehammer in the form of ReTyre, I still had to break out the Tarminator. You can see the dressing residue still clinging to the sidewall prior to cleaning below...........
One stripped tire and one ruined towel..............

Polished and coated. I had to break out the CutMax on these two, for some reason these had some deeper scratches that wouldn't clear up with Perfect Finish.
After cleaning the wheel arches, suspension parts and polishing the calipers, the wheels went back on and the car lowered back to ground. On the last wheel and last lug nut, I had to re-use one of the old lugs because the new one had some galled-up threads. I picked from the best of the old ones, gave it a polish and no would pick the difference..............except me.
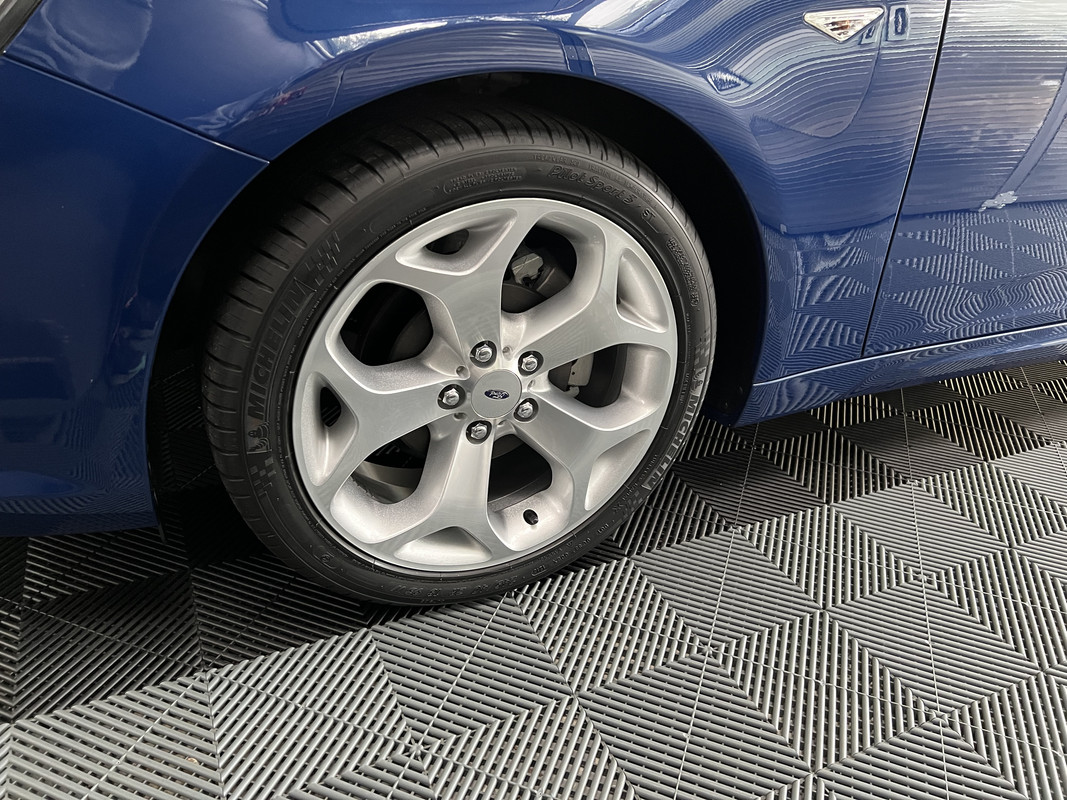
With the wheels now clean, polished and coated and back on the car, there is a problem. Well, I knew this was going to be a problem as soon as I took the first wheel off yesterday......................


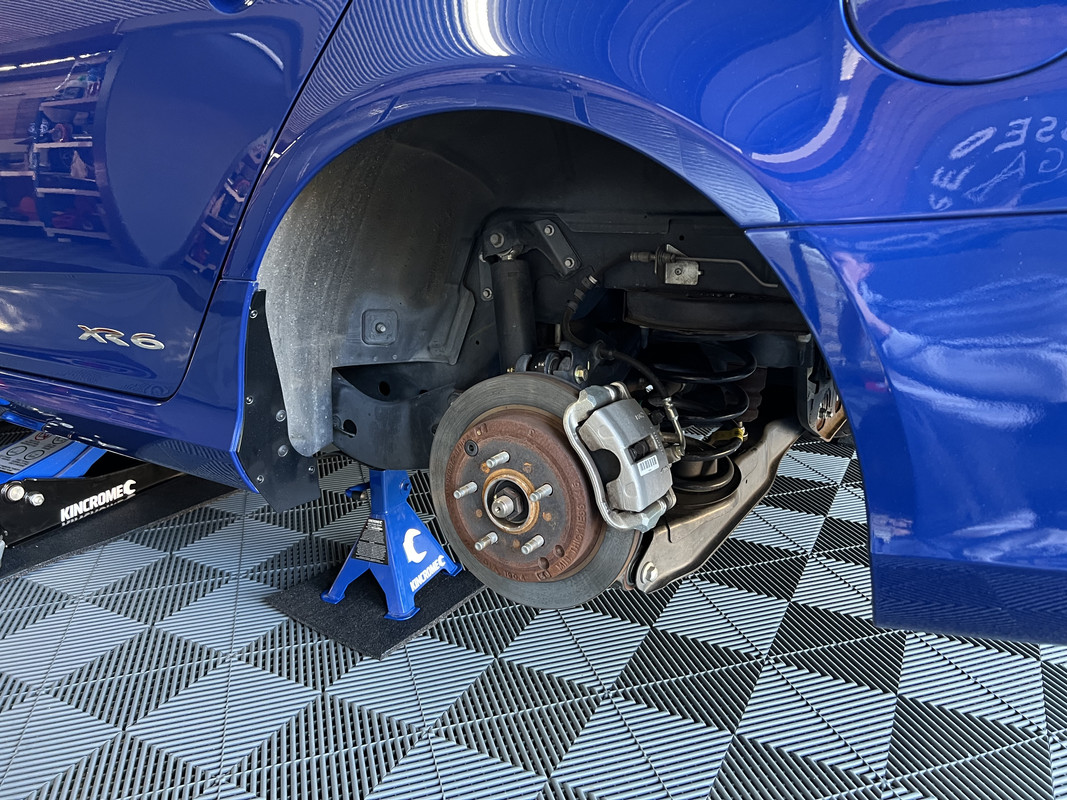
Those dust shields should be matte black in colour. They are 15 years old and I guess frequent washing didn't help the situation. :lol Fitted to the car with the wheels on, the degradation is less obvious but..................well, you should know by now that would bother me.
The simple solution would be to sand, prime and repaint them. The cold and windy weather didn't inspire me to do that. So, the even simpler solution was to replace them. A quick call to the Ford dealer and I have four new ones arriving tomorrow. Which means taking the wheels off again. Ah well, at least I get to use my torque wrench again! 
These dust shields are largely useless on FG Falcon's with the entry level PBR brakes. Anyone who had an early BA Falcon would disagree with that, those were very dusty in comparison. Many would simply remove the dust shields, but I like how they cover up the rusty rotor hats.
So that's the next job, replacing the dust shields. I will then re-dress the tires. I think I might even have a go at replacing the rubber bump stops on the rear suspension, which seems like an easy job for a mechanical noob like me.
Oh, and I still need a lift.
-
Post Thanks / Like - 0 Thanks, 4 Likes, 0 Dislikes
Similar Threads
-
By Matador in forum Auto Detailing 101
Replies: 7
Last Post: 08-11-2021, 06:22 PM
-
By Nick McKees37 in forum How to Articles
Replies: 3
Last Post: 02-17-2015, 11:14 AM
-
By Mike Phillips in forum Off-Topic
Replies: 5
Last Post: 09-17-2010, 09:47 PM
-
By Mike Phillips in forum PICTURES: 3-Day CAR Detailing Bootcamp Classes
Replies: 20
Last Post: 06-28-2010, 03:05 PM
-
By Mike Phillips in forum How to articles
Replies: 3
Last Post: 06-23-2010, 01:00 PM
 Members who have read this thread: 86
- KirkH,
- cb804,
- ev780,
- Dyerlog,
- mikeinauburn,
- GrnEyeDog,
- AMarkham40,
- FocusSTguy,
- melF1fan,
- jstollar,
- PaulMys,
- Gridlink,
- barryscott,
- Dynoguy,
- The Guz,
- Jplouch,
- ellens2,
- no cigar,
- Bosko,
- D.BRITT,
- cyclops,
- delt1964,
- tradecraft1,
- chris87,
- vaced,
- John U,
- jrose0070,
- Danube,
- aannatshlzea6696,
- ollever,
- 02whitetundra,
- VISITOR,
- Rsurfer,
- 11Silverado,
- Desertnate,
- Ace22,
- damonb10,
- JSkibisky,
- georgia boy,
- chris12,
- larr12,
- gibby68,
- filhotran,
- Awickedtruth,
- Alansr,
- DG3.7,
- eveausasdy529,
- pdl2mtl90,
- Mklauss,
- T-STeve,
- ajdavies91,
- Silly Rabbit,
- Thunderchicken,
- 2FORDS,
- Vegas1,
- Odrapnew,
- WillSin865,
- 4getgto,
- BTW574,
- Wknd Dtlr,
- bill walsh,
- Optimus Grime,
- RippyD,
- TroyScherer,
- DanaDetailingPros,
- Texchappy,
- scottlee,
- bapatickmjnra7168,
- dbeng,
- chefwong,
- brianshaeffer,
- Dirty Harry,
- Azure,
- oneheadlite,
- chilly,
- SNP209,
- msharpe785,
- kappy,
- Tasmania,
- gregory1420,
- hansen97,
- wierdkid,
- DFB,
- Karl_in_Chicago,
- Setec Astronomy,
- Prange
Posting Permissions
- You may not post new threads
- You may not post replies
- You may not post attachments
- You may not edit your posts
-
Forum Rules
|
| S |
M |
T |
W |
T |
F |
S |
| 28 | 29 | 30 |
1
|
2
|
3
|
4
|
|
5
|
6
|
7
|
8
|
9
|
10
|
11
|
|
12
|
13
|
14
|
15
|
16
|
17
|
18
|
|
19
|
20
|
21
|
22
|
23
|
24
|
25
|
|
26
|
27
|
28
|
29
|
30
|
31
| 1 |
|


 Reply With Quote
Bookmarks