 Dislikes: 0
-
 Re: Pictures: Autogeeks Roadshow Class with PRAXIS Detailing in Auburn, Indiana Re: Pictures: Autogeeks Roadshow Class with PRAXIS Detailing in Auburn, Indiana
 Originally Posted by RACLARK

Mike
I'd Had a Great Time and took in a Lot of info.
Meet a Lot Great People and made friends in the Process. Vast amount of Info was Shared, and a Great learning Experience.
Thank You so much for Your Time and to the Host Mike Liebing as well.
The Equipment Used was Great and Learn how To used Each One .
The Cars were of a vast varieties, and Learn how to make One, 100% Better then when we started , with Great People as a Team to make them look Great.
Thank You to the Team and to Both Mike's
Roger Clark

Hey Roger thanks for bringing your cars and being motivated to help in any way, nice to have you at the class.
-
Re: Pictures: Autogeeks Roadshow Class with PRAXIS Detailing in Auburn, Indiana
Awesome work Team! And many cool and beutieful cars you worked on!
Great to learn by doing hands on teaching. And Mike Phillips is an awesome guy and really does something extra ordinary with his classes.
Thanks for shareing the 2-day detailing class with us.
/ Tony
-
Re: Pictures: Autogeeks Roadshow Class with PRAXIS Detailing in Auburn, Indiana
Originally Posted by 57Rambler
Got any pics of the Goat's 389 engine ?

Getting some....

-
Re: Pictures: Autogeeks Roadshow Class with PRAXIS Detailing in Auburn, Indiana
Continued....
Here's another topic we cover at ALL our car detailing classes and that is,
How to correctly clean and protect a canvas convertible top
Our classes include,
3-day Bootcamp Classes at Autogeek in Stuart, Florida --> January - May - September
2-Day Roadshow Classes - All across the United States of America
>>> Click here for info on upcoming car and boat detailing classes <<<<
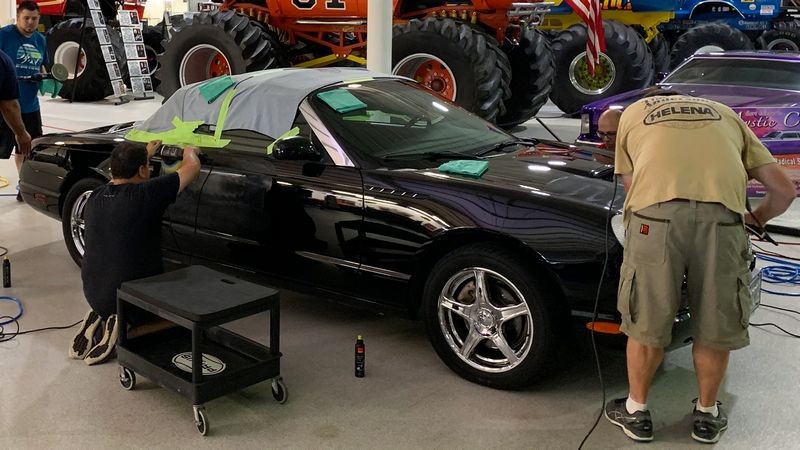
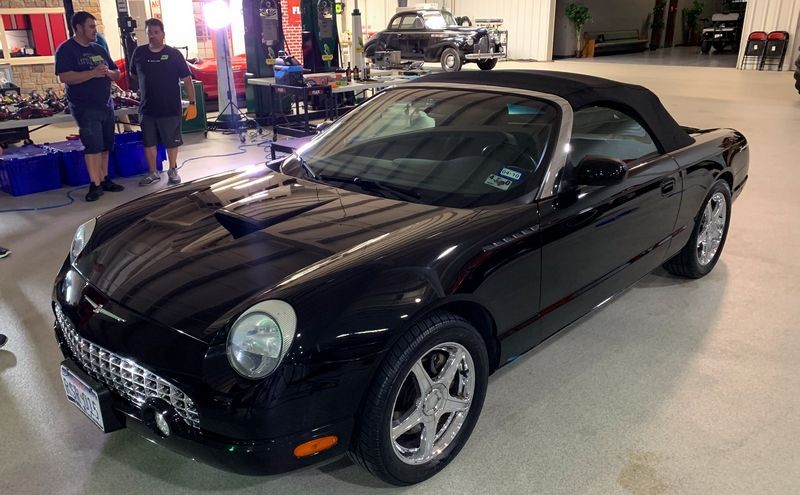
Now onto the convertible top this class washed and protected on the 2004 Ford Thunderbird.
Step 1: Wash, clean and dry the top.
- Vacuum loose dirt out of the weave.
- Blow-out loose dirt out of the weave.
- Blass off loose dirt using a strong spray of water
- Spray RaggTopp Fabric/Vinyl Cleaner onto top.
- Agitate RaggTopp Cleaner using the RaggTopp Convertible Top Brush
- Thoroughly rinse all loosened dirt and road grime off the top until water sprayed on top runs clear.
- Move car where top will remain clean and fully dry.
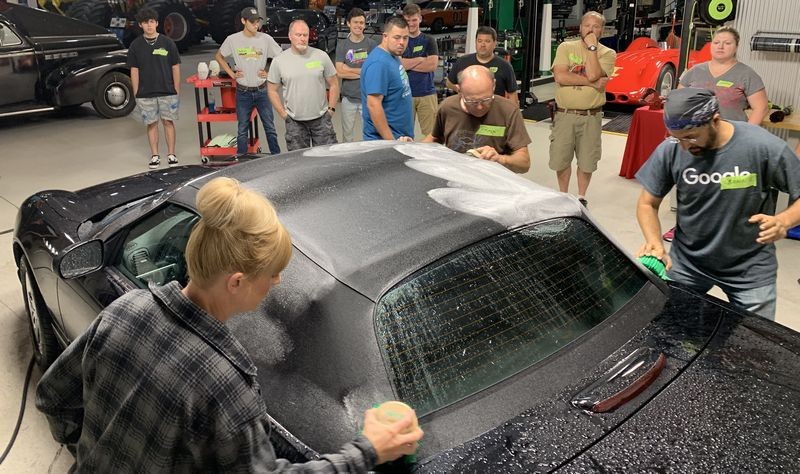
Spraying RaggTopp Fabric/Vinyl Cleaner onto top after first rinsing and wetting the top.

After spraying the cloth top down with the RaggTopp cleaner, the class then uses the RaggTopp and Haartz Convertible top brushes to safely scrub the cloth fibers that make-up the top.
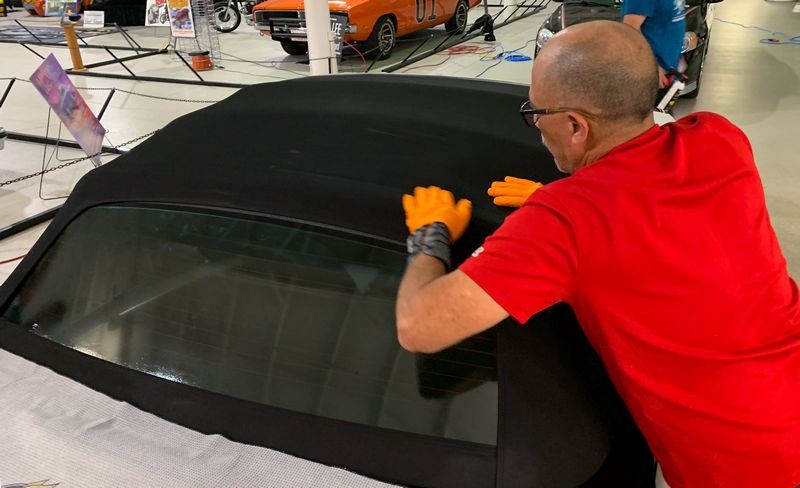
After thoroughly rinsing, the blotting technique is shown for safely drying a cloth top. We also go over the reason WHY to use the blotting technique. Then the class uses Cobra Guzzler HD Waffle Weave Drying Towel to safely dry the water off and out of the top via capillary action.

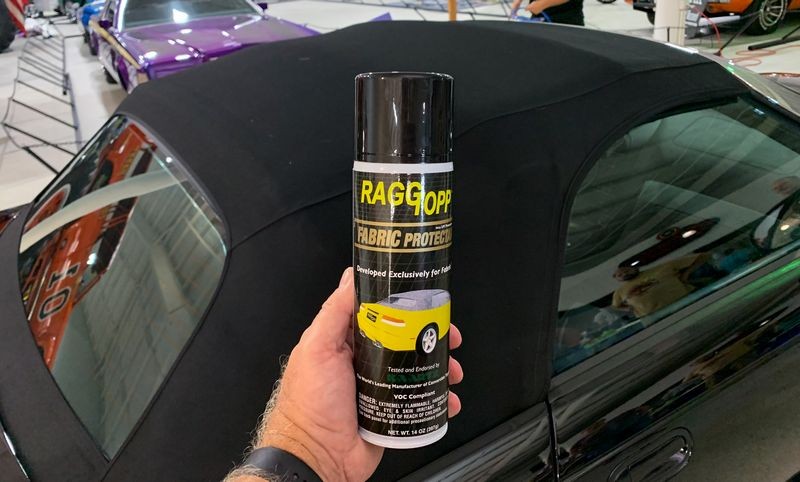
Step 2: Spray RaggTopp Fabric Protectant onto top.
- Hold spray about 8" to 10" away from top and lay down a heavy or wet application.
- Hold can so product sprays inward toward top to avoid overspray onto glass and body panels. (it will wipe off)
- Spray extra product onto any visible stitching.
- Wearing safety nitrile gloves, gently massage the product INTO the fabric.
- Allow product to fully dry and repeat until you empty the can on your car's top.
Here's Armando and Luis spraying the T-bird top with RaggTopp Fabric Protectant.


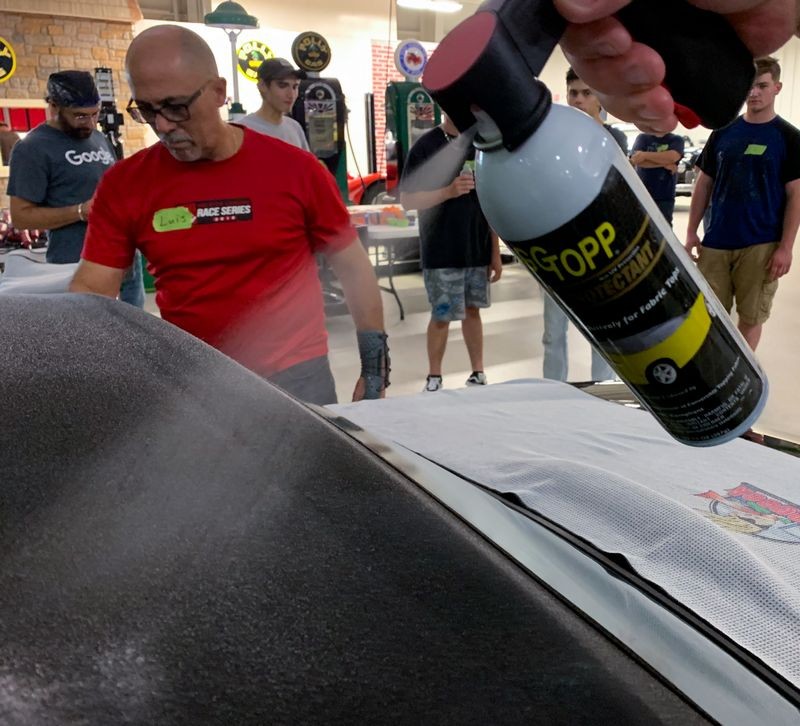

This is what a heavy or wet application looks like. Kind of looks like morning dew on the top.

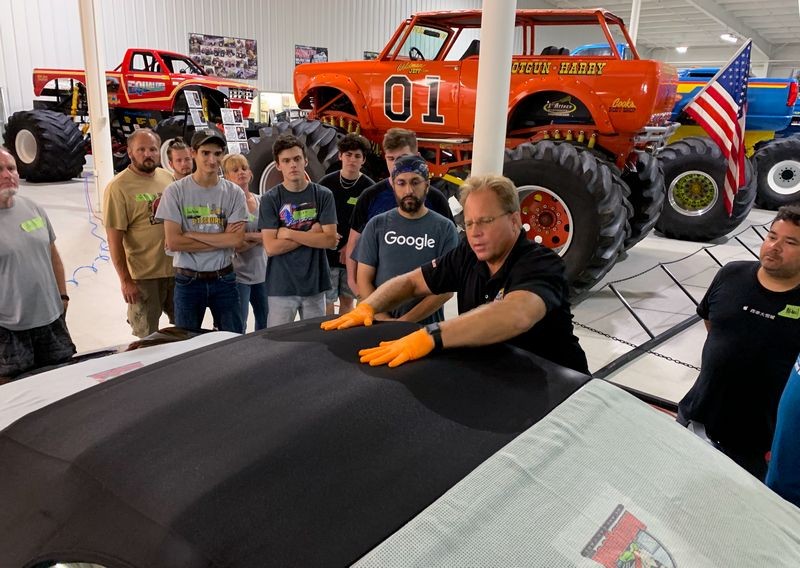
Mike Phillips Technique
The original directions state to let the product dry and then re-apply. In my way of thinking, I don't what the product sitting on TOP of the fabric drying, I want it INSIDE the fabric drying. So with the blessing of Rick Goldstein, (owner of RaggTopp), I show people to first put on some safety gloves and then massage the product into the weave of the cloth.

All colors of cloth
It's easy to see the dramatic before and after sides of the product sitting on the surface and where I've worked it INTO the cloth because this cloth top is BLACK. You should also do this for all other colors of cloth tops even though on lighter colores like white and tan cloth tops it's harder to see this before and after difference. The BIG PICTURE is to work the product in no matter what the color.
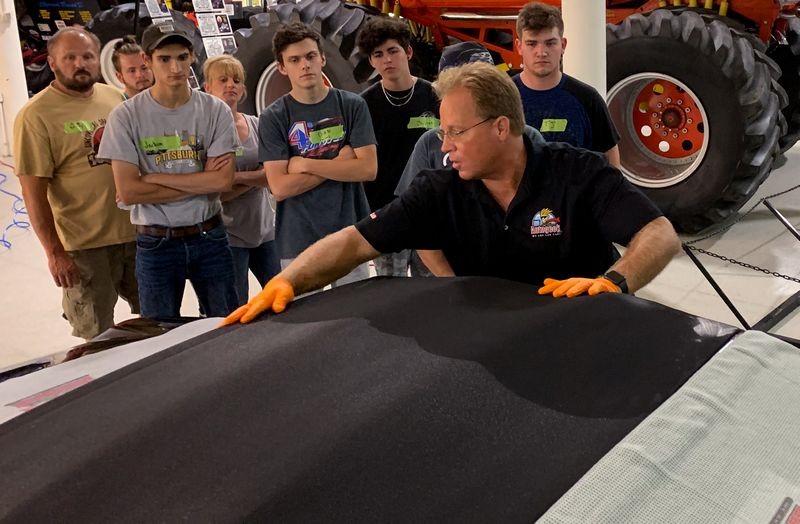
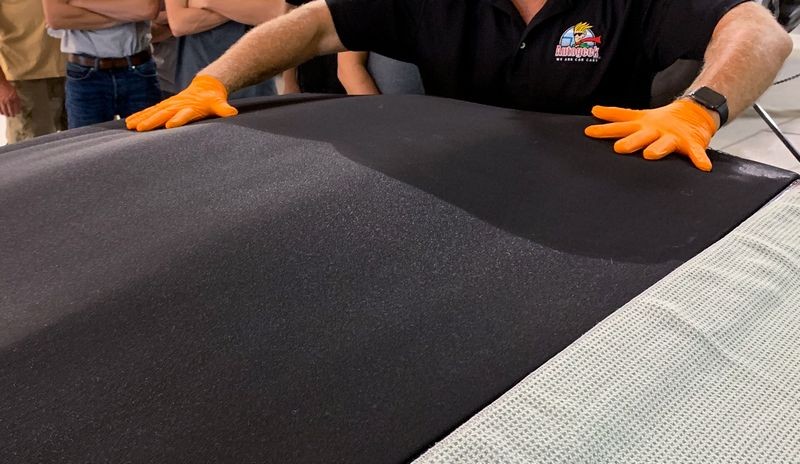
Here's Luis working the product into the cloth on the passenger side.
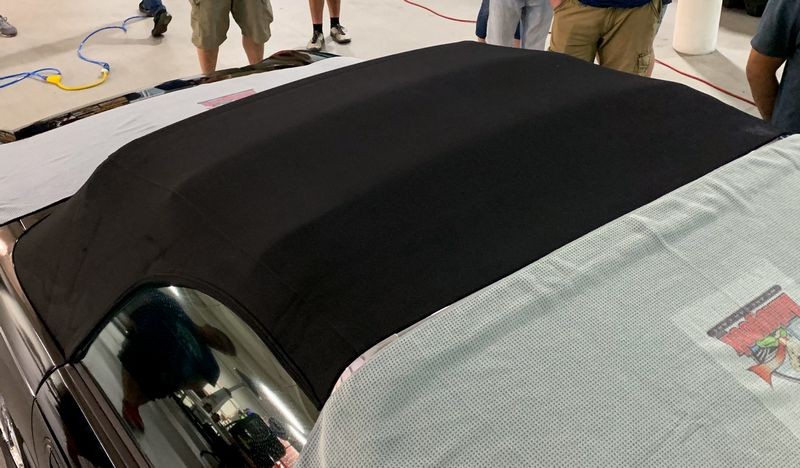
Here's the end results.
The cloth has a darker, fresher factory new look. Plus the waterproofing is restored and UV protection is restored.
-
-
Post Thanks / Like - 0 Thanks, 1 Likes, 0 Dislikes
-
Re: Pictures: Autogeeks Roadshow Class with PRAXIS Detailing in Auburn, Indiana
Continued....
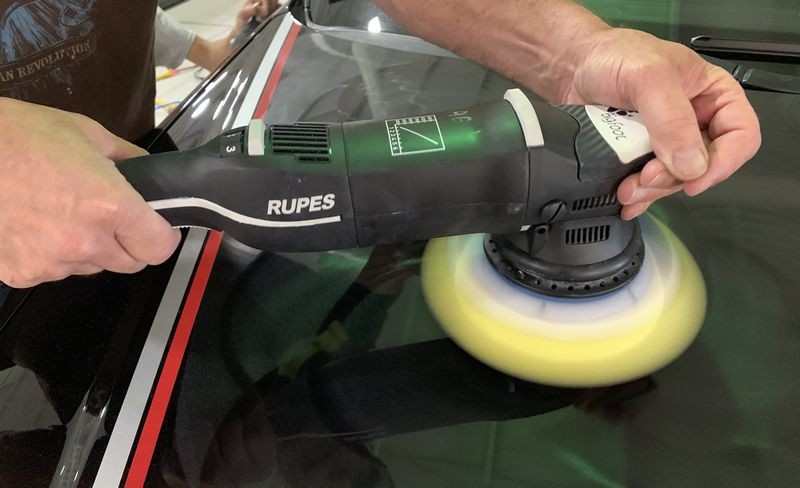
RUPES Detailing Academy - Roadshow Style!
Ever since Autogeek brought the RUPES line of tools into the Autogeek Store I've been showcasing the RUPES tools as a system. That's because if you read my how-to book,
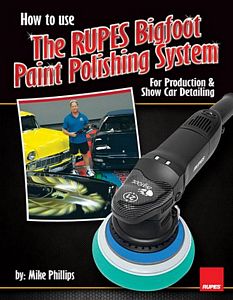
How to use the RUPES BigFoot Paint Polishing System
(for production detailing and show car detailing)
I explain that RUPES is not merely a tool, it's a complete and well-thought out paint polishing system. I probably have more how-to articles and reviews on RUPES products than anyone breathing. And as a professional courtesy to RUPES - I always show their tools with their pads and their products and do my best to stay on the RUPES message. (I also do this for all tool and product manufactures, it's my training from my days at Meguiar's)
Building on a foundation
I start all my car detailing classes with simple, 8mm free spinning random orbital polishers. The current tool I showcase is the Griot's 6" Random Orbital Polisher. This is basically a version of the ORIGINAL tool for the 8mm free spinning random orbital polishers and that is the Porter Cable 7424 and 7336 units. We sell both polishers here at Autogeek but the fact is - the Griot's version simply has a TON more usable power.
The BIG PICTURE being, I have people attend my classes from all walks of life from being brand new to detailing and machine polishing to being seasoned professionals. No matter what their background I start them out with what I consider to be the easiest tool to learn how to use and master and that's 2 things. Even Pros learn tips and techniques when I go over 8mm free spinning random orbital polishers.
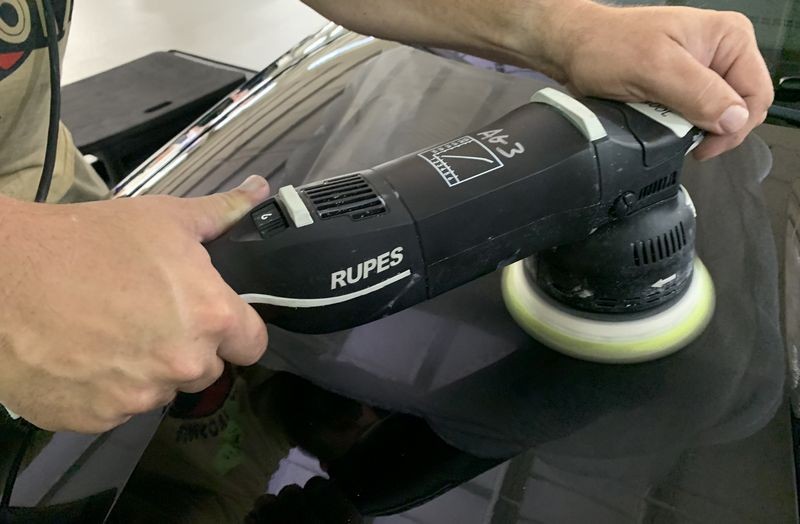
After we build the foundation for right and wrong techniques - NEXT we move onto the RUPES line of polishers. I NEVER say RUPES or any brand of long stroke polisher is more difficult to use than the simple 8mm tools, but I do think that they require a tick more technique and skill to maximize their potential. Read that carefully because I'm a veteran of the Zaino vs NXT Wax Wars and every word I type online I pick with purpose. If I write it - I can defend it. No one takes what I write apart over a single word.
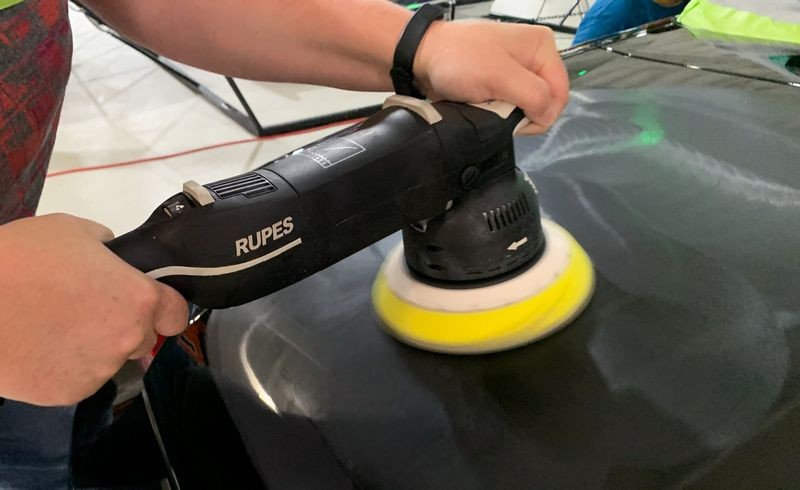
The RUPES Tools
The BigFoot electric polishers include,
21mm BigFoot Legacy, Mark II and Mark III
15mm BigFoot Legacy, Mark II and Mark III
12mm Duetto and Mini
The RUPES Mille
RUPES also has introduced a 5mm gear-driven orbital polisher. It is not referred to as a RANDOM orbital polisher because the gear-drive means a FIXED orbit pattern. Free spinning orbital polishers, because they are NOT gear-driven results in a RANDOM orbital pattern and that's because they are not gear-driven the backing plate and pad can make random orbital patterns depending upon a number of factors like,
- Tool speed.
- Pad size, thickness and weight.
- Technique - how the tool is held.
- Shape of body panel.
- Etcetera
The Mille is "like" the FLEX XC 3401 aka the BEAST except that the BEAST offers an 8mm gear-driven orbit pattern. So,
Mille = 5mm orbit pattern
BEAST = 8mm orbit pattern
I let the students use ALL the tools and let them decide which tools they like and that includes these two powerful gear-driven orbital polishers.
RUPES Nano
RUPES also offers the very cool Nano polisher in long and short neck versions. I bring both versions to the class. The Nano tools come with 3 different swappable drive units called orbit connector and/or eccentric set. By choosing which swappable connector or unit you install into the head of the Nano you can choose from one of the below 3 drive options.
3mm free spinning random orbit connector
12mm free spinning random orbit connector
Rotary pattern eccentric set
Here's my article on their with pictures and more info.
RUPES Terms - Eccentric Set and Orbit Connector - Nano iBrid Tools
And if you ever purchase a RUPES Nano - be sure to read this before making a mistake.
RUPES 2" Backing Plate not for use with the rotary connector and the RUPES Nano iBrid in Rotary Mode
RUPES Rotary Polisher
I have 1 RUPES rotary polisher in the entire collection of tools at Autogeek. I have LOTS of corded and cordless FLEX PE14 rotary polishers as FLEX provided these free of no charge. FLEX knows how hands-on my classes are and takes advantage of this touch point to get their tools into the hands their target market. During the RUPES detailing session we don't use the RUPES rotary polisher just like we don't use the FLEX PE14s during the FLEX detailing session. I reserve rotary buffers for the wetsanding class when yu learn the most efficient tools to use to remove sanding marks.
If you want more info on the RUPES rotary polisher or you would like to see some pictures, check out my review
Review: RUPES BigFoot LHR 19E Rotary Polisher by Mike Phillips at Autogeek
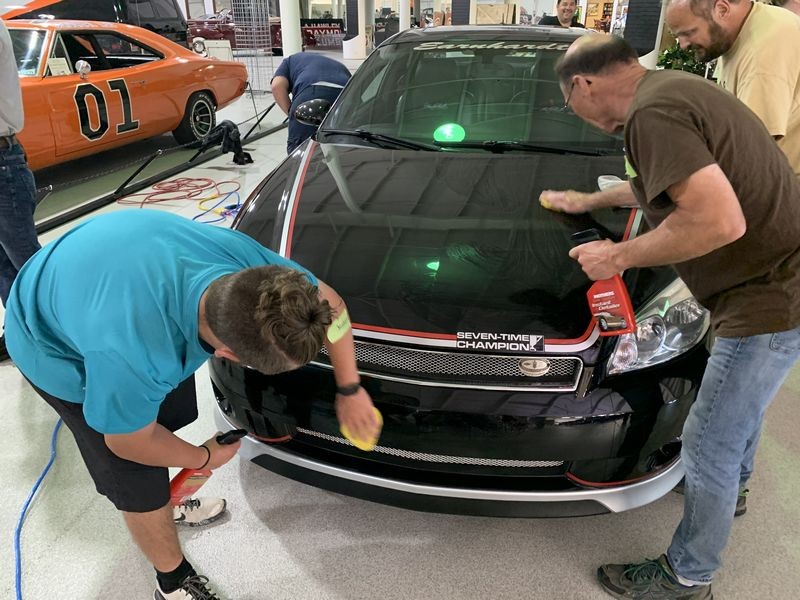
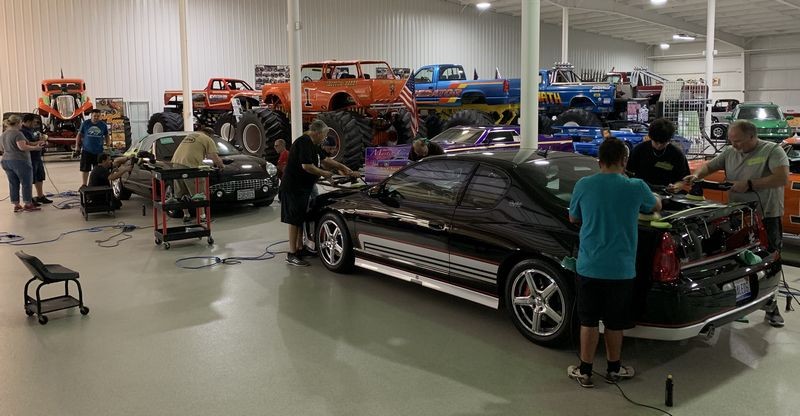
Now that I've covered some background information about RUPES tools and how our classes flow, let's take a look at the pictures taken as the class detailed 2 more cars at this Roadshow Car Detailing Class
-
-
-
-
Re: Pictures: Autogeeks Roadshow Class with PRAXIS Detailing in Auburn, Indiana
Continued....
Next up is the Griot's Garage Detailing Class!
Griot's BOSS Long Stroke Orbital Polishers
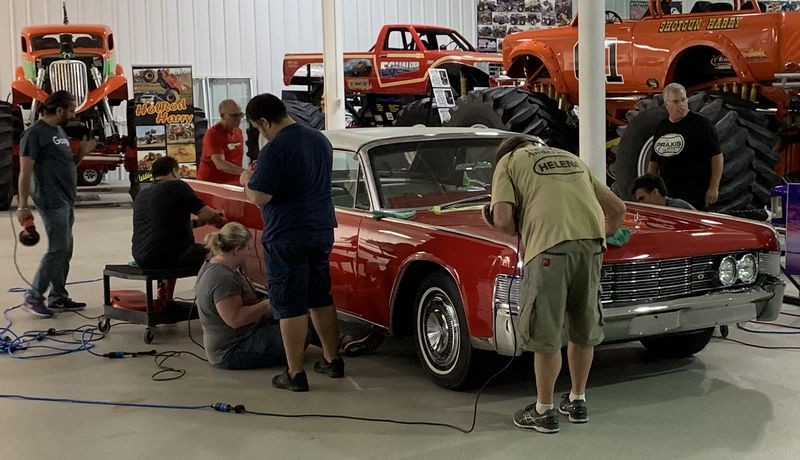
I like to let the class use the Griot's long stroke BOSS polishers, BOSS pads and BOSS creams immediately after using the RUPES system and let them make up their own mind as to which tools and paint polishing system they like best. And as you'll see - everyone is on their feet working with the tools. No chairs. No sitting.
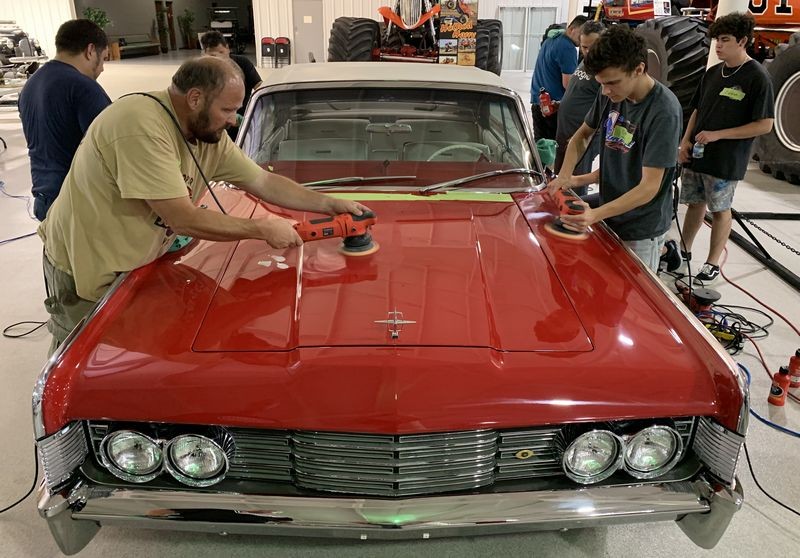
For this class they will be working on the 1965 Lincoln Continental and the 1939 Lincoln Zypher!
1939 Lincoln Zypher
Step 1: We did a waterless wash using BLACKFIRE Paint Prep. (sorry no pictures)
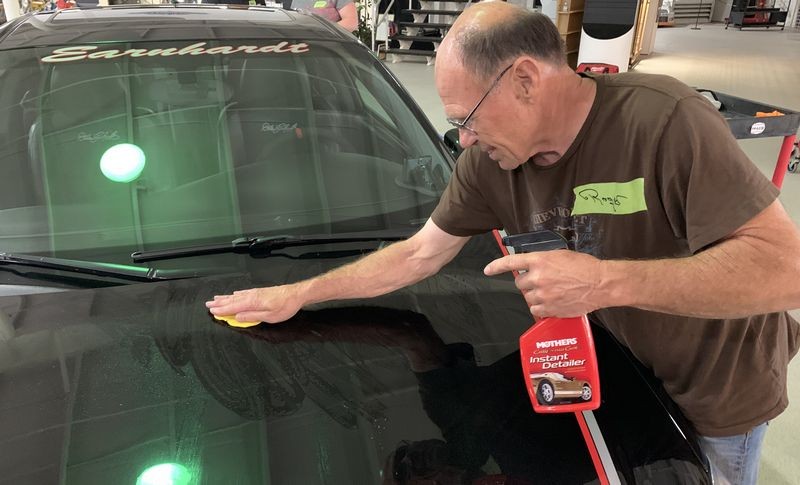
Step 2: We did the Baggie Test and discovered the paint was lightly contaminated so we used Mother's Detailing Clay plus Nanoskin Towels to mechanically decontaminate the paint, glass and trim.
Here's Jackson using traditional detailing clay to remove above surface bonded contaminants.
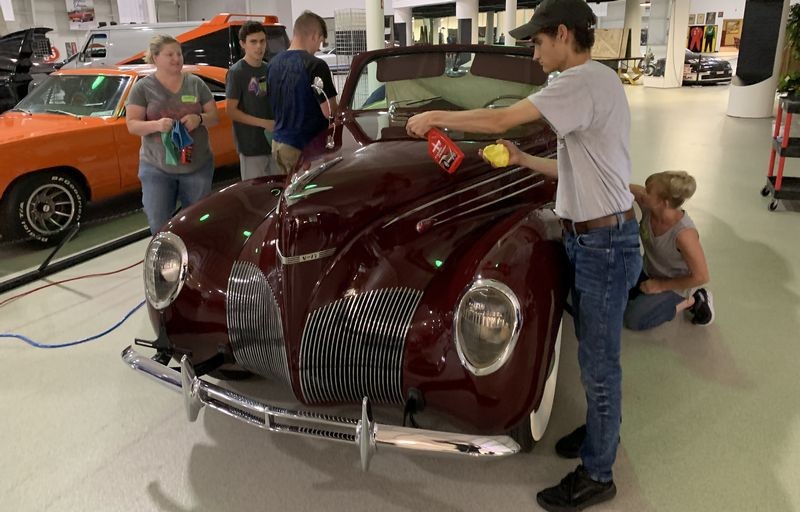
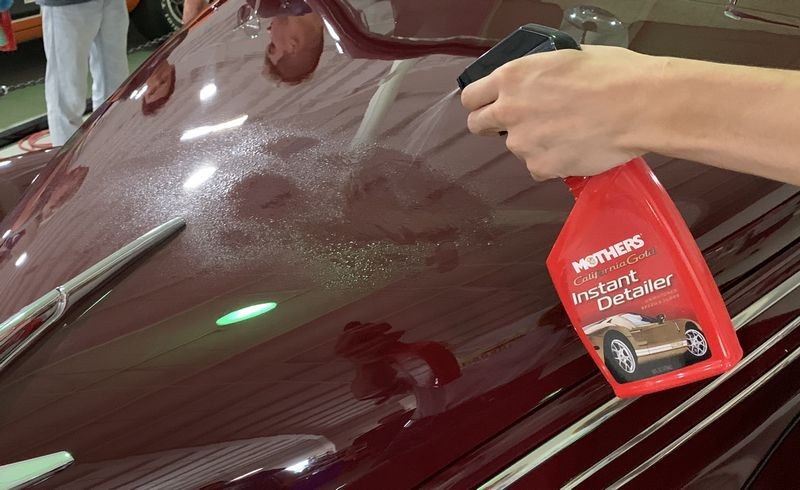
First lubricate the paint using Mothers Instant Detailer
Then form the clay bar into a patty and rub it over the paint.

Step 3: Perform a Test Spot - (no pictures)
Our Test Spot found we needed the Griot's Correction Cream with the BOSS orange foam cutting pad to remove the paint defects to our satisfaction and to restore a true show car finish.
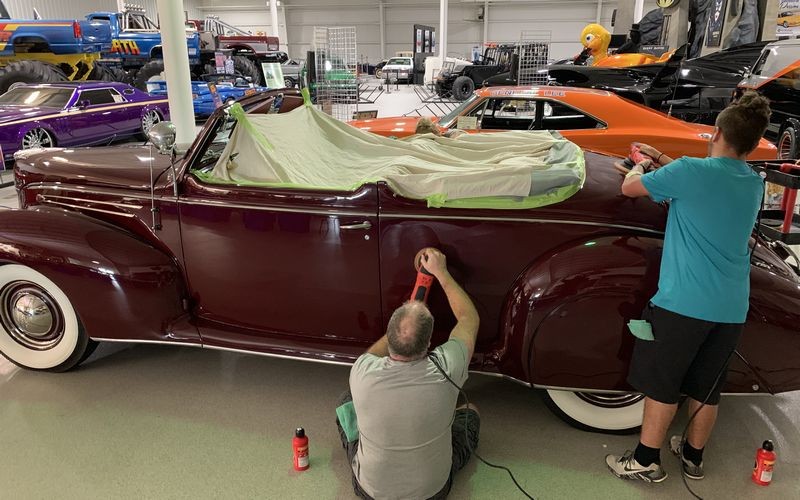
Step 4: Machine compounding using the Griot's BOSS Correction Cream
Below is Eric and Josh using the Griot's BOSS polishers to remove the swirls and scratches.
Note the blanket covering the leather interior to protect it from any splatter dots.


Here's Jamie removing the swirls and scratches out of the THIN PANEL of paint in-between the trim on the side of the hood.


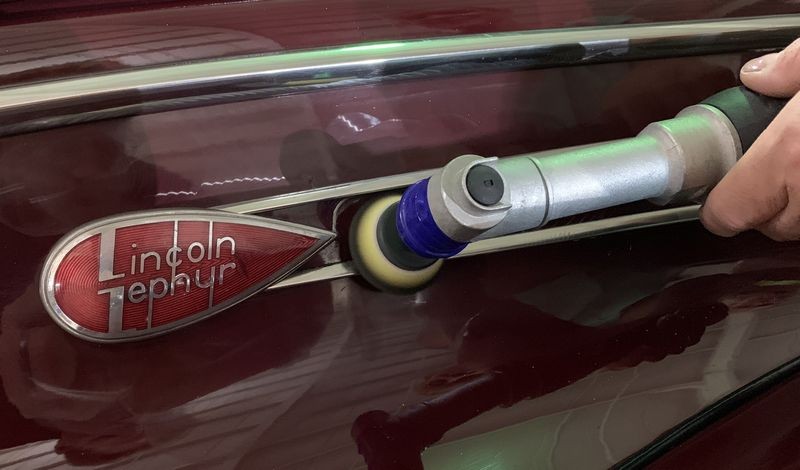
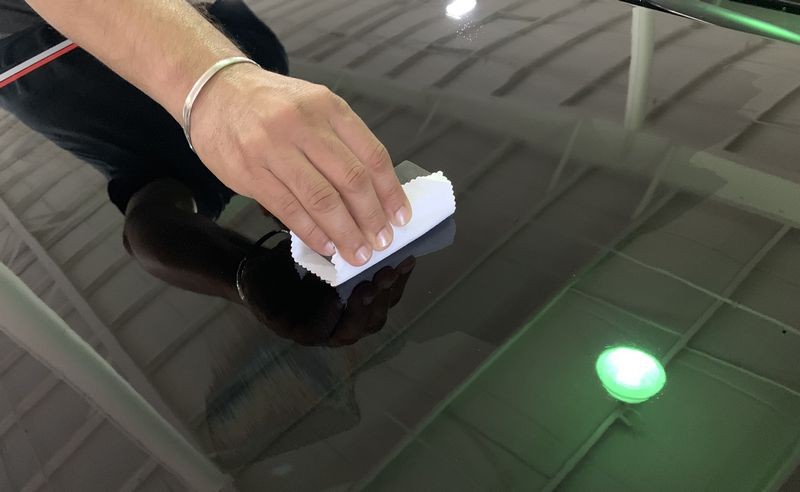
And then polishing the glass and trim on the emblem...

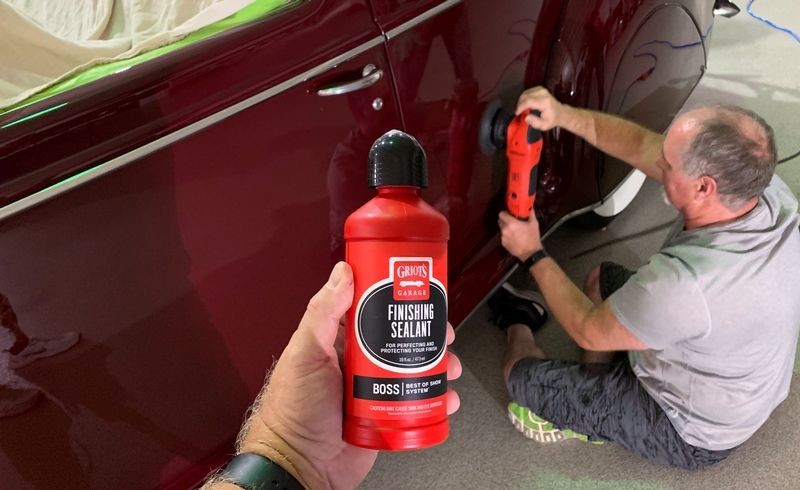
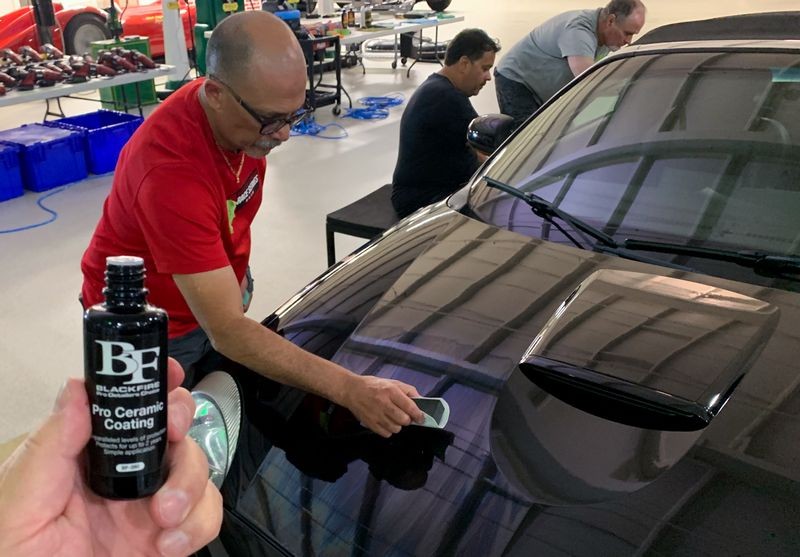
Step 4: Machine polishing and SEALING the paint in one step
The Finishing Sealant in the BOSS system is both a fine cut polish plus a synthetic sealant, so technically it's a cleaner/wax or even more technically a
Cleaner/Sealant or AIO
This means it will maximize the gloss and clarity created by the BOSS Correction Cream while sealing the paint in one step.
 f f


Jamie and Roger giving the paint a final wipe. In the back is Eric carefully removing tape and the cloth covering the interior.

1966 Lincoln Continental Convertible
The paint on this car was filled with HOLOGRAMS. I may have some before pictures somewhere, maybe not. But I used this car to share and educate exactly what holograms are by how they look. Just to clarify, holograms are a specific scratch pattern inflicted by a ROTARY BUFFER and only a rotary buffer.
Step 1: Wash the car and decontaminate the paint.
We washed the Continental first thing Saturday morning. This also included properly cleaning the vinyl top using 303 products.
Wheels and tires first
This car has full cover hubcaps and whitewall tires, so we go over tools, products and techniques for these types of wheels and tires.
NOTE: Class - as you read this - remember what we learned about breaking off rubber valve stems and how to avoid this issue.

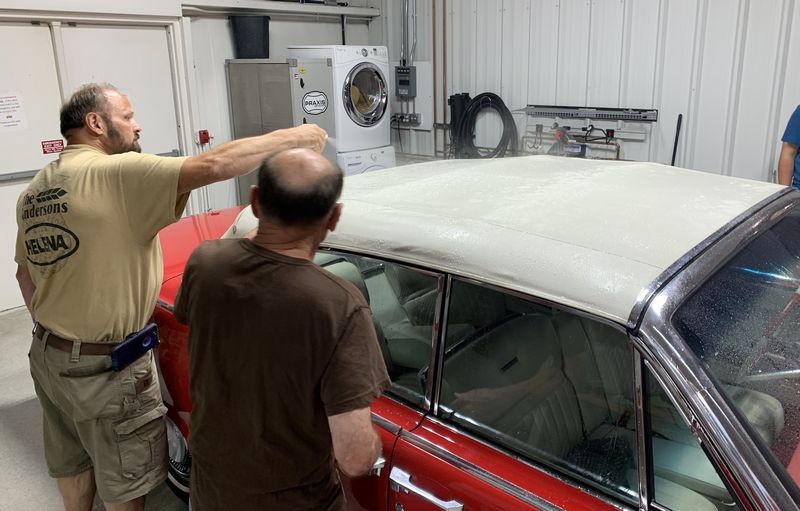
Properly cleaning a vinyl top
303 Multi-Surface Cleaner is a personal favorite cleaner of mine. I shared the story about my vibrant white tennis shoes and how I stained them before driving to work at Barrett-Jackson this year for Detail Fest and how after trying 2 to 3 other name brand cleaners, that didn't work, I used the 303 Multi-Surface Cleaner and it absolutely removed the orange color from the tongue of my brand new tennis shoes.
In the same way, it SUPRE cleans this dirty, extremely neglected vinyl top.
303 Patio Furniture Cleaner, Multi-Surface Cleaner


Step 2: Do a Test Spot
Our test spot shows that the BOSS Correcting Cream was more than aggressive enough to remove the holograms.
(no pictures for the test spot)
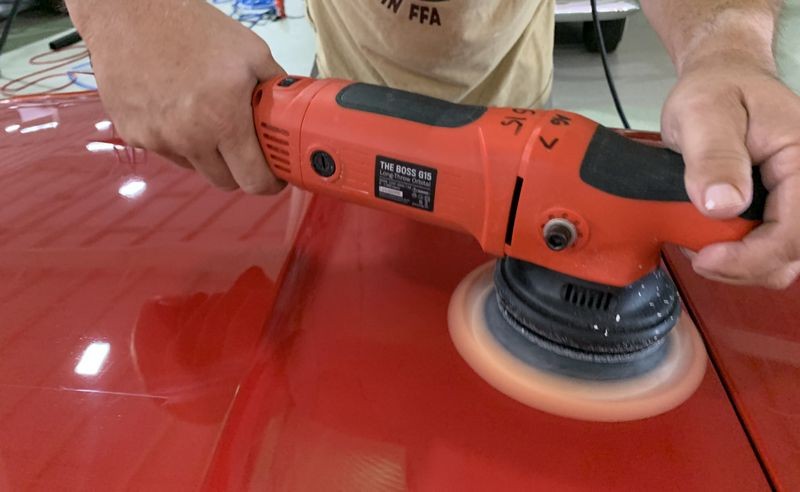
Step 3: Machine correct the paint
The class used the Griot's BOSS Long Stroke polishers, the BOSS Correcting Cream and the BOSS orange foam cutting pads.
Here's Mike using the BOSS 15 on the hood.

Here's Ronnie using the BOSS 21

Here's Michael, (or at least Michael's hand) inspecting his results using the SCANGRIP Sunmatch II swirl finder light.

Mike and Dan correcting the hood...
The teams really start to gel after a few cars....
Step 4: Machine polishing and SEALING the paint in one step
The Finishing Sealant in the BOSS system is both a fine cut polish plus a synthetic sealant, so technically it's a cleaner/wax or even more technically a
Cleaner/Sealant or AIO
This means it will maximize the gloss and clarity created by the BOSS Correction Cream while sealing the paint in one step.
Here's Jennifer using a yellow BOSS foam polishing pad with the BOSS Finishing Sealant to perfect and seal the paint in one step.

-
Post Thanks / Like - 0 Thanks, 1 Likes, 0 Dislikes
Similar Threads
-
By Mike Phillips in forum 2-Day ROADSHOW Car Detailing Classes - Info & Dates
Replies: 6
Last Post: 07-27-2020, 02:25 PM
-
By Mike Phillips in forum 2-Day ROADSHOW Car Detailing Classes - Info & Dates
Replies: 8
Last Post: 07-13-2019, 06:41 PM
-
By Mike Phillips in forum 2-Day ROADSHOW Car Detailing Classes - Info & Dates
Replies: 3
Last Post: 07-06-2019, 09:55 AM
-
By Mike Phillips in forum 2-Day ROADSHOW Car Detailing Classes - Info & Dates
Replies: 8
Last Post: 04-23-2019, 03:35 PM
-
By Mike Phillips in forum 2-Day ROADSHOW Car Detailing Classes - Info & Dates
Replies: 15
Last Post: 08-16-2018, 08:39 PM
 Members who have read this thread: 0
There are no members to list at the moment.
Posting Permissions
- You may not post new threads
- You may not post replies
- You may not post attachments
- You may not edit your posts
-
Forum Rules
|
| S |
M |
T |
W |
T |
F |
S |
| 30 |
1
|
2
|
3
|
4
|
5
|
6
|
|
7
|
8
|
9
|
10
|
11
|
12
|
13
|
|
14
|
15
|
16
|
17
|
18
|
19
|
20
|
|
21
|
22
|
23
|
24
|
25
|
26
|
27
|
|
28
|
29
|
30
|
31
| 1 | 2 | 3 |
|


 Thanks:
  Likes:


 Reply With Quote
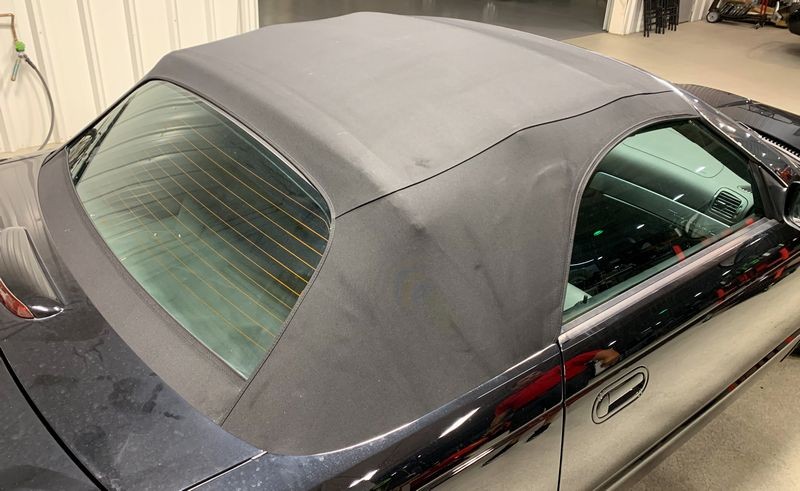


Bookmarks