 Thanks: 0
 Dislikes: 0
-
323 Pictures - Autogeek's Hands-On Roadshow Detailing Classes!
323 Pictures - Autogeek's Hands-On Roadshow Detailing Classes!
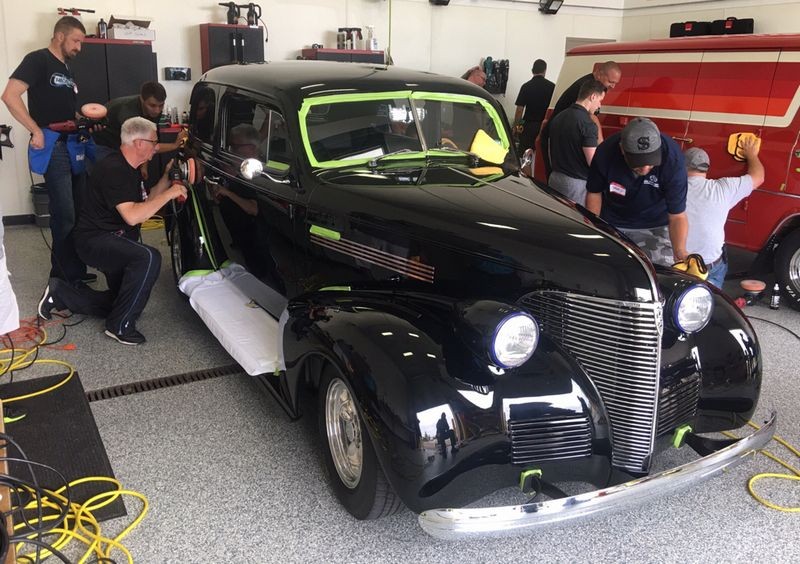
Over the weekend of August 12th & 13th, Autogeek held their first official roadshow detailing class in Oconomowoc, Wisconsin in the training garage of Lake Country Pad Manufacturing.
Because I know that most people have no idea what they get to do, what tools they get to use and the topics covered, we took a LOT of pictures at this class to document visually what attending one of our classes is like.
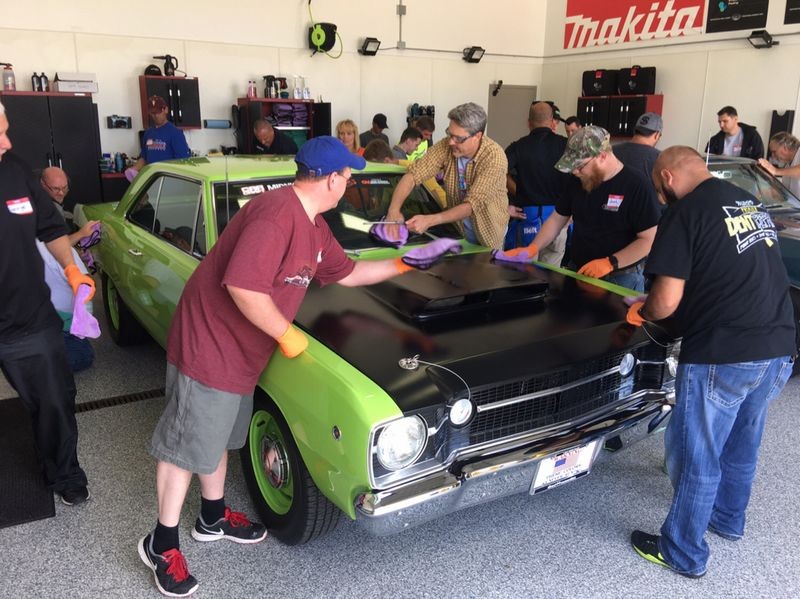
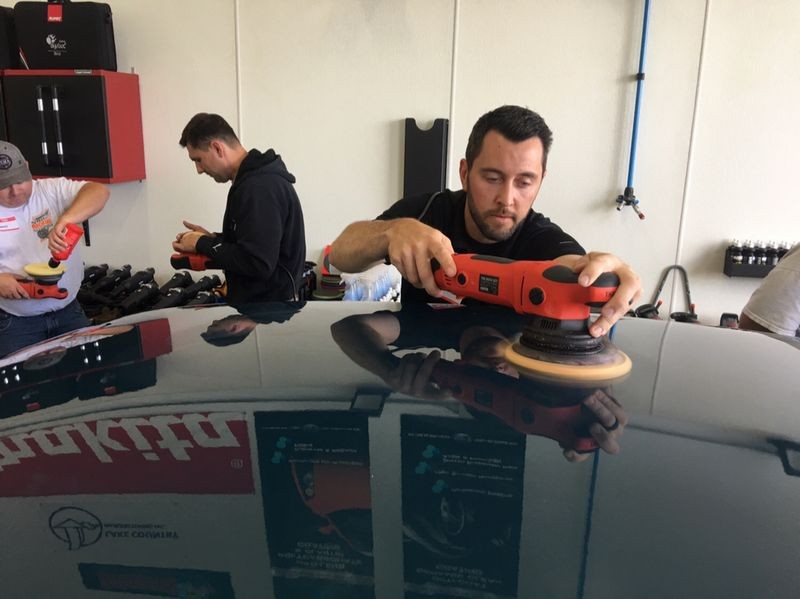
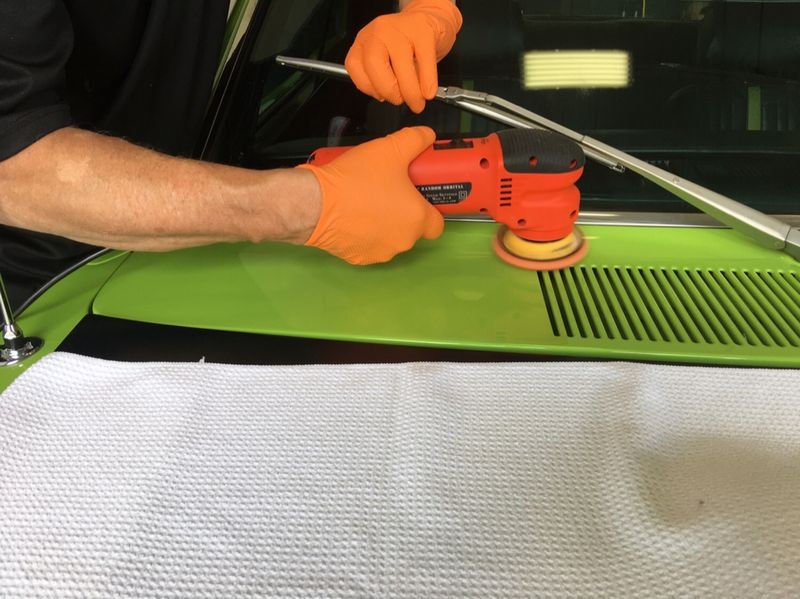
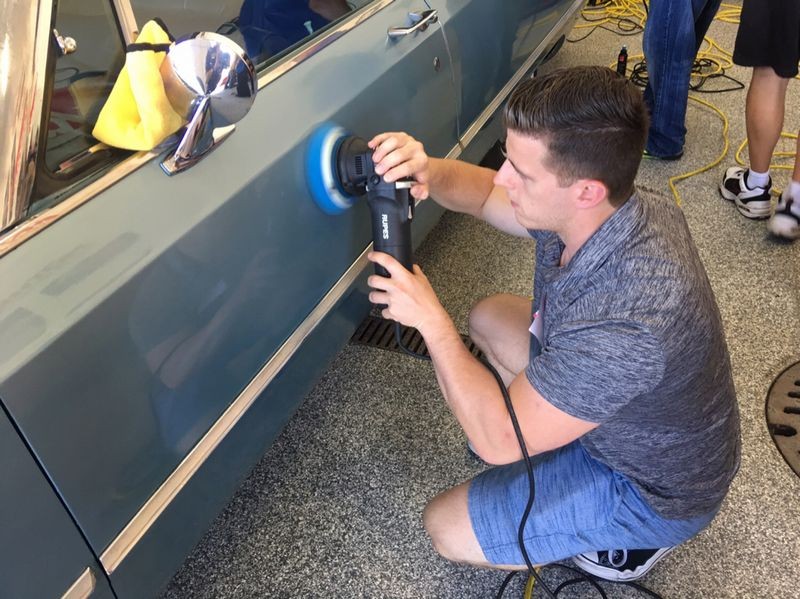
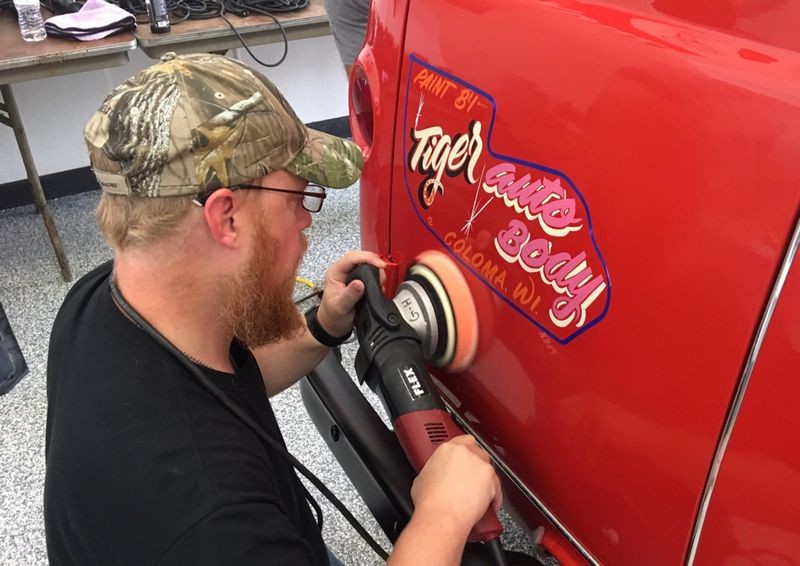
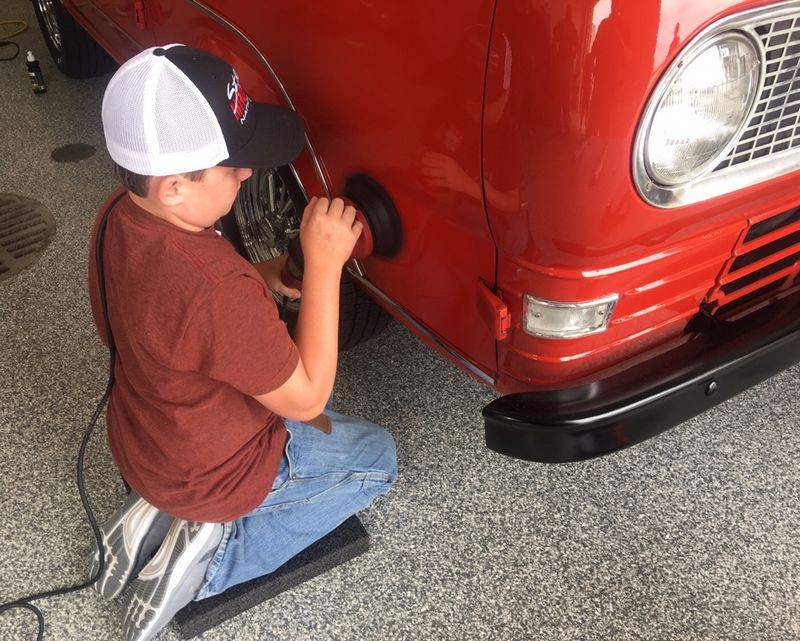
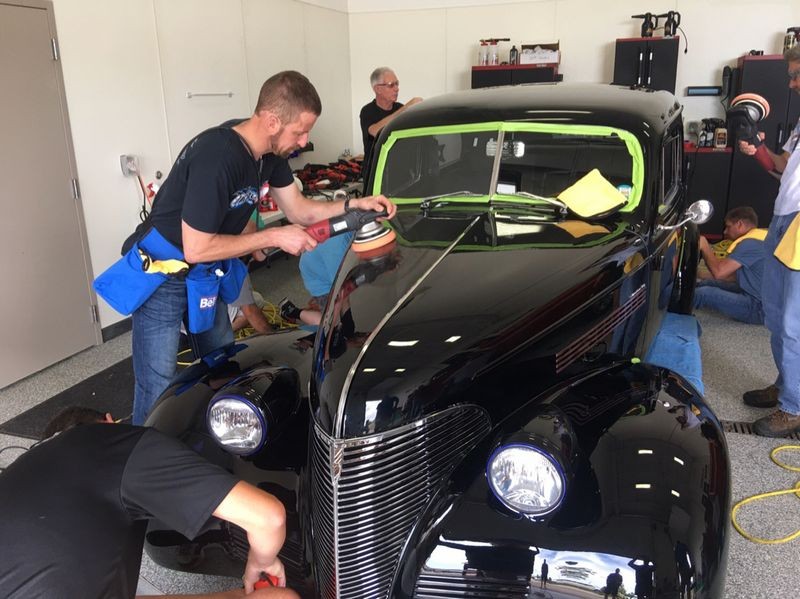
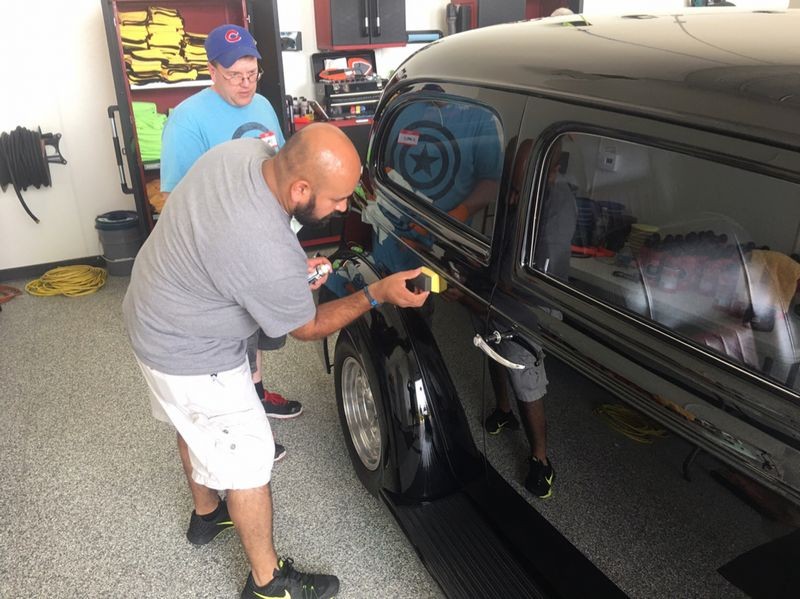
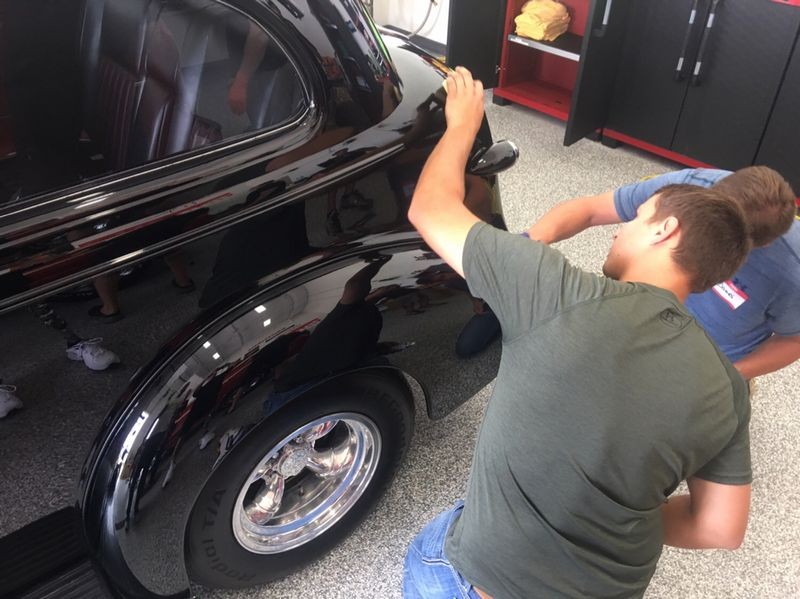
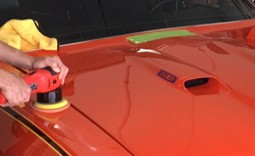
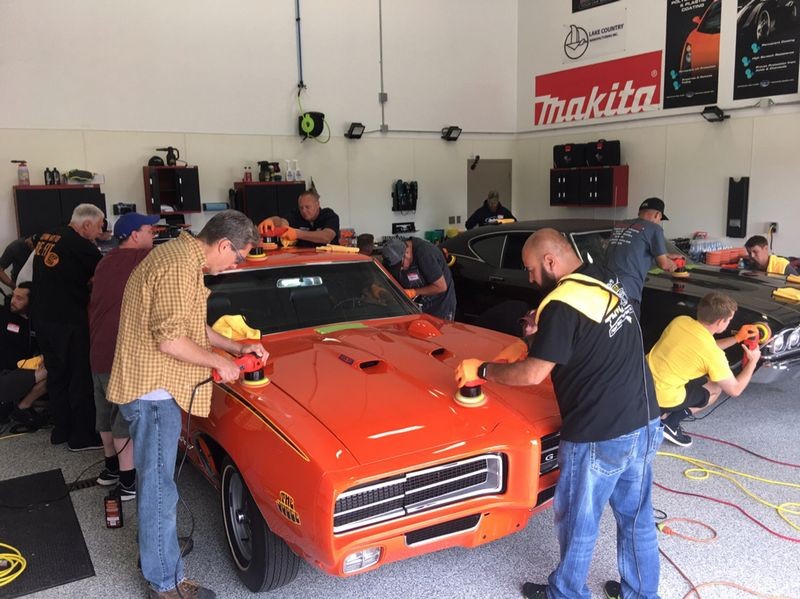
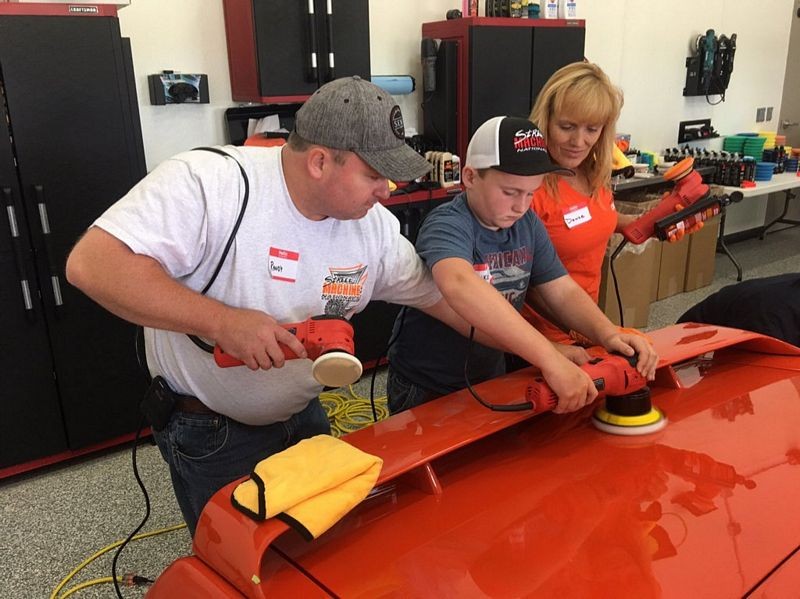
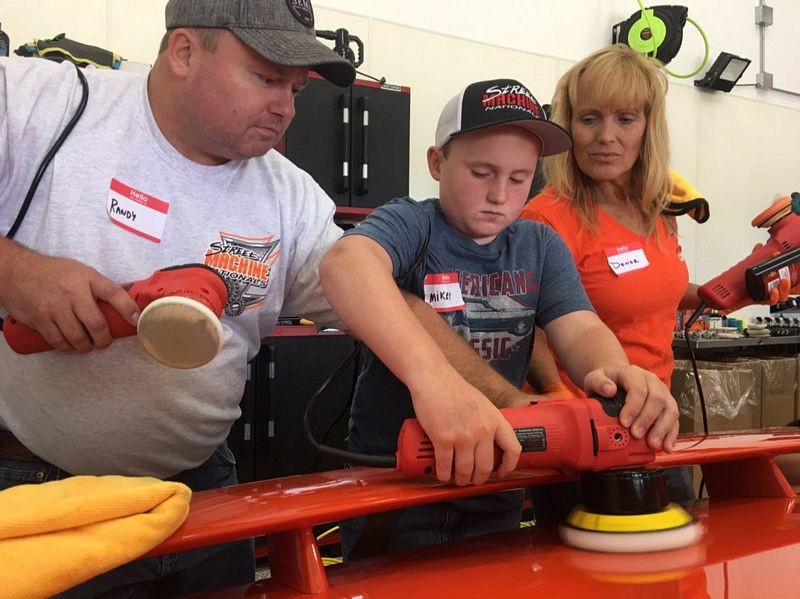
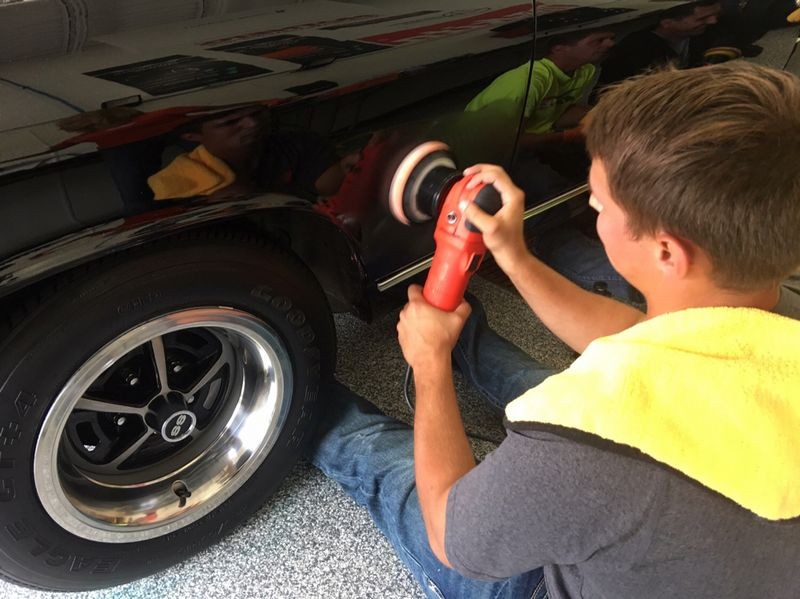
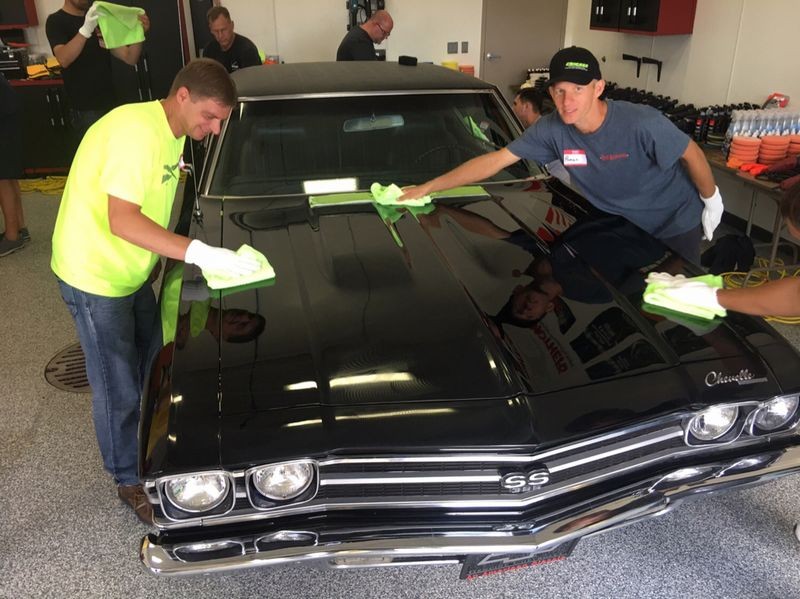
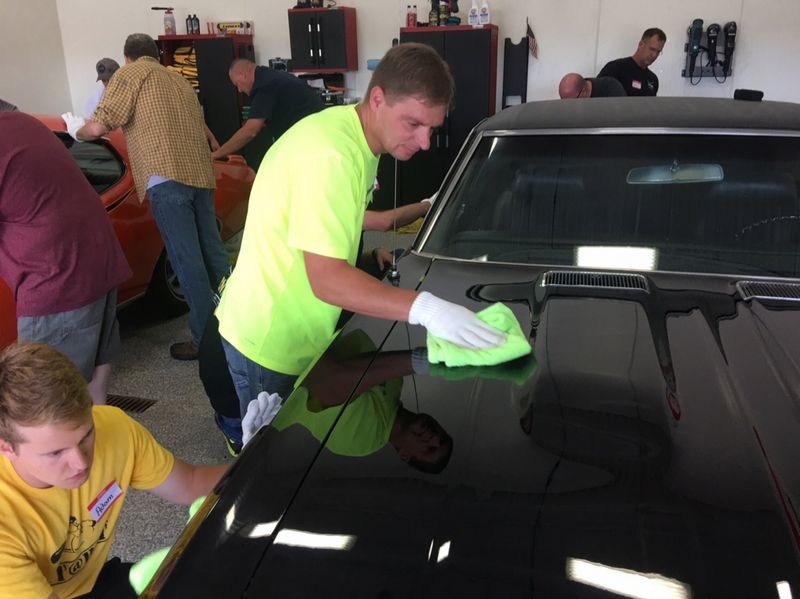
1: The first thing you will notice is these are HANDS-ON classes. If you prefer to sit in a chair and listen to someone speak then you don't want to attend one of these classes.
2: The next thing you'll see as you scroll through the pictures is that you get to use ALL the popular tools and paint polishing products and systems. NOT just a single brand of tool, pads and products. That's how ALL our classes are at Autogeek, whether they are the roadshow classes or the 3-day classes at Autogeek in Stuart, Florida or our boat detailing classes.
We sell everything and we show everything and that means >you< get to use everything and then you can make up your own mind what's the best.
Over the years I've fine-tuned the flow of the class and the order of the topics and tools covered. There's a rhyme to the reason. The pictures below are in fairly chronological order. The class actually starts in the classroom with a Power Point that walks everyone through some basic head knowledge, there's no pictures of the classroom portion from this class and there's also NOT pictures of everything we covered. Can't share all the secrets. But there are enough pictures to show you that when you sign-up for an Autogeek Roadshow Detailing Class - you're in for a fast-paced fun and educational experience from start to finish.
Take a look...
The real experience
I'm known for the high level of quality cars I bring in for the class to learn on. I can't guarantee each and every class will be as fortunate as this class to get this many cool cars to work on but I try my best to get great learning cars for each class. The cars are more for a fun experience, there's nothing like learning show car detailing on a real show car. It makes the experience REAL. That said, I can teach you show car detailing techniques on a 2004 silver metallic 4-door Toyota Camry, it's just not going to be the same experience as learning show car detailing on a 1969 GTO Judge in Hugger Orange. Make sense?
For this class, with the help of Mike Drees and David Patterson, plus a few people in this class that have already attended my class at Stuart, Florida, we were able to put together a GREAT collection of cars for the first day - the day we cover Show Car Detailing. Show car detailing is where you learn to create the most perfect finish out of what you have to work with. You learn to remove as many of the above and below surface paint defects is as humanly possible (safely), while squeezing every little drop of gloss and shine out of the paint
Here are the cars for this class...
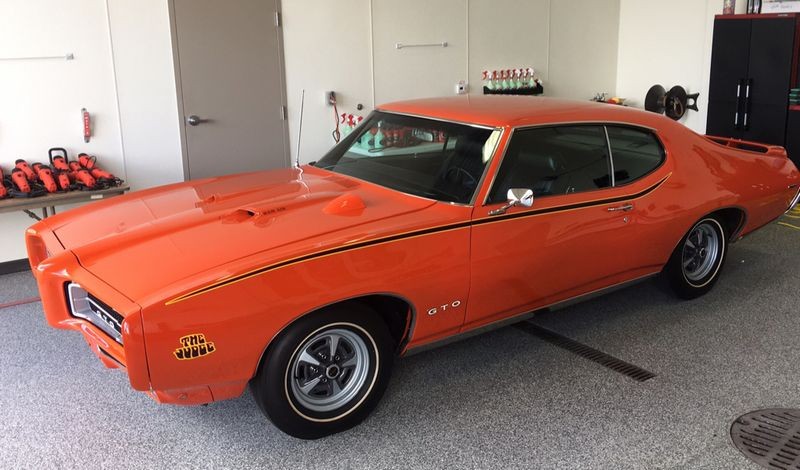
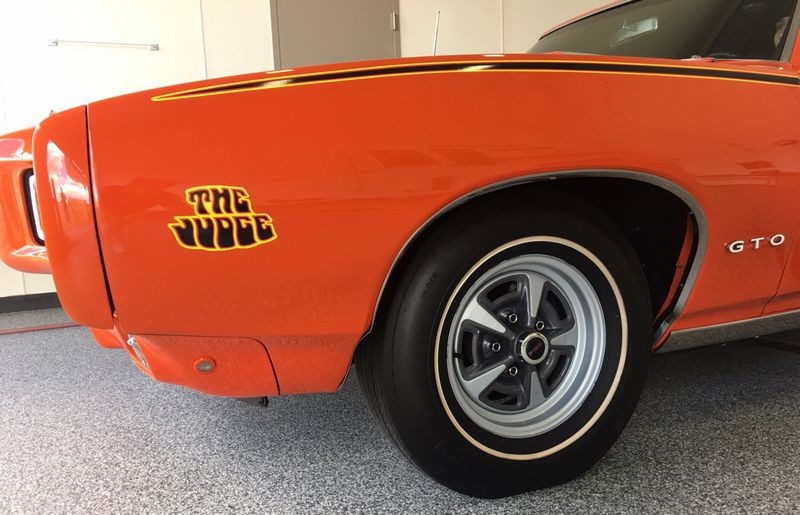
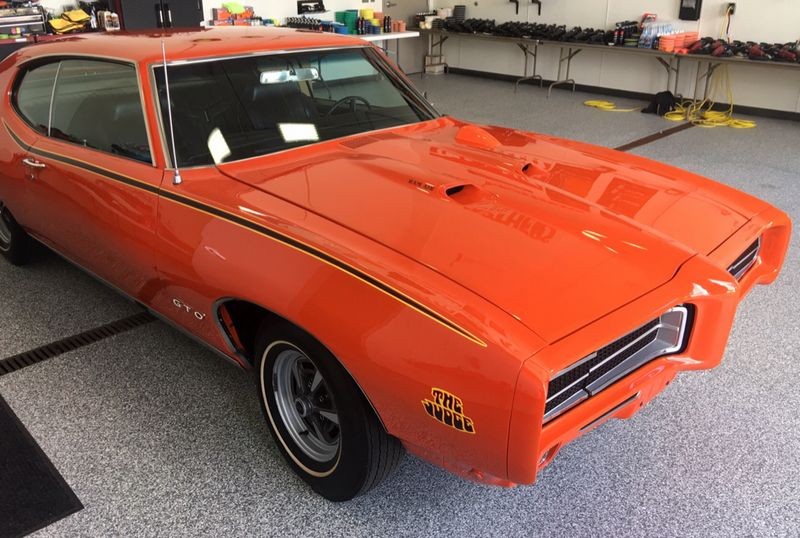
1969 GTO Judge
This is the real deal. This is easily a six figure collector grade muscle car. This restoration has a modern basecoat/clearcoat finish. The paint had HORRIBLE scratching from a car cover that had beat against it plus had a super rough feel to the paint indicating it had some form of contamination.

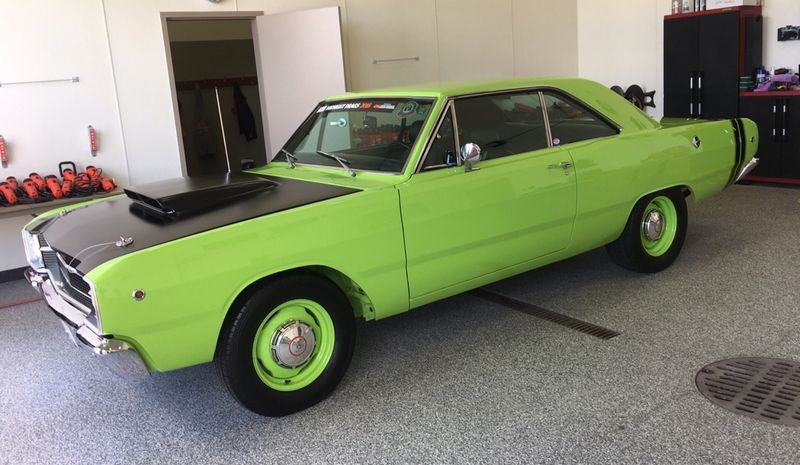
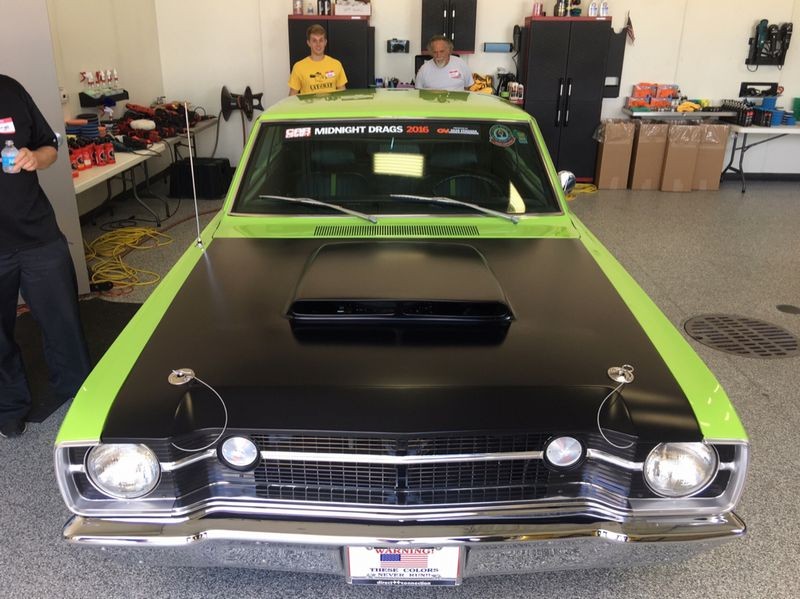
1968 Dodge Dart GT
This is local quarter mile race car with a magazine quality build. This car has a modern basecoat/clearcoat finish. This car had the normal swirls and scratches you would expect to see in a race car.

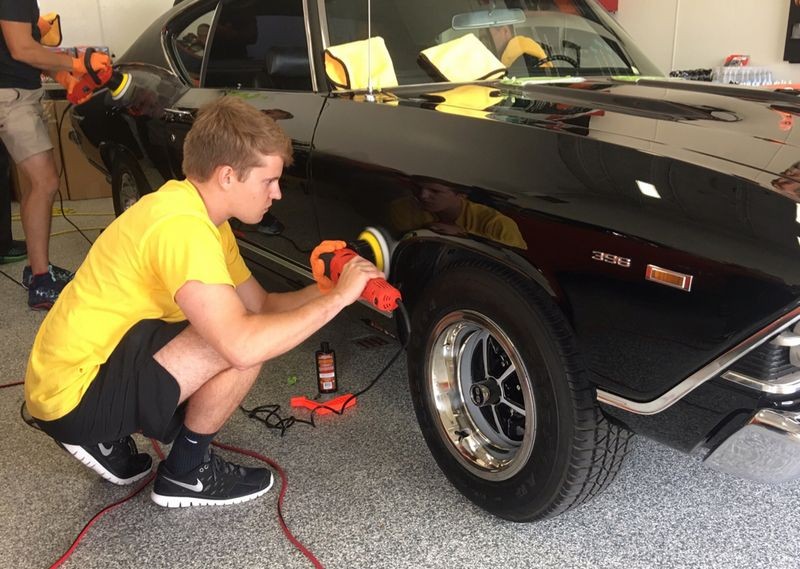
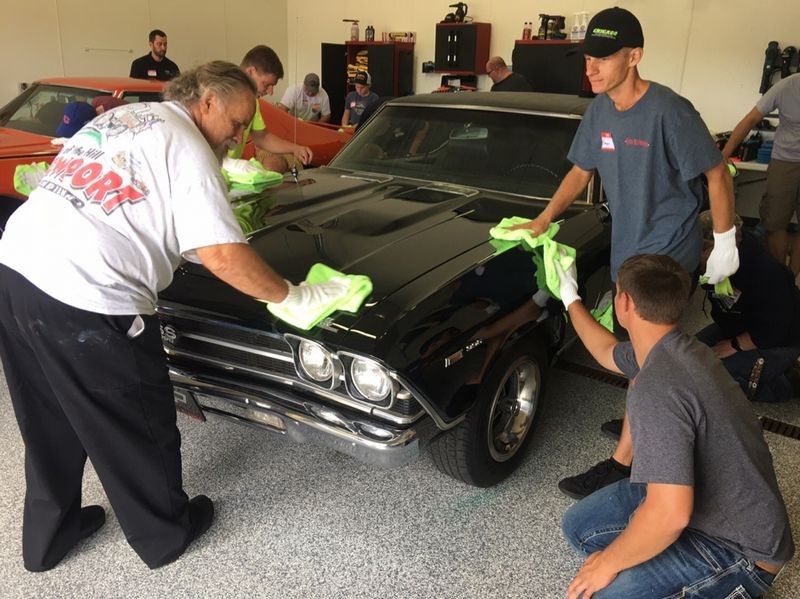
1969 Chevy 396 Big Block Chevelle SS
This too is the real deal, this is factory big block survivor car. This car has a modern basecoat/clearcoat finish. The paint on this Chevelle was completely swirled-out and contaminated.

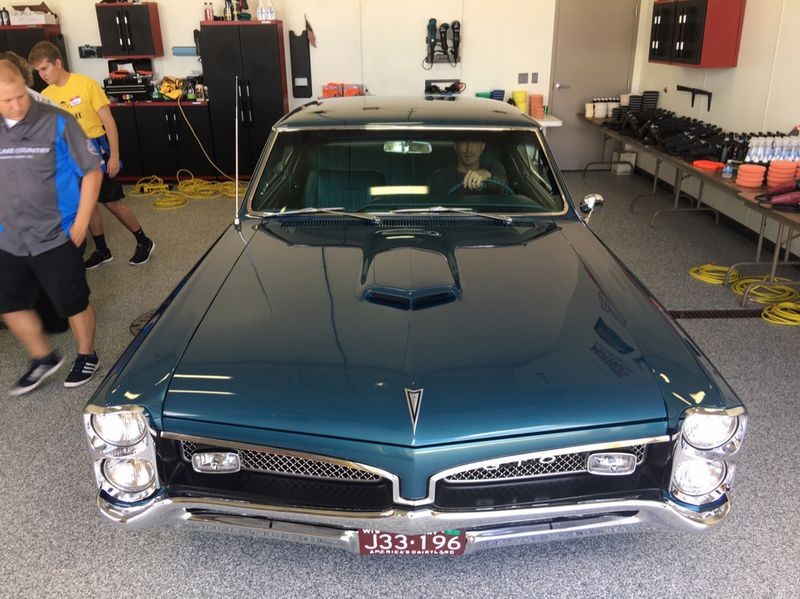
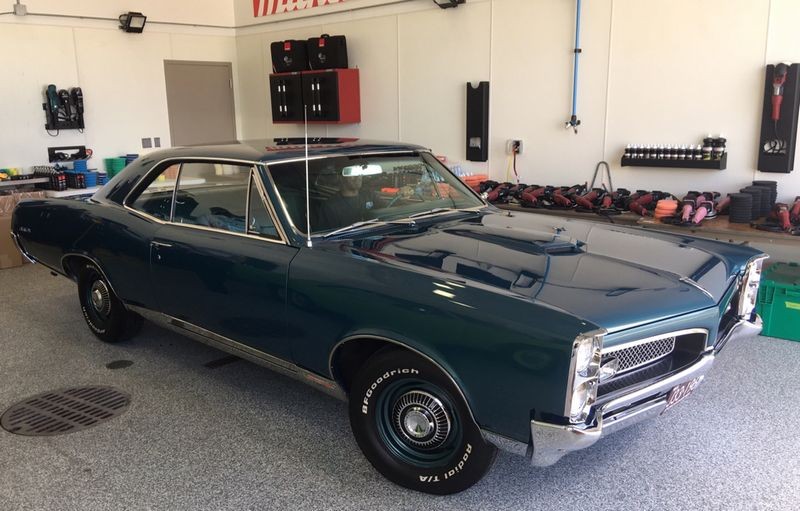
1967 GTO
Pristine condition survivor car with a modern basecoat/clearcoat finish. This GTO probably had the nicest finish of all the cars in this class. It had very light swirls from normal maintenance.

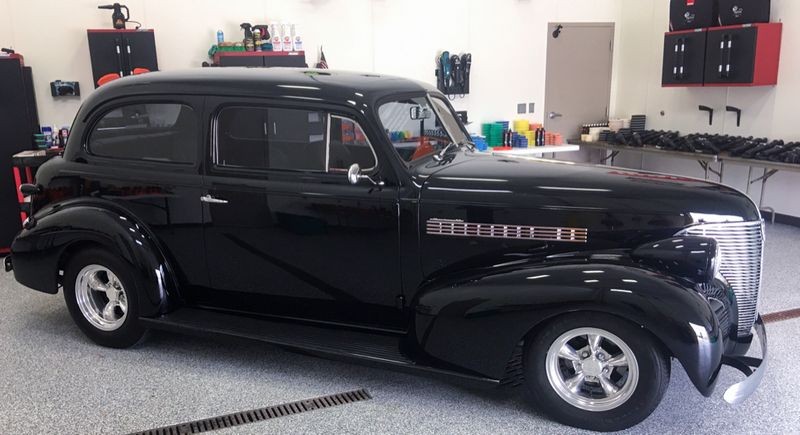
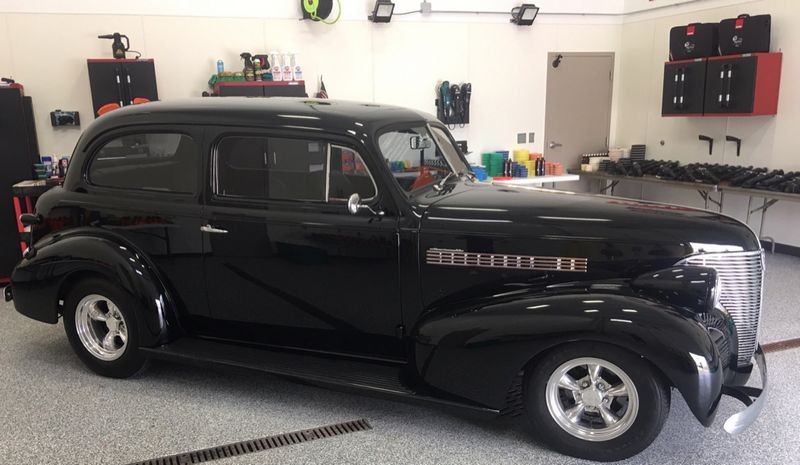
1939 Chevy Streetrod
This beautifully built streetrod has a basecoat/clearcoat finish. The paint on this car had been recently clayed and the claying left marring throughout the finish.
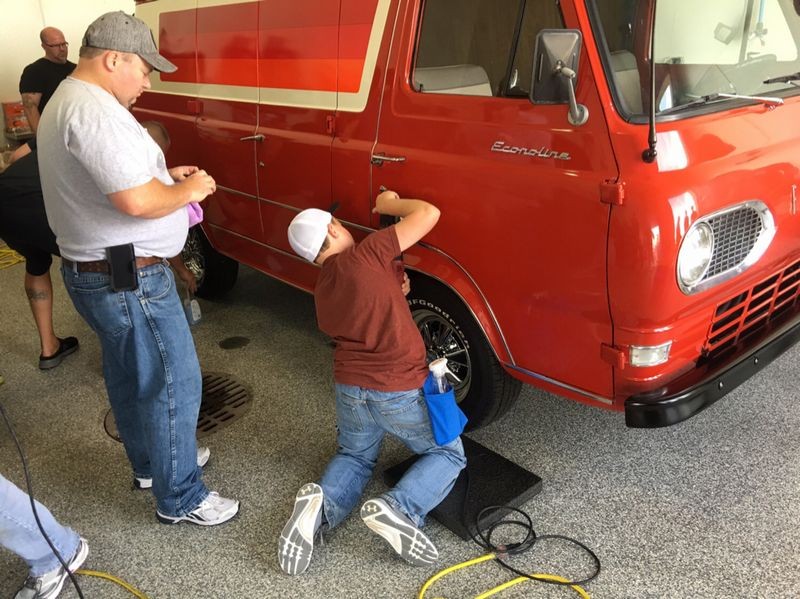
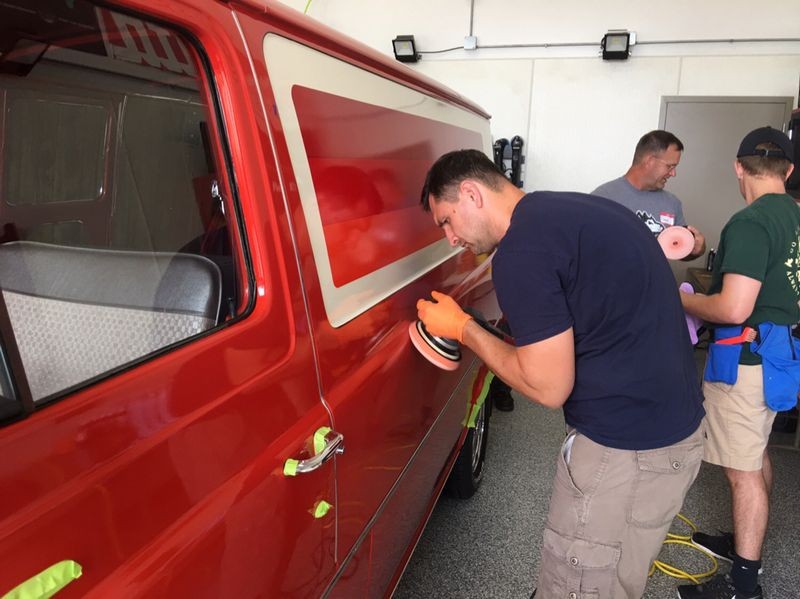
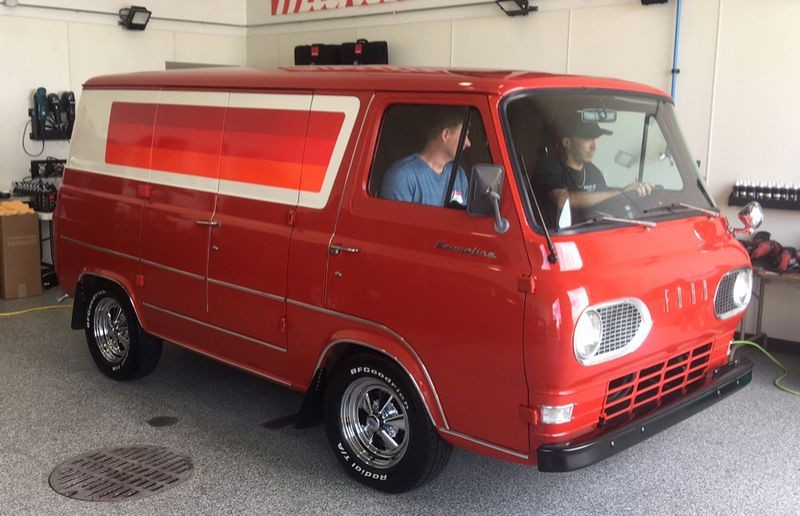
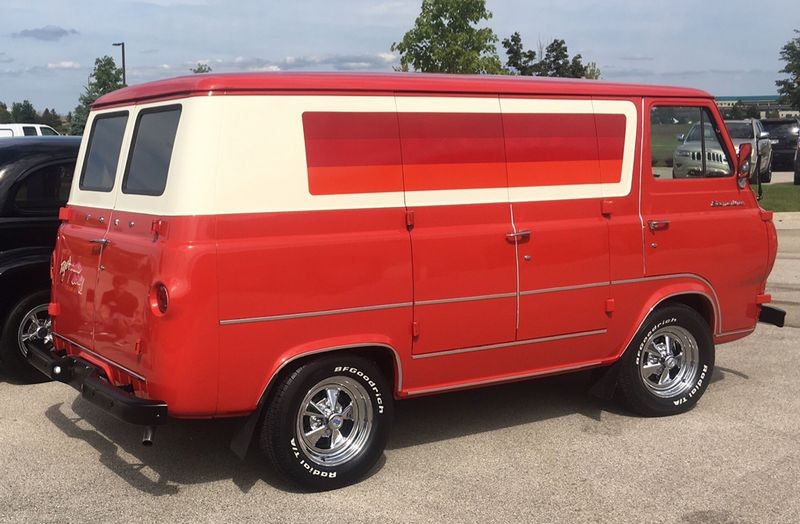
1965 Ford Econoline Van
This 60s era van still has shag carpeting in it from the 1960s but it is sporting a modern basecoat/clearcoat finish on the body sides but the roof is single stage. This groovy van had holograms throughout the finish from the abuse from a rotary buffer.

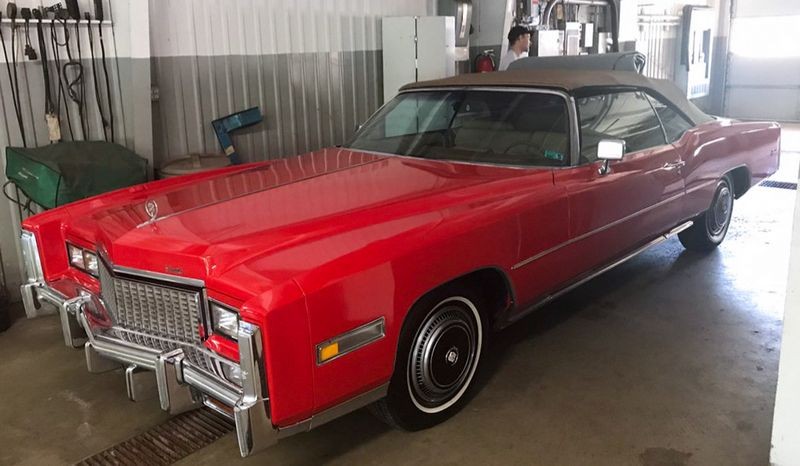
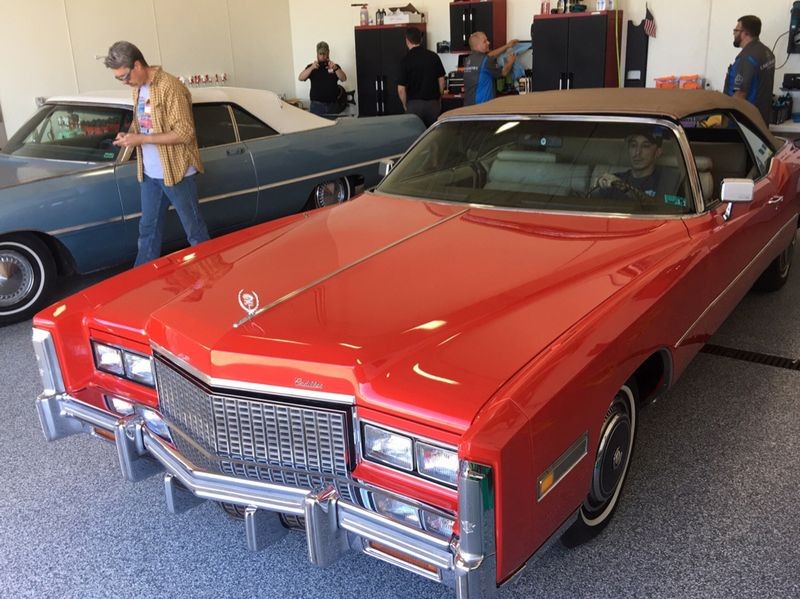
1976 Cadillac Eldorado Convertible
This car luxury land yacht only has 50,000 mile on it but it has been repainted and has a basecoat/clearcoat finish. This car had also been buffed out by a troglodyte using a rotary buffer and had holograms throughout the finish.
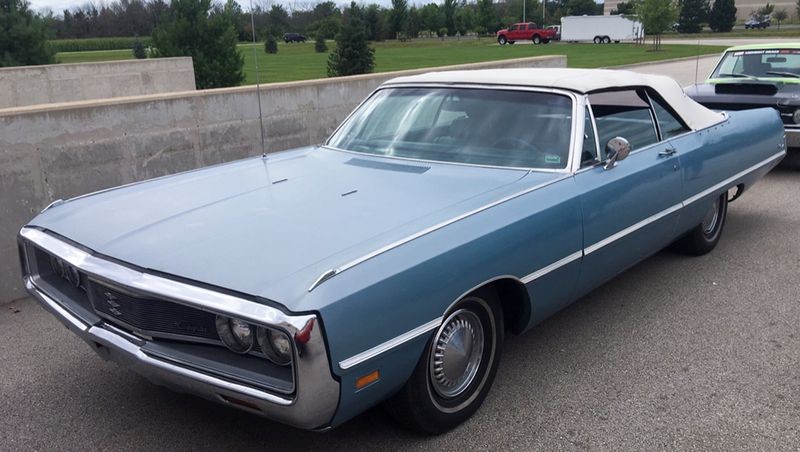
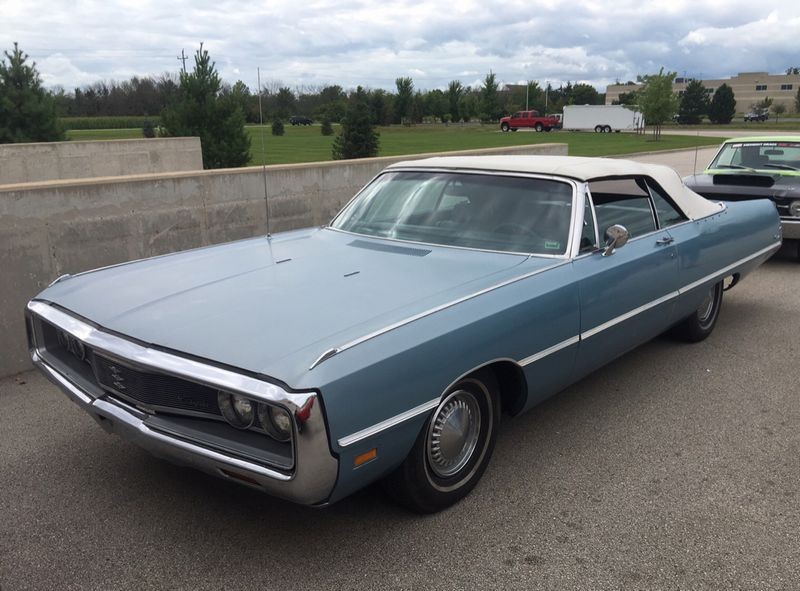
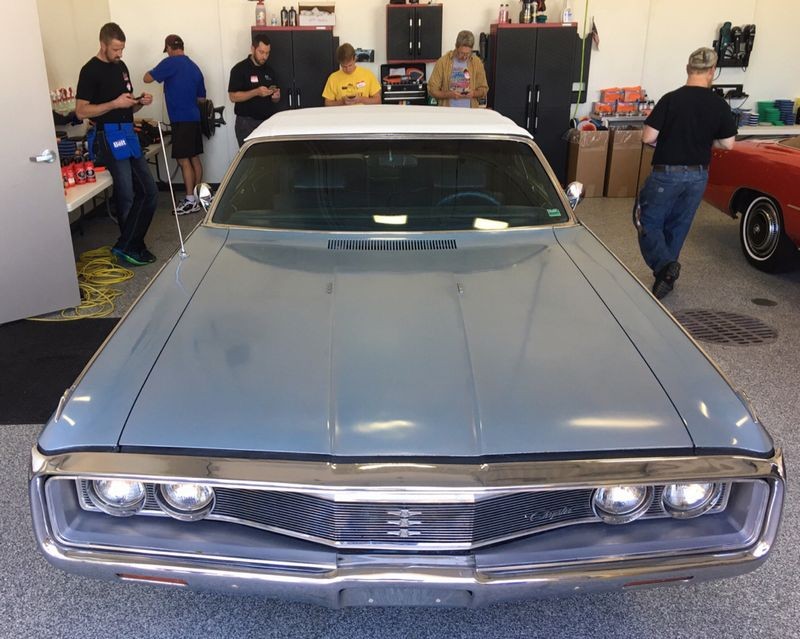
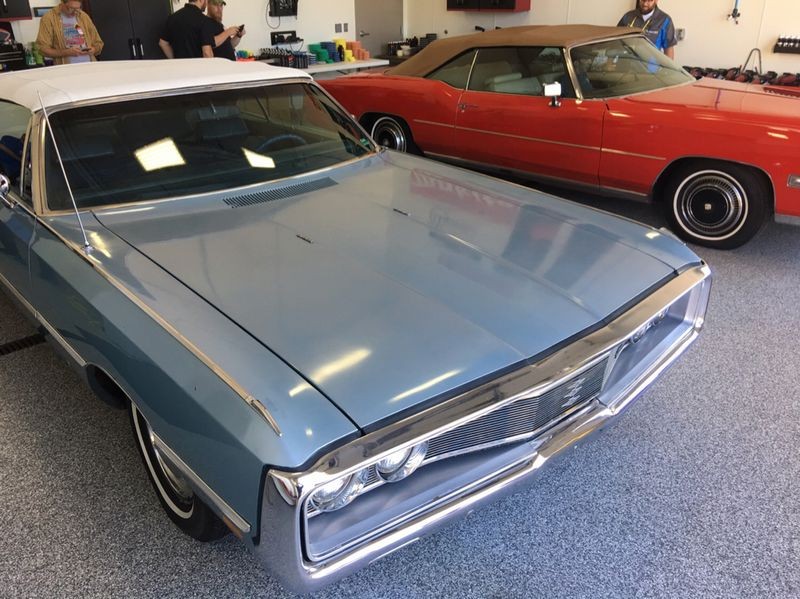
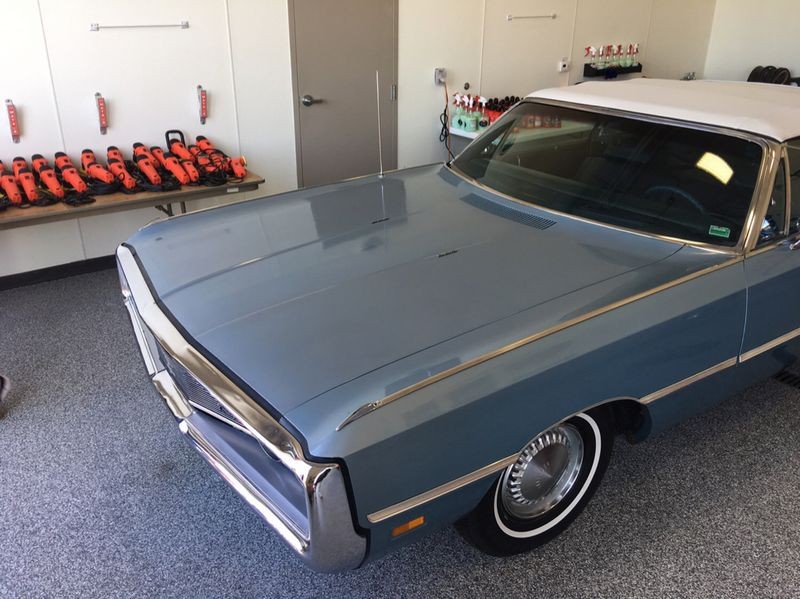
1969 Chrysler Newport Convertible
This classic cruise has an older, antique single stage metallic finish. Even though this car did not have the original single stage paint it had an older single stage re-paint that had oxidized to the point of turning chalky. This was an unexpected BONUS as it gave me the opportunity to teach the class the technique for restoring antique paint using the #7 Rub Down Technique. This was a rare opportunity for a "Detailing Class" and to date, I think I'm the only guy that teaches this technique in the detailing industry.
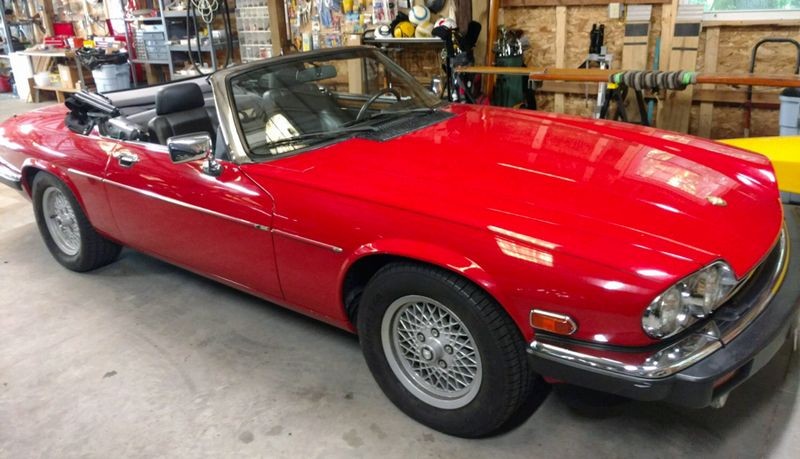
1982 Jaguar - V12 Edition
This car had rotary buffer swirls or holograms throughout the entire finish. It also had some form of contamination throughout the finish.
2011 Ford Mustang
Not in bad shape but needed to be brought back to factory new condition. You'll see pictures of this car bleeding read when it's is chemically decontaminated.

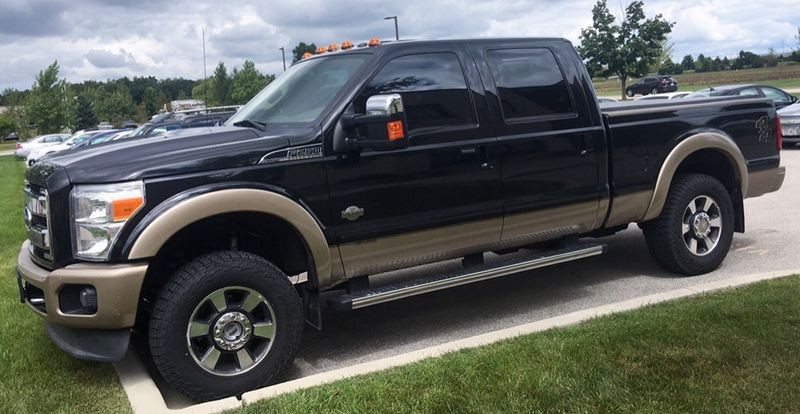
2012 Ford F-250 Super-Duty
This is a daily driver in rough shape all-around.
Again... each class we teach will have different cars. This is also what makes each class unique for the students and unique in the industry.

-
Re: What it's like to attend an Autogeek Roadshow Detailing Class - Lots of pictures!
Continued....
For years now, people have been asking us to bring our Competition Ready Detailing Class that we teach here in Stuart, Florida on the road.
My guess is - most people don't know what that means?
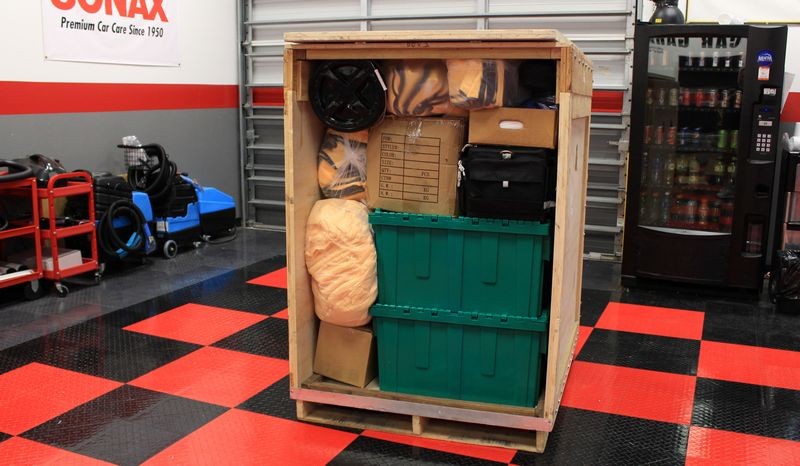
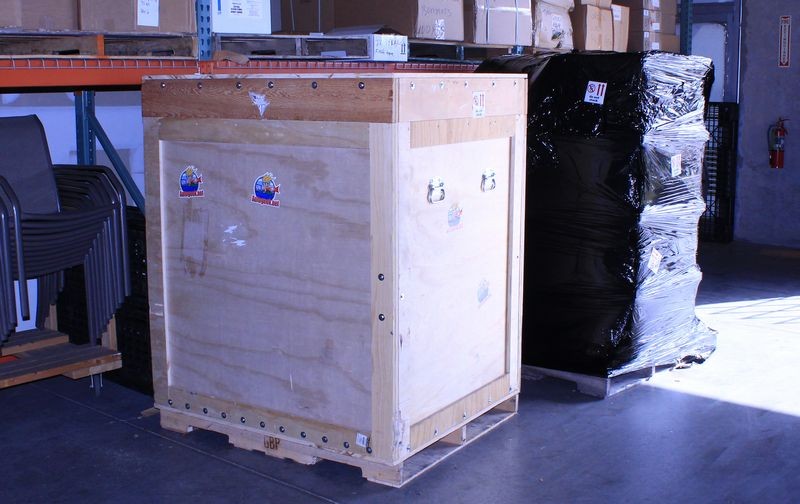
That is, what it means to PACK and SHIP all the tools, pads, products, towels and even extension cords that you would get to use here if you travelled to Autogeek in Stuart, Florida, got a hotel and a rental car for a few days and attended the class here.
Well it's a lot of stuff...
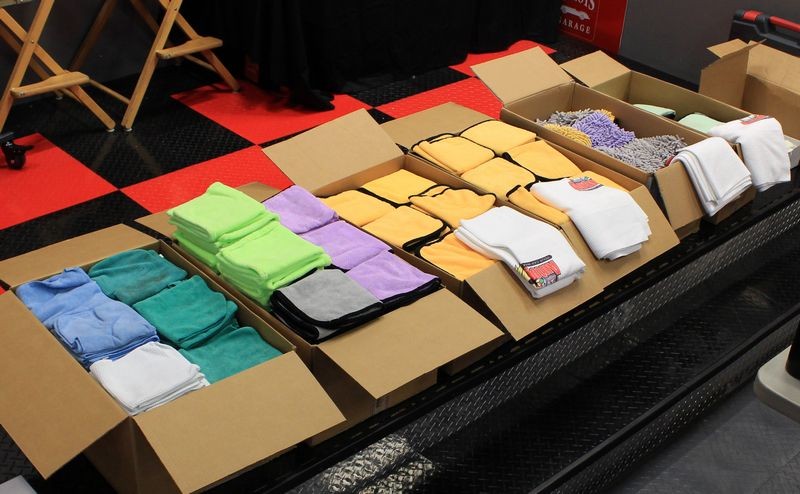
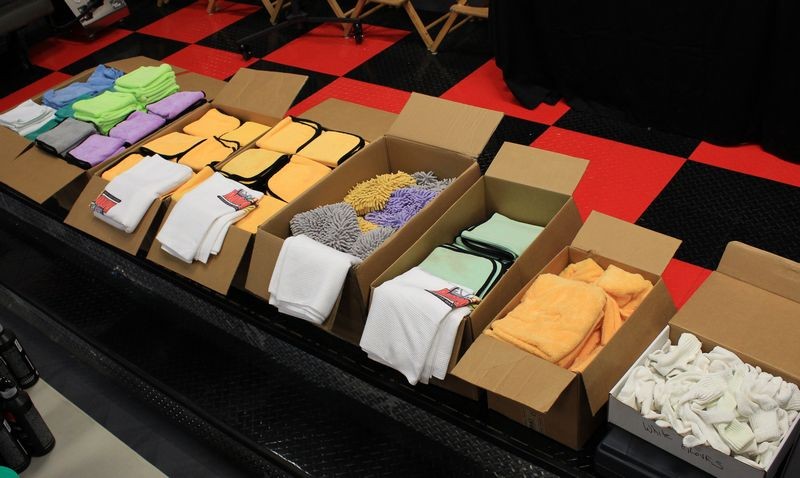
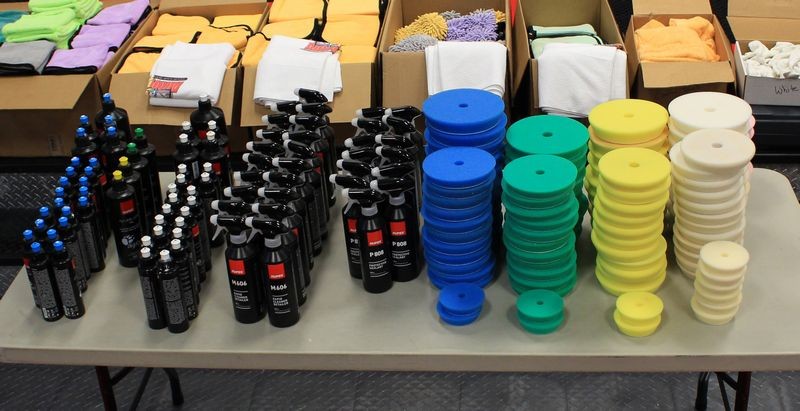
Here's some of what we ship and pictures still don't do it justice...
Boxes and boxes of multiple types of microfiber towels, plus Guzzler drying towels, plus cover-up towels and even microfiber gloves.
RUPES compounds, polishes and pads
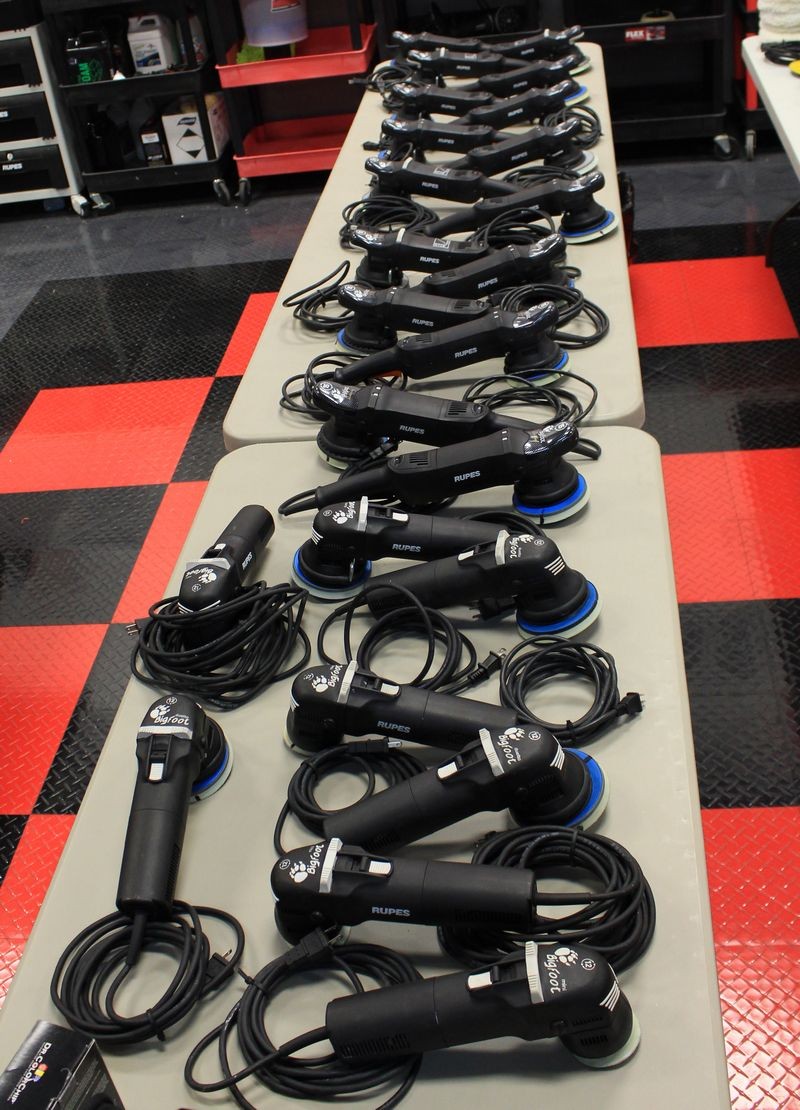
RUPES tools - and lots of them....
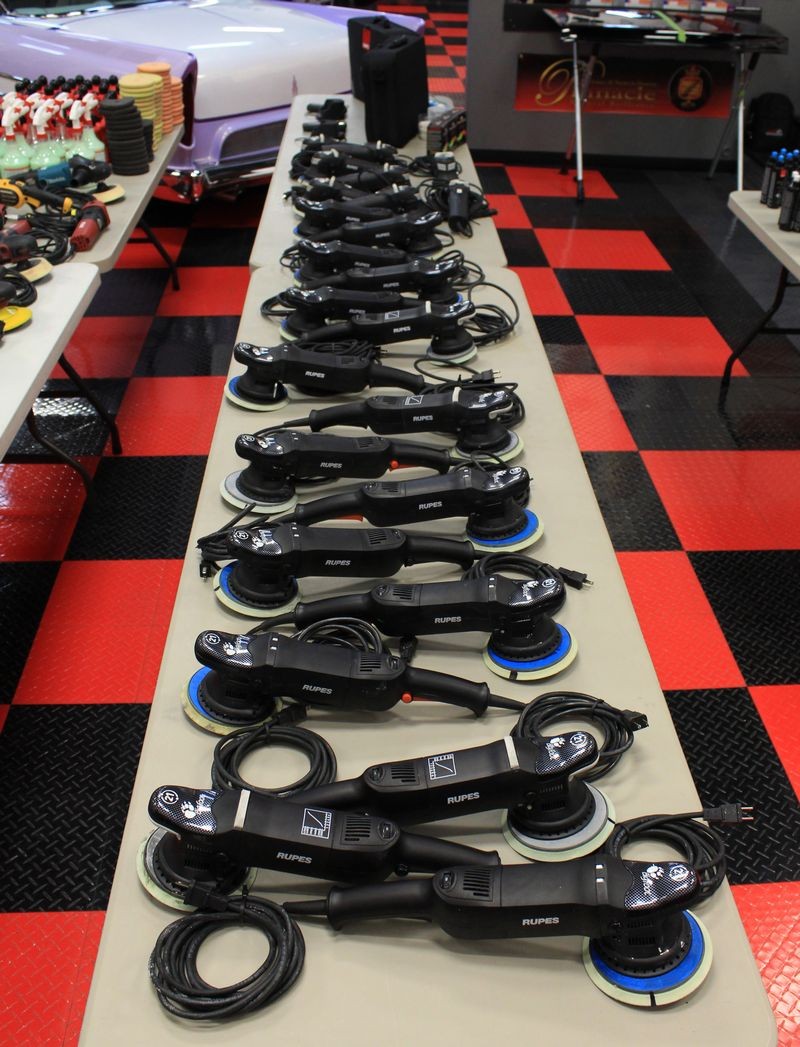
Camera shot from the other side of the 8' tables...
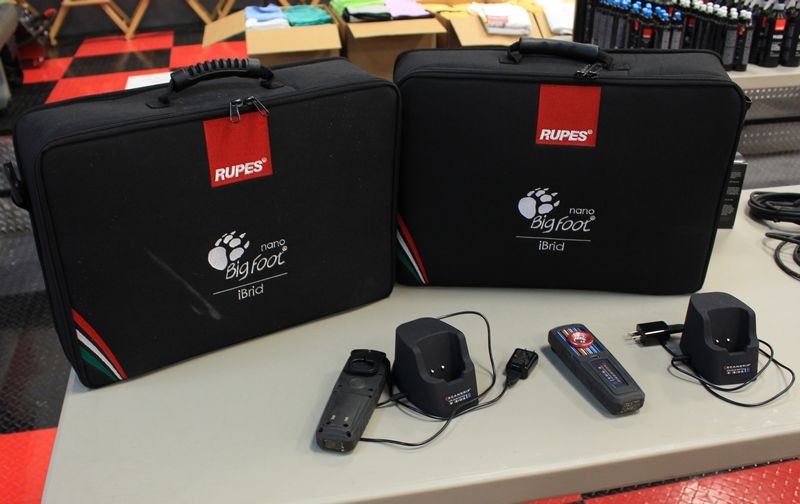
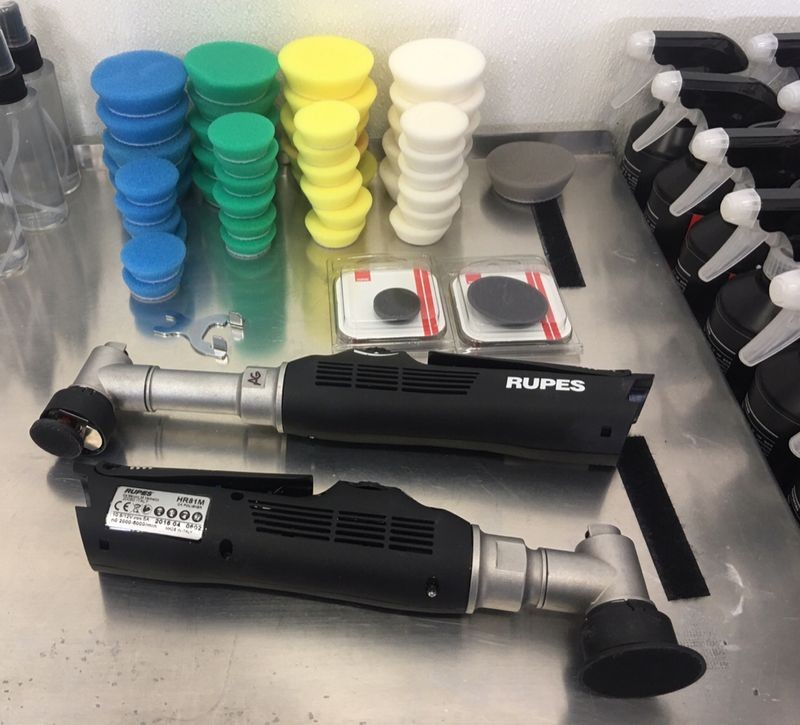
RUPES iBrid Nano - Both Long Neck and Short Neck - SCANGRIP Sunmatch Swirl Finder Lights
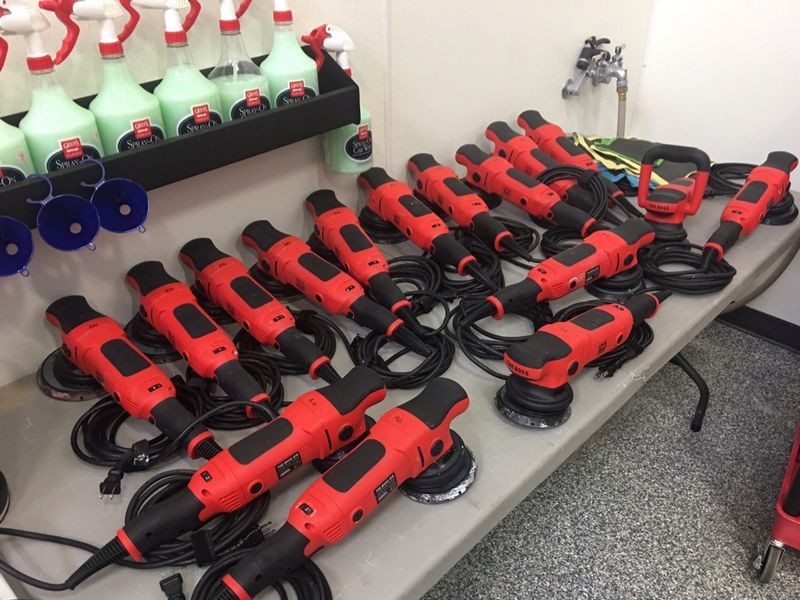
FLEX PE14 Rotary Polishers - and lots of them!

And from the other side....
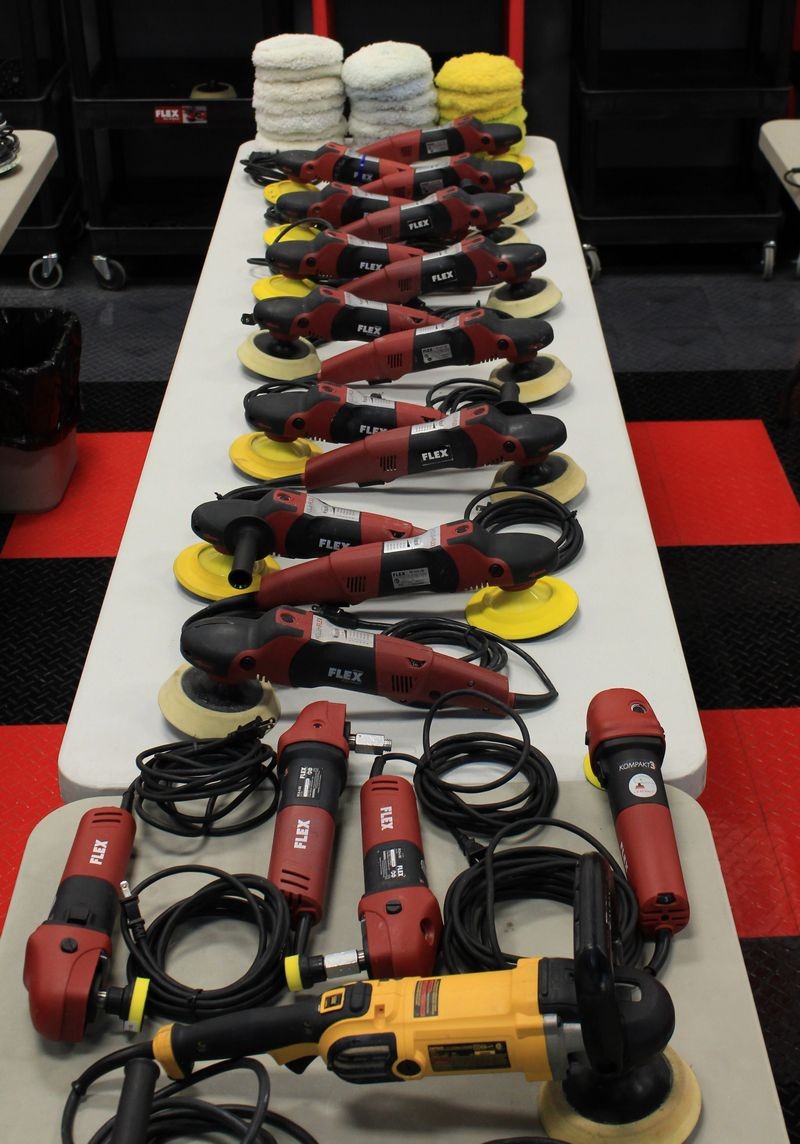
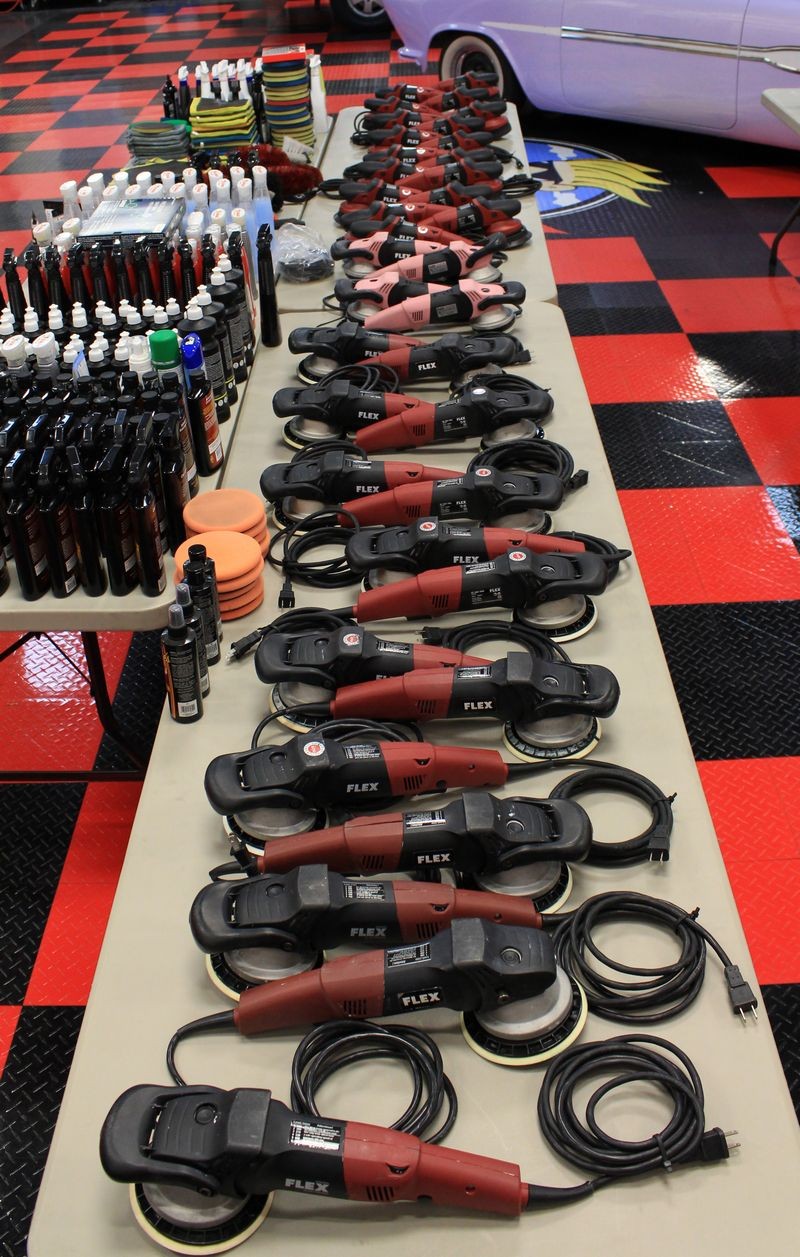
FLEX 3401 and XFE7 Polishers and yes... LOTS of them!
And from the other side of the tables...

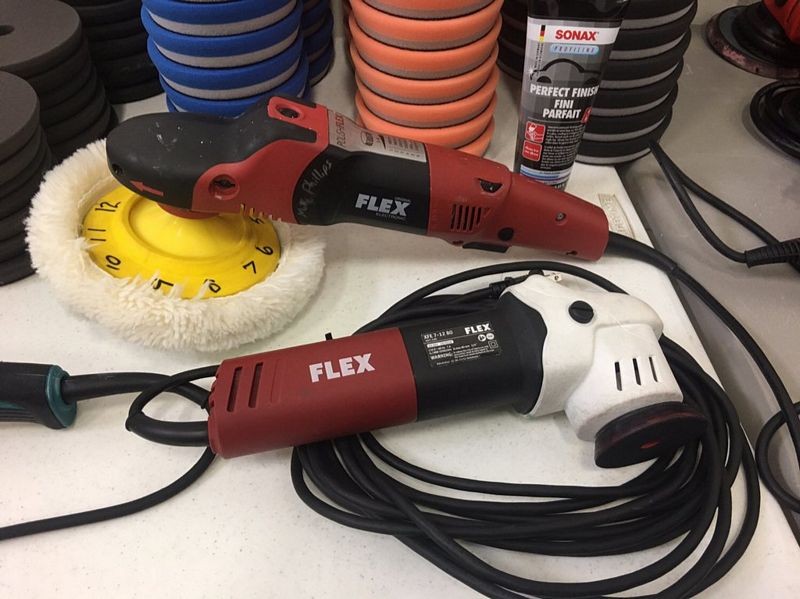
Here's the FLEX PE8 Rotary Polishers
And just so the class can feel what a FULL SIZE rotary buffer is like to work with I'll bring a Makita and a DeWALT

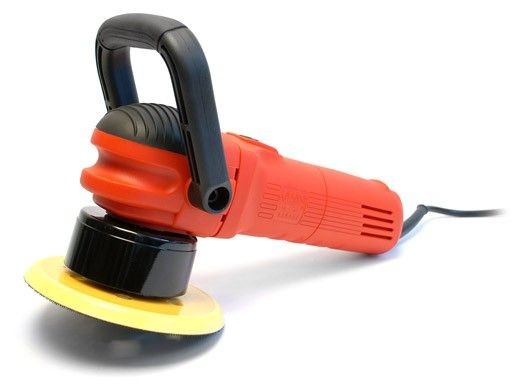
Griot's 6" DA Polisher - 3" DA Polisher - BOSS 15 and 21 Long Stroke Orbital Polishers
And yes, there's a few on the table....

From the opposite side....
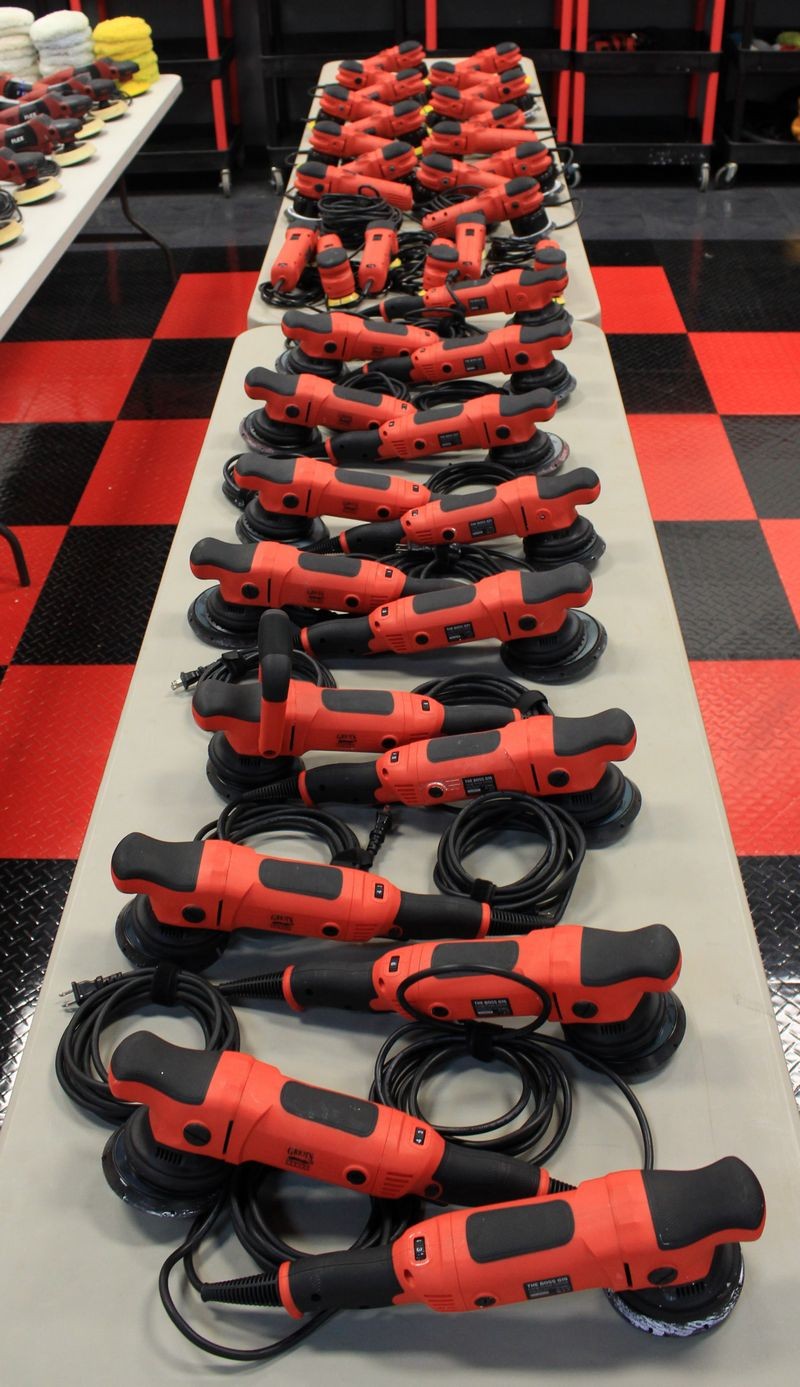
Griot's BOSS pads and products

Scads of all the needed products...
Tuf Shine Tire Cleaner and Tire Coating, RaggTopp, 303, Nanoskin tools...

Most classes you only get to use one brand of tool, (and one brand of products), and a lot of time just one TYPE of tool.
In order for you to use all the tools that are currently popular right now in the detailing world you either have to travel to Stuart, Florida and attend on of our 3-day classes, ($1,795.00 plus your travel, hotel, rental car and meal costs), or attend one of our roadshow classes, which is $995.00 - you save $800.00 PLUS all your airline ticket costs, hotel costs, rental car costs and meals-on-the-road.
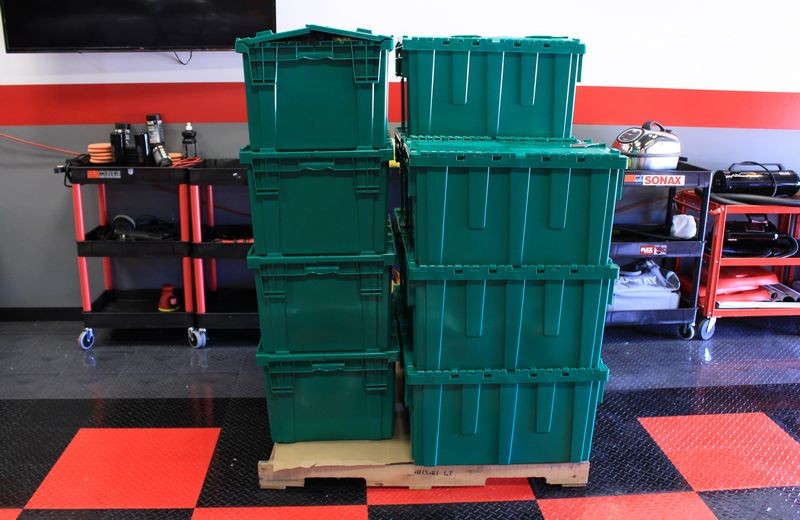
And of course, after the class, we have to pack and ship everything back to Stuart, Florida...
There's a LOT of logistics to make a pro-grade detailing class happen in another state.
-
-
Re: What it's like to attend an Autogeek Roadshow Detailing Class - Lots of pictures!
Continued....
What happens next?
Yancy and I clear our schedules to be out of the office for 4-5 days. We need to fly-in to the hosting site's city two days before the class. One day to travel and one day, (Friday), to set-up the class and stage the cars.
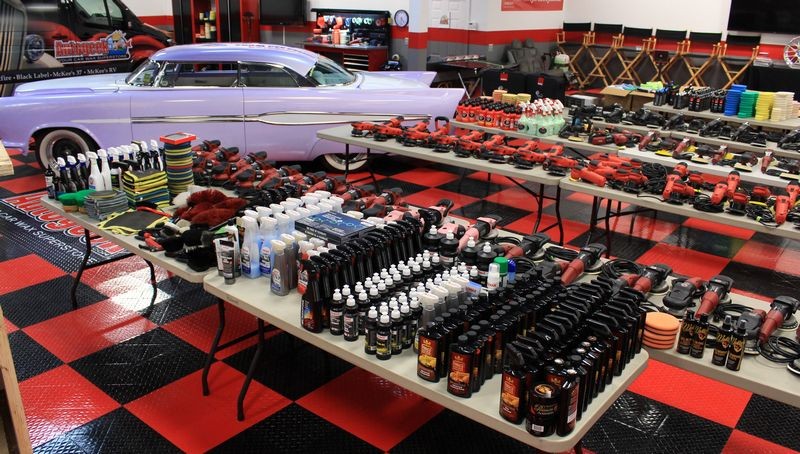
Setting up for a hands-on detailing class...
When you showcase as many tools, pads and products as we teach in our classes - you need some tables! Luckily for us, Lake Country had some long, sturdy tables to hold all the tools, pads and products. Whatever we couldn't get out of a tote and onto a table Yancy marks the side of the tote to note what's inside the tote and/or puts the word Sunday on the side of the tote so we know the contents of a Sunday tote are not needed on Saturday.
There's also an order in which I teach both tools and techniques and the tools, pads and products are laid out accordingly to match the flow of the class. (this isn't my first rodeo)
Griot's 6" DA Polisher and Pinnacle Paint Polishing System
Simple 8mm Free Spinning Orbital Polishers
First up are simple or entry level tools. For our classes we showcase the Griot's Garage 6" DA Orbital Polisher. This is a free-spinning orbital polisher with a 8mm orbit stroke length.
Tools like the Griot's 6" DA Polisher are the EASIEST to learn how to use and master, (that's two things), and also a great tool to get the class warmed up first thing in the morning.
$200,000.00 worth of training cars
The GTO is valued between $125,000.00 and $150,000.00 and the Chevelle is valued at around $60,000.00 so that's approximately $200,000.00 worth of cars that class will be STARTING out on.
Top shelf abrasive technology
For this tool and this class I showed how to use the Pinnacle line of compounds, polishes and waxes. Pinnacle uses top notch abrasive technology that works with ANY tool and any paint system. When working on other people's expensive cars we only use products that use Best in Class abrasive technology and Pinnacle is top shelf all the way.
Here's the tool the class warms-up with...
Griot's Garage 6" ROP -
Pinnacle Compounds, Polishes & Waxes

On this first table, (reading around the garage from left to right), you can see,
Pinnacle products
Lake Country 5.5" Flat Foam Pads
Lake Country 5.5" ThinPro Foam Pads
Mother's Clay Bars
Griot's Garage 6" DA Polishers
Pad Conditioning Brushes


And if you look - you can see there are plenty of tools, pads and products so EVERYONE can have their own tool, pads and products for the most hands-on classes on the Planet Earth!
Setting up continued....
Griot's BOSS Tools and Paint Polishing System
The next tool sets and polishing system the class will train with is the Griot's BOSS tools and paint polishing system.
So the table just to the right of the table above has everything we need for the next two training cars.

The Complete Griot's Garage BOSS System
Griots Garage BOSS G21 Long-Throw Orbital Polisher
Griots Garage BOSS G15 Long-Throw Orbital Polisher
Griots Garage Waterless Spray-On Car Wash 35 oz
Setting up continued....
RUPES BigFoot Orbital Polishers and Paint Polishing System
I would say most people think RUPES is a tool. They're close... it's a paint polishing SYSTEM. It includes a LOT of tools, pads and products. For our classes you get to work with and use the complete line of RUPES tools, pads and products.
As we move to the other side of the garage, the tables in the back on the right hand side have all the RUPES tools, pads and products for the class to use.


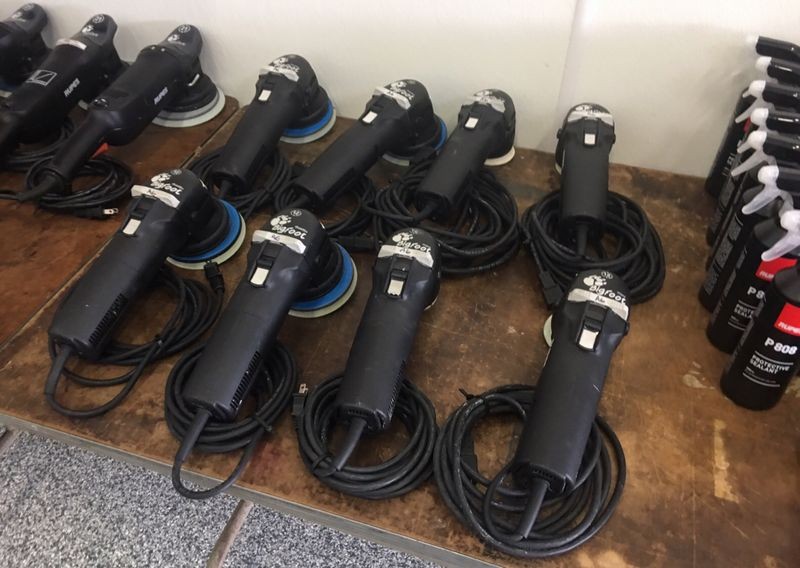

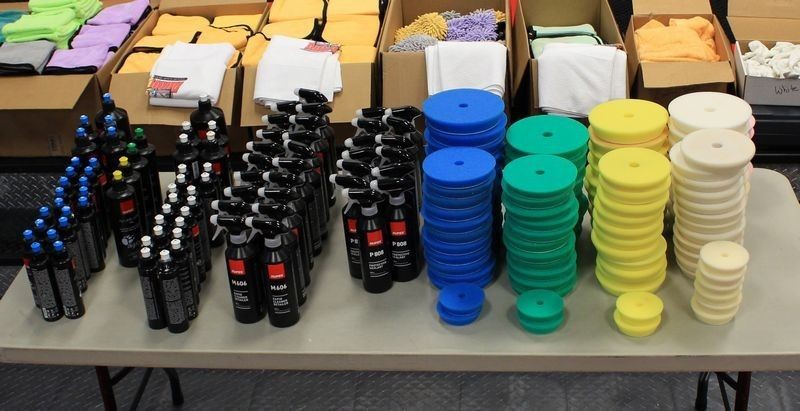
All RUPES Tools, Pads & Products
RUPES BigFoot LHR21 Mark II Random Orbital Polisher
RUPES BigFoot LHR15 Mark II Random Orbital Polisher
RUPES LHR 12E Duetto Random Orbital Polisher
RUPES LHR 75E Mini Random Orbital Polisher
RUPES Bigfoot Nano iBrid Short Neck Kit
RUPES Bigfoot Nano iBrid Long Neck Kit
RUPES M606 Rapid Cleaner Detailer
RUPES P808 Protective Sealant
All RUPES Foam Pads
All RUPES Compounds and Polishes
Setting up continued....
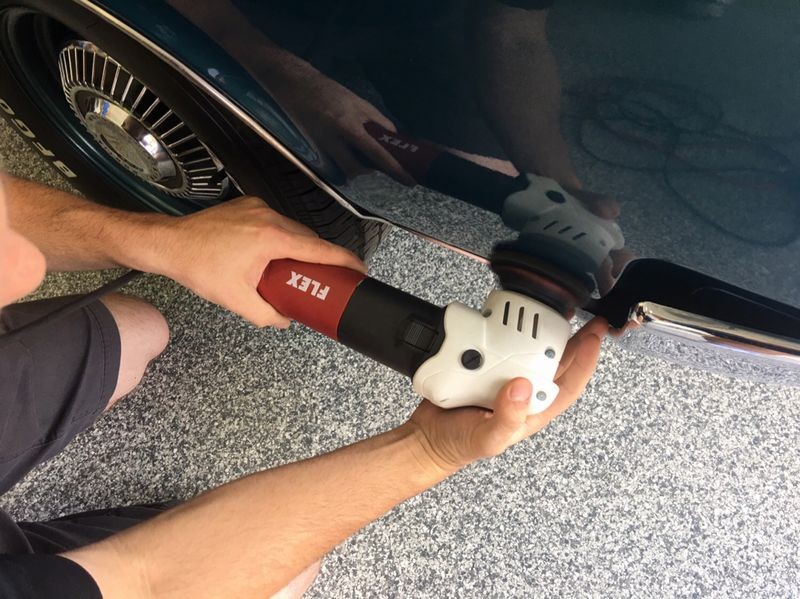
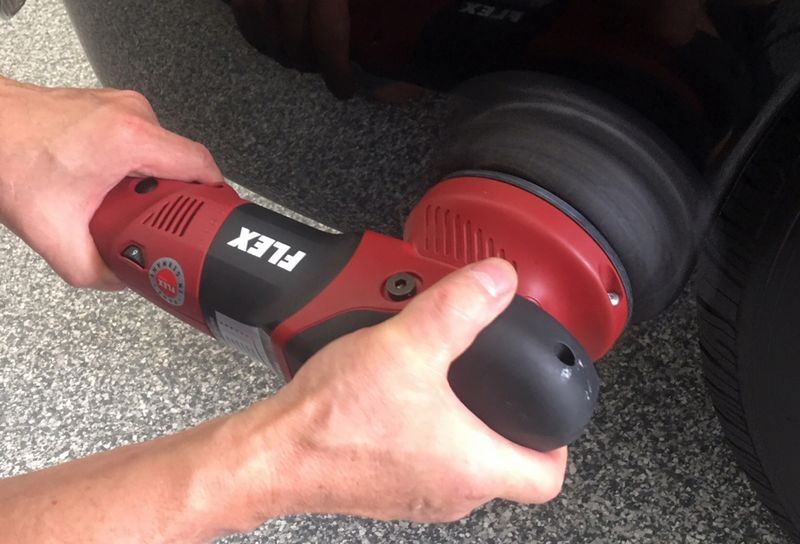
FLEX Power Tools - FLEX 3401 and FLEX XFE7
FLEX is famous for their gear-driven orbital polisher the FLEX 3401 aka the BEAST! Before getting to use the FLEX 3401 the class works through all the free-spinning orbital polishers. For the FLEX class we cut or compound with the FLEX 3401 and then finish out with the FLEX XFE7 aka the FINISHER!.
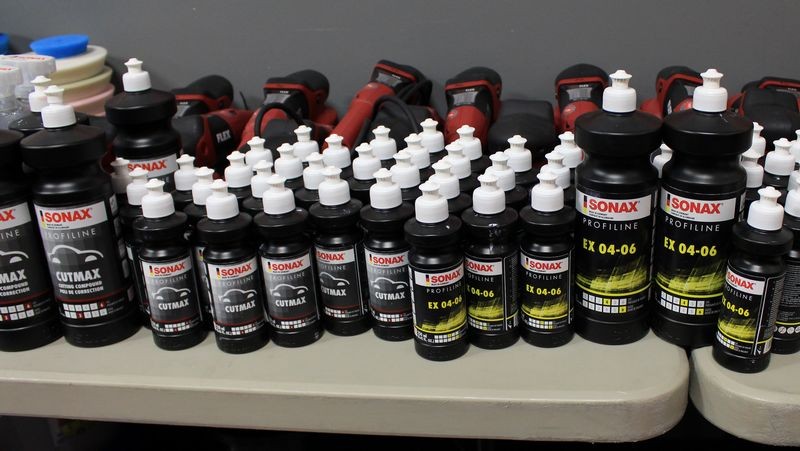
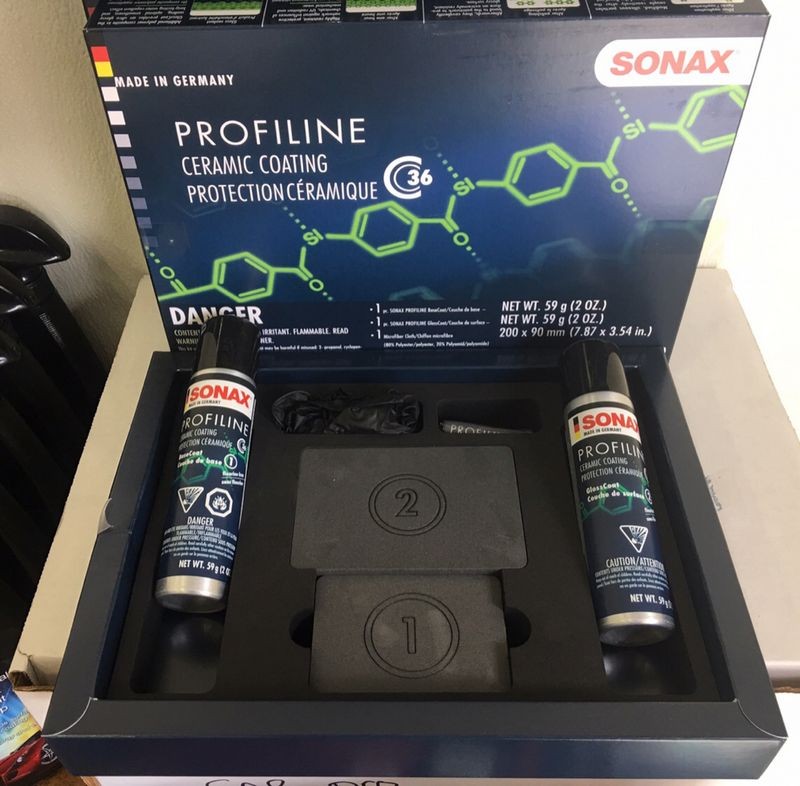
FLEX polishers are not finicky when it comes to products as long as the products use GREAT abrasive technology. For the FLEX class we use all SONAX compounds and polishes plus the CC36 Ceramic Coating. For pads we use the Lake Country Force Hybrid Foam pads.
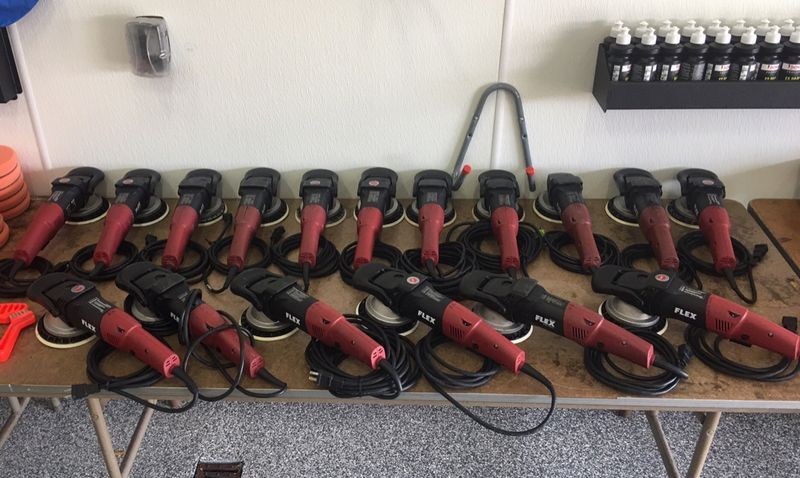


All FLEX Tools
FLEX XC 3401 VRG Dual Action Orbital Polisher
FLEX XFE7-15 Long Stroke Orbital Polisher
Lake Country Force Hybrid Foam Pads
All SONAX products
SONAX CutMax
SONAX EX 04-06
SONAX CC36 Ceramic Coating
SONAX Brilliant Shine Detailer
And the above is all for the FIRST day!
(if we don't get through all of the above tools sets and all 8 cars, we pick up where we left off on Sunday)
-
Re: What it's like to attend an Autogeek Roadshow Detailing Class - Lots of pictures!
Continued....
So as you can see so far, at these classes you get to use multiple tools and multiple paint polishing systems.
Griot's
Griot's Garage 6" DA Polisher
Griot's Garage 3" Mini Orbital Polisher
Griot's Garage BOSS 21
Griot's Garage BOSS 15
Griot's BOSS Paint Polishing System (matching pads and products)
RUPES
RUPES iBrid Nano Long Neck
RUPES iBrid Nano Short Neck
RUPES BigFoot 21 - both Legacy and Mark II
RUPES BigFoot 15 - both Legacy and Mark II
RUPES Duetto 12
RUPES Mini 12
RUPES Paint Polishing System (matching pads and products)
FLEX
FLEX XFE7 15mm Free Spinning Orbital Polisher
FLEX XC 3401 8mm Gear Driven Orbital Polisher
FLEX XFE 7-12 80 - 12mm free spinning orbital mini polisher
Makita
Makita PO5000C
That's a LOT of tools to get to use in one detailing class. 14 by my count.
Plus a lot of other pads and products.
Now lets see what the flow of the class to see what you get to do when you attend one of these classes.
Note there's no pictures of people sitting in chairs.
-
-
-
Re: What it's like to attend an Autogeek Roadshow Detailing Class - Lots of pictures!
Continued...
Next up we moved onto the Griot's BOSS System. The class will learn how to use the Griot's long stroke orbital polishers as well as the BOSS compounds, polishes and BOSS pads on two more INCREDIBLE cars.
1968 Dodge Dart GT

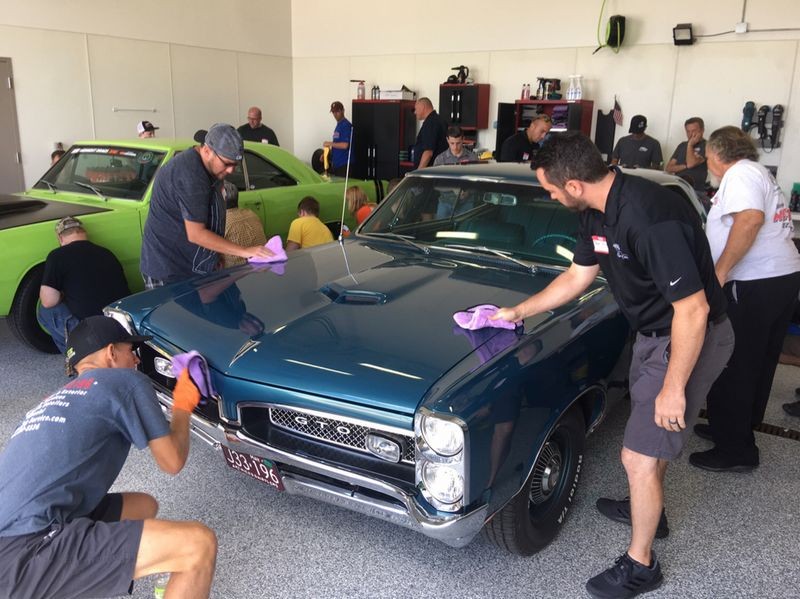
1967 Pontiac GTO

Here's the tools, products and pads...
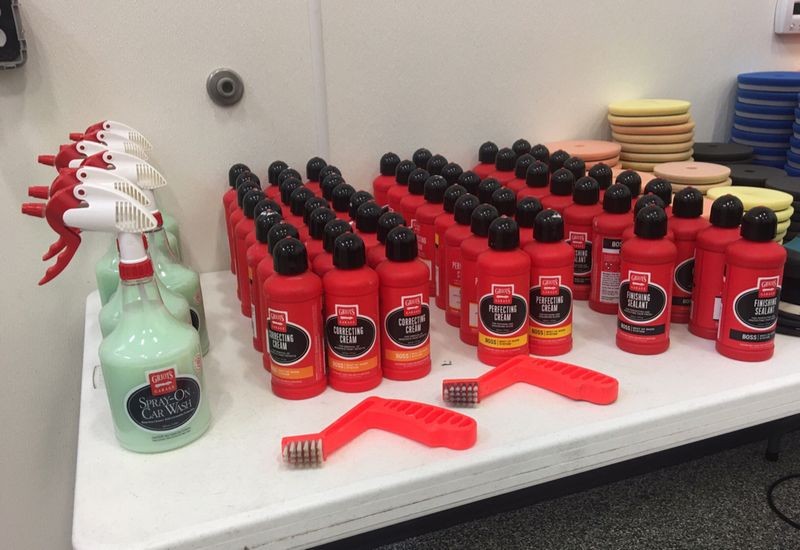
For this portion of the class we also covered how to use a Waterless Wash using the Griot's Spray-On Car Wash you see in the pictures above.
After getting the cars clean, we then used Nanoskin Towels to mechanically decontaminate the paint. (sorry no pics)
TEST SPOT and Technique
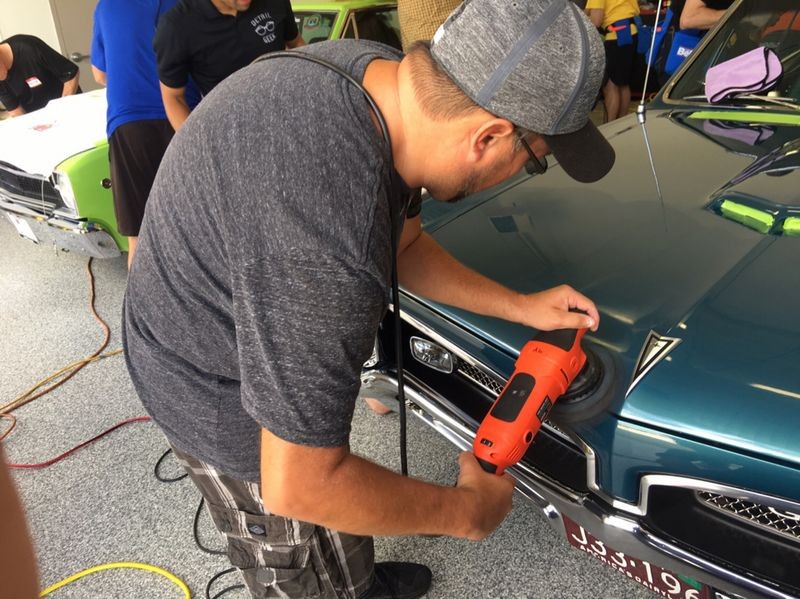
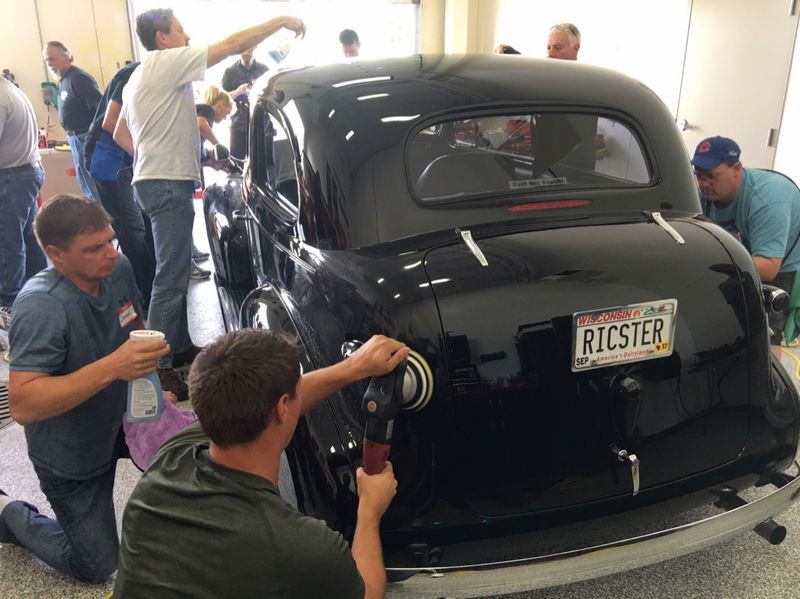
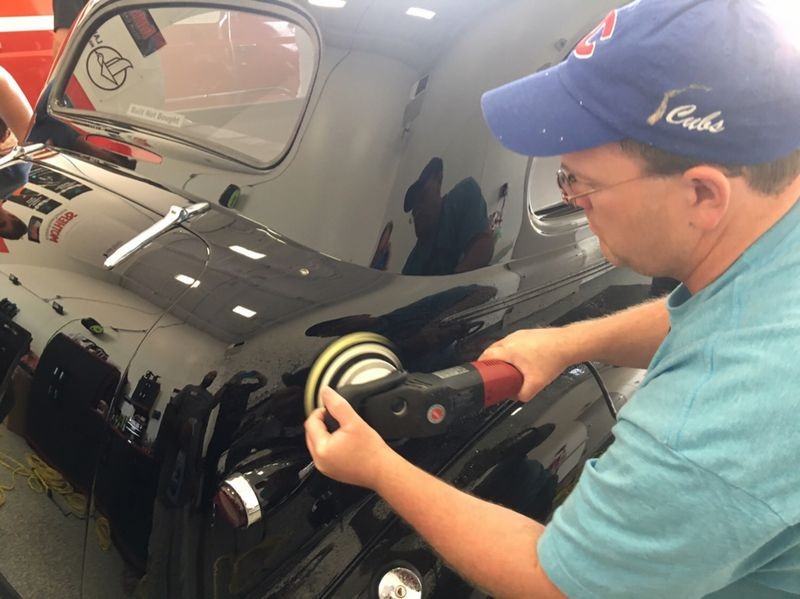
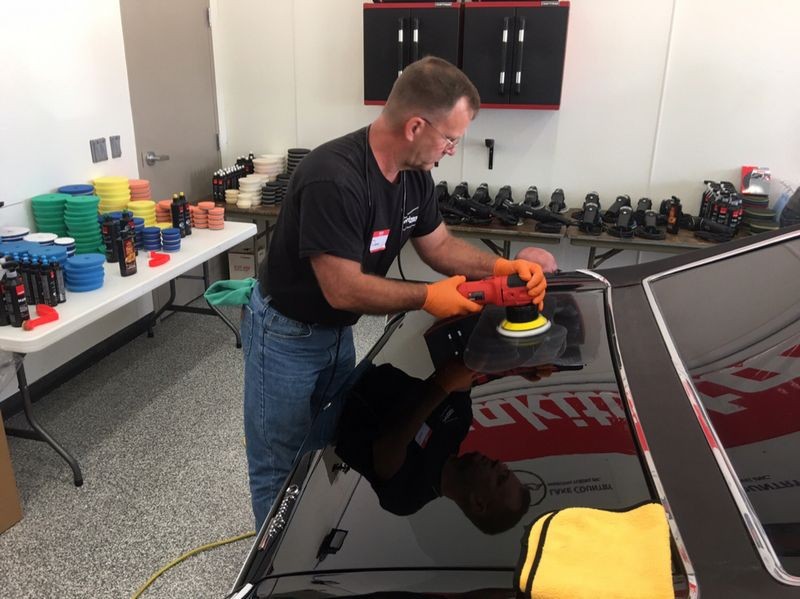
After cleaning, decontaminating the paint and then inspecting both cars for pre-existing damage, I again demonstrated how to do a Test Spot using the Griot's BOSS System and then went over the correct techniques for using the Griot's BOSS 15 and BOSS 21 Long Stroke Orbital Polishers.
Next up - hands-on learning. Note again, no pictures of anyone sitting in chairs.
Because the new FLEX Mini Polisher is NOT available at the time of this class and the only one available in the United States for people to test out is my Prototype, the class was encouraged to use the FLEX Prototype at anytime and on any car even when the focus of the class was on a specific tool brand, in this case Griot's BOSS System.

Not a lot of pictures of the Griot's BOSS System being used on the 1968 Dodge Dart so use your imagination...
Even though the Griot's 3" Mini Polisher has a 5mm orbit stroke length and is NOT a part of the BOSS System, it's perfectly okay to use it where and when it's needed in our classes, for example the THIN panel on the tops of the fenders.
We do use it with the BOSS pads and chemicals during the BOSS portion of the class.


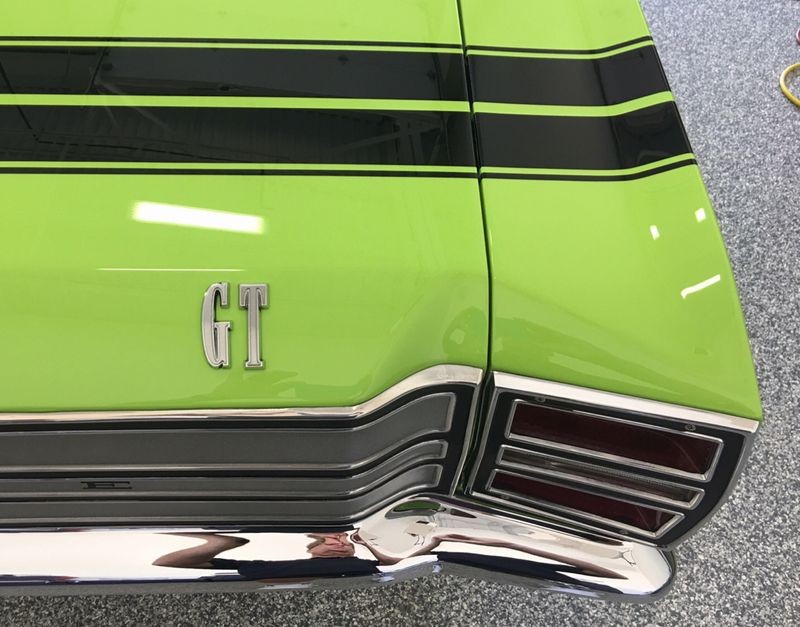
Results
And here are the beauty shots...


Comments....
At this point of the class, everyone has spent plenty of time using 8mm, 5mm, 15mm and 21mm free spinning orbital polishers as well as two brands of pro grade compounds, polishes and waxes.
We also covered lots of techniques that simply don't show up in a picture, like inspecting your microfiber towels before wiping polished paint etc..
The only way to learn so much information while re-enforcing the information with real-world, hands on learning is by attending one of these classes.
Also, by now the students in my class know how the class rolls. That is, cars come in, we clean using one of 4 methods of cleaning a car, visual inspection, mechanical decontamination, VIF form, Tape-off and cover-up, Test Spot, demonstration of correct technique and then time to learn by doing, not listening to me talk.
So now everything goes faster...
These classes are dialed-in. I've been doing this as long and in most cases longer than anyone breathing. Read the testimonies from the people that have attended one or more of these classes.
These classes are fun and that's important but they are also intensely educational.
-
Re: What it's like to attend an Autogeek Roadshow Detailing Class - Lots of pictures!
Continued....
Next up are the RUPES tools and the RUPES paint polishing system.
Including,
RUPES iBrid Nano Long Neck
RUPES iBrid Nano Short Neck
RUPES BigFoot 21 - both Legacy and Mark II
RUPES BigFoot 15 - both Legacy and Mark II
RUPES Duetto 12
RUPES Mini 12
The RUPES Paint Polishing System which includes the matching RUPES pads, compounds, polishes and LSPs.
As a professional courtesy to all my friends at RUPES and any company that offers a complete system, when I teach how to use their tools I also teach how to use their system. It's the right thing to do and service to the people that attend our classes wanting to learn about not only a specific brand of tool but the rest of the companies' line.
For the RUPES class I have two really cool cars... and HUGE cars so everyone gets TONS of hands-on time with the tools.
HOWEVER
Before we move onto the RUPES tools and paint polishing system the class was in for a real treat. One of the cars in the class has old, even antique single stage paint. I am the ONLY guy in the world with multiple articles on how to correctly restore antique and original single stage paint.
So when I have a car in one of my classes that has oxidized, chalky antique or original single stage paint I share with them what I call,
The #7 Rub Down Technique
At the end of this post I'll include the link to all my articles on using the only product on the market today that was on the market at the time the Ford Model T was around. (This means the only product on the market today that was around when car paint was invented).
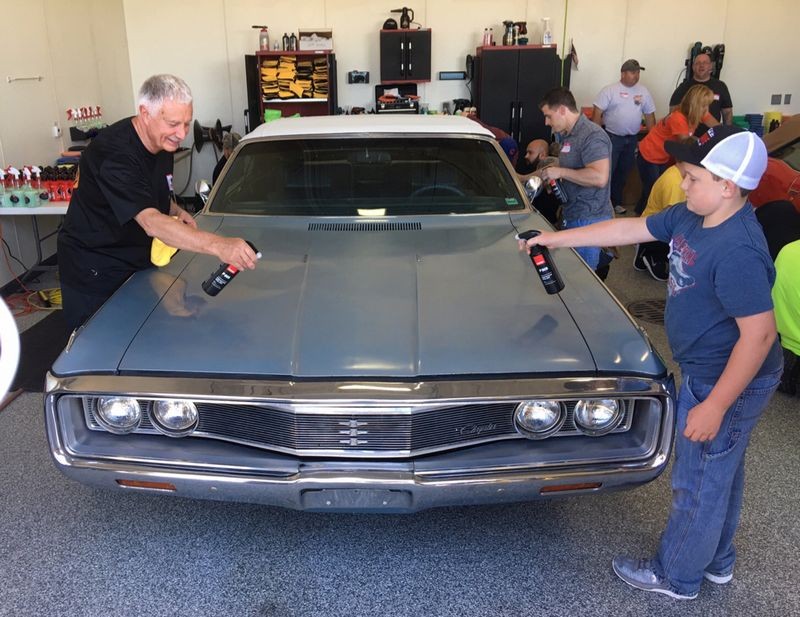
Here's the car, a 1969 Chrysler Newport Convertible
And here's the bottles of #7 I packed and shipped to Wisconsin for this class. You can also see other items that were packed and shipped for one of our roadshow detailing classes. You want to have some fun and learn a lot? Then when you see one of our classes coming to your State, don't hem and haw... get signed up.
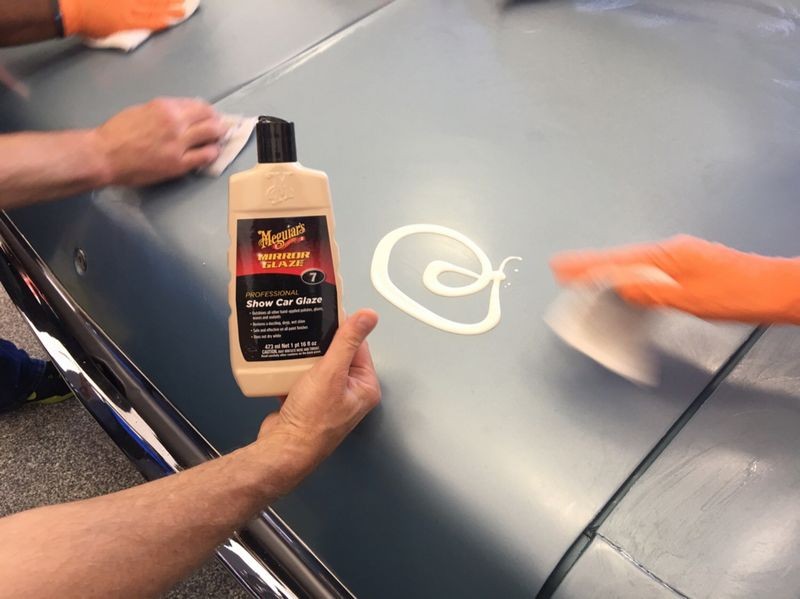
How to restore neglected single stage paint with Meguiar's #7
First we wiped both cars for the RUPES class down using the RUPES M606 Rapid Cleaner Detailer. We basically used it as a waterless wash.
The SECRET to applying #7 and restoring antique singles stage paint is NOT using abrasives but instead using 100% cotton terrycloth and elbow grease you supply.
I am always teaching people that fibers are a form of abrasive. When you cut with a wool cutting pad on a rotary buffer or a microfiber pad on a dual action polisher, part of the abrading action taking place is the FIBERS of these types of pads CUTTING the paint.
When it comes to SAFELY restoring paint that is important to you or your customer, instead of using abrasives, I teach people to use fibers in the form of a piece of terry cloth plus the trade secret oils found in the #7 as both a lubricant and the magic juice that brings out the full richness of color in the pigments in single stage paint.
The results are usually incredible considering the paint and the approach.
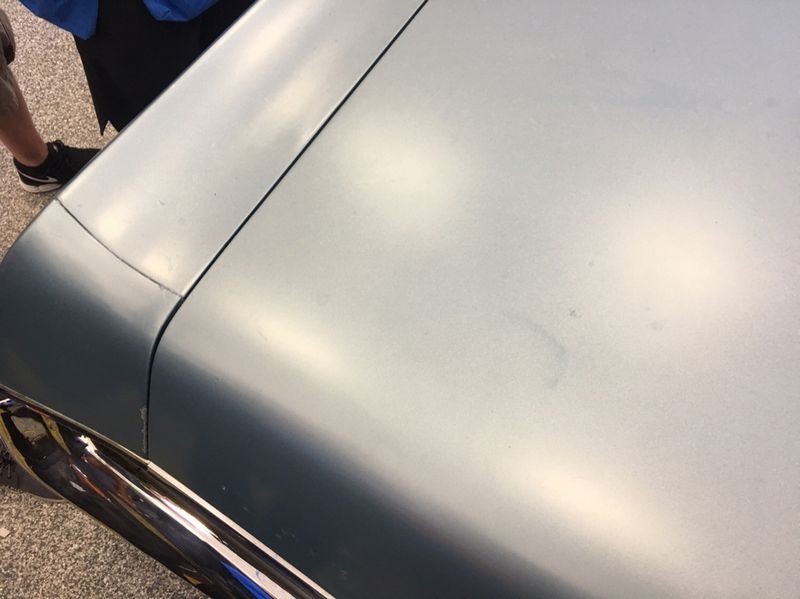
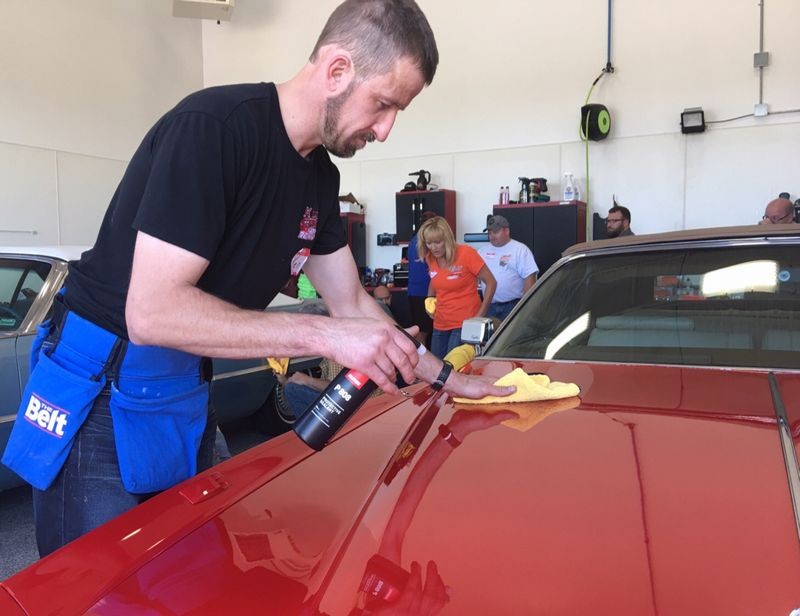
Here's the clean trunk lid....

Here's some #7, some terrycloth and some elbow grease...
Before
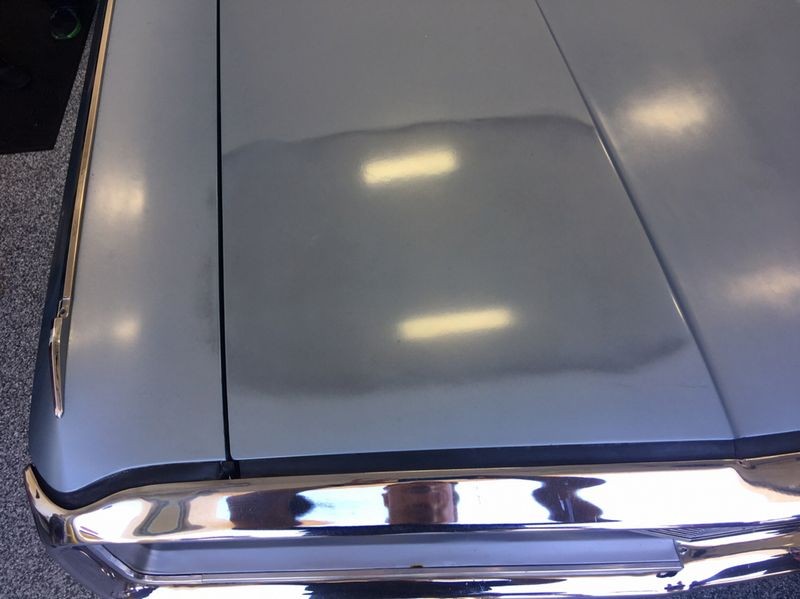
After

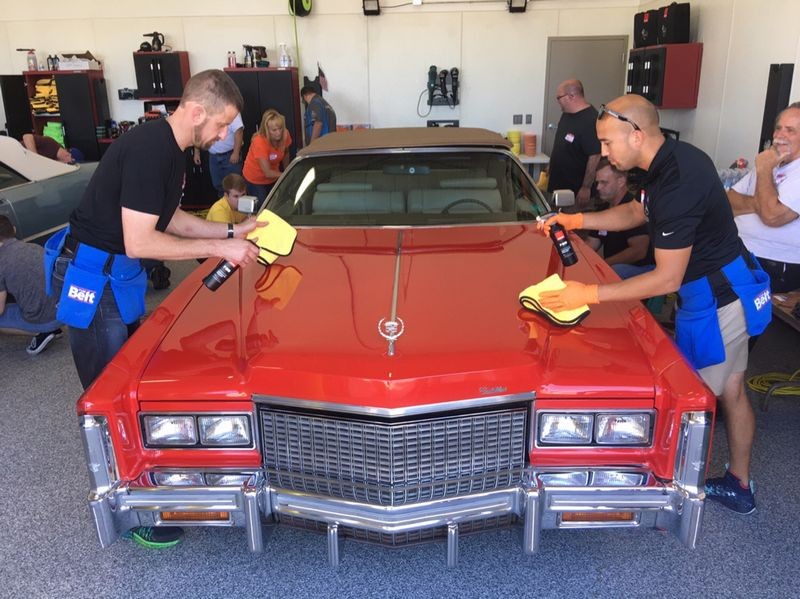
Now it's time for hands-on learning. This is such a rare experience. Where else are you going to learn this technique?

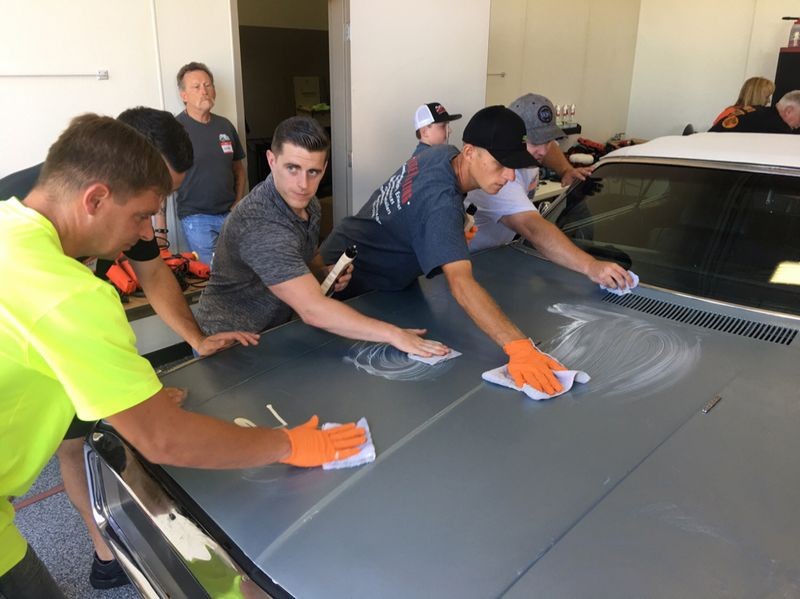

The application is done and now the class is wiping the #7 off the paint.

This was mostly a lesson on "how to do it" so if any of these people are requested to restore antique paint in the future they will have, the experience the knowledge, the skill and most important... the confidence to tackle the project.
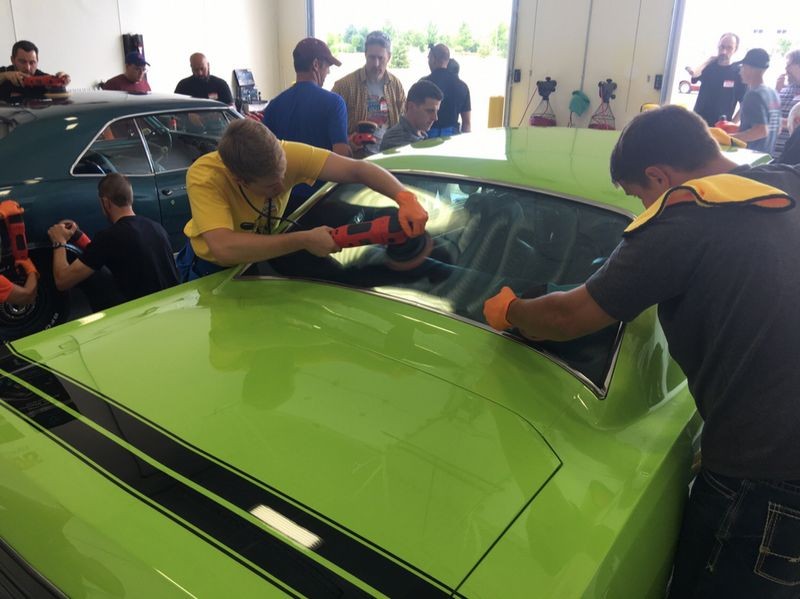
After showing how to restore antique paint now it's time to move on to how to use the RUPES Paint Polishing System.
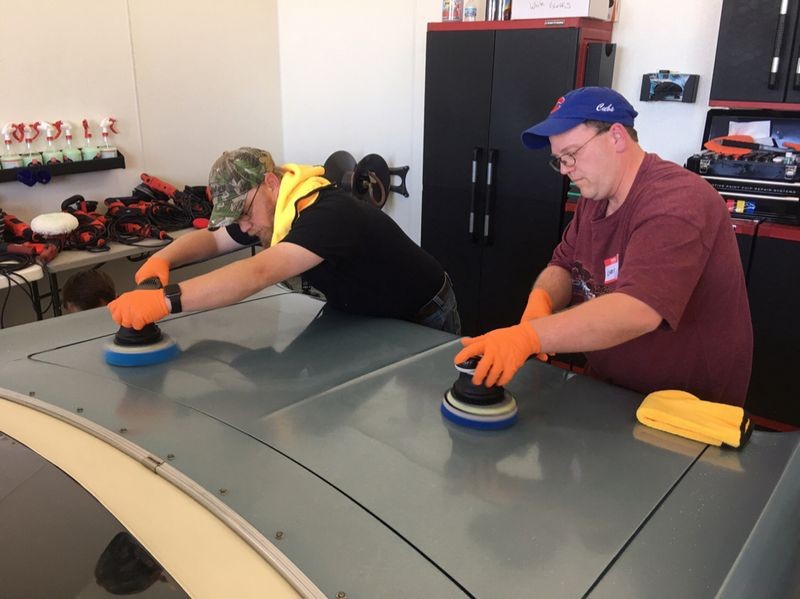
At our classes there are always more than enough tool so EVERYONE gets their own tool of choice to learn and practice with. Note again, no chairs.

TEST SPOT and Technique
First I show exactly how to do a test spot using the RUPES paint polishing system. Then I go over the techniques for using the various RUPES tools.
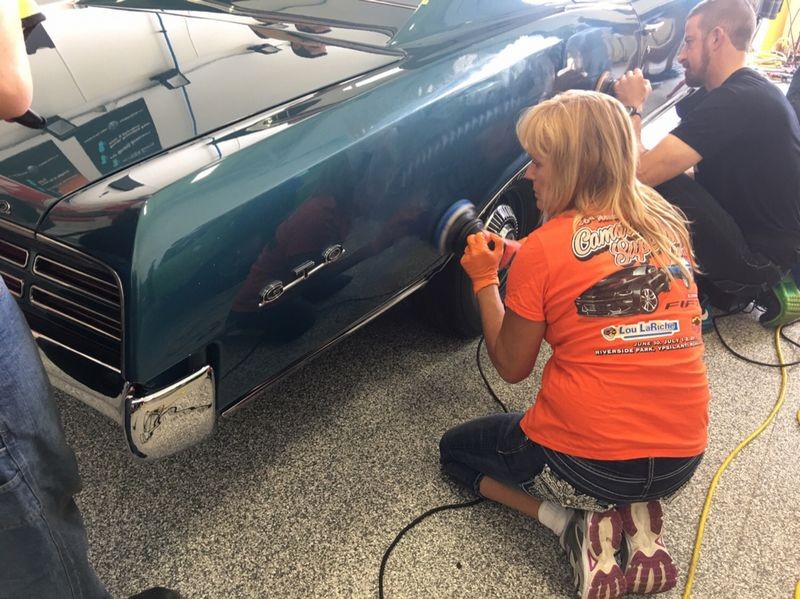
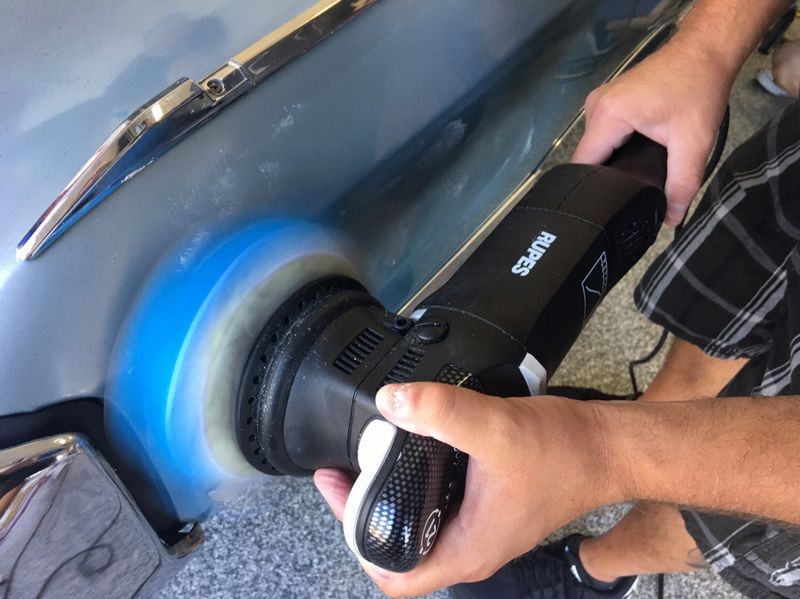
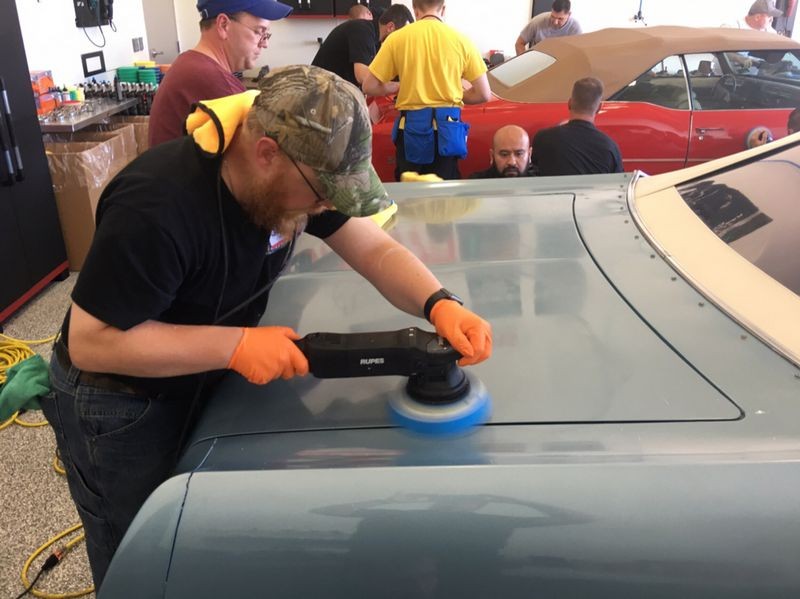
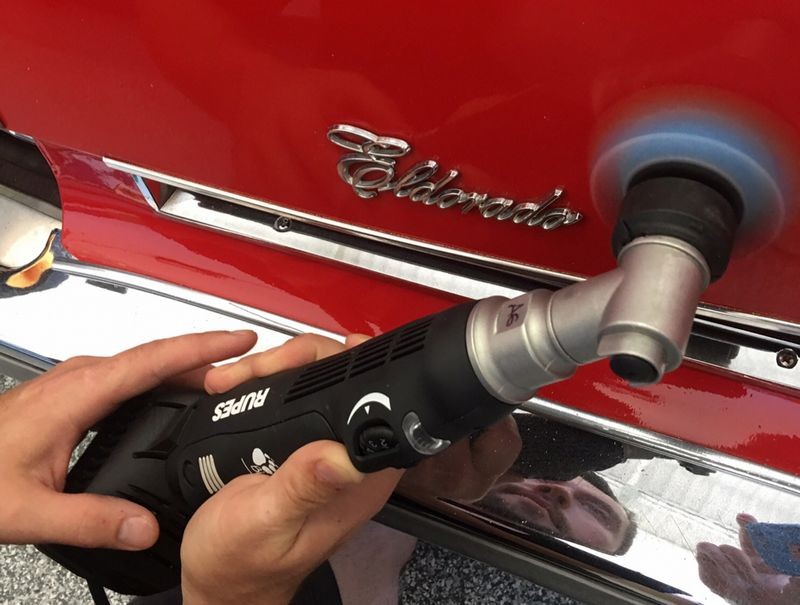
Paint correction and polishing with RUPES - 1969 Chrysler Newport Convertible
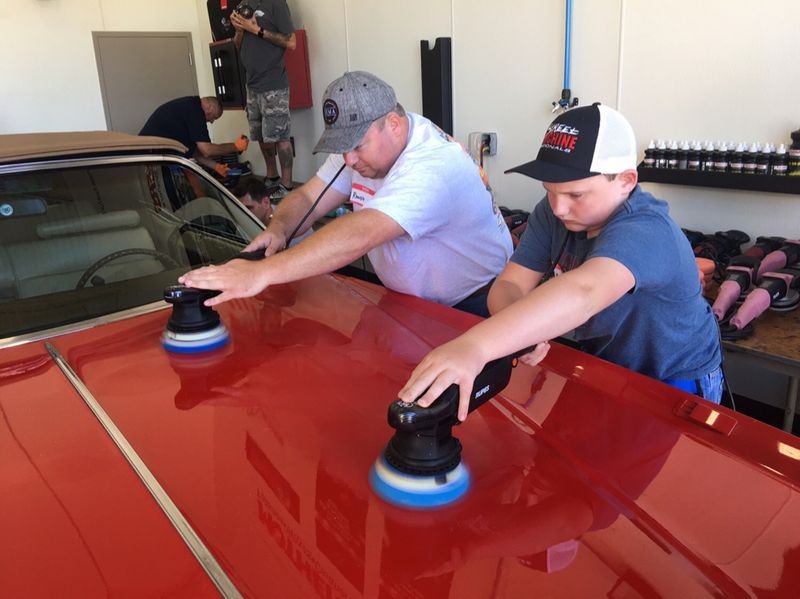
After that it's time for the students to learn by doing, not listening to someone talk or watching someone else run a buffer...


Paint correction and polishing with RUPES - 1976 Cadillac Eldorado Convertible


Seal the deal
After all the correction and polishing work is completed it's time to seal the deal using RUPES P808


Results...
And here are the results....


Comments...
By now the class has used a LOT of tools, pads and products and pumped out 6 cars!
There's always a lot of interest in the RUPES tools and products I can guarantee you from the feedback I hear, everyone loves all the hands-on time they get with the RUPES system.
-
Re: What it's like to attend an Autogeek Roadshow Detailing Class - Lots of pictures!
Continued....
FLEX Power Tools Detailing Class
At this point of our class, we have detailed 6 cars and are moving on to numbers 7 and 8 and for these two cars the class will be starting with the gear-driven FLEX 3401 and then finishing out with the FLEX XFE7 15mm Free Spinning Orbital Polisher.
At this time FLEX does not offer their own line of compounds and polishes as their tools are meant to work with any quality brand of compound, polish and wax. For this FLEX class we'll be using the SONAX CutMax for our compound and the SONAX EX 04-06 for our polish and then sealing chemically stripping the paint with Blackfire Crystal Coat Paint Prep and then sealing the paint with the SONAX CC36 Ceramic Paint Combo.
Here's the training cars for the FLEX class
1965 Ford Econoline Van

1939 Chevy Streetrod
How to wash a car?
For all the cars you've seen so far we've used one of these options,
Spray Detailer
Waterless Wash
Rinseless Wash
(We'll get to traditional wash methods when we get into production detailing, right now we're covering show car detailing)
For the Van and the Chevy Streetrod when went over how to use the Wolfgang Uber Waterless Wash. You can see the bottle of concentrate on the Grit Guard Universal Detailing Cart in the picture below.

Mechanical Decontamination
After getting both vehicles clean the next step was to mechanically decontaminate the paint. Mechanical decontamination means to remove above surface bonded contaminants, these would be the contaminants that don't simply wash off. Things like,
- Overspray paint
- Industrial fallout
- Traffic pollution
- Tree Sap Mist
For the previous 6 cars we used,
- Detailing Clay
- Nanoskin Towels
For the FLEX class we're going to use Nanoskin Autoscrub Pads on the FLEX tools to remove the overspray paint on both cars.
Nanoskin Autoscrub Pads
Machine decontaminating the paint on the 1939 Chevy Streetrod


Machine decontamination to the 1965 Scooby Doo Van


TEST SPOT and Technique
Next up is learning how to do a Test Spot using the FLEX 3401 with SONAX CutMax and Lake Country Force Hybrid Foam Cutting pads.
After performing the test spot, next we went over the correct techniques for holding and using the FLEX 3401 and the FLEX XFE7 for both paint correction, (removing swirls and scratches), and then machine polishing to maximize the gloss and clarity of the paint.
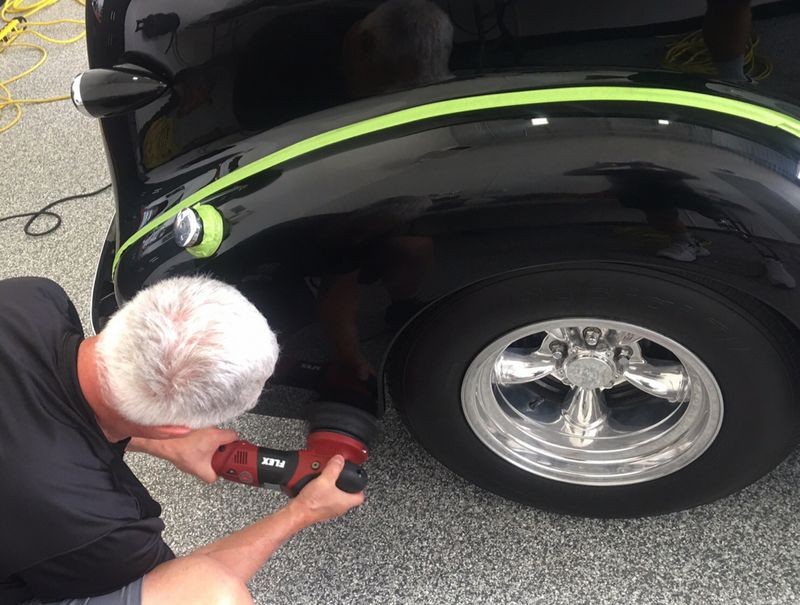
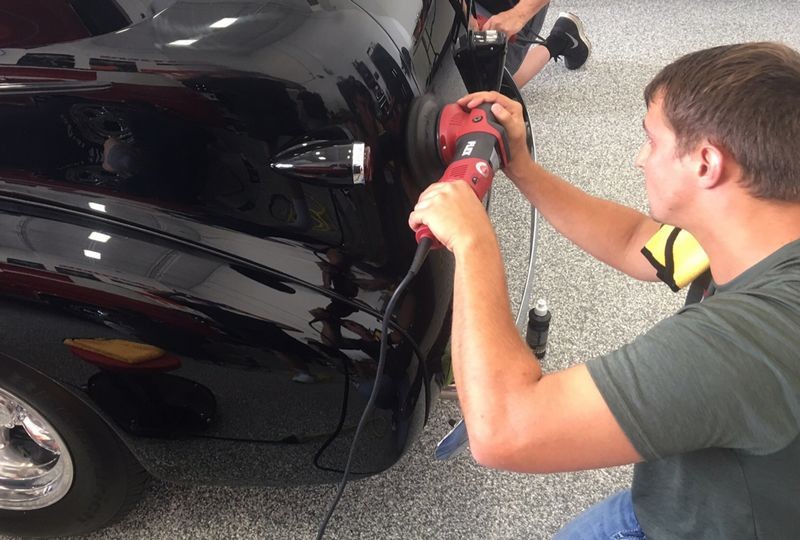
Correction work using the FLEX 3401 aka the BEAST and SONAX CutMax


Polishing with the FLEX XFE7 aka the FINISHER and SONAX EX 04-06


Correction work using the FLEX 3401 aka the BEAST and SONAX CutMax


Polishing with the FLEX XFE7 aka the FINISHER and SONAX EX 04-06


How to apply the SONAX CC36 Ceramic Paint Coating
After the compounding and polishing step the next step is to learn how to chemically strip the paint to remove any residual polishing oils off the paint so they don't interfere with the bonding of the ceramic paint coating. For this I brought the BLACKFIRE Crystal Coat Paint Prep.

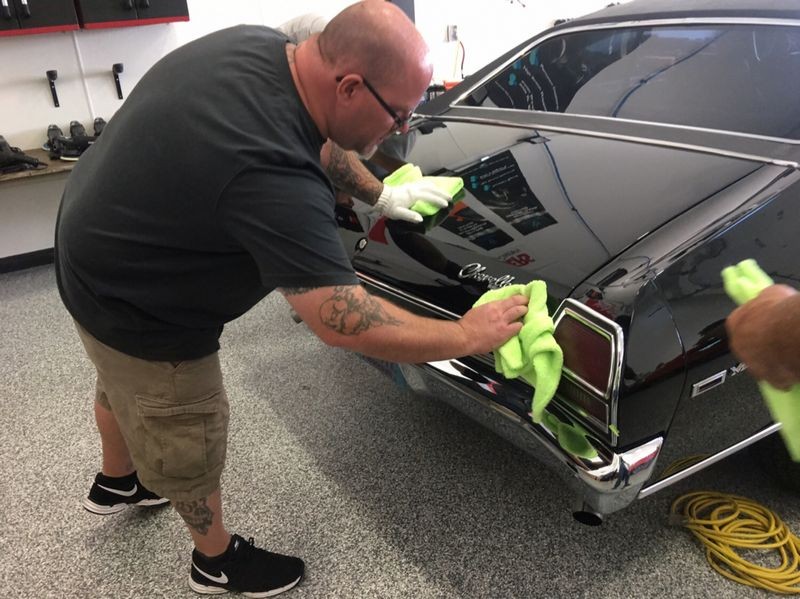
I bring special microfiber towels for both the chemical stripping step and the final buff of the coating to remove high spots...
And of course, plenty of CC36 Coating and applicators so everyone gets to apply the coating.
Applying SONAX CC36 to the 1939 Chevy Streetrod

Applying the SONAX CC36 Ceramic Paint Coating to the 1965 Ford Econoline Van


Results
And here are the beauty shots of the finished work...
1939 Chevy Streetrod corrected with FLEX and SONAX and sealed using a ceramic paint coating


1965 Ford Econoline Van corrected with FLEX and SONAX and sealed using a ceramic paint coating


Comments....
The 1939 Chevy provides a great lesson on how to buff out curves as it has a lot of curvy panels. It also has a rain gutter rail that the students need to learn how to buff around without damaging.
The Scooby Doo Van was probably the most popular vehicle here for this class and while the panels were large and flat there were still plenty of areas that require focused attention to avoid mistakes.
I think the class really likes getting to use so many free-spinning orbital polishers before working their way to the gear-driven FLEX 3401 and seeing just what it's like to go from free spinning to gear-driven.
Switching back to the FLEX XFE7 - a free spinning 15mm long stroke polisher - AFTER using the gear-driven FLEX 3401 is also a great learning experience since it's both extreme options when it comes to power tools.
After detailing these two cars the class has now successfully detailed a total of 8 cars and used over 14 different polishers and a huge selection of different types of products and pads plus LSPs.
There is simply no other car detailing class like the classes offered by Autogeek at their corporate office in Stuart, Florida or their roadshow classes coming to city near you.
The important thing to know is that for the Roadshow Detailing Classes - YOU MUST sign up 4 weeks out from the date of the class.
You cannot wait until a week or two before the class because if too many people wait and we don't have 15 people signed up before the 30 day mark - the class will be canceled and that's how the cookie will crumble.
Just saying... people been asking me to bring our Stuart class on the road for years now... and now that we're doing it it's time to put your money where your mouth is and get signed up early.
Similar Threads
-
By Mike Phillips in forum PICTURES: 3-Day CAR Detailing Bootcamp Classes
Replies: 30
Last Post: 08-12-2020, 08:19 PM
-
By Mike Phillips in forum 2-Day BOAT Detailing Classes - Info & Dates
Replies: 10
Last Post: 08-12-2020, 03:12 PM
-
By Mike Phillips in forum PICTURES: 2-Day BOAT Detailing Classes
Replies: 11
Last Post: 03-02-2020, 10:05 AM
-
By Mike Phillips in forum PICTURES: 3-Day CAR Detailing Bootcamp Classes
Replies: 10
Last Post: 03-28-2017, 09:20 AM
-
By Mike Phillips in forum PICTURES: 3-Day CAR Detailing Bootcamp Classes
Replies: 18
Last Post: 08-24-2015, 08:09 AM
 Members who have read this thread: 0
There are no members to list at the moment.
Posting Permissions
- You may not post new threads
- You may not post replies
- You may not post attachments
- You may not edit your posts
-
Forum Rules
|
| S |
M |
T |
W |
T |
F |
S |
| 26 | 27 | 28 | 29 | 30 | 31 |
1
|
|
2
|
3
|
4
|
5
|
6
|
7
|
8
|
|
9
|
10
|
11
|
12
|
13
|
14
|
15
|
|
16
|
17
|
18
|
19
|
20
|
21
|
22
|
|
23
|
24
|
25
|
26
|
27
|
28
|
29
|
|
30
| 1 | 2 | 3 | 4 | 5 | 6 |
|


 Likes:


 Reply With Quote


Bookmarks