 Thanks: 0
 Likes: 0
 Dislikes: 0
-
Garage Mods for Efficiency
If you're like me, you enjoy detailing. A lot. More than most "normal" people. However, I absolutely despise setting up my gear and cleaning up after I'm done. To me, that's just chore work that is not enjoyable.
I like rinseless washes when the situation calls for it, but on my weekends, weather permitting, I look forward to my traditional two-bucket washing with my music on and some cold drinks.
I like using a pressure washer, either for just initial blowing off the dirt before the 2BW or using a foam cannon. It's just fun. I also like to dry my cars using Metro's Master Blaster and vacuum them out as part of my maintenance routine.
The problem comes when setting up each step - plugging in the master blaster, wheeling it out to the car, drying, then putting things back after you're done. Then repeat for the vacuum.
A few years ago, I tried to optimize this process by placing the master blaster and vac n' blo on a cart. The idea was to simply wheel out the cart to do the job at hand. As novel as that was in theory, I found it cumersome and aggravating to use. It also took up a lot of space in the corner of the garage.
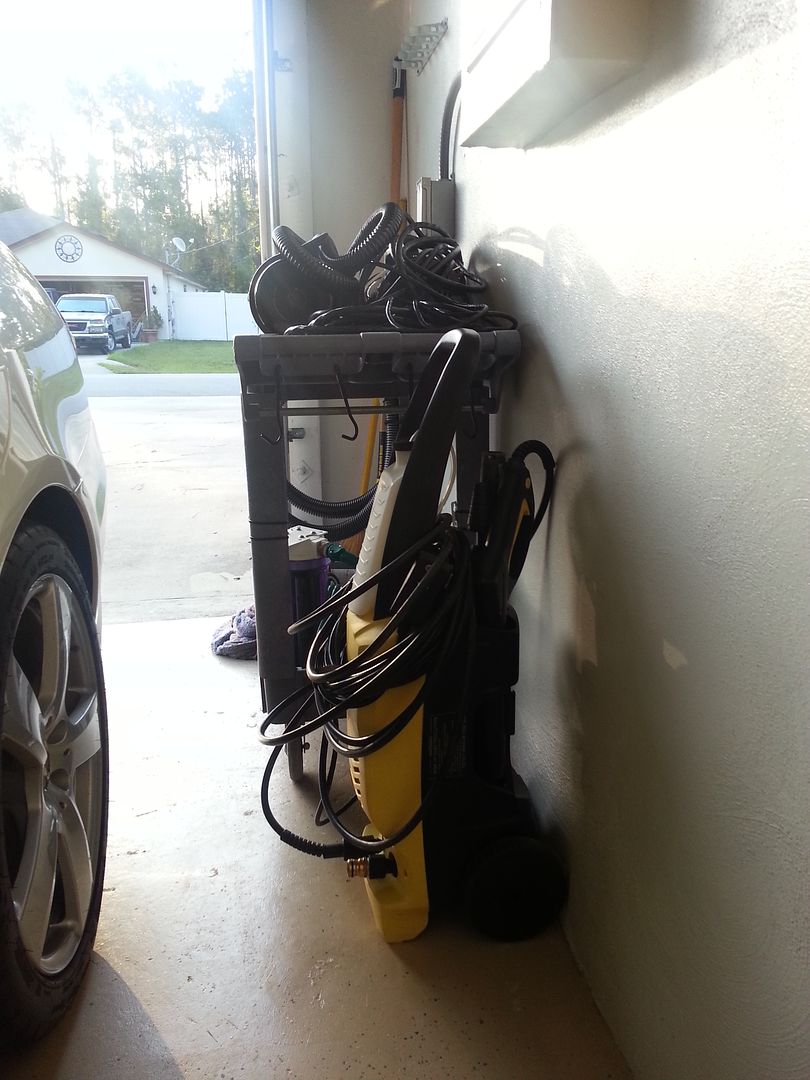
As you can see here, limited walking space results from the "cart". The last thing I want to do is brush my backside along the car everytime I want to get in or out (the front bumper is all the way up to the front shelf).
I wanted to change the way I did my maintenance washes. I wanted to set up my garage to be as efficient as possible for this very purpose.
So my idea was to wall mount everything in order to gain back the space around the car.
I bought some extensions for the Master Blaster as well as the Vac N Blo units, since they will now be staionary. I had to buy the mounting bracket for the MB as well, along with some hose hangers, wall hardware (Tapcon) as my garage wall was concrete block underneath stucco.
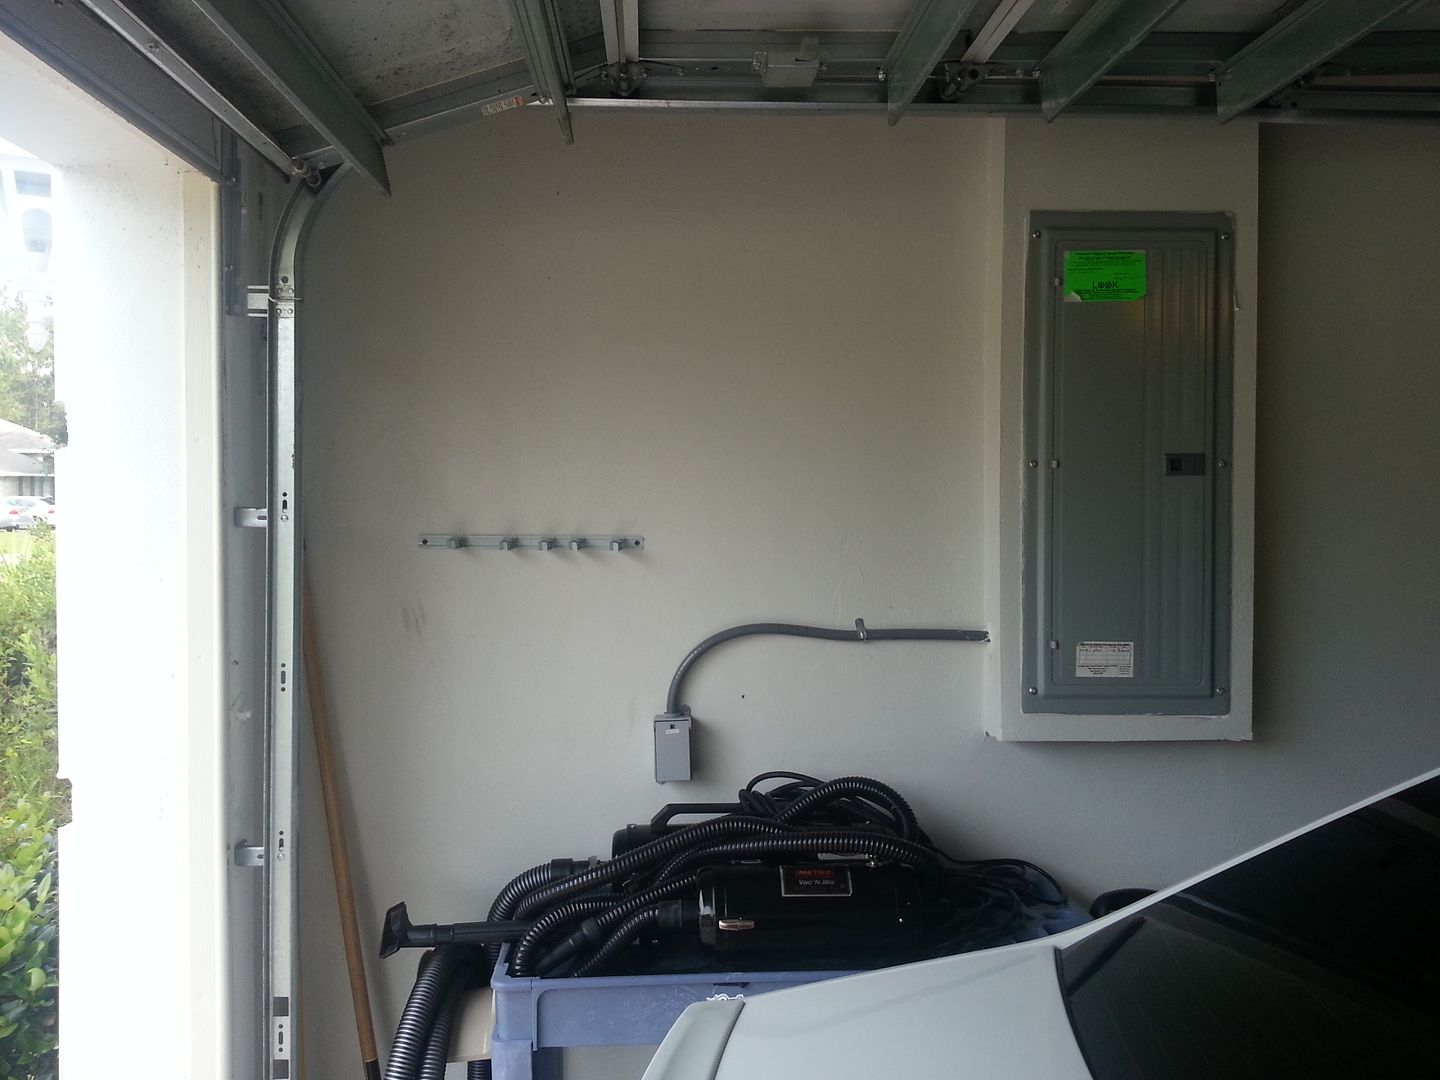
Here was my original idea
(Special thanks to SizzleChest for bringing his hammer drill and helping me do this)
Somehow it didn't look right. I tried to utilize that small area between the door and the wall for the units, which would minimize the loss of hose length that is useable, but it just didn't seem right to me.
Also my pressure washer needed replacing. It worked fine, but hated how it had no cord management, and it wasn't wall mountable. Trying to find an affordable, basic use, wall-mountable unit was almost impossible. Until I saw this on Pinterest...
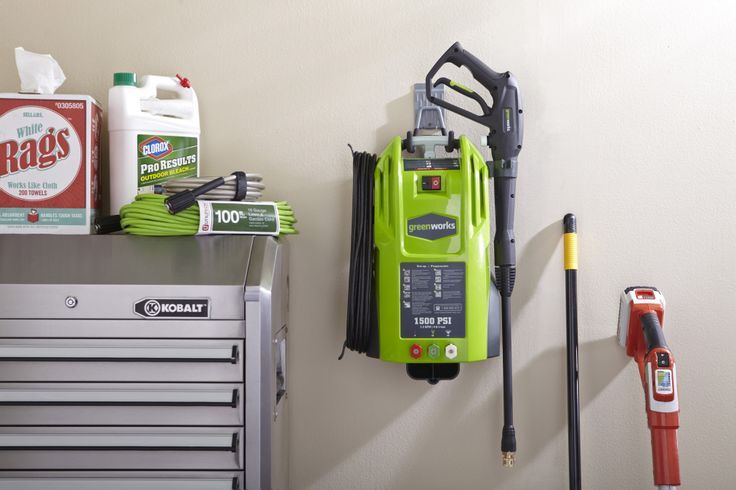
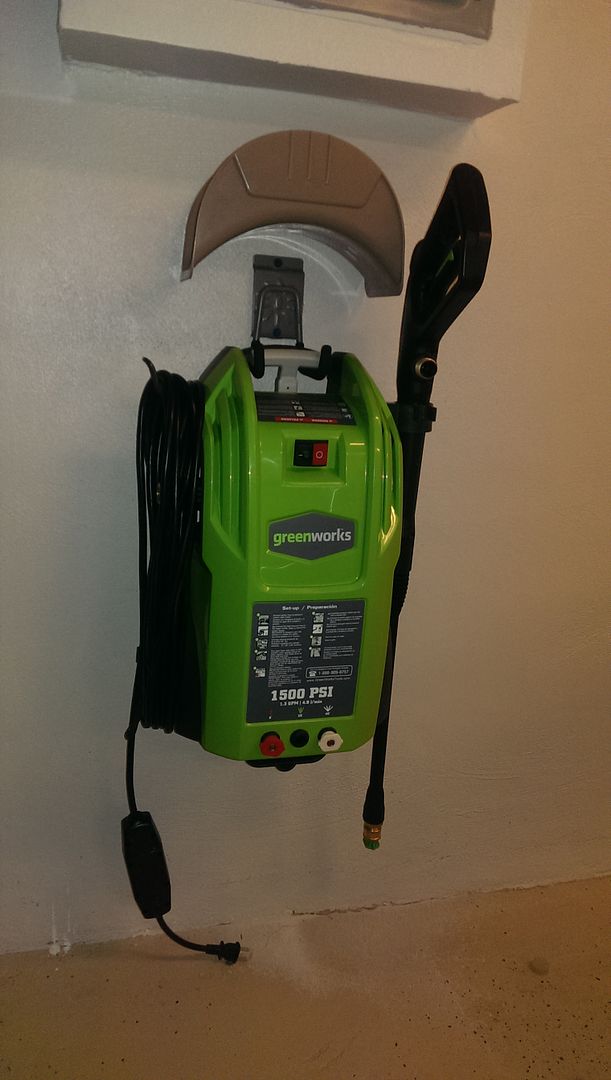
This was a pin from Lowe's. It shows one of their Greenworks pressure washers mounted using a hanger on a wall. I researched it a little and found that it uses standard 22mm connectors for the pressure hose. That means I can use a single 50-ft. pressure hose instead of having two hooked up together. Perfect. I have a Lowe's card. Even more perfect. I ordered it online and picked it up that evening at the store.
Within an hour, I had it mounted on the wall.
My plan was to use my existing hose hanger above the unit to hang the pressure hose.
This made me think of a better idea for mounting my Metro units. So, A few beers, a new hammer drill (my very own!) a bunch of Tapcons and even more mosquito bites later, I had this:
Ok so this is starting to take shape. All I needed now was to add an extra gang outlet to the existing electrical box I had installed for this purpose, then clean it up a little.
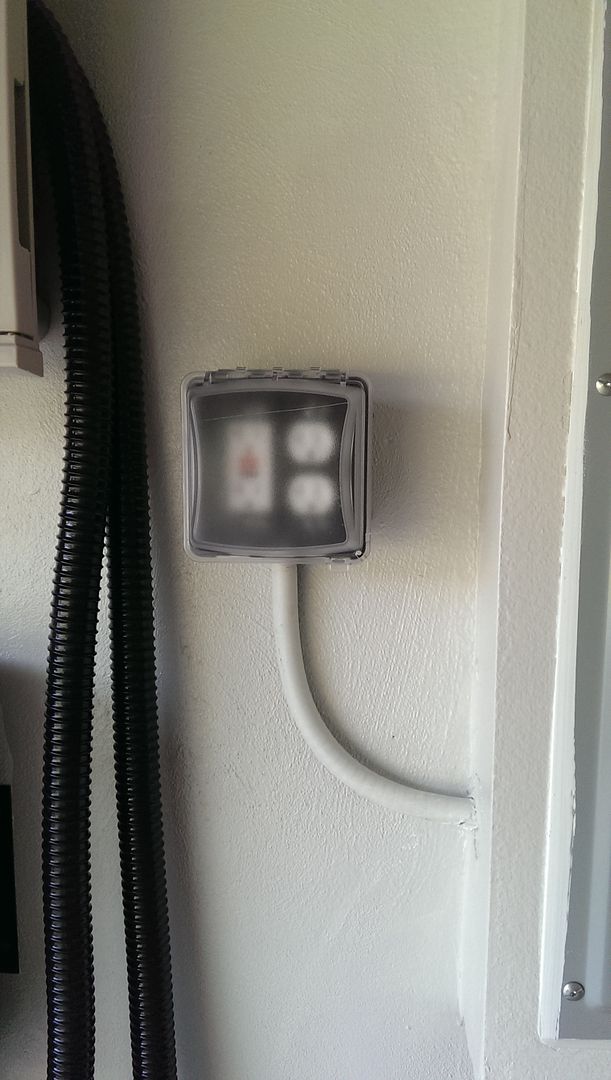
Here it is done with a cover and 4 outlets wired to a 30 amp dedicated breaker inside the main panel to the right. the left side is GFCI and the right side is not. There is no way I can use more than one of these outlets at any given time, unless I can somehow dry, vacuum and pressure wash the car simultaneously, so there are no issues with the amperage.
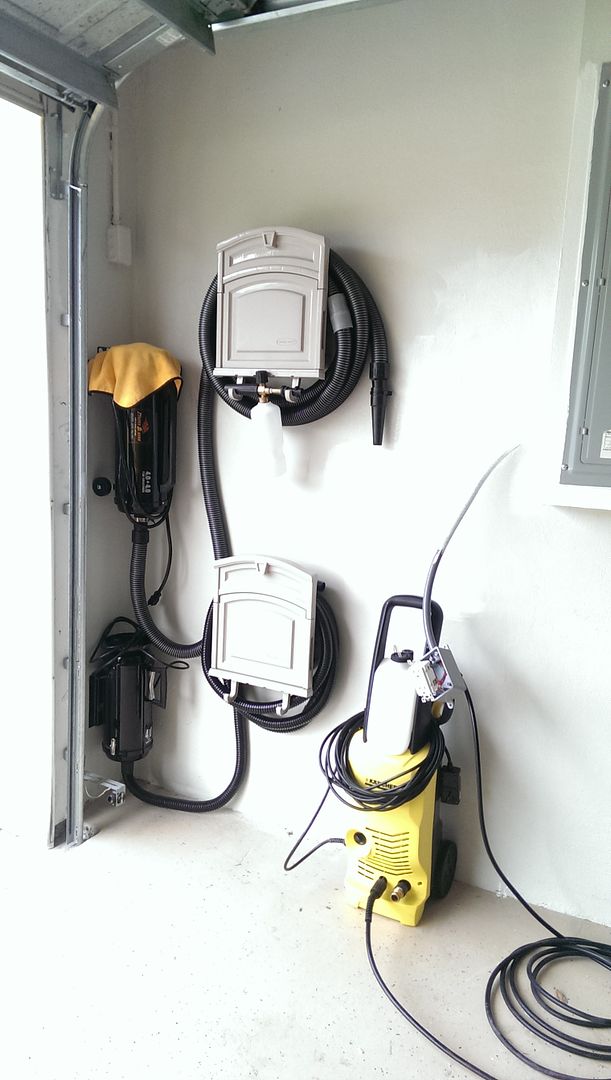
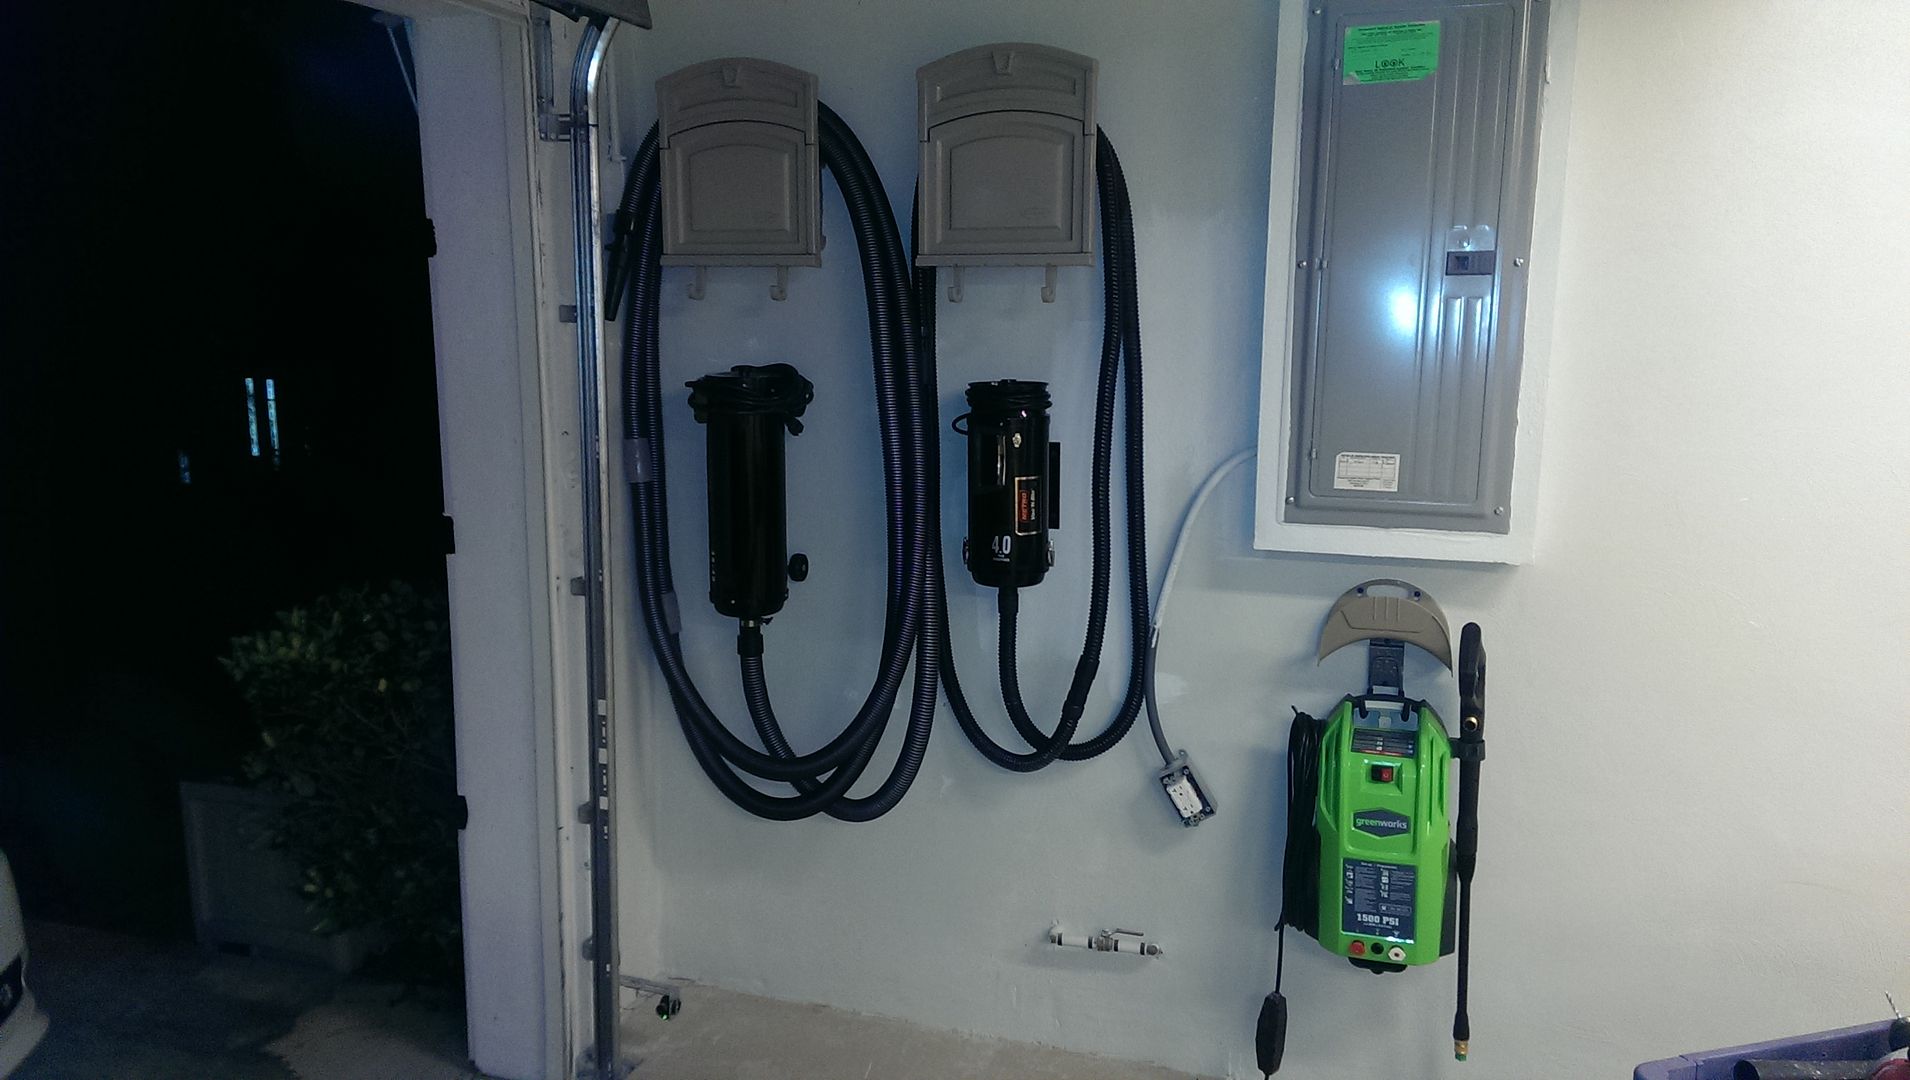
Here is what it looks like, almost complete.
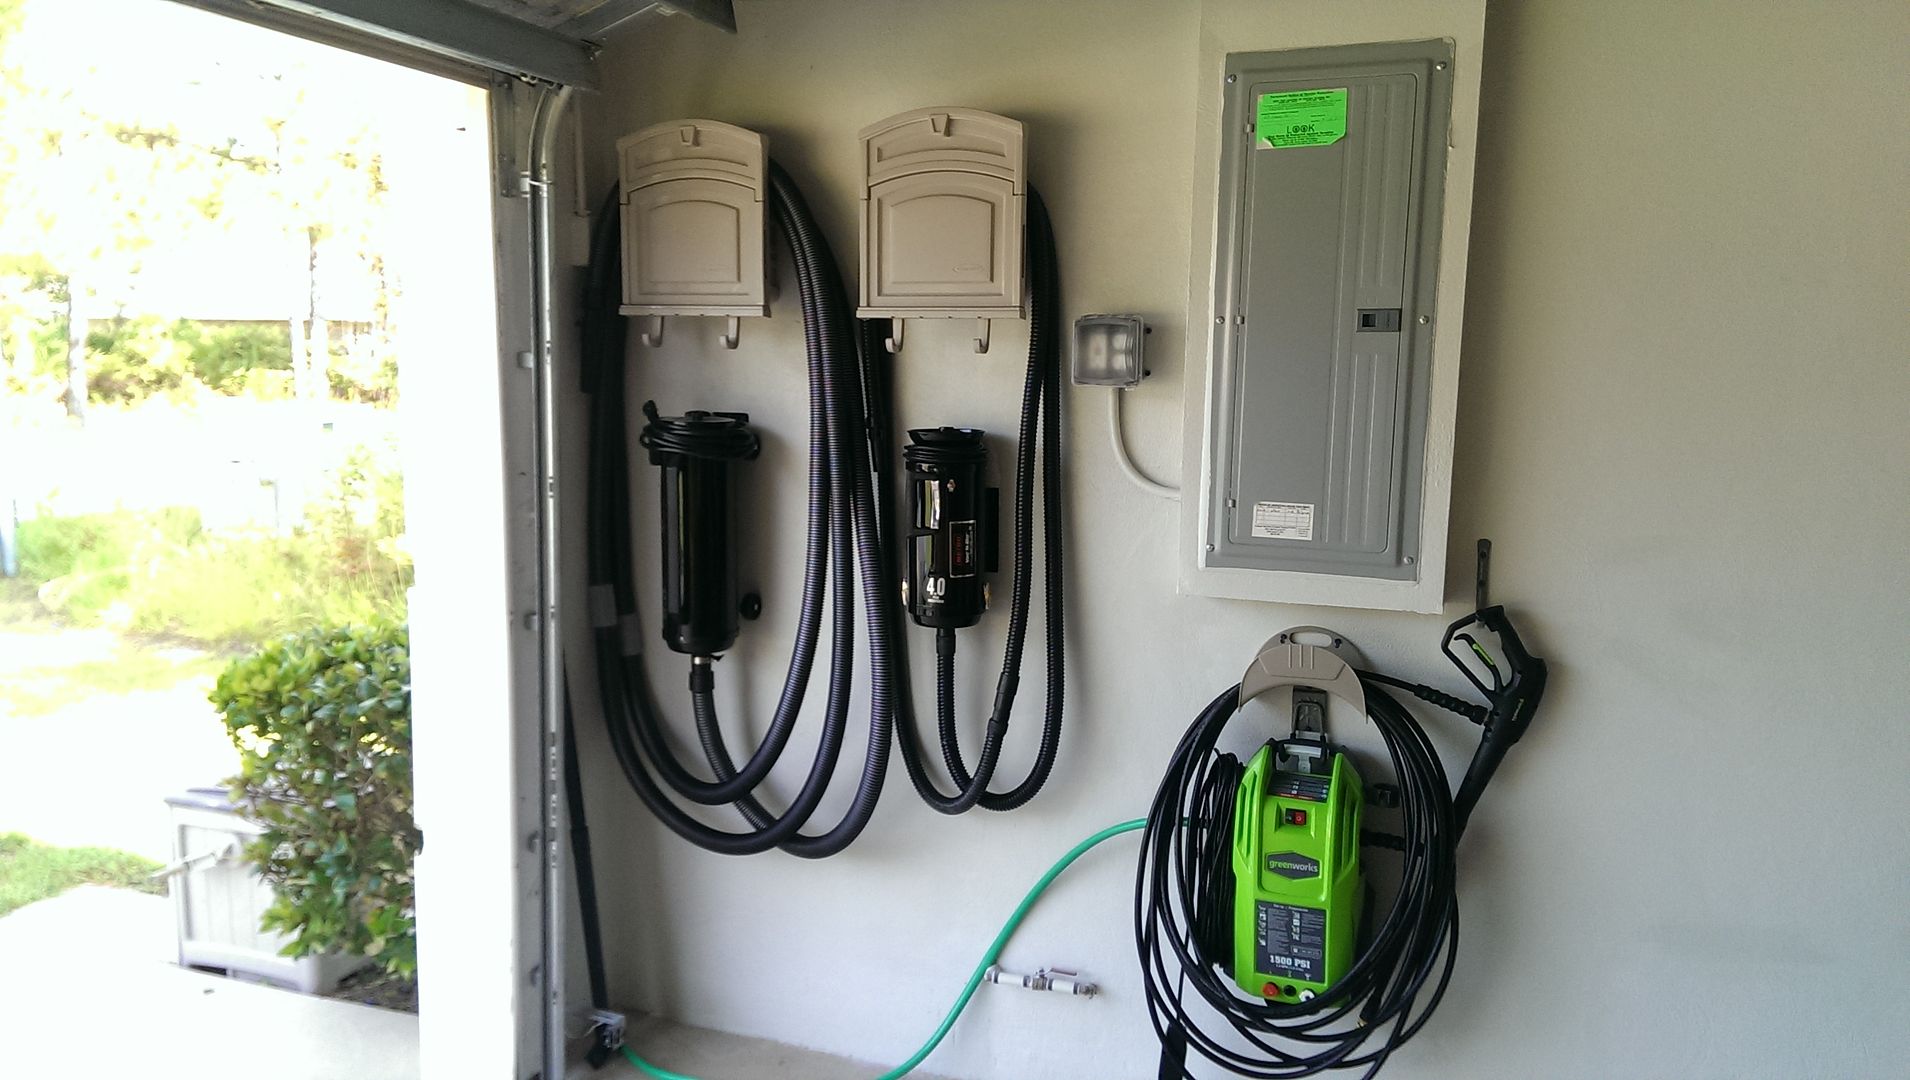
The above picture shows,
1. Master Blaster with Metro Wall Mount and two hose extensions (total of 30 ft.) Extensions were reinforced by Gorilla Glue as per Metro's recommendations.
2. Master Vac N Blo Wall Mount version - shown with 3 hose extensions (most likely will add a fourth).
3. Suncast hose hangers with built-in storage, mounted above each unit.
4. Greenworks 1500psi Pressure Washer with a generic hose hanger mounted above it and a 50' pressure hose with 22mm connectors, using the stock Greenworks gun. An additional hanger was installed to the right of the washer to hang the gun due to the size of the longer hose interfering with the built-in holster on the unit.
6 ft. leader hose connected to the left of the pressure washer with a male quick-disconnect attached to the outside end.
My outside water source (garden hose reel) sits just outside that wall (you can see it just outside the door) with the female quick disconnect and shut-off valve. This keeps any water that may flow out when I disconnect the ends to be towards the outside and not further into the garage.
I have ordered some cable covers so that I can route the power wires to the outlet and keep everything plugged in. When that is done, I will post the final pic, then testing to see if this is easier to use than the previous setup!
I welcome any suggestions to further optimize this setup.
-
Super Member

Re: Garage Mods for Efficiency
NICE!!!! Great little set up you have. Thanks for sharing!
-
Super Member

Re: Garage Mods for Efficiency
Awesome idea!!!!! My problem is always having places to leave all my mitts and brushes to dry. An over the door shoe hanging rack mounted on my wall works awesome!
-
Super Member

Re: Garage Mods for Efficiency
Looks great! I have been meaning to wall mount my Master Blaster too... can you show some more details on the wall mount? Is the MB unit totally secure from falling? It appeared to me that the unit could fall if accidentally bumped side to side... any info would be nice! Thanks 
 Retired Professional Detailer
-
Super Member

Re: Garage Mods for Efficiency
Nicely done. I need to get my Metro vac off the floor as well. Nice ideas.

Perfection is attained by slow degrees; it requires the hand of time. (Voltaire)
2013 TESLA MODEL S | Gyeon Syncro | Gyeon Cancoat
-
Re: Garage Mods for Efficiency
-
Re: Garage Mods for Efficiency
 Originally Posted by DaytonaJae

Here it is done with a cover and 4 outlets wired to a 30 amp dedicated breaker inside the main panel to the right. the left side is GFCI and the right side is not. There is no way I can use more than one of these outlets at any given time, unless I can somehow dry, vacuum and pressure wash the car simultaneously, so there are no issues with the amperage.
The newly organized area looks great!!
About your receptacles...If I'm not mistaken branch circuits for receptacles can only be 15 or 20 amp and never 30! What size wire did you use and what amp rating are the GFI and other receptacles?
FYI- I am not an licensed electrician
-
Re: Garage Mods for Efficiency
Originally Posted by zmcgovern45
can you show some more details on the wall mount? Is the MB unit totally secure from falling? It appeared to me that the unit could fall if accidentally bumped side to side... any info would be nice! Thanks
The mount is a single piece of metal that is mounted on to the wall using 3 screws. How strong it is depends on what you mount it to. In my case, I mounted it directly into concrete block using 3 Tapcon screws, pre-drilled. That mount is very sturdy and I can most likely do pull-ups on it (if I can do a pull-up lol) Most likely hang from it without feeling like it's ever gonna budge.
The way the unit hangs on the mount itself is a simple bar that extends between the front two wheels (or whichever set of wheels you want to mount the unit. In my case, I mounted the unit from the rear wheels so the output faces downward.)
The hanger's design makes it somewhat impossible to accidentally knock off the wall. You'd have to lift up the unit about 1 inch in a backwards direction to clear the lip of the mount. I'll take pics of it in more detail later on today when I get home for you, it's difficult to explain in words.
It does sway side to side if you brush up against it, but impossible to have it come off the hanger unless you physically try and lift the unit up past the lip, and as you know, the master blaster isn't a lightweight unit.
I was really afraid of it coming off and hitting a car in the middle of the night, etc... I mean, what detailer isn't afraid of something like that? But I feel very secure in the rigidity of these mounts.
-
Super Member

Re: Garage Mods for Efficiency
Wow very nice!! My garage is set up for working on a car at night but not like your set-up. Thanks for some ideas!!! Awesome garage stuff!! A garage is a mans castle!! Everything else is the woman's!!...LOL
-
Super Member

Re: Garage Mods for Efficiency
With those hose extensions for your MB, will you lose air force output?
Similar Threads
-
By RMM in forum Ask your detailing questions!
Replies: 11
Last Post: 02-12-2022, 02:03 PM
-
By Wills.WindowsAndWheels in forum Auto Detailing 101
Replies: 11
Last Post: 09-27-2018, 12:15 PM
-
By Gilberte Platz in forum Off-Topic
Replies: 11
Last Post: 02-16-2016, 06:53 AM
-
By brothercheese in forum Auto Detailing 101
Replies: 2
Last Post: 09-25-2015, 04:43 PM
-
By shadowstep in forum Auto Detailing 101
Replies: 8
Last Post: 10-19-2010, 02:59 PM
 Members who have read this thread: 0
There are no members to list at the moment.
Posting Permissions
- You may not post new threads
- You may not post replies
- You may not post attachments
- You may not edit your posts
-
Forum Rules
|
| S |
M |
T |
W |
T |
F |
S |
| 31 |
1
|
2
|
3
|
4
|
5
|
6
|
|
7
|
8
|
9
|
10
|
11
|
12
|
13
|
|
14
|
15
|
16
|
17
|
18
|
19
|
20
|
|
21
|
22
|
23
|
24
|
25
|
26
|
27
|
|
28
|
29
|
30
| 1 | 2 | 3 | 4 |
|


 Reply With Quote
Bookmarks