 Thanks: 0
 Likes: 0
 Dislikes: 0
-
Super Member

How to Repair 3-Prong Electrical Plug
Dear Friends
A few days ago the ground of my Master Blaster's plug broke off into my extension cord.
I'm not a card-carrying DIYer, but after wiring up my son's model railroad and doing a Google search for "Repairing 3-Prong Electrical Plug," I found this YouTube video:
Repairing a 3-Pronged Grounded Electrical Cord - YouTube
I read the comments and learned that the instructor made one error: it does matter which wire goes to which blade on the plug. In short, the green wire will go to the ground, the positive or black wire will go to the silver blade (or the blade on the top right of the ground plug if you're facing it), and the white or negative wire will go to the brass blade (or the blade on the top left of the ground plug).
A quick check at Wikipedia provided a wealth of information, including nomenclature and wiring diagrams for this type of plug as well as many others.
Here is the plug I purchased from Lowe's to replace the plug that came with my Master Blaster.
In short, here are the basic steps:
- Cut off the old plug with wire cutters.
- Using wire strippers strip about 0.50.75" of cover from the blunt end created in the previous step. This will expose three wires, each covered by its own jacket.
- Strip about half to three quarters of the exposed length of each of the three wires.
- Twist the ends of each of the three wires so that each is compact and can be threaded through a small opening.
- Thread housing of replacing plug on electrical cord.
- Insert each of the wires into its proper place on the replacement plug (green for ground, black for positive or top right, and white for negative or top left).
- Tighten the corresponding screws to secure the wire.
- Reassemble the plug and test.
Here are some quick-and-blurry pictures from my iPhone from my Master Blaster repair:

Broken stock plug
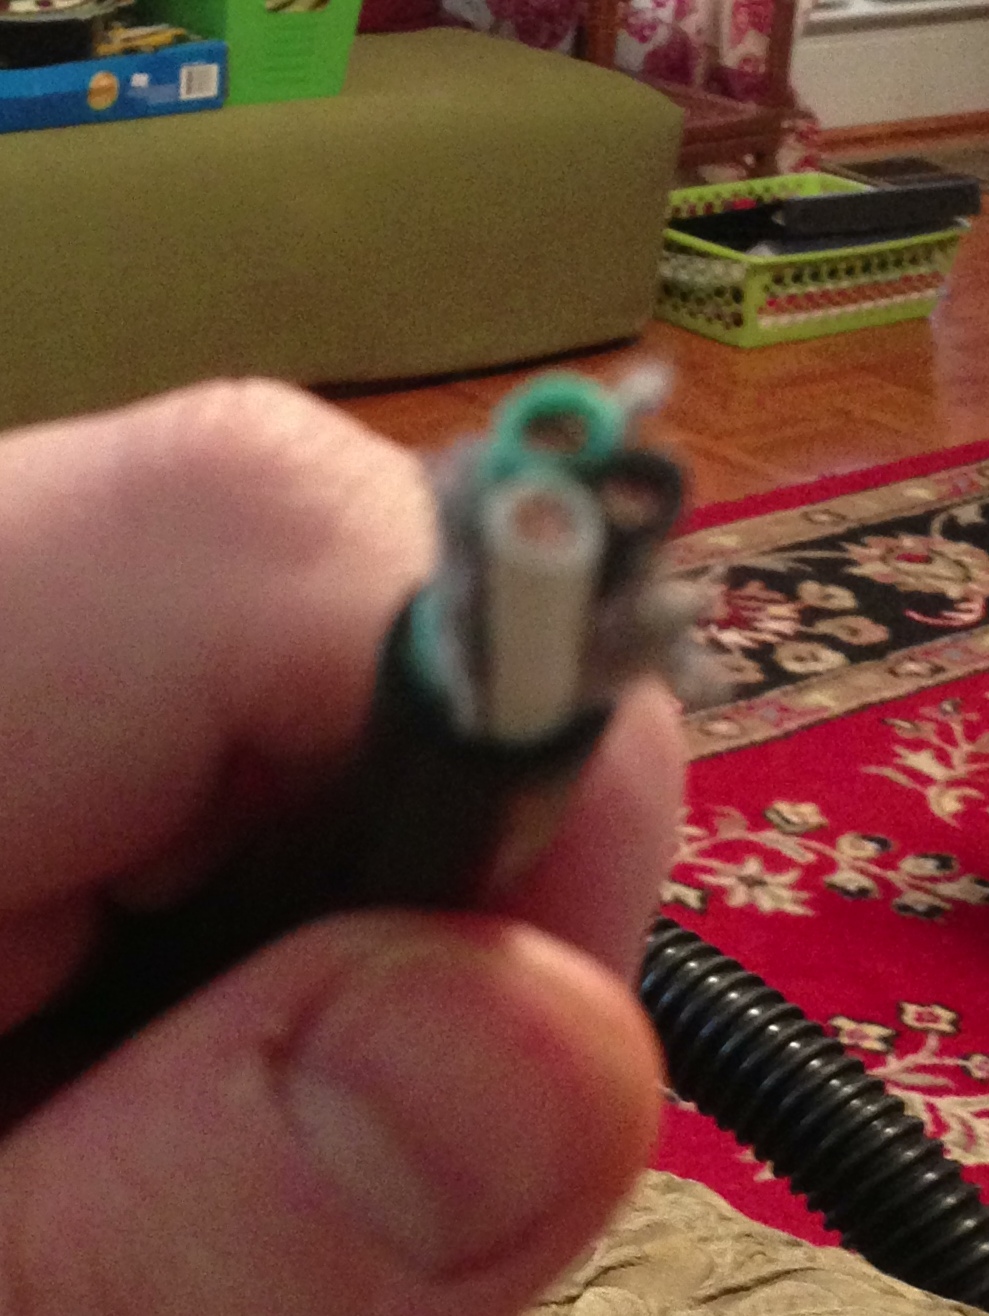
Exposed wires after snipping off broken plug. Notice the stringy insulation. I snipped those loose strings off when attaching the wires to their connector points on the replacement plug.
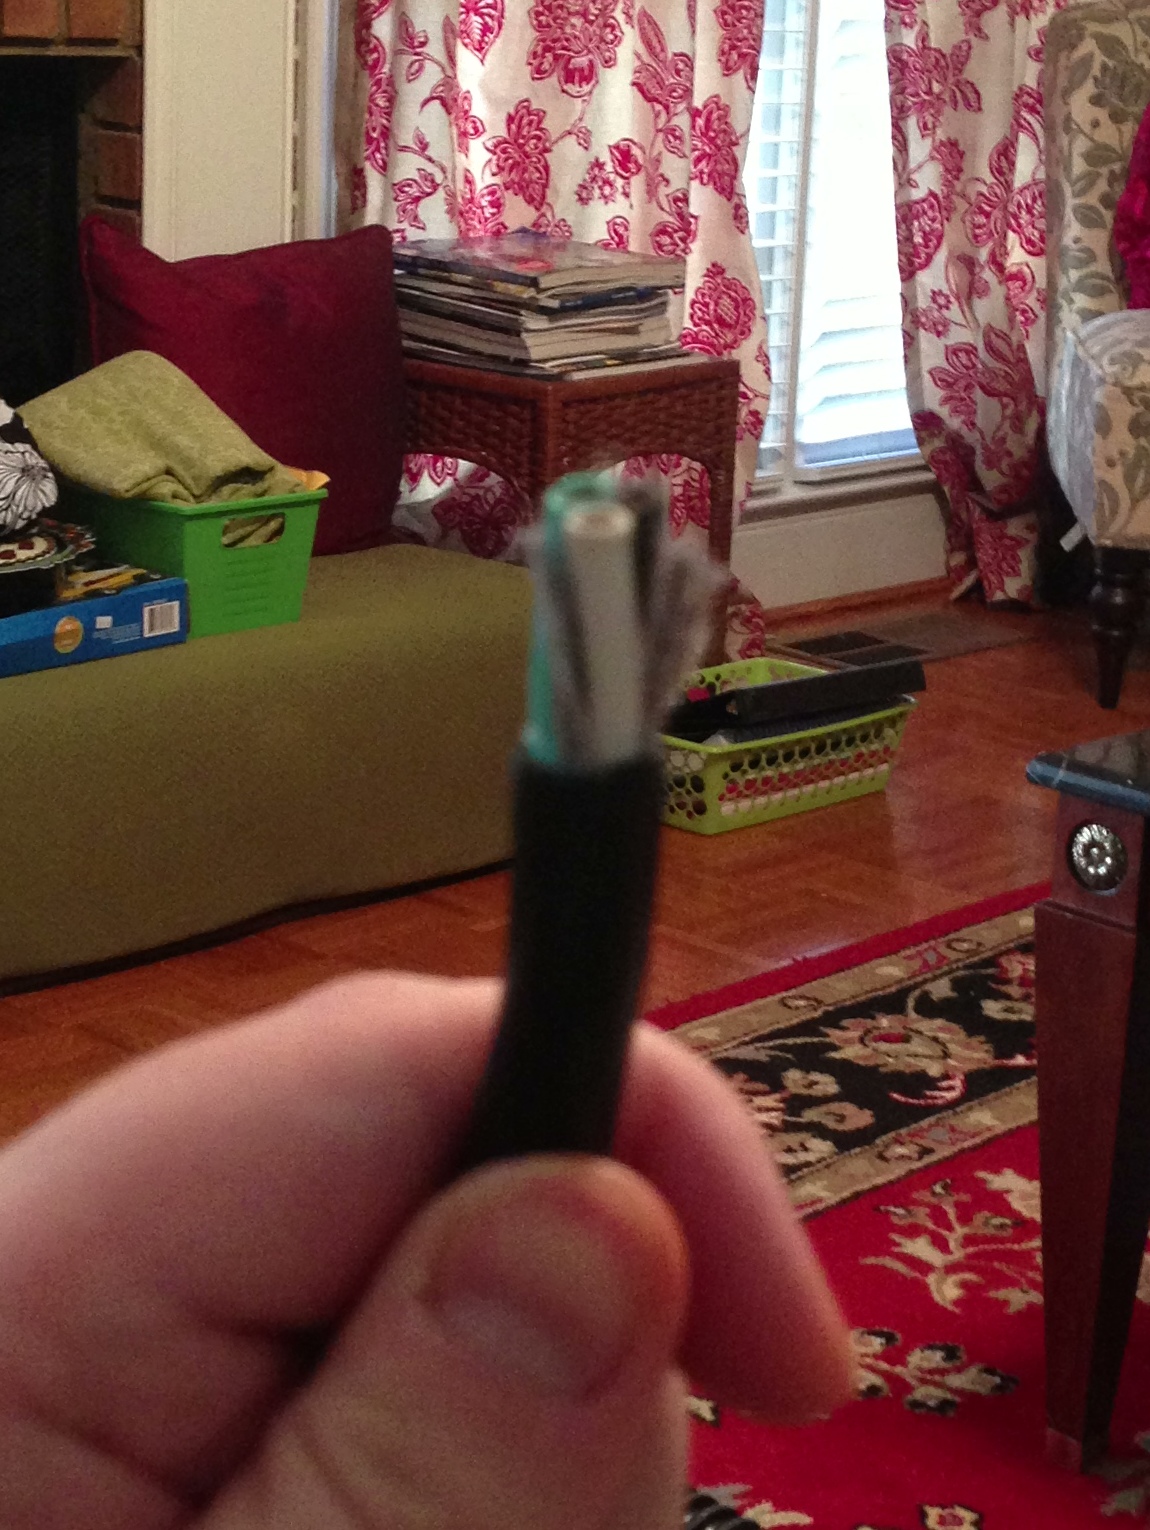
Another image of the exposed wires after snipping off broken plug
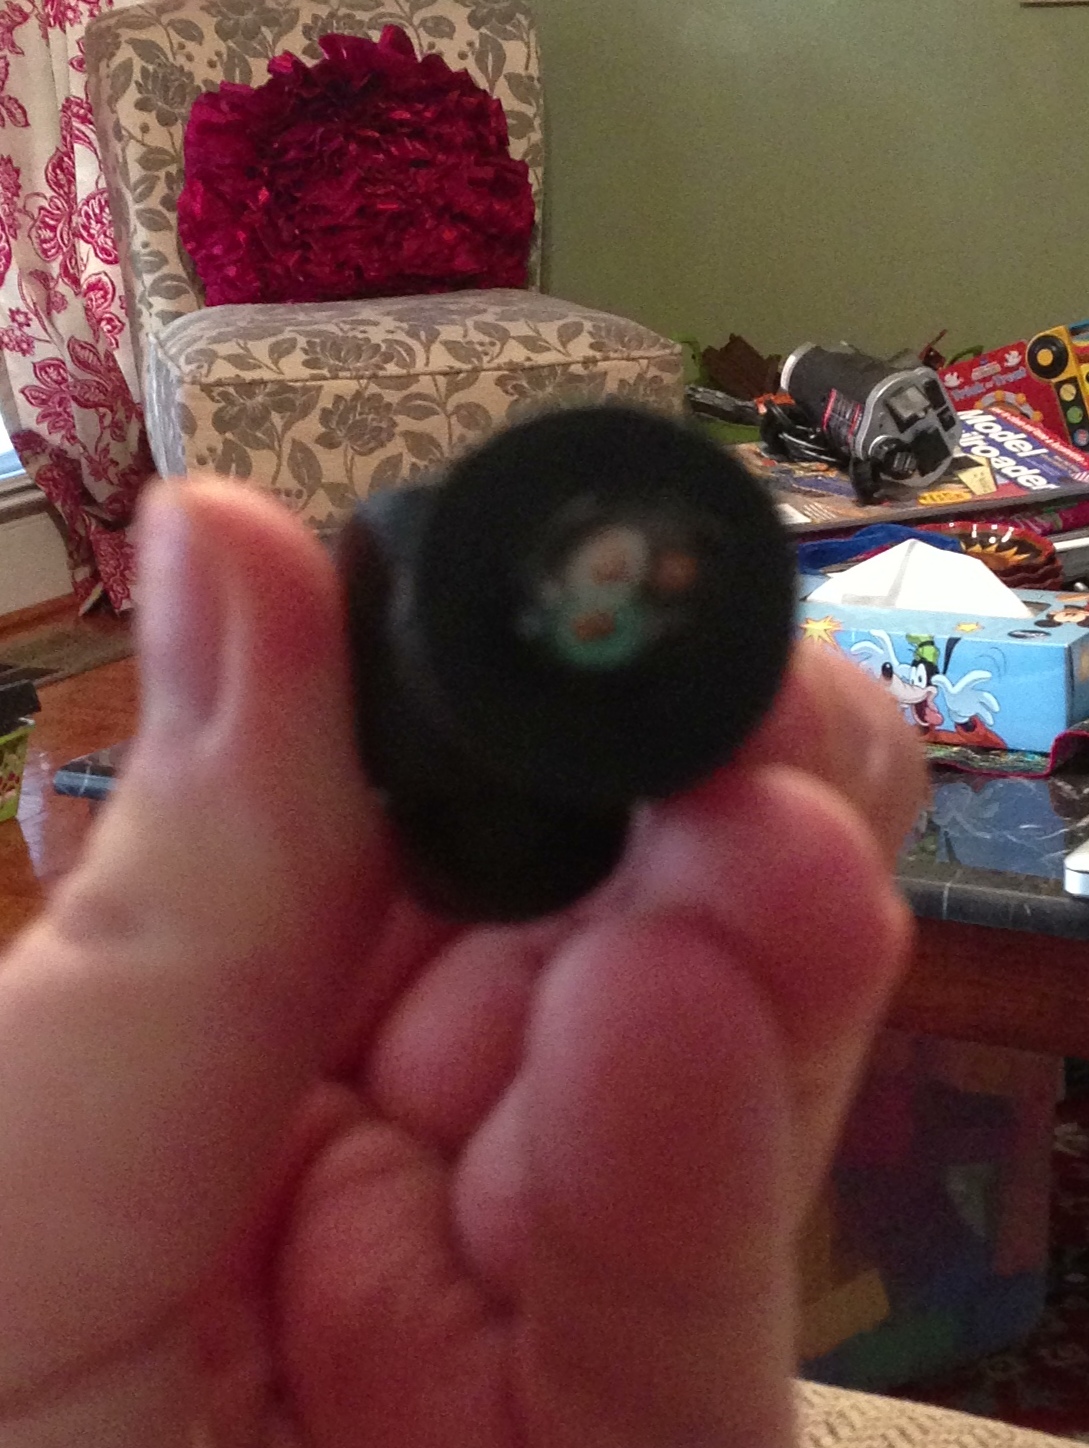
Snipped-off plug
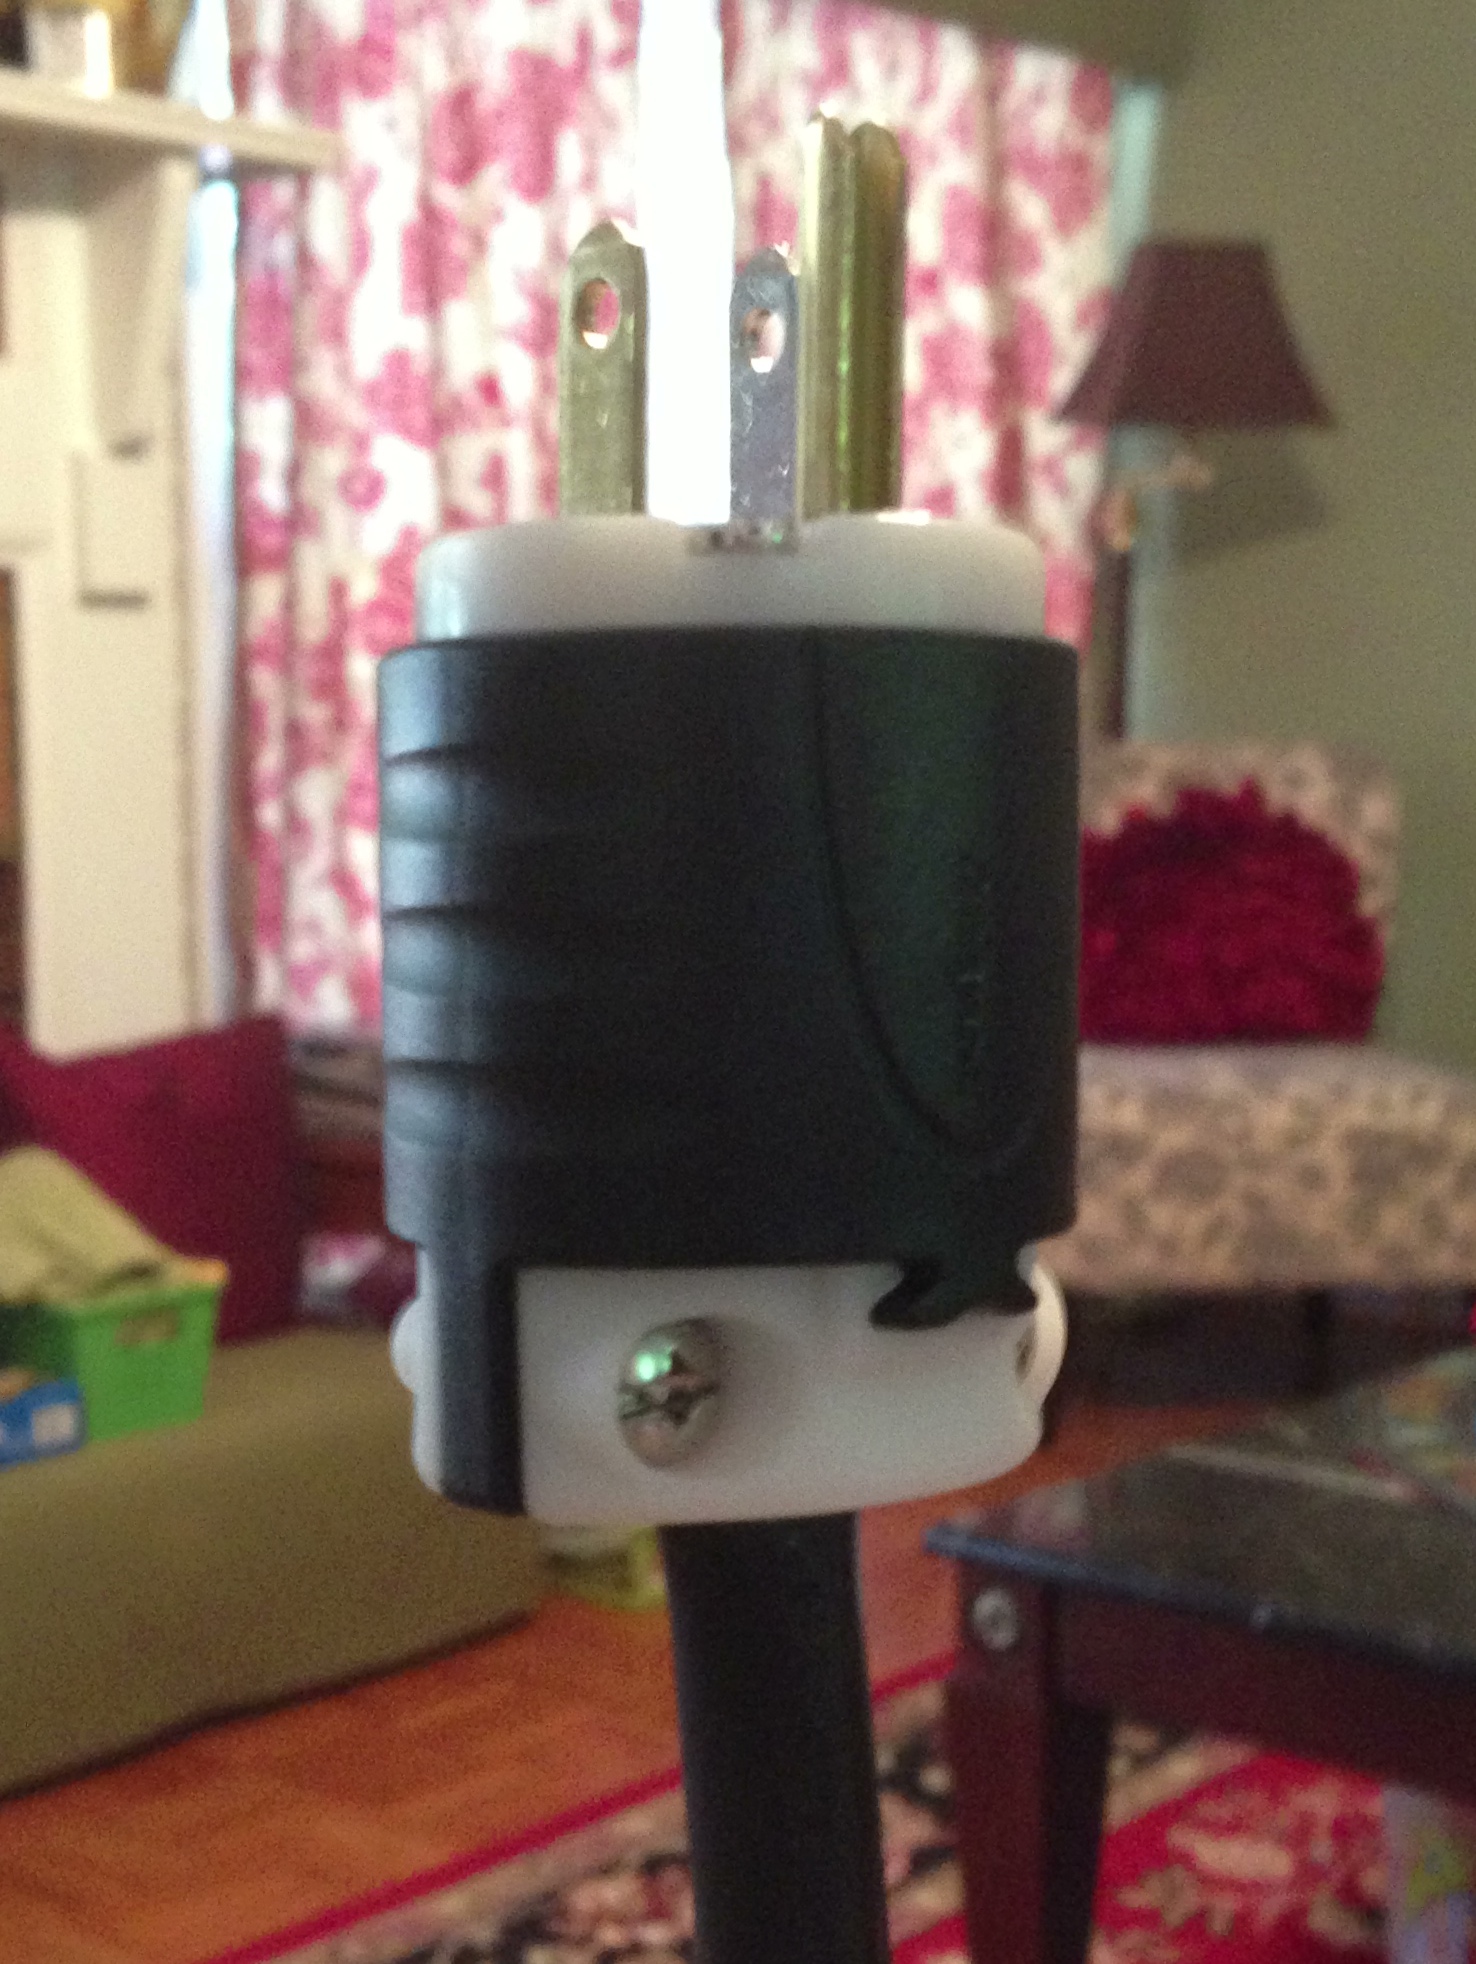
Replacement plug properly installed
I'm embarrassed to admit that this process took me half an hour. I forgot to put the replacement plug's housing on the cord prior attaching the three wires, so I had to repeat some of this process.
Jaddie, Max's proud chauffeur
2012 Honda Odyssey & 2016 Ford Escape
-
Super Member

Re: How to Repair 3-Prong Electrical Plug
LOLOL Been there done that  Just a note, the YT guy is correct in that if you do mess up the black and whit, It really wont matter a whole lot. nice to get it 100% but I have done lots over the years and it has never had an ill effect that I could see. Most important though is your Ground. Just a note, the YT guy is correct in that if you do mess up the black and whit, It really wont matter a whole lot. nice to get it 100% but I have done lots over the years and it has never had an ill effect that I could see. Most important though is your Ground.
I also like to splice chords to make them longer. cut, strip, twist ends, match and twist together (after twisting, lay exposed wire flat against insulated part of of wire,,NOW THE IMPORTANT PART: ONCE YOU HAVE THEM ALL JOINED UP, YOU HAVE TO ISOLATE EACH ONE OF THEM. Wrap each connection in electrical tape(or if you have heat shrink,which needs to go on before you twist them together) Once each wire is wrapped, then you can tape them all together. I like to wrap it till its at least 4 passes up and down. Make sure the cord you are adding is rated either same or higher for your tool. This might help ya out at some point also.
-
Re: How to Repair 3-Prong Electrical Plug
 Originally Posted by beamerstrumpet

LOLOL Been there done that Just a note, the YT guy is correct in that if you do mess up the black and whit, It really wont matter a whole lot. nice to get it 100% but I have done lots over the years and it has never had an ill effect that I could see.
Maybe nothing you could see, but mixing up the hot and neutral is a big deal and something you don't want to do.
-
Junior Member

Originally Posted by Jaddie
In short, the green wire will go to the ground, the positive or black wire will go to the silver blade (or the blade on the top right of the ground plug if you're facing it), and the white or negative wire will go to the brass blade (or the blade on the top left of the ground plug)..
Actually it's the other way around. Black wire bronze screw, white wire silver screw. But your machine will still work if the polarity is reversed.
-
Super Member
Re: How to Repair 3-Prong Electrical Plug
Dear El Flaco Taco
That's what people are saying.
I was going by the diagram and instructions on Wikipedia.
But now I thinking I'm going to unscrew this thing and wire it your way.
Jaddie, Max's proud chauffeur
2012 Honda Odyssey & 2016 Ford Escape
-
Super Member
Re: How to Repair 3-Prong Electrical Plug
Dear Friends
All I've been able to find online is that the hot wire usually goes to the brass blade and the neutral wire usually goes to the silver blade.
'Tis true that I have a silver blade and a brass blade. Figuring the manufacturer of the plug must have made it that way for a reason, and on the heels of your corrections, I rewired the plug so the black wire is in the brass blade's connector and the white wire is in the silver blade's connector.
If you guys hadn't corrected me, it would've been wired incorrectly. While some of you maintain it really doesn't matter, it matters to me. This compartment of my life, detailing, is about imposing order on chaos. I'd prefer to be correct whenever possible.
Thank you for helping me get there.
I wrote the tutorial above to help y'all, but, as it turns out, you've helped me.
Thank you.
Jaddie, Max's proud chauffeur
2012 Honda Odyssey & 2016 Ford Escape
-
Super Member

Re: How to Repair 3-Prong Electrical Plug
Simple way to check, place original Plug in Vice, Hacksaw Plug open, and check.
-
Super Member

Re: How to Repair 3-Prong Electrical Plug
Originally Posted by Jaddie
......
I'm embarrassed to admit that this process took me half an hour. I forgot to put the replacement plug's housing on the cord prior attaching the three wires, so I had to repeat some of this process.
LOL! We all have done this so don't be embarrassed. I can't count how many times I've forgot the housing.
-
Super Member
Re: How to Repair 3-Prong Electrical Plug
Dear Friends
(The information below has been corrected and updated from its first appearance as the original post of this thread.)
A few days ago the ground of my Master Blaster's plug broke off into my extension cord.
I'm not a card-carrying DIYer, but after wiring up my son's model railroad and doing a Google search for "Repairing 3-Prong Electrical Plug," I found this YouTube video:
Repairing a 3-Pronged Grounded Electrical Cord - YouTube
I read the comments and learned that the instructor made one error: it does matter which wire goes to which blade on the plug. In short, the green wire will go to the ground, the positive or black wire will go to the brass blade, and the white or negative wire will go to the silver blade.
A quick check at Wikipedia provided a wealth of information, including nomenclature and wiring diagrams for this type of plug as well as many others. (I can't link to the Wikipedia article from here. The forum software fouls up the URL, so all I can do is suggest visiting Wikipedia and searching for "NEMA connector." This style of connector is a NEMA 5-15.)
Here is the plug I purchased from Lowe's to replace the plug that came with my Master Blaster.
In short, here are the basic steps:
- Cut off the old plug with wire cutters.
- Using wire strippers strip about 0.5–0.75" of cover from the blunt end created in the previous step. This will expose three wires, each covered by its own jacket.
- Strip about half to three quarters of the exposed length of each of the three wires.
- Twist the ends of each of the three wires so that each is compact and can be threaded through a small opening.
- Thread housing of replacing plug on electrical cord.
- Insert each of the wires into its proper place on the replacement plug (green for ground, black for positive/brass, and white for negative/silver).
- Tighten the corresponding screws to secure the wire.
- Reassemble the plug and test.
To the best of my knowledge, the remainder of the original post is correct.
Jaddie, Max's proud chauffeur
2012 Honda Odyssey & 2016 Ford Escape
-
Super Member

Re: How to Repair 3-Prong Electrical Plug
Originally Posted by Setec Astronomy
Maybe nothing you could see, but mixing up the hot and neutral is a big deal and something you don't want to do.
That's right. The Safety ground and neutral or common (white wire) work together to provide current a path back to ground in the event of a short circuit. If they're hooked up backward the tool will still run but your path to safety ground is compromised, meaning the tool's user could take the majority of the current instead of it going to ground. 
Similar Threads
-
By mikehookipa in forum Auto Detailing 101
Replies: 3
Last Post: 04-13-2017, 08:17 PM
-
By mkuszek in forum Rotary Buffers
Replies: 3
Last Post: 03-31-2016, 04:53 PM
-
By richy in forum Off-Topic
Replies: 10
Last Post: 09-05-2014, 07:54 PM
-
By Nuke33 in forum Off-Topic
Replies: 0
Last Post: 03-02-2007, 07:38 PM
-
By Whitethunder46 in forum Off-Topic
Replies: 7
Last Post: 02-10-2007, 06:02 PM
 Members who have read this thread: 0
There are no members to list at the moment.
Posting Permissions
- You may not post new threads
- You may not post replies
- You may not post attachments
- You may not edit your posts
-
Forum Rules
|
| S |
M |
T |
W |
T |
F |
S |
| 31 |
1
|
2
|
3
|
4
|
5
|
6
|
|
7
|
8
|
9
|
10
|
11
|
12
|
13
|
|
14
|
15
|
16
|
17
|
18
|
19
|
20
|
|
21
|
22
|
23
|
24
|
25
|
26
|
27
|
|
28
|
29
|
30
| 1 | 2 | 3 | 4 |
|


 Reply With Quote
Bookmarks