 Thanks: 0
 Likes: 0
 Dislikes: 0
-
Re: Understanding headlamp repair
nice write up, Barry. If you paid your bills like you polish old headllights, man you'd be on top of the world.
what a shame. Be careful out there. folks. Some will rip you off if ya give em a chance.
-
Junior Member

Re: Understanding headlamp repair
 Originally Posted by displeased

nice write up, Barry. If you paid your bills like you polish old headllights, man you'd be on top of the world.
what a shame. Be careful out there. folks. Some will rip you off if ya give em a chance.
Hey thanks for the compliments  If you read the entire article, You would understand that didn't actually polish these headlights. These were recoated with UV protection. Im glad you signed up here just to harass me. Anyway's have a great day. If you read the entire article, You would understand that didn't actually polish these headlights. These were recoated with UV protection. Im glad you signed up here just to harass me. Anyway's have a great day. 
-
Super Member

Re: Understanding headlamp repair
Originally Posted by Barry Theal
Hey thanks for the compliments If you read the entire article, You would understand that didn't actually polish these headlights. These were recoated with UV protection. Im glad you signed up here just to harass me. Anyway's have a great day.
Looks like I'm not your only fan Barry  . .
-
Re: Understanding headlamp repair
Originally Posted by Barry Theal
Understanding Modern Headlights on Todays Cars.
By Barry Theal of Presidential Details and Lancaster Headlight Repair, Often the littlest things on a car can make a huge difference in both safety and appearance for you and your fine automobile. Todays modern headlights can quickly become hazed and yellow. This is a result of oxidation to the UV coating on the lens. In some cases the lens can be polished without disturbing the coating to a like new OEM finish. Others will have to have a more complicated approach to resurface and restore. In this article I will explain why this happens and what you can do to properly fix it.
Headlights use to be made of glass prior to 1980. Eventually manufacturers in the automobile industry were changing designs and needed something they could easily form to a mold. Thus they began to look into newer sleeker materials that were lighter and could contour to a more aerodynamic shape. They ended up using a material called polycarbonate or the proper name Lexan. Polycarbonate is used in many products today; ranging from sunglasses, safety glass, eye glasses, to basketball backboards. Its a very tough durable material, virtually impact resistant as well. The weight is much lighter then glass which plays a major role in todays modern sports cars.
While polycarbonate has many great features it also has several downsides that could cause a concern for drivers today. Polycarbonate alone is not able to hold up to environmental issues like the sun. Over time it will become very dull and faded. Next, manufacturers decided to put an Ultra Violet coating over the lens to prevent this from happening. While this was a great fix to keeping the polycarbonate from fading and dull out instantly while underneath the suns rays, it also has issues.
The easiest way for me to explain this coating is like clear coat on a car. Clear coats purpose was to add protection to the paint. Remember how older cars often oxidized. We have all seen those pink cars that were once red. This is the same thing that happens to the coating. It oxidizes and fades to a dull look. This robs from a vehicles overall finish, and also brings a very big safety concern. Over time this dull appearance will block light transfer and the headlight will not be able to produce the amazing brightness it once had.
Over the years many companies have claimed that they can restore headlights to new condition by sanding and polishing them out. This is often referred to as a scuff and buff fix. From first glance, the result can be amazing. However, this is not the best approach. During this process the factory installed UV coating has been removed. Once this coating is removed there is no wax or sealant that will be able to hold long lasting results once the protection has worn down. The polycarbonate lens will actually fade 3 times as fast. This usually happens with in 3-5 months of the scuff and buff fix. Over time you will constantly have to have your headlamps sanded and polish. Most places can charge in the range of $80 100 dollars for this. This is a complete waste of time and money for the consumer. Some may say 80 bucks isnt all that bad twice a year. The problem isnt within the cost itself. The concern is that polycarbonate is only so thick, repeated sanding and polishing will ruin the lens permanently. So whats a new lens cost? Recently a customer shipped me some lenses and he said that a new headlamp assembly was $1200.00 for one lens!
In order to restore the lens back to its OEM standards a new UV coating must be re-applied. There are several companies who can provide the coating. I will leave out all company names so no promotional advertisements are provided. During the part of this article I would like to show how to properly apply the coating and the steps involved.
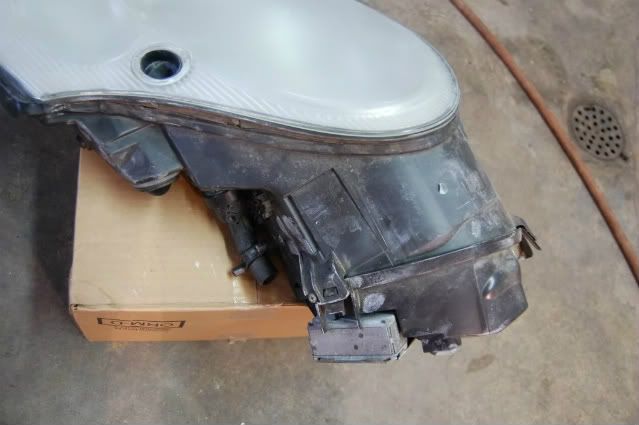
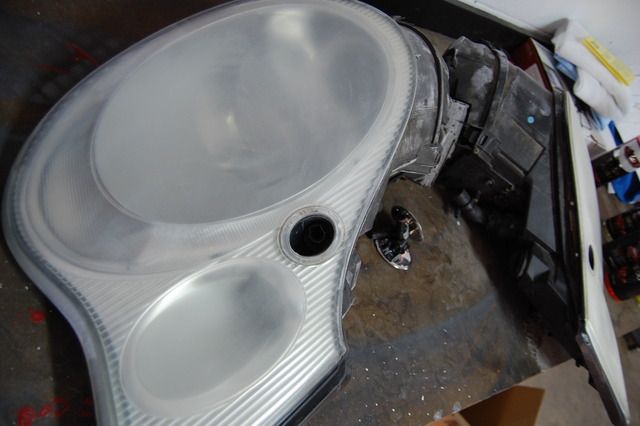
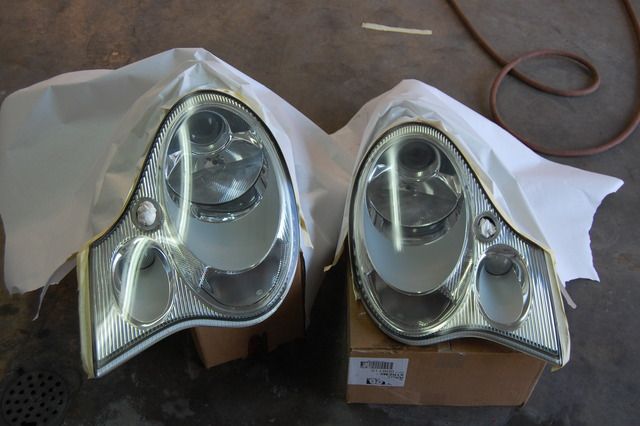
In the below picture you can see how these lights had seen better days. Take notice this is an extreme case. These lights hardly had any transparency at all. It was difficult to see the bulb on the inside. Here is how they looked prior to repair.
 First thing you want to do is to clean the entire lens. For this I used all purpose cleaner to remove any dirt and debris from the lens and the housing.
 Next, It was important to mask everywhere. I covered all the rubber edge moldings. This ensure no coating overspray and also prevents the housing from being nipped with the sander.
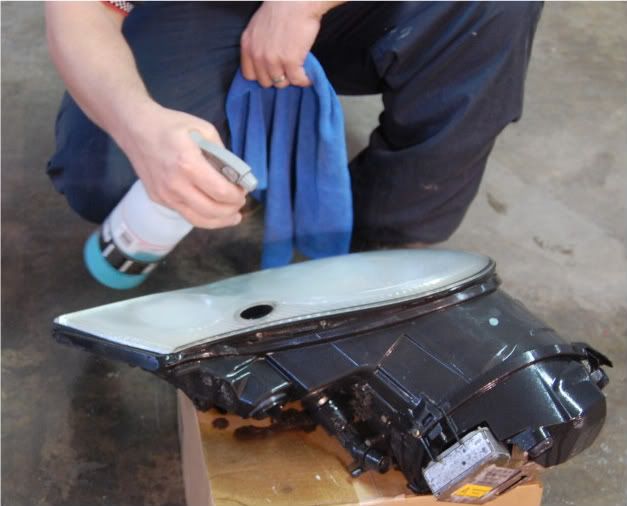
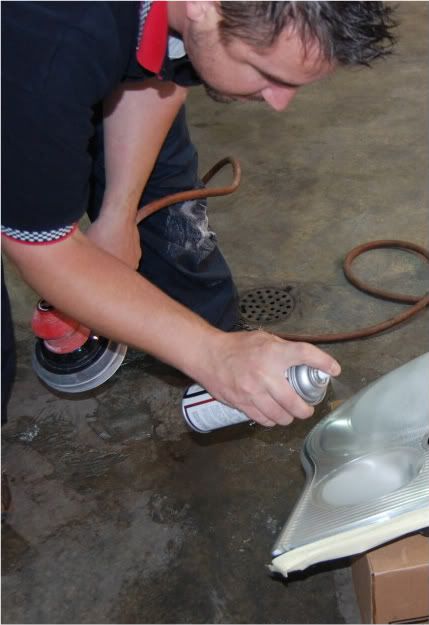
 The following step I used a sanding lubricant that is designed for polycarbonate cleansing. It foams nicely and allows for a very smooth surface.
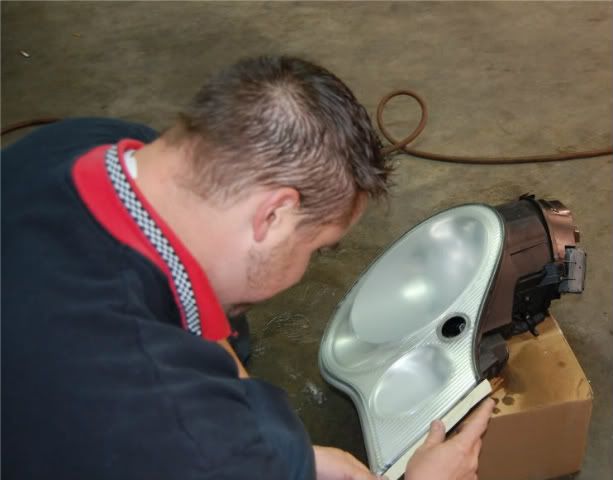
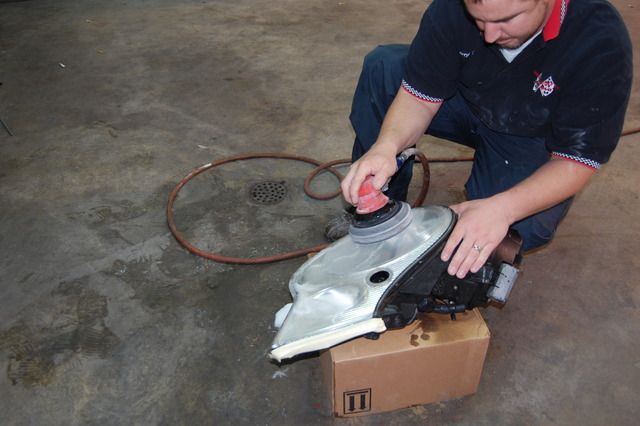
 Once sprayed I began to sand the entire area first with 400 grit, then 600, then 800 and worked my way up the ladder to 1500 grit as a final sanding. Keep in mind just like paint some headlamps have a harder UV factory coating. Porsche has a very severe hard shell. It takes a lot to get the entire coating off. In most cases I have found that 800 grit is a great start.
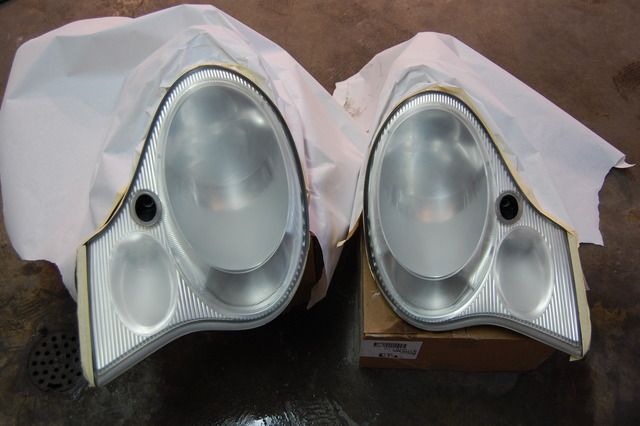
 Once both lenses were finished sanded to 1500 grit, everything got masked and taped prior to applying, the new coating.
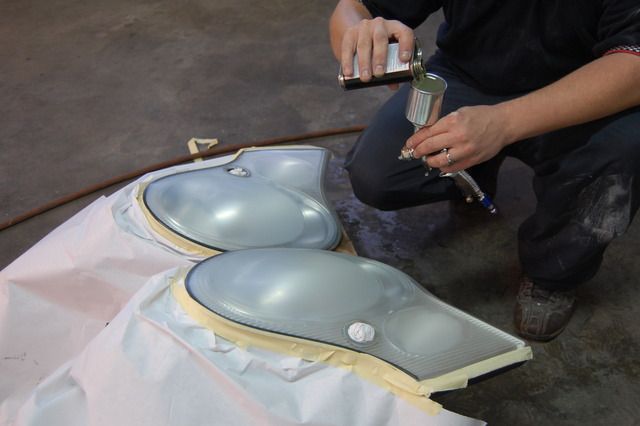
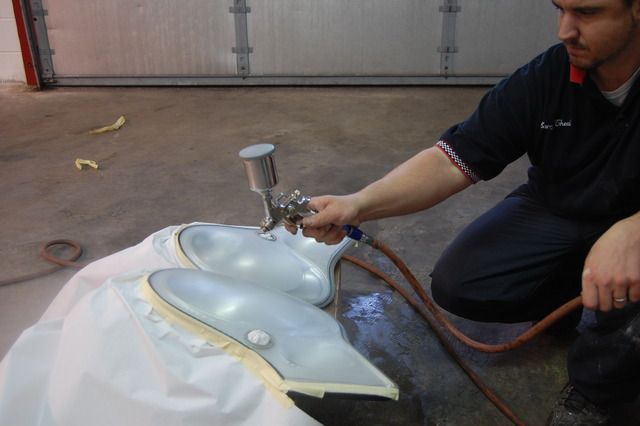
 Next we mixed our new UV coating catalyst into our spray gun and began to apply the coating.
 All finished up after the curing process.
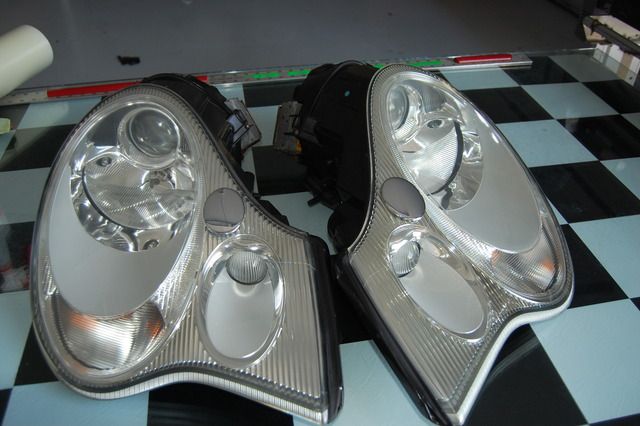
 Finally, I got them all put back together and placed them on the table to be sent back to the owner.
 Using this unique new system, I am now able to provide a long lasting result that I can provide with a 3 year warranty for protection.
In conclusion, from my finding this is the only proper way to restore a head lamp housing is to reapply the coating. I tried to make this article informative for both the detailer and the consumer. If you have any questions please contact me personally.
Barry E. Theal
Using this unique new system, I am now able to provide a long lasting result that I can provide with a 3 year warranty for protection.
In conclusion, from my finding this is the only proper way to restore a head lamp housing is to reapply the coating. I tried to make this article informative for both the detailer and the consumer. If you have any questions please contact me personally.
Barry E. Theal
Barry.....Could you PM me the products you used (foaming sanding spray and the Coating) and also let me know how long the curing time is with that product? Please?
-
Super Member

Re: Understanding headlamp repair
+1
Originally Posted by Part-timer
Barry.....Could you PM me the products you used (foaming sanding spray and the Coating) and also let me know how long the curing time is with that product? Please?
Desert Detail
89 Toyota Cressida with a 2JZ....... Mmmmmmm boost.......
-
Re: Understanding headlamp repair
So does that mean it's not good to use Meguiar's PlastX or some M205 on your headlights?
-
Re: Understanding headlamp repair
don't mean its bad what i think barry means is if no uv protectant is applied afterward they will be the same condition very soon, there are plenty of uv protectant for plastics or the nano coatings.if you're that worried look up the "hotrod method" of using spar urethane and mineral spirits and see how that works for you. just a suggestion we will see what others have to say. just a suggestion we will see what others have to say.
-
Re: Understanding headlamp repair
Originally Posted by opie_7afe
don't mean its bad what i think barry means is if no uv protectant is applied afterward they will be the same condition very soon, there are plenty of uv protectant for plastics or the nano coatings.if you're that worried look up the "hotrod method" of using spar urethane and mineral spirits and see how that works for you. just a suggestion we will see what others have to say.
Ah, got it. So if you just put a LSP over it like Z-Clear Seal (has UV protection), then it's good to go again?
-
Re: Understanding headlamp repair
What about using a spray clear coat product like Wurth High Gloss Clear Lacquer after the lights are prepped and sanded??
What would that do for ya? I have three cans that I've never used, so I'm asking because since I haven't used them on anything yet, I'm unfamiliar what the finish would be.
-
Re: Understanding headlamp repair
Originally Posted by rock012345
Ah, got it. So if you just put a LSP over it like Z-Clear Seal (has UV protection), then it's good to go again?
Um...no. An LSP has minimal UV protection compared to the factory-applied UV coating, or clearcoat as shown in this thread. If you polish your headlights back to perfection and protect them with Z-CS, expect to either reapply the Z-CS say monthly, or have to polish the headlights periodically to restore them. Even Z-CS monthly isn't going to keep them from eventually degrading--think of it this way, the factory UV coating didn't last forever, and it might even have been helped by LSP's along the way.
Similar Threads
-
By Maestro Sam in forum Auto Detailing 101
Replies: 12
Last Post: 03-11-2018, 12:07 PM
-
By parttimer in forum Auto Detailing 101
Replies: 22
Last Post: 05-06-2014, 10:22 PM
-
By birdog in forum Auto Detailing 101
Replies: 14
Last Post: 08-09-2013, 06:08 PM
-
By Lucian in forum Rotary Buffers
Replies: 7
Last Post: 04-02-2011, 10:13 AM
 Members who have read this thread: 0
There are no members to list at the moment.
Posting Permissions
- You may not post new threads
- You may not post replies
- You may not post attachments
- You may not edit your posts
-
Forum Rules
|
| S |
M |
T |
W |
T |
F |
S |
| 28 | 29 | 30 |
1
|
2
|
3
|
4
|
|
5
|
6
|
7
|
8
|
9
|
10
|
11
|
|
12
|
13
|
14
|
15
|
16
|
17
|
18
|
|
19
|
20
|
21
|
22
|
23
|
24
|
25
|
|
26
|
27
|
28
|
29
|
30
|
31
| 1 |
|


 Reply With Quote
Bookmarks