 Dislikes: 0
-
-
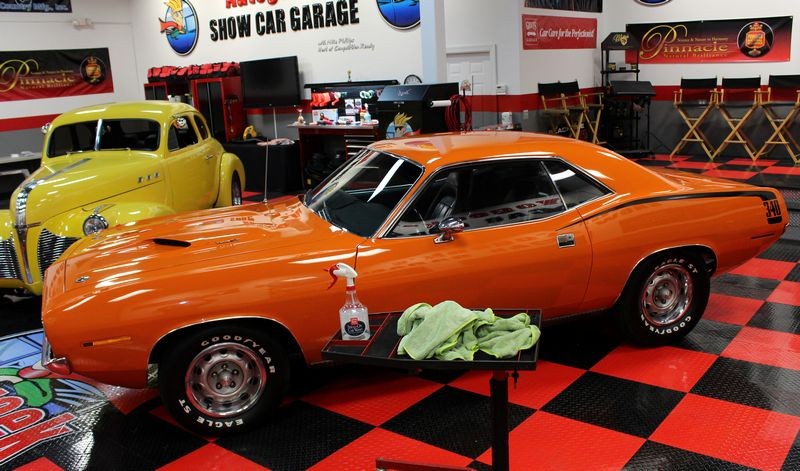
Re: How to use Griot's Garage to detail your car - A detail job Richard Griot would be proud of!
Step 2: Inspect the paint for above surface bonded contaminants and if discovered, remove them.
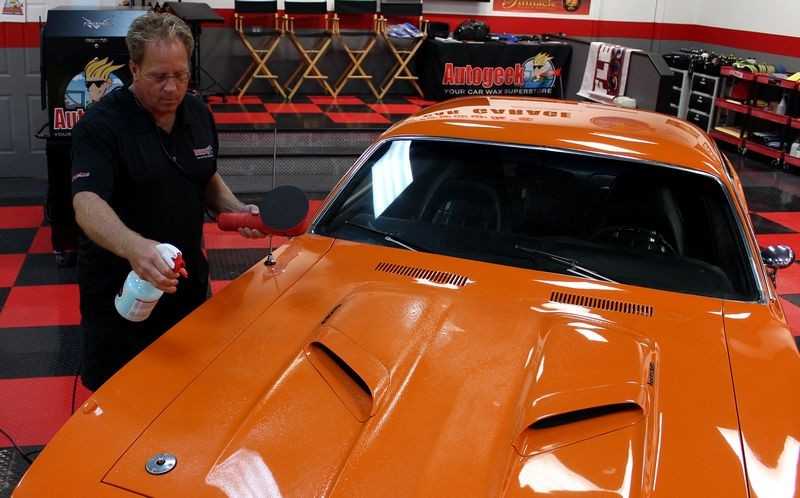
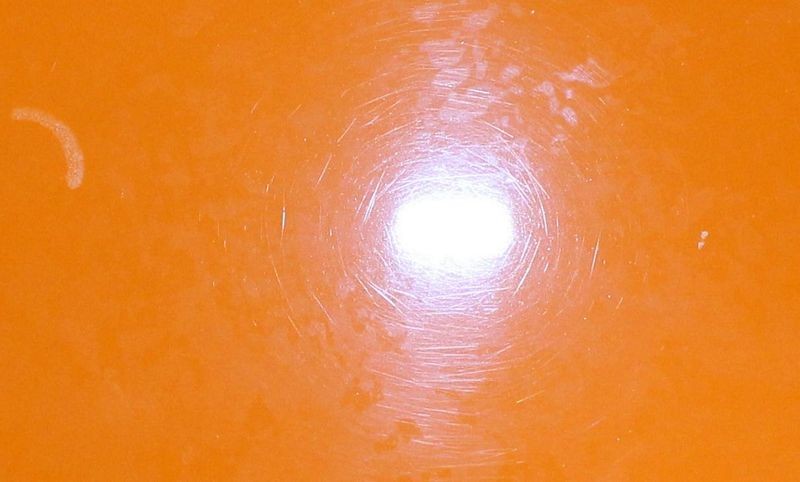
I did the baggie test. The paint felt rough.
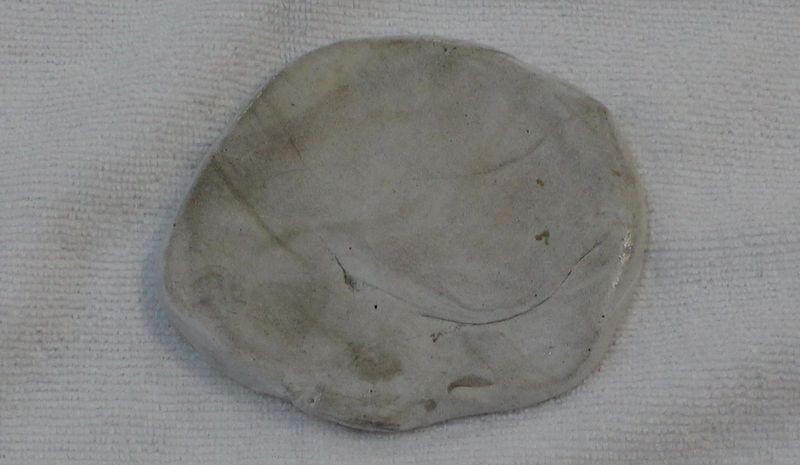
I clayed a section on the front of the hood. I like to use clay when I'm curious to see the color of the contaminants on the paint. Other methods work great to remove contaminants but clay can show you what's coming off the paint.

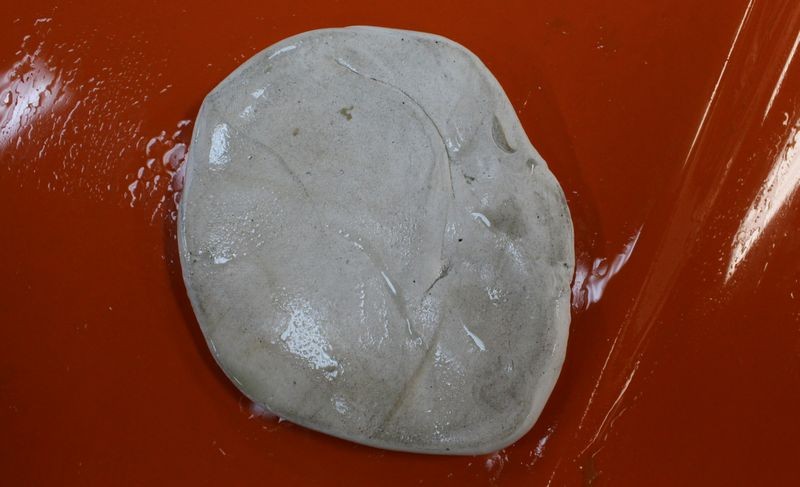
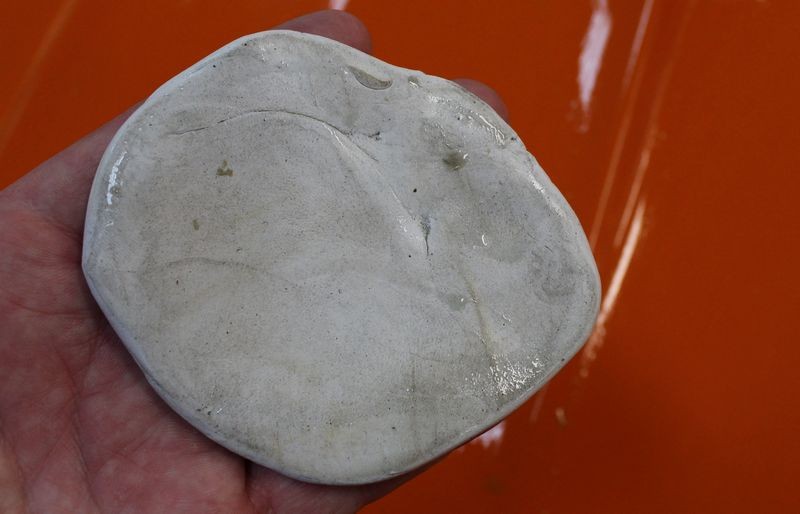
Sometimes I like to place the clay on a white microfiber towel to show the contrast...
Gloss comes from a smooth surface
Years ago I wrote an article that explains that gloss starts with a smooth surface. In order to create a super high gloss finish you must make the paint as smooth as possible and this starts with removing the contaminants like you see on the clay patty above.
While I tested the paint with white detailing clay to see the color or the contaminants on the paint, after testing with clay I finished removing the contaminants with two new products by Griot's Garage.
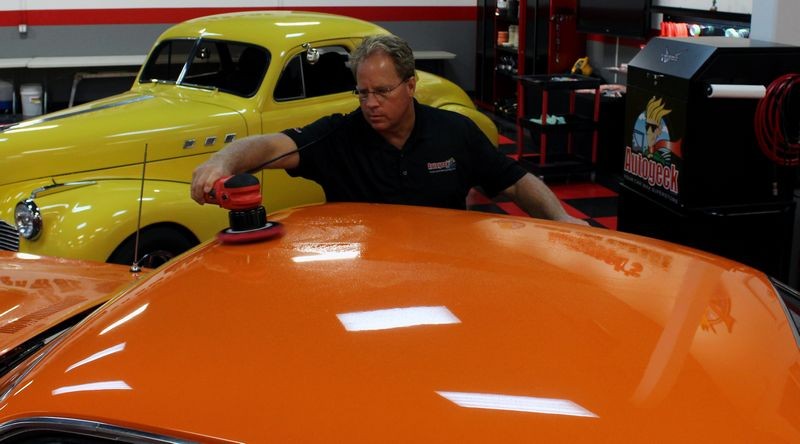
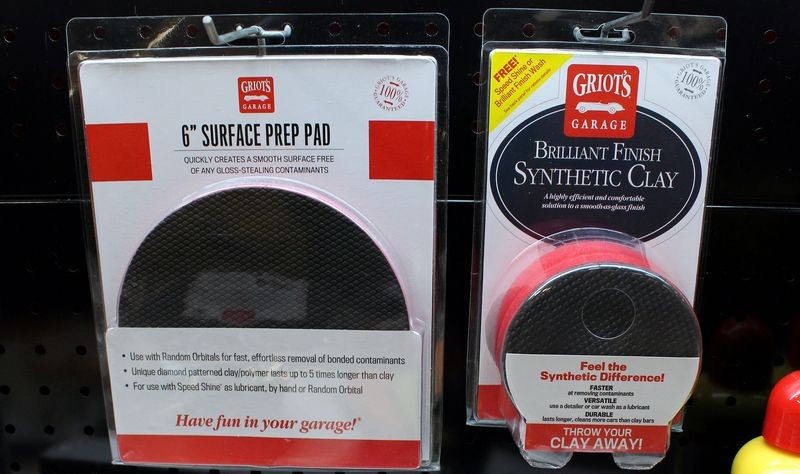
Review and How-To: Griot's Garage 6" Surface Prep Pad
Now you can throw away your detailing clay and remove contaminants by machine!
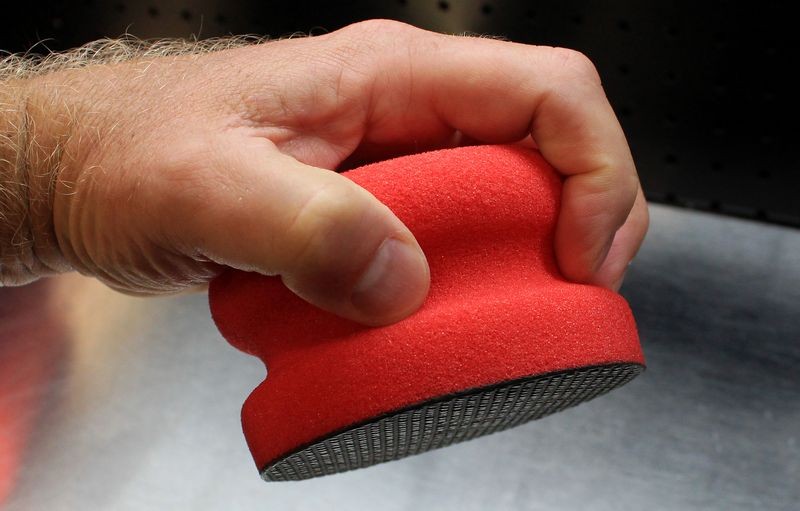
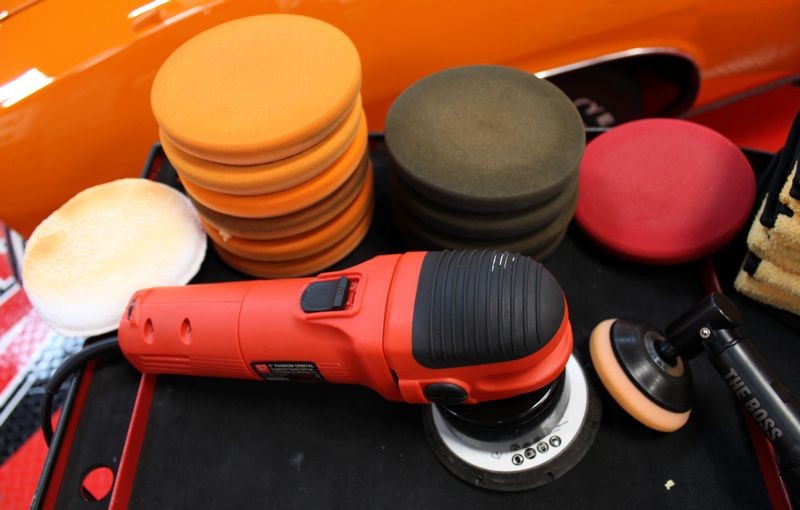
Griot's Garage 6" Surface Prep Pad
Most people that know me through the online car detailing world know that I prefer to do as many procedures by machine instead of working by hand because simply put, the human hand cannot compete with the results you can create when working by machine.
Not only is this true when machine compounding, polishing and waxing paint but it's also true when it comes to removing above surface bonded contaminants like,
- Overspray paint
- Tree sap mist
- Industrial fallout
- Traffic pollution
- Airborne dirt, dust and contaminants
The above types of airborne contaminants land on your car's finish anytime you're car is outside. Whether you're driving it or if it's parked at work or outside when at home. Over time, contaminants build-up on the exterior surface and form such a strong bond that they won't wash off when you wash your car.
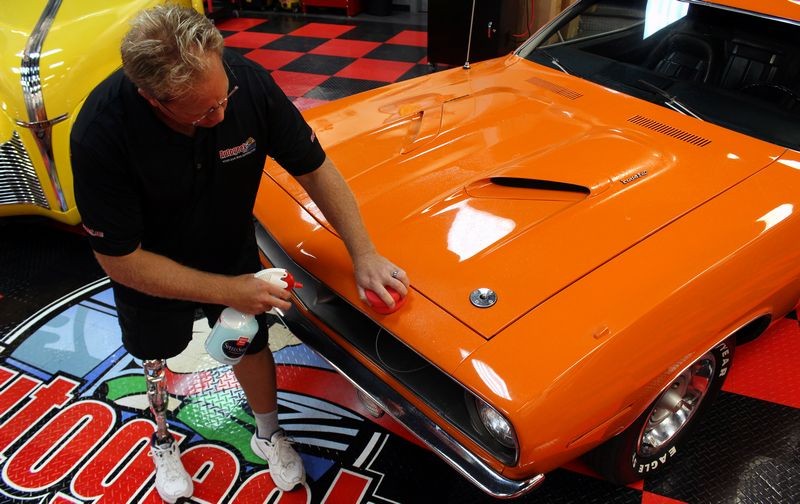
Historically, the way professional detailers and do-it-yourselfers would remove these types of contaminants is by using detailing clay. Griot's Garage has introduced a new tool that will enable you to remove these contaminants by MACHINE!
This new tool is called the Griot's Garage 6" Surface Prep Pad and in my opinion and experience it is the BEST way to effectively remove 100% of any contaminants on your car's finish. It works better than normal car detailing clay and besides working better it lasts longer. Plus - if you drop it on the ground you can simply wash the surface off and then continue to use it.
Last longer than clay
Normal detailing clay loads up with the contaminants you're removing of your car's finish. As you use the clay you knead and re-knead it to expose fresh clay to work with. In reality, as you knead a used clay patty you not only fold the contaminants into the clay but you also fold or move them back out to the working surface so you're never truly working 100% clean. Then at some point the clay becomes so loaded with contaminants that you must throw the clay away and switch to a new piece of clay.
Griot's Garage 6" Surface Prep Pad lasts 5 times longer than traditional clay plus because you can wash and rinse the contaminants off the surface as you work around the car you're always working clean for better results faster.
Griot's Garage new 6" Surface Prep Pad for working by machine or hand!

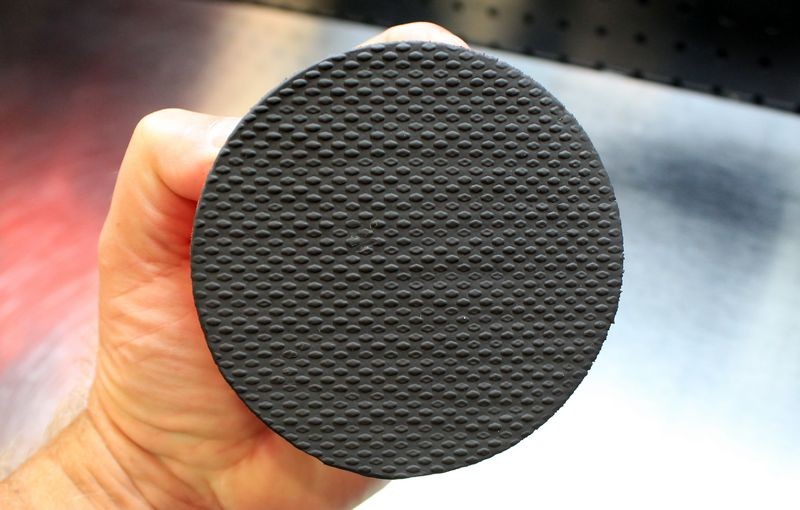
The diamond pattern embossed into the polymerized rubber surface creates channels for contaminants to flow into instead of becoming trapped between the pad and the paint for a safer and more effective decontamination process.
The foam core enables the pad to flex to maintain surface contact when machine decontaminating curved body panels.

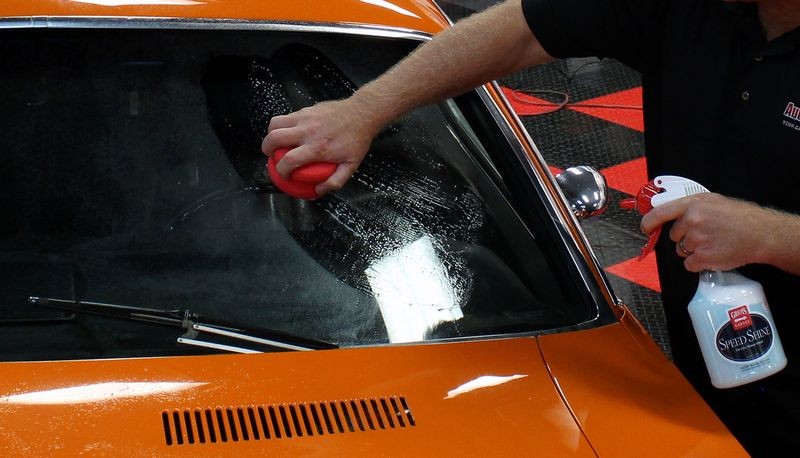
Directions
Step 1: Break in new pads on glass before using on paint
When starting out with a brand new pad it's important to break in the polymerized rubber surface by running it over some clean glass like the windshield.
Mist some Griot's Garage Speed Shine onto a section of clean glass.


Run the pad over a section of glass for about 5 to 6 section passes on the 3 to 4 speed setting.
Your pad is now broken in and read to use on paint.
Step 2: Mist a generous amount of Griot's Speed Shine onto a section of paint.
Step 3: Using only a little more than the weight of the machine, move the Surface Prep Pad over the paint on the 3-4 speed setting.
Adjust the speed setting so that you can clearly see pad rotation. The pad must be rotating for effective contaminant removal.


Step 3: Repeat this process over the rest of the car.
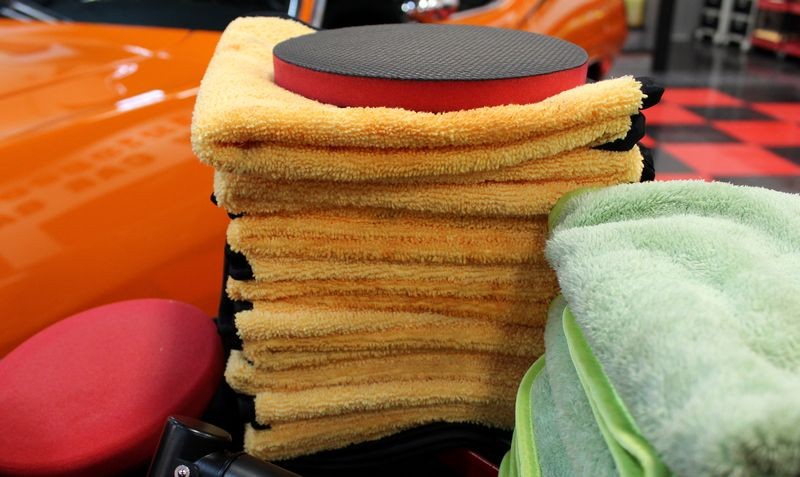
After decontaminating a section of paint or an entire panel, use a clean microfiber towel to wipe off and remove any residues.


The best way to maximize gloss...
If you're looking for the maximum shine out of our car's finish then look into the Griot's Garage 6" Surface Prep Pad. Gloss comes from a smooth surface. Taking your car's finish to show car quality starts with getting the paint as smooth as possible by removing any contaminants off the surface. After removing contaminants off the surface the next step is to remove defects like swirls and scratches below the surface. The combination of addressing above surface bonded contaminants followed by removing below surface paint defects is the approach professional detailers use to create award winning paint on show car and you can create these same results on your car.
On Autogeek.com
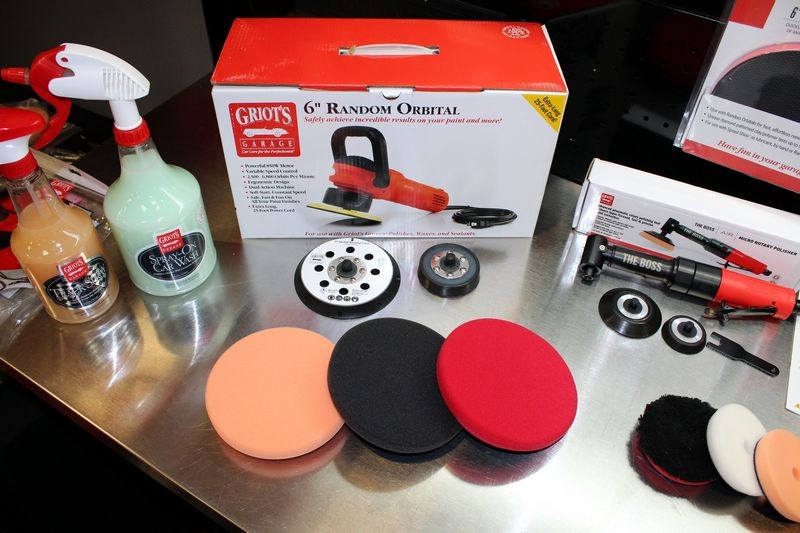
Griots Garage 6 inch Surface Prep Pad
Griots Garage 6 Inch Random Orbital Polisher
Griots Garage Speed Shine Detailer - 35 oz
All Griot's Products

-
Re: How to use Griot's Garage to detail your car - A detail job Richard Griot would be proud of!
Decontamination continued....
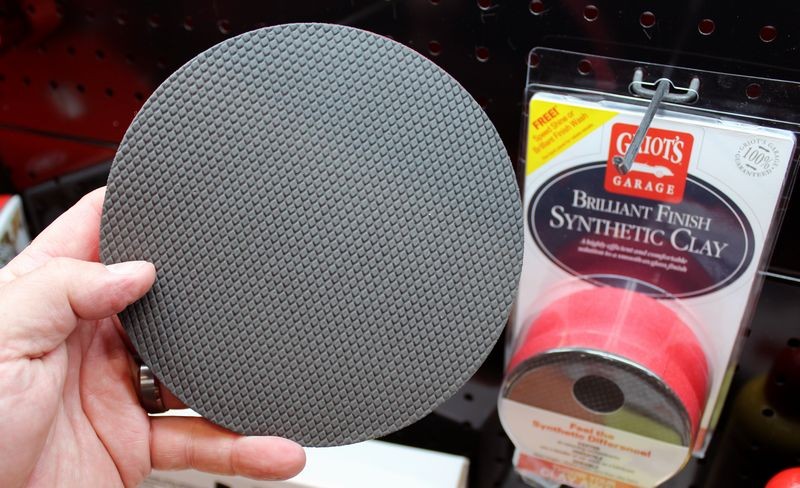
Review and How To: Griots Garage Brilliant Finish Synthetic Clay
Gloss comes from a smooth surface
If you love a shiny finish then the first step to restoring a high shine finish is to remove any contaminants that doesn't wash off during the washing process. Contaminants like overspray paint, tree sap mist, industrial fallout, traffic pollution and other airborne contaminants build up on the exterior surfaces of your car and form a bond that is strong enough that normal washing simply won't remove. That's why after washing off loose dirt the next step to restoring the factory fresh appearance is to remove any bonded contaminants.
Griot's Garage Brilliant Finish Synthetic Clay
New from Griot's Garage!
Griot's has introduced an easy to use synthetic clay pad. It has an easy to grip, ergo foam handle built-in which makes it super easy to hold on both horizontal and vertical sides. In fact, it's real easy to drop a normal piece of clay patty when working on vertical sides and if this happens you must through normal clay away to avoid scratching your car's finish. But not so with this new synthetic clay replacement for regular detailing clay. First the easy-grip foam handle ensures you don't drop it and if you do, unlike normal detailing clay you can simply rinse this synthetic clay off and go back to claying.
Polymerized Rubber Surface
The important part however is the face of this Synthetic Clay as this is where the magic takes place. Like normal clay, this polymerized rubber surface contains a paint safe abrasive which as you rub the surface over contaminated paint it safely abrades off the contaminants to leave smooth clean paint behind. The diamond pattern creates channels for contaminants to reside until you rinse it off helping to prevent any scratching or marring since particles are not trapped between the paint and the surface of the diamond patterned surface.
Perfect size
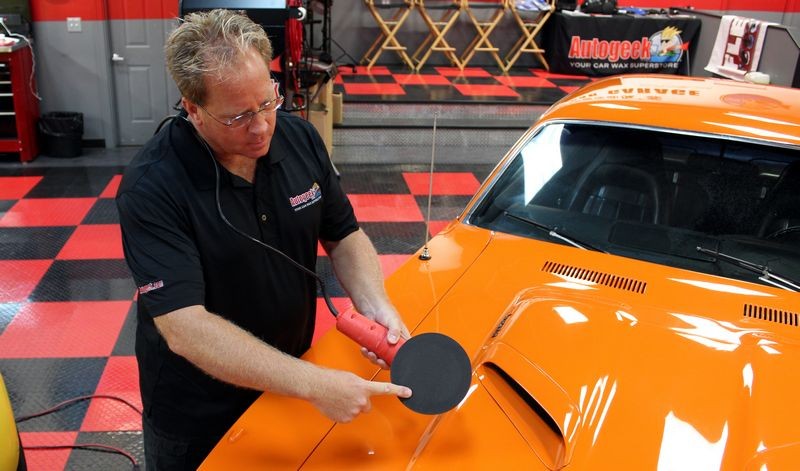
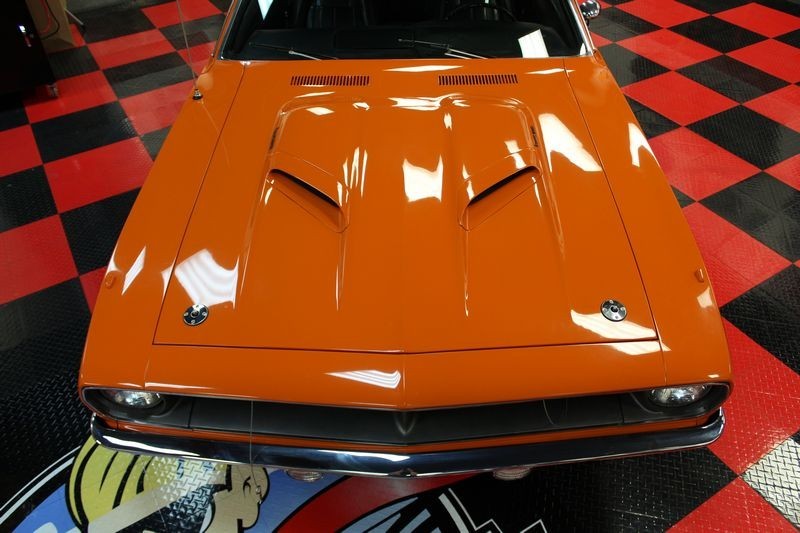
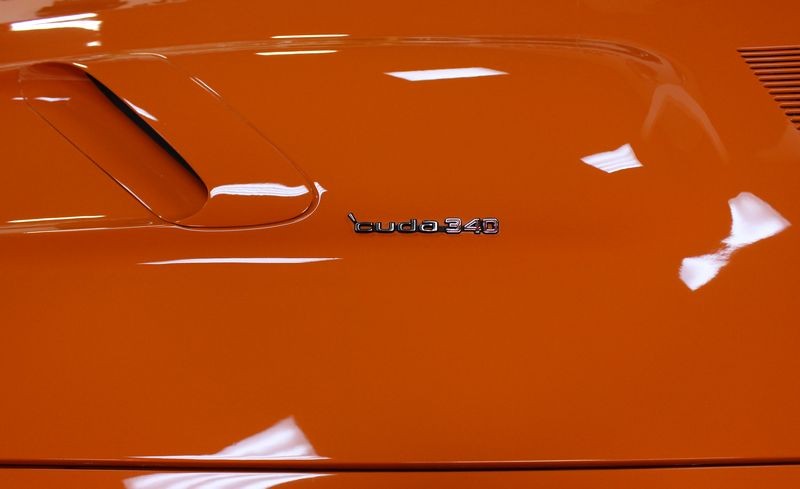
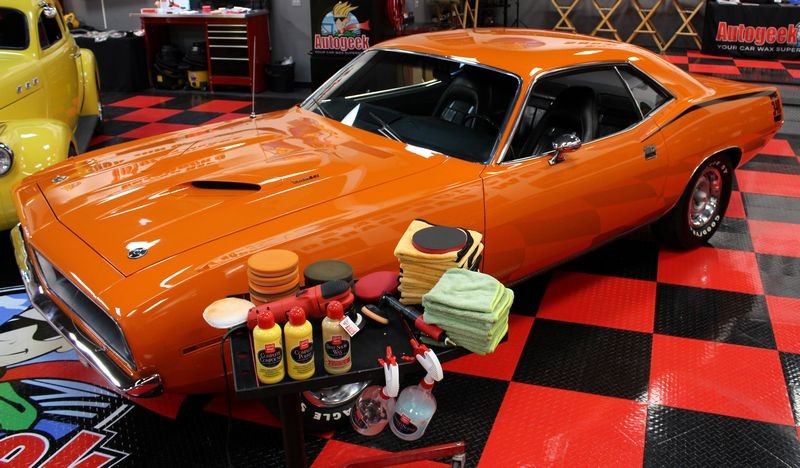
The face of this synthetic clay pad is 4" in diameter and this is large enough to do entire large panels and even more perfect for working thin panels like you'll see me do on the 1970 Cuda I tested this new product out on.
Versatile
You can use the Griot's Synthetic Clay with the Griot's Speed Shine or with Griot's Brilliant Finish Car Wash when washing your car.
The SECRET to decontaminating paint during the washing step is to first wash and THOROUGHLY RINSE your car BEFORE using the Griot's Synthetic Clay to remove contaminants. Because the handle is made of soft foam sponge material it safe for use around clearcoat paints and when using it during the washing process you can squeeze it while rubbing it over the paint to release more soapy car wash solution to lubricate the surface as you remove contaminants.
Technique tip...
Break in your brand new Griot's Garage Synthetic Clay by rubbing it against clean glass with a spray lubricant. This will create a more perfect surface and help to prevent any marring to more scratch-sensitive surfaces.
How to use with Speed Shine
Step 1: Wash and dry car.
Step 2: Spray Griot's Speed Shine over a single panel. For large panels only tackle a section at a time.
Step 3: Rub the Griot's Synthetic Clay over the paint using a back and forth motion. After a few moments or after you feel the synthetic clay glide effortlessly over the paint, wipe off the excess residue and move onto a new section.
Step 4: Periodically rinse the face of the Griot's Synthetic Clay off under clean running water or in a bucket of clean water to remove any contaminants lodged in the diamond pattern face of the polymerized rubber face.
How to use when washing your car with Griot's Brilliant Finish Car Wash
Step 1: Working in the shade, wash your vehicle as you normally do.
Step 2: This is important - THOROUGHLY RINSE the vehicle to completely flush off all dirt loosened during the washing step.
Step 3: While the car is still wet, dip the Griot's Synthetic Clay into your bucket of soapy water and then rub in a back and forth fashion over a panel at a time. Rub for a few moments or until you feel the Griot's Synthetic Clay glide effortlessly over the surface.
Step 4: Rinse the panel you just decontaminated and then rinse off the face of the Griot's Synthetic Clay.
Step 5: Dip the Griot's Synthetic Clay back into your bucket of soapy water and clay the next panel repeating the process in step 3 and step 4.
Step 6: After using the Griot's Synthetic Clay over all the painted panels and any other smooth surface give the vehicle a final rinse and then dry off any standing rinse water.
Here's the Griot's Synthetic Clay removed from the packaging.

Here you can see the diamond pattern imprints on the surface of the pad and the channels it creates surrounding the diamond shaped nubs. These channels provide an escape for particles to flush into instead of being rubbed against your car's paint.
Easy to grip ergo foam handle makes removing contaminants easy PLUS helps to prevent you from dropping the synthetic clay when working on verticals sides.

Break in new pads
When using Griot's Garage Synthetic Clay for the first time break in the surface by rubbing it against clean glass using Griot's Speed Shine as a lubricant.

Rub the Griot's Synthetic Clay in a back and forth motion in the direction of the length of the panel to be decontaminated or in the direction of the length of the vehicle for larger panels.
Spray plenty of Speed Shine for lubrication while removing contaminants.

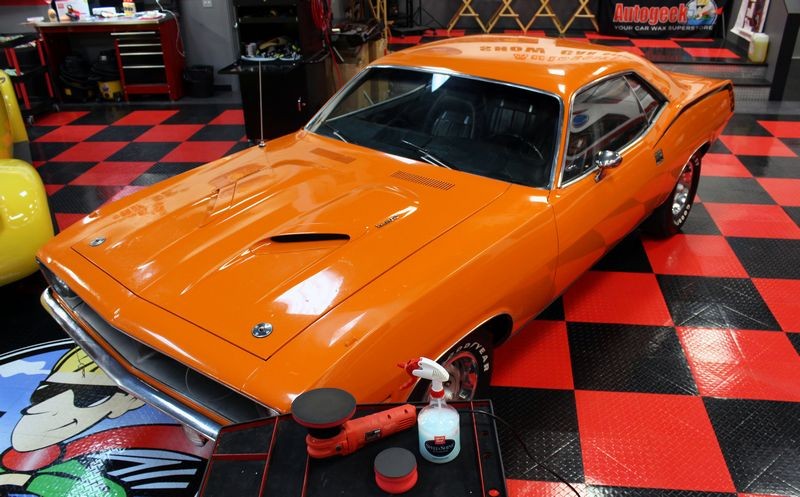
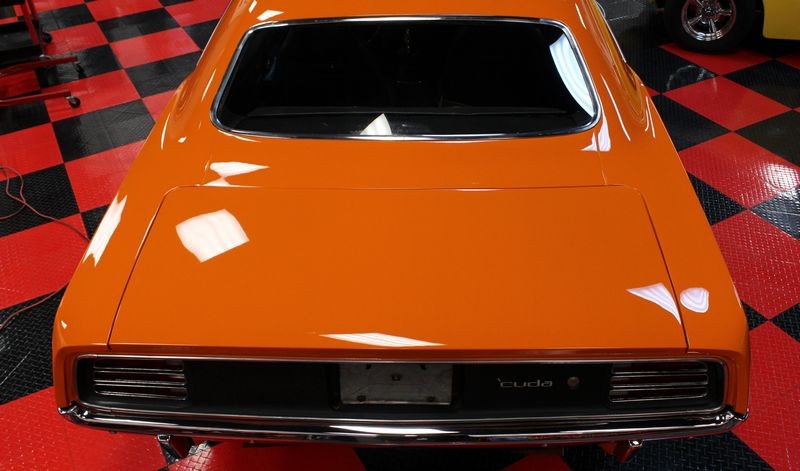
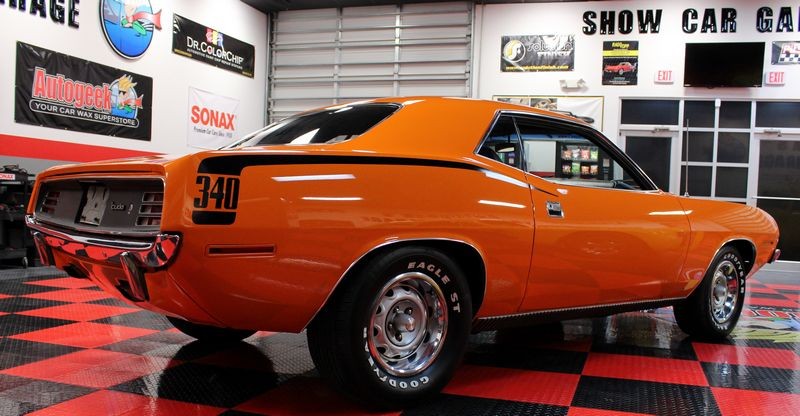
Results = Clean, smooth glossy paint
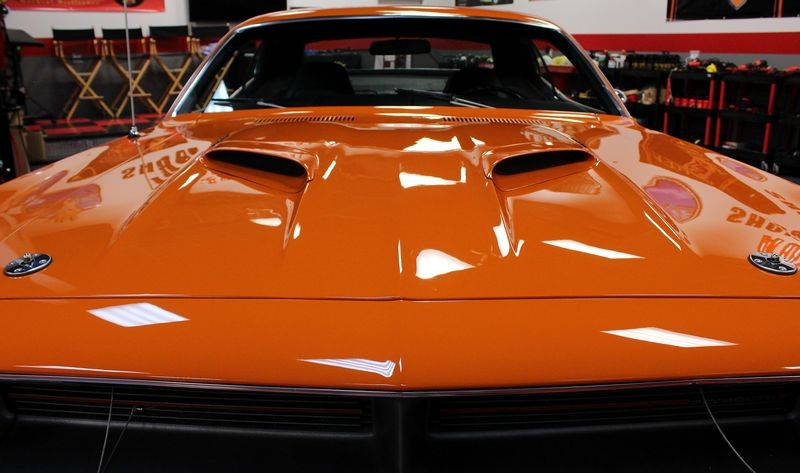
After using both the Griot's Synthetic Clay and the Griot's 6" Surface Prep Pad to fully decontaminate this 1970 Cuda the gloss has been restored.
On Autogeek.com
Griots Garage Brilliant Finish Synthetic Clay
Griot's Speed Shine - 35 ounce
Griot's Brilliant Shine Car Wash - 64 ounce
All Griot's Products
-
-
-
Re: How to use Griot's Garage to detail your car - A detail job Richard Griot would be proud of!
Continued...
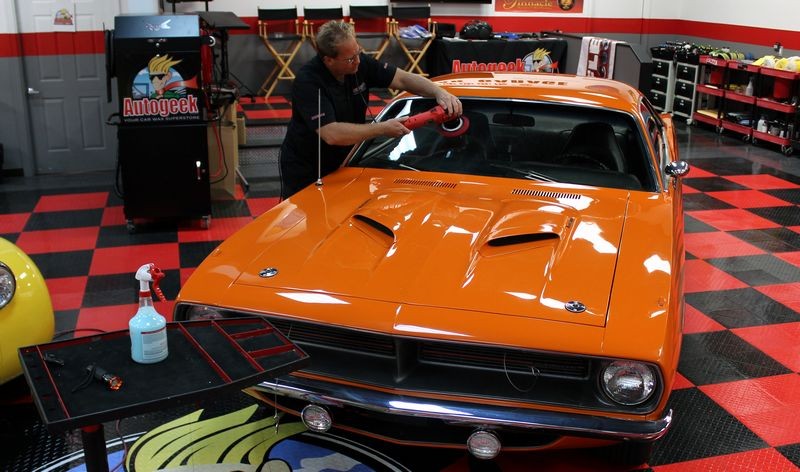
First the horizontal body panels were compounded, polished and then waxed and after the horizontal panels were finished the process was repeated over the vertical panels.
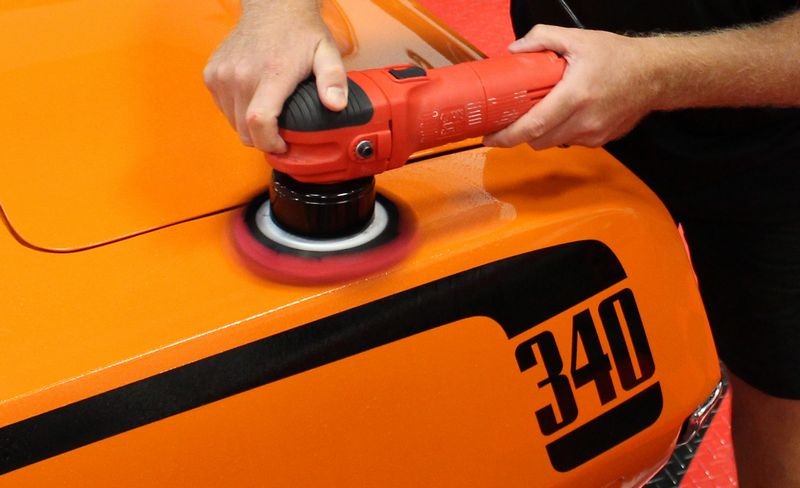
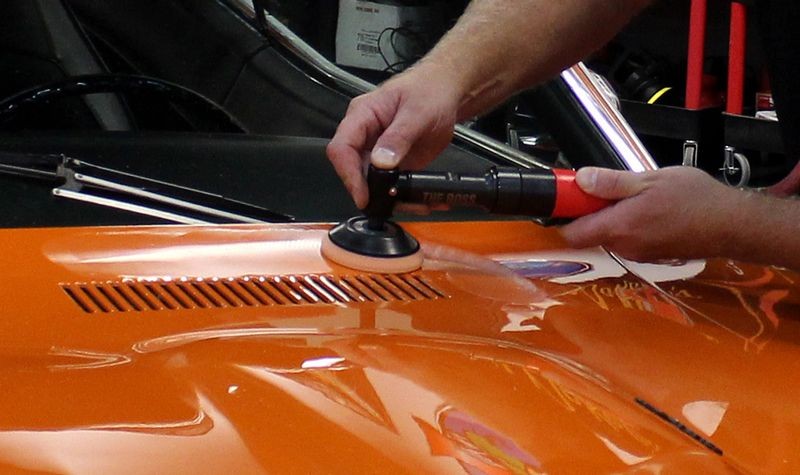
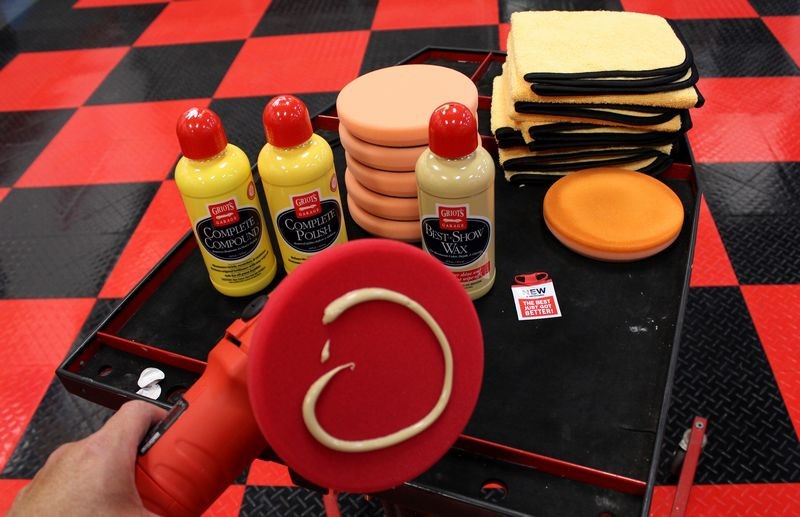
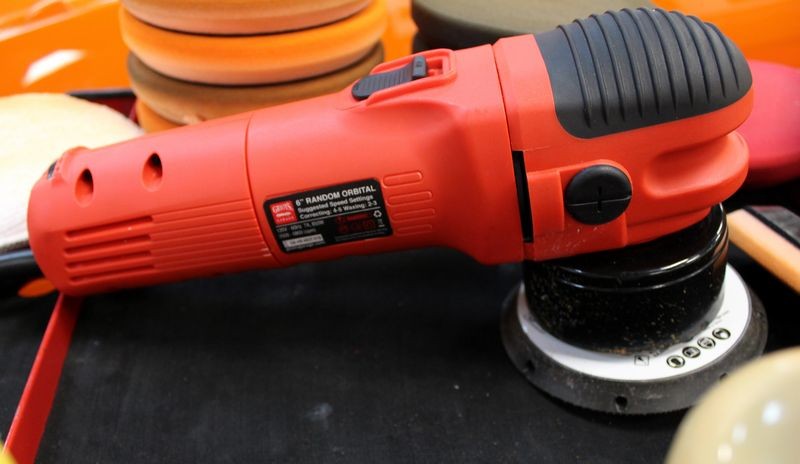
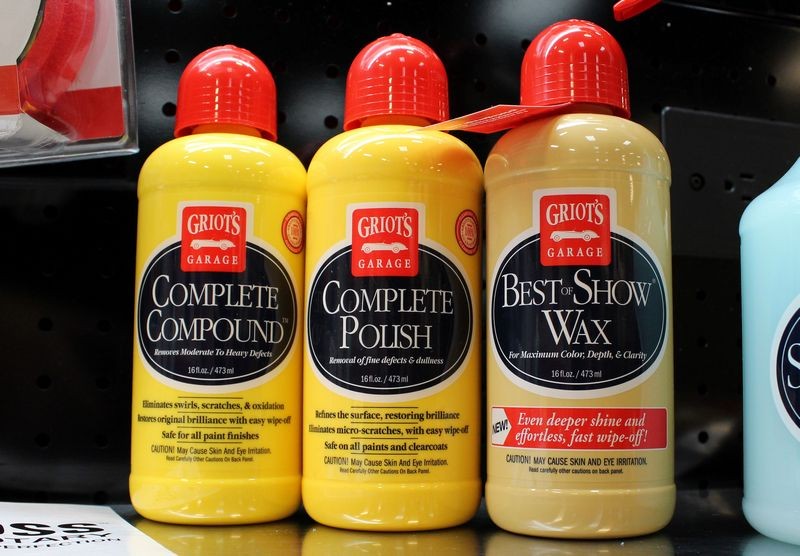
Step 4: The Correction Step with Griot's Complete Compound
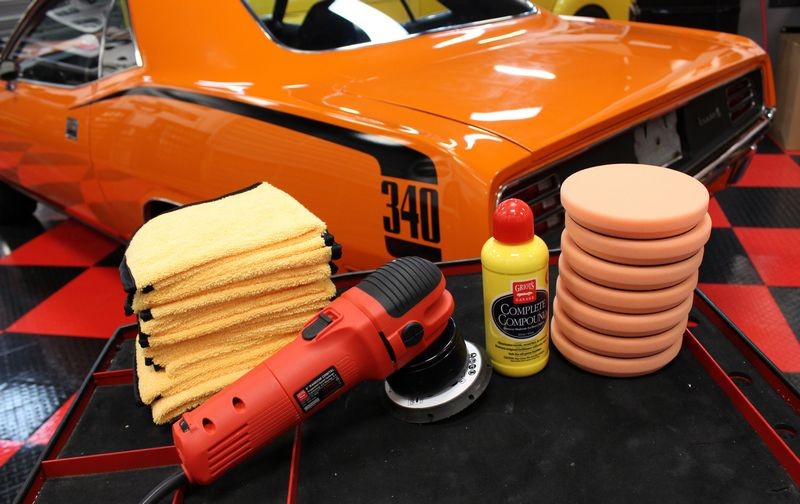
Products used
- Griot's Complete Compound
- Griot's Garage 5.5" Orange Foam Correction Pad
- Speed Setting - 6.0

Compounding Technique
Small Sections
Each panel was divided into smaller sections about the size of a 16" by 16" microfiber towel. After a section was compounded, when moving onto the next section I would overlap a little into the previous section to ensure uniform material removal for a uniform final appearance.
Cross Hatch Pattern
When working a section, a crosshatch pattern was used UNLESS the panel being compounded was thin and then a simple back and forth pattern was used since there's not enough width to effectively move the pad and polisher in a crosshatch section.
See my article here dated October 8th, 2012
The Yoda Technique for Buffing out a Car
Perform 8 Section Passes
A single section pass is here you move the polisher and pad over the section being compounded from the starting point at one side of the section until you cover the section with 50% overlapping passes to reach the opposite side of the section being compounded. This is one section pass. Repeat this 7 more times using a crosshatch pattern and you will have performed 8 Section Passes over the section, which is normal for removing major swirls and scratches with a free spinning, 8mm orbit stroke length orbital polisher.
See this article,
How-To do a "Section Pass" when Machine Polishing with a DA Polisher
Precision Correction and Polishing Work
For the thin panels and for getting around tight and intricate areas I used the new Griot's Garage Pneumatic Micro Rotary Buffer.
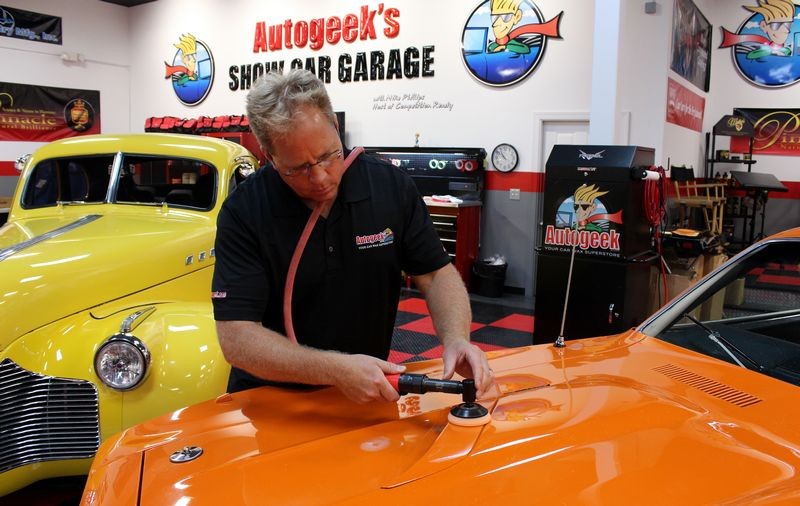
The small, compact size of the Griot's Micro Rotary Buffer made it very easy to control.

The 3.5" pads were perfect for removing swirls, scratches and oxidation from all the thin panels.

The easy to control air powered rotary buffer made working around components a cinch.

The 3.5" pads enabled me to polish out the paint behind the fresh air intake grill without slinging splatter behind the grill.

Now this is what I cal surgical precision buffing...


See my full review of the Griot's Micro Rotary Polisher here,
Review: Griot's New Micro Rotary Buffer
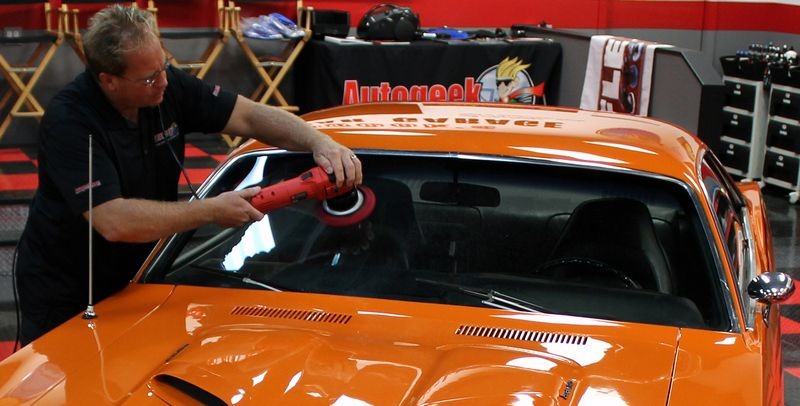
Step 5: The Polishing Step with Griot's Complete Polish
Products used
- Griot's Complete Polish
- Griot's Garage 5.5" Black Foam Finishing Pad
- Speed Setting - 6.0
Kissing the finish
If you look at the splotches of polish on the paint in the below picture, this is a technique called,
Kissing the finish
You can read about what it is, why to do it and how to do it here,
Kissing the Finish by Mike Phillips


Polishing Technique
Same as compounding technique except at this point you really should only need to make around 5-6 section passes and you can tackle a little large section at one time.
The point being is that the grunt work, that is the majority of the deepest swirls and scratches SHOULD HAVE BEEN removed during the compounding step. The polishing step is to refine the results of the compounding step to ensure each square inch (or millimeter if you like the metric system), is perfectly clear and haze free.
Any deep swirls and scratches NOT removed during the compounding step are not normally removed via the polishing step.
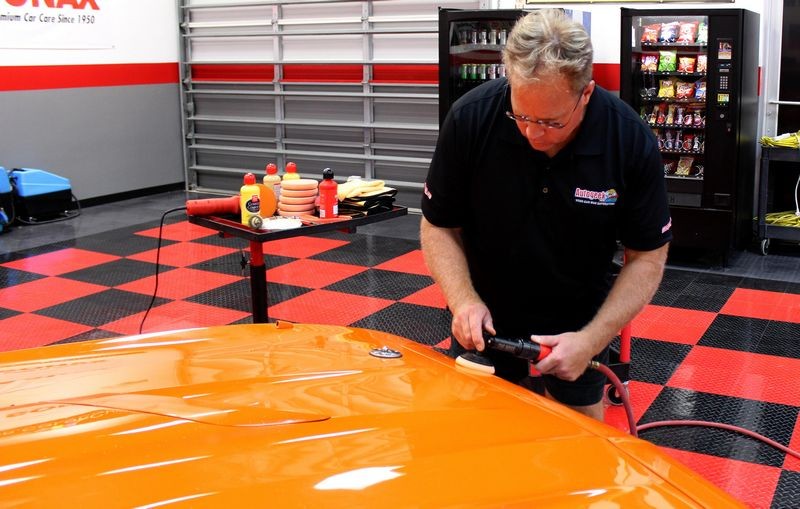
Step 6: The Sealing Step with Griot's Best Show Wax
Products used
- Griot's Garage Best of Show Wax
- Griot's Garage 5.5" Red Foam Waxing Pad
- Speed Setting - 2.0
If you look closely you can see a thin film of wax on the paint.
.
Machine Waxing Technique
The machine waxing technique is nothing like the compounding or polishing steps. At this point all you're trying to do is spread a thin uniform layer or wax over the paint.
Work large sections
You DON'T have to work small sections like you do when compounding and polishing. In fact, you work as large of a section as you can reach as long as you can see that you still have enough product on the surface to spread out via the polisher.
The big idea
The big idea behind machine waxing is to remove your hand from the process and thus pressure points from your fingertips. You're also able to work faster and do better work. The human hand can never compete with a machine applied wax.
Allow the wax to dry to a haze
Before removing the wax allow it to dry to a haze. In most cases after applying the wax, you can start removing the wax where you first started out when applying it and then simply,
Follow your path of travel
The Griot's Best of Show Wax dries quickly when applied correctly and applied correctly means a thin layer.
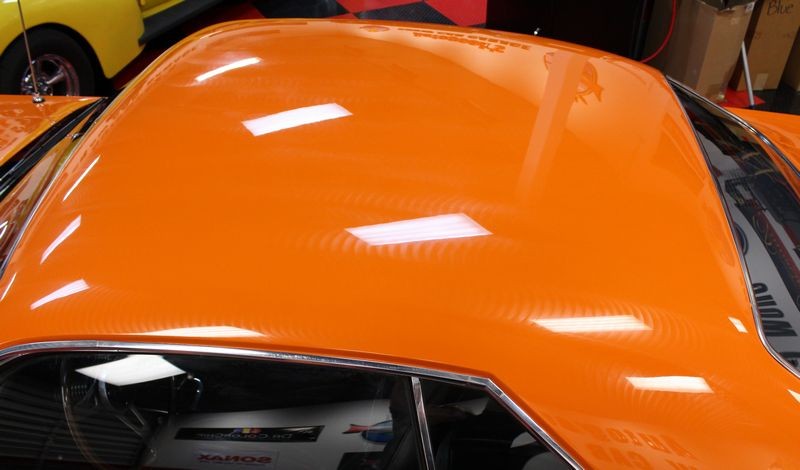
Roof is Finished
Here's the results after the roof was compounded, polished and waxes.


I explain why to knock out the roof first, (before doing the rest of the car), all the way from start to finish here,
Knock out painted roofs first, then tackle the rest of the car...
Hood and Trunk Lid Finished
Here's the results after the hood and trunk lid were compounded, polished and waxed.
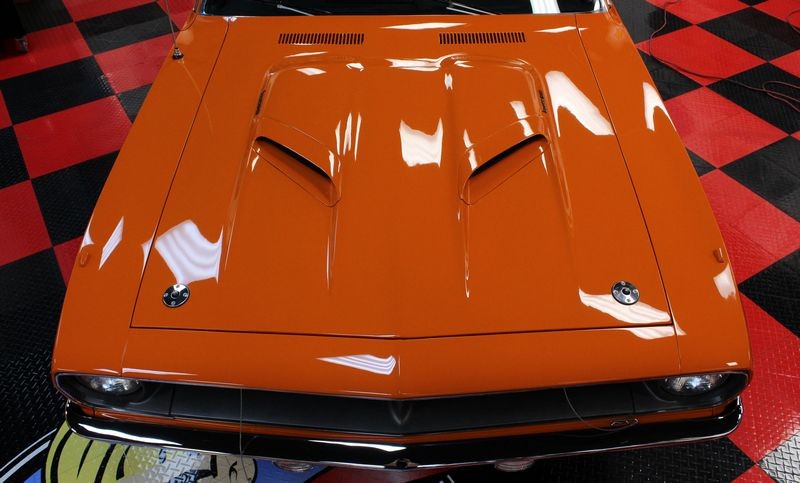
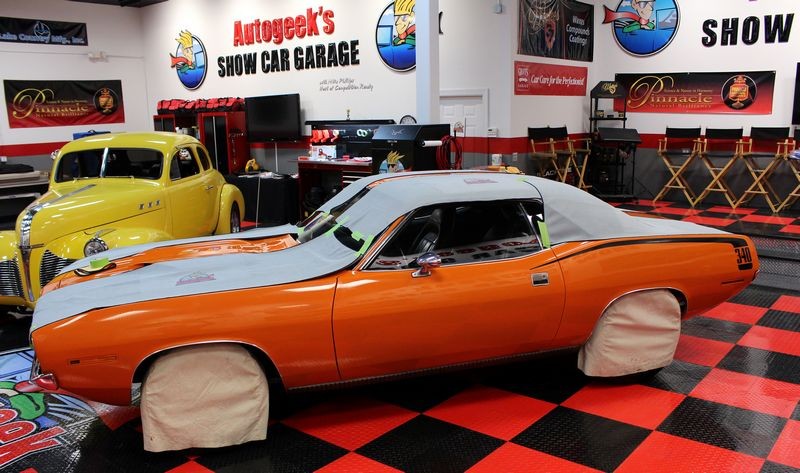
All that's left now are the 6 side panels.
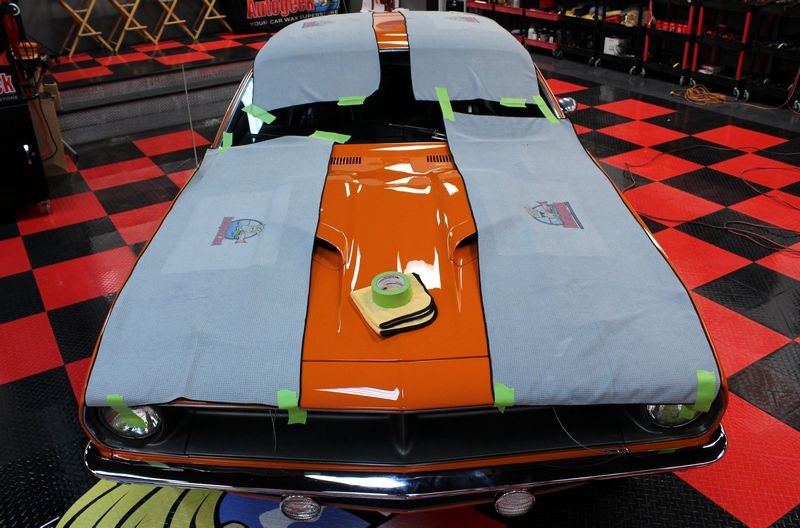
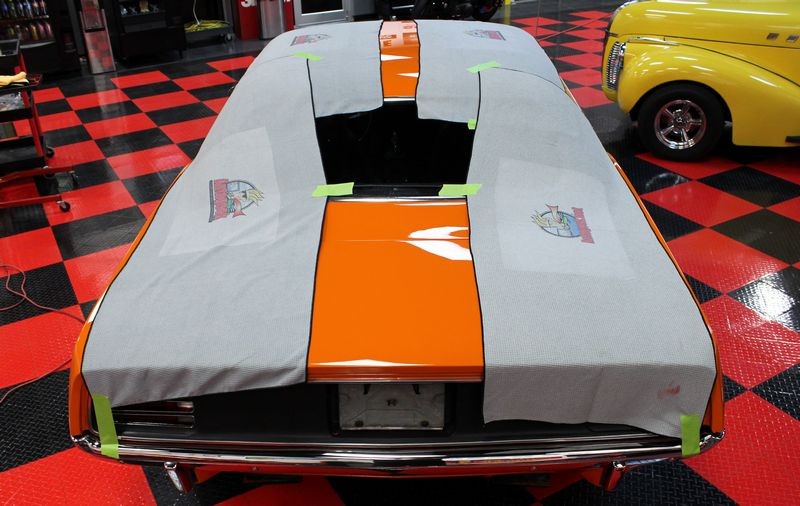
Autogeek Cover-up Towels
Horizontal surfaces are finished, before I tackle the vertical panels I placed Autogeek Cover-up Towels over the waxed surface to protect them from any compound or polish splatter as I work around the sides of the car.
I cover this technique and why to do it on page 118 of my how-to book The Complete Guide to a Show Car Shine

Sorry... no pictures of any of the compounding, polishing or waxing being performed to the horizontal surfaces or the vertical surfaces. I detailed this car a few days before Team Autogeek left for SEMA 2016 and all staff was busy with normal job duties.
-
-
-
Re: How to use Griot's Garage to detail your car - A detail job Richard Griot would be proud of!
-
Post Thanks / Like - 1 Thanks, 0 Likes, 0 Dislikes
-
Super Member

Re: How to use Griot's Garage to detail your car - A detail job Richard Griot would be proud of!
Needless to say AWESOME !!!!!
As always THANKS !!!!!
This time of the year Griots Spray Wash is my product..
Similar Threads
-
By Nick McKees37 in forum Car Care Product Giveaways
Replies: 20
Last Post: 01-22-2011, 12:01 AM
-
By Mike Phillips in forum How to articles
Replies: 3
Last Post: 06-23-2010, 01:00 PM
 Members who have read this thread: 1
Posting Permissions
- You may not post new threads
- You may not post replies
- You may not post attachments
- You may not edit your posts
-
Forum Rules
|
| S |
M |
T |
W |
T |
F |
S |
| 28 | 29 | 30 |
1
|
2
|
3
|
4
|
|
5
|
6
|
7
|
8
|
9
|
10
|
11
|
|
12
|
13
|
14
|
15
|
16
|
17
|
18
|
|
19
|
20
|
21
|
22
|
23
|
24
|
25
|
|
26
|
27
|
28
|
29
|
30
|
31
| 1 |
|


 Thanks:
  Likes:


 Reply With Quote
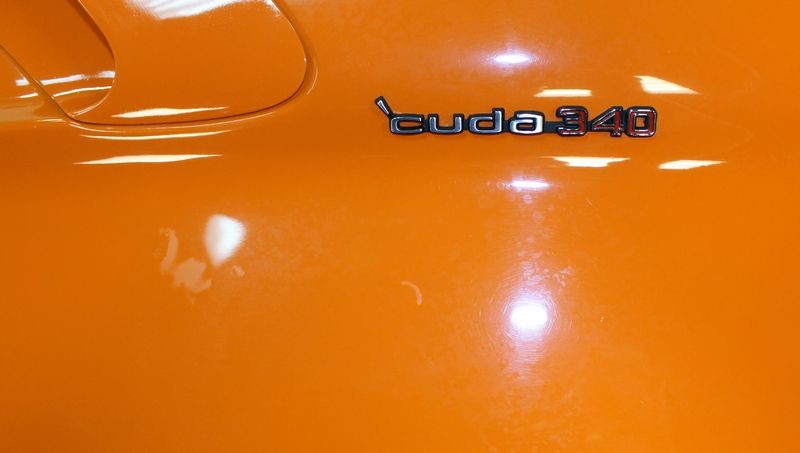


Bookmarks