 Dislikes: 0
-
-
-
Post Thanks / Like - 0 Thanks, 1 Likes, 0 Dislikes
-
Re: How to use a foam gun by Mike Phillips
Mixing your soap solution
First things first - in order to get a LOT of foam suds you need to use a car wash soap formulated for creating lots of foam suds. This is key to maximizing the performance of the foam gun because not all car wash soaps are high sudsing soaps.
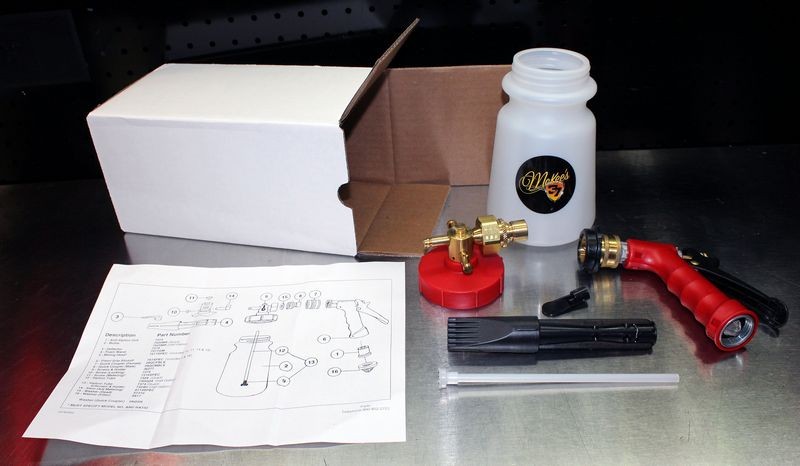
McKee's 37 Xtreme Foam Formula
McKee's 37 Extreme Foam Formula is a super high sudsing car wash shampoo specifically formulated for use with foam guns. It creates mountains of rich, luxurious soap suds and also provides excellent cleaning ability for removing road film and dirt off your car. McKee's 37 Xtreme Foam Formula is pH balanced and non-detergent so it cleans well without being harsh to delicate clearcoat finishes. It's available in both 16 ounce bottles and 1-gallon jugs.
My comment....
This is the car wash soap I use for washing and maintaining the finish on my truck and my wife's Mercedes-Benz.
McKee's 37 Xtreme Foam Formula

How to mix the correct dilution of car wash soap and water
While you don't have to be a math genius or a chemist to correctly mix car wash soap with water it is important to mix the correct amount of soap to water for maximum suds.
The Glug-Glug Method
Here's my advice - don't use the glug-glug method. You guys all know what I'm talking about. That's when you simply pour the soap into the water without measuring, you know, glug, glug glug. The problem with using this Caveman technique is that if you under-use your soap you won't get great foaming action from the foam gun and if you overuse the soap you'll needlessly waste product. If you REALLY overuse product the solution can be so thick it wont draw through the siphon holes. This means it won't work!
The correct method for mixing soap for your 1-quart foam gun
So to make it simple I've done all the math and measuring and in the pictures below I show you how to use the markings on the 1-quart bottle to fill the bottle with the correct amount of water and soap for the perfect foam solution.
I like LOTS of suds so the directions below are for maximum suds with the McKee's 37 Xtreme Foam Formula soap and the directions it provides for mixing the proper dilution for maximum suds.
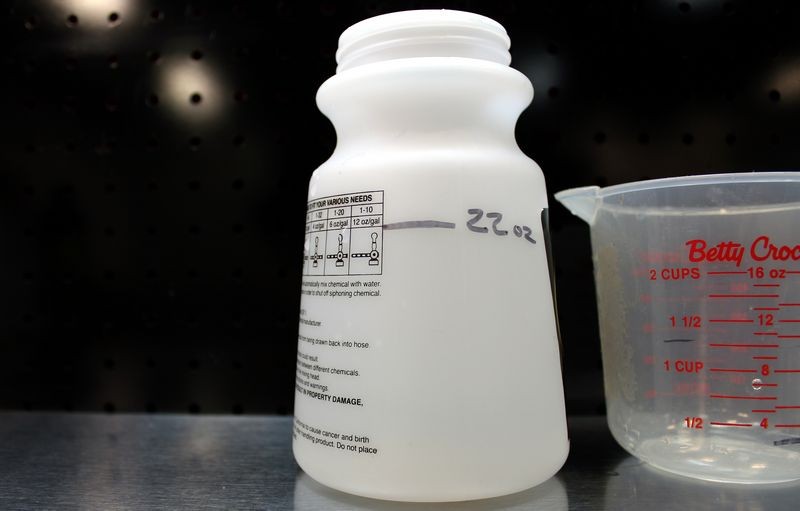
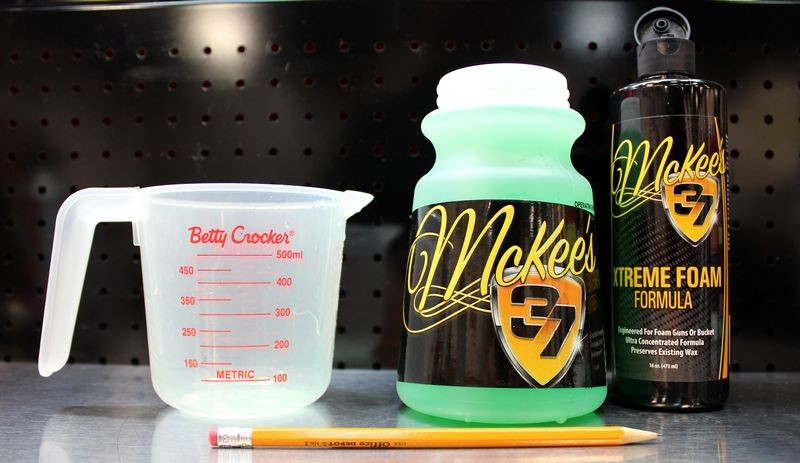
1 quart = 32 ounces
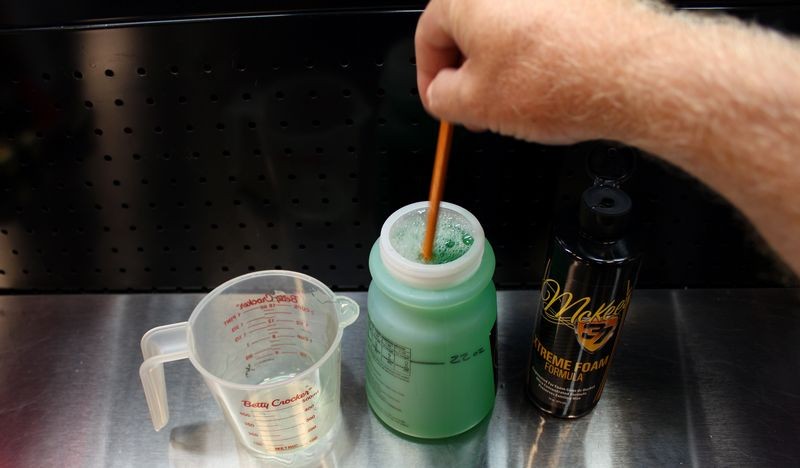
In the picture below, one quart fills the bottle to the location on the bottle the pencil is pointing to. I know for a fact because I filled my handy-dandy Better Crocker measuring cup with 32 ounce of water and then poured it into the foam gun bottle just to check so I would know 100% for sure.

The recommended dilutions for McKee's 37 Xtreme Foam Formula car wash soap are,
2 ounces soap to 6-8 ounces of water
Because I like lots of suds the below mixing instructions are for mixing 2 ounces of soap to 6 ounces of water.
32 divided by 6 = 5.3
If we just round the 5.3 to 5 that means 5 groups of 6 ounces will go into the one quart bottle but each group of 6 ounces will also get 2 ounces of soap. So that's 8 ounces. 8 will go into 32 3 times and now I'm done doing math. 
Instead of making this difficult I do what I call look at the BIG PICTURE. The big picture is I want lots of suds.
In order to completely fill the 1 quart bottle with a uniform mixture of soap and water solution at the 2 ounces of soap to 6 ounces of water dilution level I fudged the math to make it EASY to mix a strong dilution of soap and suds. If you want a weaker solution then simply add more water than I show below and less soap. For example you could add 24 ounces of water and 8 ounces of soap. Or add 28 ounces of water and 6 ounces of soap. For these dilutions, to make it easy on yourself, simply measure out the water first and then MARK the side of the bottle with a permanent marker. Then in the future you can quickly fill the bottle with water to the mark and then fill the rest of the bottle with soap.
For maximum suds
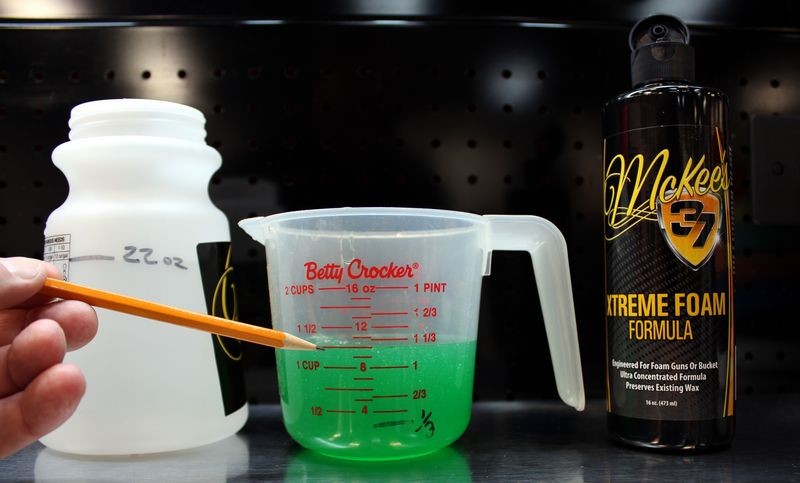
I filled the bottle with 22 ounces of water then added 10 ounces of soap. This gave me a total volume of 32 ounces of soapy water solution.
To add 22 ounces of water to the 1 quart bottle add water till it reaches the line I'm pointing to with the pencil.


Here I've placed a line on the side of the 1-quart bottle using a permanent marker
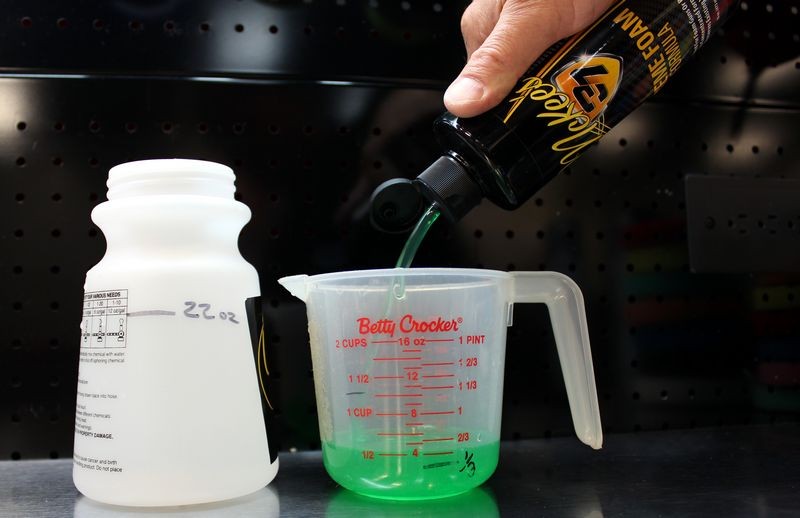
Measure the soap
Next I pour 10 ounces of soap into the measuring cup. This is mostly to show the math works, that is 22 + 10 = 32
Next I pour the soap into the 1-quart bottle
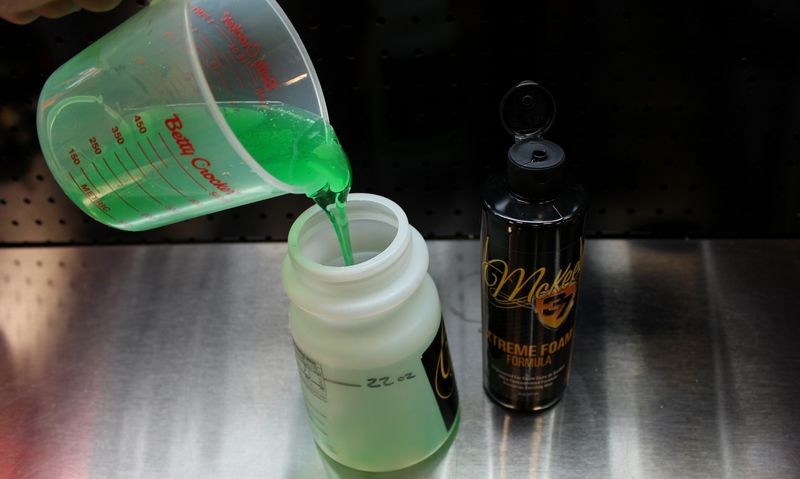
Stir for a uniform mixture
And here I'm stirring the soap and water together for a uniform mixture. This is important as it's not easy or effective to try to shake the bottle after the foam mixing lid is attached. So grab a pencil or anything long and skinny and simply stir the mixture. Since I write a lot of articles and take a lot of pictures I alwasy have pencils and ink pens handy in the garage.
Mmm.... soapy water!

There you go... perfectly mixed soap and water for maximum suds.
My comment....
A repeatable process that does not require thinking
The reason I do things like this is so in the future I don't have to re-think the dilution process out again. By nature I'm lazy. I like to do things one time, dial in a process and be done with it. Every time I wash my truck or my wife's car all I have to do is simply add water to the line you see below and then fill the rest with soap. I don't get out my Better Crocker mixing cup every time I wash my car and measure the soap like you'll see in the pictures below. This was a one time measurement and now each time I want to mix up some soap solution it will be quick and easy.
Hope all of the above is as clear as soap and water solution.

-
-
Post Thanks / Like - 1 Thanks, 1 Likes, 0 Dislikes
-
-
-
Re: How to use a foam gun by Mike Phillips
A couple more cool tools for turning you into the Car Wash King of your block....
The Dual Bucket Dolly System with Grit Guard Inserts and Grit Guard Washboards
Even though you have a foam gun you still need a wash mitt or two and in-between washing body panels you need to rinse off your wash mitts to remove the dirt you loosened.
The trick is how to do it BEST.
Why?
Because if you don't remove any dirt particles trapped onto your wash mitt then you'll put scratches in your car's paint when you move onto the next panel.
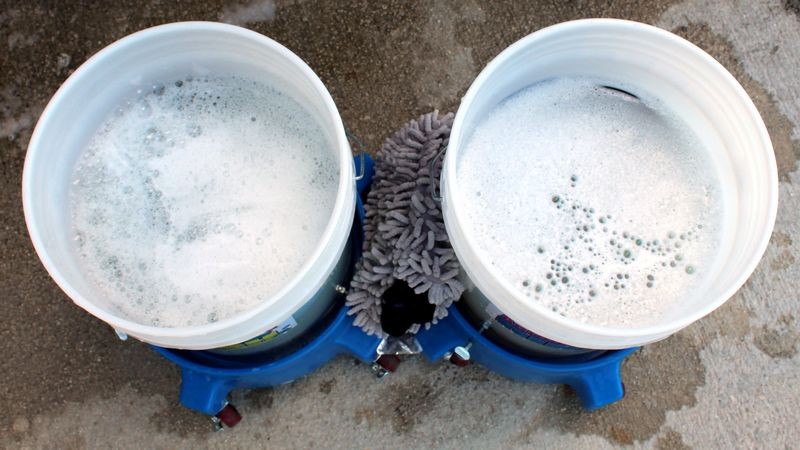
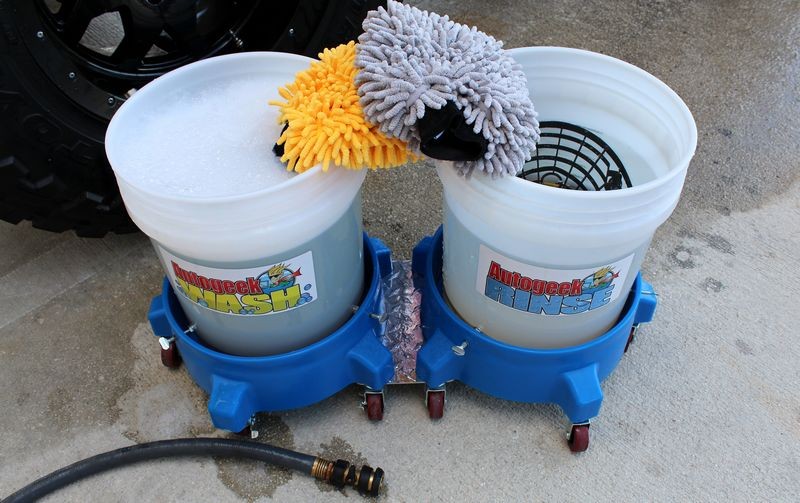
The folks at Grit Guard came up with a solution to help all of us including yours truly from instilling scratches into our car's paint during the wash process. It's called the Dual Bucket Dolly System with Grit Guard Washboards inserted into each bucket.
The Dual Bucket Dolly System
It's two 5-gallon buckets connected at the middle so when you roll one bucket around your car you roll the other bucket at the same time. This saves you time, energy and steps.
Note the labels on the buckets? I tell you why you want these below....
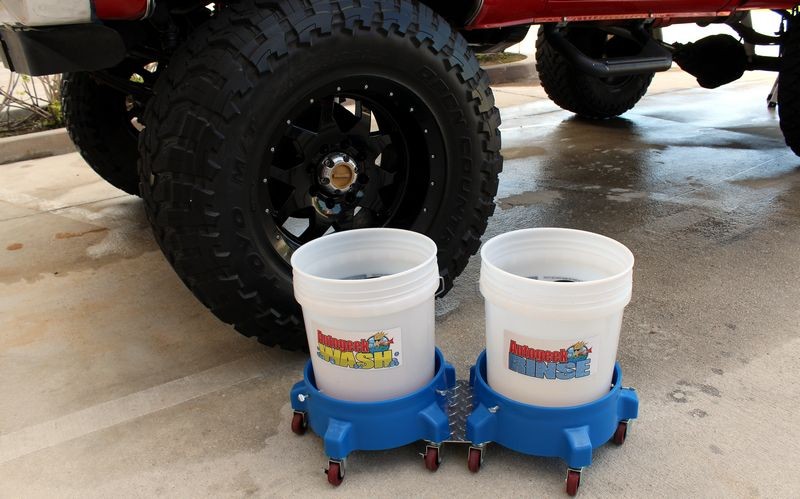
Wash & Rinse Labels
Note the labels on the buckets? I tell you why you want these below....


Grit Guard Washboards
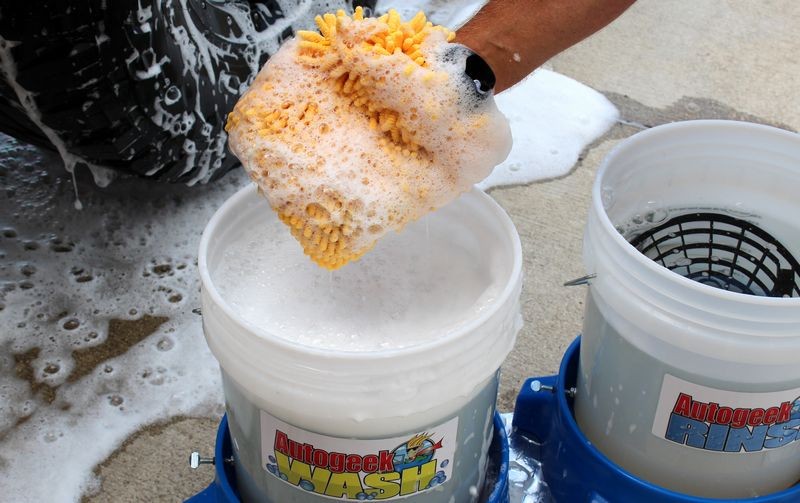
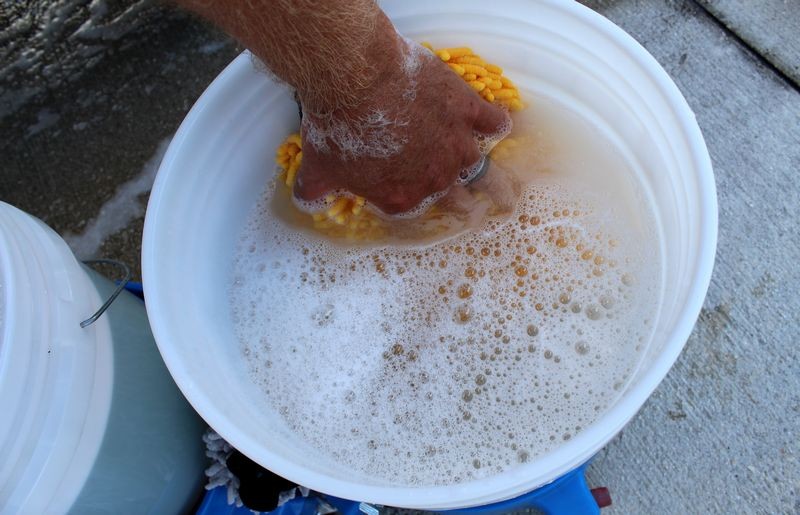
Here you can see the Grit Guard Washboards sitting on top of Grit Guard Inserts inside of each bucket. First thing I'm going to do is add water to both buckets and then add some of the McKee's Extreme Foam Formula car wash shampoo to the wash bucket to saturate and lubricate my wash mitt with some car wash soap.

Here's what they look like inside a cut away bucket

Now pay attention....
Here you can see the wash bucket is filled with soap solution and the rinse bucket is filled with clean, clear water.

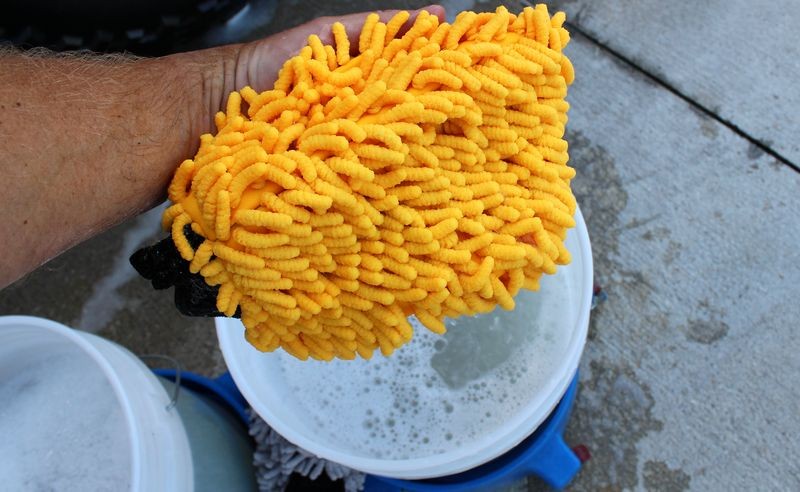
High Quality Microfiber Chenille Wash Mitts
Here's my choice for wash mitts. I love these things!
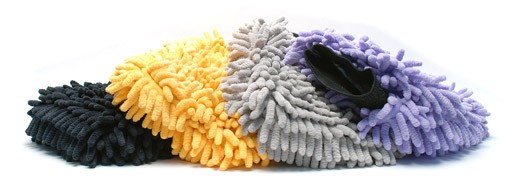
These are Microfiber Chenille Wash Mitts carried on the Autogeek.com store. I know you see these at discount stores but here's the deal.. The cheap ones fall apart. We only carry the high quality version. You get what you pay for. Don't waste your time or money on the cheap version they will simply fall apart.
The Microfiber Chenille Mitts we sell at Autogeek can be washed and dried in your washer and dryer without falling apart. The cheap ones will simply unravel and you'll end up throwing them away.
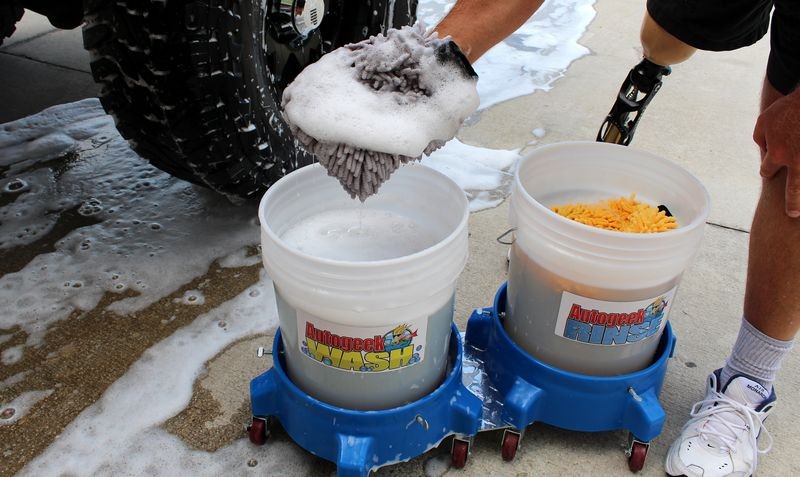
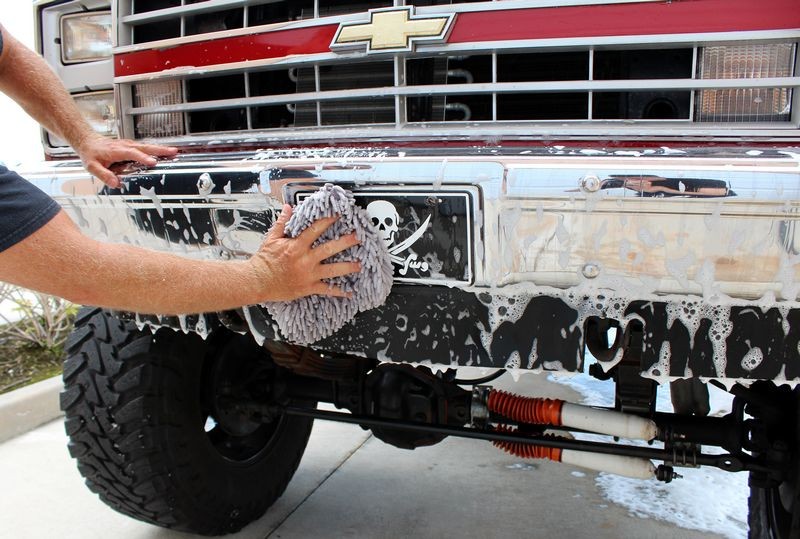
How to use the two bucket method
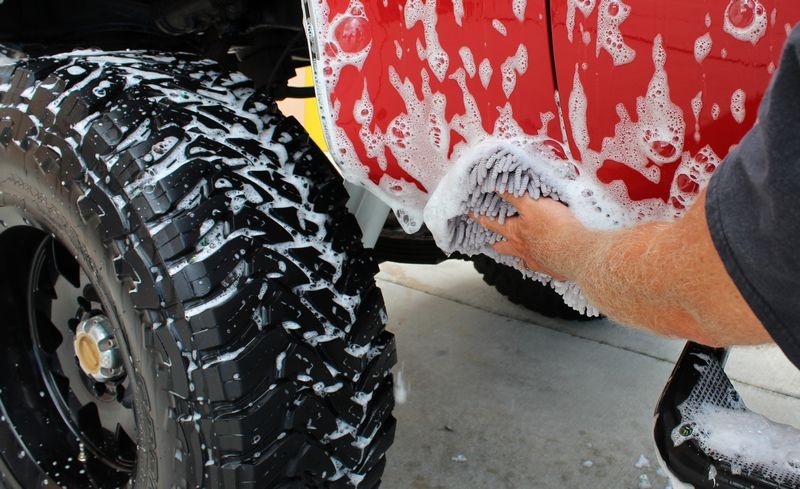
When you go to wash a body panel you always start out dipping your mitt in the bucket with soapy water and then wash the panel.


After washing a panel, next you dunk the mitt in the clear rinse water bucket to remove the dirt that accumulated onto the mitt.
NOTE since I'm just starting the clear RINSE water bucket is EASY to identify because the water is CLEAR.

Here I am scrubbing the mitt against the Grit Guard Wash Board to remove the dirt off the mitt. Note what's happening to the clear water?
Here's my mitt, rinsed off clean and ready for the next body panel....
Now look at the buckets?
Which bucket is the wash bucket and which bucket is the rinse bucket?
It's about speed and working effectively
That's what the wash and rinse labels are for... to enable you to visually identify which bucket is which after you start washing your car. After you dunk your wash mitt ONE TIME into the rinse water bucket without the labels you will not be able to quickly and easily tell which bucket is which.
Color coding system
Note I have a gold mitt and a gray mitt? I use the gold mitt for the upper panels and when I get to the lower panels or bumpers I use the gray mitt. This is a color coding method I use to help prevent getting the heavier dirt that accumulates on the bottom portions of a vehicle over upper panels that tend to be a lot cleaner.
Gray mitt for the lower, dirtier portions of a vehicle.

Going overkill
If you really want to go nuts then wash the lower portions of your rig first and then start at the top of the vehicle and work your way down. Somewhere on the forum I have an article about why to do it this way but here is the nutshell version.
My natural tendency is to go the extra mile. This applies to life and washing my truck. When I'm washing the upper, cleaner panels it's natural to want to reach a little further to do more work faster. This means using my best mitt, the gold mitt to wash the lower portions and this means contaminating my best mitt with dirt off the lower panels. So one way to avoid this is to wash the lowest dirties portions of a panel first BUT don't wash the upper sections at all. Then rinse and then move to the roof and work downward. By washing the dirtiest portions first with my gray mitt there's no way I can accidentally or by trying to hard, (going the extra mile), that I can contaminate my gold mitt with dirt on the lower panels because I've already washed these areas. This is about as anal retentive as I can get or anyone can get when it comes to washing your vehicle carefully and for most it's overkill but I still thought I would throw this out there.
Drying your car - Avoid water spots
After you've completely washed and rinsed your car (or truck), be sure to dry off any standing water to avoid water spots. Water spots are the worst type of defect to have to remove if there's anything corrosive in the water. Highly contaminated city water or well water can actually leave water spots in the paint that are not spots ON the paint but ETCHINGS IN THE PAINT and the only way to remove these types of water spots is usually to machine compound the paint. That's a lot of work. It's a LOT faster and easier to simply dry the water off.
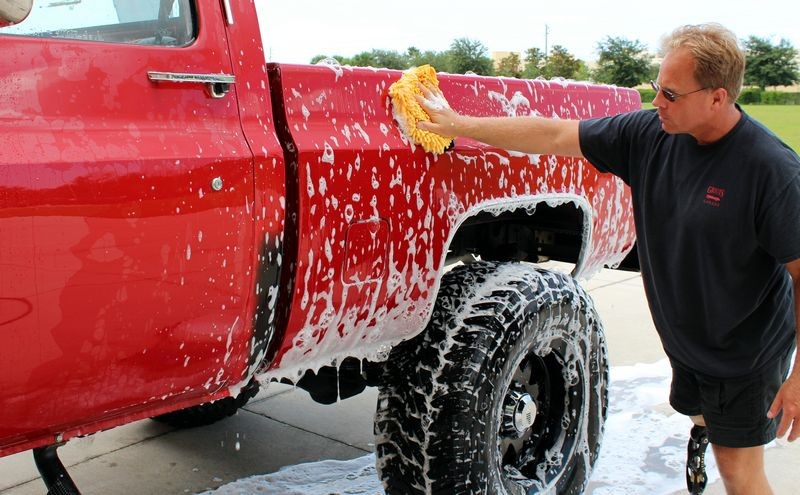
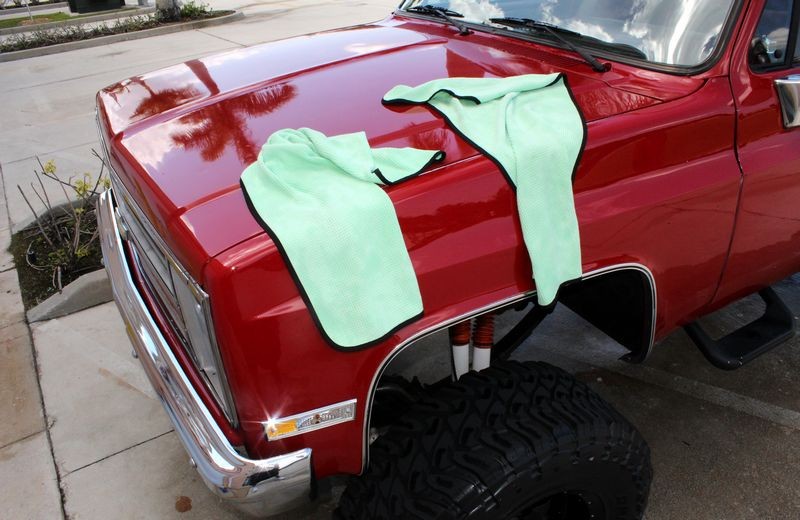
There's all kinds of tools and all kinds of ways to dry a car Here's a really simple but effective way and that's to use Guzzler Microfiber Waffle Weave Drying Towels. I dried my entire truck using two of the 20" x 40" size towels and then I'll simply throw them in the washing machine and dryer and they'll be clean and ready to use the next time I need to dry my truck or someone's car.
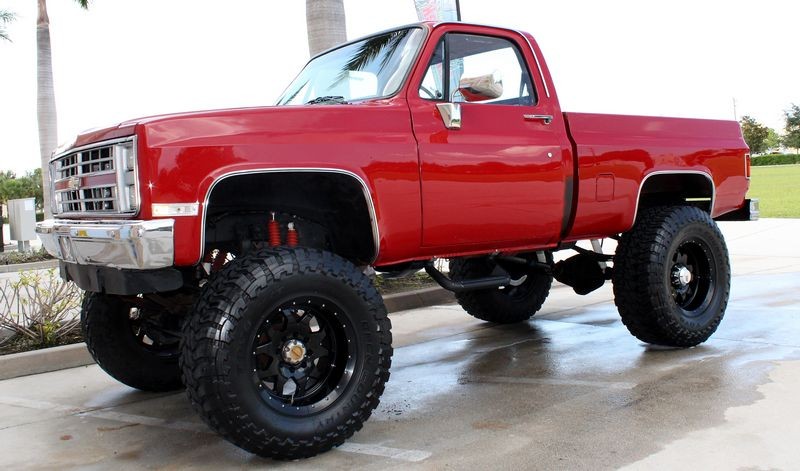
Here she is sparkling clean!
On Autogeek.com
Grit Guard® Dual Bucket Washing System - CLEAR
Grit Guard Washboard Combo
Wash & Rinse Bucket Labels
Micro-Chenille Wash Mitt 3-Pack - Choose Your Color
3 Pack The Supreme Guzzler Waffle Weave Towels, 20 x 40 inches
Questions?
Post them to this thread or call our Customer Care Staff.
1-800-869-3011
They can help you get any or all of the above plus anything else you need to take care of your car the right way.
-
Post Thanks / Like - 1 Thanks, 0 Likes, 0 Dislikes
 Nikki
Nikki thanked for this post
-
Super Member

Re: How to use a foam gun by Mike Phillips
Excellent, thorough review Mike!
-
Re: How to use a foam gun by Mike Phillips
My foam gun and grit guards should be here on Thursday. You're right, it does look like a lot of fun. I can't wait to break them out this Holiday weekend. I have a feeling my neighbors are going to be jealous, so as long as they chip in for a gallon of McKee's Extreme Foam I'll be up for doing all their cars too. Thanks for once again a detailed thread with lot's of pictures, it really helps us newbies.
-
Re: How to use a foam gun by Mike Phillips
 Originally Posted by Murphy77

My foam gun and grit guards should be here on Thursday. You're right, it does look like a lot of fun. I can't wait to break them out this Holiday weekend.
I have a feeling my neighbors are going to be jealous,
Or they'll think you've finally went off the deep end...
Originally Posted by Murphy77
so as long as they chip in for a gallon of McKee's Extreme Foam I'll be up for doing all their cars too.
That would be a killer deal for them...
Originally Posted by Murphy77
Thanks for once again a detailed thread with lot's of pictures, it really helps us newbies.
Just to note...
I have a few more pictures to add to really tie all the ideas, tips and techniques together.
I'll make another reply to this thread when all the pictures have been inserted.
Similar Threads
-
By Mike Phillips in forum Ask your detailing questions!
Replies: 27
Last Post: 04-01-2021, 01:14 PM
-
By Mike Phillips in forum How to articles
Replies: 4
Last Post: 01-28-2021, 09:47 AM
-
By Mike Phillips in forum How to articles
Replies: 73
Last Post: 08-13-2019, 10:06 AM
-
By Mike Phillips in forum How to articles
Replies: 8
Last Post: 05-02-2017, 06:34 AM
-
By Mike Phillips in forum Product Reviews by Mike Phillips
Replies: 4
Last Post: 04-28-2017, 02:29 PM
 Members who have read this thread: 2
Posting Permissions
- You may not post new threads
- You may not post replies
- You may not post attachments
- You may not edit your posts
-
Forum Rules
|
| S |
M |
T |
W |
T |
F |
S |
| 26 | 27 | 28 | 29 | 30 | 31 |
1
|
|
2
|
3
|
4
|
5
|
6
|
7
|
8
|
|
9
|
10
|
11
|
12
|
13
|
14
|
15
|
|
16
|
17
|
18
|
19
|
20
|
21
|
22
|
|
23
|
24
|
25
|
26
|
27
|
28
|
29
|
|
30
| 1 | 2 | 3 | 4 | 5 | 6 |
|


 Likes:


 Reply With Quote
Bookmarks