 Thanks: 0
 Likes: 0
 Dislikes: 0
-
Regular Member

Time to step up my game.
As BobbyG (G is for genius) would say, it is time to step up my game. I am currently working on a black 2001 BMW 325i. Over the years the car has been repaired several times. The only place I can find that has not been touched up in the trunk lid. The repairs arent terrible with the exception of the whole drivers side. That being said, I decided to wet sand it in an effort to remove the orange peel. They had obviously left plenty of clear to work with. I did test spots and removed as little as needed.
The machine I am using to compound is a GG 6 DA. with Meg 105. This is killing me. I dont have the experience to jump straight to a rotary so I was thinking of stepping up to a Flex 3401. So that is my quandary. Will this help me out? The results have been great so far but very time consuming. The grits I am using is 2000, 2500 and 3000.
Craig
-
Super Member

Re: Time to step up my game.
 Originally Posted by cgreen1120

As BobbyG (G is for genius) would say, it is time to step up my game. I am currently working on a black 2001 BMW 325i. Over the years the car has been repaired several times. The only place I can find that has not been touched up in the trunk lid. The repairs arent terrible with the exception of the whole drivers side. That being said, I decided to wet sand it in an effort to remove the orange peel. They had obviously left plenty of clear to work with. I did test spots and removed as little as needed.
The machine I am using to compound is a GG 6 DA. with Meg 105. This is killing me. I dont have the experience to jump straight to a rotary so I was thinking of stepping up to a Flex 3401. So that is my quandary. Will this help me out? The results have been great so far but very time consuming. The grits I am using is 2000, 2500 and 3000.
Craig
My Griots DA won't remove 3000 grit marks. If I were you I would get a rotary. They really aren't as dangerous as you percieve them to be
Hard times create strong men, strong men create good times, good times create weak men, and weak men create hard times.
-
Re: Time to step up my game.
-
-
-
That's a cool video demonstration by mike! Meguiars also has a picture demonstration of removing 3000 grit marks with a DA and their mf system
-
Regular Member
Re: Time to step up my game.
Mike,
I read a thread recently where you suggested stepping to forced rotation DA before graduating to a rotary and to me that makes sense. I will read the review you suggested but it sounds like I need to pay more attention to my surface prep by finishing out with the 3M 5000. That being said, will the Flex 3401 make my life easer or do I make the jump to rotary? Keep in mind I only have 8 months under my belt.
Craig
-
Super Member

Re: Time to step up my game.
The key with safely buffing out sanding marks with a rotary is to not sand in areas where you are likely to get in trouble with burns or strike throughs etc. In other words, if you can't safely buff in that area (such as an edge of a panel) don't sand in that area. Working in relatively open or flat areas with a rotary buffer is quite safe and a relatively straight forward proposition. Of course you'll need to practice some common sense and not grind away at one area for a long period of time.(keep it moving and it won't burn.)
Another misconception, "I think" a lot of new rotary users experience is fear of the wool pad. The thought process is something like this...
"Oh My!!! A wool pad!! Oh No!! Wool is the most aggressive pad in the world!! It's surely going to burn my paint!! I better use a foam pad instead!!"
Of course I typed that with a silly and somewhat exaggerated tone. But really, I think this is a typical thought process from a lot of inexperienced rotary users while going through a period of fear and anxiety preceding their first rotary experience. (It was for me anyway)
This however is far from the truth in terms of the creation of heat that might burn paint, as a foam pad will create much more heat than what a wool pad will. Yes a wool pad can be very aggressive in terms of how much clear coat material is actually being abraded off of the car, especially when combined with a super duty "rocks in a bottle" type of compound.
It seems to me that a lot of folks who are inexperienced in detailing, "having not done their homework", are pretty quick to grab a hold of a bottle of the cheapest compound available (which often time is rocks in a bottle) and proceed to buff away willy nilly and create a mess of things.
The friction created between a foam pad being spun with a rotary against paint is potentially much greater than that which is created between a wool pad and the paint.
So for removing sanding marks as a newbie with a rotary, using a wool pad would be safer and easier to learn with "as long as you keep in mind one main thing". The wool pad will leave behind it's own swirl marks in the paint, that to an inexperienced rotary user may, or could be mistaken for paint defects that just aren't being removed.
This single mistake in thinking "I believe", gets more new rotary users in trouble than any other factor. They see the swirls left behind by the wool pad and think..."Damn...These swirls will just not buff out of this paint!!! This must be some seriously hard paint!!!" All the while in reality.. the paint defects have been long since removed, and what the inexperienced rotary user is actually seeing is the swirls that the wool pad itself is imparting into the paint.
They keep on buffing away trying to remove the swirls and before they know it they begin to see primer coming through the base coat.
Real world experience in seeing several cars with this situation present has suggested to me that this is a common occurrence among new detailers having not first done their duty in researching how to do things correctly.This is why practicing on a junk panel first is often suggested by experienced rotary users.
Having said all of that....Have you tried removing your sanding marks with a 4 inch pad on your DA?
-
Re: Time to step up my game.
Originally Posted by cgreen1120
Mike,
I read a thread recently where you suggested stepping to forced rotation DA before graduating to a rotary and to me that makes sense.
That's for people detailing cars for money or enthusiast that want a more powerful tool for buffing out their own cars.
When it comes to removing sanding marks out of paint the fastest and most effective way is by using a wool pad on a rotary buffer and here's what I always say about this topic...
In the context of wetsanding an entire car...
"It already takes a long time to buff out all your sanding marks using a rotary buffer, using any other tool will just take longer"
Can you remove sanding marks using a DA Polisher like a PC, Meguiar's, Griot's or Flex 3401?
Heck yeah!
I walked a guy through the entire process from start to finish where he restored a 1965 Mustang, painted, wetsanded it and then removed all the sanding marks using a Meguiar's G110 over on MOL but even he admitted it took a l-o-n-g time.
The guy was retired so he had all the time in the world for the project and it was cool because he did it all for his son who was serving in the military during the Iraq war so when his son returned home the car was finished and an awesome welcome home present.
But still.... even with #3000, #4000 and now #5000 grit sanding discs if I'm the guy that's going to do the sanding and buffing I'm still going to choose a wool pad and a rotary buffer to remove the sanding marks because it already takes a long time, why would I want to do it any slower....
For a weekend warrior, with no time deadlines, you can remove sanding marks using any of the various DA polishers, it will just take more time.
Originally Posted by cgreen1120
I will read the review you suggested but it sounds like I need to pay more attention to my surface prep by finishing out with the 3M 5000.
Finishing out using the highest grit papers or discs you can obtain will always make the buffing process faster and this is key... cooler.
Originally Posted by cgreen1120
That being said, will the Flex 3401 make my life easer or do I make the jump to rotary? Keep in mind I only have 8 months under my belt.
Craig
If I were you, I would go for the rotary and a wool pad and either some M105 or M101 and like Dave suggested, get a junk panel from the wrecking yard or from a local body shop and practice.
Even practice heating the paint up on purpose and burning through an edge and a flat surface so you have the experience from doing this and it will help you to know what not to do.

-
Re: Time to step up my game.
Also, top coat hardness is a HUGE factor.
The harder the paint the more difficult it is to abrade it to remove any type of defects.
The harder the paint, the more effective a rotary buffer will be for removing 100% of the defects.
Similar Threads
-
By bean438 in forum Auto Detailing 101
Replies: 52
Last Post: 01-17-2019, 09:22 AM
-
By CamTech in forum Introduce Yourself
Replies: 12
Last Post: 05-31-2015, 06:35 AM
-
By njarmstrong81 in forum Auto Detailing 101
Replies: 5
Last Post: 04-16-2014, 01:12 PM
-
By luv2clean in forum Auto Detailing 101
Replies: 36
Last Post: 05-18-2010, 02:10 AM
-
By BigFloppy in forum Introduce Yourself
Replies: 7
Last Post: 11-02-2007, 07:44 PM
 Members who have read this thread: 0
There are no members to list at the moment.
Posting Permissions
- You may not post new threads
- You may not post replies
- You may not post attachments
- You may not edit your posts
-
Forum Rules
|
| S |
M |
T |
W |
T |
F |
S |
| 31 |
1
|
2
|
3
|
4
|
5
|
6
|
|
7
|
8
|
9
|
10
|
11
|
12
|
13
|
|
14
|
15
|
16
|
17
|
18
|
19
|
20
|
|
21
|
22
|
23
|
24
|
25
|
26
|
27
|
|
28
|
29
|
30
| 1 | 2 | 3 | 4 |
|


 Reply With Quote
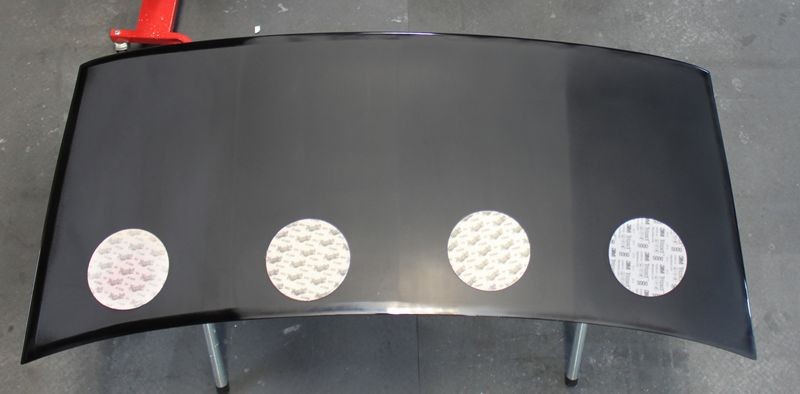


Bookmarks