I've never used that machine before but I'm sure it's somewhat compatible to others maybe.During the compound phase 6 to 8 lbs of pressure is called for.I would use the weight of the machine and apply just a little down force pressure till you see clarity and a swirl free finish.Apply more down force pressure if you need to,only you will know what is needed.Slow steady passes are key so don't rush it.Section your work in a small square at a time with the speed on 5 or 6 depending on the severity of the finish and polish choice.Keep your pads clean after a couple of sections and don't saturate them with to much product.Mike Phillips markings on the backing plate is a great indication making sure the machine is spinning only 1 marking is sufficient.
Navigation
Install the app
How to install the app on iOS
Follow along with the video below to see how to install our site as a web app on your home screen.
Note: This feature may not be available in some browsers.
More options
Style variation
Hologram/buffer trail help
- Thread starter Rtrick87
- Start date
Mike Phillips
Active member
- Dec 5, 2022
- 51,004
- 6
Long time lurker,
Thank you for joining our forum and welcome to AutogeekOnline! :welcome:
decided to join and ask a question.
I have a 2013 sport red impala. I was using my torq x DA polisher with scratch x to remove some spider webbing swirls.. And I thought everything looked good so I put some glaze on and sealant and finished up.
Went to visit my daughter at the hospital, get into the garage and check out my car and I've got tons of buffer trails on my hood and trunk.
- I used the orange hex pad from chemical guys with meguiars scratch x,
- followed by ez glaze and sealant.
At this point, I would say if the buffer trails were NOT in the paint before you started but now they are, then it could be the paint is not hard but soft and the CG Orange Hex pad, which I believe is a foam cutting pad, left marring in the paint.
ScratchX is a great product. It's more like a fine cut polish in a tube. I worked for Meguiar's when this product was introduced and saw it go through several updates. Including when it went from hand use only to hand or machine use. I think I was actually one of the guys that pushed for the formula change because I was teaching the Saturday Detailing 101 classes at the time and when the early versions of ScratchX would get hot they would get real gummy.
I don't think ScratchX would be the culprit here but finishing with an aggressive foam cutting pad could be.
Remember,
"Polishin paint is an art form, not a grinding process"
Wondering what I did wrong. Note, I did try this about a month ago but I felt like I rushed because it was getting late. I didn't see results while using ultimate compound which is why I used scratch x. But the first time ever using a DA polisher last month and I didn't have any holograms or swirls. Any help would be awesome
Start fresh. Re-polish or compound the entire good or car. Use a normal and simple three step process like,
- Foam cutting pad with compound
- Foam polishing pad with polish
- Seal by hand or machine, if you seal by machine use a foam finishing or foam waxing pad
I'm more of a flat pad fan than using pads with designs to the face because the designs could potentially hold debris that is time consuming and cumbersome to remove unlike a flat pad where you can quickly and easily clean the face of the pad with a nylon brush.
As for the spider webbing scratches. How do I go about getting them out? I've only used my DA polisher twice today and last month.
I have an article that covers how to use any simple dual action polisher here,
Step-by-Step How-To use the Porter Cable 7424XP
All the information in it is just as accurate today as when I wrote it 7 years ago. It's FULL of tips and techniques.
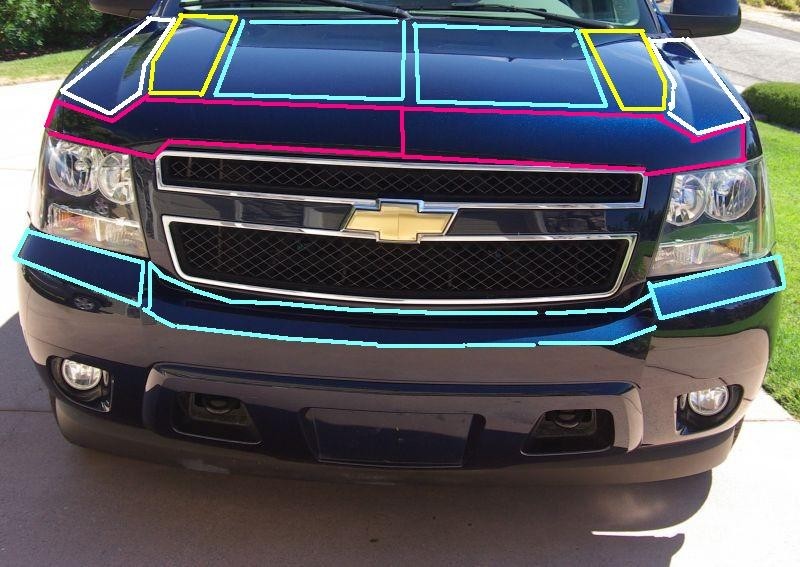
Also, for ANY car polishing project you always want to start by doing what I call a Test Spot. That is you test out the process you're THINKING of using over the entire car to one small section and MAKE sure you're getting GREAT results in that one small section before buffing out the ENTIRE car. This way you dial in your system and make it bubba-proof so you know when you're done the car will look great.
How To Do a Test Spot
And before you do anything, read this article.
DA Polisher Trouble Shooting Guide
")
Mike Phillips
Active member
- Dec 5, 2022
- 51,004
- 6
One question I have it how much pressure is enough? I put 4 black lines along the backing plate to see the rotation.
Do I put enough to where the lines slow down a bit or where they freely rotate at full speed?
The tool weighs around 5-6 pounds. You want to apply about 15 pounds total pressure for compounding, maybe a little less for polishing and just the weight of the machine when machine applying a wax or sealant.
The pressure pushes the abrasives into the paint to cause them to take little bites out of the paint thus leveling the surface and the visual results are the swirls and scratches disappear.
Check out this article, there's some pictures in post #6 to give you an idea.
http://www.autogeekonline.net/forum...uch-pressure-apply-griots-garage-orbital.html
Don't apply to much pressure that the motor bogs down or the pad stops rotating. You want to apply some pressure ONLY to the head of the polisher and still see the pad rotating at a good clip.
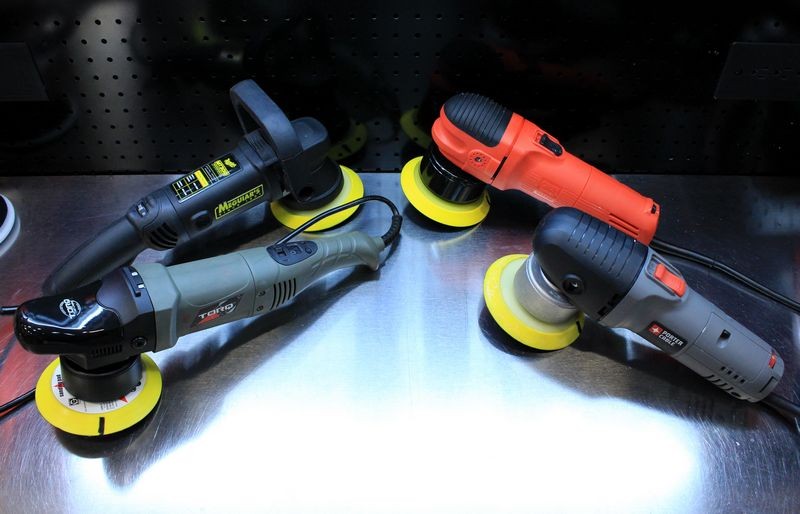
Most important thing you can do with this polisher is use THIN foam buffing pads.
Mike Phillips
Active member
- Dec 5, 2022
- 51,004
- 6
Just to note...
Thin pads rotate (and oscillate) better than thick pads.
Here's my recent article on all the thin foam pad options available to you with pictures and links to the AG store to stock up on thin pads.
5.5" SUPER THIN FOAM PAD OPTIONS for your Dual Action Polisher
Use these pads...

On these tools for best performance and max efficiency....
Thin pads rotate (and oscillate) better than thick pads.
Here's my recent article on all the thin foam pad options available to you with pictures and links to the AG store to stock up on thin pads.
5.5" SUPER THIN FOAM PAD OPTIONS for your Dual Action Polisher
Use these pads...
On these tools for best performance and max efficiency....
Mike Phillips
Active member
- Dec 5, 2022
- 51,004
- 6
Two more articles to help you out...
How to divide larger body panels into smaller sections for machine buffing
Here's another good one...
How many pads do I need to buff out my car?
How to divide larger body panels into smaller sections for machine buffing
Here's another good one...
How many pads do I need to buff out my car?
- Thread starter
- #26
Thank you for joining our forum and welcome to AutogeekOnline! :welcome:
At this point, I would say if the buffer trails were NOT in the paint before you started but now they are, then it could be the paint is not hard but soft and the CG Orange Hex pad, which I believe is a foam cutting pad, left marring in the paint.
ScratchX is a great product. It's more like a fine cut polish in a tube. I worked for Meguiar's when this product was introduced and saw it go through several updates. Including when it went from hand use only to hand or machine use. I think I was actually one of the guys that pushed for the formula change because I was teaching the Saturday Detailing 101 classes at the time and when the early versions of ScratchX would get hot they would get real gummy.
I don't think ScratchX would be the culprit here but finishing with an aggressive foam cutting pad could be.
Remember,
"Polishin paint is an art form, not a grinding process"
Start fresh. Re-polish or compound the entire good or car. Use a normal and simple three step process like,
- Foam cutting pad with compound
- Foam polishing pad with polish
- Seal by hand or machine, if you seal by machine use a foam finishing or foam waxing pad
I'm more of a flat pad fan than using pads with designs to the face because the designs could potentially hold debris that is time consuming and cumbersome to remove unlike a flat pad where you can quickly and easily clean the face of the pad with a nylon brush.
I have an article that covers how to use any simple dual action polisher here,
Step-by-Step How-To use the Porter Cable 7424XP
All the information in it is just as accurate today as when I wrote it 7 years ago. It's FULL of tips and techniques.
Also, for ANY car polishing project you always want to start by doing what I call a Test Spot. That is you test out the process you're THINKING of using over the entire car to one small section and MAKE sure you're getting GREAT results in that one small section before buffing out the ENTIRE car. This way you dial in your system and make it bubba-proof so you know when you're done the car will look great.
How To Do a Test Spot
And before you do anything, read this article.
DA Polisher Trouble Shooting Guide
Thanks Mike! I defintely missed a step last night. I used the scratch x on the cutting pad around the whole car, buffed off by hand and then applied a glaze by hand, buffed off then used a sealant called Blitz from the CG. What I have in my arsenal for right now are obviously the scratch x, I also have turtle wax polishing compound, meguairs ultimate compound, meguairs ultimate polishing and for tools I have the torq x DA polisher, chemical guys orange pad which is for heavy to medium cutting and the white hex pad which is light medium polishing pad. I should be good with what I have right?
Here's a link to some of the CG stuff
Sealant
Chemical Guys - BLITZ Acrylic Spray Sealant (16 oz)
glaze
Chemical Guys - Extreme Shine EZ Creme Glaze (16 oz)
Polisher
http://www.chemicalguys.com/TORQ_TO...p/buf503.htm?gclid=CPjt5JuUo84CFcsehgodDDoAHw
Rsurfer
Active member
- Jan 26, 2007
- 14,157
- 20
From what I have... What product do I use with what pad I have? I'm new to the "paint enhancement" world
Try using your white pad with Meg's Ultimate Polish on a test section.