 Thanks: 0
 Likes: 0
 Dislikes: 0
-
How to achieve 95%+ correction with M105/205 with a DA polisher?
My usual routine:
-M105 on orange pad with Speed setting of 5. About 4-5 passes (horizontal is one pass, vertical is one pass)
-After M105 it seems it is hard to get the product off of the paint when wiping it down. Like sometimes I have to actually rub hardish to get it off.
-M205 with White pad with Speed setting of 5. About 4-5 passes same way
-M205 is much easier to wipe down.
It seems that I can usually get about 80% of the scratches off and make a glossy finish but if I look closely I can either see the original scratches just smaller or what seems to look like buffing scratches (looks like 4 lines or so going outward in a circle)
What do I need to change / do to achieve much better correction?
The weight on the DA while buffing is basically just the weight of my hand resting over it and I can see that it spins pretty good but not crazy fast like an extremely light touch would.
The Last Detail LLC
"We'll make it Shine like a diamond in a goat's ass!"
dd- 93 Trans Am
-
Re: How to achieve 95%+ correction with M105/205 with a DA polisher?
What size pad are you using?
Set the speed setting on 6.0 and push down about 15 pounds of downward pressure. There's a unique phenomena about these PC style DA Polishers that if you just have the weight of the machine, no downward pressure, even on the high setting they can stall and not spin.
You need to press down and this will engage the abrasives wit the paint so they take little bites out of it.
Also, read this, it's from my article list... lots of topics on just about anything related to detailing cars...
DA Polisher Trouble Shooting Guide
When you're first starting out machine polishing and learning to use a DA Polisher it's common to have questions about your results and your results are directly tied to your technique.
Here's a list of the most common problems,
1. Trying to work too large of an area at one time.
2. Moving the polisher too fast over the surface.
3. Using too low of speed setting for removing swirls.
4. Using too little downward pressure on the head of the polisher.
5. Using too much downward pressure on the head of the polisher so the pad quits rotating.
6. Not holding the polisher in a way to keep the pad flat while working your compound or polish.
7. Using too much product or using too little product.
8. Not cleaning the pad often enough. Here's a list of the solutions in matching order,
1. Trying to work too large of an area at one time.
Shrink the size of your work area down. You can't tackle to large of an area at one time. The average size work area should be around 20" by 20". Most generic recommendations say to work an area 2' by 2' but for the correction step, that's too large. You have to do some experimenting, (called a Test Spot), to find out how easy or how hard the defects are coming out of your car's paint system and then adjust your work area to the results of your Test Spot. The harder the paint the smaller the area you want to work.
2. Moving the polisher too fast over the surface.
For removing defects out of the paint you want to use what we call a Slow Arm Speed. It's easy and actually natural for most people new to machine polishing to move the polisher quickly over the paint but that's the wrong technique. One reason I think people move the polisher too quickly over the paint is because they hear the sound of the motor spinning fast and this has psychological effect which causes them to match their arm movement to the perceived fast speed of the polisher's motor.
Another reason people move the polisher too quickly over the paint is because they think like this,
"If I move the polisher quickly, I'll get done faster"
But it doesn't work that way. Anytime you're trying to remove swirls, scratches, water spots or oxidation using a DA Polisher you need to move the polisher s-l-o-w-l-y over the paint.
3. Using too low of speed setting for removing swirls.
When first starting out many people are scared of burning or swirling their paint, so they take the safe route of running the polisher at too low of a speed setting but this won't work. The action of the polisher is already g-e-n-t-l-e, you need the speed and specifically the pad oscillating and rotating over the paint as well as the combination of time, (slow arm speed), together with the abrasives, the pad aggressiveness, and the downward pressure to remove small particles of paint which is how your remove below surface defects like swirls or scratches.
Removing below surface defects is a leveling process where you need the abrasives to take little bites out of the paint and to get the abrasives to take these little bites with a tool that uses a Free Floating Spindle Bearing Assembly you need all of the above factors working for you including a high speed setting.
4. Using too little downward pressure on the head of the polisher.
For the same reason as stated in #3, people are scared, or perhaps a better word is apprehensive, to apply too much downward pressure to the polisher and the result of too little pressure is no paint is removed thus no swirls are removed.
5. Using too much downward pressure on the head of the polisher so the pad quits rotating.
If you push too hard you will slow down the rotating movement of the pad and the abrasives won't be effectively worked against the paint. You need to apply firm pressure to engage the abrasives against the paint but no so much that the pad is barely rotating. This is where it's a good idea to use a permanent black marker to make a mark on the back of your backing plate so your eyes can easily see if the pad is rotating or not and this will help you to adjust your downward pressure accordingly.
Correct technique means finding a balance of applying enough downward pressure to remove defects but not too much downward pressure as to stop the rotating movement of the pad.
This balance is affected by a lot of factors like the lubricity of the product you're using, some compounds and polishes provide more lubrication than others and this makes it easier to maintain pad rotation under pressure.
Another factor that can affect pad rotation are raised body lines, edges and curved surfaces as anytime you have uneven pressure on just a portion of the face of the pad it can slow or stop pad rotation. This is where experience comes into play and experience comes from time spent behind the polisher.
6. Not holding the polisher in a way to keep the pad flat while working your compound or polish.
Applying pressure in such a way as to put too much pressure to one edge of the pad will cause it to stop rotating and thus decrease abrading ability.
7. Using too much product or using too little product.
Too much product hyper-lubricates the surface and the result is that abrasives won't effectively bite into the paint but instead will tend to skim over the surface. Overusing product will also accelerate pad saturation as well increase the potential for slinging splatter onto adjacent panels.
Too little product will means too little lubrication and this can interfere with pad rotation.
Again there needs to be a balance between too much product and too little product and finding this balance comes from reading articles like this one, watching videos an most important, going out into the garage and putting in time behind the polisher and as you're buffing with specific product and pad combinations, pay attention to pad rotation.
8. Not cleaning the pad often enough.
Most people simply don't clean their pad often enough to maximize the effectiveness of their DA Polisher. Anytime you're abrading the paint you have two things building up on the face of your buffing pad,
As these to things build up on the face of the pad they become gummy and this has a negative affect on pad rotating plus makes wiping the leftover residue on the paint more difficult. To maintain good pad rotation you want to clean your pad often and always wipe-off any leftover product residue off the paint after working a section. Never add fresh product to your pad and work a section that still has leftover product residue on it.
Pad Cleaning Articles
Why it's important to clean your pads often...
How to clean your foam pad on the fly
How to use the Grit Guard Universal Pad Washer

-
Re: How to achieve 95%+ correction with M105/205 with a DA polisher?
Thanks alot. Btw the pads I am using are 5.5'' so should I move the speed up to 6 or keep it at 5?
The Last Detail LLC
"We'll make it Shine like a diamond in a goat's ass!"
dd- 93 Trans Am
-
Super Member

Re: How to achieve 95%+ correction with M105/205 with a DA polisher?
I personally have not found the orange pads to offer the kind of correction needed for a full paint correction. You might try moving down to yellow pads or using mf cutting pads.
-
Super Member

Re: How to achieve 95%+ correction with M105/205 with a DA polisher?
Sometimes M105 is a little hard to get off, especially when I/you use to much product. I use CarPro Eraser to aid in removal. M205 is always easier to remove. I usually use speed 5-6 for compounding (M105) on my PC 7424XP and speed 4-5 for lighter correction (M205). I would make more passes to correct more. You could also add a medium polish like Meguiars Ultimate Compound or Menzerna Power Finish in-between 105 and 205.
Rule 62: Don't take yourself to d*mn seriously
Cincinnati, OH
Shawn
-
Super Member
Re: How to achieve 95%+ correction with M105/205 with a DA polisher?
There are also times that the issues that are trying to be corrected might be beyond the ability of a compound. I just worked on a co workers hood. Someone had taken a rubbing compound when his car was dirty and wiped it all over the car making the car looked like it had been sanded poorly. I used M105 and an Orange CCS pad, speed 6, and lots of pressure, and while I got the surface scratches out, the deeper stuff is still in there. His paint is shiny again and he was tickled, but it would need a wet sand to get everything out is my guess.
-
Super Member

Re: How to achieve 95%+ correction with M105/205 with a DA polisher?
Actually, Mike, if you remember that Cadillac we did in your detail class, my co workers car is just like that, actually a little worse.
-
Super Member

Re: How to achieve 95%+ correction with M105/205 with a DA polisher?
I recently ran into a problem like this, which is in this section. Turned out I just wasn't using the right product. However, it sounds like you're using the right stuff. Try working in a smaller area and see how your results turn out.
-
Re: How to achieve 95%+ correction with M105/205 with a DA polisher?
 Originally Posted by wgilles

Try working in a smaller area and see how your results turn out.
That's a good technique anytime you run into harder paint or deeper defects or both... work a smaller area and by doing you'll get more concentrated abrading of the paint.
 Originally Posted by Jaretr1

Actually, Mike, if you remember that Cadillac we did in your detail class, my co workers car is just like that, actually a little worse.
Of course I remember, that was a great class and the Cadillac demo car came out great!
Pictures & Comments from May 14th, 2011 Saturday Detailing 101
Fun class! 
PC demo

Cyclo demo
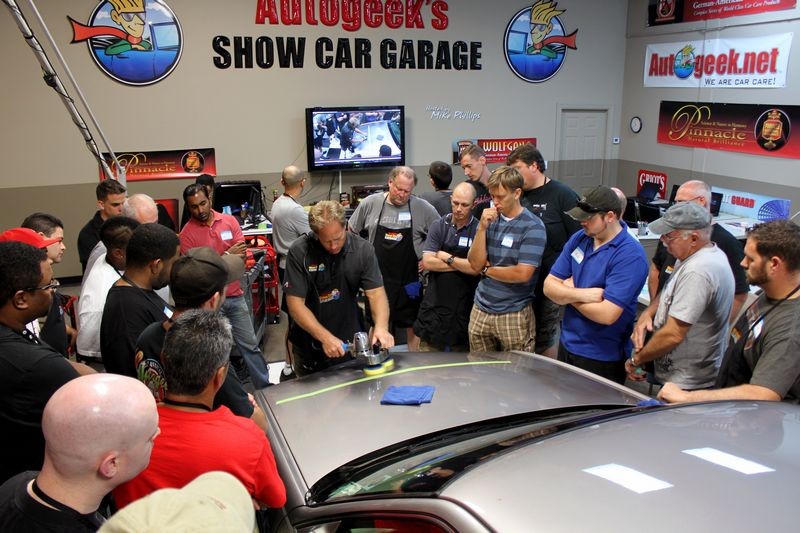
Flex 3401 Demo

Everyone was able to see and then learn how to clean a pad on the fly...
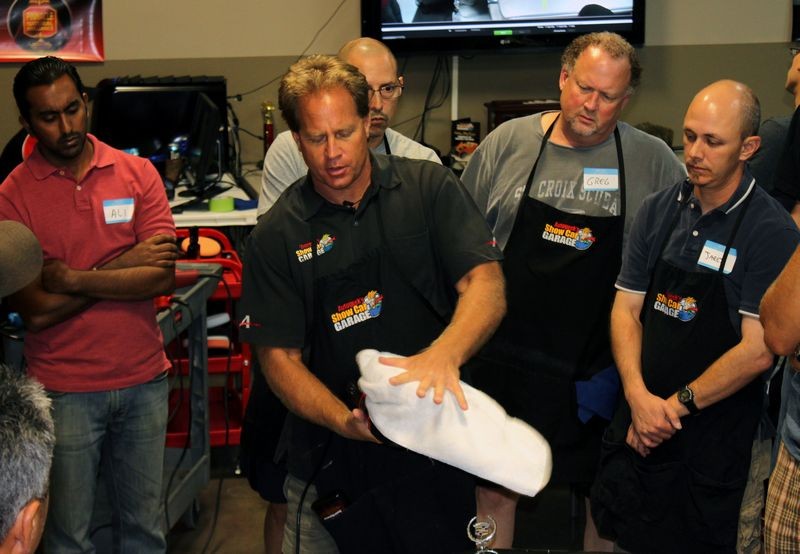
Everyone gets to learn how to use the 10 @ 10 Technique to pick up a bead of product using a rotary buffer
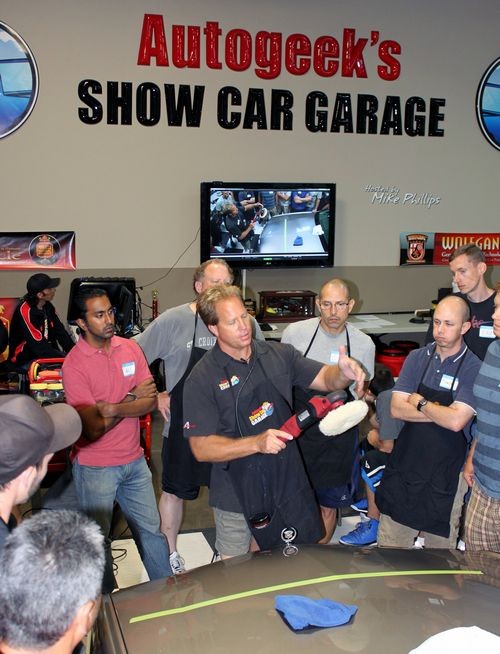
You can find my article on using the 10 @ 10 Technique by using the below words on Google
The 10 @ 10 Technique

The lightweight Flex PE14 makes learning to use the Rotary Buffer easy...

After demonstrating proper techniques with each of the tools it's hands-on time!

Ali testing out the Porter Cable 7424XP

Kyle testing out the Griot's Garage DA Polisher
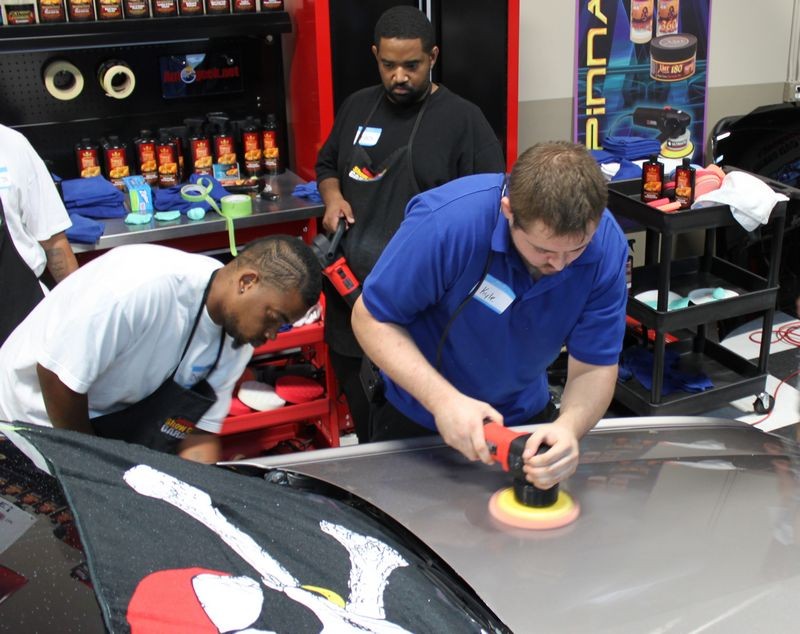
Larry loves the Flex PE14 with a 7.5" Wool Cutting Pad and a Solo Flexible Backing Plate

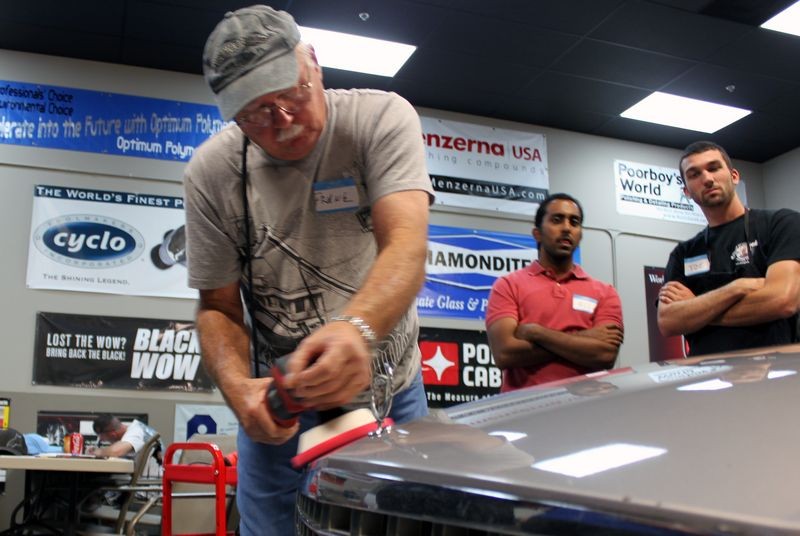
Frank in the two pictures below was actually very good with the rotary buffer, you could tell he's been using an RB for decade as he made it look so easy...

That's a Flexi-Foam 5" Backing Plate with a 5.5" Hydro-Tech Crimson Pad... I highly recommend flexible backing plates, especially if you're new to the rotary buffer.
Yep, I remember that class well... and the swirled out, neglected Cadillac came out looking like it had a brand new paint job.
Show Car Results by the May 14th Detailing 101 Class
[ame=http://www.youtube.com/watch?v=WaRsnCBeR3s&hd=1]Detailing Class Results from Autogeek's May 14th Detailing 101 Class - YouTube[/video]
I'm glad you were a part of that class Jaret!

-
Re: How to achieve 95%+ correction with M105/205 with a DA polisher?
Wow, That is one thing I would love to learn to use but with a rotary, I am really afraid I am going to burn the paint.....
Yes I would love to be down there for the May 5th and 6th boot camp but I am only afraid I would be able to attend the 6th and not the 5th. Arrrrgh.
Similar Threads
-
By carlg in forum Auto Detailing 101
Replies: 17
Last Post: 07-02-2018, 11:14 AM
-
By Nabors in forum Auto Detailing 101
Replies: 4
Last Post: 04-30-2015, 01:24 PM
-
By SON1C in forum Show N' Shine
Replies: 52
Last Post: 05-10-2013, 01:18 PM
-
By xxnonamexx in forum Auto Detailing 101
Replies: 16
Last Post: 05-08-2012, 09:38 AM
-
By ryanmcg1 in forum Product Reviews
Replies: 16
Last Post: 09-30-2011, 02:19 PM
 Members who have read this thread: 0
There are no members to list at the moment.
 Posting Permissions
- You may not post new threads
- You may not post replies
- You may not post attachments
- You may not edit your posts
-
Forum Rules
|
| S |
M |
T |
W |
T |
F |
S |
| 28 | 29 | 30 |
1
|
2
|
3
|
4
|
|
5
|
6
|
7
|
8
|
9
|
10
|
11
|
|
12
|
13
|
14
|
15
|
16
|
17
|
18
|
|
19
|
20
|
21
|
22
|
23
|
24
|
25
|
|
26
|
27
|
28
|
29
|
30
|
31
| 1 |
|


 Thanks:
  Likes:
  Dislikes:

 Reply With Quote


Bookmarks