 Thanks: 0
 Likes: 0
 Dislikes: 0
-
Super Member

Re: Wolfgang Duo 3.0 OR Meguirar's 105/205 Twins
 Originally Posted by DavidsV8Mustang

Thanks for all your helps so far everybody. Since I began my research for a buffer/polisher and products earlier this month I've learned that everyone is defiantly different in what combination of products work best with for them. Pad and polish combination has definitely been the area were I've spent most of my time researching. I'm leaning more toward the Wolfgang just for the obvious reason that it looks like an easy combo to learn with. Not to aggressive, yet aggressive enough to remove the light swirls that my vehicles have. Though the Meguiar's twins seem to work extremely well, I'm think I may purchase them later if the Wolfgang Duo cant provide the type of results I'm looking for. But I'm tempted to go ahead and purchase them just because they get so much respect among its users.
Nothing says you have to purchase as pair. You could get WG duo and Meg 105 or UC when a more agressive cut is required.
-
Super Member

Re: Wolfgang Duo 3.0 OR Meguirar's 105/205 Twins
A good arsenal would have M105 or UC, a medium polish (SIP, TSR, etc) and a finishing polish (106FA, M205) to handle various paints.
-
Super Member

Re: Wolfgang Duo 3.0 OR Meguirar's 105/205 Twins
Though you appear to have decided to go with the Wolfgang twins, if you should change your mind and go with M105/M205, I would also encourage you to get a bottle of Ultimate Compound. Though it does not have the cut of M105, it sure is a lot easier to use--less dusting, longer work time. For my needs, UC/M205 is an excellent combination. I have a bottle of M105 for spot correction, but I find I rarely have to use it.
-
Junior Member

Re: Wolfgang Duo 3.0 OR Meguirar's 105/205 Twins
All the positive feed back for Meguirar's is really got me intrigued. When using the Meguirar's twins, do you control the amount of cut based on the pressure you apply? Being a first time user, I'm afraid that the amount of pressure I will be applying may vary until I get the hang of it. If it does will I leave a distorted look to the paints finish. That's what I'm afraid of, Lack of experience with a high cut compound. Granted I will be taken my time to learn technique, I just don't want to do irreparable damage to the paints surface.
-
Re: Wolfgang Duo 3.0 OR Meguirar's 105/205 Twins
Originally Posted by DavidsV8Mustang
All the positive feed back for Meguiar's is really got me intrigued. When using the Meguiar's twins, do you control the amount of cut based on the pressure you apply?
The amount of cut is determined by a number of factors...
Downward pressure
Pad rotation speed
Pad size
Number of passes over one section
Amount of product
Size of work area
Arm speed
Sounds complicated but it's not, with a SMAT product you can stop anytime during the buffing cycle, this means even if the product is super aggressive, if you stop after the defects are removed, that's the same as buffing with a less aggressive product for a longer amount of time.
Make sense?
You have control over when you stop buffing, or you have control over how much paint you remove.
Originally Posted by DavidsV8Mustang
Being a first time user, I'm afraid that the amount of pressure I will be applying may vary until I get the hang of it.
This why it's a great idea to test out and learn machine polishing on something that's not important to you... then when your comfort level increases, work on your toy or whatever it is that's important to you.
Originally Posted by DavidsV8Mustang
If it does will I leave a distorted look to the paints finish.
No, assuming you don't do anything extreme like drop the polisher on the hood of the car...
Originally Posted by DavidsV8Mustang
That's what I'm afraid of, Lack of experience with a high cut compound.
Granted I will be taken my time to learn technique, I just don't want to do irreparable damage to the paints surface.
It's normal to be apprehensive, but a little practice and you'll get the hang of it. The DA style polishers are the easiest to learn and master, I've been telling people that after buffing out the front clip of a car, that is the hood and front fenders, you'll pretty much have a feel for how to hold the polisher and move it to get great results.
It's really not a very hard tool to learn how to use. The key thing to learn is how to do a section pass because buffing out a car is just a matter of buffing out one section after another till you've gone around the entire car.

-
Re: Wolfgang Duo 3.0 OR Meguirar's 105/205 Twins
Here's how to do a "Section Pass" when trying to remove swirls, scratches and other below surface paint defects.
How to do a Section Pass [ame=http://www.youtube.com/watch?v=Q70g83mnTn4]YouTube - How to do a "Section Pass" with a Porter Cable 7424XP[/video]
When talking about machine polishing on discussion forums or even in detailing classes, the below questions always comes up,
- What's a pass?
- How many passes do I make?
- What's a section pass?
The definition of a pass
There are two definitions of the word pass as it relates to machine polishing with any type of machine.
Single Pass
A single pass is just that. It's when you move the polisher from one side of the section you're buffing to the other side of the section you're buffing. That's a single pass.
Section Pass
A section pass is when you move the polisher back and forth, or front to back with enough single overlapping passes to cover the entire section one time. That's a section pass.
In most cases if you're removing any substantial below surface defects you're going to make 6-8 section passes to the section youre working before you either feel comfortable you've removed the defects or you're at the end of the buffing cycle for the product you're using.
Buffing Cycle
The buffing cycle is the amount of time you are able to work the product before the abrasives have broken down, (if youre using a product that uses diminishing abrasives), and/or the product begins to dry and you lose the lubricating features of the product. Different products have different buffing cycles depending upon the type of abrasives used in the formula and the different ingredients used to suspend the abrasives and provide lubrication.
Factors that affect the buffing cycle include,
- Ambient temperature
- Surface temperature
- Size of work area
- Type of machine
- Type of pad material
- Humidity
- Wind or air flow surrounding the car
- Amount of product used
- Technique
Wet buffing technique
Most compounds and polishes should be used so that there is enough product on the surface to maintain a wet film while the product is being worked. The wetness of the product is lubricating the paint as the abrasives abrade the paint and cushion or buffer the abrading action so the abrasives dont simply scour the finish leaving behind swirls and scratches.
Dry Buffing Technique - Buffing to a dry buff
There are some products on the market where the manufacture recommends buffing the product until it dries. As the product dries youll tend to see some dusting as the product residue becomes a powder and the paint will have a hard, dry shine to it.
Although some manufactures recommend this, its important to understand whats taking place at the surface level as you buff to a dry buff. As the product dries, in essence you are losing the lubricating features of the product and as this happens friction and heat will increase. As friction and heat increases, so does the risk of micro-marring the paint or instilling swirls either by the product residue or the pad material and/or a combination of both.
While we trust that the manufacture knows their products best, when we take a close look at what it means to buff on a delicate surface like an automotive clear coat, it doesnt make sense to run a buffing pad on top of the paint without some kind of wet film to lubricate the paint at the same time. We always recommend that you follow the manufacturer's recommendations and use your own judgment.
Everyone new to buffing wants to be told some easily identifiable sign that they can use to tell when it's time to stop buffing and it's not that simple, so here's an indicator I've always used and taught to others,
Wet film behind your path-of-travel
As you're making a single pass with the polisher, the paint behind the path of travel of the buffer should have a visible wet film on it. If the paint behind the pad is dry and shiny, you've run out of lubrication and you're dry buffing. Turn the polisher off. Wipe the residue off and inspect using a Swirl Finder Light to make sure you didn't dull or mar the paint, you usually won't cause any harm, but pay attention when your running the polisher and don't buff to a dry buff. If you do, you can quickly re-polish that section by cleaning your pad and adding a little fresh product and making a few new section passes.
UMR
Remember, in most cases the goal is UMR or Uniform Material Removal. The reason for this is so that you remove an equal amount of paint over each section and in turn over the entire car. In order to do this you need a method that you can control and duplicate and for most people following a back and forth, side-to-side pattern works because its easy to remember, easy to do and easy to duplicate.
Resources
The above video segment is a 4 minute clip filmed during the extended version of How To Remove Swirls using any Dual Action Polisher like the Meguair's G110v2 and the Griot's Garage ROP and all models of he Porter Cable Dual Action Polisher, including the PC7424XP, PC7424, PC7336, G100
How to Remove Swirls using the Porter Cable 7424XP or any D.A. Polisher

-
Super Member
Re: Wolfgang Duo 3.0 OR Meguirar's 105/205 Twins
I well understand the fear that one might do irreparable damage to one's beloved car; but the fear really is groundless. Of course it takes time to learn how to polish one's car (I'm still learning), but the dual action polisher limits the potential damage and that damage is almost always correctible.
Two suggestions:
1) Begin with the least aggressive polish and only move up to the more aggressive products if necessary.
2) Always do a test spot first. The test spot allows you to (a) determine which products you need to effect the desired level of paint correction and (b) refine one's technique. If you can make the test spot look good, then you good to go for the rest of the car.
Do check out Mike Phillip's videos on machine polishing.
-
Re: Wolfgang Duo 3.0 OR Meguirar's 105/205 Twins
Originally Posted by DavidsV8Mustang
When using the Meguiar's twins, do you control the amount of cut based on the pressure you apply?
Something related I wrote...
Factors that affect how aggressive or non-aggressive a product is...
Originally Posted by DavidsV8Mustang
Being a first time user, I'm afraid that the amount of pressure I will be applying may vary until I get the hang of it.
When buffing with a DA Polisher, here's a tip... take a permanent marker and mark the back to you can easily see that the pad and backing plate are in fact rotating when you're doing your correction steps.
Like you see in this article,
5" and 6" Backing Plates on 6.5" pads (Pictures to show safety margin)
Here's 5" backing plates on 5.5" pads to show how they fit. Shown are the Meguiar's W67DA and the Edge DA 500 on 5.5" Hydro-Tech pads and 5.5" CCS pads
5.5" Hydro-Tech pads
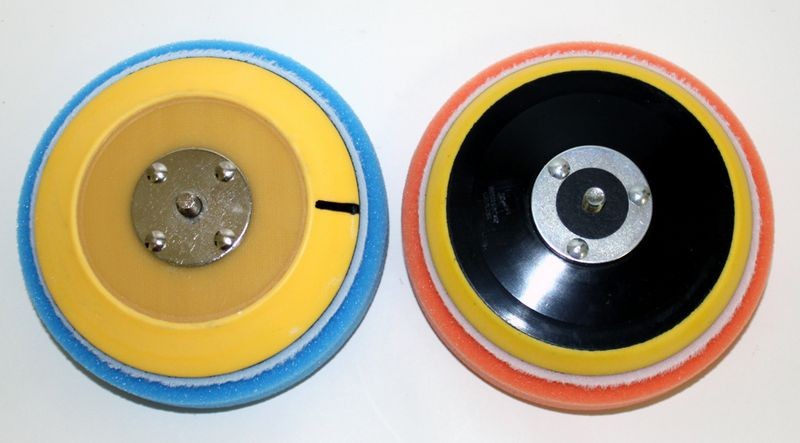
5.5" CCS pads

You will want to push down on the pad with about 15 to 20 pounds of downward pressure, this sounds like a lot but it's really not. The key thing is after applying firm downward pressure, make sure the pad is still rotating. It will be rotating slowly with firm pressure, not fast and that's okay.
This is where attending one of our Detailing 101 classes comes in handy and you get to see first how exactly how to use one of these tools, how hard to press down, how fast to move the tool over the paint and the pattern and size of area to work at one time.

-
Super Member

Re: Wolfgang Duo 3.0 OR Meguirar's 105/205 Twins
If u still feel a bit nervous about using your polisher for the first time, try a local body shop for a fender or hood that's on the scrap pile and practice on that!!!
-
Re: Wolfgang Duo 3.0 OR Meguirar's 105/205 Twins
Originally Posted by Dr Oldz
If u still feel a bit nervous about using your polisher for the first time, try a local body shop for a fender or hood that's on the scrap pile and practice on that!!!
Great advice...
Body shops remove fenders, trunk lids and hoods everyday and you can probably get one for free. It will be crumpled in some areas but you can practice what's left that's not damaged.
Similar Threads
-
By explorerlyon in forum Ask your detailing questions!
Replies: 11
Last Post: 02-22-2023, 02:08 PM
-
By Mike@DedicatedPerfection in forum Wolfgang Car Care
Replies: 1
Last Post: 10-25-2012, 12:58 PM
-
By HeavyMetal in forum Wolfgang Car Care
Replies: 20
Last Post: 05-24-2011, 05:58 PM
-
By Sunstealer in forum Auto Detailing 101
Replies: 9
Last Post: 01-03-2011, 12:38 PM
-
By AaronO in forum Auto Detailing 101
Replies: 9
Last Post: 05-29-2008, 05:25 PM
 Members who have read this thread: 0
There are no members to list at the moment.
Posting Permissions
- You may not post new threads
- You may not post replies
- You may not post attachments
- You may not edit your posts
-
Forum Rules
|
| S |
M |
T |
W |
T |
F |
S |
| 31 |
1
|
2
|
3
|
4
|
5
|
6
|
|
7
|
8
|
9
|
10
|
11
|
12
|
13
|
|
14
|
15
|
16
|
17
|
18
|
19
|
20
|
|
21
|
22
|
23
|
24
|
25
|
26
|
27
|
|
28
|
29
|
30
| 1 | 2 | 3 | 4 |
|


 Reply With Quote
Bookmarks