 Thanks: 0
 Likes: 0
 Dislikes: 0
-
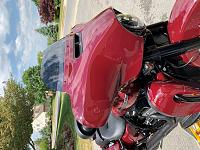
Harley batwing fairing
OK, so this is a follow up on my issue polishing the concave surfaces of this fairing with a Griot's G8 and 3'" pads. The fairing really has no flat surfaces, it is either convex or concave, and it's hard to keep the pad spinning.
I did a number of things differently this time.
First, I clayed it. I have always skipped this step, thinking that the bike is stored in the garage most of the time, but I did the baggy thing and there was some grittiness there so I did the clay and added a few scratches with this step, but the grit was gone.
I used pads which are new to me, Buff and Shine yellow pads with Wolfgang Swirl remover, and Buff and Shine white pads with Wolfgang Finishing Glaze. The yellow pad is a little softer than the orange Griot's pads I usually use, the white ones feel about the same as Griot's black pads.
I used less polish, 4 drops to start, 3 drops to re-load, two yellow pads, two white ones to do the fairing, which is all I did today. The fairing gets most of the bugs when riding, and looks beat up before the rest of the bike.
This part you are probably not going to like. Instead of polishing in slow straight lines with the pad flat against the surface, I moved the polisher faster and swept it in an arc toward and away from the surface, doing an 8" section back and forth a few times before moving to the next section. This kept the pad spinning. I also slowed the machine down a little, from 5 to 4 speed setting.
Finally, I used Blackfire paint prep between polishing and applying Blackfire Blackice hybrid wax. I added some straight fine scratches in one spot when wiping off the paint prep, too much pressure. Otherwise I do not see any micro-marring in the final finish.
-
Super Member

Re: Harley batwing fairing
 Originally Posted by coop creek

... This part you are probably not going to like. Instead of polishing in slow straight lines with the pad flat against the surface, I moved the polisher faster and swept it in an arc toward and away from the surface, doing an 8" section back and forth a few times before moving to the next section. This kept the pad spinning. I also slowed the machine down a little, from 5 to 4 speed setting...
Why would anyone not like your process? I'm of the opinion that you do whatever you have to do to get the result you want.
Straight line polishing with the pad flat to the surface only works on flat panel sections. When polishing a part like your fairing you have to improvise. There is not a straight/square/flat section anywhere on that part. Your polishing patterns/process need to reflect that.
The only things about your post that surprises me a little is...
- Slowing the polisher speed. Typically a concave surface requires a higher speed setting to maintain pad rotation assuming all other parameters remain equal.
- And the paint prep step... Is that really necessary with your LSP?
-
Re: Harley batwing fairing
Originally Posted by coop creek
OK, so this is a follow up on my issue polishing the concave surfaces of this fairing with a Griot's G8 and 3'" pads. The fairing really has no flat surfaces, it is either convex or concave, and it's hard to keep the pad spinning.
Here's your pictures. I downloaded them. Rotated them 90 degrees right and then uploaded them to your free gallery here on AGO. Now they have an actual internet address or URL address and can be shared anywhere on the Internet using html or bb code.
Looks great!


Originally Posted by coop creek
I did a number of things differently this time.
First, I clayed it. I have always skipped this step, thinking that the bike is stored in the garage most of the time, but I did the baggy thing and there was some grittiness there so I did the clay and added a few scratches with this step, but the grit was gone.
Yup. The old Baggie Test. Love it and hate it but it reveals the truth.
Also - One practice I have and share with others, if I'm going to clay a car I've already factored in I'm also going to polish the car to remove any marring or scratches the claying process inflicted into the paint.
Some say claying or any of the other clay substitute options are SAFE - but these people are never around with me after I clay something to take over and polish the marring out of the paint. 
Originally Posted by coop creek
I used pads which are new to me, Buff and Shine yellow pads with Wolfgang Swirl remover, and Buff and Shine white pads with Wolfgang Finishing Glaze. The yellow pad is a little softer than the orange Griot's pads I usually use, the white ones feel about the same as Griot's black pads.
I used less polish, 4 drops to start, 3 drops to re-load, two yellow pads, two white ones to do the fairing, which is all I did today. The fairing gets most of the bugs when riding, and looks beat up before the rest of the bike.
Good pads - a LOT thicker than the Griot's pads but still good pads.
Originally Posted by coop creek
This part you are probably not going to like. Instead of polishing in slow straight lines with the pad flat against the surface, I moved the polisher faster and swept it in an arc toward and away from the surface, doing an 8" section back and forth a few times before moving to the next section. This kept the pad spinning. I also slowed the machine down a little, from 5 to 4 speed setting.
Works for me - worked for you.
One thing that can assist pad rotation IS keeping the polisher moving.
Originally Posted by coop creek
Finally, I used Blackfire paint prep between polishing and applying Blackfire Blackice hybrid wax.
I added some straight fine scratches in one spot when wiping off the paint prep, too much pressure.
Otherwise I do not see any micro-marring in the final finish.
I feel so vindicated.
For years, actually probably over a decade now I've been telling others that wiping scratch-sensitive paint with a solvent is a recipe for marring or scratching.
At least the BLACKFIRE Paint Prep is a decent product. I feel sorry for all the unwashed masses that cheap-out and try to buy Isopropyl Alcohol and wipe paint. Talk about not a good panel wipe.
Results look great. Learning to work without working backwards comes with practice. The best thing from your post here on the forum is others will find this via Skynet and learn from your experience. Plus I imagine you'll help others in the real-world in your circle of influence.
Win/Win/Win
Thanks for sharing!

Similar Threads
-
By jeri in forum How to Articles
Replies: 2
Last Post: 02-23-2020, 10:10 PM
-
By frankprozzoly in forum Auto Detailing 101
Replies: 9
Last Post: 03-05-2015, 03:59 PM
-
By streetglide12 in forum Auto Detailing 101
Replies: 10
Last Post: 10-17-2014, 07:51 PM
-
By regal in forum Introduce Yourself
Replies: 1
Last Post: 06-22-2009, 11:50 AM
 Members who have read this thread: 0
There are no members to list at the moment.
Posting Permissions
- You may not post new threads
- You may not post replies
- You may not post attachments
- You may not edit your posts
-
Forum Rules
|
| S |
M |
T |
W |
T |
F |
S |
| 28 | 29 | 30 |
1
|
2
|
3
|
4
|
|
5
|
6
|
7
|
8
|
9
|
10
|
11
|
|
12
|
13
|
14
|
15
|
16
|
17
|
18
|
|
19
|
20
|
21
|
22
|
23
|
24
|
25
|
|
26
|
27
|
28
|
29
|
30
|
31
| 1 |
|


 Reply With Quote
Bookmarks