 Thanks: 0
 Likes: 0
 Dislikes: 0
-
Super Member

-
Super Member

Re: wet sanding help?
Heavy swirl remover with a green pad seems like an unbalanced pair to use. Heavy swirl remover with a cutting pad is what you need in your process.
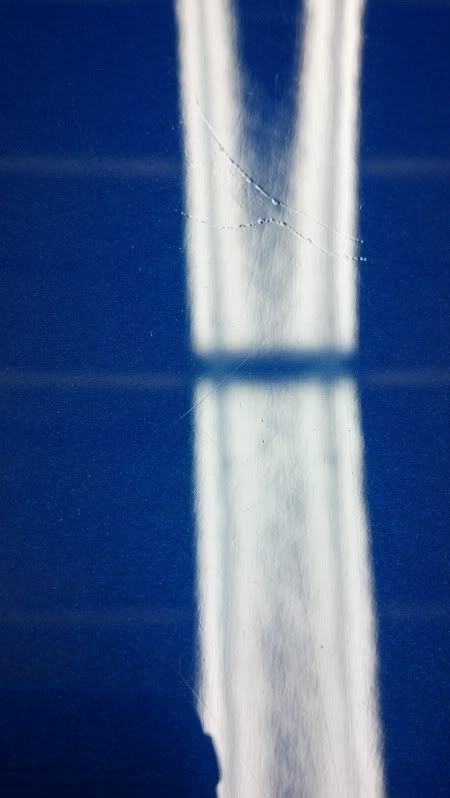
Looks to me like you sanded by hand based on striations in the first pic. If that is indeed the case you would need to sand down some more, preferably with a DA rather than by hand. If you have to do it by hand then you need to apply more pressure and perform each pass in alternating directions.
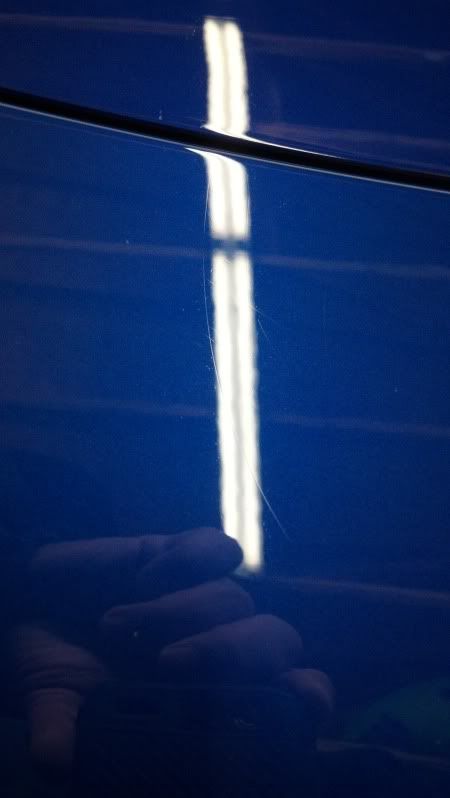
Until those scratch marks are reduced more or eliminated, there is little reason to go to a compound or polish.
I assume you know the tradeoffs to sanding down the paint so much so I won't go into it.
-
Regular Member

Re: wet sanding help?
Do you have M105 and a yellow pad? If so then I would step up to that then step down to swirl remover with a orange pad and finally a glaze with a white pad.
-
Super Member

Re: wet sanding help?
When ever I wet sand I start with a rotary and a wool pad and usually 3M's heavy cutting compound (ie:rocks in a bottle). That combination gets me 95% of the way in a minimum amount of time. Then if needed you can go to a DA. If your going to use a DA for the whole process it will take a lot longer with assorted pads and compounds.
Dave
-
Super Member

-
Super Member
Re: wet sanding help?
 Originally Posted by BobbyG

Due to film thickness these days it's sometimes impossible to completely remove a defect without breaking through the clear. When this situation presents itself the goal is to "improve" the defect and make it much less noticeable... 
Be careful.....
What Bobby said is very true. Once you break though there is no going back. Unfortunately no one can tell you the thickness of your coatings. You can buy some meters that give you overall readings but you would have to find a spot that does not have clear on it to guesstimate the different readings and it would still be a guess. Under the hood or in the trunk may be like this but then you have to assume the primer and color is all the same thickness. If you take the readings before you start and during the process at least you would know how much your removing. Whether that helps or not I do not know.
Dave
-
Super Member

Re: wet sanding help?
Originally Posted by davidc
What Bobby said is very true. Once you break though there is no going back. Unfortunately no one can tell you the thickness of your coatings. You can buy some meters that give you overall readings but you would have to find a spot that does not have clear on it to guesstimate the different readings and it would still be a guess. Under the hood or in the trunk may be like this but then you have to assume the primer and color is all the same thickness. If you take the readings before you start and during the process at least you would know how much your removing. Whether that helps or not I do not know.
Dave
+2
-
Super Member

Re: wet sanding help?
+3. Just be very careful when you do it.
-
Super Member

Re: wet sanding help?
Originally Posted by mwoolfso
Heavy swirl remover with a green pad seems like an unbalanced pair to use. Heavy swirl remover with a cutting pad is what you need in your process.
Looks to me like you sanded by hand based on striations in the first pic. If that is indeed the case you would need to sand down some more, preferably with a DA rather than by hand. If you have to do it by hand then you need to apply more pressure and perform each pass in alternating directions.
Until those scratch marks are reduced more or eliminated, there is little reason to go to a compound or polish.
I assume you know the tradeoffs to sanding down the paint so much so I won't go into it.
....^^^  ^^^.... ^^^....
Bob
"Be wary of the man who urges an action in which he himself incurs no risk."
~Joaquin de Setanti
-
Super Member
Re: wet sanding help?
Originally Posted by mwoolfso
Looks to me like you sanded by hand based on striations in the first pic. If that is indeed the case you would need to sand down some more, preferably with a DA rather than by hand. If you have to do it by hand then you need to apply more pressure and perform each pass in alternating directions. OK this is the information I was looking for, Thanks.
Until those scratch marks are reduced more or eliminated, there is little reason to go to a compound or polish. at first I was going to live with them but ocd took over. The first pic is how the paint was when I got the car. I tried hand sanding another part of the hood but made similar scratches.
I assume you know the tradeoffs to sanding down the paint so much so I won't go into it.
Yes I am aware, there are many rock chips that need repaired so a repaint is not a big deal. If I get the scratches out I will live with the chips. Or Until I build a garage with a paint booth ... :-)
Adams heavy swirl remover with Adams green pad is correct combination. sorry for the confusion.
Similar Threads
-
By Mike Phillips in forum How to articles
Replies: 4
Last Post: 01-08-2019, 09:56 AM
-
By Mike Phillips in forum How to articles
Replies: 22
Last Post: 02-03-2017, 08:53 AM
-
By DavidAl in forum Auto Detailing 101
Replies: 2
Last Post: 07-13-2016, 08:16 PM
-
By Mike Phillips in forum How to articles
Replies: 1
Last Post: 09-24-2013, 08:14 AM
-
By ALLN1WASH in forum Auto Detailing 101
Replies: 5
Last Post: 07-13-2011, 08:49 PM
 Members who have read this thread: 0
There are no members to list at the moment.
Posting Permissions
- You may not post new threads
- You may not post replies
- You may not post attachments
- You may not edit your posts
-
Forum Rules
|
| S |
M |
T |
W |
T |
F |
S |
| 28 | 29 | 30 |
1
|
2
|
3
|
4
|
|
5
|
6
|
7
|
8
|
9
|
10
|
11
|
|
12
|
13
|
14
|
15
|
16
|
17
|
18
|
|
19
|
20
|
21
|
22
|
23
|
24
|
25
|
|
26
|
27
|
28
|
29
|
30
|
31
| 1 |
|


 Reply With Quote
Bookmarks