About Flex 3401 Forced Rotation Dual Action Polisher
The Flex 3401 is a gear driven, forced rotation dual action polisher with a variable speed controller enabling you to select the appropriate speed for the task at hand. The Flex 3401 is purposefully built for machine polishing paint. The Flex 3401 is German Engineered to be a professional grade tool that can be used in a production environment under heavy use. There are multiple backing plates and pads available for this tool for just about any type of paint correction, polishing or even machine waxing.
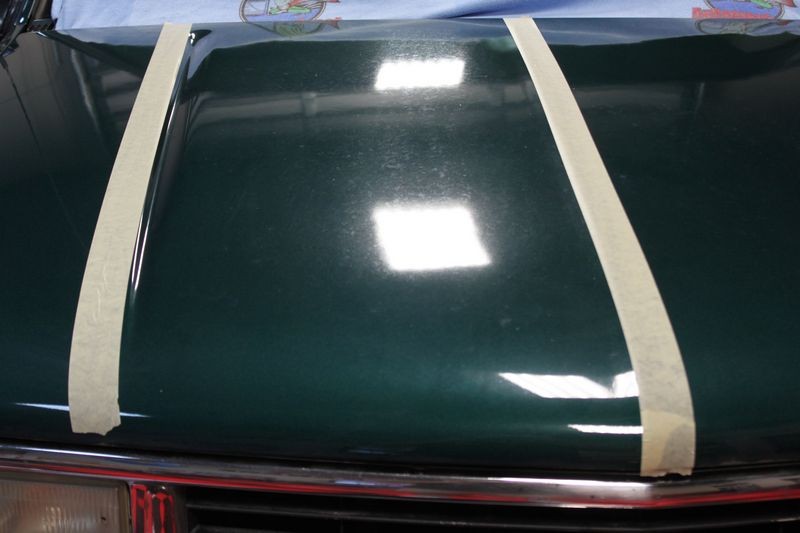
Here's my demo truck, a severely neglected Chevy Tahoe owned by my buddy Dave who's not really into car detailing but more into building Monster Trucks and Swamp Buggies for use at the Mud Fests in in South Florida.
This Tahoe has been repainted at some point in it's history but since then I doubt it's ever been waxed, let alone washed.
Speedy Prep Towel
I clayed the passenger side of the hood using the Speedy Prep Towel Medium Grade with Detailer's Universal Clay Lube before starting.
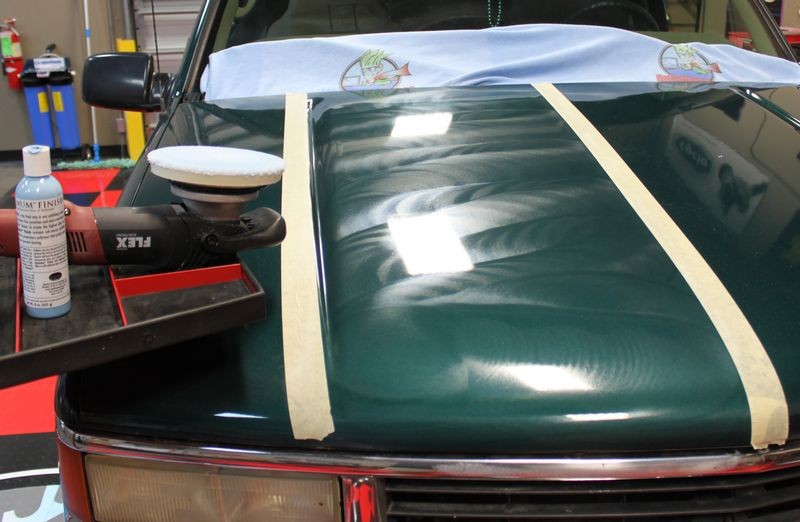
Here you can see water spotting and general staining and oxidation of the paint. Because the Flex 3401 is a gear-driven, forced rotation polisher it offers a lot of power and for this reason I'm able to buff out this large section at one time.
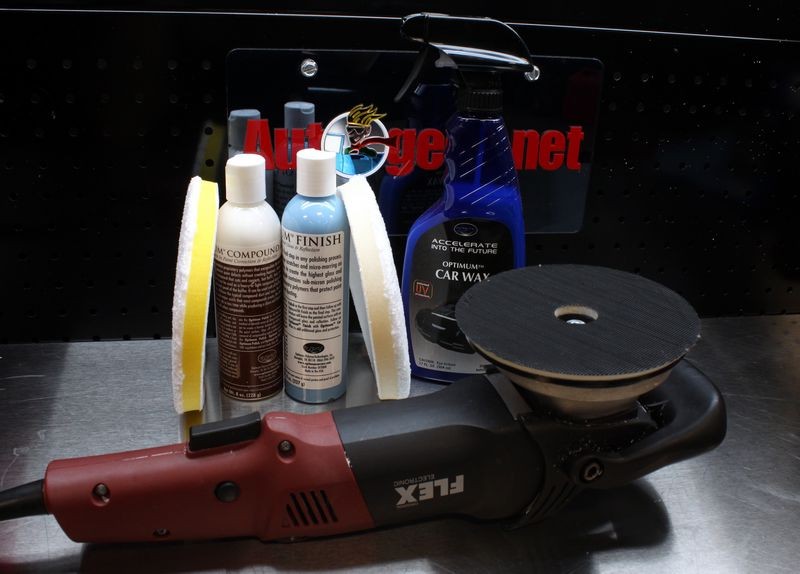
Here's the Flex 3401 as well as some products from Optimum Polymer Technologies.
Here I'm priming a Microfiber Cutting Pad with Optimum Compound II
Here I've turned the polisher on and spread my working product evenly over the entire surface I'm going to work.
I work the section using overlapping passes and a crosshatch pattern...
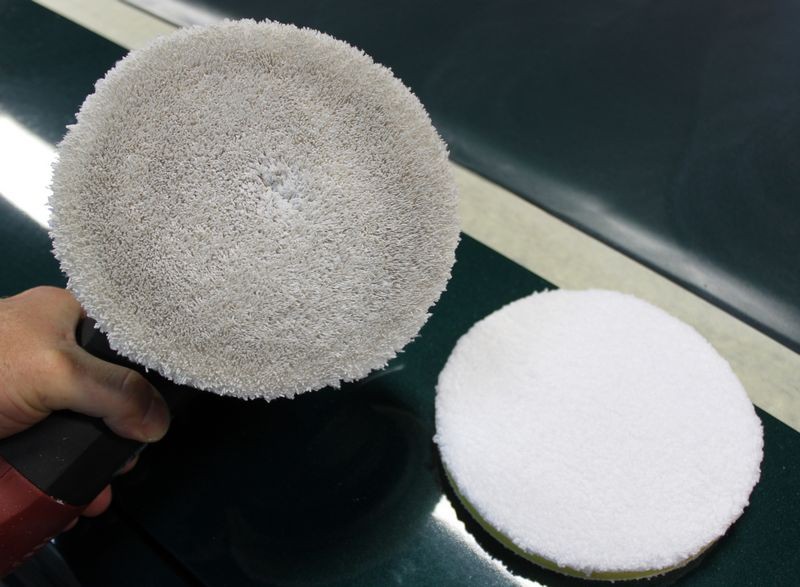
Even after wiping the hood clean and removing all the above surface bonded contaminants off using the speedy Prep Towel you can see all kinds of embedded dirt coming off the paint onto the pad. Note I have a clean pad in the picture for contrast.
Here I'm wiping the compound residue off and you can see a clear, glossy finish is starting to return.
Next I switch to the Optimum Microfiber Polishing Pad and Optimum Finish and proceed to prime the pad and then add the working product.
I repeat the overlapping, crosshatch pattern to the same section. Both the compound and the polish were applied using speed setting 6
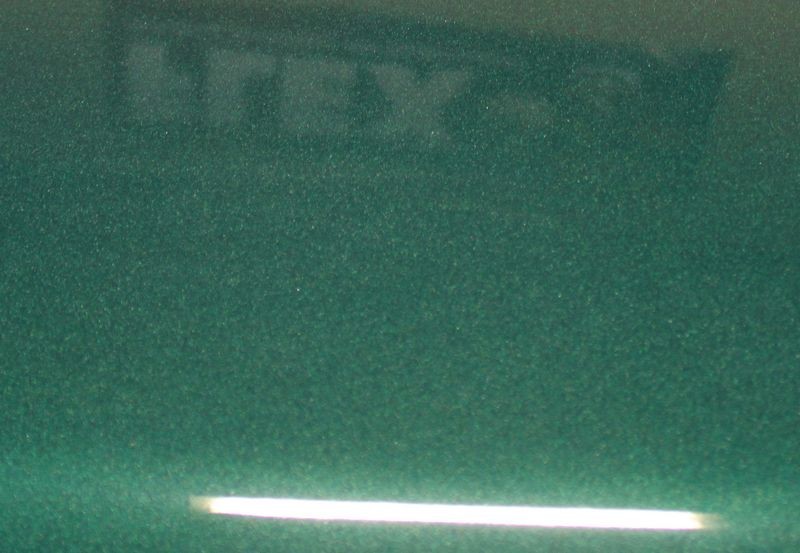
The clarity and gloss are increasing after using the Optimum Finish
You can actually see the metallic flake now...
For contrast, here's what the paint looked before which is dull and flat and then to the right side is clear, glossy paint.
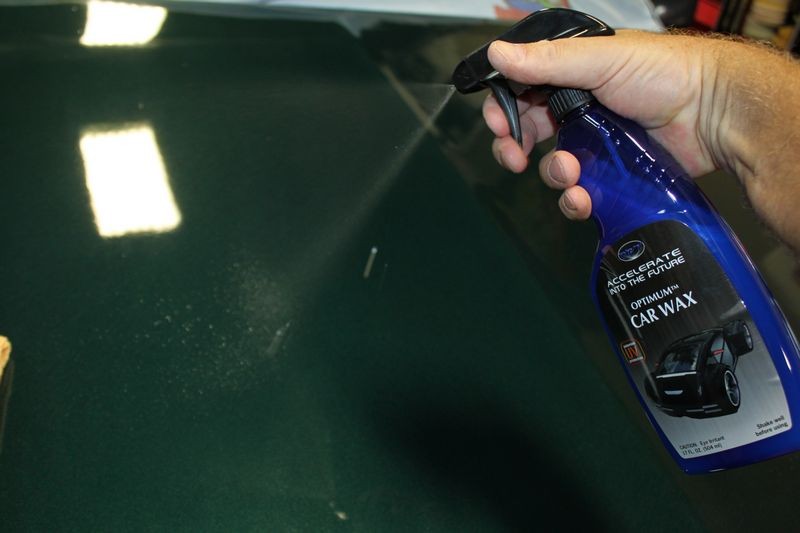
Optimum Car Wax
After compounding and polishing the rest of the hood I then applied the Optimum Car Wax which offers patented UV Inhibitors, the same UV Inhibitors that are used in clear coat paint formulas. Dave parks this in the South Florida sunshine everyday so the paint needs all the protection it can get...
Here's the end resuls...
The Flex 3401 is a powerful tool and a tool that can get the job done fast without the risk of burning the paint or instilling swirls at the same time.
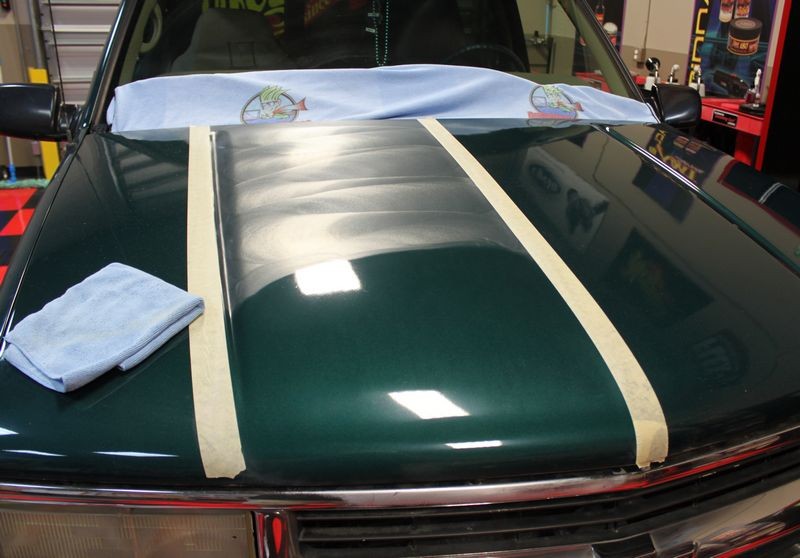
How I would section any body panel would be easier to figure out if I were standing right in front of the vehicle, that said, here's how I would probably divide the hood into smaller sections to polish with a Porter Cable type dual action polisher. If using a more powerful tool, rotary , Flex 3401 or Rupes, you could take the small section I've outlined and tackle more of them at one time. I'd still divide the center large mass of the hood into at least two section and possibly 4 sections depending how much correction is needed.
These, longer, THINNER sections of a body panel are the norm for a lot of cars, trucks and suvs and this is why I like 5.5" pads on tools like the PC and even 4" Spot Repair Pads and that's because smaller diameter pads fit modern cars better than large pads.
I drew lines to show how to divide a large hood into smaller sections. You would buff each one of these sections out one at a time.
After you buff a section, wipe the residue off the paint in that section and move onto a new section.
Before you move on, clean your pad with a pad brush or using the "clean your pad on the fly method".
Just like you removed the residue off the panel after buffing it, you're going to have residue on the face of your buffing pad. If you don't remove this residue, which is removed paint and spent product, it will build up and create a caked-up mess.
From my article list and also in my how-to book, ebook and ibook...
Re: The Definitive How-To Article for Removing Swirls, Scratches and Water Spots Using a Porter Cable 7424XP, G110v2 or Griot's Garage Polisher
Originally Posted by arisking
Does conditioning/priming a pad with spray wax make the pea/dime sized drops you apply less workable?
I'm asking because I bought a spray wax just for this to prime MF pads because it seems like A LOT of product will have to be used to prime.
Have you ever used this method Mike?
I just don't want to diminish the product by doing this.
Nope. Never used a spray-on wax to prime a pad.
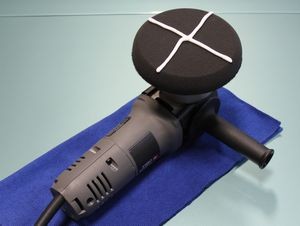
You could use the traditional X-Pattern and forget priming altogether.
MILLIONS of cars have been buffed out by simply making an X-pattern on the face of the pad and skipping priming all together. Or the Circle-Pattern.
2. Applying a Circle Pattern of Product
Benefits to a Circle Pattern
As you work around the car you'll find that your product will migrate to the center on it's own. This can lead to pad saturation starting at the center of the pad where most of the heat is generated.
This can cause problems because wet foam will hold in heat better than dry foam and over time this can accelerate de-lamination between the hook & loop material and either the foam of the pad or the backing material on the backing plate.
Knowing this... I don't help the problem by using an X pattern as using an X-pattern means putting product onto the middle of the face of the pad.
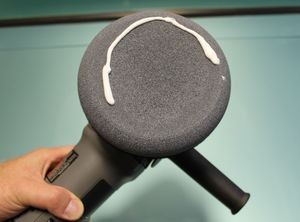
If you're placing pea or dime sized amounts of product to the face of your pad then it's also a good idea to avoid placing the product directly in the center of the pad.
Circle Pattern on a clean dry pad and then worked for a Section Pass
After working the circle of product over a section, you can see it spread the product out over the entire face of the pad without having to spread it with your finger. The pad is now equally primed with residual product.
Cut down on product after your first section pass
At this point you could clean your pad or add fresh product and when you add fresh product you can adjust how much product you apply.
In this example I used half a circle of product since 100% of the face of the pad is now primed from the previously applied and worked product.
3. Applying an X-Pattern of Product
Applying your product to the face of your buffing pad using an X-pattern is a fast and simple way way to get product out of the bottle and onto the pad in a measured way that's easy to teach others and a method that's easy to duplicate over and over again.
X-Pattern on a clean dry pad and then worked for a Section Pass
Cut down on product after your first section pass
After making a thorough Section Pass. The pad is now equally primed with residual product. At this point you could clean your pad or add fresh product and when you add fresh product you can adjust how much product you apply. In this example I used half an X-Pattern, or a single strip of product since the pad is already primed.
Remember, you want the abrasives in a compound or polish to bite into the paint and remove a little, applying a wax might hinder this by making the surface to slippery?
Don't now for sure, just throwing that out there...
Re: The Definitive How-To Article for Removing Swirls, Scratches and Water Spots Using a Porter Cable 7424XP, G110v2 or Griot's Garage Polisher
Originally Posted by arisking
Make sense about the pad being too slippery Mike. Never thought of that part.
I know that if a clay lube is too slippery it can hinder clay from abrading. (Makes sense it's lubricating the surface).
Some people use spray detailers and most will work. An example of too slippery is Meguiar's Last Touch in their professional line, they recommend to use it as a clay lube to dilute by 50% otherwise it's too slippery.
Re: The Definitive How-To Article for Removing Swirls, Scratches and Water Spots Using a Porter Cable 7424XP, G110v2 or Griot's Garage Polisher
I know this is an old thread, and although I kmow it never looses interest I just wanted o pick it up and say thank you Mike for all these tips and writtings.
I am really considering myself to buy one of these machines so reading all Imcan about it before hand is always extremely helpful. I am just on the hobby side, but i have found out that detailing is one of the only things that releases me from the stress of my daily long and agitated office days.
Re: The Definitive How-To Article for Removing Swirls, Scratches and Water Spots Using a Porter Cable 7424XP, G110v2 or Griot's Garage Polisher
Originally Posted by Rod
I know this is an old thread, and although I know it never looses interest I just wanted o pick it up and say thank you Mike for all these tips and writtings.
Thank you and you're welcome.
Originally Posted by Rod
I am really considering myself to buy one of these machines so reading all I can about it before hand is always extremely helpful. I am just on the hobby side, but i have found out that detailing is one of the only things that releases me from the stress of my daily long and agitated office days.
So, once again, thanks!
You're in good company here.... I too, as many others here on the forum like to polish our rides as a form of therapy and relaxation.
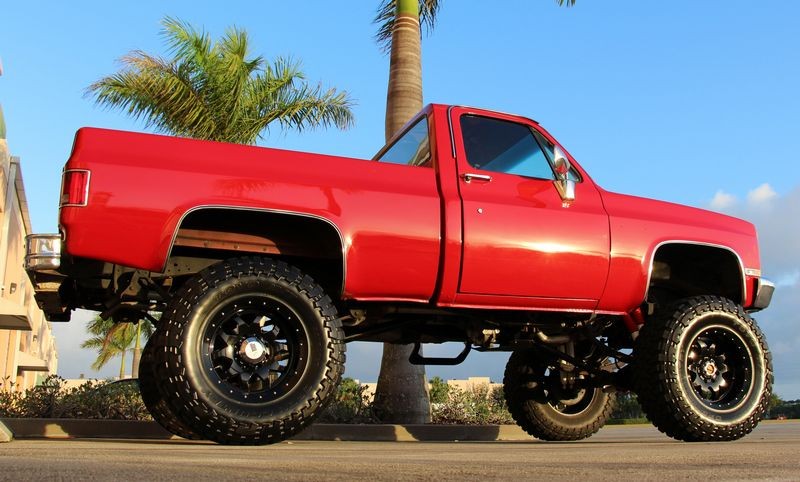
I love buffing and waxing my truck, I like driving it around with the paint looking freshly waxed and the tires looking dark black and clean. Every time I park it anywhere and get out of it guys always walk over and compliment the truck, the finish and then ask me what size engine it has etc.
Work can be hard, but working on our cars is relaxing and rewarding...
Re: The Definitive How-To Article for Removing Swirls, Scratches and Water Spots Using a Porter Cable 7424XP, G110v2 or Griot's Garage Polisher
You know I just wanted to say a big thanks Mike for always coming out with great videos, and tutorials for the DIY. Keep up the great work, and always a pleasure to see your posts Hoping one day I can make it down to Florida for a weekend.
Re: The Definitive How-To Article for Removing Swirls, Scratches and Water Spots Using a Porter Cable 7424XP, G110v2 or Griot's Garage Polisher
thank you very much! mr mike. I come from Vietnam. and I am not an expert in the details ... I specialize in electrical parts for automobiles. a one-time gift Cabana wax meguiars products. I was looking for product information, then I have watched a lot of Mike's posts. I have learned so much from your loved ones like Mike ... in my country, detailing cars are very popular. but all they are doing is not good ... less than 2/10 the way he did. then learned from his work mike. I ask locals to buy some products from autogeek sent to Vietnam. I spent 3 hours every night to see mike ... and I've been practicing on a few cars. I do not well ... I used meguiars DA's Power to modify my way ... I just bought poter cable from the HD 7424 autogeek and add some product details ... now I love this art. Thank you very much .. Mike.


 Thanks:
  Likes:
  Dislikes:
 Originally Posted by 2007M6


 Reply With Quote


Bookmarks