 Thanks: 0
 Likes: 0
 Dislikes: 0
-
Super Member

OCDetails Corolla Detailing Part 2
Part 2 of the big Corolla Detail (See Part 1 for Wheels/Tires and Engine)
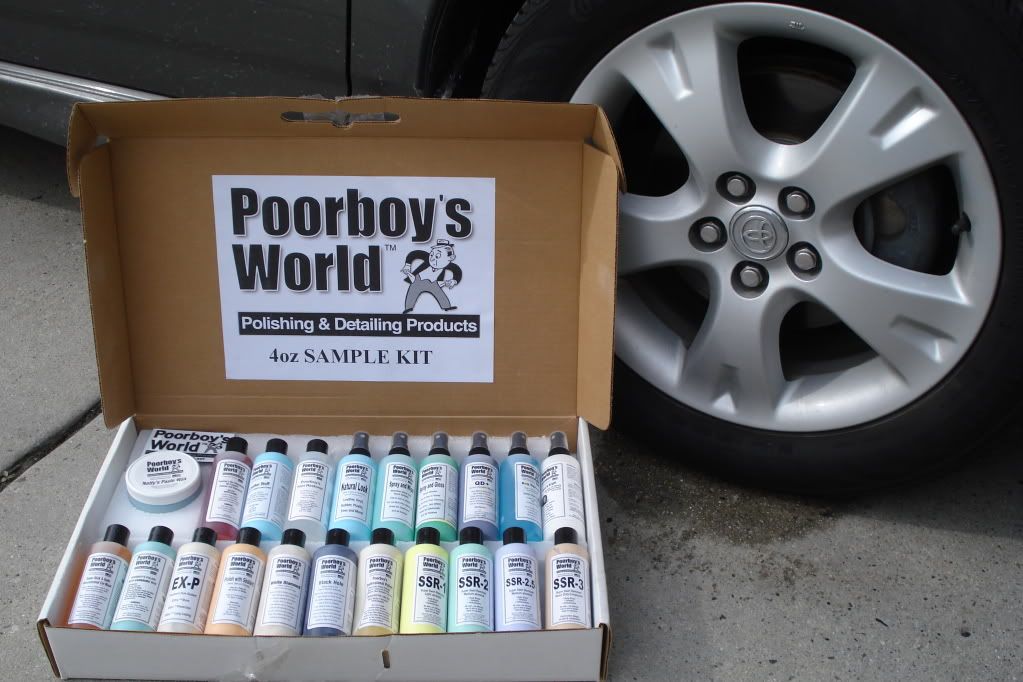
We have already covered wheels and engines, so we’ll just start with the washing and I’ll have to put things in the right order after I have everything finished. Now, for this part of the process I’m only using products that I got from a Poorboy’s Sample Kit. I could do the engine, wheels, and tires with products from the same kit. After this whole thing is done then I’ll put together a list of the products that I got locally and everything else came out of this kit.
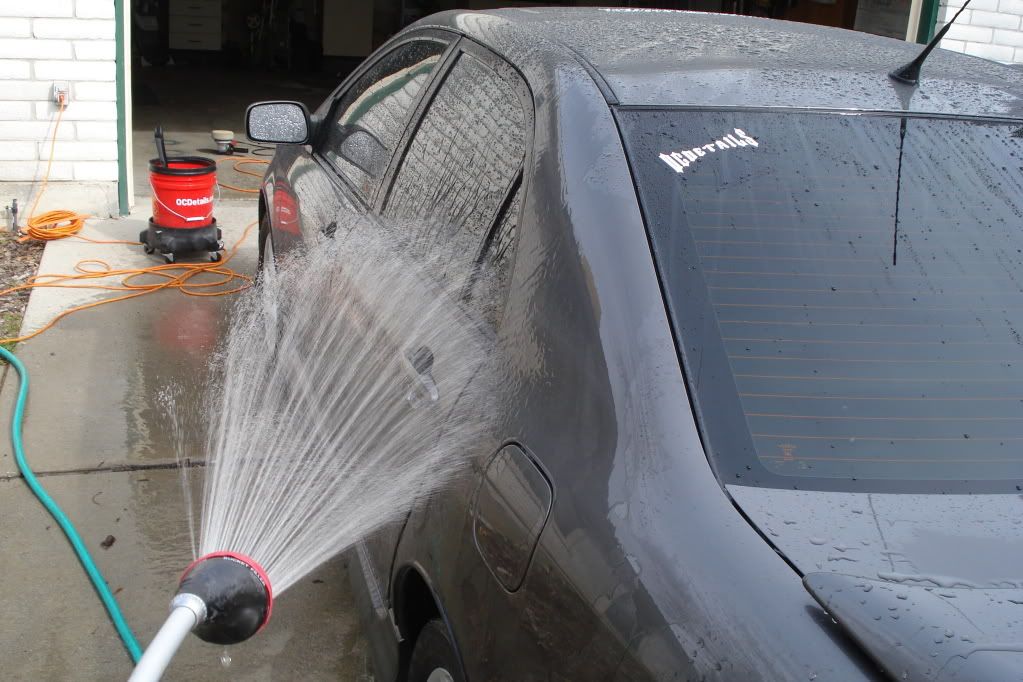
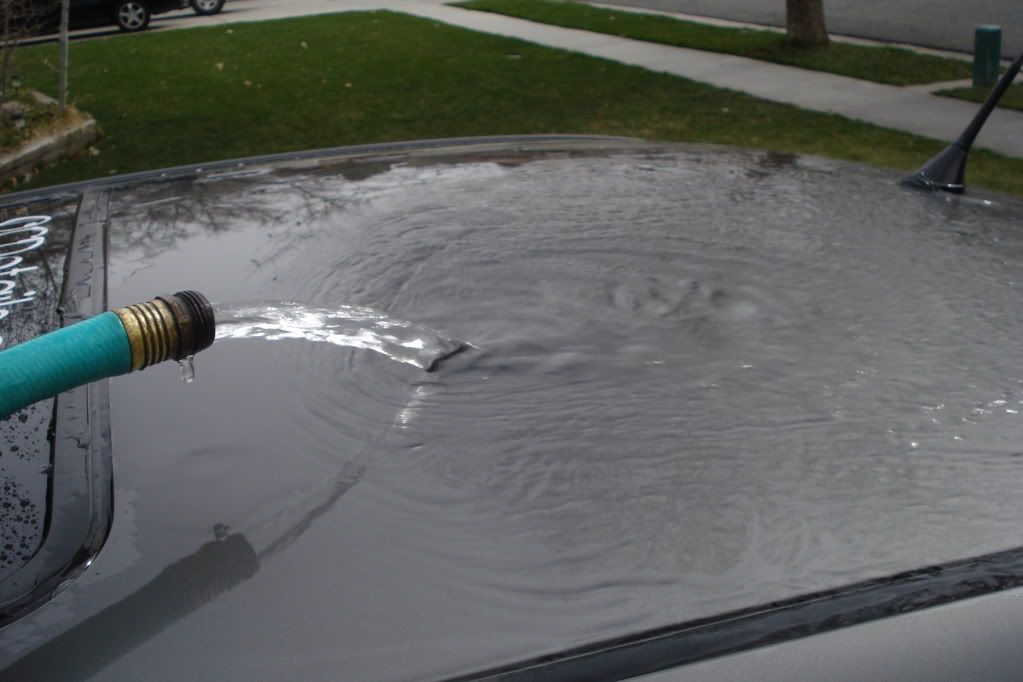
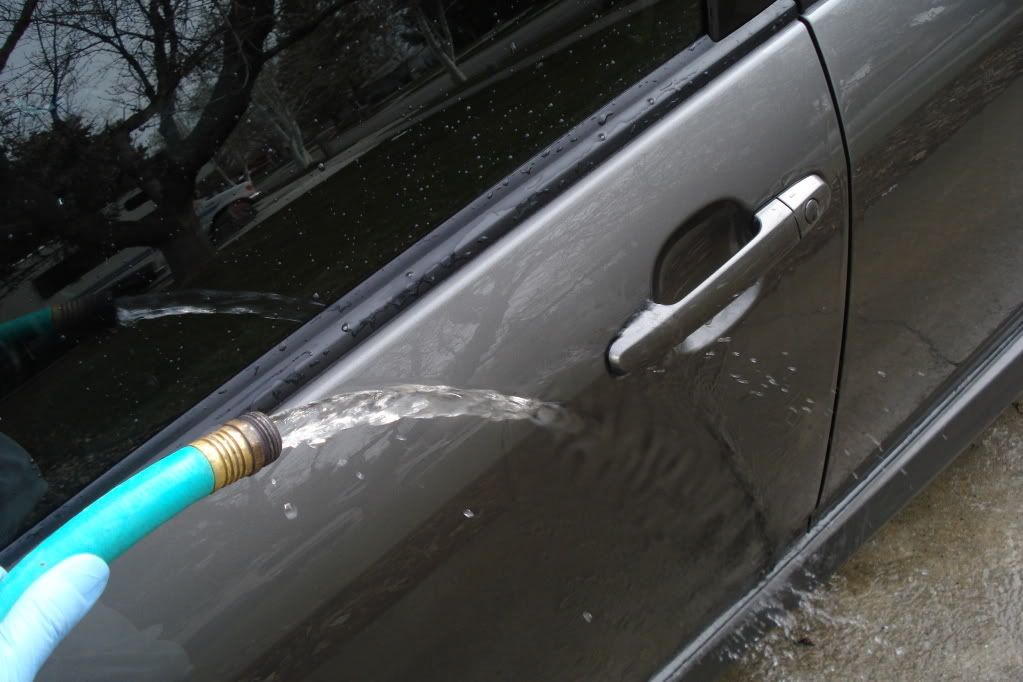
Step one is to do sort of a presoak. It is assumed at this stage you have already detailed the wheels & tires, so as you are rinsing those off, just wet down the rest of the vehicle. It helps loosen the dirt and makes washing easier.
Now get your soap and fill a bucket with bubbles. The soap you use is important because it does a couple important things. 1) It breaks down the dirt that is stuck to the surface. 2) It lubricates between the wash mitt/sponge/brush and the paint. And 3) it floats the dirt off the car. Using a good soap that gets lots of bubbles and doesn’t just settle to the bottom of the bucket is important.
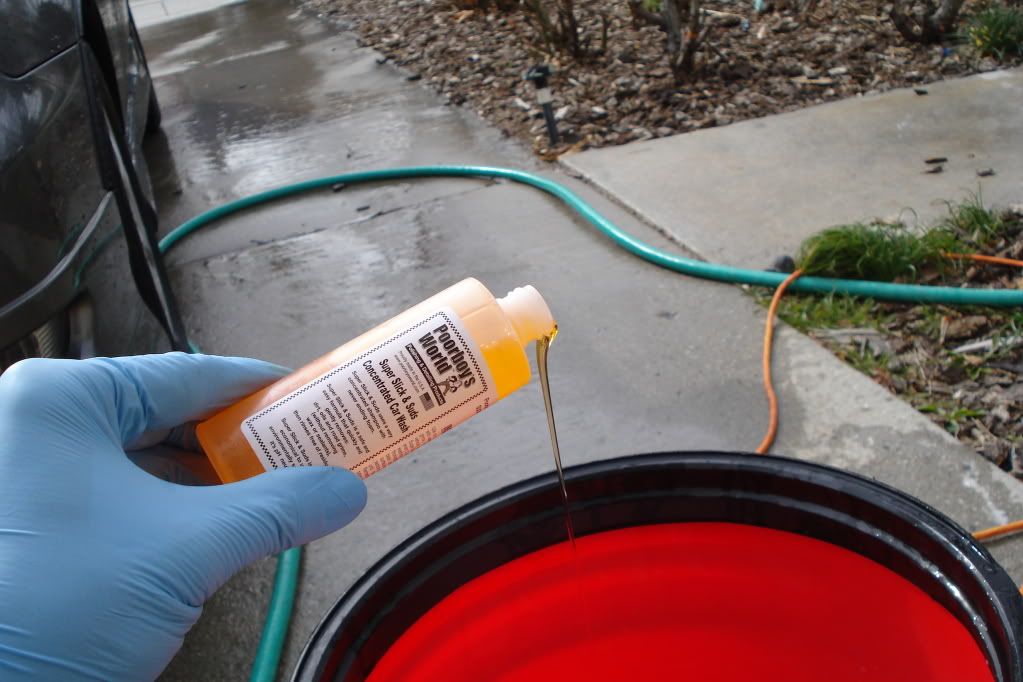
DO NOT USE DISHSOAP. That is not a good car wash soap. It is too harsh and it will remove the wax that you have applied. So unless it is your intention to remove all the wax from your car, leave the dishsoap in the kitchen. Besides, most dishsoaps have hand moisturizers and other things that have no place on your car. I doubt it will hurt much, but extended washing with dishsoap can dry out the rubber and plastic moldings and seals on your car.
Next step is to start washing. Using either a lambs wool wash mitt or a terry cloth sponge (the safest tools), wash in the same direction that the wind moves over your car. This means back and forth. Not circles. Not random directions. Go from front to back. There is a grain to your paint that is created by the dust and ice and everything else your car drives through. If you want to give yourself some gnarly spiderwebs to deal with, then go ahead and wash in whatever direction you want. I’m giving you this advice so you cause as little damage during the washing phase as possible. This is where most of your swirls probably came from to begin with, so let’s start with some new wash habits if you aren’t already doing this.
One other piece of advice is to start from the top and work your way down. No sense in having dirty water dripping down over clean surfaces, is there?
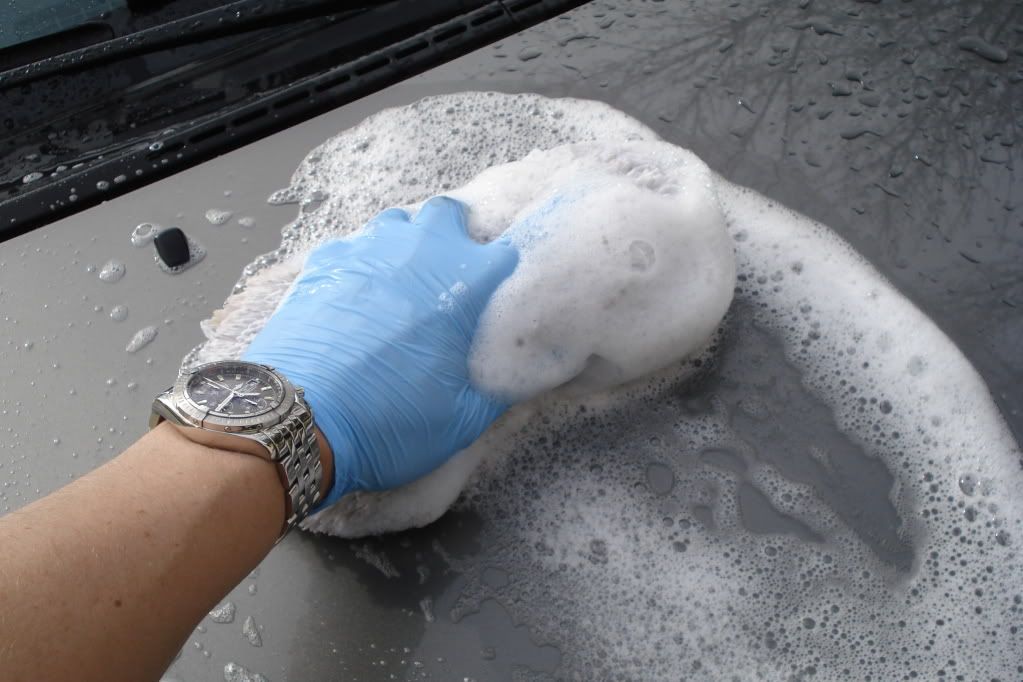
Remember, lots of bubbles is a good thing. Rinse them off as you go so they will not dry on the car and just leave most of the dirt still sitting there. Definitely rinse as you go if you are in the sun or it is pretty hot outside.
Speaking of rinsing, once you have your car waxed, I want to share a neat tip about how to get the car rinsed and mostly dried at the same time. If you use a slow stream of water you will notice that most of the water just sloughs right off the panel. If you spray it and it splashes everywhere then you get water drops everywhere. But a slow stream will just slide all the water right off and you’ll be left with only a few drops to blot out with your towel. Give it a shot. It doesn’t do much for my car at this phase because there isn’t much by way of wax or anything else on the surface anyway.
Before you bust out your towel just yet, let’s move on to the clay stage. The extra water on the surface will lend itself to the task of clay lube. Clay lube can get expensive, so while official clay lubricant is best, soapy water works too. So that is what I use. Call me cheap, but I use what works and if it is cheap, then all the better.
Clay doesn’t have to be a mystery to people, but I’m always surprised how many people don’t know what it is. I’ve got a full clay article on OCDetails.com if you really want to know about it, but we’ll just keep it simple here.
You can get a bar of Clay Magic at AutoZone for somewhere around ten bucks. It will even come with a bottle of clay lube that will work for about one car and then you are on your own. When you get your 100 gram bar of clay you will want to break it into smaller pieces as you go. Don’t use the whole bar at once. The reason for this is because there is always the chance that you will drop your clay at some point and contaminate it with gravel and grit. You wouldn’t want to burn a whole bar if that happens.
I follow a simple rule of thumb. Quite literally, in fact. I break off pieces about the size of my thumb and work with that until I need another piece. You can generally get half a dozen cars at least out of a clay bar if you aren’t dropping pieces. Depending on how messed up the cars are that you are detailing, you could possibly get quite a few more than that I’d wager.


Spray the surface with your clay lube and glide the clay in the same direction you washed in. Claying may cause microscratches, but since the next step is to polish the paint anyway, I don’t worry about that. Don’t be surprised if you see them after you are finished claying though. Considering what the clay is removing from your paint, I’m surprised that the scratches aren’t deeper.
Because I use soapy water for clay lube, it often times leaves quite a mess. So I give the car another once over with the hose and wash mitt again. Just to be safe.
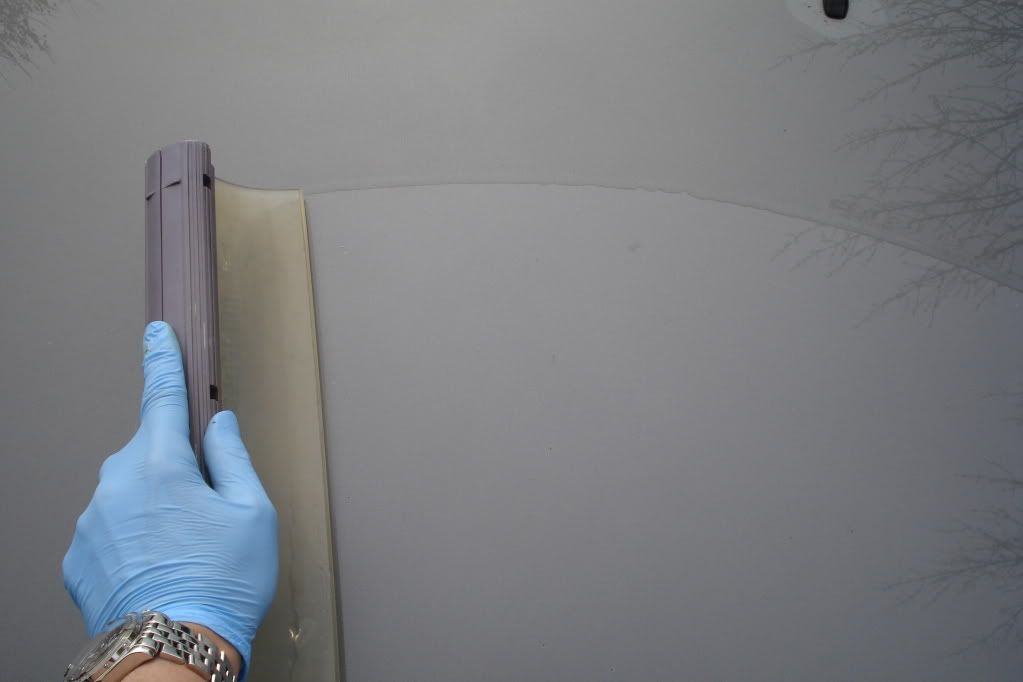
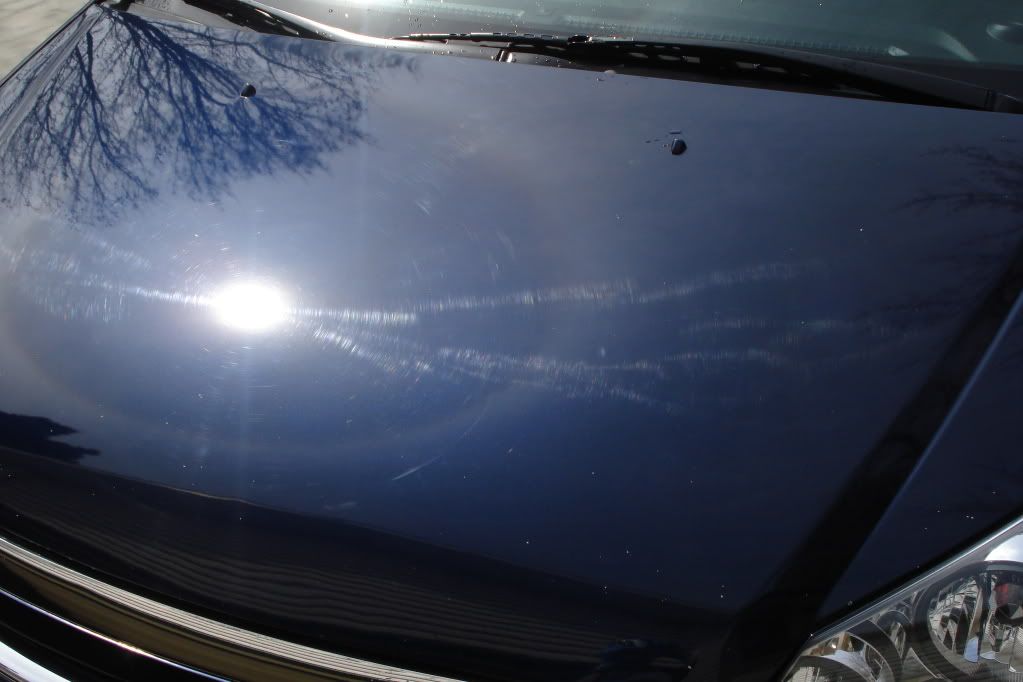
Now the car definitely doesn’t bead any water or give any indication that there is protection on the paint. Good. Now I can get to polishing. First, let’s dry the car.
There is a great tool I’ve been using for years called the California Water Blade. If you keep the blade clean, it is very effective at getting the water off the car. Like any tool, if you use it wrong then you can do damage. I always run my fingers along the blade every second or third swipe just to make sure there isn’t any grit there. When the car is sheeting water I find this to be a very effective time saving tool when it comes to drying the car. It works great on windows too. Just remember to start at the top and work your way down. If you dry the hood and then flip a bunch of water from your windshield on it, then where does that leave you? Try to find a process that doesn’t make you repeat any part of the process.
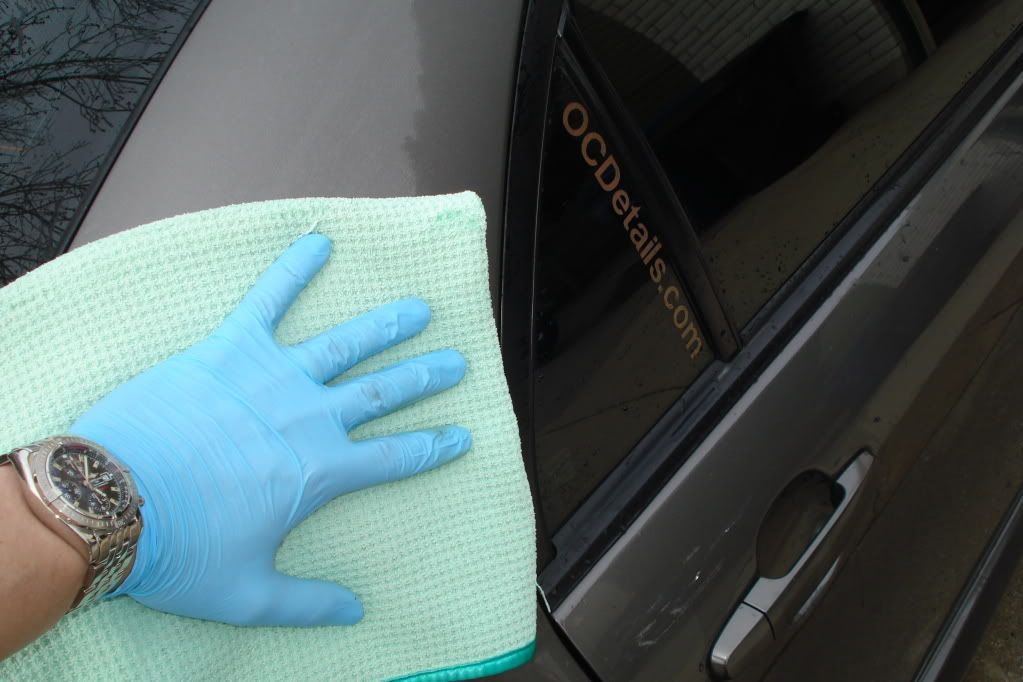
When you finish swiping most of the large areas dry, you’ll still have a few spots that need drying. I strongly recommend a good quality waffle weave microfiber towel for the drying. Remember that microfiber comes in all sorts of grades. They make everything from underwear and bathrobes to hats and jackets out of the stuff, so there is bound to be a difference in softness. Don’t just use any ole ‘microfiber’ towel on your car. Especially when you are drying it. Personally I’ve never found a microfiber towel locally that I would use anywhere other than under the hood or in the interior of my car. The best microfiber towels are found online. If someone asks me then I’d tell them that I get mine from Autogeek.net, but you can get them in a number of places. This one is one I got from Autogeek a few years ago.
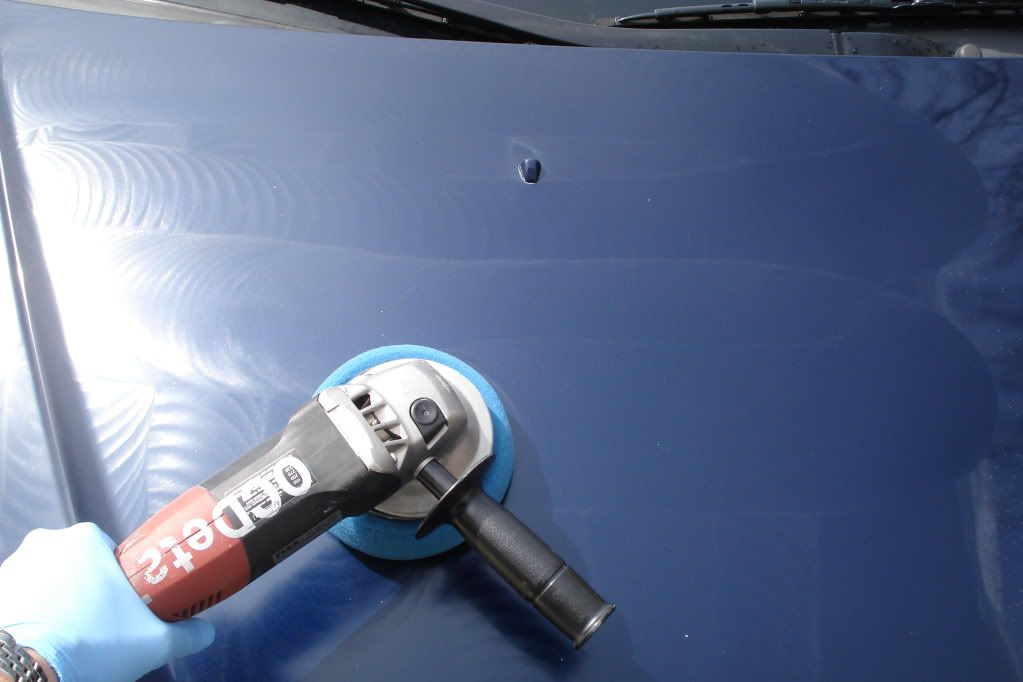
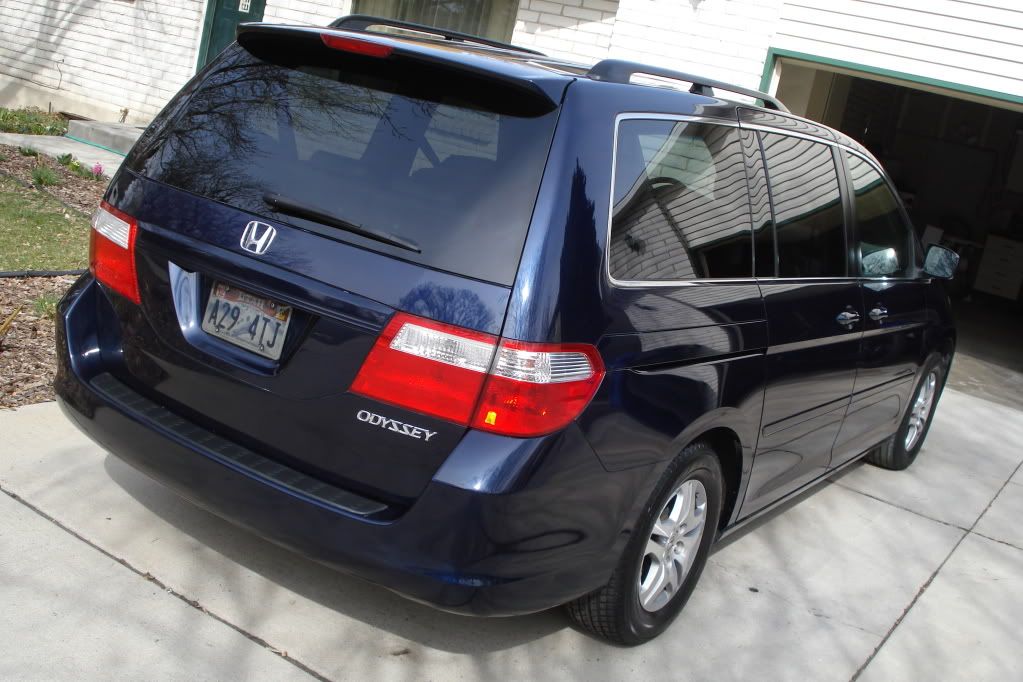
When the car is dry you can move right into polishing. I’m using the FLEX 3410 just because I love this machine so much, but the PC7424 is still a very capable machine. They are both random orbitals, but the FLEX has an entirely gear driven movement that makes the job go about 30% quicker for me. Since I was polishing my car and my wife’s van today for this article, I needed the speed.
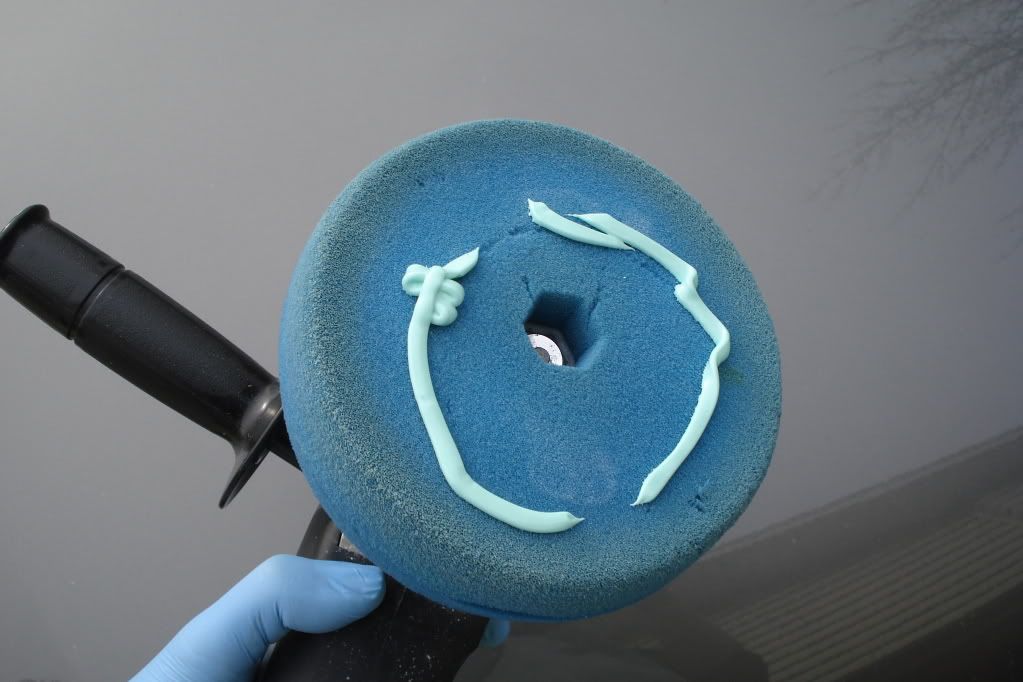
I’m going to use Poorboy’s SSR2 and a blue Edge 2000 foam pad. The reason for the SSR2 is because I’ve got some swirls, but they aren’t that bad. The paint isn’t the easiest to cut though, so the SSR1 wouldn’t quite do it. I could probably use a yellow pad and SSR1, but then I would have pad haze to clear up and I’d have to polish twice. So I’m using a more aggressive polish and a less aggressive pad to get the results I want. You’ll find that I do that quite a bit. It just comes from practice. You’ll figure out what works best for you.

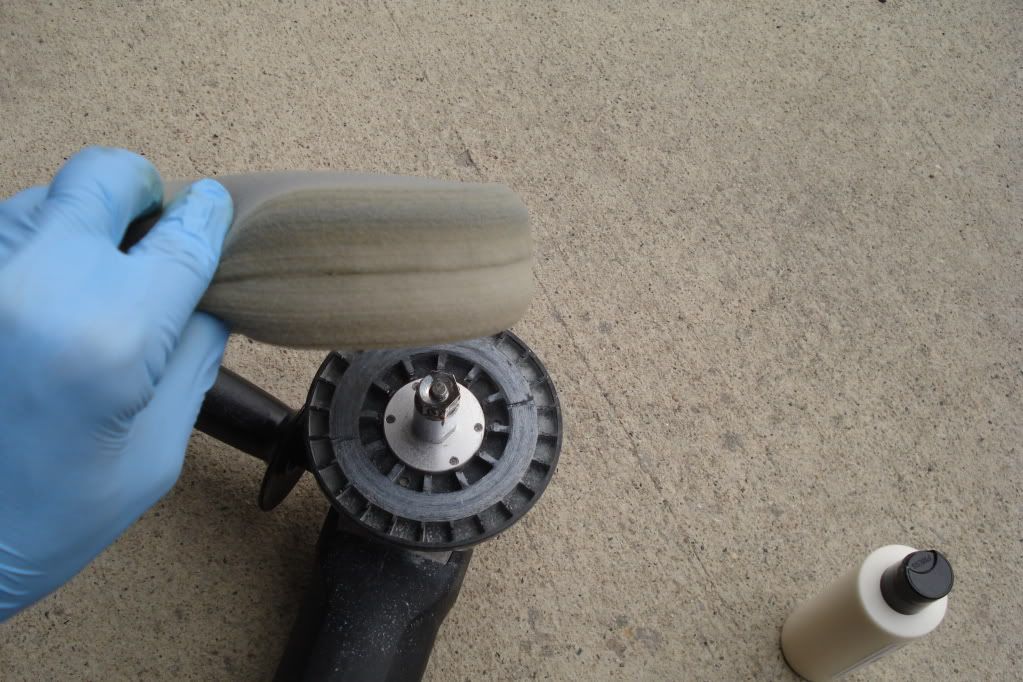
Apply about this much product to the pad. This too you’ll sort of figure out as you go. I just sort of draw a circle half the size of the pad and call it good.
Put the machine against the paint and start the machine on a slow speed to spread the product around. Then kick it up to 5 and start to work. Go in a criss cross pattern to ensure the best coverage. So go up and down and then back over it from side to side. You’ll get the feel of when the polish is done doing what it needs to do, but the best thing to do is check your work frequently. Buff off a section and see where you are at before going on to the next panel. This will help you know how severe your swirls are and how long you need to work the machine and polish before you get the results you want.
Since my car doesn’t photograph swirls well, we’ll use the van for this example. Same products and process.
Remember that if you are detailing a daily driver that it is ok to leave a few marks on the paint. Seriously, n o b o d y is going to notice them. Well, nobody except for me and you probably, but that doesn’t matter. To anybody else your car is going to look perfect. Don’t over obsess or it will drive you nuts. A daily driver is going to get swirls again the first time you drive it to work, so get comfortable with a certain level of ‘good enough’.
Occasionally you’ll be going along in your polishing and you’ll hit a drip or a nice flow of water. This always happens on the back of the car, but you’ll pull water out from under the door handles like this too. When this happens you will want to wipe it up quick. This kind of mess is a real pain to clean up when it dries. Wipe it down and spin the water out of your pad before going over the spot again. Trust me on that. It makes buffing it off much easier.
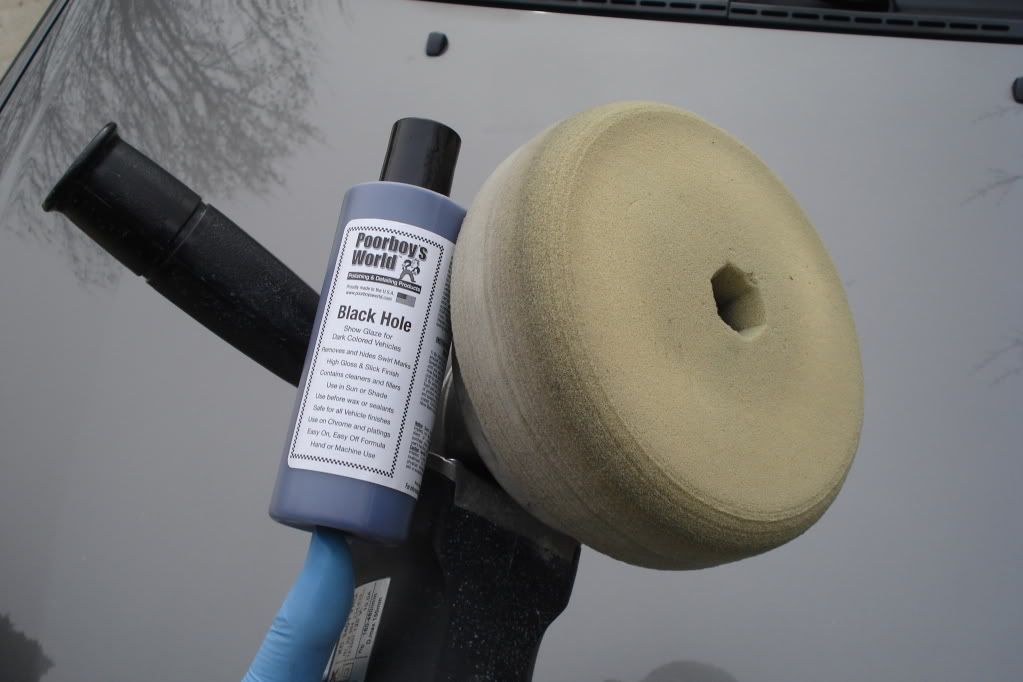
Now buff the polish of and pick your poison. I’m going to give Poorboy’s Black Hole a shot. It is some sort of a glaze or something, but it says you can put a sealant on top, so that is what I’m going to do. I’m going to apply Black Hole and then EX-P.
Same process here as when you did the polishing. I don’t necessarily always do the whole criss cross pattern thing, but sometimes I do. You just want to make sure you get coverage everywhere.
The reason I use the Edge 200 pads is because after I finished applying and buffing off the Black Hole and it was time to apply the EX-P, all I had to do was flip the pad over and I was ready to go. I didn’t have to go find another pad so that I didn’t mix my products up. I don’t’ know that it would make a whole lot of difference, but this is the first time I’m layering these two products, so I don’t want to mess anything up. So a quick click and flip and I’m ready to go with the EX-P.
-
Super Member
Re: OCDetails Corolla Detailing Part 2
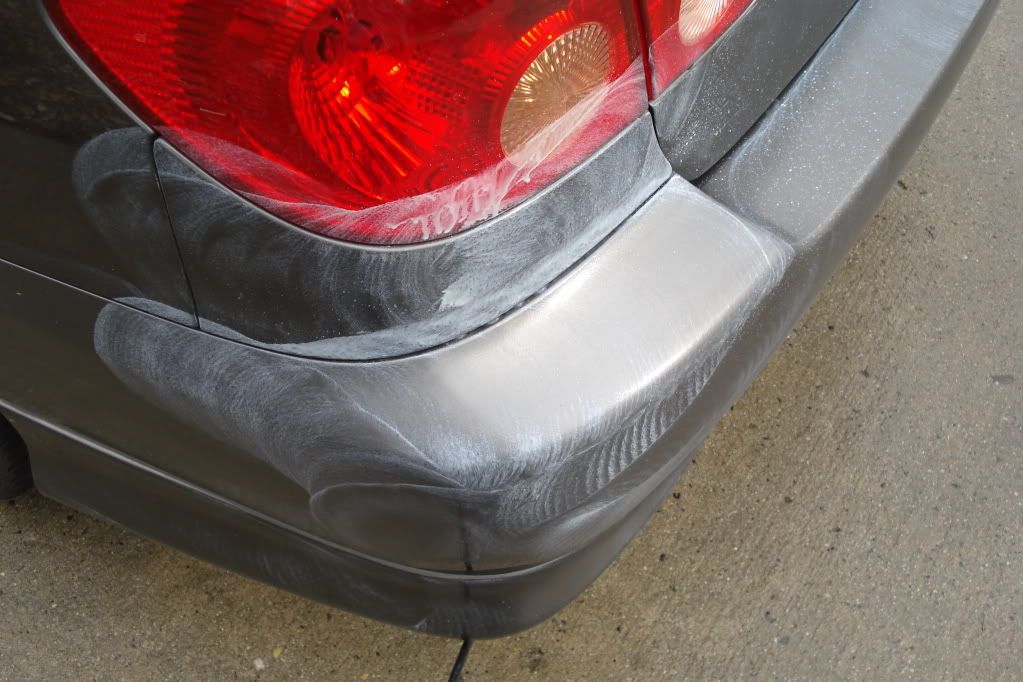
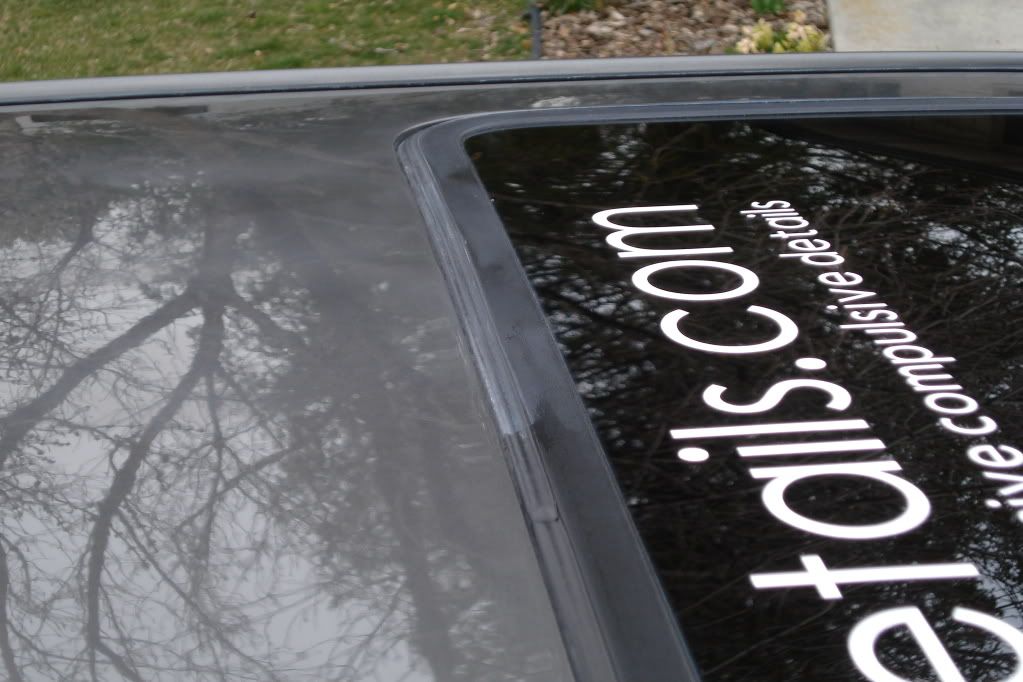
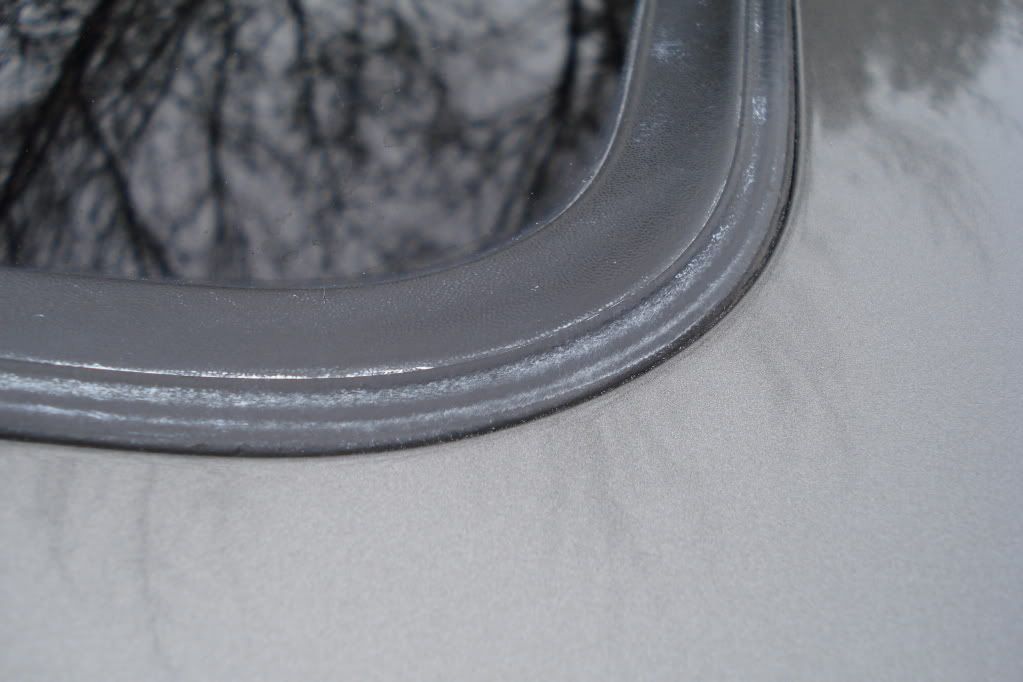
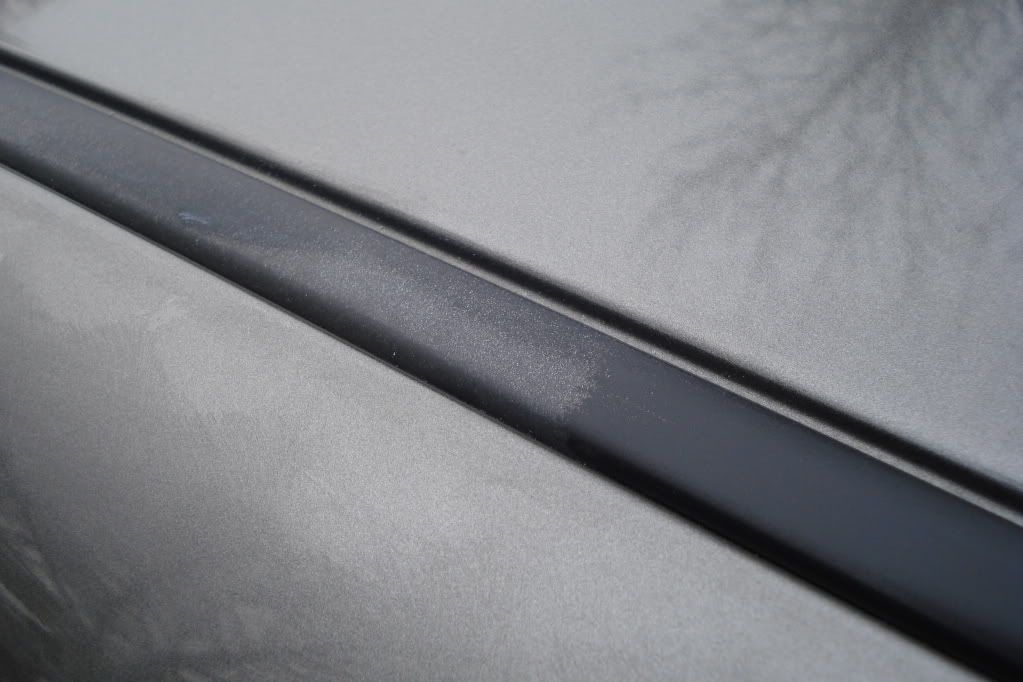
Whoops!! Yeah, so I didn’t mask anything off like I normally would have, but that was on purpose. I wanted to show you what happens when you hit your trim and seals with your polisher and how to clean it up.
You’ve seen that before I’m sure, right? Well, it isn’t so bad to clean up. My wiper cowl can get to looking like that sometimes too.

The solution there is Poorboy’s Trim Restorer. It does a fantastic job on polish stained trim and general damage to plastic and rubber.
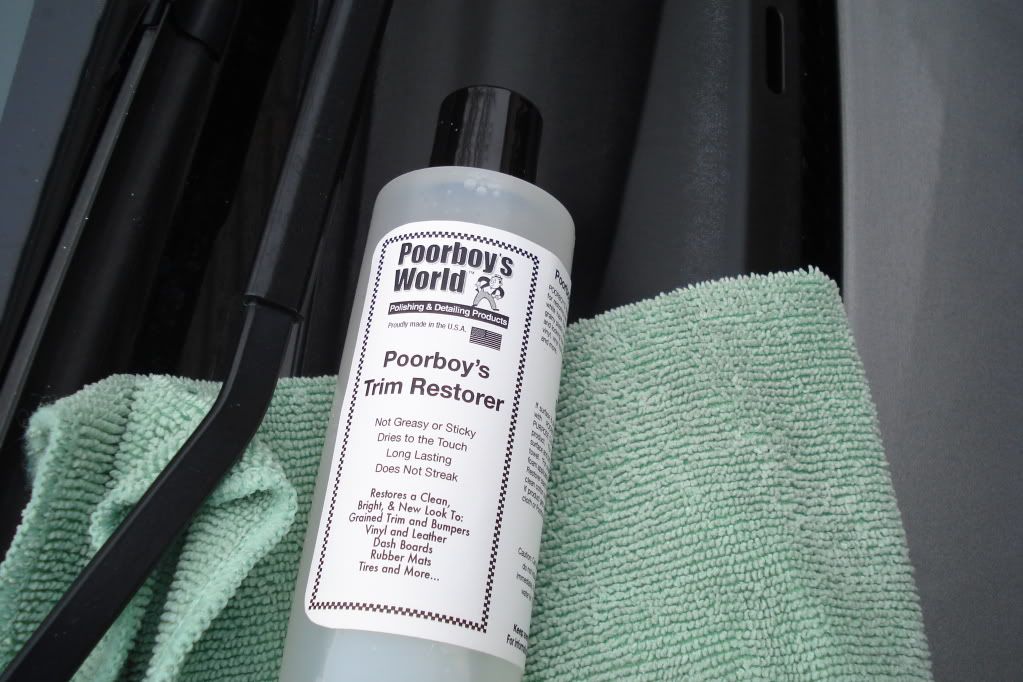
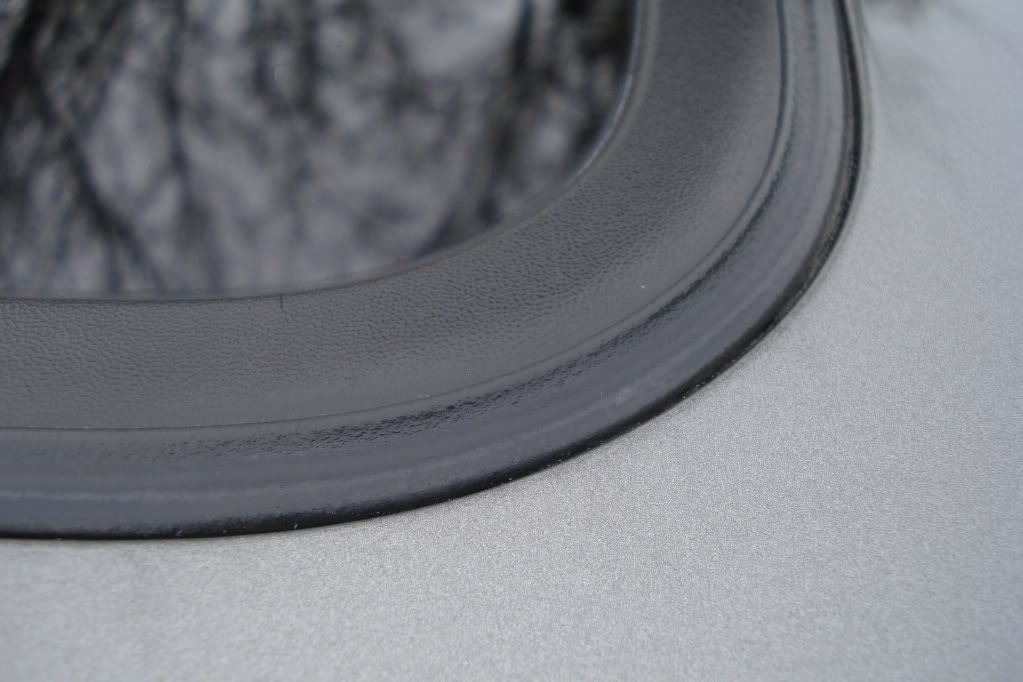
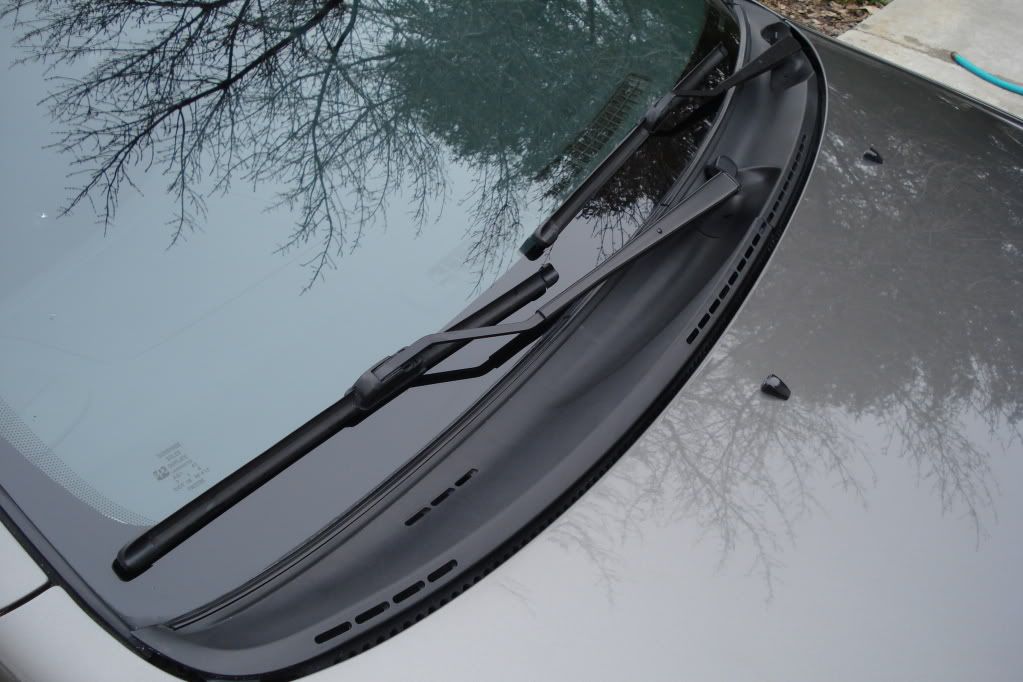
Not bad, eh? Definitely look into getting some of that. It is awesome. It isn’t quite a gel, but it is thicker than Armor All. Sort of like soap, only thinner by a little bit. You can either apply it directly on the piece you are working on, or just apply it to the towel and rub it in. You’ll be amazed at what a difference it makes.
So now you can clean your glass (I don’t really need to tell you how to do that, do I?), dress your tires, and admire your work. It looks so much better than when you started.
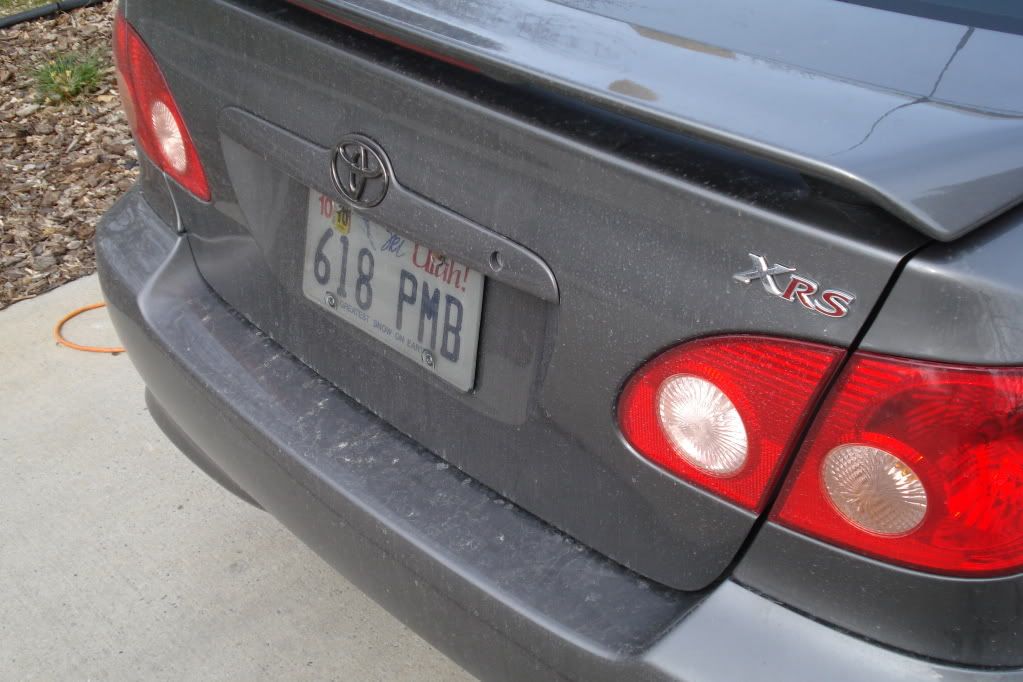
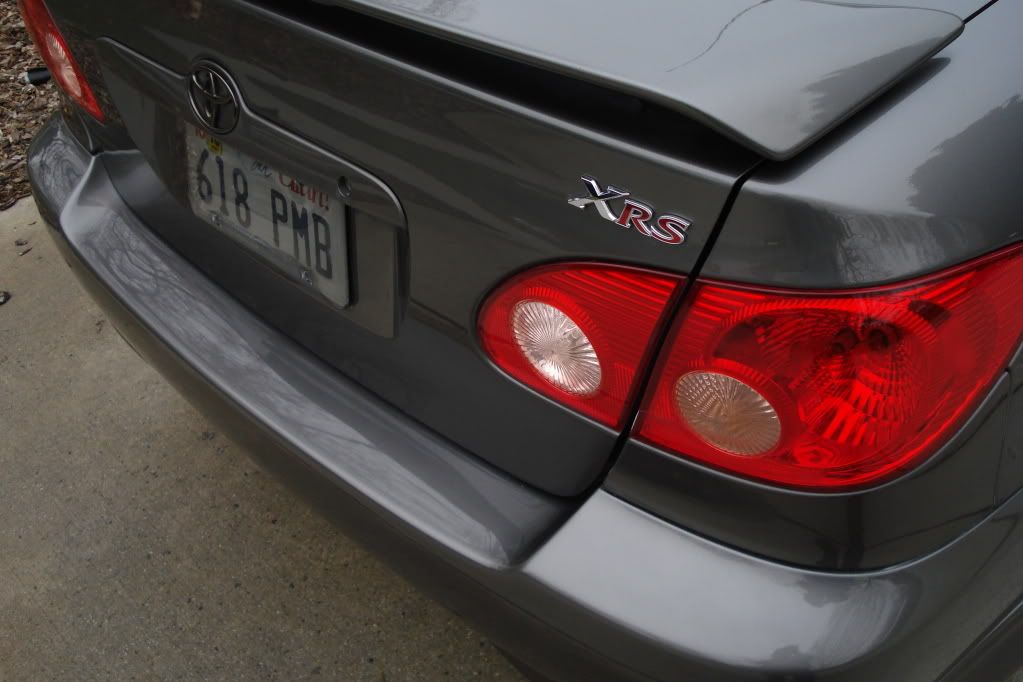
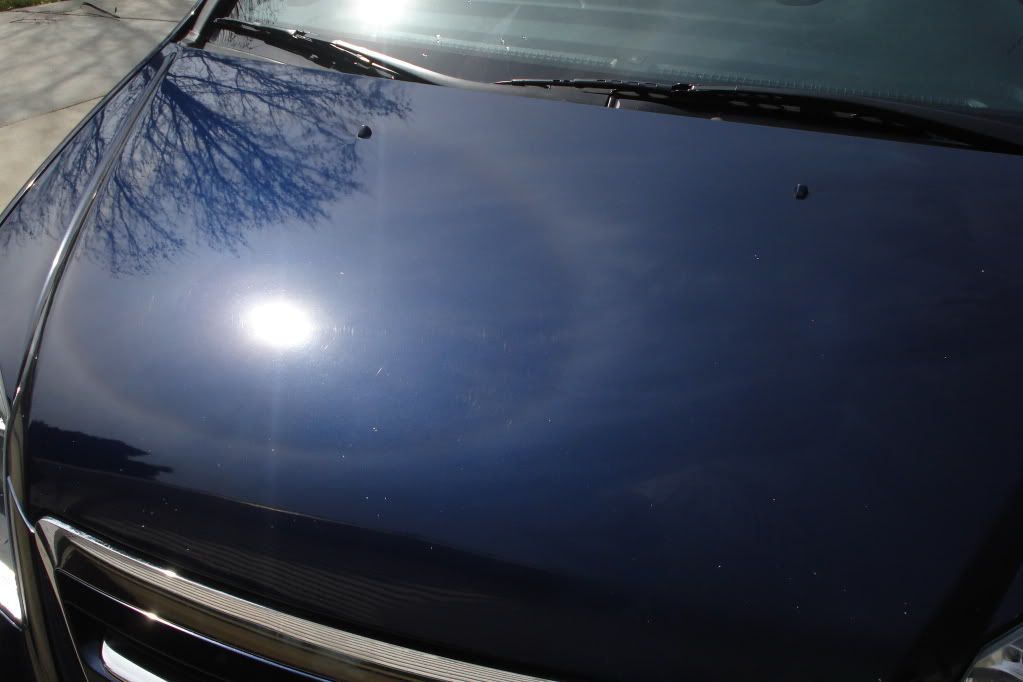
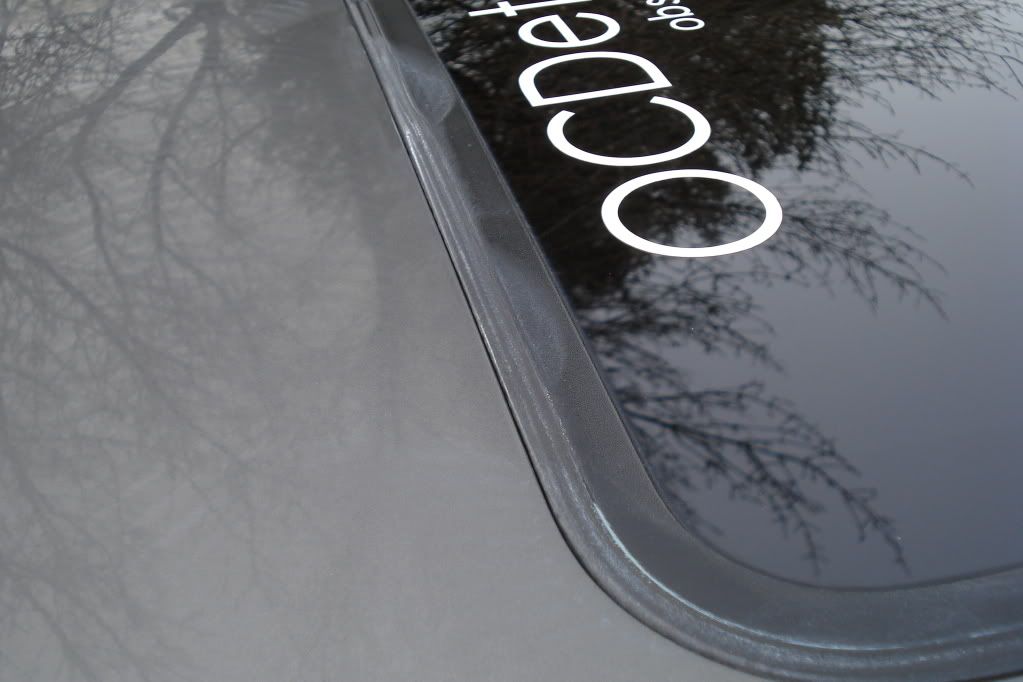
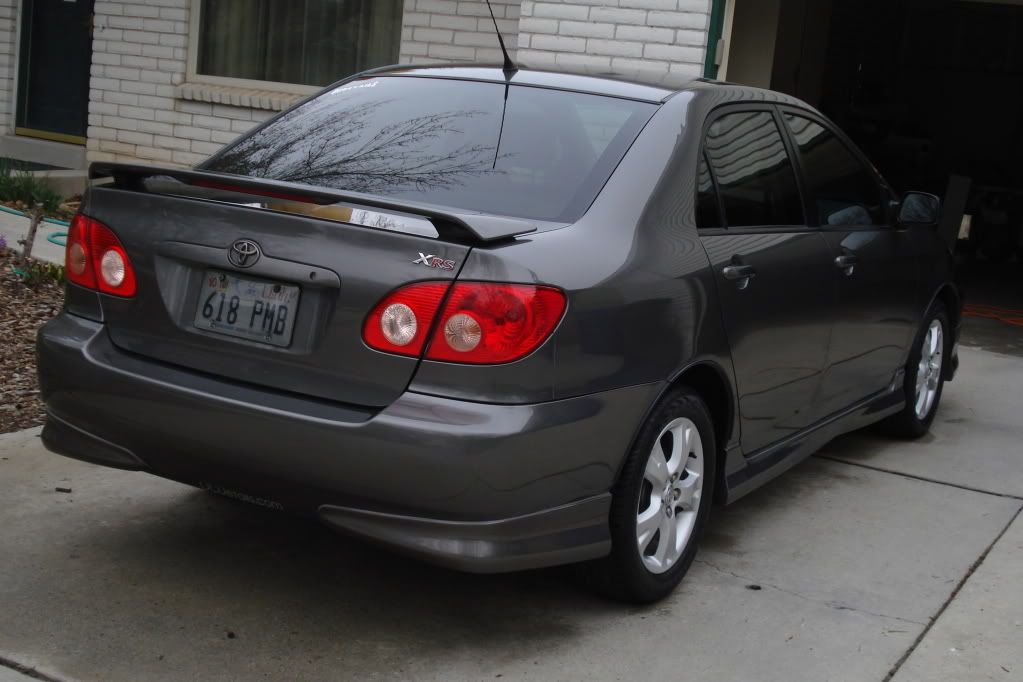
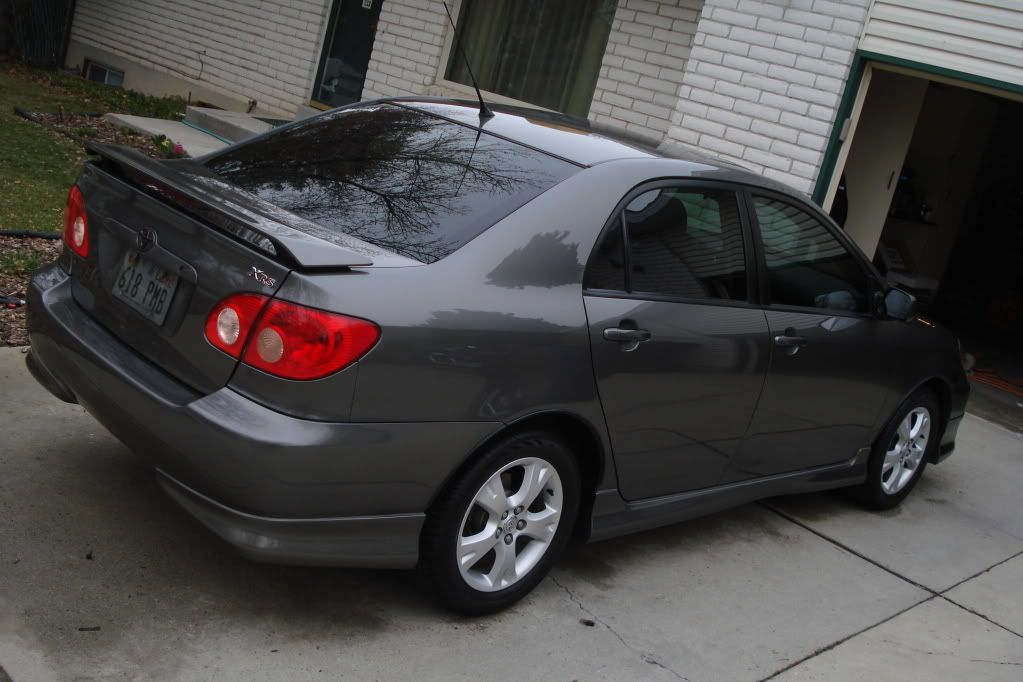
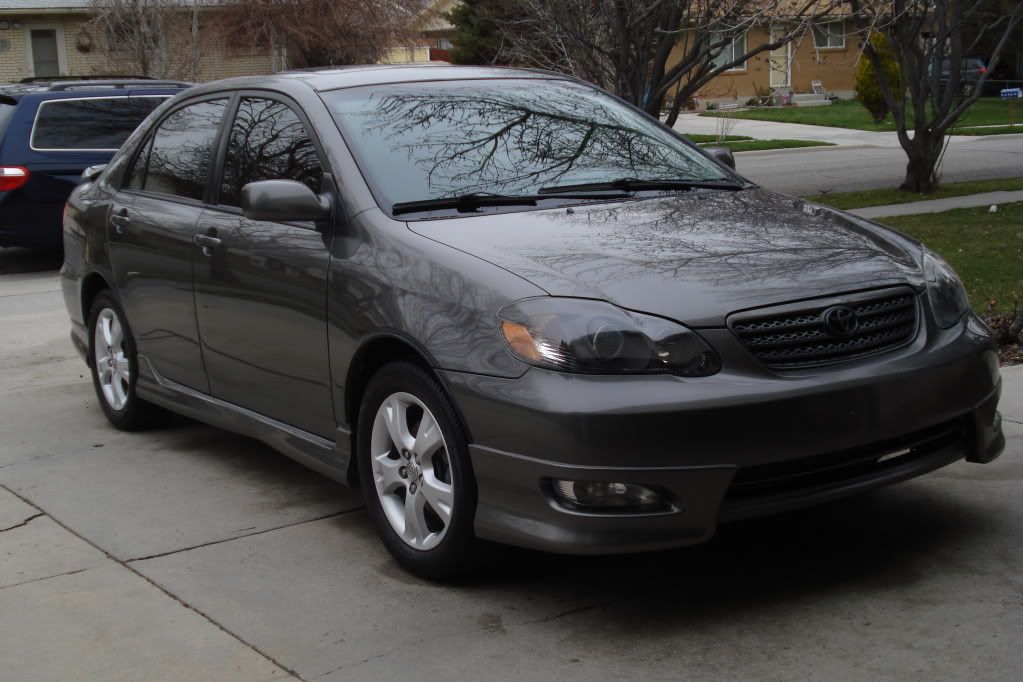
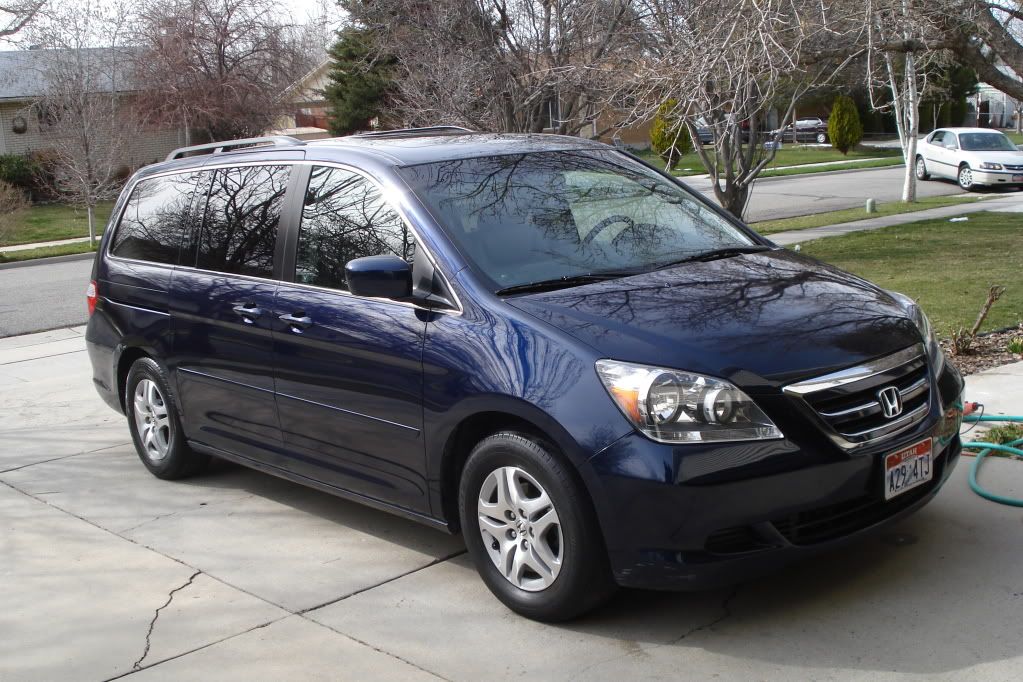
Notice how the body lines will glow more than they did before. I don’t care how clean you get your car by washing it. You’ll never get appearance like this until you polish it and use a quality sealant or wax on it. The difference is blinding. I’ll get some pictures in the sun perhaps later. It was a cloudy day and that doesn’t make for good pictures, but here are the results of my efforts today.
-
Super Member

Re: OCDetails Corolla Detailing Part 2
Nice writeup! Very well done! 
Two questions for you.
(1) What do you think of Poorboy's products in general? Are they quality products you would reach for time and time again or just use once in a while for a change of pace?
(2) Why does the van have two license plates and the Corolla only has one? Are you required to have one or two in Utah?
Shane
2021 Honda Civic Hatchback EX Lunar Silver
-
Super Member
Re: OCDetails Corolla Detailing Part 2
Well, the ones I used this time were just for a change of pace. However, I would reach for a bottle of any of the SSR products if I need a high quality polish. They do a terrific job of swirl removal on so many levels.
Actually, there are other products too like the Trim Restorer and Bold N Bright that work so well that they would be easy to make your 'go to' product of choice. I've never really heard anybody complain about any of the product line, in fact. I know I've never had any reason to complain.
Technically in Utah we are required to have a plate in front and back. I took mine off when I was wetsanding the bumper a couple years ago and just never put it back on. Cops only hassle you for it if you give them reason to, so I haven't had any trouble. It is in my glovebox, so I guess I could put it on whenever I wanted to, but I just haven't thought about it. The van had a bracket there for the plate and everything, so it would have looked odd if I had left it off. The car looks pretty normal without the plate, so it just never screams "SOMETHING IS OUT OF PLACE ON ME!" or anything. lol
-
Super Member

Re: OCDetails Corolla Detailing Part 2
WOW amazing write up!
Those body lines really do glow now, that Corolla looks amazing. Nice choice of colour btw!
Never be afraid to do something new. Remember, amateurs built the ark; professionals built the titanic
-
Super Member
-
Junior Member

Re: OCDetails Corolla Detailing Part 2
Great write up and useful information!
-
Super Member

Re: OCDetails Corolla Detailing Part 2
-
Regular Member

Re: OCDetails Corolla Detailing Part 2
i know this thread is preaty old but i was just wondering where you got that sample kit ive been looking for it and cant find it.
-
Super Member

Re: OCDetails Corolla Detailing Part 2
 Originally Posted by coreymg51

i know this thread is preaty old but i was just wondering where you got that sample kit ive been looking for it and cant find it.
you can find it at poorboys world.com and welcome to AGO!
Tim "I have done so much with so little for so long. Now I can do anything with nothing"
Similar Threads
-
By Avgguy in forum Auto Detailing 101
Replies: 3
Last Post: 04-29-2018, 07:12 AM
-
By OCDetails in forum How to Articles
Replies: 3
Last Post: 03-29-2010, 05:16 PM
-
By OCDetails in forum Show N' Shine
Replies: 11
Last Post: 09-05-2007, 08:41 AM
-
By bejor77 in forum Auto Detailing 101
Replies: 3
Last Post: 01-01-2007, 11:38 PM
-
By sparkie in forum Show N' Shine
Replies: 25
Last Post: 11-10-2006, 12:29 AM
 Members who have read this thread: 0
There are no members to list at the moment.
Posting Permissions
- You may not post new threads
- You may not post replies
- You may not post attachments
- You may not edit your posts
-
Forum Rules
|
| S |
M |
T |
W |
T |
F |
S |
| 31 |
1
|
2
|
3
|
4
|
5
|
6
|
|
7
|
8
|
9
|
10
|
11
|
12
|
13
|
|
14
|
15
|
16
|
17
|
18
|
19
|
20
|
|
21
|
22
|
23
|
24
|
25
|
26
|
27
|
|
28
|
29
|
30
| 1 | 2 | 3 | 4 |
|


 Reply With Quote
 I'm a sucker for dark blue, but when I went looking for an XRS I could only find one blue one and it had a pin stripe. Pin stripes are deal breakers for me. I've never regretted having a charcoal grey car though. It is by far my favorite color that I've ever owned. It hides swirls, but is still dark enough for awesome reflections. It hides water spots and dust and a lot of the other little annoyances that would make nuts at this stage of my life. I just don't have the time to obsess over my paint like I used to, so having a low maintenance color like grey is a good choice.
  It looks freaking awesome when it is shined up like this, but man it is a lot of work!
Bookmarks