Mike Phillips
Active member
- Dec 5, 2022
- 51,004
- 6
1-Step versus 3-Step Process by Hand
This is a quick comparison of the kind of results you can get from using a one-step Cleaner/Wax, (also called an AIO or All-In-One product), as compared to a multi-step process using a dedicated compound, followed by a dedicated polish followed by a dedicated finishing wax.
For this write-up, I needed an older daily driver with a thrashed, swirl-out clear coat finish. While black cars always work the best I found a medium colored 1998 Saturn SW2 with lots of swirls and scratches.
For this comparison I'm going to use Meguiar's ColorX, a strong non-abrasive one-step cleaner/wax for one section and for a second section I'm going to use a 3-Step approach using Ultimate Compound, followed by SwirlX, followed by NXT Tech Wax.
For the one-step section I'll apply the ColorX twice, working the product over the paint firmly using Meguiar's Even Coat Microfiber Applicator pad. In most cases you would let a cleaner/wax dry before removing but because I'm going to apply it twice, the first application will be wiped off immediately and only the second application will be left to dry. In essence, I'm using the first application of the cleaner/wax like I would use a paint cleaner to really clean the paint. Since I'm going to follow this with a second application there's no reason to let the first application dry as the second application will simply remove any protection ingredients deposited in the first application. Since I'll be stopping after the second application, I'll let the second application dry.
For the multiple-step section I'll use Ultimate Compound and apply it aggressively twice, followed by SwirlX applied firmly to start with and then lessening my pressure towards the end of the application of this product. Then I'll follow this with a thin coat of NXT Tech Wax.
After letting both waxes dry sufficiently, we'll wipe the dried reside off and then pull the car out into the sun and snap some after shots.
Before even doing this I can tell you what you're going to see.
The ColorX side will still have a lot of swirls and scratches but the paint will be more clear and as a result you'll be able to see the color of the paint as well as the metallic flakes. It will also be smoother and thus glossier.
The Multi-Step side will look much better, there will be a dramatic reduction in the amount of swirls and scratches and the clarity, depth and shine will be better.
The point of this is that in most cases you'll always get better results when working on a neglected finish by breaking up the polishing process into dedicated steps. That is using a dedicated swirl and scratch remover to first remove the below surface defects. Follow this with a less aggressive product to further refine the results achieved by the first step, and then afterwards locking in the shine with a protective coating of wax or paint sealant.
While the multi-step approach will yield better end-results, the one-step approach will still dramatically improve the appearance of the paint. It's important to note that both approaches are great for car owners who want to do-it-themselves, that is restore the finish on their car's paint.
Some people only want to do one step after the washing and drying their car, especially if their car is a daily driver and that's completely understandable.
For others however, they may be willing to invest more time and energy into their car's finish in an effort to get better results.
So this isn't a write-up about pitting one approach against another approach, it's simply meant to to show what a person can expect from the two different approaches when it comes to restoring a nice finish on a daily driver car, truck or s.u.v.
Lets begin...
First we wiped the car clean and then clayed the paint on the hood. The car was actually washed yesterday by the owner so the dirt you're seeing on the clay is dirt and other air-borne contaminants that were bonded to the paint.
The film or stain you see on the surface of the clay is actually the film or bonded contaminants that were removed during the claying process.

Here's our candidate car, a 1998 Saturn SW2
The owner is a young man and says sometimes he slides across the hood like Bo Duke from the "Dukes of Hazard"

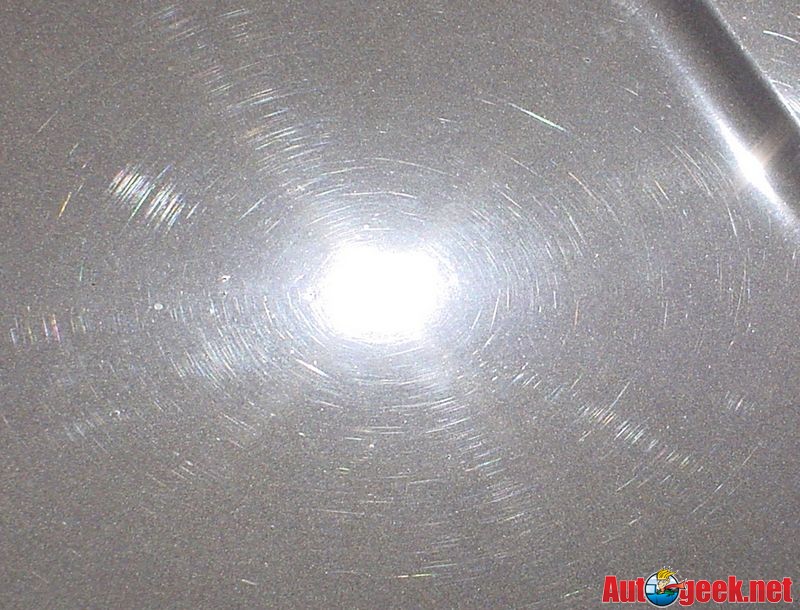
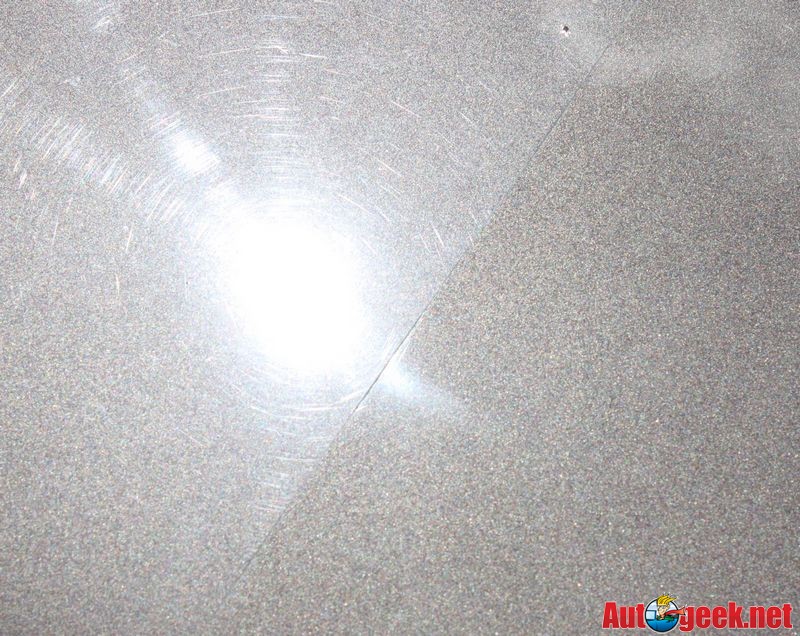
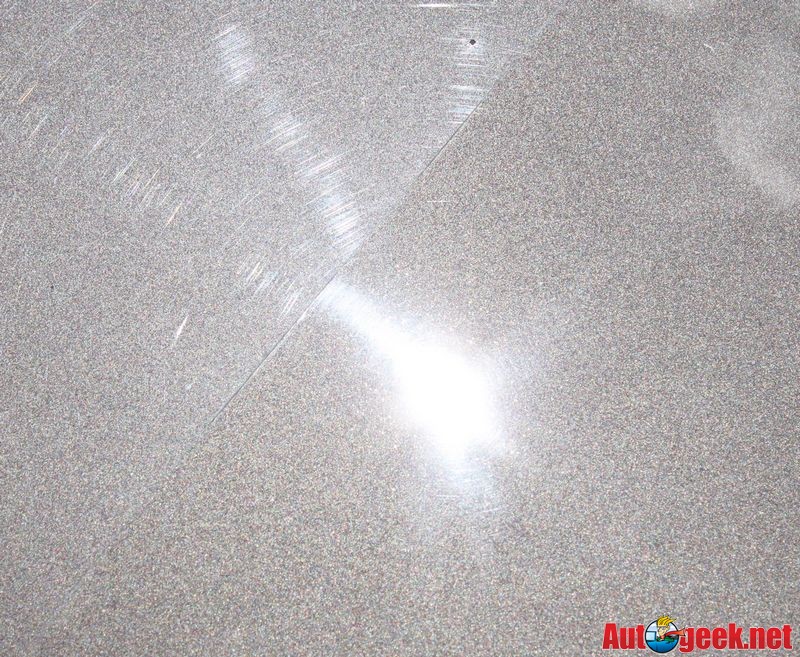
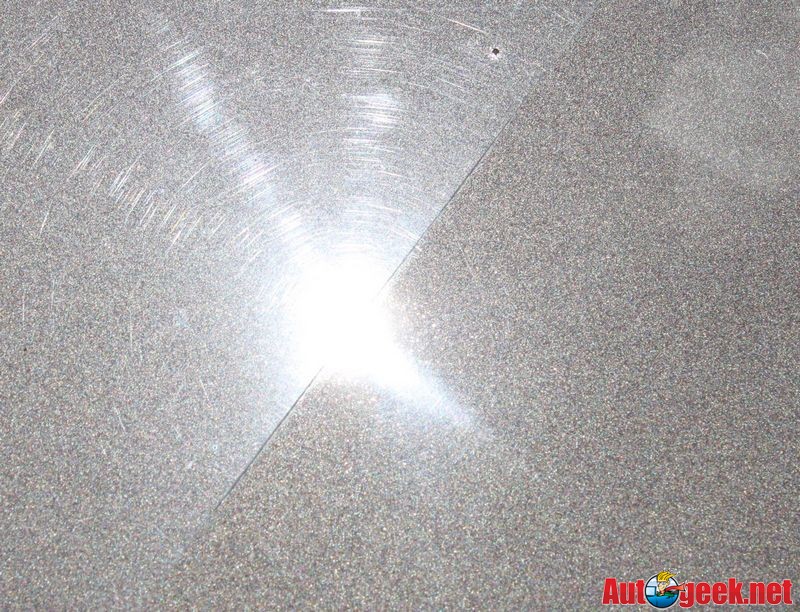
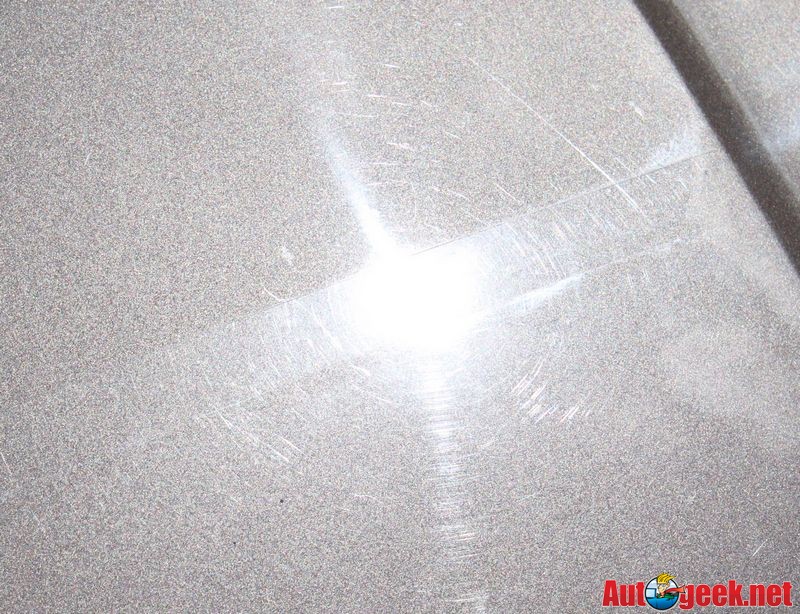
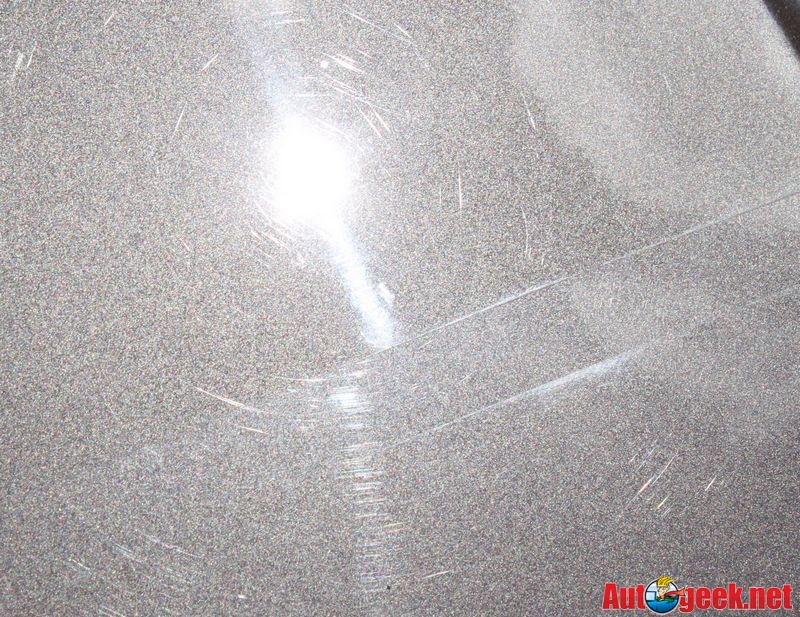
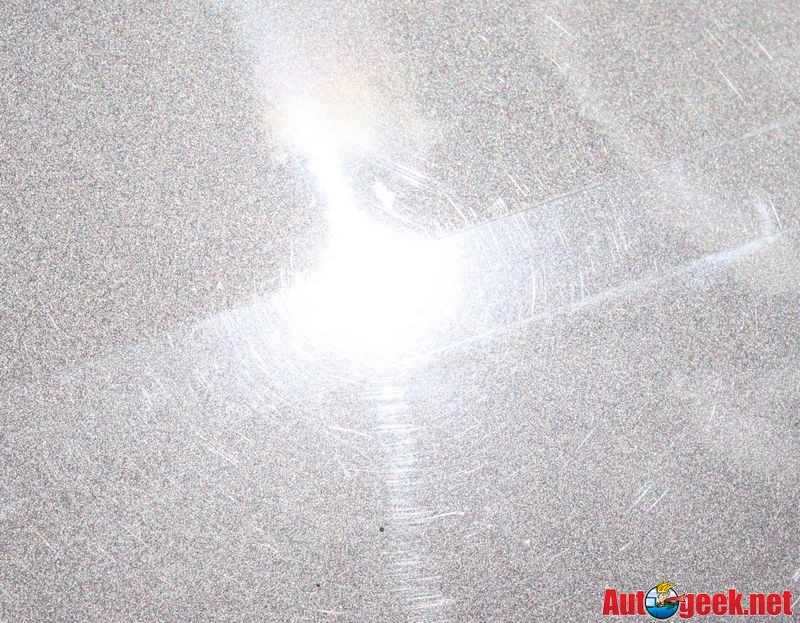
The finish is completely filled with swirls and scratches.

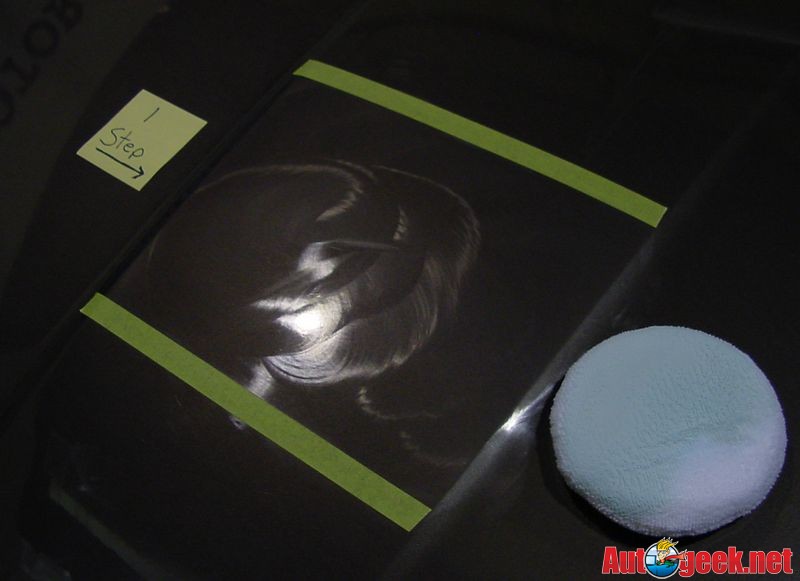
Here's our two sections, both are about a foot squared

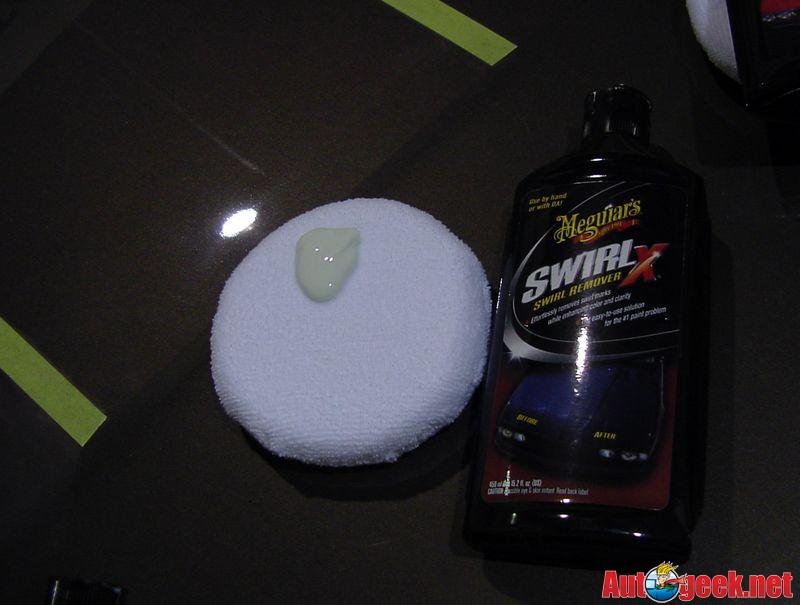
The lower section will get two well-worked applications of ColorX. When working on a neglected surface you want to only work a small section at a time and use your product heavy or wet to have plenty of chemical cleaners on the surface as well as diminishing abrasives to give you some cleaning and abrading power.

After the second application we'll let the coating of wax remain on the surface to dry while we start working on the upper section.
For the upper section we're going to apply Ultimate Compound twice and just like the cleaner/wax step we're going to use the product heavy or wet to insure their's plenty of abrasives and chemical cleaners on the surface working for us to restore the paint.

Now we're applying the SwirlX, look at the reflection of the light next to the applicator pad, you can already see that the Ultimate Compound has removed a majority of the swirls and scratches and restored a clear, smooth surface. The SwirlX will now refine these results to an even higher level.
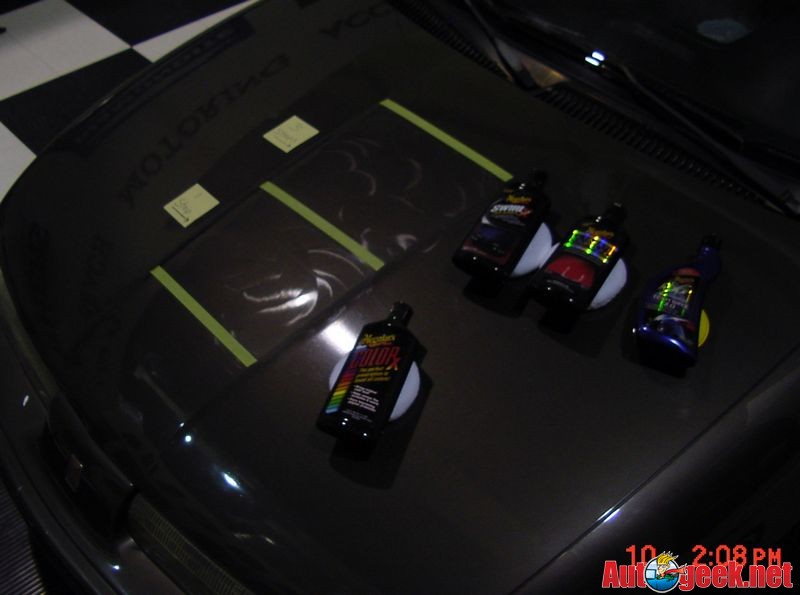
The below photo came out kind of dark but at this point I've finished working both sections and am just waiting for the NXT Tech Wax to dry.
We've removed the wax and pulled the car out into the sun, the swirled side is the before side or section of paint closest to the windshield
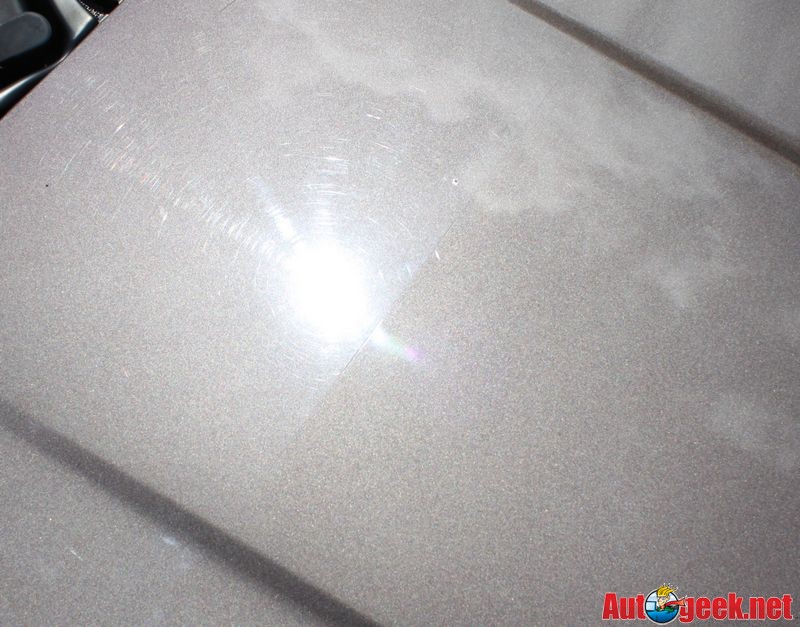
We've moved in such a way to place the sun on the after side, this is the multi-step section. You can see there's a HUGE difference. There are dramatically less swirls and the clear coat is now clear again so you can see the metallic flake under it.
This is the ColorX section. You will still see lots of swirls and scratches but the paint is now clear so you can see the color of the paint and the metallic flake under it. ColorX isn't supposed to remove all the swirls, that's the job of a compound, it's supposed to do a good job however of improving the finish with just one or two well worked applications which it did in our comparison.

And here's our test car, I've moved the Post-It Notes to the side because I shot a video using my iphone and I wanted to capture the swirls in the paint next to the sections we worked without the Post-It Notes in the way.

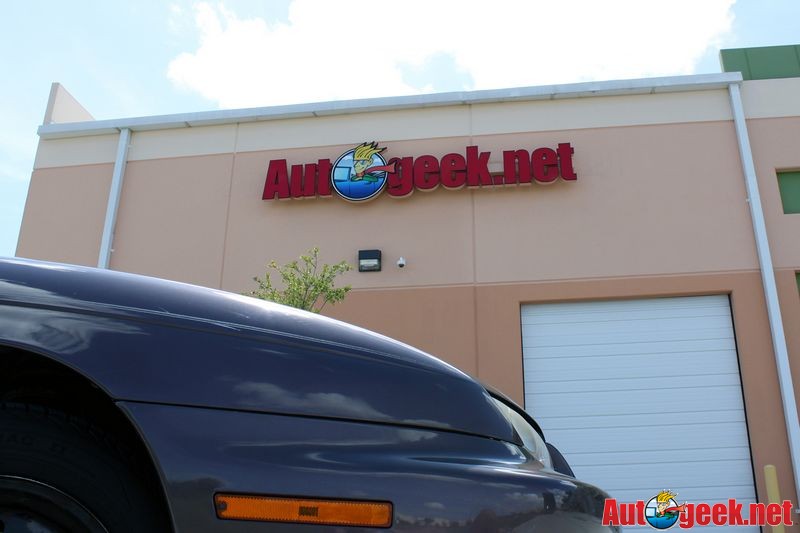
And a parting shot... just another day at Autogeek.net!
This is a quick comparison of the kind of results you can get from using a one-step Cleaner/Wax, (also called an AIO or All-In-One product), as compared to a multi-step process using a dedicated compound, followed by a dedicated polish followed by a dedicated finishing wax.
For this write-up, I needed an older daily driver with a thrashed, swirl-out clear coat finish. While black cars always work the best I found a medium colored 1998 Saturn SW2 with lots of swirls and scratches.
For this comparison I'm going to use Meguiar's ColorX, a strong non-abrasive one-step cleaner/wax for one section and for a second section I'm going to use a 3-Step approach using Ultimate Compound, followed by SwirlX, followed by NXT Tech Wax.
For the one-step section I'll apply the ColorX twice, working the product over the paint firmly using Meguiar's Even Coat Microfiber Applicator pad. In most cases you would let a cleaner/wax dry before removing but because I'm going to apply it twice, the first application will be wiped off immediately and only the second application will be left to dry. In essence, I'm using the first application of the cleaner/wax like I would use a paint cleaner to really clean the paint. Since I'm going to follow this with a second application there's no reason to let the first application dry as the second application will simply remove any protection ingredients deposited in the first application. Since I'll be stopping after the second application, I'll let the second application dry.
For the multiple-step section I'll use Ultimate Compound and apply it aggressively twice, followed by SwirlX applied firmly to start with and then lessening my pressure towards the end of the application of this product. Then I'll follow this with a thin coat of NXT Tech Wax.
After letting both waxes dry sufficiently, we'll wipe the dried reside off and then pull the car out into the sun and snap some after shots.
Before even doing this I can tell you what you're going to see.
The ColorX side will still have a lot of swirls and scratches but the paint will be more clear and as a result you'll be able to see the color of the paint as well as the metallic flakes. It will also be smoother and thus glossier.
The Multi-Step side will look much better, there will be a dramatic reduction in the amount of swirls and scratches and the clarity, depth and shine will be better.
The point of this is that in most cases you'll always get better results when working on a neglected finish by breaking up the polishing process into dedicated steps. That is using a dedicated swirl and scratch remover to first remove the below surface defects. Follow this with a less aggressive product to further refine the results achieved by the first step, and then afterwards locking in the shine with a protective coating of wax or paint sealant.
While the multi-step approach will yield better end-results, the one-step approach will still dramatically improve the appearance of the paint. It's important to note that both approaches are great for car owners who want to do-it-themselves, that is restore the finish on their car's paint.
Some people only want to do one step after the washing and drying their car, especially if their car is a daily driver and that's completely understandable.
For others however, they may be willing to invest more time and energy into their car's finish in an effort to get better results.
So this isn't a write-up about pitting one approach against another approach, it's simply meant to to show what a person can expect from the two different approaches when it comes to restoring a nice finish on a daily driver car, truck or s.u.v.
Lets begin...
First we wiped the car clean and then clayed the paint on the hood. The car was actually washed yesterday by the owner so the dirt you're seeing on the clay is dirt and other air-borne contaminants that were bonded to the paint.
The film or stain you see on the surface of the clay is actually the film or bonded contaminants that were removed during the claying process.
Here's our candidate car, a 1998 Saturn SW2
The owner is a young man and says sometimes he slides across the hood like Bo Duke from the "Dukes of Hazard"
The finish is completely filled with swirls and scratches.
Here's our two sections, both are about a foot squared
The lower section will get two well-worked applications of ColorX. When working on a neglected surface you want to only work a small section at a time and use your product heavy or wet to have plenty of chemical cleaners on the surface as well as diminishing abrasives to give you some cleaning and abrading power.
After the second application we'll let the coating of wax remain on the surface to dry while we start working on the upper section.
For the upper section we're going to apply Ultimate Compound twice and just like the cleaner/wax step we're going to use the product heavy or wet to insure their's plenty of abrasives and chemical cleaners on the surface working for us to restore the paint.
Now we're applying the SwirlX, look at the reflection of the light next to the applicator pad, you can already see that the Ultimate Compound has removed a majority of the swirls and scratches and restored a clear, smooth surface. The SwirlX will now refine these results to an even higher level.
The below photo came out kind of dark but at this point I've finished working both sections and am just waiting for the NXT Tech Wax to dry.
We've removed the wax and pulled the car out into the sun, the swirled side is the before side or section of paint closest to the windshield
We've moved in such a way to place the sun on the after side, this is the multi-step section. You can see there's a HUGE difference. There are dramatically less swirls and the clear coat is now clear again so you can see the metallic flake under it.
This is the ColorX section. You will still see lots of swirls and scratches but the paint is now clear so you can see the color of the paint and the metallic flake under it. ColorX isn't supposed to remove all the swirls, that's the job of a compound, it's supposed to do a good job however of improving the finish with just one or two well worked applications which it did in our comparison.
And here's our test car, I've moved the Post-It Notes to the side because I shot a video using my iphone and I wanted to capture the swirls in the paint next to the sections we worked without the Post-It Notes in the way.
And a parting shot... just another day at Autogeek.net!
")
 rops:
rops:
 )
)