 Thanks: 0
 Likes: 0
 Dislikes: 0
-
How to crop out the fluff and resize your pictures! - Using FREE online software!
How to crop out the fluff and resize your pictures! - Using FREE online software!
If you don't own any fancy graphics software here's a website that will let you upload a photo at a time and crop out the fluff and the resize it to a width you select. You can also download a free version of their software and for a modest price download the full version.
PicResize
Thank you to Troy Armstrong for sharing this resource with our forum...
(Due credit where credit is due)
Cropping out the fluff
Cropping out the fluff means to remove all the portions of a picture that surrounds the main object the picture is about. The focuses your viewers attention to the meat of the picture, not the nothingness surrounding it like grass or pavement, or blue sky...
Resizing a picture
Resizing means to shrink the size of your photo down to a viewable size for most computer monitors will display so that your reader will not have to Horizontal Scroll in order to see all of the picture and actually, anytime a person has to scroll to see the entire picture they can't actually see the entire picture because as you scroll to one side the picture falls off the screen on the other side, therefore a person can never see then entire picture. It's actually good Netiquette to resize your pictures before uploading them and sharing them on forums.
The interface on PicResize.com is pretty self-explanatory but here's a simple tutorial for anyone that wants a little help...
How to crop out the fluff and resize your pictures!
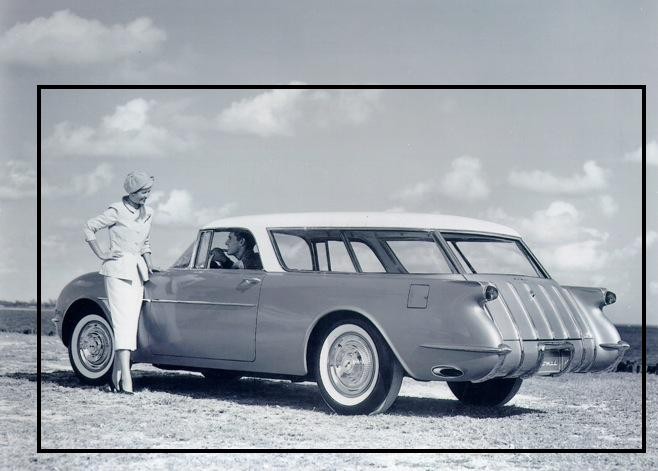
Here is a picture of a 1954 Corvette Nomad Prototype that is 658 pixels wide and 471 pixels tall. I will show you how to crop out the fluff and then resize to 175 pixels wide for use as an Avatar on forums that allow Avatars up to 175 pixels wide.
(Some archaic forums don't increase the default Avatar size from 80 pixels wide by 80 pixels tall, or some other small dimension, which is really lame but that's their issue)

Because an Avatar is small to start with I don't really care to show the sky and the grass, I want to focus in on the car itself, so I'm going to crop out the fluff, which is the surrounding nothingness in the photo that I refer to as fluff.
The black line represents the approximate area I want to crop out...
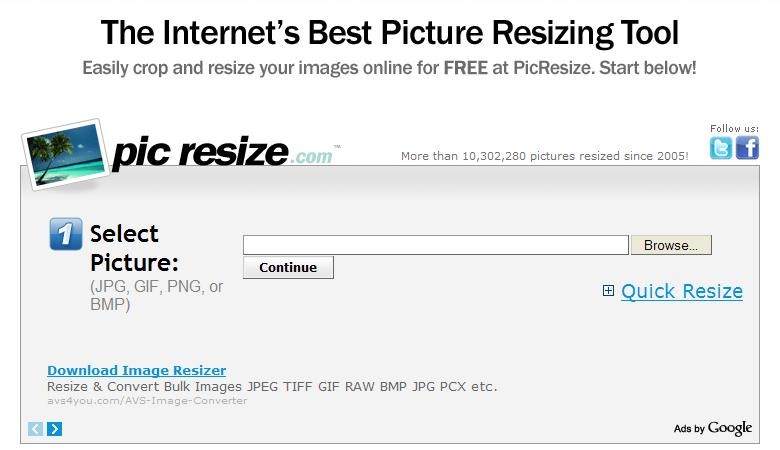
I surf over to Free Online Picture Resizer - Crop and Resize photos, images, or pictures online for FREE! and click on the "Browse" button which will enable me to go to the folder or my desktop, (where ever the photo you want to crop and resize is located) and select it to be uploaded to the PicResize website where I can then work with it using their software through my browser interface.
After the picture uploads you'll see it in the work space like you see below. I've placed a black box around the area I want to crop like I did in the original picture above to give you an idea of how I would crop out the fluff in this particular photo.

To select the area you want to crop, take and click on the picture with your Left Mouse Button one time and release the mouse button. Now move your pointer to the opposite corner of the picture and when you have a red dotted line in the position you want to make the crop, click on your left mouse button again. This will leave a box like you see below using a red dotted line.

Now click on the "Crop Selection" button and the software will crop your photo for you. Or, if you didn't get the red dotted line exactly where you wanted it, click on the "Original" button and it will reload your original picture so you can try again.

Now that you have cropped out the fluff, it's time to resize the photo to the size you want. You have some different option but instead of using the vague option of selecting 75% or 50% or 25% smaller, you can be very precise and specific by selecting the "Custom Size" option and then type the number into the "Width" box for the width you want to make the picture AND also select "Pixels" instead of "Percentage" in the drop down list to the right of where you enter the number for the width.
Leave the Height box along and the software will adjust the photo on it's own so that it won't be distorted. (Very important or your picture will look all Wacky-Doodle)

After you've done the above steps, it's time to tell the software to make your new pictures, scroll down towards the bottom of the page, past the area where you can add "Special Effects", (leave this part alone, it's better in most cases not to mess with your photos), and select "JPG" from the drop down list to save your photo as a .jpg file, (The most common picture file type used on the Internet and on forums), and then click on the "Resize Picture" button.

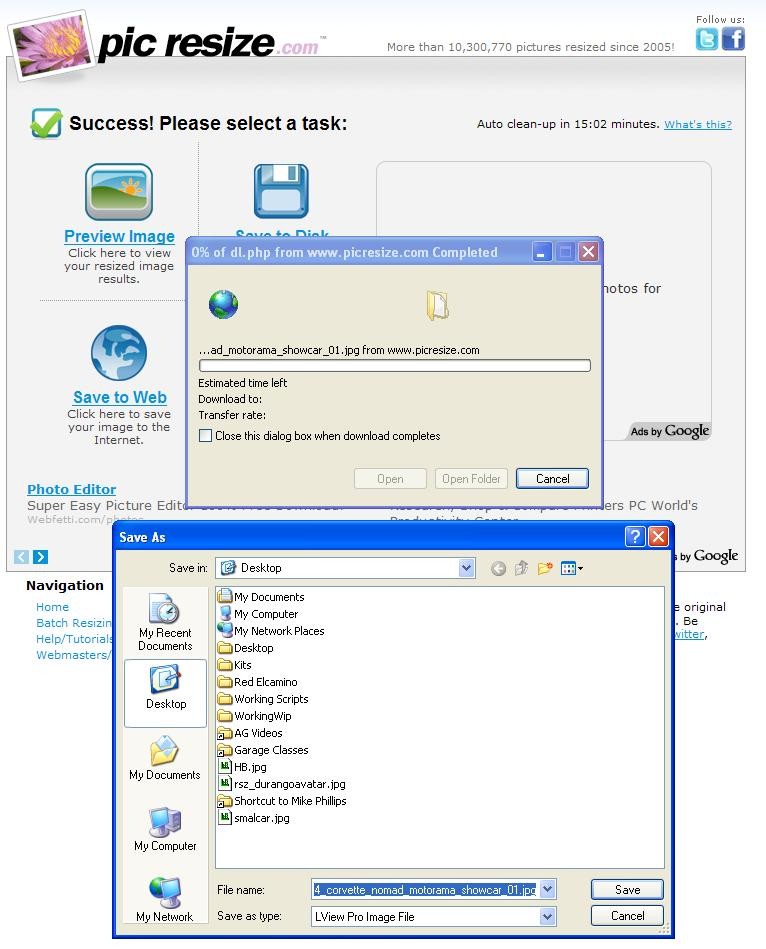
You will now be taken to a new screen where you have 4 basic options, I'll cover just two of these option.
1. Save to Disk
This will download your cropped and resized image to your computer's hard drive and from there you can upload it to the gallery or as your Avatar via the User CP which means User Control Panel on most discussion forms.
2. Save to Web
This will save your picture to your own personal folder on the PicResize.com website which is very nice of them to offer this. You need to give them a real e-mail address and then they will send you the location of your image where you can then share it via the URL Address.

If you select "Save to Disk" a dialog box will appear giving you three options, choose "Save"

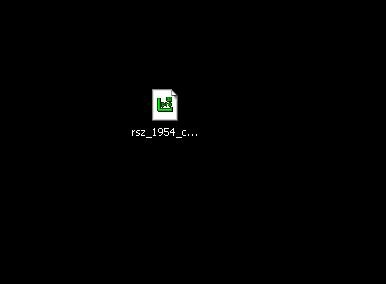
Then choose where you want to save the picture on your computer, in this case I simply saved it to my desktop as I'm going to upload it to the forum gallery and then delete it off my computer.
And here's the picture file as it appears on my desktop...
Here's the original and below it is the cropped and resized version of it that can now be used as an Avatar.

If you choose to "Save to Web" then you will have to give PicResize.com a valid e-mail address because after they save it to a folder on their website they'll need to let you know where you can find it, so give them your e-mail address and then after clicking on the "send" button, they will place the picture into a folder for you and then send you a link to your e-mail so that you can get to your picture.
Now that your picture is "Hosted" on the Internet, in order to use it you need to get it's URL Address, that will look like this,
http://my.picresize.com/vault/BHCPF9XJ0D.jpg
Note the URL address starts with http and ends with .jpg
That is the complete URL Address and with this address you can share your picture on just about any discussion forum that allows pictures. Two learn what to do with the URL Address to make a picture show up in a message on a forum, click the link below

How to insert a picture into a message on a forum
Go to the message where you want to insert your picture.
To insert your image you want to click on the little tiny "Picture Icon" right above the message box where there are text formatting options.
The one that looks like this ----->  <------ <------
It will pull up a dialog window that looks like the image in the picture below.
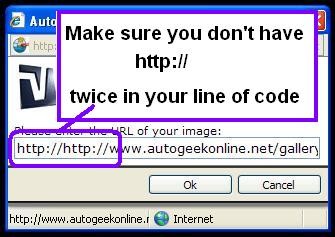
You want to paste the URL Address into the dialog window and then click on OK

Important: If you fidget with your mouse it's real easy to un-highlight the http:// code and then when you paste the URL Address into the dialog box you'll end up with the code http:// twice and it will look like this
Having the http:// twice in the code will cause a Red X to show up instead of your picture.
If you do everything correctly it will look like this,

Hope this helps...

-
Super Member

Re: How to crop out the fluff and resize your pictures! - Using FREE online software!
Thanks Mike very helpful write up
-
Re: How to crop out the fluff and resize your pictures! - Using FREE online software!
For anyone that has free time on their hands and likes working with photos and showcasing their creative talent, here's a link to our new Avatar Farm where you can post pictures of your Avatars for other members to use with their account.
The Avatar Farm
Please keep all Avatars family friendly, you children, parents and grandparents should be able to look at it and not feel uncomfortable.
Anything questionable will be removed.
Similar Threads
-
By Mike Phillips in forum How to articles
Replies: 12
Last Post: 01-30-2022, 02:44 PM
-
By richy in forum Off-Topic
Replies: 11
Last Post: 09-18-2017, 08:31 PM
-
By Crazy Amos in forum How to make money detailing cars
Replies: 19
Last Post: 04-29-2011, 06:39 AM
-
By Frank787 in forum Tips, Techniques and How-to Articles for Interacting on Discussion Forums
Replies: 7
Last Post: 03-09-2010, 07:47 PM
-
By gewb in forum Tips, Techniques and How-to Articles for Interacting on Discussion Forums
Replies: 1
Last Post: 03-09-2010, 02:32 PM
 Members who have read this thread: 0
There are no members to list at the moment.
Posting Permissions
- You may not post new threads
- You may not post replies
- You may not post attachments
- You may not edit your posts
-
Forum Rules
|
| S |
M |
T |
W |
T |
F |
S |
| 31 |
1
|
2
|
3
|
4
|
5
|
6
|
|
7
|
8
|
9
|
10
|
11
|
12
|
13
|
|
14
|
15
|
16
|
17
|
18
|
19
|
20
|
|
21
|
22
|
23
|
24
|
25
|
26
|
27
|
|
28
|
29
|
30
| 1 | 2 | 3 | 4 |
|


 Reply With Quote
Bookmarks