 Thanks: 0
 Likes: 0
 Dislikes: 0
-
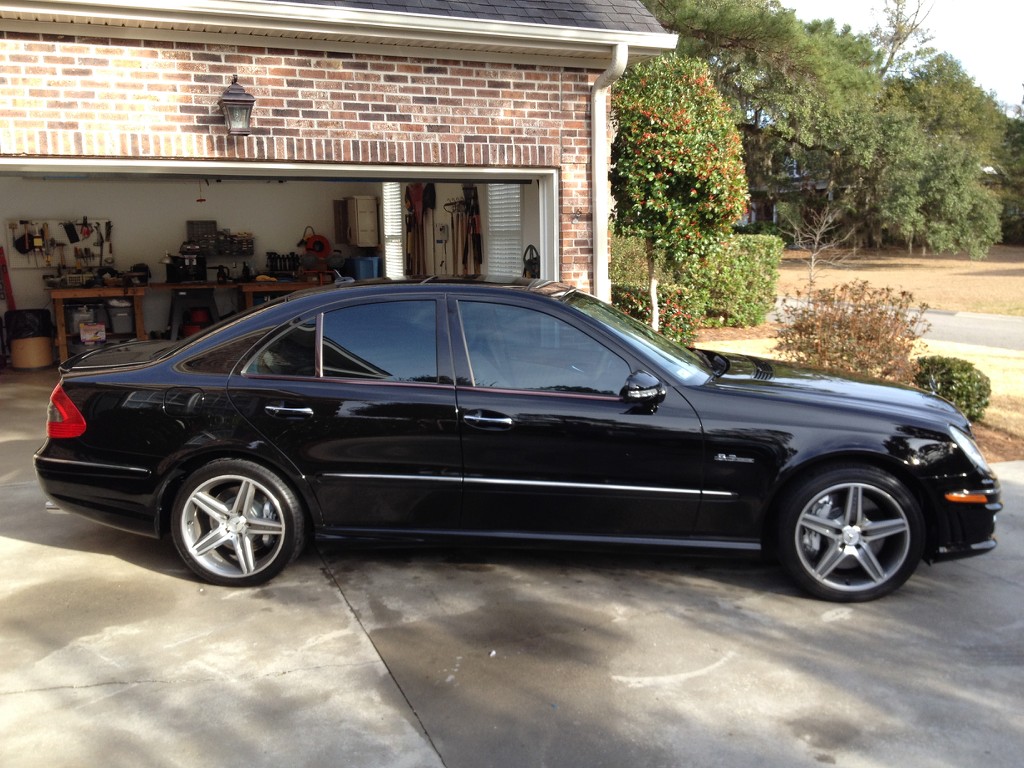
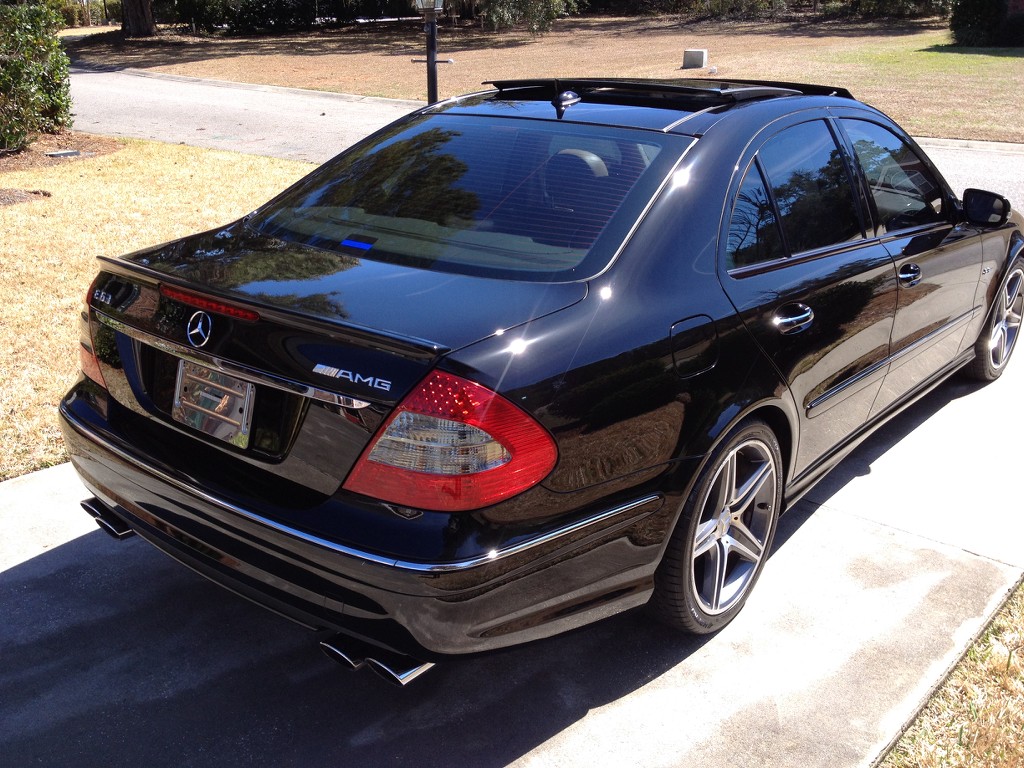
Mercedes Black E63 Correction Long Write Up
Mercedes-Benz E63 AMG 2007 40 hr Full Paint Correction
Inspection:
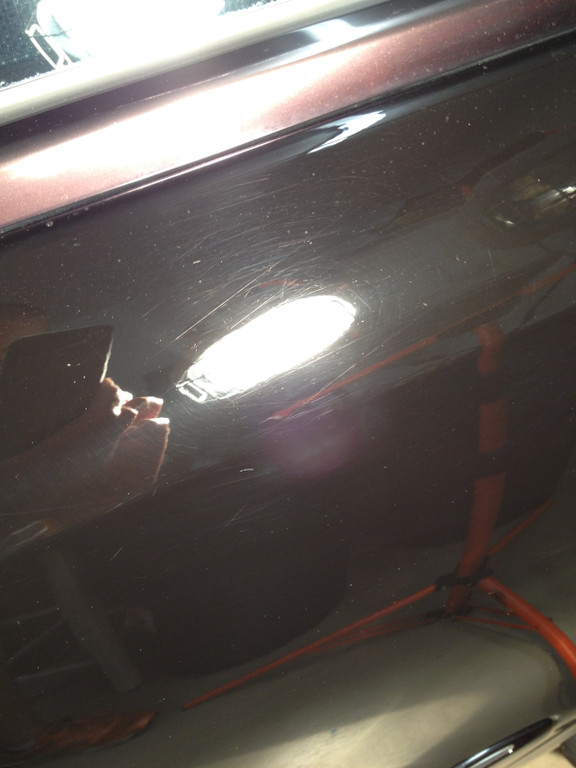
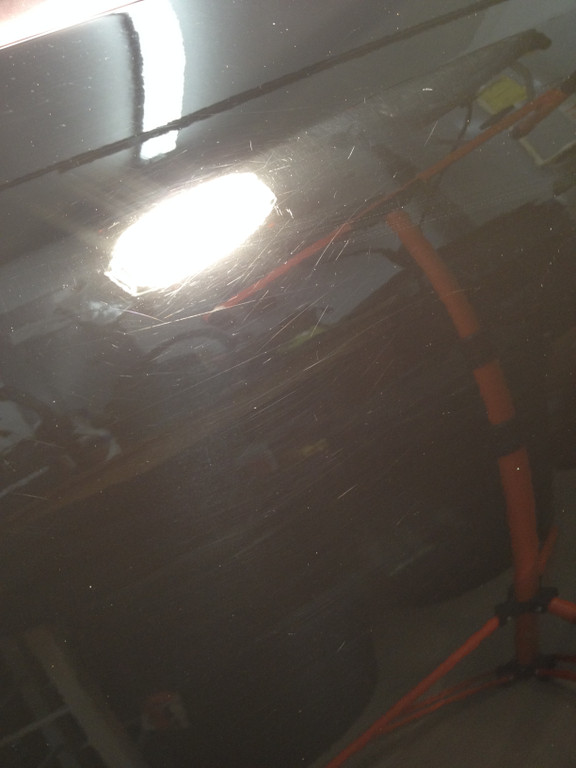
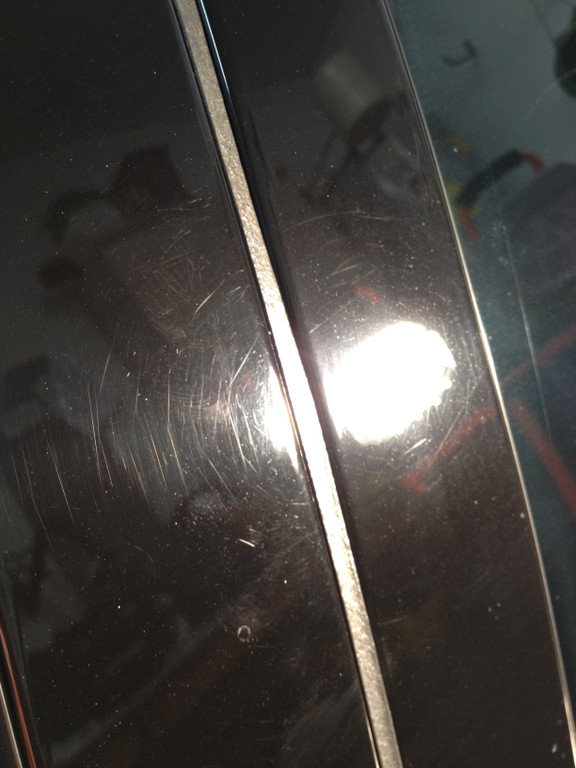
Initial inspection concludes the paint had typical marring and swirls, and normal scratches for a 70k vehicle. I measured paint levels and concluded no exterior paintwork had been done prior to my receiving it. Due to being my vehicle, I wanted flawless so planned a 3-4 step correction. If you find deep marks (RIDs), dents, questionable areas remember to take pictures immediately and document the damage or issue, so that can be discussed with the customer up front, and it protects you from the customer returning asking how you damaged his vehicle.

Test Panels:
I measured paint levels and concluded no exterior paintwork had been done prior and then worked a test area, lower passenger side quarter panel at rear of car. My next step is ALWAYS the top of the trunk. I something goes wrong that is the easiest place and cheapest place to re-spray. Lower rear quarter panel is also the least likely area or a customer to see on a daily basis, so if you messed something up and there was time he would be driving it before the repair, the customer does not keep on seeing the damage and reminding him why he wont ever return to you for work. Keep that in mind when working a high-end vehicle, least visible, smallest panel that is separate from the rest of the car. The bumper areas are NOT a good indication of how a product might react to the work being done. Its is plastic. So choose a nice area and try your main go to product and pad selection, first going least aggressive ie
Polishing light cutting pad w/ SF4000 or your polish of choice with the least cut. If you need to go into it further (which you will of course at least somewhere on the vehicle) start at the next least aggressive, ie
.Polishing pad w/ FG400 or M105 or D300 (speaking of MF pads, you can start with the polishing pad and work your want into most aggressive for those also, same process, different materials).
Most people typically match their pads and products right off the bat. Think about what you are doing to achieve the result you actually want. A light cutting pad can be used with any polish or compound. The combination will decide the level of cut you will receive. So as an example, tangerine Hydro pad with Rupes Diamond polish will cut significantly less than the tangerine Hydro with Rupes Keramilk or Quartz. (D300, FG400). You can also lessen the severity of cutting by using SF4000 with a blue Hydro cut pad rather than the D300, FG400 types. Keep this in mind when you cut or polish, so when you need to only lightly cut or heavily polish you can also vary your pads to products instead of buying specific cutting or polishing products specific to pads. I dont think most people think this way, and you can achieve great results without taking off half the clear coat (CC) and leaving some for the next person down the road.
Products vs. machines:
I typically use a Flex 3401, GG 3, now a Rupes 3 and only when absolutely needed a Dewalt rotary. (might grab a pe-14 sometime) Mike Philips has repeatedly gone over combinations with these machines and the threads written about them constantly people try to use different combinations than what is suggested and issues arise. IT is highly recommended when using any Rupes DAs to utilize Rupes product line. They are specifically manufactured to work with and produce the exceptional results. Yes, you can use other pads and polishes with them, however unless you have these items lying around and you want to test them, purchase the Rupes items only for it. You will have less aggravation, and spend less money in the future. Flex 3401 DA I have not tried at this point the Lake Country (LC) Hybrid pads which were made specifically for the 3401. Now that I know this, I will be using them from now on. I have spent a good amount of money trying CCS, Hydro pads and finding what worked for me and Hydro worked the best, but cannot wait to use the Hybrids. Meguires Micro Fiber (MF) discs worked great also, just seems on some paints the polishing MF Disc leaves a tad bit of micro marring so I like to finish with a foam pad. Think also about the quantity of pads you will use. I am at fault also, but most people use no where near enough pads on a vehicle. Key to properly making the most of your work is to change out pads very regularly. Use a pad for each 1.5 panels. This will achieve the results you want, without making extra work. Clean pads = proper results.
This is a list of products used. Whole vehicle took 45 hours for a 3-4-step paint correction. Vehicle came out better than new, and there was very little RIDs on the car when finished. Due to the hardness of Merc paint, I had to switch up on different panels, pads and compounds, to get the finish right. Some panels just needed two separate passes to get the initial correction to the level I was happy with. Then the Polishing was done in two stages, just to get that jeweled look as much as possible.
Products:
- Meguires D300 @Autogeek.net
- Menzerna FG400 for a few spots @Autogeek.net
- Menzerna SF4000 @Autogeek.net
- Menzerna SF4500 @Autogeek.net
- Rupes Quarz @Autogeek.net
- Rupes Diamond @Autogeek.net
- 22ple Glass Coating PRO Level @DetailedImage
- 22ple Glass coating for Wheels and Metal @DetailedImage
- Optimum Opti-Seal Synthetic Sealant (For Trim, wheel well plastic)
- Pads:
- LC Hydro Tech Tangerine 5.5in @Autogeek.net
- LC Hydro Tech Blue 5.5in @Autogeek.net
- LC Hydro Tech assortment 3 @Autogeek.net
- Meguires MF 5.5 in and 3 cut and polish pads @Autogeek.net
Soaps and Interior Products:
Chemical Guys Citrus Car Soap @Autogeek.net
Chemical Guys Honeydew @Autogeek.net
AMMO Plum @ammonyc.com
AMMO Brute Wheel Soap @ammonyc.com
AMMO Lather @ammonyc.com
Blackfire Clay Bar @Autogeek.net
Chemical Guys Leather Conditioner @Autogeek.net
IPA 12%
Tools:
- Flex 3401 DA @Autogeek.net
- Griots Garage 3 DA polisher @Autogeek.net
- Wool Wash Mitt @Autogeek.net
- Microfiber towels from @Autogeek.net
- Metro Master Blaster @Autogeek.net
- Halogen Spotlights for correction light (I turn off all lights and use this light when doing correction work) (switching over to 55w LEDS)
- McCullough Steam Cleaner
The wash:
I started with the wheels first. (Actually removed all 4 for this process and ease of glassing the barrels of them also) I used AMMO Plum iron deposit remover, let sit for 3-4 min and then used a Daytona Speed brush to get into the interior of the rims. Then Hand washed with AMMO Wheel Soap the rest of the tires, rims, and wheel wells and suspension. I then rinsed off the wheels and wells, then rinsed off the whole vehicle to loosen any large dirt particles. I then used the two-bucket method with Chemical Guys Citrus Soap and a Wool mitt and started on the roof. In between each panel I rinsed and re-soaked the wool mitt to lessen the chances of contaminating the next panel with particles. Then rinsed vehicle.
The clay bar:
After initial wash I used the Blackfire Clay bar before drying using CG Honeydew Car Soap as lubricant. I used a small piece separately for each rim. Then rewashed vehicle. I will now start using the NanoSkin light wash mitt from no on, to lessen marring and to make everything easier and less time consuming.
Drying:
I then dried the vehicle using the Master Blaster to eliminate any chance of marring the finish any more than it was already. I do this no matter what anyway, takes a lot longer, but in the end there is no chance of marring the finish and all the water is out of the cracks and crevices.
Compounding:
Test panels showed the Flex 3401 DA w/ LC Hydro Tech Cyan pads with the D300 worked great. Also the Megs MF cutting discs worked great too. So I had two choices to work the car with. Several areas I had to switch to the Meg cutting disc with the Menzerna FG400 for some heavier marks and in some non level areas in grooves along the hood. I also used the FG400 quite a bit with the GG3 and cyan foam pads due to the lower power, (hence why I switched to the RUPES 3)
After each section was finished, the Brinkman was used to inspect for any heavy swirls or marring that the polishing steps would not remove. Most panels were pretty perfect with only very small and minor swirls in a few places. The Meg D300 finishes really well, and was again thoroughly pleased with it.
Polishing:
All the fine polishes had long working times and removed easily when finished with the section. Typically worked a 3 by 3 section to maximize work area.
Next was a whole car polishing using the Menzerna SF4000 Polish with a Tangerine Hydro Tech Pad using the Flex on a setting of 4 for pass 2-3 and 3 for pass 4-7. The GG 3 was a orange pad on setting 6 for small and tight areas.
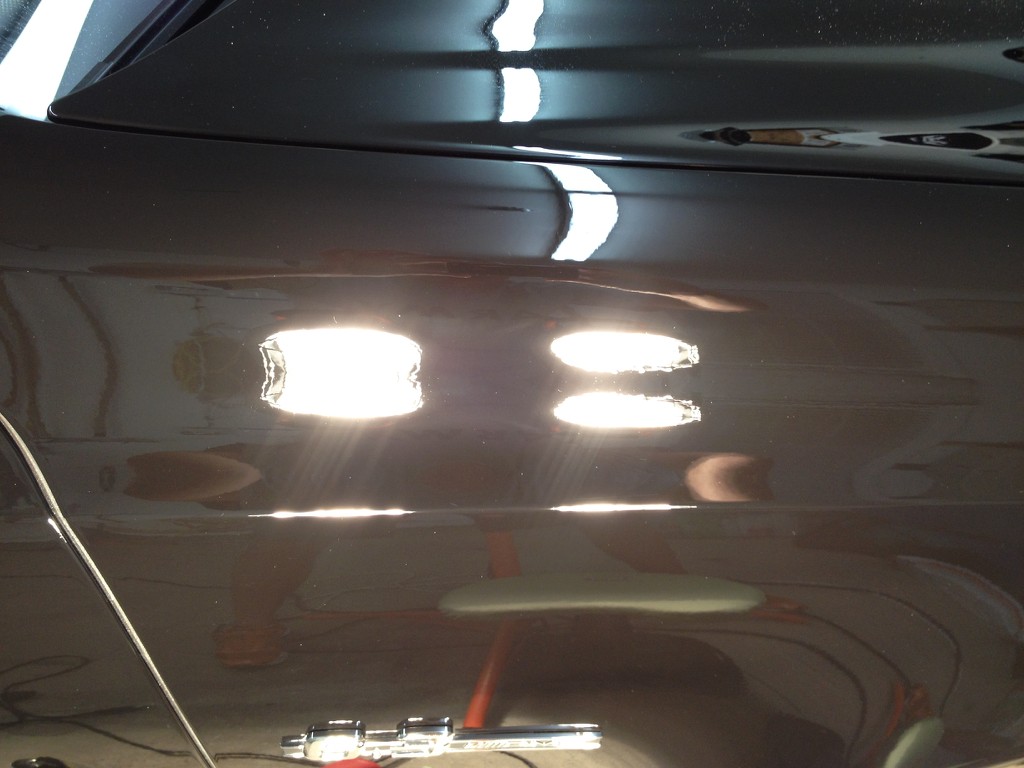
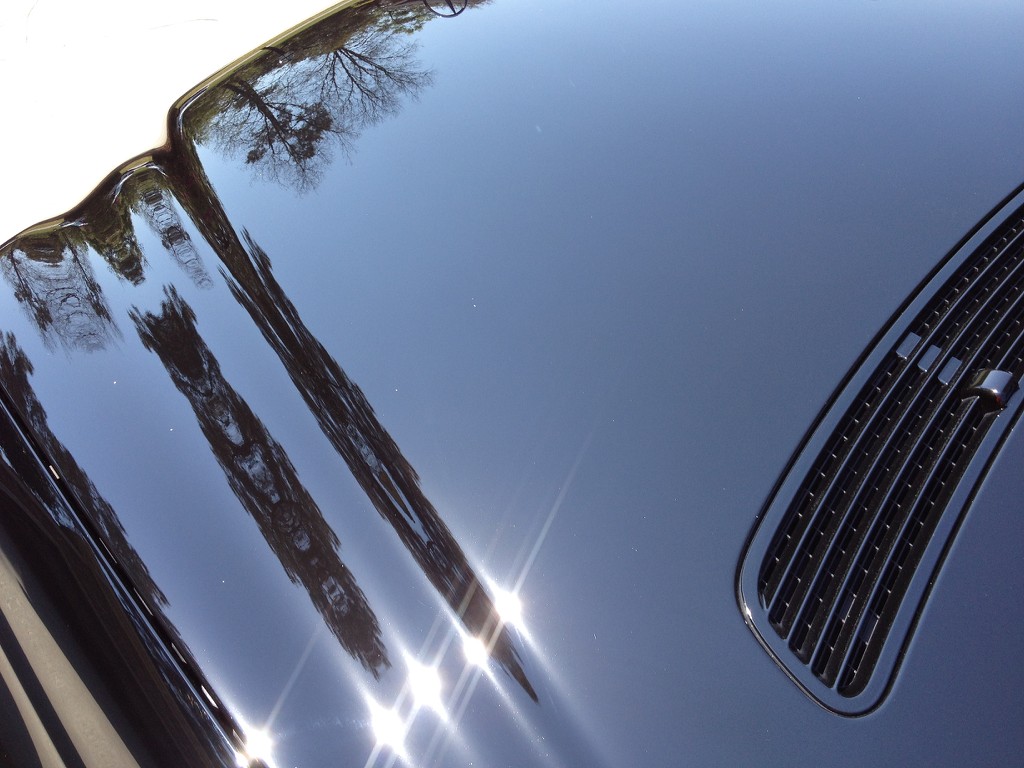
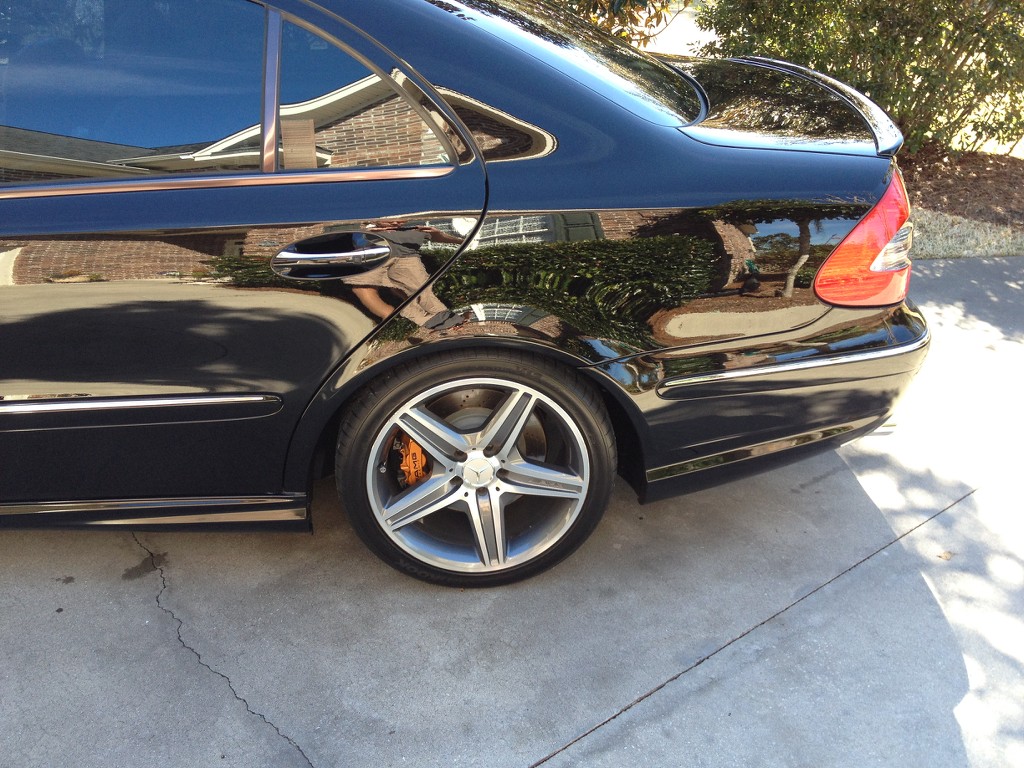
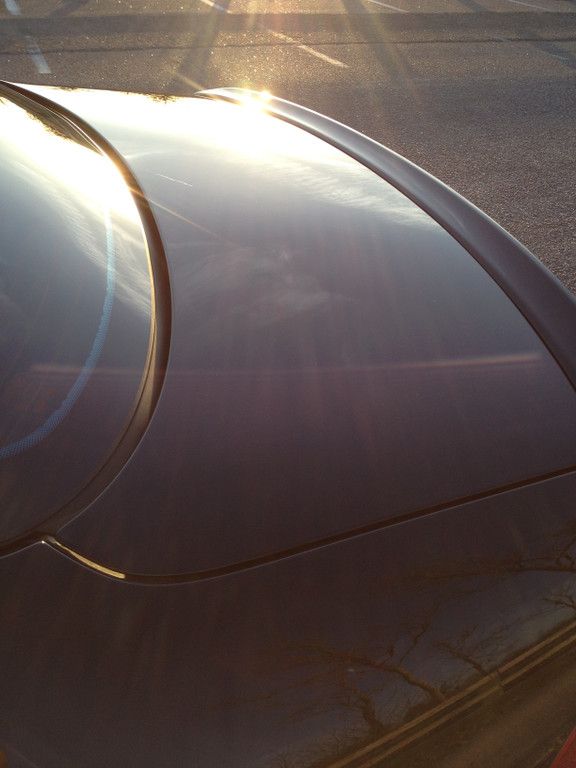
Next was the Rupes Diamond super fine polish, (I only did this step due to the time I had on my hands, and the desire to make it absolutely perfect) using a Gold Jeweling LC CCS Pad, on Flex setting of 2-3 with 5 lbs. pressure for pass 1-2 to diminish the abrasives quickly so passes 3-8 were Jeweling the CC. GG 3 was used on 4-5 with no pressure and used a no cut Red pad. Remember this is the step that constitutes the vast majority of your gloss levels. Spend time on this step and you will be pleased.
Checking the Work:
All Panels were inspected for any swirls or marks, and each one found, a piece of tape was used to mark it. 4 spots were found and re-touched up using the tangerine then Gold pads and appropriate polish. Then another inspection was done, and I concluded all possible scratches were removed. Typical Rock Chips in the front Valance, bumper, hood (Bonnet for the UKers), and right behind the front wheels on the lower rocker panels, were still there. Other than those spots the paint came out absolutely perfect.
The Coating:
I did a thorough wash using CG Citrus Soap and then a IPA 30/70 wipe down. Again the paint was inspected to make sure there were no scratches, RIDs, or marring that could be removed.
Due to using the Modesta line of coating also, I has a bottle of primer that I looked at the chemical composition and it was so similar to the 22ple that I thought I would try to use it the same but with the 22ple glass. I primed the vehicle, then waited the recommended 3 hours before the next step. I then coated the paint using 22ple pro glass coating. The coating goes on smooth (used a cut up foam red pad for application), and used a cross hatch pattern to reduce any high spots. Waited 3 min and started to remove with one MF towel, and then polished to the high shine with a second MF towel. This coating increases its gloss levels over time while it is curing. I was able to allow the vehicle to sit in the garage for 3 days. (total cure is supposed to be 5 days, however after 24hrs you can drive it without wet weather, give it at least 3 days before the wet weather). I also glassed under the hood, trunk jambs, and all doorjambs to make those areas easier to clean in the future.
The wax:
I waited one week then I decided to top the coating with a Polish Angel product. The properties within the PA carnauba similarly matched to the 22ple so thought I would try it for some added gloss. PA carnaubas are typically a paste liquid that applies smooth (GG 3 white pad setting 2) and removes just as easy. I thought I noticed slight gloss level increase, however probably just me wanting it there. The surface feel did not change.
Windows:
Each window was Razor Bladed to remove any contamination. Then all surfaces were coated with GTechniq and buffed clear. (22ple just introduced a surface coating that will be tried next. Probably another similar version to GTechniq like most the others.
Leather:
All Leather and door panels were Steam cleaned then conditioned with CG Leather conditioner. 24hrs later a second conditioning was done. Leatherique process was not needed due to the leather being in great condition just needing some conditioning.


Interior:
Only several spots on the carpets needed cleaning, so I used the AMMO Lather and a brush to blot out the needed areas, then re-vacuumed the vehicle and put stripes with the brush into the carpet. All dash surfaces and center console areas were wiped down using AMMO Lather sprayed on a mf towel. ALL wood pieces were treated to a Menzerna SF4500 polish with a Microfiber pad, and then buffed to an incredible shine. (Most treated wood interiors have a CC the same as the outside paint, so can be treated the same) Then took the 22ple trim glass coating and applied it to all CC wood trim.
Black Trim:
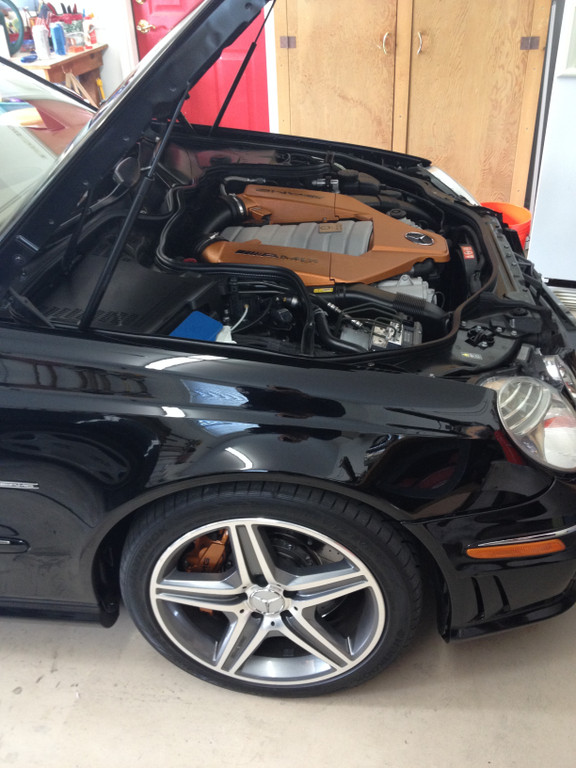
The Optimum Opti-Seal sealant was applied to all exterior Black pieces. (Wiper arms, plastic wiper tray, ALL window seals, the Door Jambs and black hinge and wiring pieces, engine bay area, etc.
) I have found the spray sealant is a perfect sealant to use for the trim on high-end details. The trim pieces stay black for 6-8 months and then just need a touch up. Same with wheel wells. No need for APC use, just soap and water and a brush, if that. Everything stays a nice deep black without being oily, or attracting dust.
Wheels:
Typically I do not remove the wheels to clean them or the wheel wells. I move the front around to get the wells, but brush out the inside of the rims. (Do not want the risk of a lug breaking, or a scratch on the rim from a lug, or ultimately a rim loosening up, when its a Bentley, Porsche, BMW, Merc, or other exotic) too much risk.
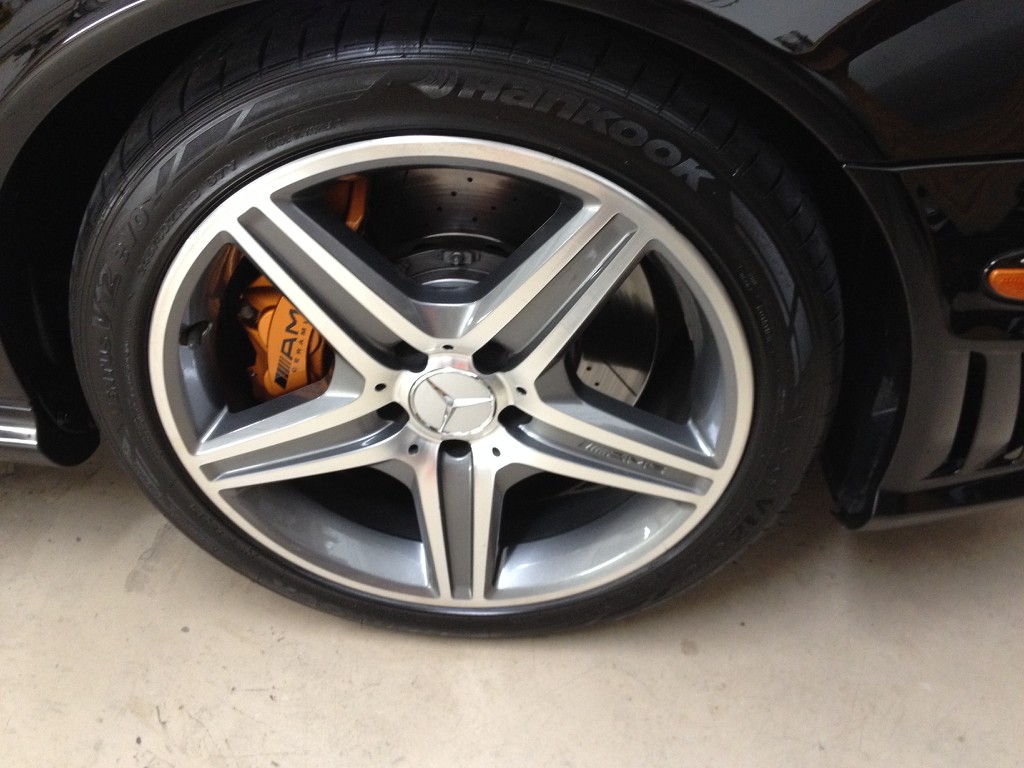
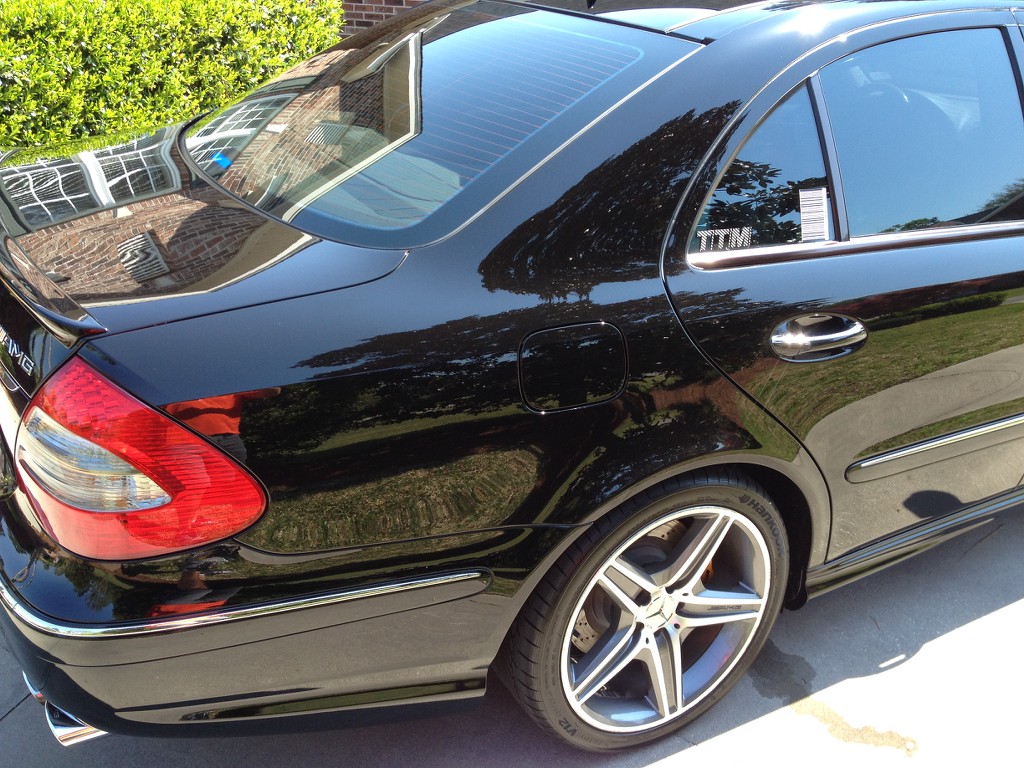
Each rim was coated with 22ple wheel glass coating. This includes the barrel of the rim also. Makes it so easy to clean off brake dust, and all you have to use is soap and water from now one. No more APC use for me. Also keeps the wheels looking cleaner for longer and increases the gloss. I did polish up a few areas with the GG 3 and SF4000 before rewashing glassing.
Finished:
Vehicle was finished at this time. I nit picked the whole car with a thorough inspection. At the time I normally walk the owner through a wash and drying process, so he can minimize the micro marring during future washes. Several customers have complained at this point, that in the past, after a detail was done the car would be slick and perfect. But after a wash they cannot feel the slickness as much and could see scratches. I explained that more than likely the Fillers used in a lot of glazes and lower level products had been left to fill the micro scratches. A IPA wipe down eliminates the fillers, which wasnt done in his previous dealings. Also I would wash it with them so he can see that after a wash and driving the vehicle would still look just as nice and perfect as the condition it arrived in. I set them up with a pdf file for appropriate products to maintain the finish and for washing and drying the vehicle. Rule of thumb 30% of scratches and micro marring come from the washing of a vehicle. 70% of the scratches and micro marring come from the drying of a vehicle. I always try to use a Master Blaster to dry with to eliminate that percentage and try to talk customers into purchasing one. However when they dont want to do that, I stress that nothing but a MF drying towel purchased from a high quality store such as Autogeek, will help prevent those marks. I also suggest using AMMO Hydrate, due to the lubricity that it creates with the mf towels. Works well.

I hope this write up helps some people, and any skeptics or suggestion are very welcomed. I try for perfection, but still years in I have a lot to learn and try to do so everyday. This is not a Job for me, this is just a perfection hobby that I do on mostly Higher end vehicles. I thought that working in some suggestions and processes might help newer detailers and explain what and why various processes take place.
-
Super Member

Re: Mercedes Black E63 Correction Long Write Up
The only thing I would suggest is that you tell the customer to buy a beater ... this car is too awesome looking to drive now.
-
Super Member

Excellent work on that Benz's paintwork
-
Re: Mercedes Black E63 Correction Long Write Up
 Originally Posted by Don M

The only thing I would suggest is that you tell the customer to buy a beater ... this car is too awesome looking to drive now.
That customer is me, thats my or was my personal car. Now its this which the other write up "Tale of Two Maserati's" was partly about. My beater  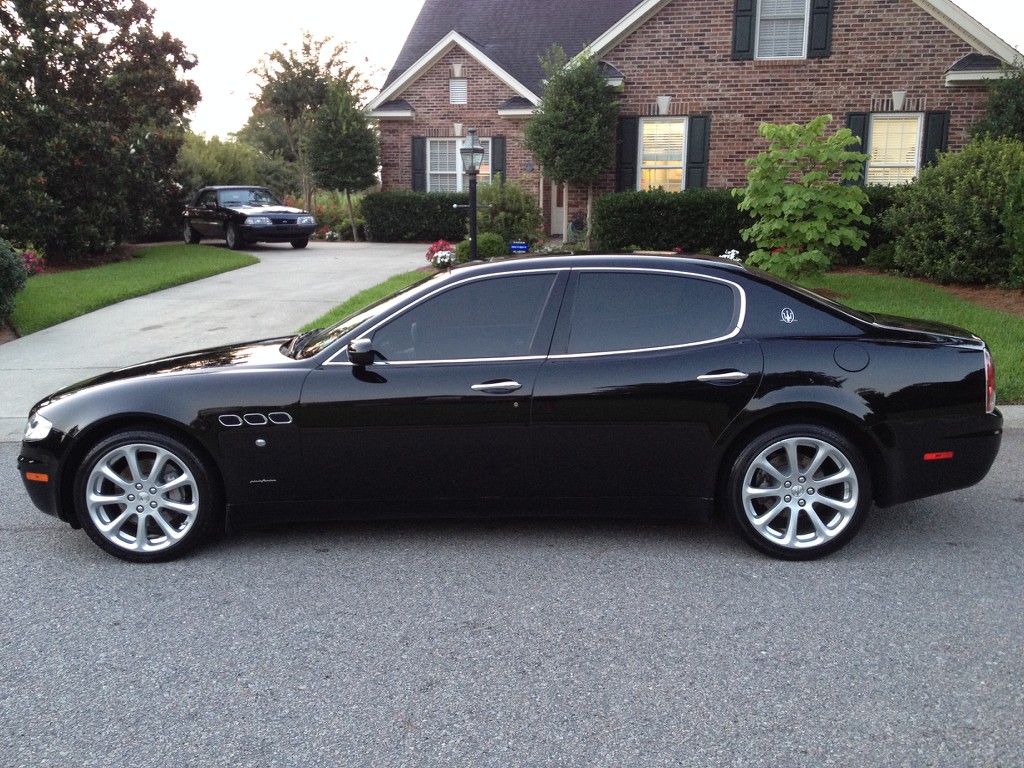
-
Super Member

Re: Mercedes Black E63 Correction Long Write Up
You have got some great looking cars
-
Re: Mercedes Black E63 Correction Long Write Up
-
Re: Mercedes Black E63 Correction Long Write Up
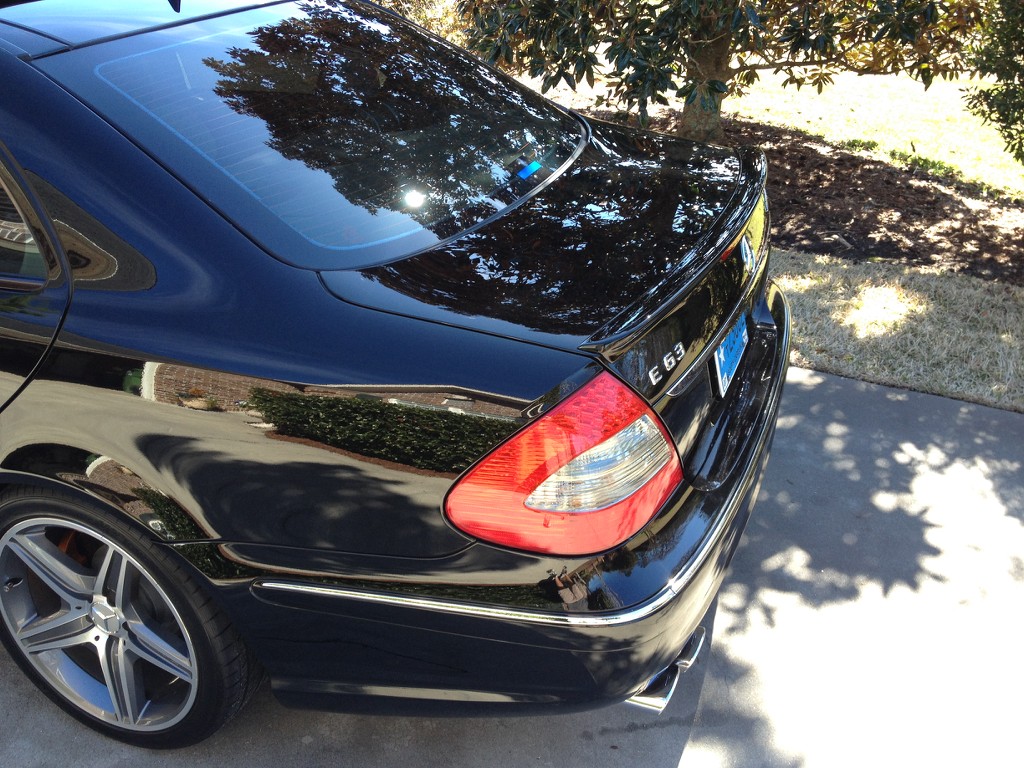
Great job, the reflection in the rear drivers side quarter panel is crazy.
-
Regular Member

Re: Mercedes Black E63 Correction Long Write Up
As a MB lover myself (owner of an e550) I have to ask why the trade for the Maserati? Just curious is all.
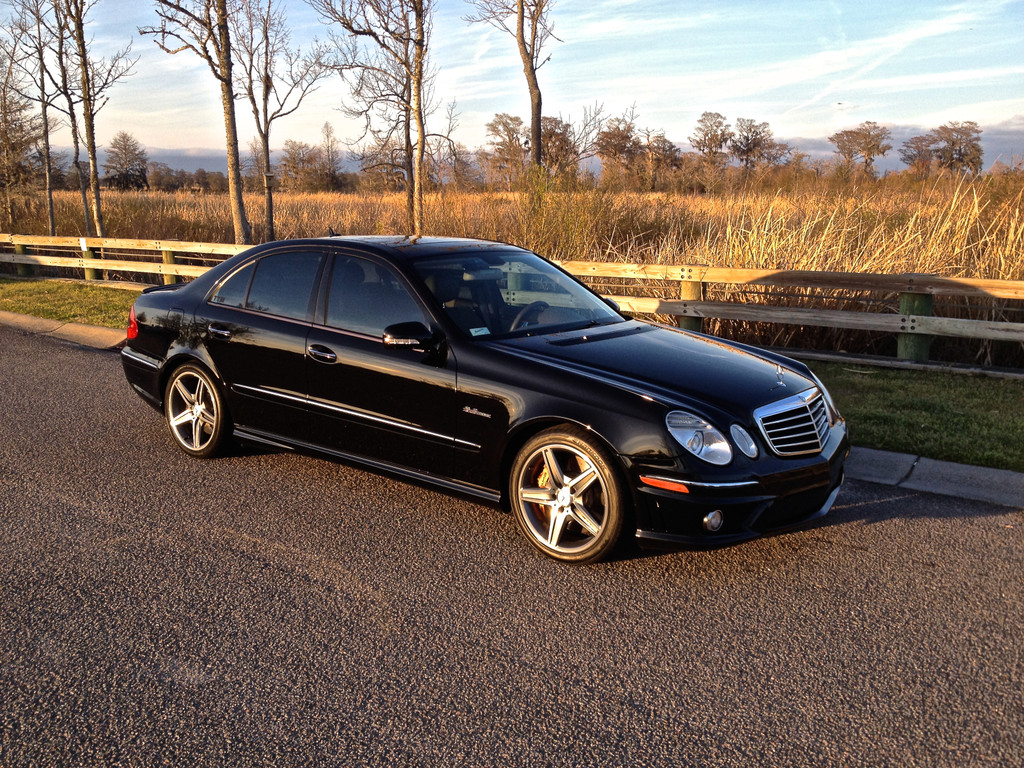
The e63 looked amazing!
-
Re: Mercedes Black E63 Correction Long Write Up
Originally Posted by rodneypierce
As a MB lover myself (owner of an e550) I have to ask why the trade for the Maserati? Just curious is all.
The e63 looked amazing!
Wanted something different, Maser has 30k miles on it, but within 2 week should be sold. The 63 was a beast for sure. Maser was bought to flip, but next on the list is a s55 AMG Merc for my daily driver, black of course, cannot wait to get that into the shape the 63 was in. Should be a lot of fun, I rather enjoy it.
Then I will start the process to search for a Aston Martin V8 Vantage 07-08 or a DB9 06-07. I want honestly to buy a car to keep for many many years and not want to constantly upgrade. I think the AM will do that. Always wanted one and now that prices have become affordable and they are reliable now, I think I will pull the trigger for one. But the searches for them are long. Each one, pending how someone took care of it makes a difference. Service records on a lot of them are not complete, and many get tracked. Looking for a Black w/ Red calipers, with Black interior w/white sticking 6-speed of course. Second choice would be a Mettalic Blue w/ red calipers, with Saddle interior w/ white, or tan stitching. When you specifically want something like that, it takes a long time to find just one of them, and then hope the PPI comes out great. Been planning on this for a long time. I will definitely do a write up on the s55 amg and most definitely on the Aston.
-
Re: Mercedes Black E63 Correction Long Write Up
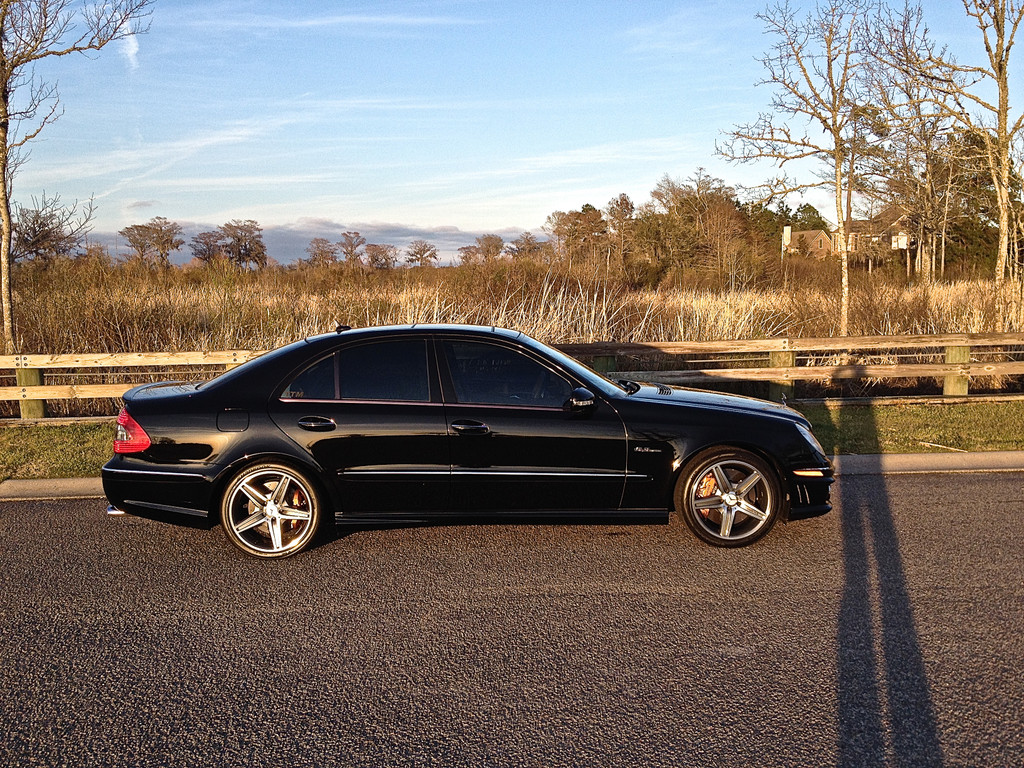
Incredible work on that black German beast! That paint looks dripping wet! Nicely done. Thanks for sharing.
As for the Hybrid pads, the Orange is the most aggressive foam pad LC manufacturers. More so than the yellow CCS pad. But if you really need to cut defects in a hurry, the Hybrid wool pad will get you there. Awaiting your thoughts on the Hybrids when you get them.
That's the only way to buy 'em. Black
Similar Threads
-
By Velocitybts in forum Show N' Shine
Replies: 9
Last Post: 01-25-2015, 09:14 AM
-
By Velocitybts in forum Show N' Shine
Replies: 8
Last Post: 12-26-2014, 05:44 PM
-
By Velocitybts in forum Show N' Shine
Replies: 25
Last Post: 12-03-2013, 09:36 PM
-
By Gurge in forum Show N' Shine
Replies: 18
Last Post: 11-23-2013, 09:57 AM
-
By Gurge in forum Show N' Shine
Replies: 19
Last Post: 03-04-2013, 09:33 AM
 Members who have read this thread: 0
There are no members to list at the moment.
Posting Permissions
- You may not post new threads
- You may not post replies
- You may not post attachments
- You may not edit your posts
-
Forum Rules
|
| S |
M |
T |
W |
T |
F |
S |
| 31 |
1
|
2
|
3
|
4
|
5
|
6
|
|
7
|
8
|
9
|
10
|
11
|
12
|
13
|
|
14
|
15
|
16
|
17
|
18
|
19
|
20
|
|
21
|
22
|
23
|
24
|
25
|
26
|
27
|
|
28
|
29
|
30
| 1 | 2 | 3 | 4 |
|


 Reply With Quote

Bookmarks