 Dislikes: 0
-
Super Member

Re: DFB's Garage
When the detailing bug follows through to your completely un-related day job.

I work in a retail garden center, Winter is always a dirty time dealing with bare-rooted trees, so I wear an apron to keep clean(ish) and hold tools close to hand. Last winter I ripped my old one on the corner of a pallet, so I needed a new one. I see no reason why I can't cross pollinate (notice the horticultural reference there) nursery work with detailing. Perhaps I will pick up a few detailing jobs by wearing in front of customers?
-
Post Thanks / Like - 0 Thanks, 3 Likes, 0 Dislikes
-
Super Member
Re: DFB's Garage
Today, round two in an attempt to take control of the situation. I have been very lucky that no damage has been left or any sign of nest. I think I must have caught it before it got out of hand.

The entire engine bay was foamed in Carpro Descale. The reason here for this soap is that in order to neutralize the odor, you need an acid to counteract the alkalinity left by the mice. I left this to dwell for about 15 minutes and rinsed.
(At this point, I want to say that I do not really like having to use this amount of soap and water in an engine bay, it just feels wrong. I don't have a choice though.)
I then re-foamed and started to agitate as much as I could using brushes and a microfiber towel.


After a VERY thorough rinse from above and below, I dried the engine bay using the Big Boi and then sprayed as much as I could with an enzyme odor neutralizer.
Because I got the bumper and a few adjacent panels wet, I went through and did a water-less wipe down using N-914.
At this stage I am just going to let it be for now and re-access again next week. Last week was a panic, I perhaps rushed my responses out of fear. This week, I took my time and was more targeted and the offenders have been either trapped, repelled or poisoned. I am doing all I can to deal with this, however this is an issue I have never had to contend with before. I am thankful for those who reached out offering advice and wisdom, your words calmed me down and gave me confidence............forums are awesome!
I then moved on to a paying job, the Wildtrack.
This was my first attempt at using Brake Buster in a foam cannon. My use of Brake Buster thus far has been at full strength, as such you have a very powerful wheel and tire cleaner. In the bottle today I mixed it at about 50/50 with water.
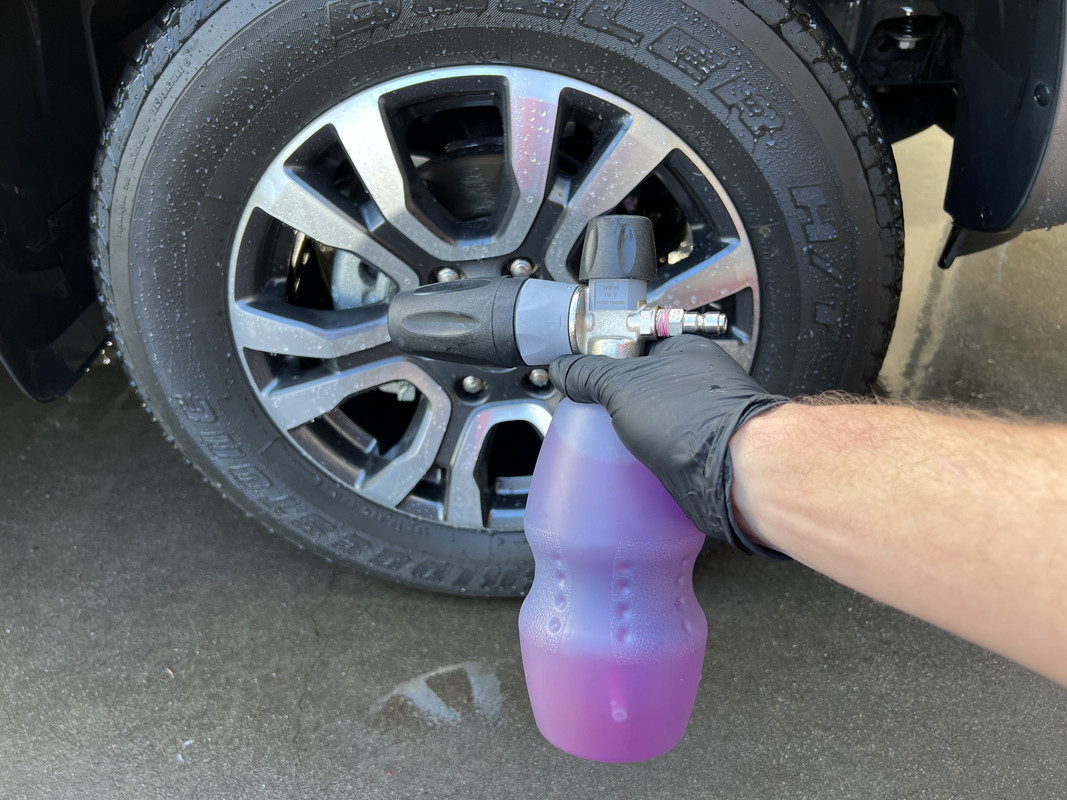

The really good thing about this application method is that it ensures excellent coverage of what needs cleaning. And because it's in foam form, it clings to those areas for longer than just spraying it from the bottle.


At this dilution, it had no trouble taking care of the wheels and wheel arches, it also used far less product. However, I found it wanting as a tire cleaner, it just did not have the bite that I am accustomed too from Brake Buster. I now understand why some people question this products ability to clean tires, they are just diluting it too much. I think I will up the Brake Buster on my next attempt to get some of that grunt back.
Today's drying aid was a first for me, Optimum Car Wax.
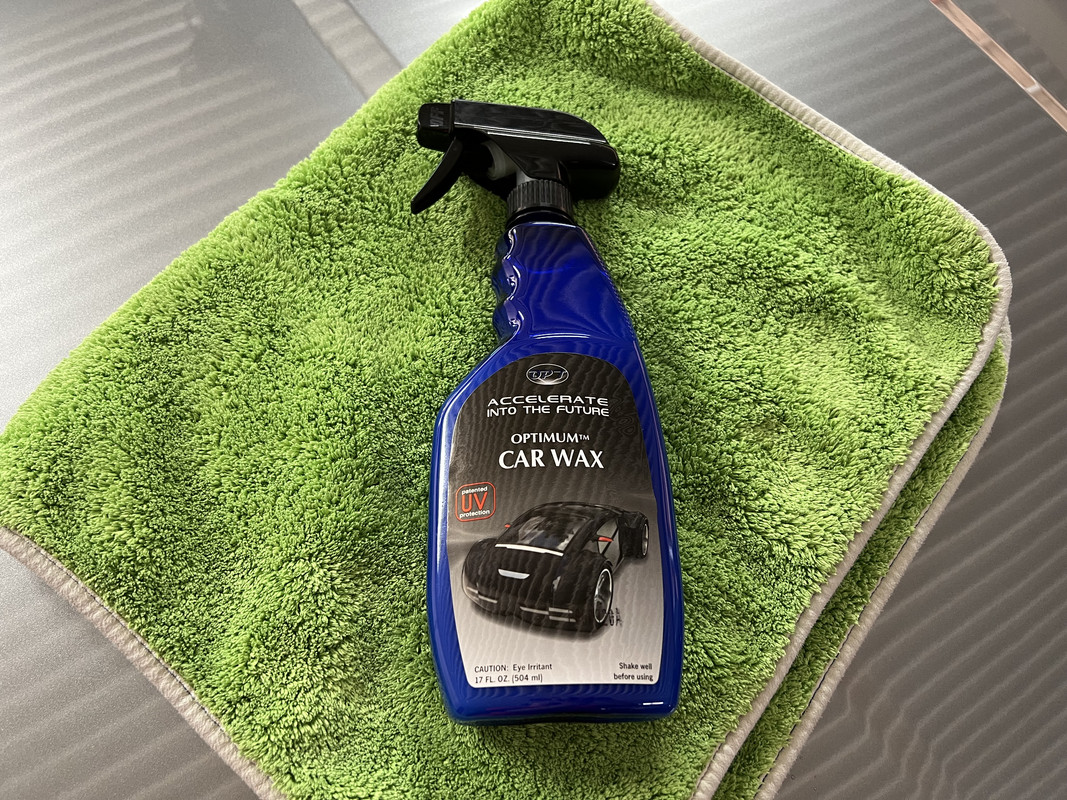
This is a liquid spray wax, a product that is very old fashioned in these days of Si02 sprays. It initially felt a touch grabby until the towel loaded up a bit, but from then on it was very nice to use. Optimum Car Wax is said to have 6-month durability, I don't really care much about that as I'm using it as topper to an existing wax.
It was then onto the interior, removing a months' worth of pie crumbs. I sometimes wonder if I am actually related to my father.  Angelwax Eden is a favorite of mine, most definitely noticeable but not offensive in it's scent. Angelwax Eden is a favorite of mine, most definitely noticeable but not offensive in it's scent.

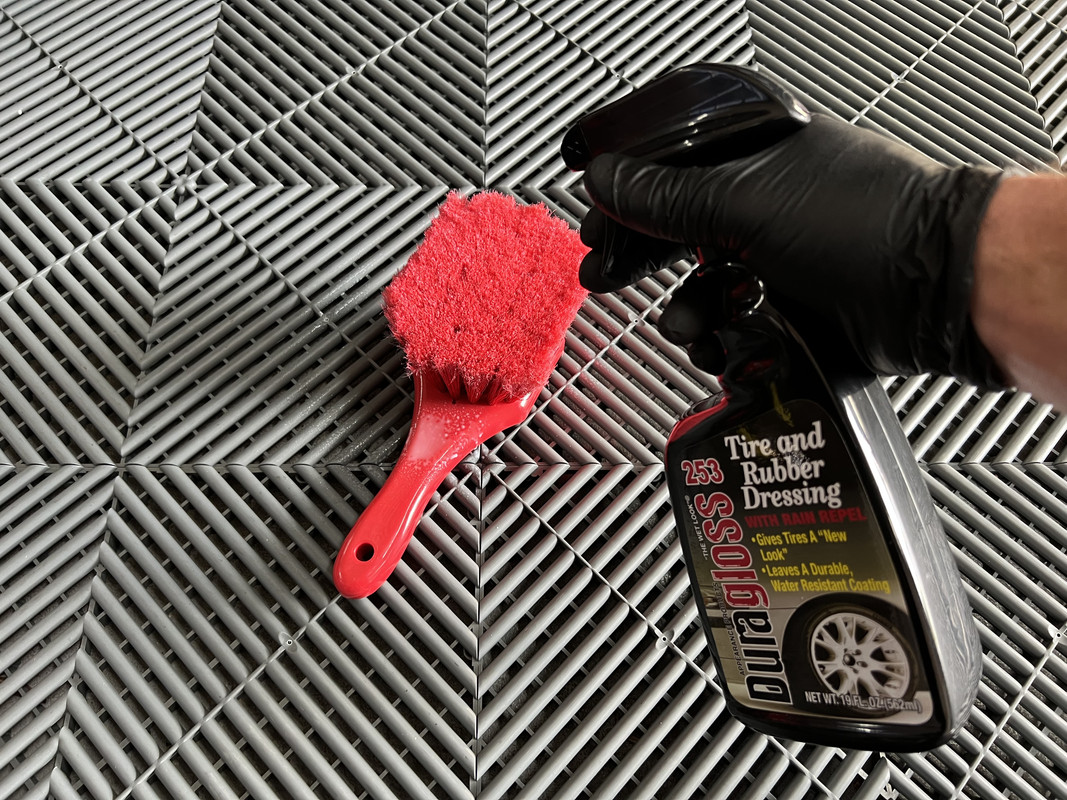
Last job was to dress the tires, today trying out a new application method.

This method I learned about on this forum, using a wheel brush to apply dressings to larger SUV and Pickup tires. In this case I am using Duragloss 253, but any runnier dressing could be used, think Diluted Carpro Perl, Autoglym Instant Tyre Dressing or Meguiar's Hyper Dressing.
Firstly, apply the dressing directly to the brush.
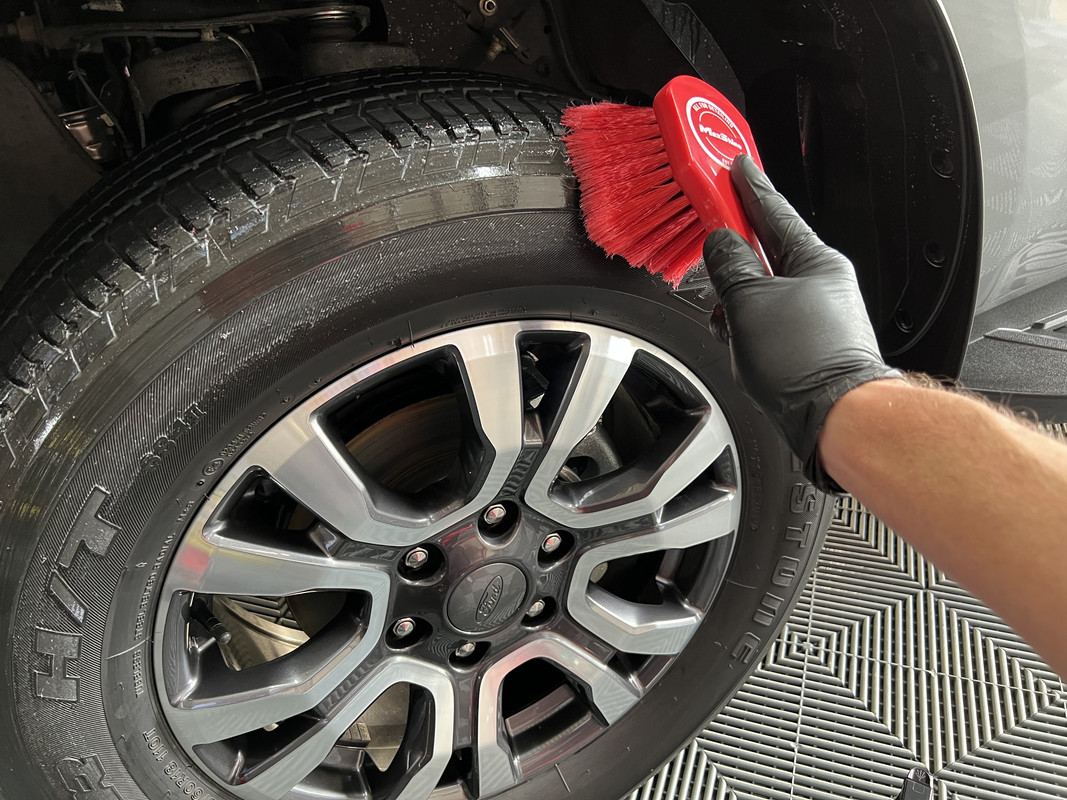
Then start working the product in, I liked that it made it easy to get into the chunkier grooves and right up to the edge of the rim.


I'm now waiting for a few new items to arrive, which I will hopefully be able to test next week.
-
Post Thanks / Like - 0 Thanks, 4 Likes, 0 Dislikes
-
Super Member

Re: DFB's Garage
 Originally Posted by DFB

Today, round two in an attempt to take control of the situation. I have been very lucky that no damage has been left or any sign of nest. I think I must have caught it before it got out of hand.
The entire engine bay was foamed in Carpro Descale. The reason here for this soap is that in order to neutralize the odor, you need an acid to counteract the alkalinity left by the mice. I left this to dwell for about 15 minutes and rinsed.
(At this point, I want to say that I do not really like having to use this amount of soap and water in an engine bay, it just feels wrong. I don't have a choice though.)
I then re-foamed and started to agitate as much as I could using brushes and a microfiber towel.
After a VERY thorough rinse from above and below, I dried the engine bay using the Big Boi and then sprayed as much as I could with an enzyme odor neutralizer.
Because I got the bumper and a few adjacent panels wet, I went through and did a water-less wipe down using N-914.
At this stage I am just going to let it be for now and re-access again next week. Last week was a panic, I perhaps rushed my responses out of fear. This week, I took my time and was more targeted and the offenders have been either trapped, repelled or poisoned. I am doing all I can to deal with this, however this is an issue I have never had to contend with before. I am thankful for those who reached out offering advice and wisdom, your words calmed me down and gave me confidence............forums are awesome!
I then moved on to a paying job, the Wildtrack.
This was my first attempt at using Brake Buster in a foam cannon. My use of Brake Buster thus far has been at full strength, as such you have a very powerful wheel and tire cleaner. In the bottle today I mixed it at about 50/50 with water.
The really good thing about this application method is that it ensures excellent coverage of what needs cleaning. And because it's in foam form, it clings to those areas for longer than just spraying it from the bottle.
At this dilution, it had no trouble taking care of the wheels and wheel arches, it also used far less product. However, I found it wanting as a tire cleaner, it just did not have the bite that I am accustomed too from Brake Buster. I now understand why some people question this products ability to clean tires, they are just diluting it too much. I think I will up the Brake Buster on my next attempt to get some of that grunt back.
Today's drying aid was a first for me, Optimum Car Wax.
This is a liquid spray wax, a product that is very old fashioned in these days of Si02 sprays. It initially felt a touch grabby until the towel loaded up a bit, but from then on it was very nice to use. Optimum Car Wax is said to have 6-month durability, I don't really care much about that as I'm using it as topper to an existing wax.
It was then onto the interior, removing a months' worth of pie crumbs. I sometimes wonder if I am actually related to my father. Angelwax Eden is a favorite of mine, most definitely noticeable but not offensive in it's scent.
Last job was to dress the tires, today trying out a new application method.
This method I learned about on this forum, using a wheel brush to apply dressings to larger SUV and Pickup tires. In this case I am using Duragloss 253, but any runnier dressing could be used, think Diluted Carpro Perl, Autoglym Instant Tyre Dressing or Meguiar's Hyper Dressing.
Firstly, apply the dressing directly to the brush.
Then start working the product in, I liked that it made it easy to get into the chunkier grooves and right up to the edge of the rim.
I'm now waiting for a few new items to arrive, which I will hopefully be able to test next week.
Well now I'll have to go out and buy a new wheel brush, I want to try that out as well.
Sent from my motorola edge 20 fusion using Tapatalk
-
Post Thanks / Like - 0 Thanks, 1 Likes, 0 Dislikes
 DFB
DFB liked this post
-
Super Member

Re: DFB's Garage
I have the same brush but with the stiffer black fibers great for scrubbing the chubbier tyres. I add about 200ml to 800ml water for brake buster dilution.
I'm happy with it but for the dirty wheels i have just bought some acid based Autoglym wheel cleaner. 5 litres for $55
-
Post Thanks / Like - 0 Thanks, 2 Likes, 0 Dislikes
-
Super Member
Re: DFB's Garage
For the first time in a while, I managed to bag some really nice weather for my day off. It's been a wet and dreary winter so far, so while it was cold, at least the sun was out.
That wet weather meant a dirty daily and I couldn't take it anymore.


Having had a number of new products arrive in the last week, I was really excited to play around with them. (A number of these are non-AG products, I'm not promoting them, just passing on my thoughts.)
The first of which was the Detail Factory's new tire scrub brush.
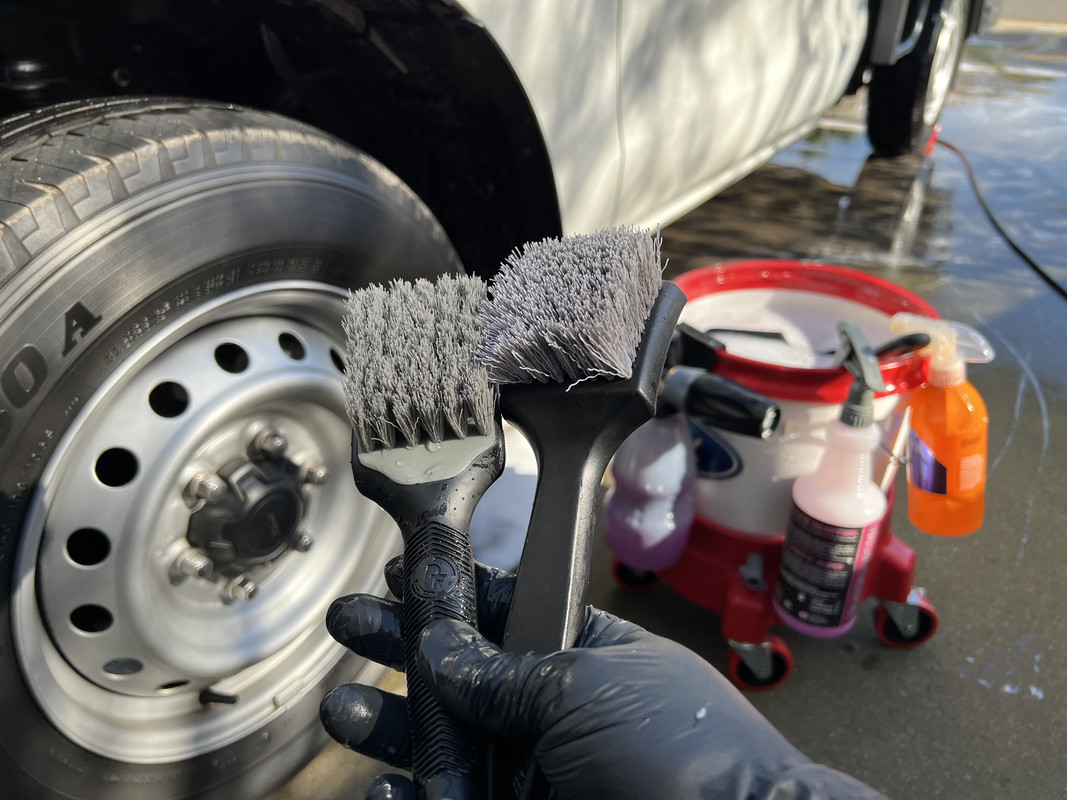

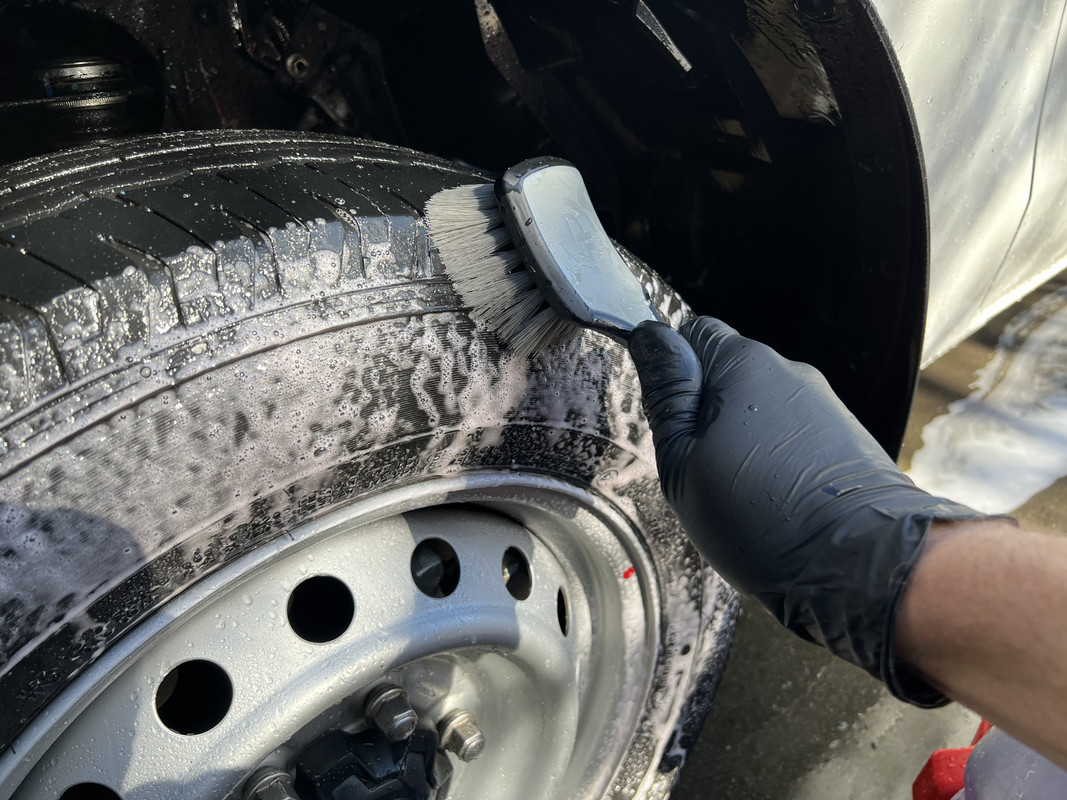
Pictured here on the right next to my old and well used Tuff Shine/Maxshine brush, the new one has longer and slightly softer bristles. Those longer bristles are noticeably easier to scrub with and conform to the variable surfaces of a tire presents. I did not expect a big difference between the two, but the reality is that the new one is vastly better at this task. Is it worth the $26 AUD price difference, absolutely YES!
Undiluted Brake Buster the choice today -

After cleaning the mats, it was time to try another new item, Koch Chemie Guf. This is a non-slip dressing for rubber floor mats and vinyl floors. (My Ranger has both.)


I then used Top Star on the interior, a combined cleaner and UV protectant.

And lastly, yet another tire dressing to try.

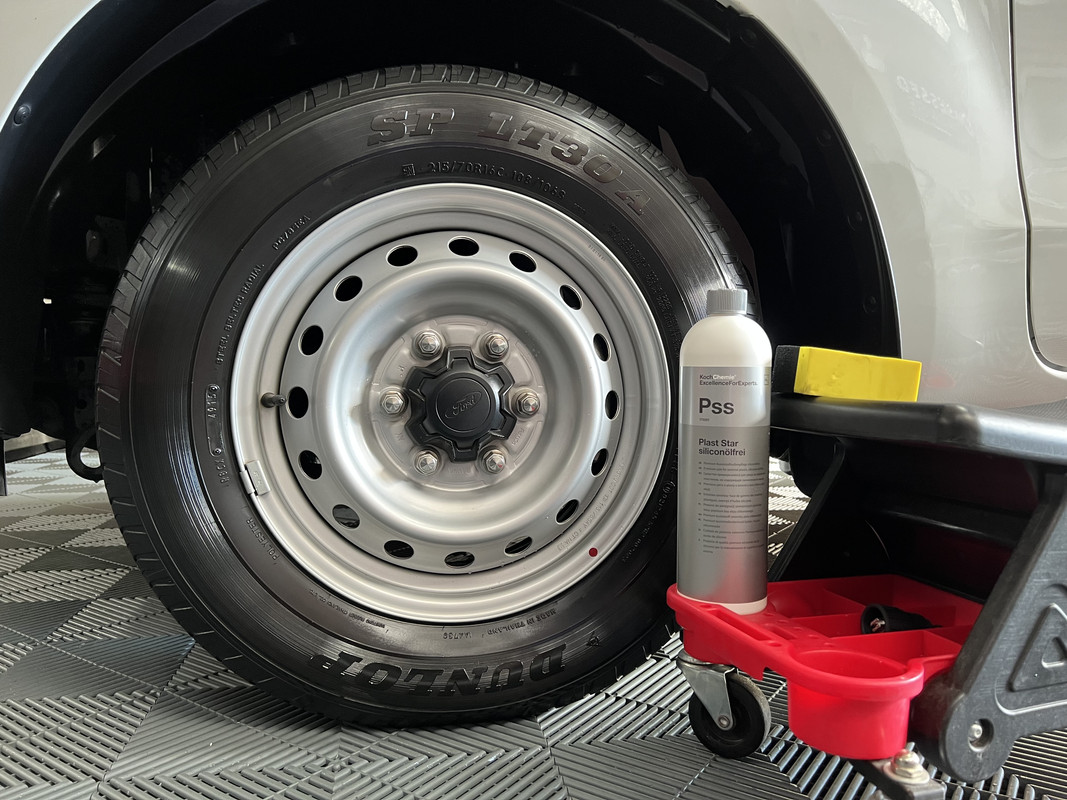
This product is touted as a silicone free dressing, but it smelt and acted exactly like a silicone product I have used before, Meguiar's Hot Shine. Either way, PSS is a very easy to apply dressing with excellent coverage and minimal working required. As always, these tires always come up pretty glossy no matter the product, I can't wait to try Plast Star on some low profiles.
Back into DFB spec, I even did a quick waterless wipe down of the tray with N-914...............

-
Post Thanks / Like - 0 Thanks, 4 Likes, 0 Dislikes
-
Super Member
Re: DFB's Garage
I've had Pss and top star for some time, Pss is great for external plastics
But yet to try it as a tyre dressing.
-
Post Thanks / Like - 0 Thanks, 1 Likes, 0 Dislikes
DFB liked this post
-
Super Member
Re: DFB's Garage
Originally Posted by Tasmania
I've had Pss and top star for some time, Pss is great for external plastics
But yet to try it as a tyre dressing.
Would urge you to give a try on tires, I'm very happy with the look it provided on my Ranger.
-
Super Member
-
Post Thanks / Like - 0 Thanks, 4 Likes, 0 Dislikes
-
Regular Member

Re: DFB's Garage
Love the garage and the post. Looking forward to following along!
Sent from my iPhone using Tapatalk
-
Post Thanks / Like - 1 Thanks, 0 Likes, 0 Dislikes
 DFB
DFB thanked for this post
-
Super Member
Re: DFB's Garage
Did my best to look like a real man by working on my cars today.
First up, replacing the pollen/cabin filters on both Falcon's. I remember when the BA Falcon launched in 2002 this being a new feature, now it's totally normal for cars to have these. From memory, the pollen filter was an optional dealer-fit accessory that replaced the standard mesh-type screen. I fitted both Falcon's with pollen filters after delivery as I had a family member in the spares department, so I got cheap genuine parts! 
First step is open the glove box and then push the tab in to allow the lid to drop right down. (Pics are a mix of both cars.)


Next is to remove the plastic trap door by sliding it towards the left.


Pull on the white tab to remove the filter from its slot.

Time for a new filter, part number BG19N619A. These fit all Falcon's from BA to FGX, and all Territories SX - SZ MK II.
https://www.ebay.com.au/itm/271160800422


These are supplied with a replacement trap door for some reason.
When fitting the new filter, make sure the white tab is pointing outwards. This both indicates the orientation of the filter but also makes it easier to remove.


Then re-fit the plastic door. I have always struggled with these things, a very poor design that requires a very particular touch.
Looking at both old filters side by side revealed one was still fine, one definitely needed replacement.


The dirtier one was from the XR6, and going by the date on it, most likely the one I fitted in 2008.  You will also note the older filter doesn't have the removal tap, as such it was much harder to slide the filter out. You will also note the older filter doesn't have the removal tap, as such it was much harder to slide the filter out.
With that done, I went ahead with changing the pod filter on the XR8. I decided to replace this due to not being able to clean it like the rest of the engine bay.

As always when I want to do something I have never done before, I went online to find some sort of content on how to remove the old filter. None seemed to exist.
But first, joy of joys, I got to use my Fender Defender!

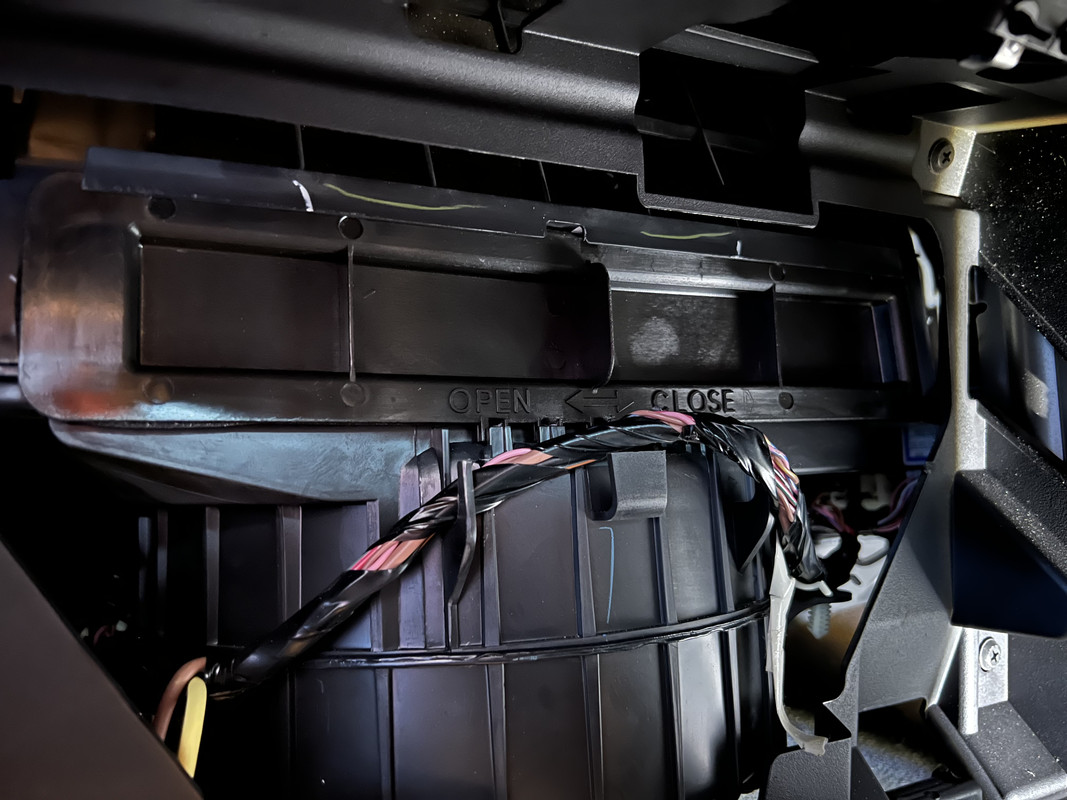
Removing these filters requires the removal of the top hat of the cold-air intake. This involves removing 7 screws, two of which are hidden under the rubber seal.


Then remove the two screws holding the locator tab in place, carefully lift and remove it. This step allows the old filter to move forward and up when removing.

The top hat is then lifted off the intake.


Next, loosen the compression clamp before working the filter free.


Now for the new filter, part number AR3Z9601A. These will fit all Supercharged V8 based Falcon's from 2010 - 2016.
https://www.ebay.com.au/itm/251848033562

Fit the new filter, making sure the clamp screw is pointing upwards. I found I had to jiggle the filter to make sure it was seated correctly on the intake duct. Once in, tighten up the clamp and replace the locator tab.


Then refit the top hat, making sure to line up the tabs inside the rubber seals.

Job done.
-
Post Thanks / Like - 0 Thanks, 6 Likes, 0 Dislikes
Similar Threads
-
By Matador in forum Auto Detailing 101
Replies: 7
Last Post: 08-11-2021, 06:22 PM
-
By Nick McKees37 in forum How to Articles
Replies: 3
Last Post: 02-17-2015, 11:14 AM
-
By Mike Phillips in forum Off-Topic
Replies: 5
Last Post: 09-17-2010, 09:47 PM
-
By Mike Phillips in forum PICTURES: 3-Day CAR Detailing Bootcamp Classes
Replies: 20
Last Post: 06-28-2010, 03:05 PM
-
By Mike Phillips in forum How to articles
Replies: 3
Last Post: 06-23-2010, 01:00 PM
 Members who have read this thread: 86
- John U,
- Vegas1,
- brianshaeffer,
- chilly,
- BTW574,
- barryscott,
- melF1fan,
- Rsurfer,
- VISITOR,
- chefwong,
- Karl_in_Chicago,
- bill walsh,
- ollever,
- 02whitetundra,
- jrose0070,
- gibby68,
- Wknd Dtlr,
- TroyScherer,
- bonedr,
- Setec Astronomy,
- RPPM,
- AMarkham40,
- Jplouch,
- JSkibisky,
- WillSin865,
- georgia boy,
- hansen97,
- delt1964,
- vaced,
- ajdavies91,
- jstollar,
- D.BRITT,
- Danube,
- DG3.7,
- Ace22,
- Azure,
- The Guz,
- wierdkid,
- Alansr,
- Desertnate,
- PaulMys,
- ellens2,
- T-STeve,
- rmtaylor51,
- 11Silverado,
- no cigar,
- FocusSTguy,
- gregory1420,
- 2FORDS,
- Texchappy,
- GrnEyeDog,
- Challen21,
- tradecraft1,
- oneheadlite,
- ev780,
- cyclops,
- Dynoguy,
- Prange,
- SNP209,
- KirkH,
- Tasmania,
- damonb10,
- chris87,
- pdl2mtl90,
- larr12,
- Mklauss,
- DFB,
- Innovator,
- Gridlink,
- Dyerlog,
- msharpe785,
- dbeng,
- Silly Rabbit,
- Thunderchicken,
- chris12,
- Bosko,
- DanaDetailingPros,
- mikeinauburn,
- cb804,
- Dirty Harry,
- aannatshlzea6696,
- kappy,
- eveausasdy529,
- bapatickmjnra7168,
- filhotran,
- Awickedtruth
Posting Permissions
- You may not post new threads
- You may not post replies
- You may not post attachments
- You may not edit your posts
-
Forum Rules
|
| S |
M |
T |
W |
T |
F |
S |
| 31 |
1
|
2
|
3
|
4
|
5
|
6
|
|
7
|
8
|
9
|
10
|
11
|
12
|
13
|
|
14
|
15
|
16
|
17
|
18
|
19
|
20
|
|
21
|
22
|
23
|
24
|
25
|
26
|
27
|
|
28
|
29
|
30
| 1 | 2 | 3 | 4 |
|


 Reply With Quote


Bookmarks