 Dislikes: 0
-
-
Post Thanks / Like - 1 Thanks, 6 Likes, 0 Dislikes
-
-
Post Thanks / Like - 1 Thanks, 2 Likes, 0 Dislikes
-
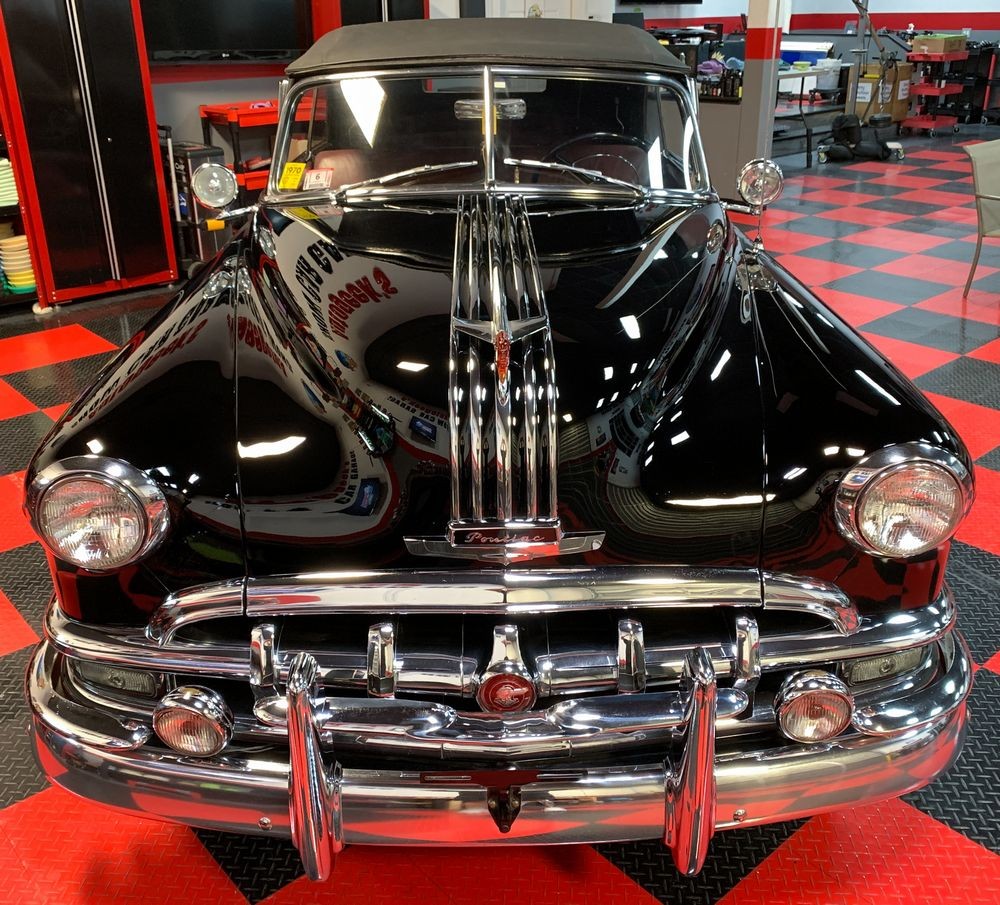
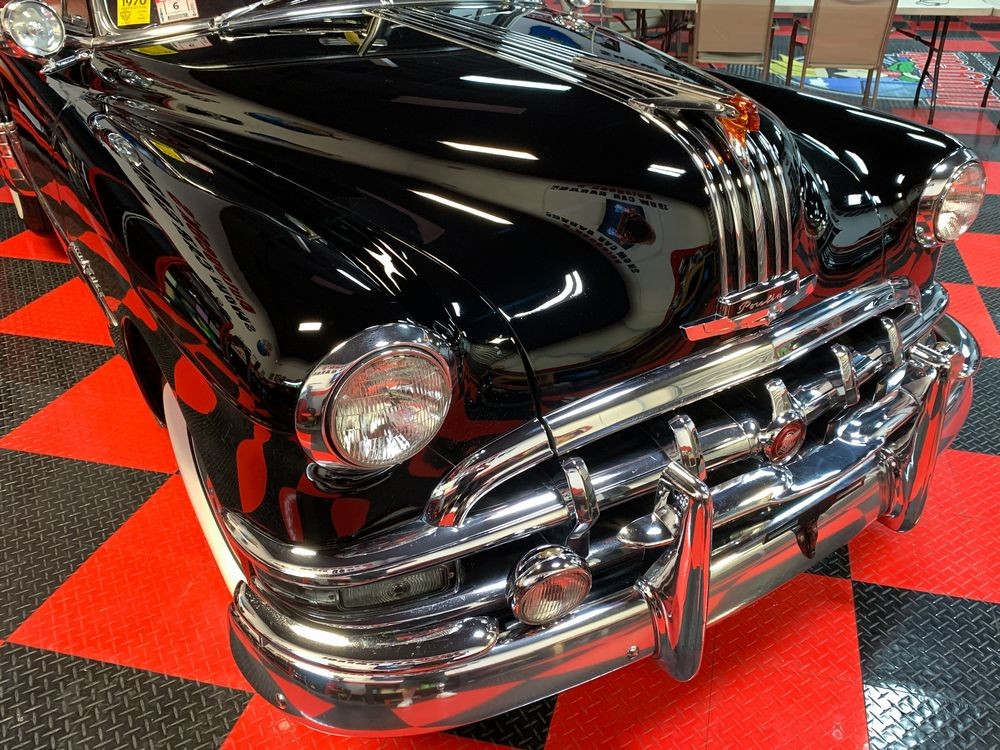
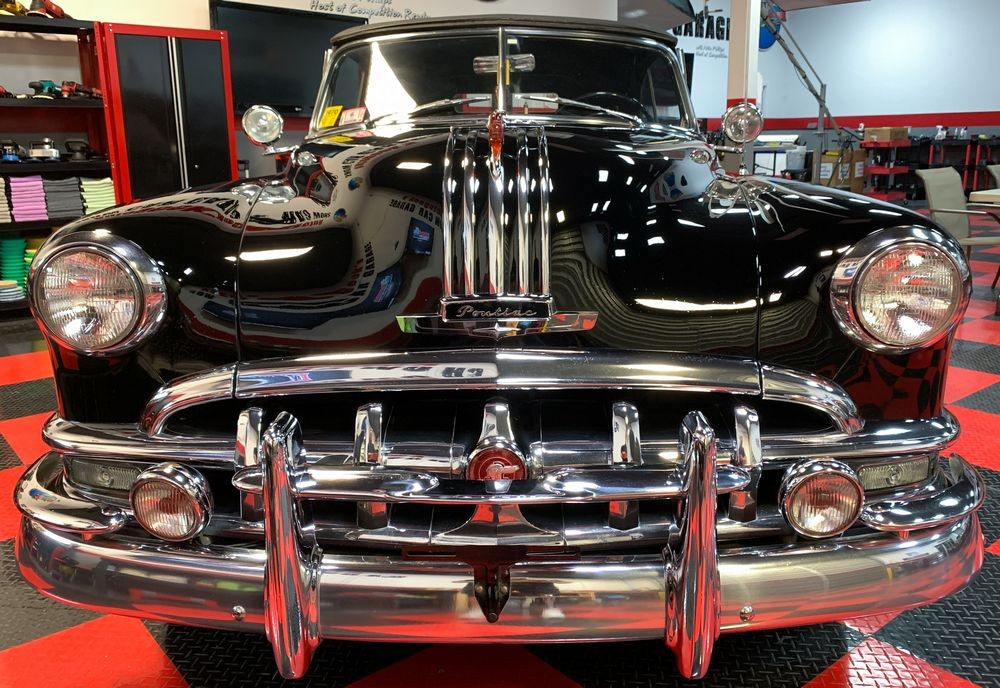
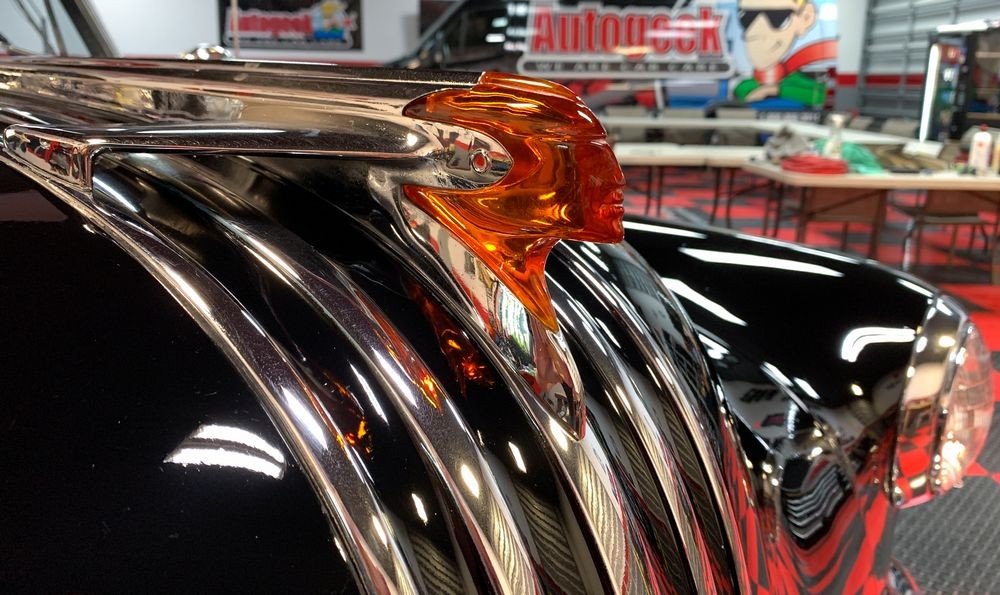
Re: Barn Find - 1950 Pontiac Chieftain Deluxe Convertible - Extreme Paint Correction
Continued...
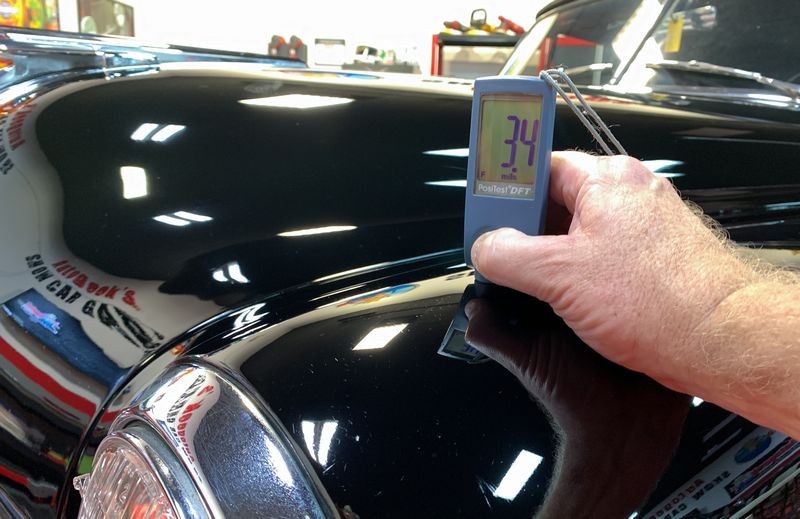
Measuring Paint Thickness
Measuring the original paint on an antique or vintage car is a tick different than measuring the paint on a new or modern car for two reasons.
1: Most modern vehicles are painted using a basecoat/clearcoat paint system. With this type of paint system you are measuring the total film build, (with the majority of Paint Thickness Gauges on the market), but you can only work on the top layer, the clearcoat.
2: With cars built before the 1980s, if the paint is still original - it's going to be either single stage enamel or single stage lacquer. I don't know of any collection of data that documents how thick or thin factory paint was on cars built before 1980 but knowing that when you have huge operations that build millions of widgets (cars), the normal practice is to reduce costs and maximize profits so my guess is no matter what, when or where a car was manufactured - it's safe to assume the factory paint is more likely THIN than thick. Wanna bet?
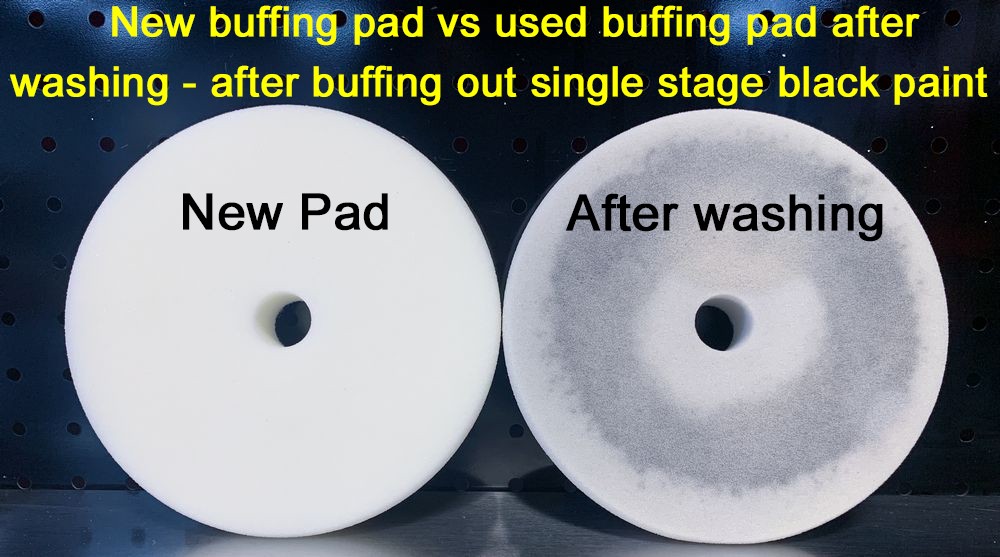
3: The unique circumstance that comes with buffing out older cars, and specifically older cars with original paint is that WE as detailers have no clue as to how many times the car has been buffed-out previously over the decades. We also don't know what has been used as it relates to tools, pads and products. And the important aspect of this issue is that in the old days they didn't have the top notch abrasive technology we have available today but instead had what I call Caveman Compounds & Polishes and these tend to be more crude and thus remove more paint. So by the time any of us get to buff out something old like this 1950 Pontiac - we really need to be careful. In fact - we should all treat the paint on cars like these as though it's Whisper Thin.
What's that you say? You don't know what I mean by the term Whisper Thin? Then read my article here,
Whisper Thin Paint on Classic Cars by Mike Phillips - Be Careful!
I shared all of the above to provide a little insight into both paint thickness or thinness as well as making sure anyone reading this takes into consideration the points I made in #3 above, that is besides paint being thin from the factory, over time - anytime a car is buffed, precious amounts of paint are removed leaving the paint thinner and thinner. Starting to get the BIG PICTURE? Paint is thin to start with and it doesn't get any thicker or safer to work on over time.
That all said, here's some paint thickness readings for paint that at the type I'm typing this, (2021), 71 years old.
Front of the hood...

Back of the hood on driver's side...

Top of driver's side front fender...
Top of passenger side fender...

Rear portion of passenger side hood...

Top of trunk lid...

Top of driver's side rear fender...

My conclusion?
The paint on this car is thin.
The Common Post-it Note
I like to use a normal, every day post-it note as a medium to show people what 3 mils looks or more accurately feels like. The reason why is because if you live in the domesticated world, then you likely have a post-it note available to you so you can grab it and hold it like this,
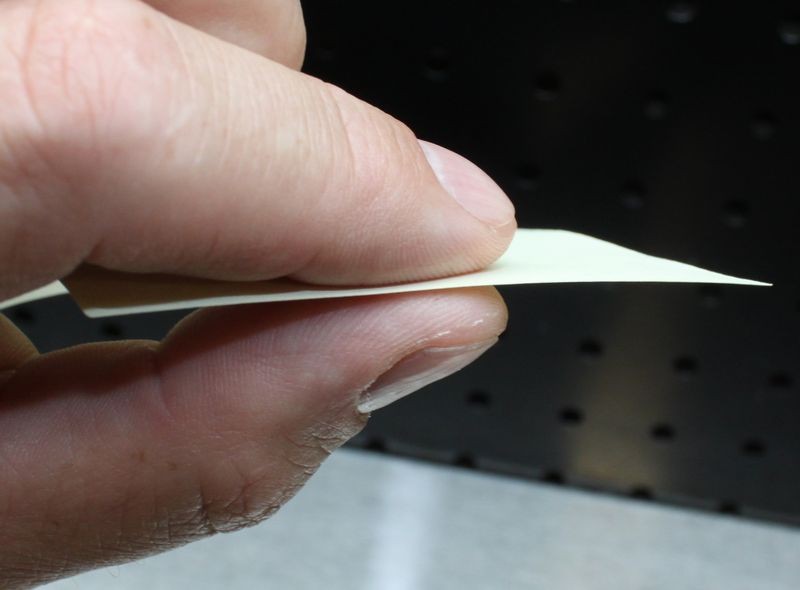
The average post-it note is around 3 mils thick. And actually - it's more accurate to type, the average post-it note is around 3 mils THIN. Make sense?
So knowing this (that a post-it note is around 3 mils thin), and looking at the above paint thickness readings I took on various body panels on the old Pontiac, it's pretty easy to understand the paint on this car is THIN.
What does this mean to me as a detailer?
Or to you if you ever have the opportunity to work on an old car with the original single stage paint? It means be super careful. Be sure to do a TEST SPOT. Above all, follow the sage advice of,
Test the least aggressive process to get the job done.
What will happen is you test or use something too aggressive?
You will buff through the black layer of single stage paint and uncover the PRIMER. Chances are very good - if you buff through the paint and hit primer you'll also hit bare metal because the factory primer on these old cars is also very thin. And for the brief moment that you run the buffer on the bare metal you'll make it shiny. Now your burn-through will stick out like a sore thumb. So please take my word on this - be super careful when working on antique and original single stage paint.

-
Post Thanks / Like - 0 Thanks, 1 Likes, 0 Dislikes
-
Re: Barn Find - 1950 Pontiac Chieftain Deluxe Convertible - Extreme Paint Correction
Continued...
Soft Paint versus Hard Paint
Generally speaking, modern clearcoats are harder than old school single stage paints with the exception of single stage white paint. Yes I know there are exceptions to the rule and any detailer that has been detailing for a while, like myself, has come across modern cars with soft clearcoat paint. Besides the exceptions, I'll say it again, generally speaking, modern clearcoats are harder than old school, solvent-evaporation single stage lacquers and enamels.
The softest paint
Generally speaking, (and from experience), antique, single stage black paint is the softest paint there is to work on in the history of "the car". When it comes to paint hardness or paint softness, this characteristic is affected by both the resin and the pigment. Paint is at it's core, some form of resin. To give paint or resin color, pigment is added in the mixing stage. Now follow me, some pigments are very hard, some pigments are very soft and of course, some pigments are in the middle. The hardness or softness of the pigment will alter or modify the hardness or softness of the resin.
Examples of hard and soft paints
Single Stage White Paint
When it comes to white paint, the pigment used is a very hard mineral called Titanium Dioxide. Adding this mineral in a powdered form to any type of resin will make the resin very hard. In fact, for the most part I would NEVER take on a job to wetsand and buff a single stage white paint job where the paint is already cured. Why? Because I'll never be able to remove 100% of the sanding marks. Sanding is easy, that's putting scratches INTO the paint. Heck, anyone can wetsand a car. The tricky part is removing the sanding marks.
Single Stage Black Paint
To make black paint, Carbon Black powder is used. Carbon Black in simple terms is soot, like in chimney soot, or the kind of soot you would find accumulating on the underneath side of the home barbecue. It's a very dark, black residue or powder from the incomplete combustion of some other materiel. The other material could be fire wood or when you burn your T-bone Steak last summer on the Weber Barbecue on the back patio.
The BIG PICTURE
When it comes to doing paint correction, knowing the hardness or softness of the paint can help you choose the products, pads and tools you'll use to remove paint defects. BUT - you will never know how hard or soft the paint is on the car before you until YOU do what I call a Test Spot. That is, you test a product, pad, tool and technique that you THINK will remove the defects and leave behind perfectly looking paint and if you have chosen wisely - it works. This is why you also start with very NON-AGGRESSIVE products. If the paint is soft, then the non-aggressive products will remove the defects while leaving the most paint behind on the car to last over the service life of the car. If start with non-aggressive products and find out the paint is hard, you're safe, you can then do another Test Spot and this time, do the test spot in a different place on the and test out more aggressive products, pads or even tools.
If the paint was in fact soft, you will have discovered this by using non-aggressive products and more important you will have done the testing in the safest way possible to protect both you, your business and your reputation and of course, protected the integrity of the paint on the car. When I say protecting the integrity of the paint on the car I mean you will NOT have burned through the paint where you did your test spot.
Doing a Test Spot is the professional approach to dialing-in a process you can then duplicate over the rest of the car. It is also the ONLY way to determine if the paint on a car is hard, soft or somewhere in-between. If you're brand new to paint correction you are missing one component that is also necessary to use a Test Spot to determine paint hardness or softness and that is experience. And the only way to get experience is to buff out hundreds of cars. I know this isn't the answer everyone wants to hear but is is the fact of the matter.
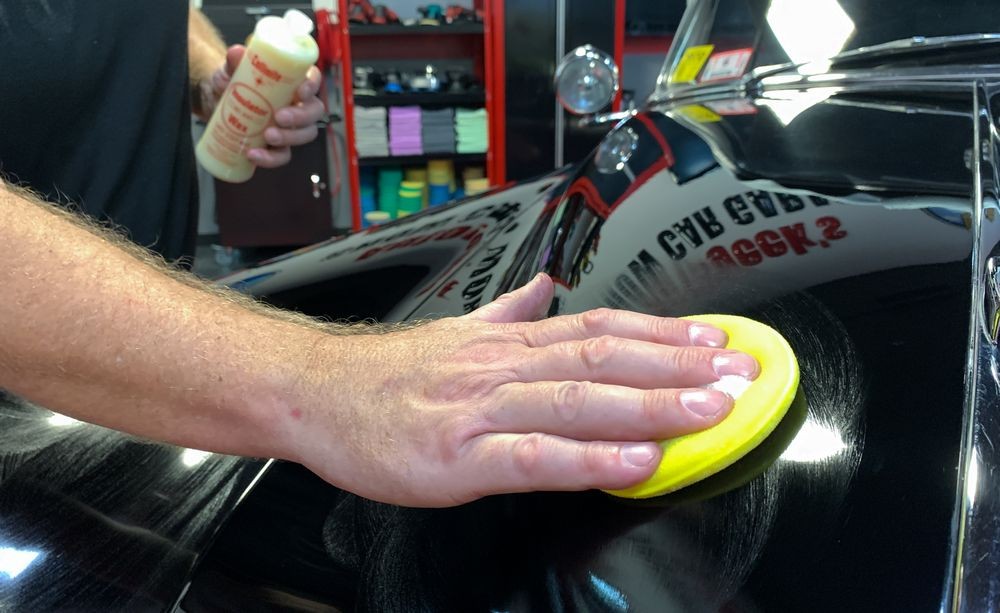
Doing a Test Spot on a 1950 Pontiac Chieftain
One of my go-to products for this type of job is to use a one-step cleaner/wax or as many refer to it - and AIO or All-in-One. A quality AIO uses GREAT ABRASIVE TECHNOLOGY and it will do three things in one step,
1: Paint Correction - the product will remove paint defects like swirls, scratches, water spots and oxidation.
2: Polish - the product will polish or burnish the surface of the paint to clear, smooth high gloss.
3: Protect - the product will leave some form of protection behind on the surface. In the old days the protection component of an AIO was some type of wax. Then science introduced synthetic paint sealants as the component used in an AIO. Now days there are AIO that use some form of nano technology in the way of ceramic for the protection component.
The point being, a great AIO will do three jobs in one step. This is my entry level detail package for people that don't want or need a multiple-step process to get a car's finish to their expectations. All professional detailers and even enthusiast detailers should understand what this type of process is and how and when to use it.
First Test Spot
For the first test spot I used a popular AIO and while it easily removed the swirls, scratches, water spots and oxidation it also left micro-marring in the paint. The results from this Test Spot told me not only was the paint soft it was STUPID SOFT. I don't use the term stupid soft to describe paint unless it's accurate. This paint was so soft that even using a great AIO with a super soft foam "finishing" pad, there was still micro-marring being left in the paint.
Second Test Spot
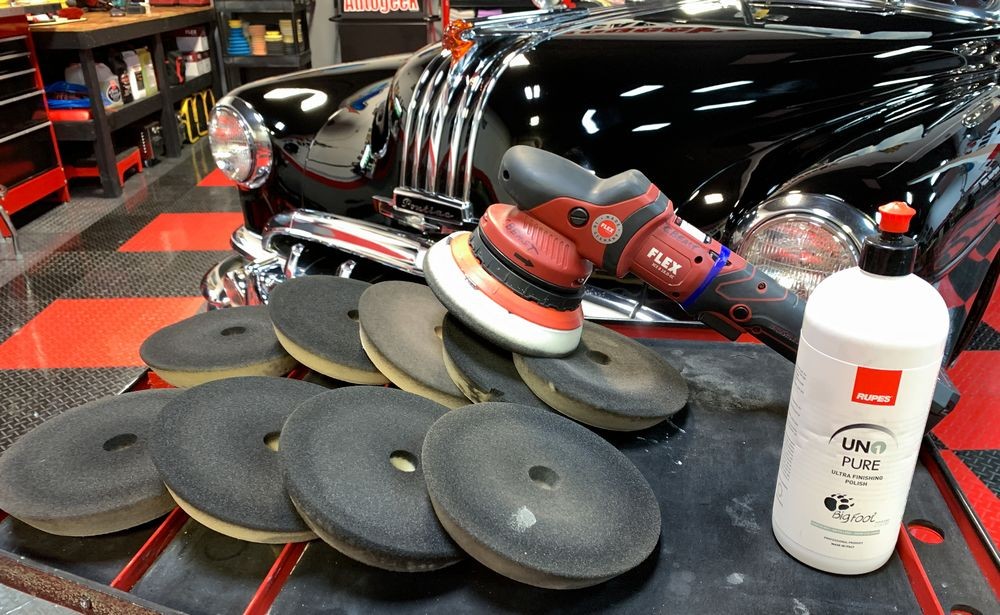
For my second test spot I remember that RUPES had recently introduced a brand new ultra finishing polish called UNO 1 PURE. This product was specifically formulated for super soft, finicky and sticky paints. I wouldn't call the paint on this 1950 Pontiac finicky or sticky but it definitely qualifies as super soft.
I tested the RUPES polish with a Buff & Shine 7" Uro-Tec soft white foam finishing pads. Together, the RUPES ULTRA fine polish and this softest foam pad formula in the Buff & Shine line-up, this is about as non-aggressive as you can get and still have enough cutting or abrading ability to actually remove the swirls and scratches.
RESULTS
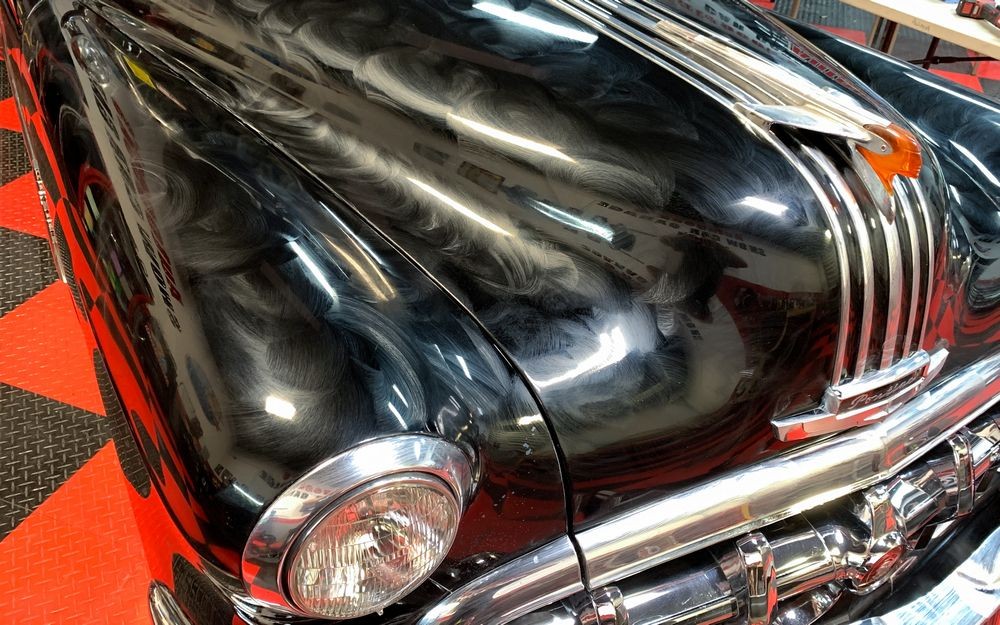
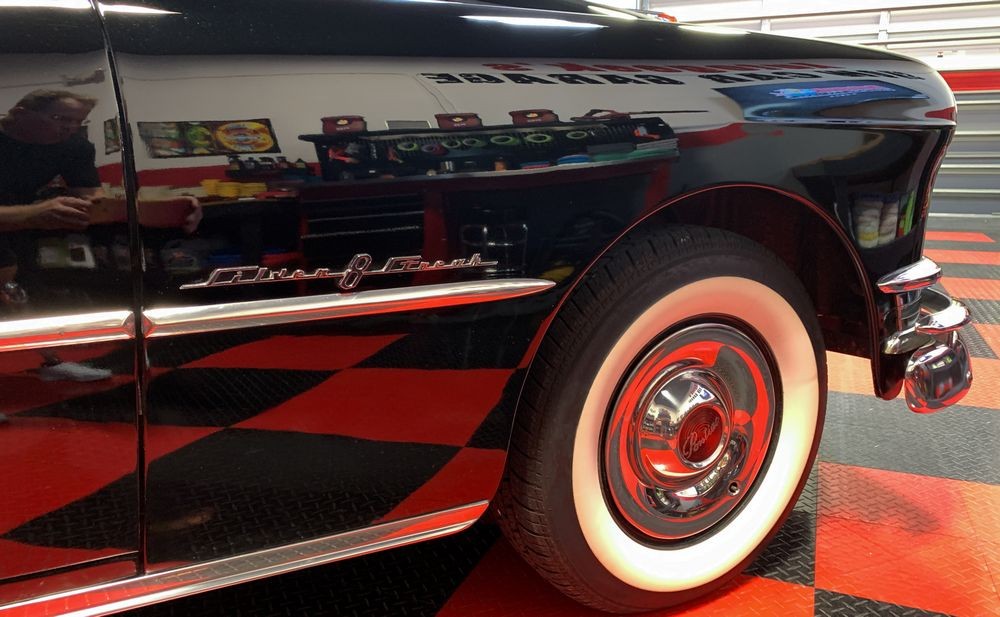
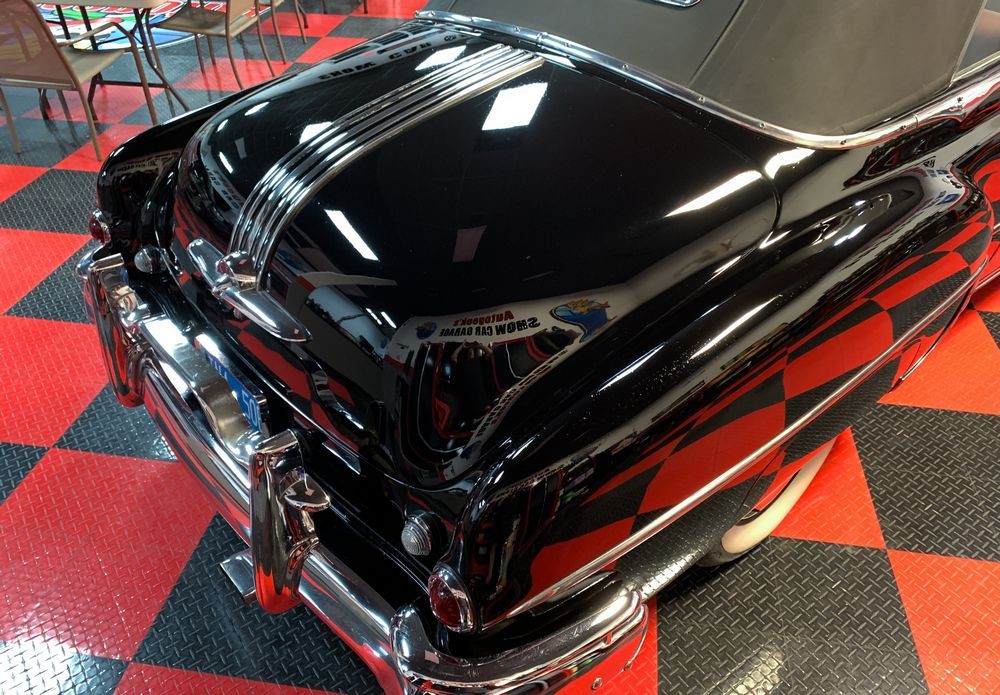
This combo did the trick. It removed the majority of swirls and scratches without leaving any micro-marring behind. After PROVING my system, I then proceeded to machine buff the entire car after doing a waterless wash with SONAX Glass Cleaner and claying the paint with Pinnacle Ultra Fine Detailing Clay.
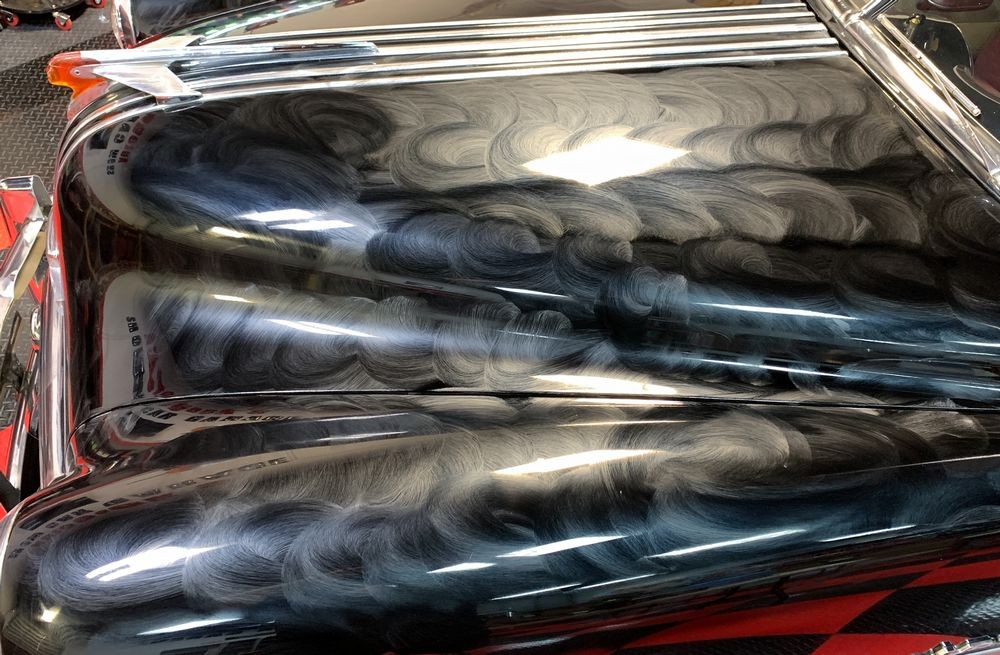
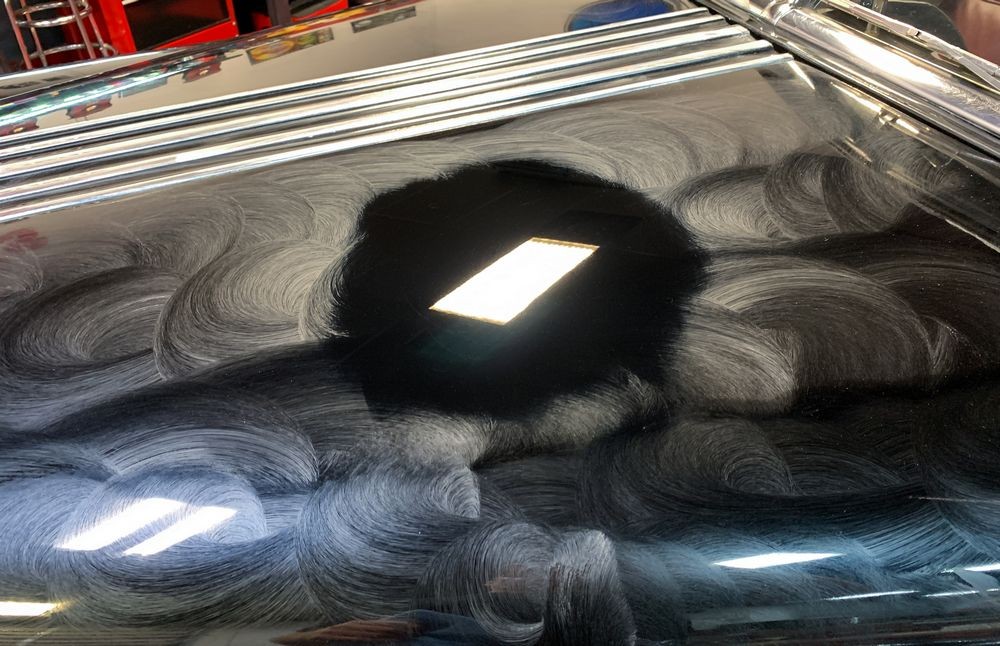
Pictures - Paint Correction

Here's a few pictures showing the paint correction step. A couple of comments.
1: The RUPES UNO 1 PURE Ultra Fine Finishing Polish has zero dusting and super easy wipe-off. If you're new to paint correction, these are two characteristics you want in any polish. I don't mind dusting so much, but zero dusting is better than any level of dusting. Easy wipe-off? Bring it on all day long. If you're a seasoned and experienced detailer then you know what I'm talking about when it comes to zero dusting and easy wipe-off.
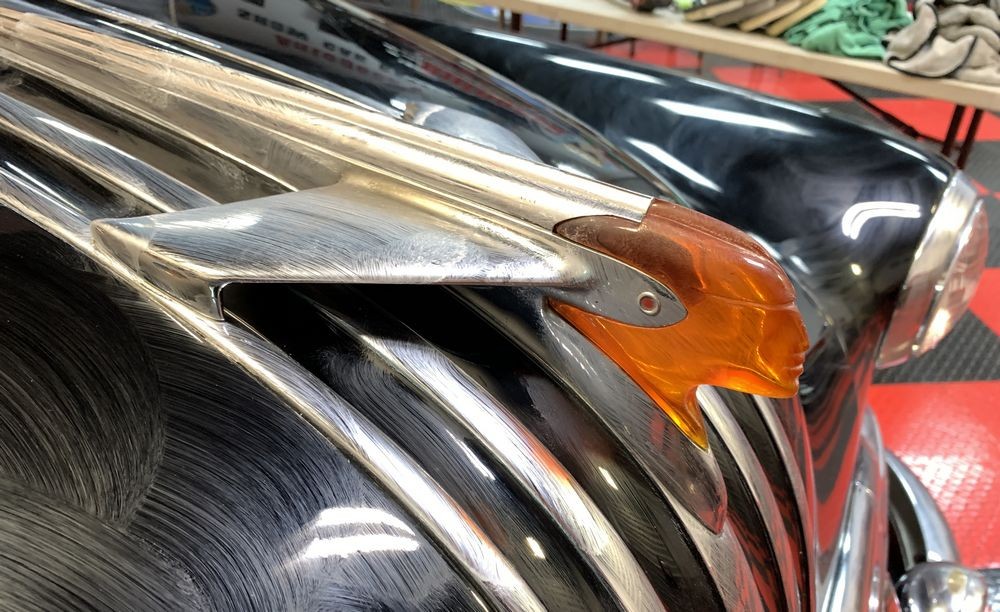
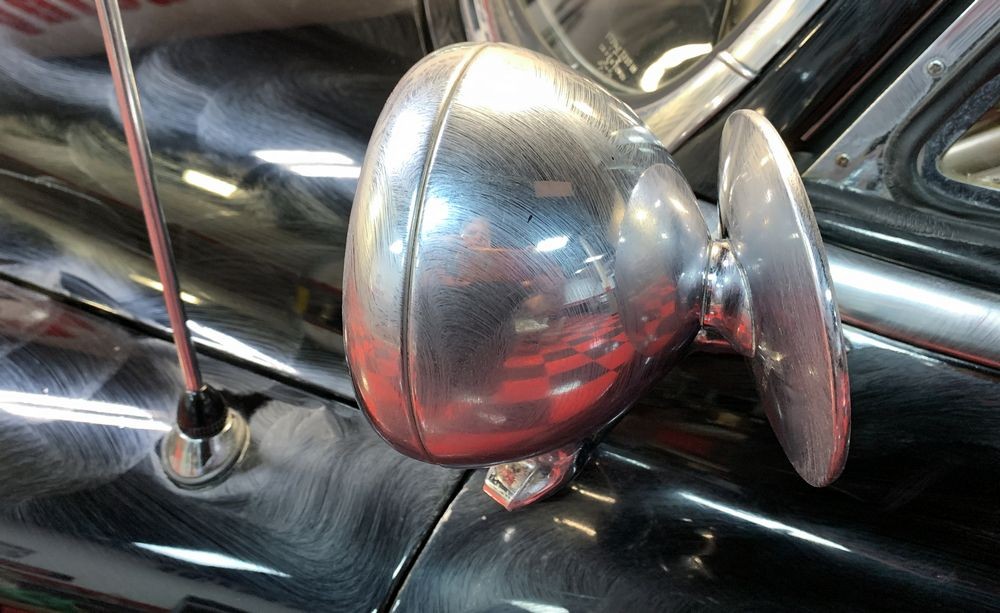
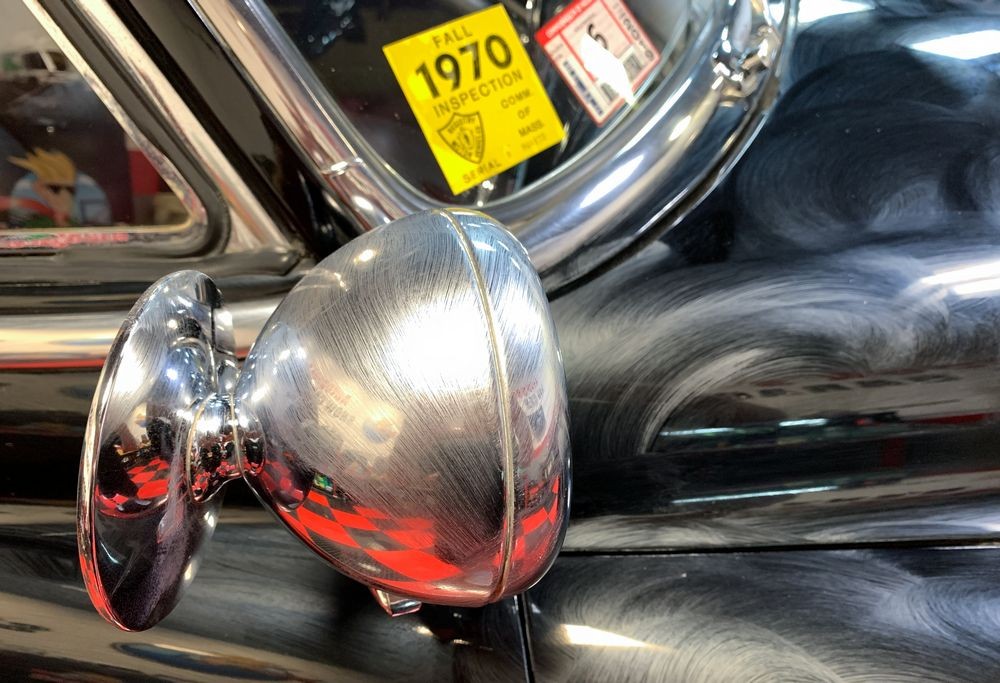
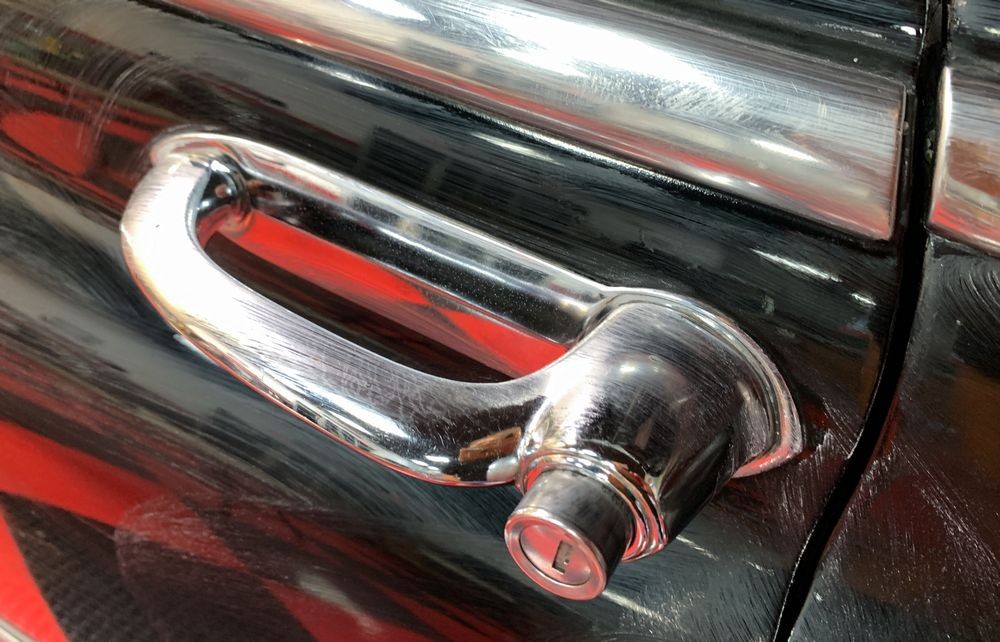
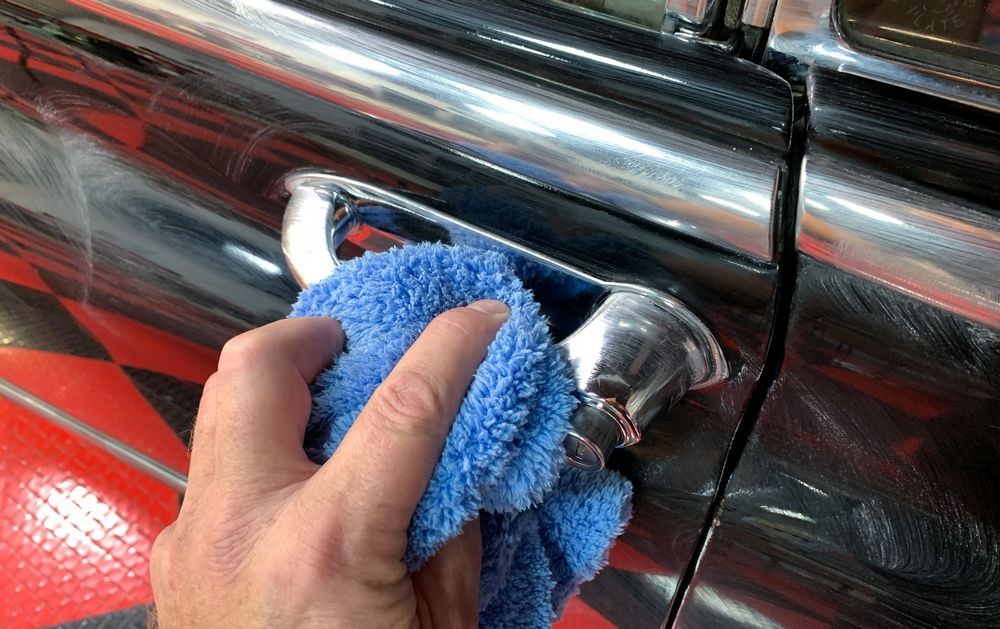
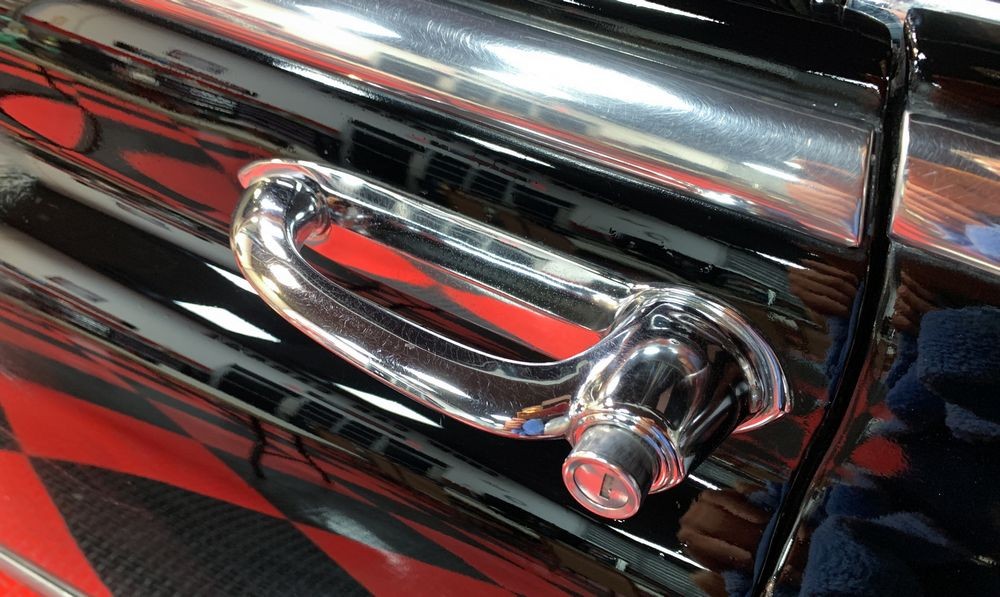
2: New cars have plastic trim and you want to tape this crud off so you don't stain it if you accidentally get any polish or wax on it. No so with classics like this Chieftain, it has chrome and stainless still trim. Instead of taping it off - you run the polisher over it. Normally it doesn't matter what type of compound, polish or even AIO it is you're using, metal surface just don't care much. Running a buffing pad with any type or brand of polish over metal trim will remove topical staining and contamination, tarnish and oxidation and typically will restore the a clear, clean bright shine. I also run the polisher over all the glass windows. Over time, in the same way paint becomes stained and contaminated - so does every other exterior surface including the glass.
Here's pics, note for some panel I wiped off the polish residue and there's zero dusting, just perfectly clear glossy paint.


-
Post Thanks / Like - 1 Thanks, 3 Likes, 0 Dislikes
-
Re: Barn Find - 1950 Pontiac Chieftain Deluxe Convertible - Extreme Paint Correction
Continued...
Technique Tips
Cover and protect canvas cloth tops
I cannot stress this enough. Anytime you're working on a convertible with a cloth top, take the extra time to cover the top to protect it from any accidental polish splatter coming off a spinning buffing pad. It doesn't matter if you're the most careful detailer in the Universe, just do it.
Why?
Because it's faster for you and safer for the canvas to cover and protect it than it is to take a toothbrush and try to scrub little tiny white dots of splatter off the top after the fact - when you're tired.
How to cover a canvas cloth top
Here's a technique tip I've been sharing for decades. What beginners to is try to tape some kind of towel, bed sheet, plastic drop cloth to the portion of a car surrounding the convertible top. To a newbie, this is how you would do it. To a seasoned expert - you don't waste time. Instead, use some painter's tape and lay a strip of tape onto the surrounding surface like you see here.
Here you can see how I placed a strip of tape onto the stainless steel trim that surrounds the bottom of the canvas top. For many modern cars, this area will be paint, not metal trim but use the same technique.


Then - you affix whatever you're using to cover and protect the canvas top to the tape line. Placing a tape line around the top is faster and ensures all the canvas close to the nearby body panels are protected. The tape line also makes it faster and easier for you to get the protective cover affixed to the car and it even allows you to be sloppy. The BIG PICTURE is to get in and get out, by this I mean, you want to cover the top but you don't want to spend hours doing it. This technique I'm sharing will save you time and protect the top and the cost of the few strips of tape you use are nothing compared to the time and energy you'll waste, not to mention the DAMAGE you'll cause trying to clean spatter dots off canvas.
This is a HUGE car with a HUGE top - it took me 3 Autogeek Cover-up Towels to fully cover over the antique, delicate canvas top and even a microfiber towel to 100% cover all the cloth.

Lift the hood to buff the edges of the hood and the fender
It's never a good idea to buff directly on top of an panel edge or raised body line.
Why?
Because paint tends to be thin in these areas AND if any hack detailer in the past was not as careful as you - then for sure it's going to be whisper thin and if you buff on it and burn through, even though someone else did the majority of the damage - you'll take the hit.
So a quick, fast easy way to buff all the paint right close to an edge on the hood and also the adjacent edge of the adjoining fender is to simply pop the hood to raise it and then do your surgical buffing in these areas.
Due to the deep curved body panel separating the inner sides of the fender to where they meet the hood - it would be difficult to buff the paint in these areas without also buffing on the edges. I opened the hood and placed a nearby empty box between the hood and the front bumper guard to hold the hood open. By doing this I was able to safely polish the paint along these panel edges.


-
Re: Barn Find - 1950 Pontiac Chieftain Deluxe Convertible - Extreme Paint Correction
Continued....
Personal Product Recommendation
This is a really nice product and a polish every detailer should have in their arsenal just in case they ever come across stupid soft paint. Together with a super soft foam finishing pad it did a great job and was a very safe approach for this original paint that is 71-years old.


Like liquid black oil....

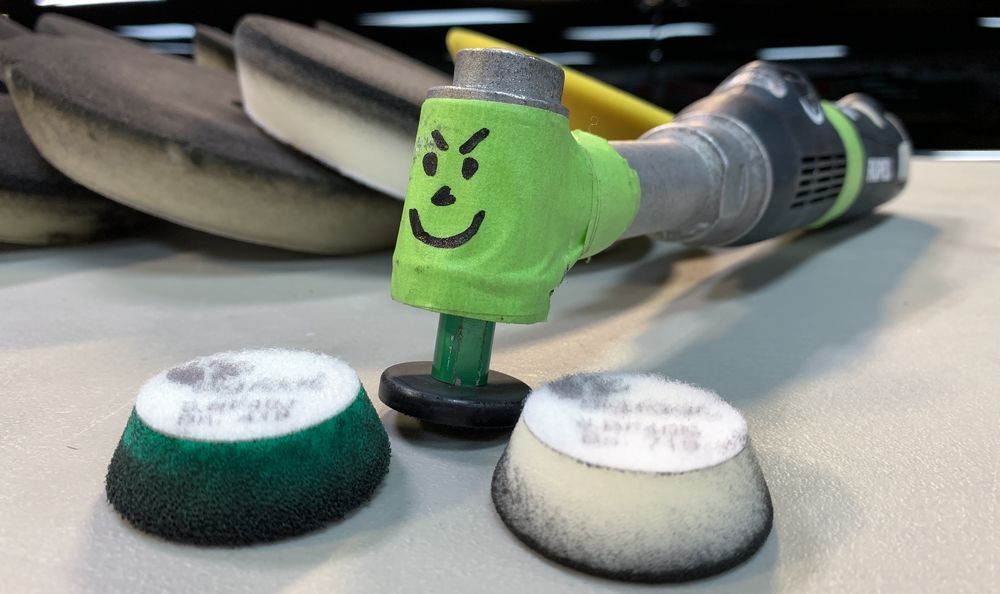
Personal Pad Recommendation
I've invested a lot of time using different buffing pads with the 3 different FLEX orbital polishers in the BEAST family. The latest pads I've used and now recommend are the 7 Inch Buff & Shine Uro-Tec Foam Pads. Due to the soft nature of this paint I used the white foam pads but all of the pads in this specific line fit and work great on 6" backing plates on any of the FLEX BEAST orbital polishers.
Buff & Shine 7" Uro-Tec Foam Pads
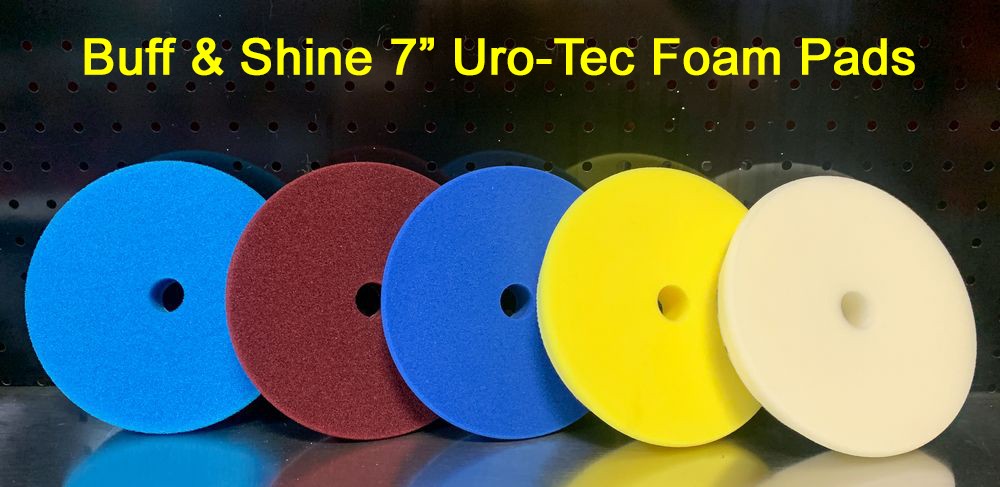
Other pads I like for the FLEX BEASTS are the new RUPES CP foam pads, the old RUPES foam pads, the Lake Country 6.5" Force Hybrid Foam pads.
Personal Tool Recommendation
Let me start by saying you can use any orbital you like and get great results. Me? I much prefer 8mm gear-driven orbital polishers simply due to the fact that they have the most reach and ZERO pad stalling. Time is everything. Zero pad stalling means as long as you're squeezing the speed trigger you're making time.
The FLEX BEAST Family
Currently FLEX offers 3 variations of their 8mm gear-driven orbital polishers. The original BEAST, the 3401 model is going to be phased out, so if you want one you better get one while the getting is good.
FLEX XC 3401 VRG - the original corded BEAST. The word BEAST is spelled with all capital letters. This is the original BEAST, which is a 8mm gear-driven fixed orbit - orbital polisher. It's easily identified by the visible aluminum shroud at the head of the polisher.
FLEX XCE 10-8 125 - the new corded BEAST aka the Supa BEAST. The word Supa is short for super and only the first letter is capitalized and the word BEAST is all capital letters. This is a 8mm gear-driven fixed orbit orbital polisher.
FLEX XCE 8-125 18.0 - the cordless BEAST aka the CBEAST - The word CBEAST is spelled with all capital letters and the letter C before the word BEAST simply stands for cordless. This is a 8mm gear-driven fixed orbit orbital polisher using Lithium-Ion re-chargeable Batteries.
From the rear to the front,
The BEAST, the Supa BEAST and in front, the CBEAST

My take on the three different BEAST options?
I get asked about these three different variations all the time. Here's my take,
The BEAST
If I REALLY want to bust-out a job and plow through it as fast as humanly possible I use the BEAST. The extra RPM and OPM are just a tick more than the Supa BEAST - BUT - if I'm in a hurry - I'll take full advantage of the extra speed and power.
The Supa BEAST
If not trying to hit Warp Speed - I grab the Supa Beast. It's much more enjoyable to use. It's an amazing tool. I would even say it's a freaking amazing tool. Compared to the original BEAST, it offers these 4 benefits.
- Smoother
- Quieter
- Lighter
- Cooler
The CBEAST
If I have an easy job, that means the car has only light swirls, scratches and these defects are shallow then I'll use the CBEAST. This also means I've done a TEST SPOT and found the paint corrects easy meaning the paint hardness is in the medium to soft range but definitely not what I would consider hard paint, then the pleasure of not hassling with a power cord cannot be understated. I love the freedom of no cord. Alas - most of the cars I detail are severely neglected with lots of swirls, scratches, water spots and oxidation so I don't use the CBEAST as often as I wish I could.
Tool choice for me is about the condition of the paint and the speed in which I want to plow through the job. I hope this sheds some light on the differences between the three different BEAST options as well as my take on them.
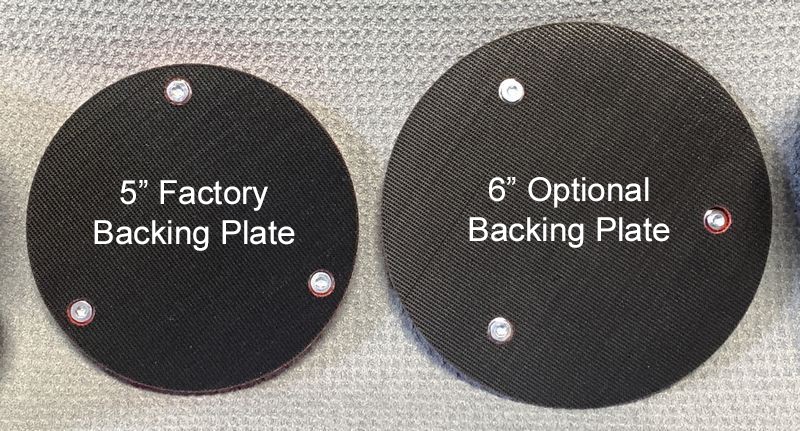
Backing Plate Recommendation
NOTE: Currently as I type on January 12th, 2021 - the Supa BEAST and the CBEAST come with a 5" backing plate from the factory in the shipping box. If you want to turn and churn any brand of 7" buffing pads you'll need to do a backing plate swap. I have all the info and the link to the correct backing plate in my article here,
Supa BEAST and CBEAST Backing Plate Swap by Mike Phillips
-
Post Thanks / Like - 0 Thanks, 1 Likes, 0 Dislikes
-
Re: Barn Find - 1950 Pontiac Chieftain Deluxe Convertible - Extreme Paint Correction
Continued...
Sealing the paint
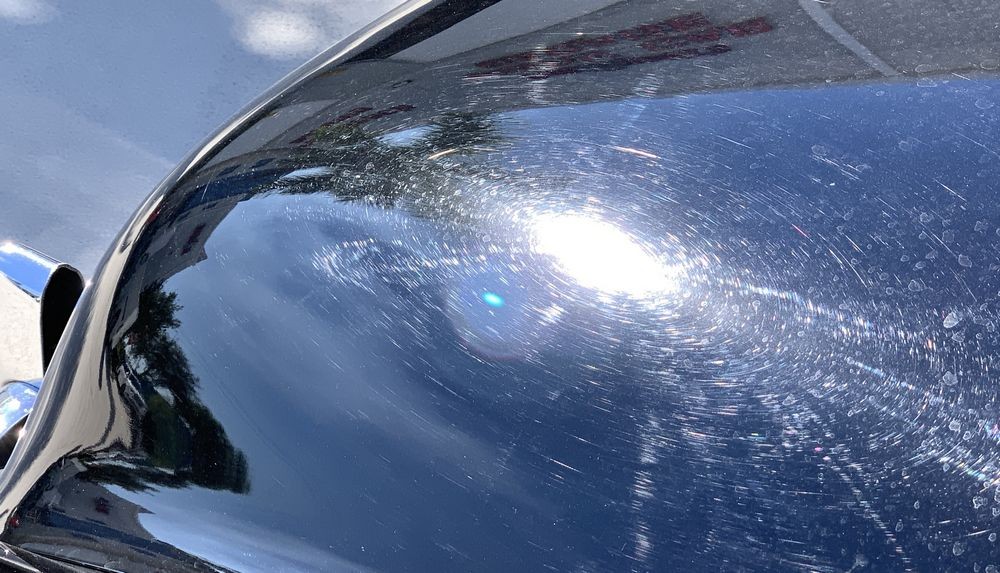
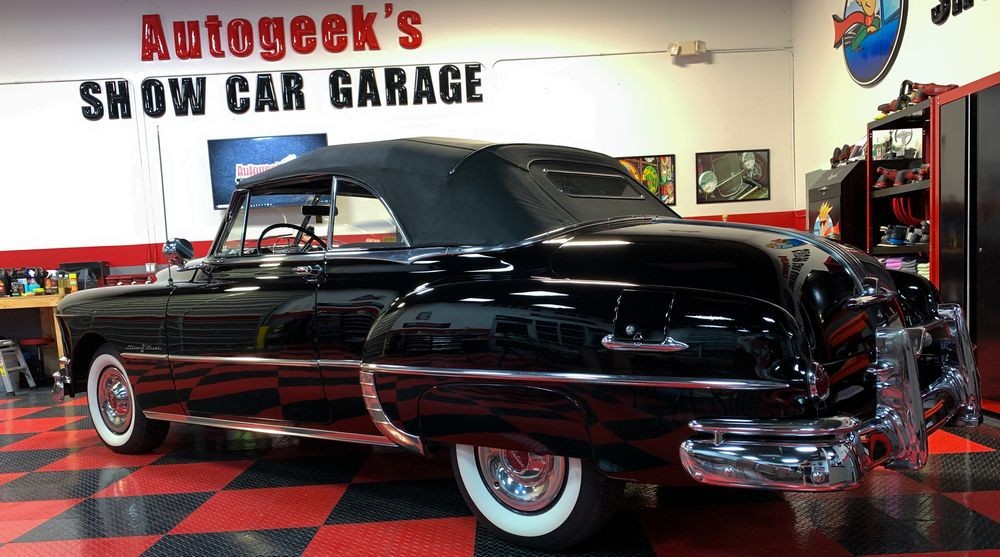
After all the paint correction was finished, it was time to seal the paint. At this stage of the game, the paint was as perfect as I was willing to get it and it's ready for a non-cleaning wax or sealant, also called a finishing wax or show car wax.
Just to note - this picture of the car is PRE-WAX.
The results you see are from just the paint correction step. If you've never had the pleasure of buffing on REAL paint - it's truly special. Nothing buffs-up like old school lacquers and enamels. The problem with NOT sealing the surface is most pro grade polishes are water soluble, so the results you see won't hold up to washing or even repeated use of spray detailers, which are mostly water so kind of like washing. This is just one reason after polishing single stage paint you want to seal the surface. I can tell you other reasons if you ask.

The legendary Collinite Insulator Wax No. 845
I've never used the Collinite 845 Insulator Wax before and figured this would be a good match. A long lasting, durable wax for a freshly corrected finish. First thing I noticed was this product needs to be shaken well before use. The bottle is somewhat clear and you can easily see there is some separation of the magic voodoo ingredients - so shake well before use.
Next I noticed it doesn't come with any type of dispenser cap, just a normal bottle lid. I could have found and used another cap but chose to use it just like it comes from the company. Just be careful when pouring some out so that you don't over do it and waste product.

This was is very slippery to apply and it's easy to spread out to lay down a thin application and this is exactly what you want - a thin coating of wax.

A little bit goes a long way. I used your basic round, yellow foam applicator pad and it worked just fine.


Everything I machine polished received a coat of wax....

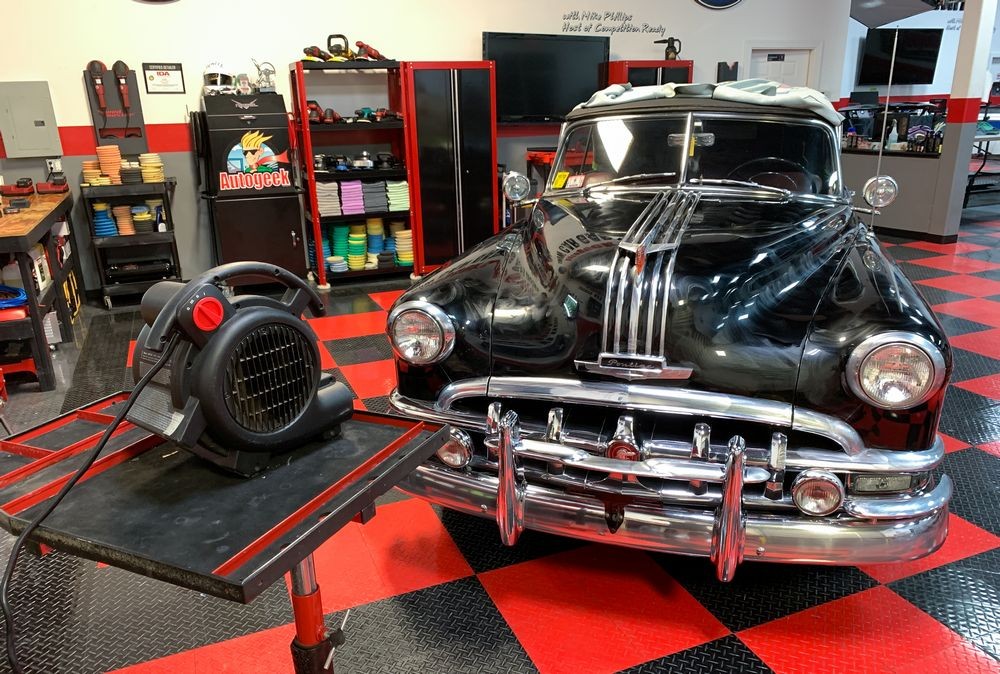
To speed-up drying, I placed used a fan to circulate air around the car. This is an optional step.


Here you can see wax on the chrome beauty ring around the headlight and also on the massive chrome bumpers


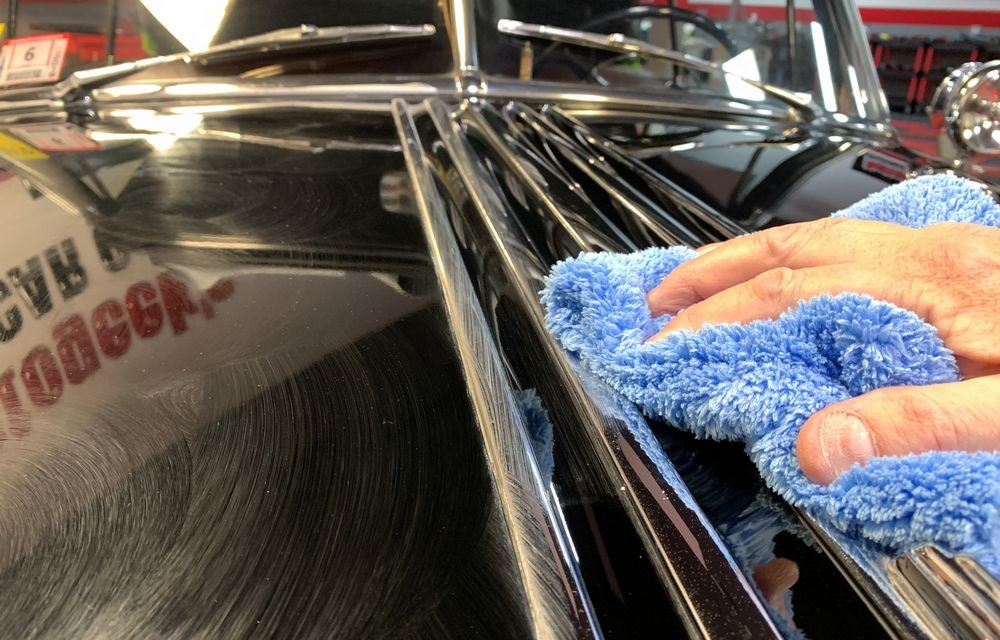
Wax Wipe-off Time
After allowing the Collinite 845 to fully dry it was time to remove it. Andre recently brought me some new super soft, super fluffy edgeless microfiber towels to test out and these seem like a perfect match for this step.


These towels are very thick and plush, they feel good in your hand...
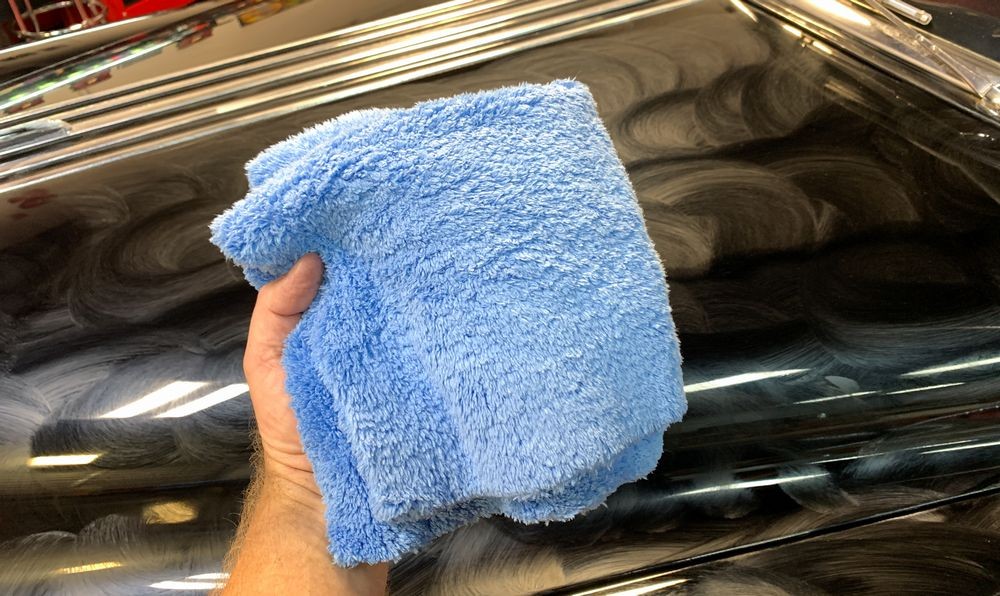

More important - they work GREAT!


-
Post Thanks / Like - 1 Thanks, 1 Likes, 0 Dislikes
-
-
Post Thanks / Like - 1 Thanks, 4 Likes, 0 Dislikes
-
Re: Barn Find - 1950 Pontiac Chieftain Deluxe Convertible - Extreme Paint Correction
Continued....
What does it take to be a detailer?
Don't start detailing with a car like this as your FIRST car
Restoring the paint on a car like this takes a little experience so you don't screw it up. I told Wayne Carine this same thing before he let me buff out the original paint on his 1953 Hudson Hornet. After chasing the Hudson for 46 years and then finally securing it for his own car collection, I was there when it arrived. I showed there was at least one place where the paint had been rubbed through exposing primer. The short version of this story is he asked me to do the paint restoration, which I did. You can see my write-up for his car here.
If you want to get into car detailing, I'd recommend starting with some modern cars, for example your own car. It's also fairly safe to start and by the word start I mean "learn" on other family member's cars, neighbors cars and even co-workers cars. In a perfect world you would start by taking one of my car detailing classes where I'll completely FLATTEN the learning curve for you. Plus you'll get all hands-on time with all the popular tools, pads and products so you don't have to experiment and for a lot of people, experimenting means wasting time and money.
For more information about my classes click this link.
Besides getting experience, to properly detail a car or more specifically, to properly detail a neglected car you're going to need,
- Tools
- Pads
- Products
- Microfiber towels
The above is the short list but you can start out with the above and then add to your collection as you grow and once you confirm this is the road you want to go down.
For most of my work, at the end of the job I'll place everything I used on a table by the car and take a picture so you can see exactly what it took me to do the job.


Thanks for looking!
As always comments and questions are always welcome.
If you have any questions about the process, the paint, the car or the stuff I used, post them and I'll do my best to answer.
-
Post Thanks / Like - 0 Thanks, 2 Likes, 0 Dislikes
-
Similar Threads
-
By 62Rambler in forum Ask your detailing questions!
Replies: 27
Last Post: 05-22-2017, 07:10 AM
-
By CAMMIN HEMI in forum Auto Detailing 101
Replies: 17
Last Post: 05-01-2017, 07:41 PM
-
By Mike Phillips in forum Ask your detailing questions!
Replies: 1
Last Post: 11-14-2016, 03:48 PM
-
By SR99 in forum Off-Topic
Replies: 3
Last Post: 04-21-2014, 09:02 AM
-
By atlpierce in forum Wet-Sanding, Cutting & Buffing
Replies: 15
Last Post: 04-17-2014, 09:39 PM
 Members who have read this thread: 1
Posting Permissions
- You may not post new threads
- You may not post replies
- You may not post attachments
- You may not edit your posts
-
Forum Rules
|
| S |
M |
T |
W |
T |
F |
S |
| 31 |
1
|
2
|
3
|
4
|
5
|
6
|
|
7
|
8
|
9
|
10
|
11
|
12
|
13
|
|
14
|
15
|
16
|
17
|
18
|
19
|
20
|
|
21
|
22
|
23
|
24
|
25
|
26
|
27
|
|
28
|
29
|
30
| 1 | 2 | 3 | 4 |
|


 Thanks:
  Likes:


 Reply With Quote


Bookmarks