|
-
Re: Newbie single stage paint restoration
I received this advice on another forum:
I've polished a lot of cars and a lot of boats... that paint needs compound without a doubt.
Try the compound on the section next to it. Then follow up with the polish. You will cut your work in half and the results should be better.
What do you guys think? Should I try a couple passes with the ultimate compound and an orange pad? I'm curious if in addition to eliminating some of the remaining haziness and speed up the whole job if it might also knock down a little of the orange peel. I assume only wet sanding would do that effectively, but maybe it would take some edge off.
-
Re: Newbie single stage paint restoration
Do 2 test spot behind the back wheel house. 1 with the white pad and compound and then one with the orange pad. And see what you get out of it. I think you could benefit from it. Or the orange and polish or even a more coarse pad with the polish and then reach for the compound.
-
Re: Newbie single stage paint restoration
After experimenting on a few test spots with polish, I took a hiatus from working on the paint in order to focus on other upgrades, prep the car for autocross and enjoy driving the car for a while. That didn't stop me from taking lots of photos in the meantime, even a couple "before and after" from the first round of cleanup described above. Here is a good photo showing how far the paint came from just wash, clay, and no 7 glaze:
Before:

After:

I drove the car like that for the last few months, took it to some cruises and had an awesome time piloting the car at autocross in June.


I didn't want to do any more work until I had time to remove the trim because it seemed like I just couldn't get up to the edge as well as I wanted. The time finally came last week so off I went...

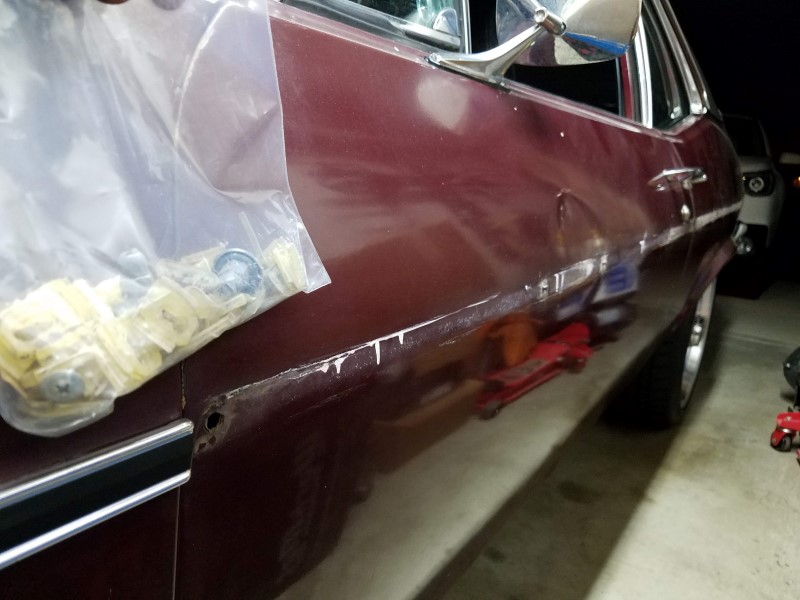

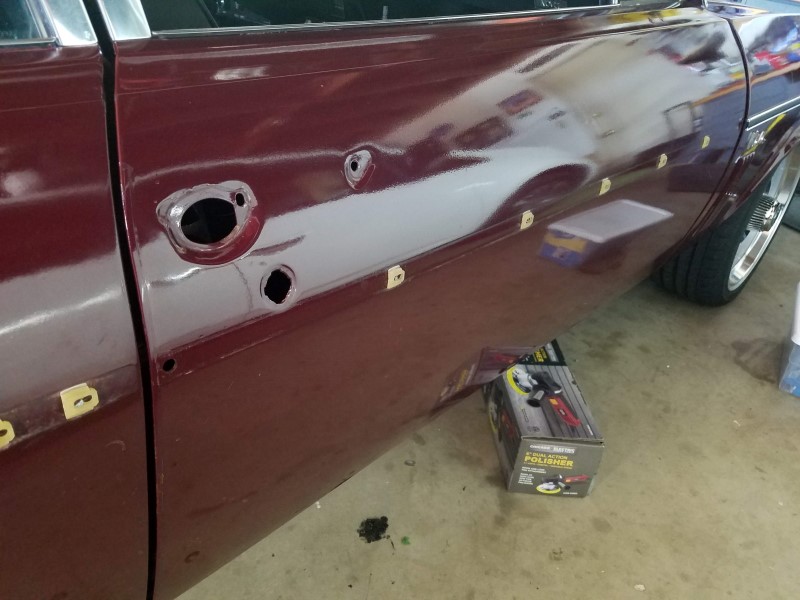
For the most part, the moldings attach to clips like the one pictured above, but before you can get the trim off the clips you have to take off a few fasteners. The quarter molding has one stud at the very back whose nut needs to be removed from inside of the trunk. The doors have screws at the front and rear (total 2 per door) which you can access just by opening the door (no need to remove the door panel. The fenders are a different story; they have studs the entire length that can only be removed from inside of the fender. To get the trim off the plastic clips, I gripped the trim carefully with my fingers and while pulling upward, I pulled/tilted the top away from the car. They sort of unsnapped.
As I mentioned, the fender trim is attached from the inside, so I dropped the inner fender and attempted to take them off.

As it turns out I could get to all the nuts except a couple which were blocked by the cowl. I tried snaking my fingers in from the door hinge area, but there was no way I could get them off without removing the fender from the car. The same held for the "Nova" emblem and decorative "gills" - no way to get them off without taking off the fender. I decided I had gone far enough and I would just have to work around these things. Out the car came for a fresh strip wash.

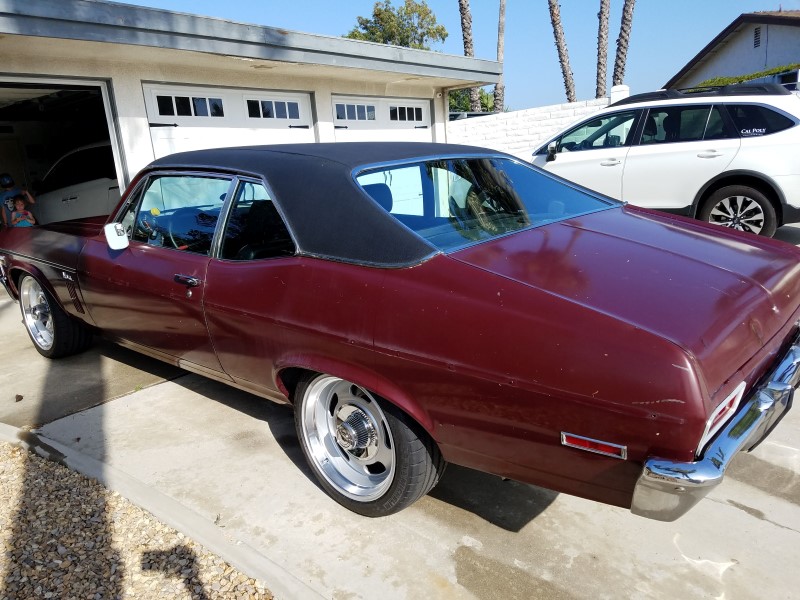
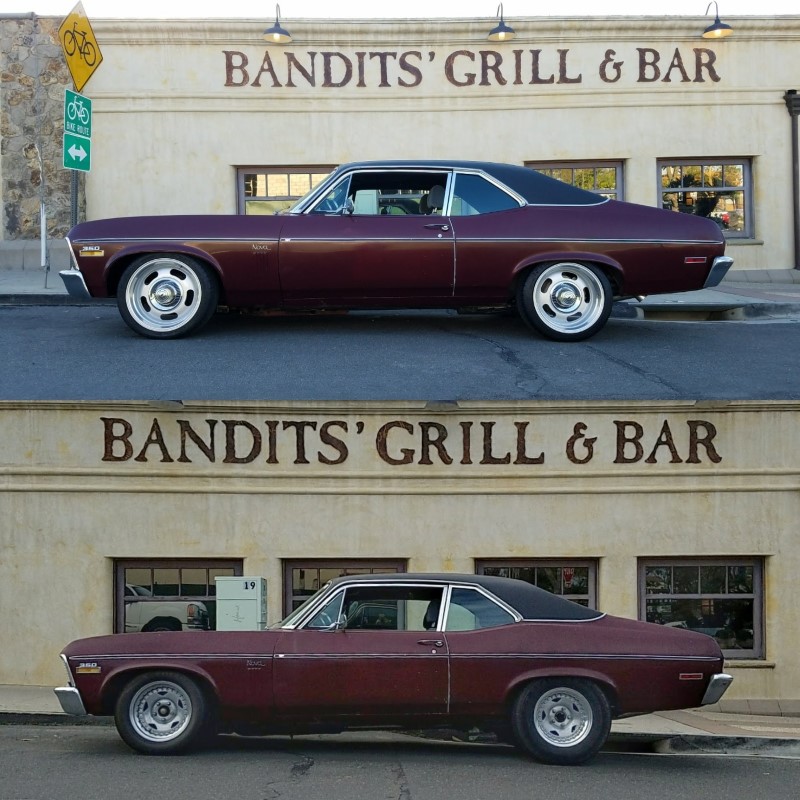
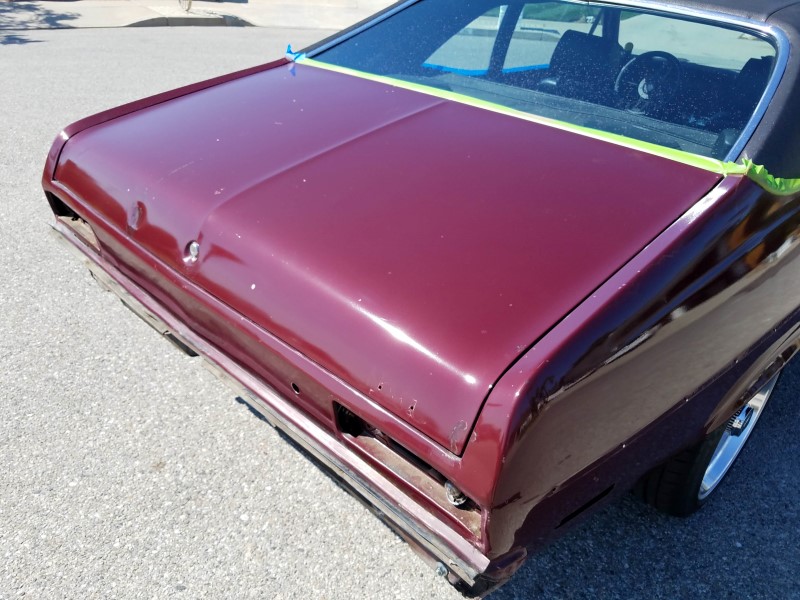
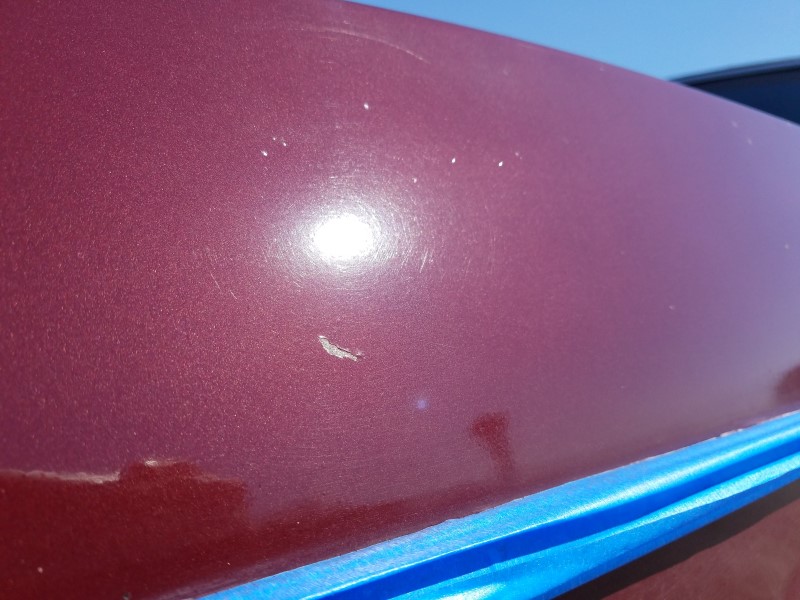
I think of my car as a "fifteen footer" because it looks and photographs well from about 15 ft, but anything closer and you start to see why I need to work on this paint. Case in point: take a look at the oxidation and/or deposits on the driver's side quarter panel.
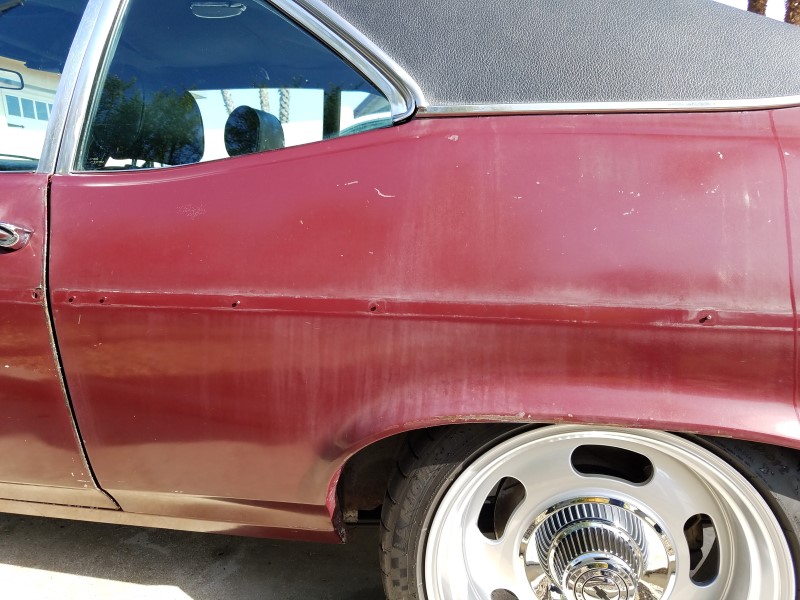
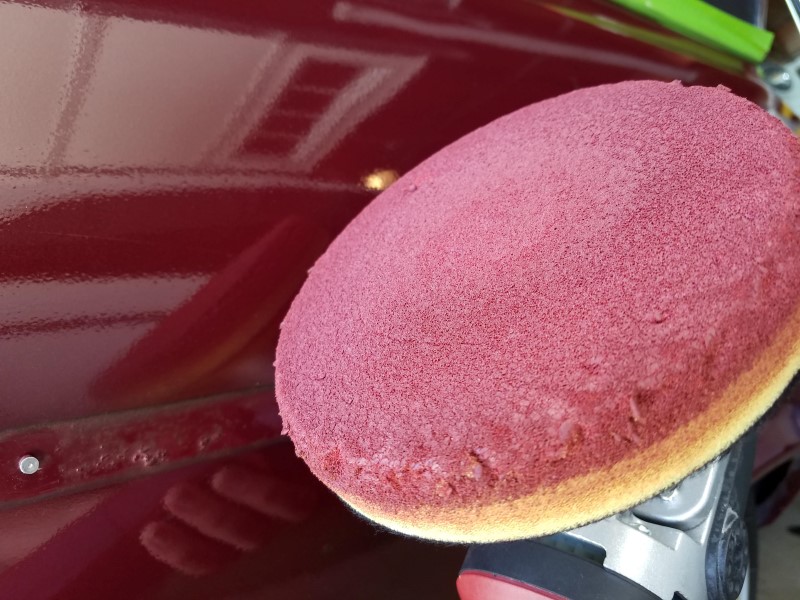
With the car clean, it was time to break out the detailing tools again. My goal was to "cut" the paint, which basically means using compound and aggressive pads to cut through oxidation and deep defects. I am using a no-name DA polisher, but I've added a Lake Country 5" backing plate because the one that comes with the polisher is junk.
Shown below are some of my Lake Country foam pads, 6" dia x 0.875in thick. The white one is a polishing pad and the orange is a medium cutting pad. After some experimentation, I decided to go with a more aggressive yellow cutting pad.

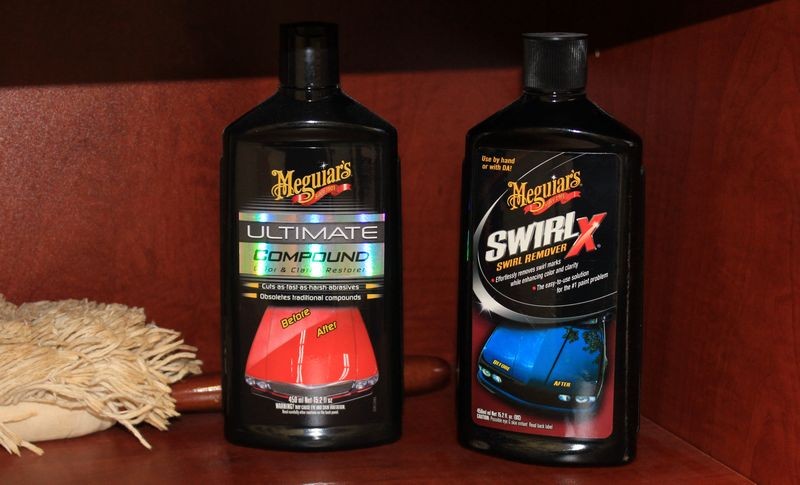
For product, I decided to try Meguiars Ultimate Compound. From my experimentation with polish, I decided I wasn't going to get through some of the heavier oxidation and I needed to be more aggressive.

And with that, off to cutting!
Working with the DA polisher is a somewhat new thing for me so bear with me. First I drizzled some compound onto the pad; roughly 4 or 5 dime size drops. Then with the DA off, I pressed the pad against a few places on the car to dab the compound onto the panel, working in roughly a 2ft x 2ft area. Then I put the DA on a very low speed setting (just over "1") to do a quick spread of the compound over the area I'll be working on. Finally, with the pad still against the car, I dial up the speed to setting "3" and move slowly (as shown in the video) in overlapping passes, first going horizontal, then vertical, and repeating. I found about 6 passes (3 hor, 3 ver) with moderate pressure worked in most areas. I came back over some where there was stubborn oxidation.
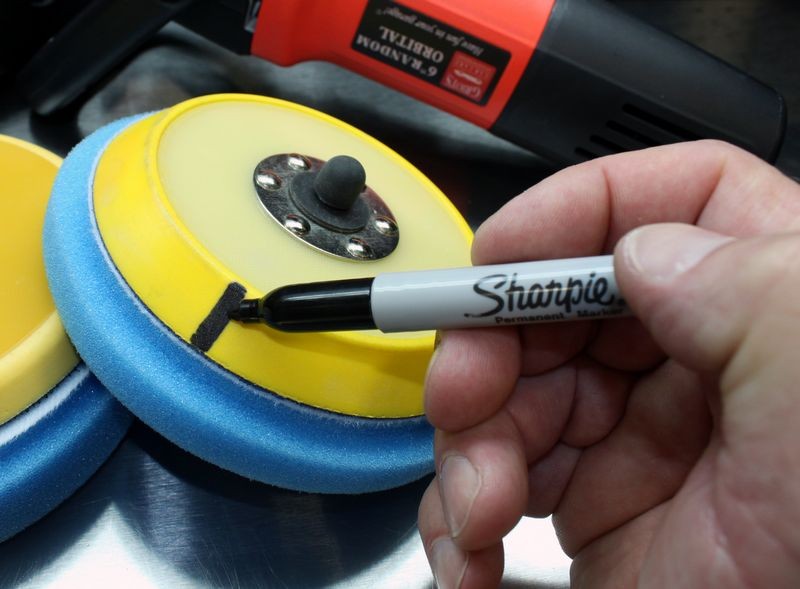
One thing that really helped was to mark a black Sharpie line onto my backing plate so I could monitor rotation of the pad. Sometimes if I tilted the pad or don't apply enough pressure, the pad would stop rotating and only orbit (the "dual action" is to both rotate and orbit and you want both!) so this line helped me keep an eye on things. Once finished with my 2x2ish area, I turn off the polisher while it's still held against the body (so it doesn't spin freely and splatter compound everywhere), then I go over the panel with a microfiber to remove remaining compound residue. Occasionally I ended up with some stubborn compound residue that was very hard to remove by hand. I found a sprits of distilled water and a wipe with microfiber took it right off. Repeat, repeat, repeat all over the car!
-
Post Thanks / Like - 0 Thanks, 2 Likes, 0 Dislikes
-
-
-
Post Thanks / Like - 0 Thanks, 1 Likes, 0 Dislikes
-
-
Post Thanks / Like - 0 Thanks, 3 Likes, 0 Dislikes
-
Re: Newbie single stage paint restoration
Awesome work and write up and pictures!
The paint came alive again. And as you say the shine will go up a notch when you polish it and wax it again. Cars are meant to be driven so enjoy your beutieful car.
/Tony
-
Super Member

Re: Newbie single stage paint restoration
I'm really loving this post!
Excellent transformation, and all your hard work is really something commendable.
Great work, man!! 
It is no coincidence that man's best friend cannot talk.
-
Re: Newbie single stage paint restoration
 Originally Posted by TheBandit

I received this advice on another forum:
I've polished a lot of cars and a lot of boats... that paint needs compound without a doubt.
Try the compound on the section next to it. Then follow up with the polish. You will cut your work in half and the results should be better.
What do you guys think? Should I try a couple passes with the ultimate compound and an orange pad? I'm curious if in addition to eliminating some of the remaining haziness and speed up the whole job if it might also knock down a little of the orange peel. I assume only wet sanding would do that effectively, but maybe it would take some edge off.
I've polished a lot of cars and a lot of boats too....
It's always good to get other's opinions or recommendations. My original article on how to restore antique single stage paint, the article you references in your first post of this thread,
Originally Posted by TheBandit
I have a 1970 Nova with single stage "black cherry" color paint. I have no idea if this is the original paint, but it is the original color, and it's in pretty bad condition.
I have owned the car for twenty years and never paid much attention to the dull oxidized surface. I always assumed that if I wanted to have a show-ready car, I would have to get it repainted.
But recently I came across Mike Phillip's fantastic articles on how to breathe life back into this paint.
This is the article you reference,
The Secret to Removing Oxidation and Restoring a Show Car Finish to Antique Single Stage Paints
Here's the first few paragraphs... I wrote this in 2010 and when I "write" I always write VERY CAREFULLY. I'm a veteran of the Zaino vs NXT Wax Wars, I never write for the day but always for the future.
As you read the below exerpt, I purposefully made the word IMPORTANT in red bold text. The reason I did this is because there are a lot of detailer experts, especially in the Facebook world that simply don't read but are always willing to shell out their expertise on topics they possibly know nothing about.
Originally Posted by Mike Phillips
Restoring original and antique paint
In the collector car hobby world, theres a lot of interest in restoring and preserving original paint on classic and antique cars. Restoring the original paint maintains the overall originality of the complete car and adds to the value as long as the resulting finish is acceptable in appearance and represents how the vehicle would look for its age had the paint been properly maintained over the years.
Hard as it is to believe, people are still finding old cars in barns, storage buildings and garages across this great land and with the right products, techniques and a little knowledge of what to do and what not to do, its possible to restore a show room new finish to these time capsule treasures.
What to do
If preserving the original paint is important to you then the first thing you want to do is condition the paint before working on it. Most people just jump right in and start rubbing some type of abrasive compound over old, dry, fragile paint and this will remove a lot of paint quickly and possible remove too much. Instead, take the extra step of conditioning the paint and bring it back to life with product that's been around since cars and thus car paints have been around.
Below I will share the product and actually a technique that may restore your car's paint to your expectations without using any abrasives at all. In the car detailing world we're always talking about the idea of,
"Use the least aggressive product to get the job done"
In this article I'll show you at least one way to put that philosophy into practice.
I wrote my article on how to restore paint for people that OWN the thing they are seeking information about, not the experts shelling out their expertise for cars they don't own. Here's the deal, when working on antique single stage paint that is neglected to the point that it has oxidized, this paint is dry or dried-out and brittle. To follow some people's advice and simply go straight to compound would be VERY aggressive as the dead paint will compound off quickly and this could lead to exposing primer. So "yeah" compounding is okay for antique single stage paint but when you OWN the car in question and it's IMPORTANT to you to do everything you can to preserve the original paint, BEFORE you compound the paint you saturate it with #7 and allow the TS oils to penetrate INTO the paint bringing it back to life and making the paint more workable and safer to work on i.e. --> compound.
You took the safe approach with your NOVA.
Now - let's see the portion where I was typing for the future!
Note the bold blue portion of text.
Originally Posted by Mike Phillips
What not to do
The first thing most people do when trying to restore an old, oxidized finish is reach for some rubbing compound and try to rub the dead, oxidized paint off the car. While this will work, it's the caveman approach because it's too aggressive, it will remove too much paint and because there's a better, safer approach that will provide a better chance at preserving as much of the original paint as possible which is the goal if you're trying to preserve the "originalness" of the car.
So if you're reading this and you have an old car out in the garage that has oxidized single stage paint, let me share with you a way of conditioning the paint in a non-abrasive way that will make your car's old, tired paint come back to life. Then you can either stop at that point if you like the results you're seeing and apply a coat of wax or I'll share with you how to machine polish the paint to squeeze out even a little more depth, shine and gloss.
I foresaw the masses would tell people to compound antique, single stage paint.
Originally Posted by TheBandit
For product, I decided to try Meguiars Ultimate Compound. From my experimentation with polish, I decided I wasn't going to get through some of the heavier oxidation and I needed to be more aggressive.
Here's my article on Meguiar's Ultimate Compound.
Meguiar's Ultimate Compound History
Meguiar's Ultimate Compound and SwirlX
Yesterday, on the Autogeek Detailing 101 Facebook Group, there was a guy that said I was a "Salesperson".
I can't even count how many HOW-TO articles I've written over the years.... they are not "SALESPERSON article", they are articles that through the CRAFT of writing and taking and then sharing pictures in a linear fashion can take what's in my brain and put it into someone else's brain so when they go out into their garage the know what to do and how to do it.

[QUOTE=TheBandit;1585270]
One thing that really helped was to mark a black Sharpie line onto my backing plate so I could monitor rotation of the pad. Sometimes if I tilted the pad or don't apply enough pressure, the pad would stop rotating and only orbit (the "dual action" is to both rotate and orbit and you want both!) so this line helped me keep an eye on things.
Here's my salesman article on that topic...
Video: Mark your backing plate to make it easy to see pad rotation
Your Nova looks great!
Thank you for the follow-up and the pictures, video and descriptions of procedures used.
I'm 100% confident many others will find and read this thread INTO THE FUTURE and your post here for the work you did will inspire them to follow in your footsteps.
-
Post Thanks / Like - 0 Thanks, 1 Likes, 0 Dislikes
-
Super Member

Re: Newbie single stage paint restoration
YES! Excellent progress. Looking good!
2017 Jeep Wrangler Unlimited Rubicon
1999 Camaro Z28
Similar Threads
-
By 72fordgts in forum Ask your detailing questions!
Replies: 7
Last Post: 08-17-2016, 06:36 PM
-
By ryanfelix in forum Ask your detailing questions!
Replies: 13
Last Post: 08-15-2016, 01:07 PM
-
By daryl_keys in forum Auto Detailing 101
Replies: 30
Last Post: 01-31-2016, 08:13 PM
-
By Mike Phillips in forum Ask your detailing questions!
Replies: 11
Last Post: 09-18-2015, 03:22 PM
-
By BillyJack in forum Show N' Shine
Replies: 11
Last Post: 08-04-2012, 12:44 AM
 Members who have read this thread: 0
There are no members to list at the moment.
Posting Permissions
- You may not post new threads
- You may not post replies
- You may not post attachments
- You may not edit your posts
-
Forum Rules
|
| S |
M |
T |
W |
T |
F |
S |
| 31 |
1
|
2
|
3
|
4
|
5
|
6
|
|
7
|
8
|
9
|
10
|
11
|
12
|
13
|
|
14
|
15
|
16
|
17
|
18
|
19
|
20
|
|
21
|
22
|
23
|
24
|
25
|
26
|
27
|
|
28
|
29
|
30
| 1 | 2 | 3 | 4 |
|


 Thanks:
  Likes:
  Dislikes:


 Reply With Quote
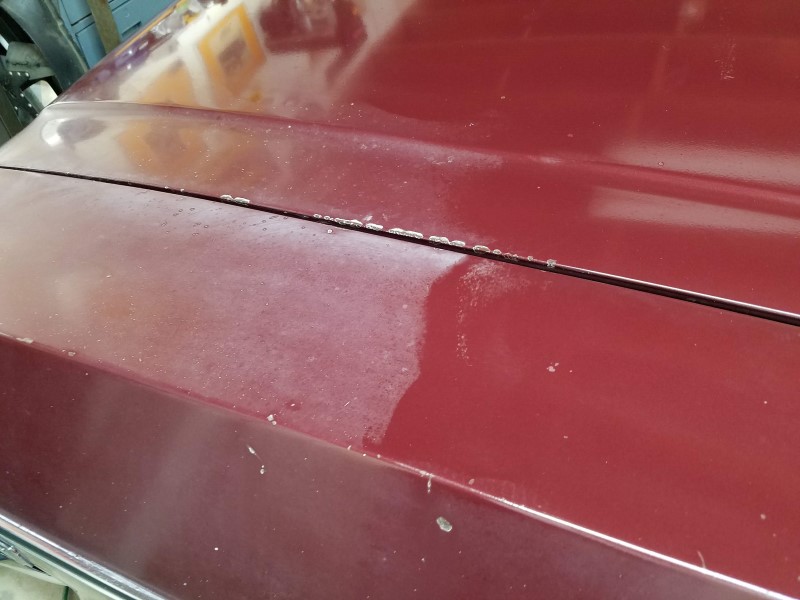


Bookmarks