 Thanks: 0
 Likes: 0
 Dislikes: 0
-
Super Member

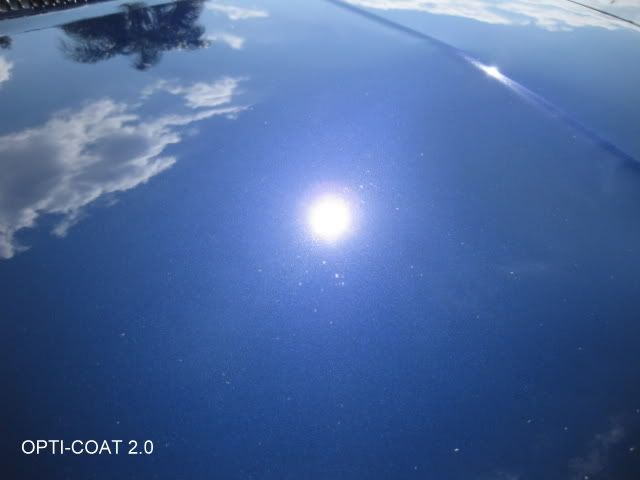
Review and Extreme Testing: Opti-Coat 2.0 and CQuartz
Review and Extreme Testing: Opti-Coat 2.0 and Ceramic Quartz
Introduction:
I want to start by saying I understand these products are very different and I mean no disrespect to either manufacturer by placing them in the same article. With changes in technology have come some very interesting new products in the last few years. About 6 months ago I purchased a couple CQuartz kits but hadnt had the opportunity to use them. With the release of Optimums consumer version of their coating (Opti-Coat 2.0), I thought it would be an interesting learning experience to use them side-by-side on the same vehicles. I also wanted to complete some extreme testing on both products. Last week I purchased 20cc of the Opti-Coat 2.0. Now admittedly, anybody who has seen these 2 cars up close would say I should have waited until I had a chance to use touchup paint on the Blue SL before placing a permanent and or semi-permanent coating on it. The rock chips are pretty bad but I couldnt wait to try these products out. As far as the Green SL goes most people might not waste the product on something that is in the process of total clear coat failure across all horizontal surfaces on top of the vast array of rock chips but to me it's the perfect palette. Last weekend I spent some time applying and getting to know these products. During the week I observed and recorded a few of their characteristics as well as conducting some extreme testing this weekend on a junk panel.
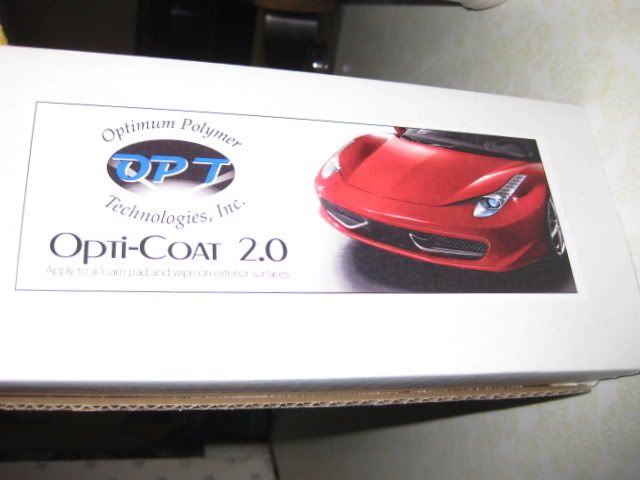
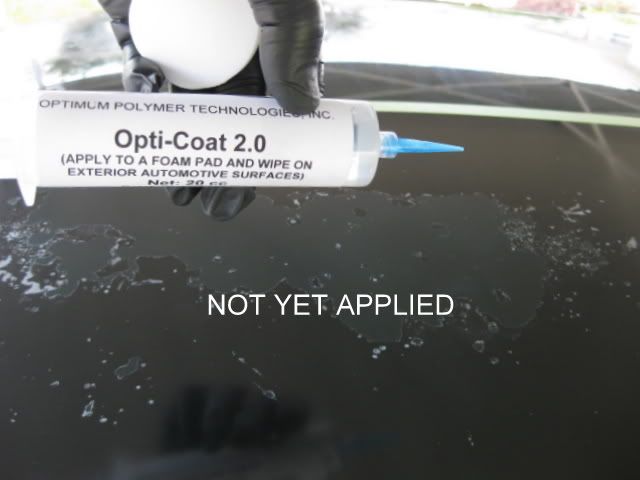
Optimum: Opti-Coat 2.0 (Manufacturer Description):
Optimum Opti-Coat 2.0 is a permanent coating that protects automotive paint over its lifetime! Unlike a wax or sealant, Optimum Opti-Coat 2.0 will not wash or wear off. It acts as a second layer of clear coat, which provides increased protection against the elements. Formerly only available to professionals, Optimum Opti-Coat 2.0 is now available to the public in a more user-friendly formula.
Car Pro: CQuartz (Manufacturer Description):
CQuartz by CarPro is an anti-static, weather-resistant nano coating that shines and protects your vehicle like nothing else! CQuartz works on the molecular level to transform the surface. Once treated with CQuartz, your vehicle will repel water and contaminants, and it will maintain a clear, reflective, hard-as-nails shine. One application can last two years!
Opti-Coat 2.0 - Initial Product Observations:
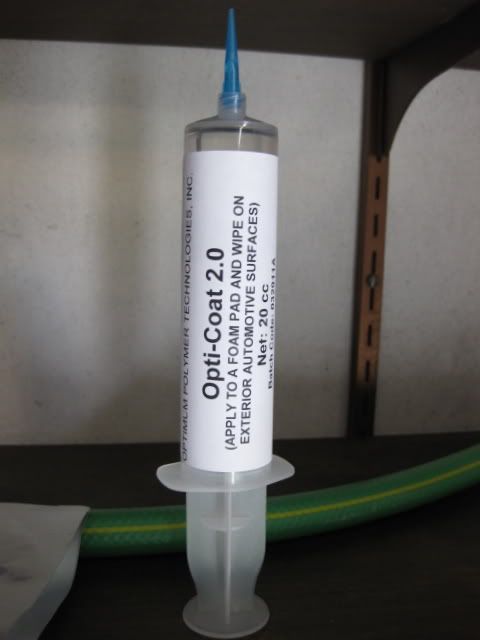
1.- Packaging: Large Box with Optimum Label
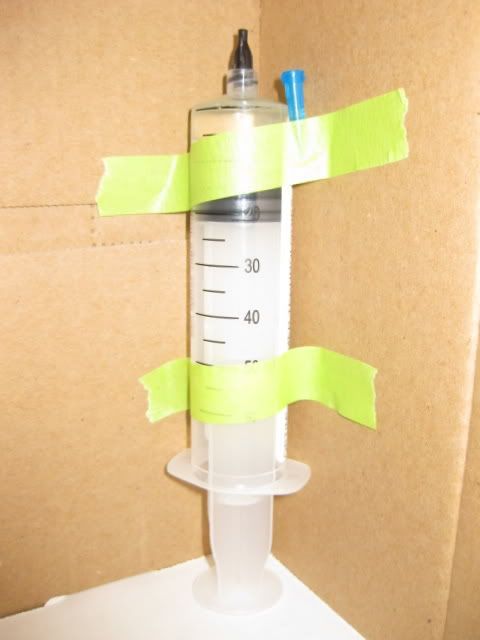
2.- Contents: (1) LARGE Syringe with threaded insert cap, threaded applicator cap, (1) foam applicator pad, and (1) MF towel
3.- Clarity of Directions: Lacking on outer packaging / Some direction on Syringe
4.- Consistency: Completely Fluid
5.- Color: Clear
6.- Scent: Probably not a good idea to sniff
7.- Size: 20cc (Equal to 20ml)
8.- Price at time of Review: $59.99
9.- Manufacturer: Optimum Polymer Technologies, Inc.
10-Made in: USA
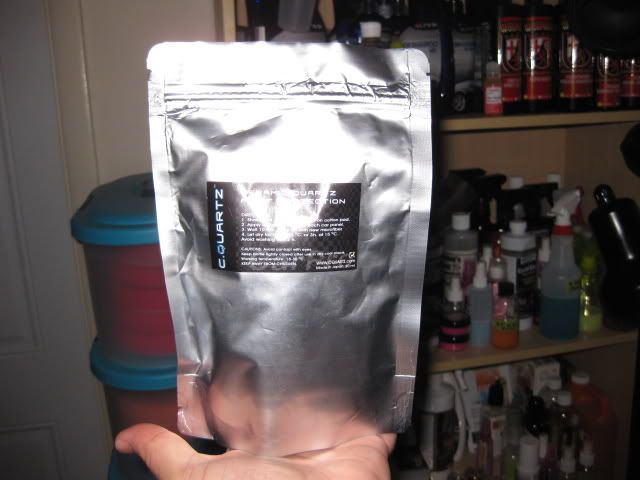
CQuartz - Initial Product Observations:
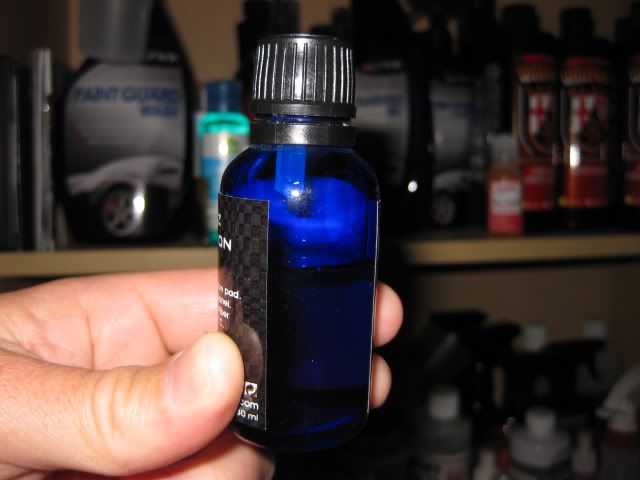
1.- Packaging: Metallic pouch (Like a capri-sun but much cooler)
2.- Contents: (1) sealed glass bottle with dripper nozzle beneath threaded lid as well as (1) applicator block and (5) applicators
3.- Clarity of Directions: Complete directions listed on outer packaging and glass bottle
4.- Consistency: Completely Fluid
5.- Color: Clear with a slightly yellow tint
6.- Scent: Definitely not a good idea to sniff
7.- Size: 30ml (Equal to 30cc)
8.- Price at time of Review: $53.99
9.- Manufacturer: Car Pro
10-Made in: Japan
Abbreviations used here:
CQ = Car Pro Ceramic Quartz
IPA = Isopropyl Alcohol
MF = Microfiber
OC = Optimum Opti-Coat 2.0
OPC = Optimum Power Clean
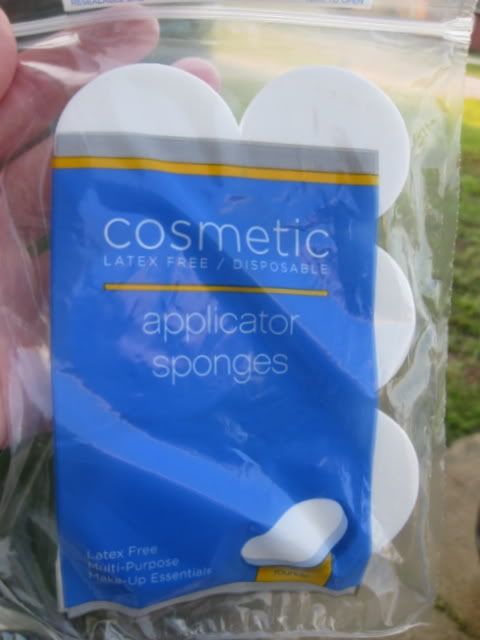
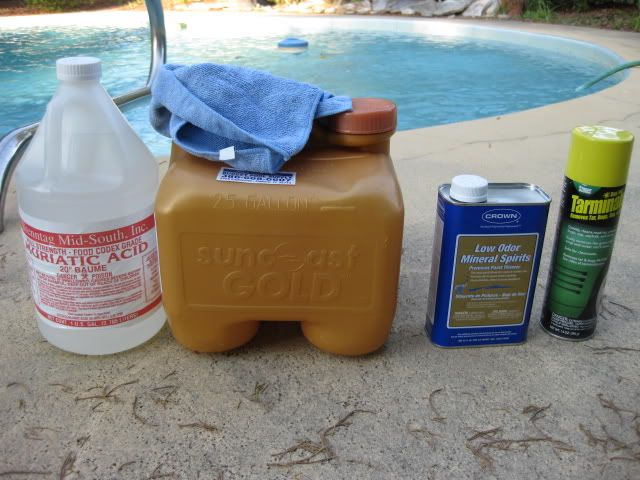
Products used during application or removal:
1.- Cosmetic Applicator Sponges
2.- Quality MF Buffing towels
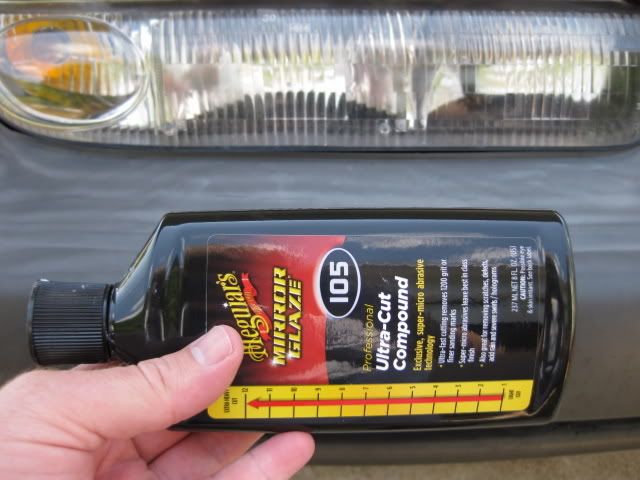
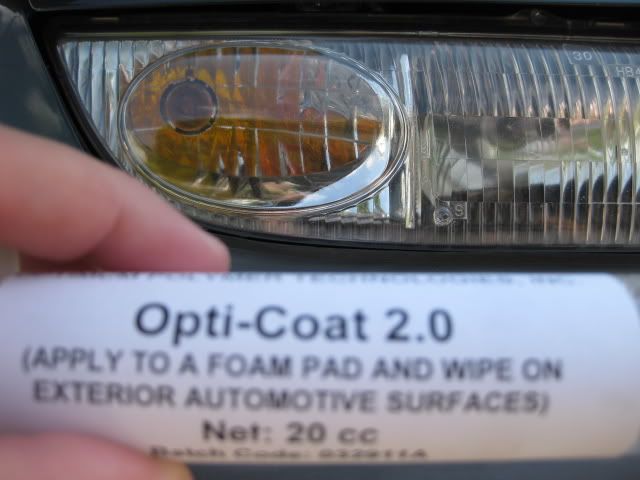
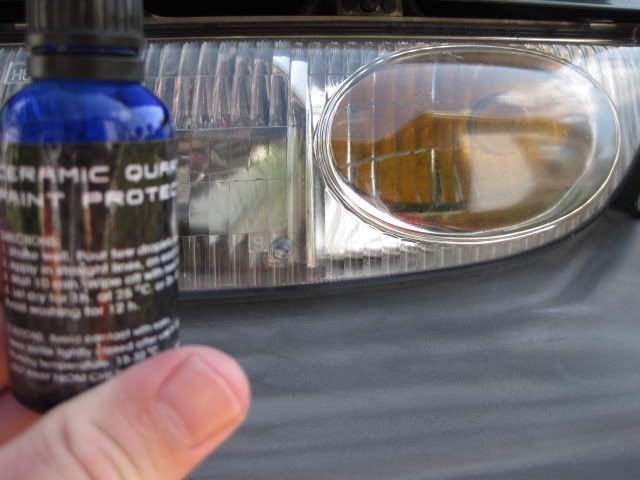
PICTURES OF PRODUCTS:
Opti-coat 2.0
Cquartz
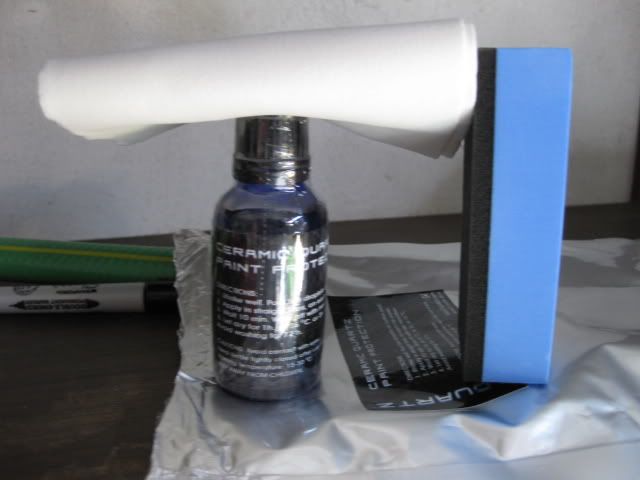
Applicators
Method of Preparation:
I began two days earlier with some prep on the clear coat failure test area but we will get to that later. Sunday morning I started relatively early by mixing up a bucket of Meguiars Shampoo Plus. Next I rinsed all of the panels that would be getting stripped.
08-BEFORE OPC

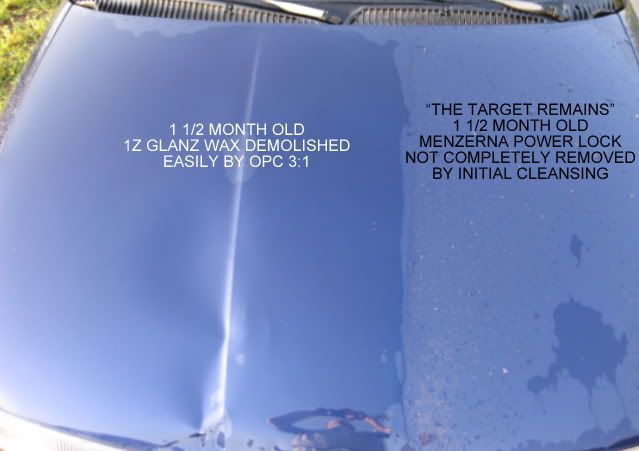
After rinsing I grabbed my bottle of OPC 3:1 and sprayed it directly on each panel (of both Blue and Green), which was to be stripped.
VIDEO: 01 Strip with Optimum Power Clean
After allowing it to set for a minute I took my MF chenille wash mitt from my premixed bucket. I used this to spread the OPC and wash each panel and rinse both mitt and panel before moving to the next. The Nattys blue and 1Z products were obviously stripped but I found the drivers section of Blue to show signs that Menzerna Powerlock was still in place.
09-AFTER OPC
10- AFTER OPC
11.-AFTER OPC
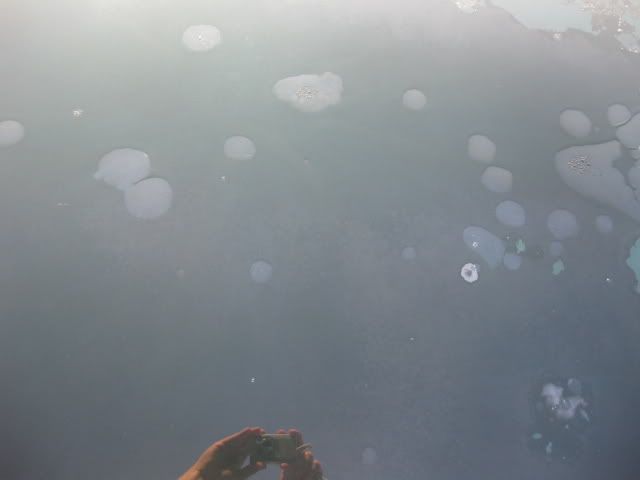
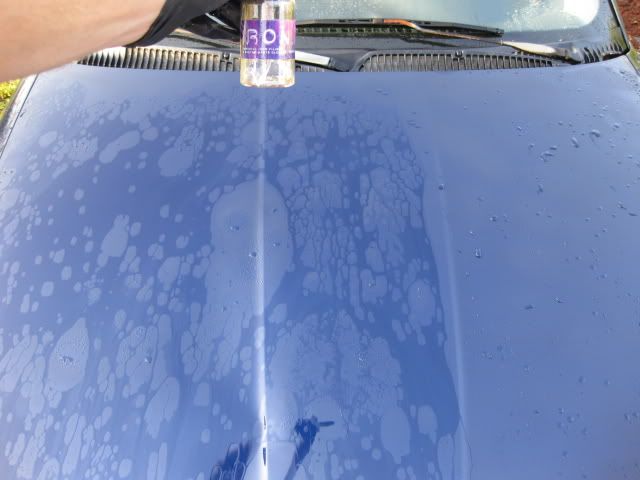
At this point the sun was moving a little higher so I pulled out my canopy and set it up to try to protect the front of blue and rear of green from getting too warm. Next I selected a small bottle of Iron X and after shaking it I proceeded to spray it across each panel.
VIDEO: 02 Spray Iron X
I did not rub it in as I should have. This was my first time using IronX and it looks like I missed a step and did not use it correctly. I should have rubbed it in before allowing it to sit but instead I misted it onto each surface I was prepping and allowed it to sit for a few minutes before thoroughly rinsing all affected surfaces.
12 18
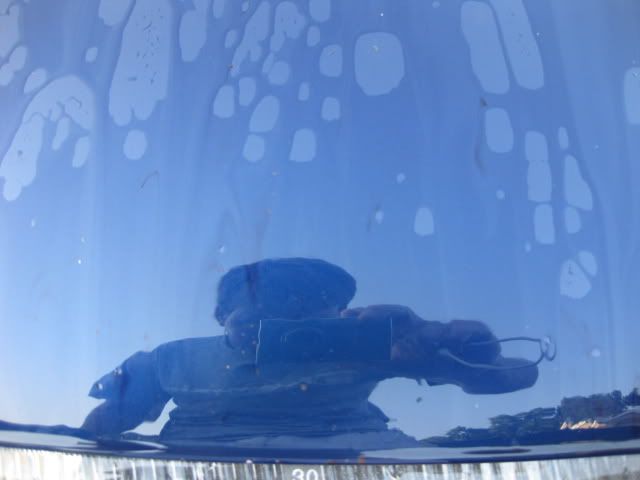

In the rinse video below you will notice that Menzerna Power Lock still showed signs of life (Driver side of Blue vehicle).
VIDEO: 03 Rinse After Iron X
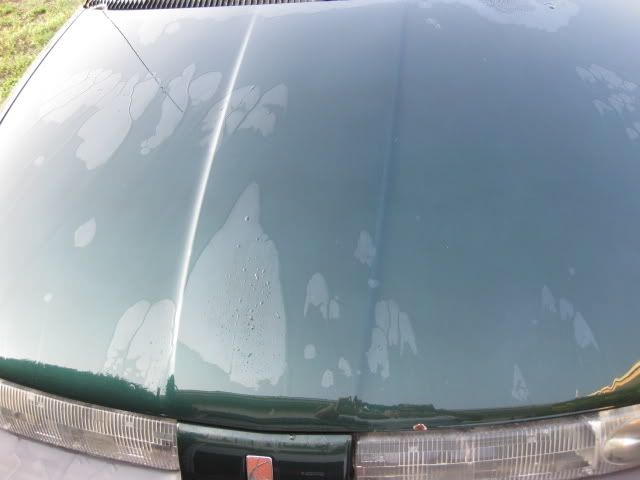
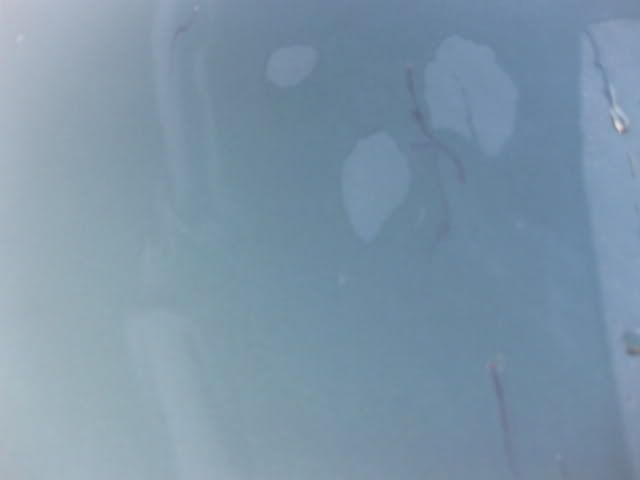
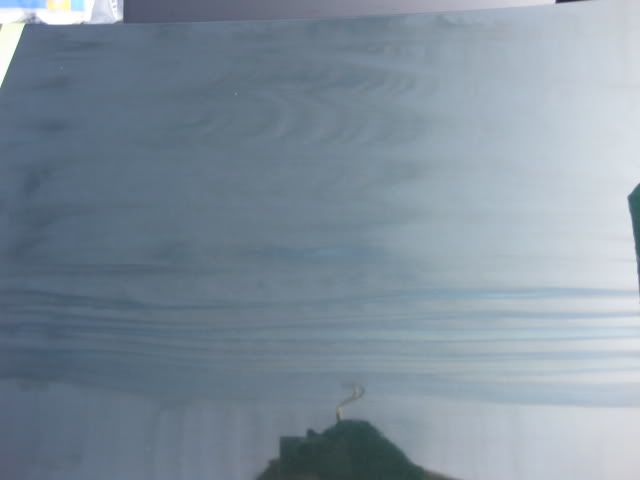
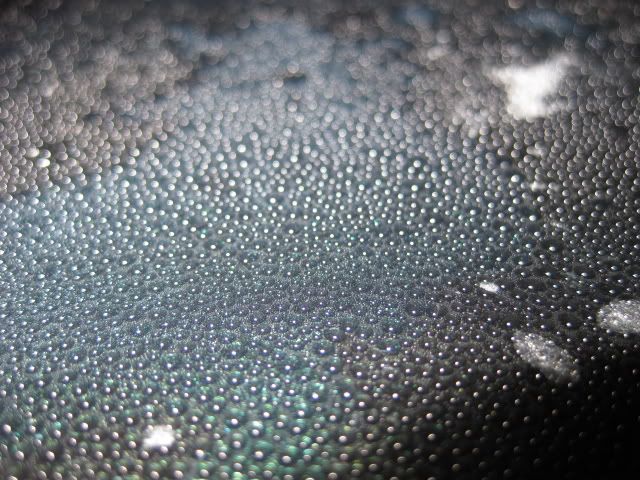
19.-Green Car Rear Lid (paint is still wet so you can see the clear coat is ready to fail any day.)
After drying all the soon to be coated surfaces with a WW towel I took a quick break to allow the last bits of water to evaporate.
20.-Green Car Rear Lid
21.-Blue Hood Dry
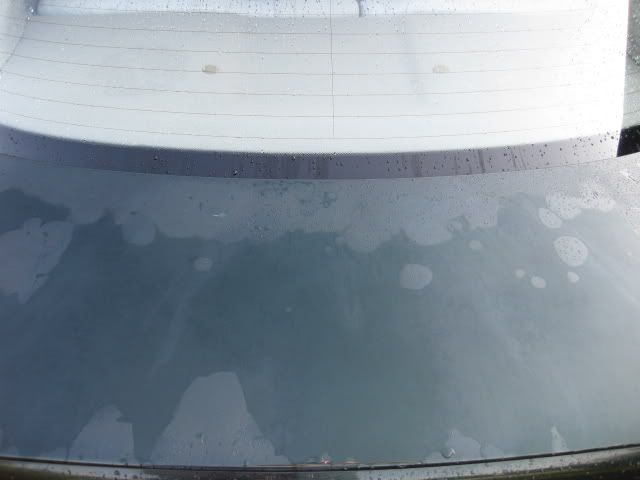
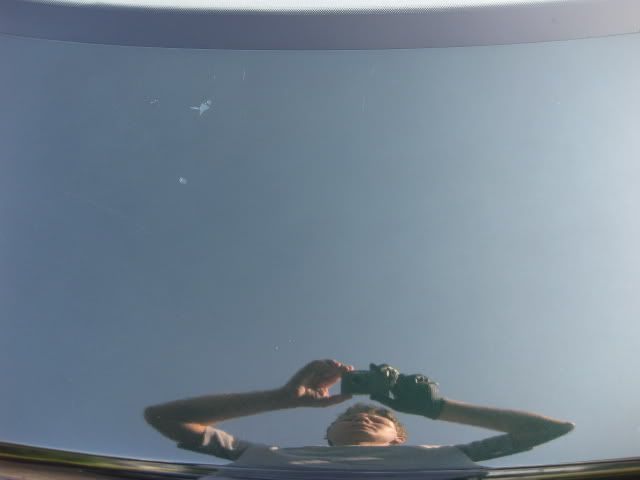
22.-Blue Windshield Dry
[SIZE=3][COLOR=black][FONT=Arial]Next I filled a small bottle with mineral spirits and sprayed it onto a section and then wiped it off with my MF towel. I repeated this method across the rear lid of Green and the hood and windshield of Blue. Next I repeated the previous step all over again this time with my small bottle of IPA mix. At this point the sun was peaking a bit too far over the canopy threatening to shine on the panels I was working. I had to move quick to get the coatings on these first two panels before re-arranging the cars and canopy.
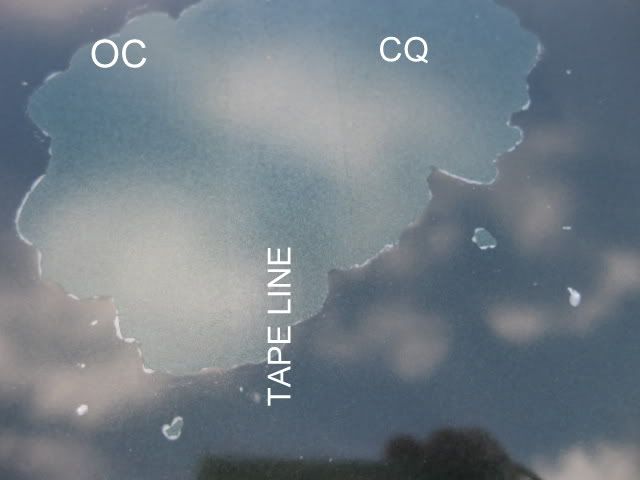
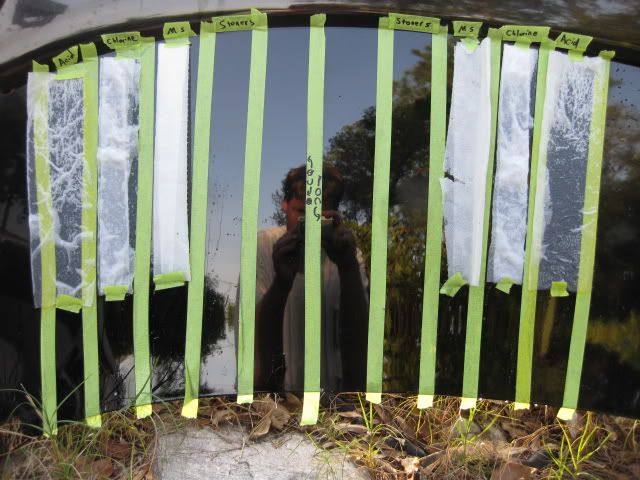
DIAGRAM COATING KEYS:
23.-BLUE CAR DIAGRAM
24.-GREEN CAR DIAGRAM
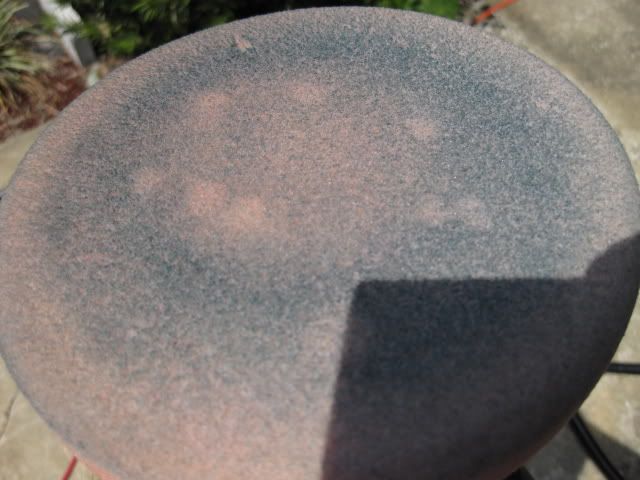
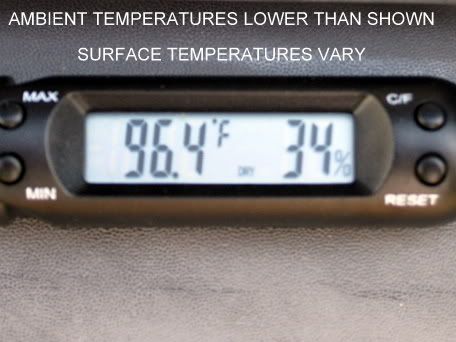
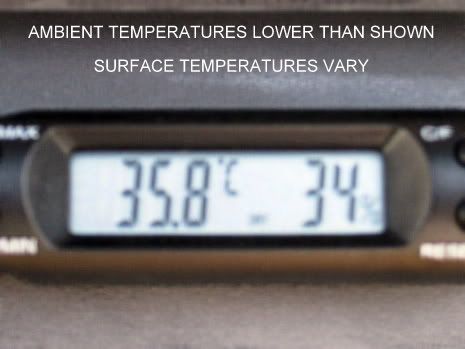
25.-Conditions at Start (Fahrenheit)
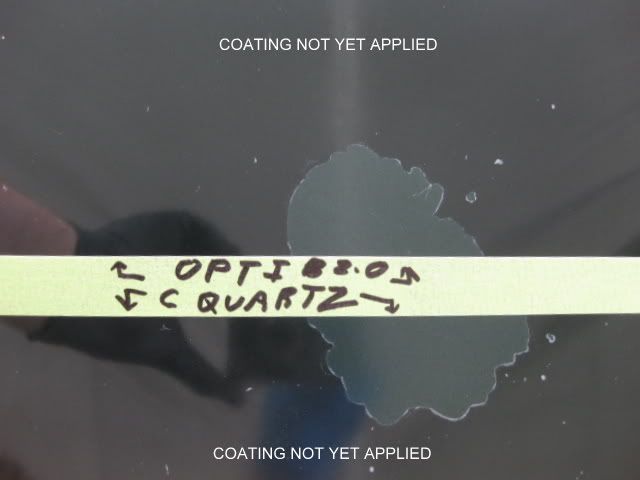
Cquartz -Method of Application:
I placed a few drops of Cquartz onto an applicator pad and began to apply it to the far drivers side of the blue hood. My initial method was to apply in one direction only overlapping the strokes a little as I went. I found the applicators I had decided to use to work quite nicely with the Cquartz although I would have preferred them to be a little larger. The Cquartz went on very easily as shown below. After completing a couple sections the following video was taken of the final section of CQ application to the drivers side of the Blue hood.
VIDEO: 05 Cquartz Paint 1
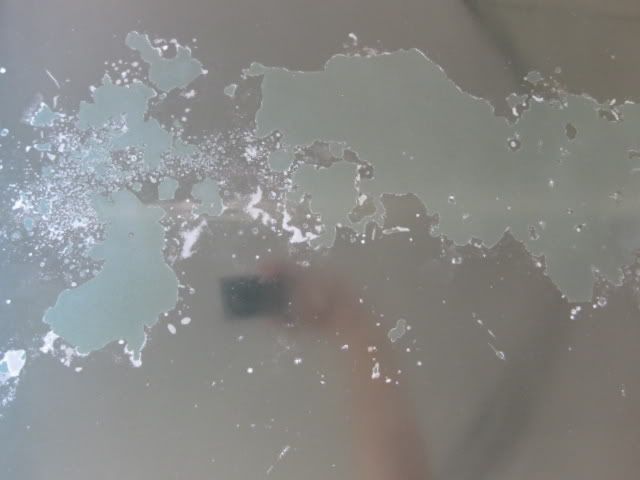
CQ was also applied to the passenger side half of the rear panel (Green Saturn) which was protected by the canopy at this time as well.
26.-CQ minutes after application
27.-CQ minutes after application

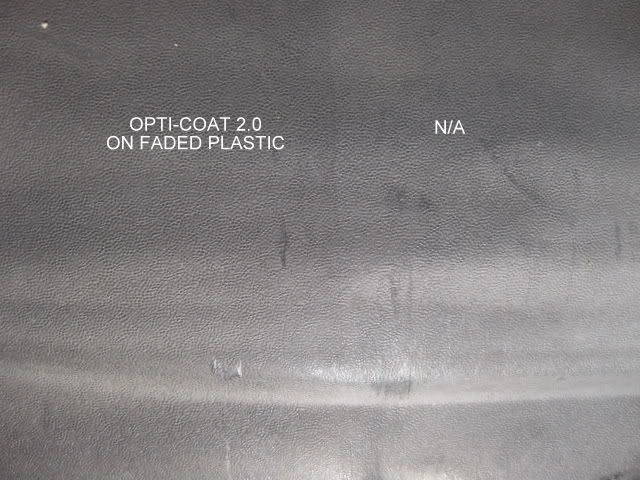
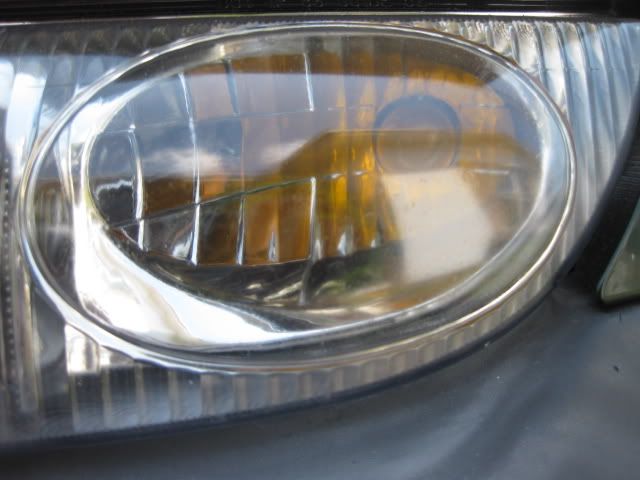
It was already very warm so I didnt want to leave the CQ on for too long before buffing it off. However I figured I would have enough time to apply the CQ to the driver side headlight and faded plastic bumper. After spending about 2 minutes on this exercise it was quite apparent that CQ was not the answer for restoring the faded bumper. The product went on a little dark initially but as soon as it started to dry the color would fade about 90+% of the way to how it was before application.
VIDEO: 06 CQuartz Faded Plastic Bumper
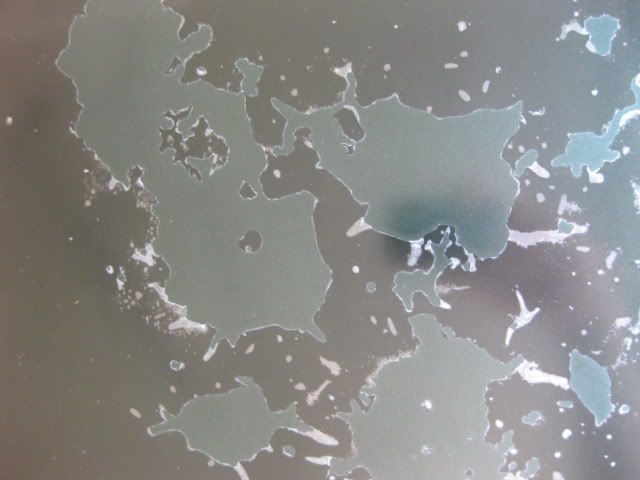
28A.-Cquartz a few minutes after application

Based on the results I stopped short of applying it to the rest off this side of the bumper. I will be reviewing C4 within a couple weeks and had no wish to waste any more CQ here. I had not yet buffed off the CQ from the hood but with only a couple minutes spent here I felt I had a little time to move forward with the OC application to the other side of the hood.
Opti-Coat 2.0-Method of Application:
After unscrewing the threaded insert cap and replacing it with the threaded applicator cap I was ready to go. I dabbed some very small drops of OC onto a fresh applicator and began to apply the OC in a very similar method as previously described. The OC appeared to evaporate slightly quicker than the CQ and may be a bit more sensitive to the temperature of the panel. After a few strokes of careful OC application I became bolder, and began to use slightly more OC. At one point the syringe released a little more OC than I wanted onto the applicator. I just dabbed it onto the paint to come back and pick up a minute later. This did not seem to cause an issue but is not best practice. After applying the product in 1 direction to a section I decided to come back and go over it in a perpendicular direction. With some experience under my belt I would have done a section about half this size before going back across it in perpendicular direction and moving forward.
Note: In these initial videos the amount of product Im applying to my applicator is unfortunately not apparent. I was careful not to press too hard so that the syringe wouldnt release more product than needed. Im really applying very little to the applicator.
VIDEO: 07 Opti Coat Paint
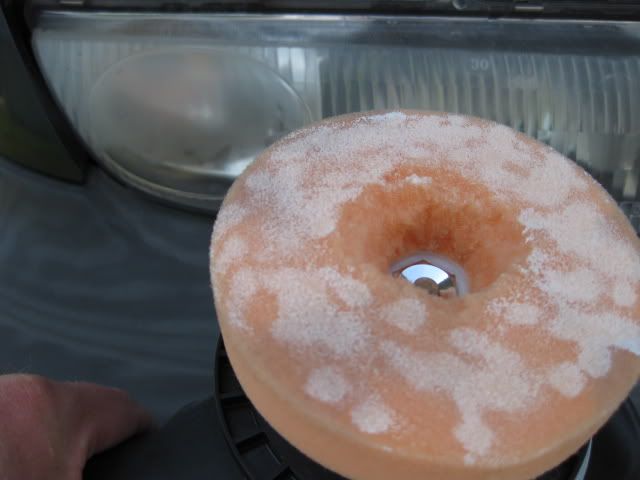
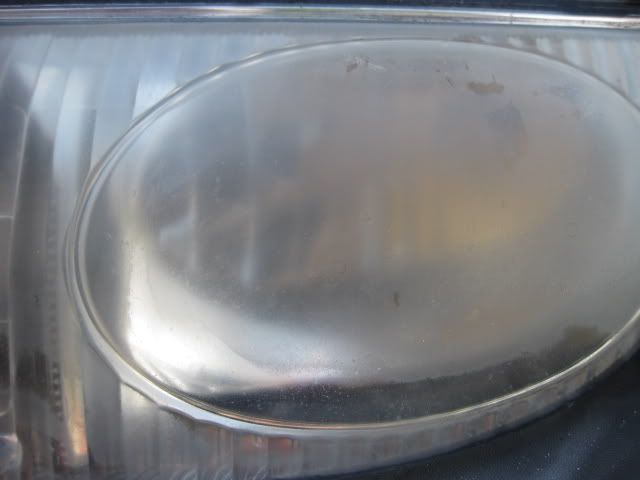
OC was applied to the passenger headlight and passenger corner of the faded plastic bumper. This application took place about an hour later but is being inserted here in this review for clarity. After spending a few minutes on the plastic bumper I found similar results to those I had observed with the CQ. These 2 coatings were not the answer for restoring the faded bumper.
VIDEO: 09 OptiCoat Faded Plastic Bumper
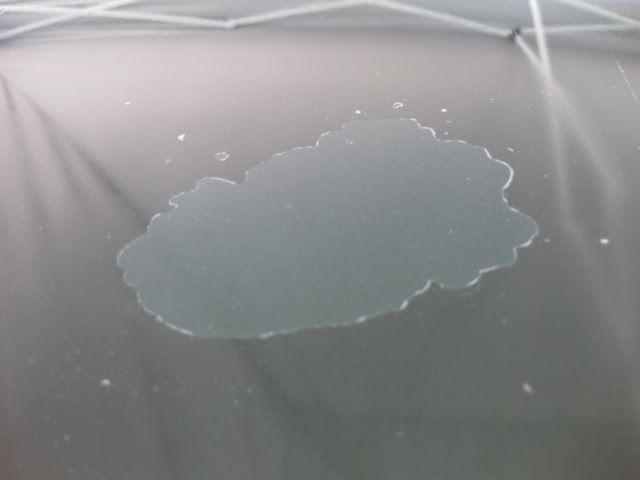
28B.- OptiCoat 2.0 a few minutes after application
--------------------------------------------------------------------------
Cquartz Buffing Off
It had been about 13-14 minutes since I had applied the CQ to the paint on the driver side and it was time to buff it off as directed. With a fresh plush MF towel I began to buff it off. The CQ buffed off with little effort and I did not feel any kind of grabbing against the towel.
VIDEO: 10 CQuartz Paint Buff Off
Opti-Coat 2.0-Buffing off Ridges:
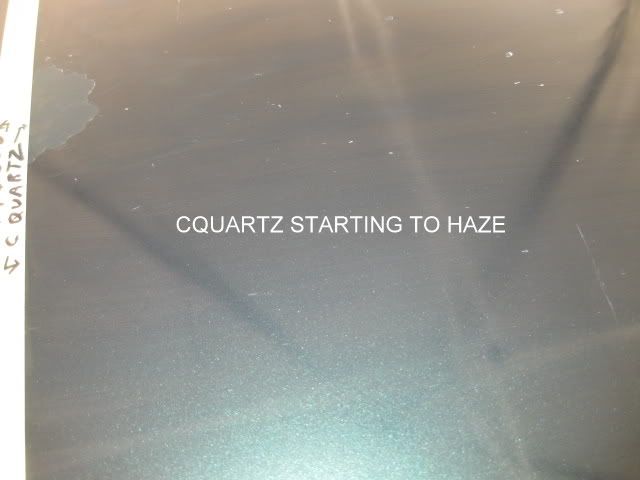
Next I came back to buff off the high spots or ridges on the OC section. The OC directions on the packaging simply state to wipe on. It doesnt talk about buffing off or removing high spots. Having said that, I had read a lot of different things about coming back and lightly touching off the high spots. Having never used this product before I was unsure about how much pressure was acceptable and how soon to complete this task. After working with the product Ill tell you its helpful to blend the high spots as soon as reasonable possible. On this section I didnt do that. Instead I came back after buffing the Cquartz side and began to buff these high spots. Taking the temperatures into account I had waited longer than I should have to flatten the high spots. That would be true if I had buffed or blended those high spots very shortly after application. Moving forward I learned my lesson and was not so afraid to buff the OC areas as needed. Incidentally when buffing the high spots on the rear of the green SL with roughly the same time elapsed I had no high spot issues. All I can think is I must have applied it more evenly and less thick.
VIDEO: 11 Opti-Coat 2.0-Buffing off Ridges
I decided to buff the OC side harder to try and remove the high spots. Optimum does not recommend buffing the product in this manner (See Q&A at end of article). After a couple more minutes I came back to inspect and lightly touch the remains of the high spots once more on the OC. As you can see the high spots that I was getting worried about had faded considerably after I buffed them.
VIDEO: Opti-Coat 2.0
Cquartz on Glass:
Unfortunately it appears I didnt make a video of my CQ application on glass but rest assured I did apply it to the driver side of Blues windshield. It applied and later buffed it off in much the same way as I showed on the paint.
Opti-Coat 2.0 on Glass:
Application was straightforward. Having left the hood for too long before smoothing the ridges this time I erred on the side of caution and I touched off the ridges immediately after application on each small windshield section.
VIDEO: 13 OptiCoat Glass
Last edited by CEE DOG; 04-18-2011 at 09:41 AM.
-
Super Member
-
Super Member
-
Super Member
-
Super Member
Re: Review and Extreme Testing: Opti-Coat 2.0 and CQuartz
Coatings - Side by side:
Composition/Technology:
Opti-Coat – Ceramic-Silicon Carbide clear resin coating
CQuartz- Ceramic Nano-tech
Application Summary: (Do not apply in the sun)
Opti-Coat 2.0 should be applied section by section and any high spots that remain should be evened out with your applicator or with a paint safe MF towel within 5 minutes in more favorable temperatures. In higher temperatures, which is what I dealt with I found I really needed to remove the ridges as I went after each small section. It is recommended (by Optimum) to avoid buffing unnecessarily. After removing the high spots OC should self-level throughout its cure time. Be sure to look for high spots with a light source as well as shaded from light. I found the ridges in my panel while shaded that were invisible when bright light was on them.
Cquartz is applied and (after hazing) is buffed off. The wait time before buffing off hinges on the temperatures. During the first ten minutes, any spots that were missed can be touched up. But only during this time, afterward don’t try to re-fill missing spots, otherwise it can stain the paint.
Initial Care:
Opti-Coat – Allow to cure before washing
CQuartz- Avoid washing the vehicle with any soap for 7 days. Rinsing with water is ok
Layering:
Opti-Coat cannot and does not need to be layered.
CQuartz can be layered and recommends you use 2 layers for more thickness, durability, and hardness.
Durability Claims:
Opti-Coat - Lifetime of paint
CQuartz- 2 Years
Scratch Resistance:
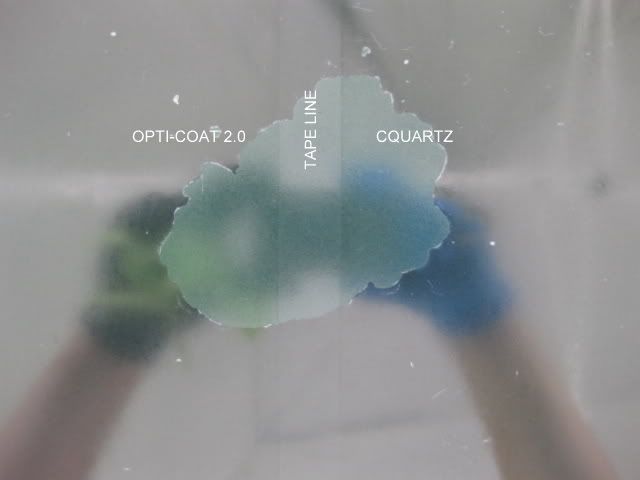
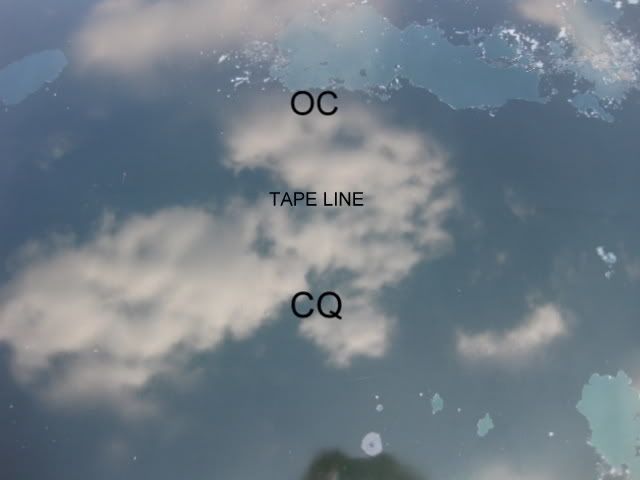
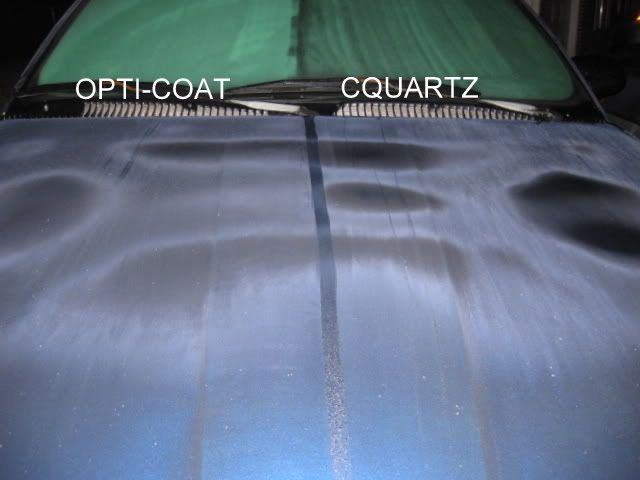
With both coatings being applied side by side on the same panels I’m in a good position to test this. With the tape line down the middle on blue there should be some fine hairline wash swirls showing in a couple months. I look forward to seeing which coating repels them the most.
Slickness:
Opti-Coat – Not as slick as sealants and wax are to the touch (You can use any of the Optimum Detail sprays or the Optimum spray wax to add slickness) Richy mentioned to me that Reload works here as well.
CQuartz- Not as slick as sealants and wax are to the touch but slicker than OC (Carpro recommends you use Reloadto add slickness)
Care:
Opti-Coat- Washing is all that is needed. OC can be clayed but it should not be necessary and Optimum Poli-Seal can be used with a foam-finishing pad to clean the paint over time. Remember this coating is expected to last for years.
CQuartz- Washing is all that is needed. CQ can be clayed with mild clay.
Bird Bomb repellency:
Will either coating protect against bird bombs? I’m not sure about that but I would continue to remove bird bombs asap. Bird bombs can eat through sealants and into regular clear coat within a matter of just a coupIe minutes so I wouldn’t expect either coating to protect from a bird bomb indefinitely. However I would expect it to buy you more time than a wax or sealant. The question at that point becomes: What does the coating look like where the bird bomb was? Is there an etch mark in the coating?
Opti-coat - If you did get a bird bomb etching I imagine you could remove it with Poli-seal.
Cquartz - Even if you have to polish the etched area all the way through the coating you could simply recoat that specific spot with another layer of Cquartz. I don’t believe the same is possible with OC.
Final Observations and Summary:
First off these products are definitely very different and each has it’s own strengths. Now let me get into the things I really like as well as the quibbles.
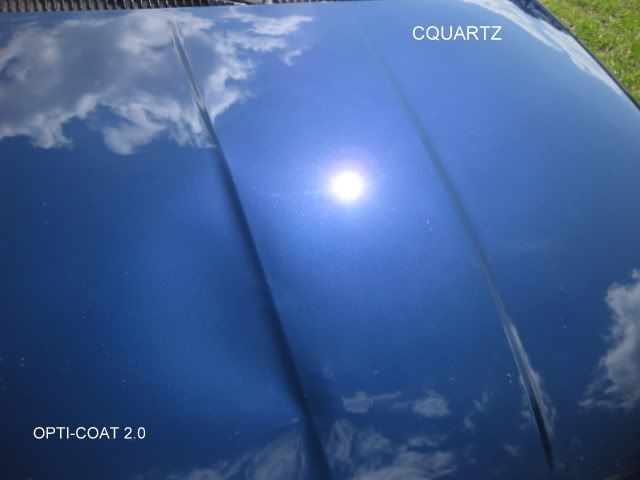
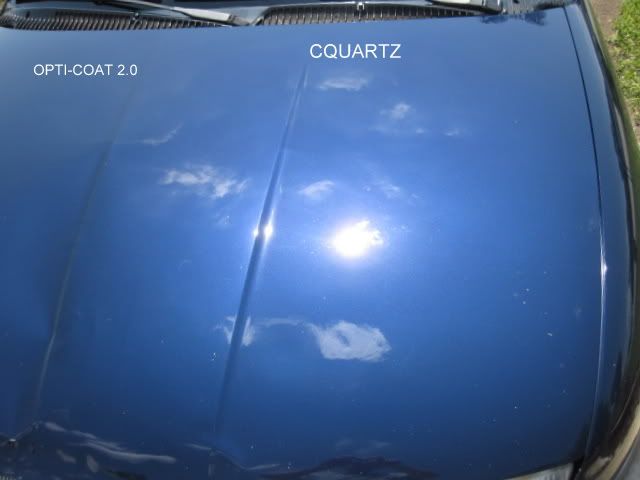
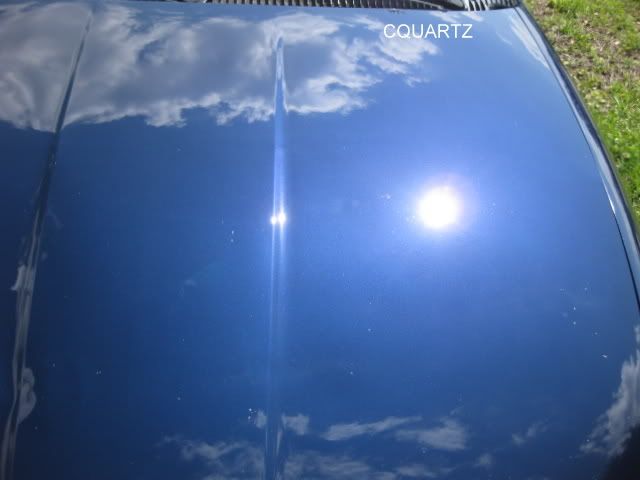
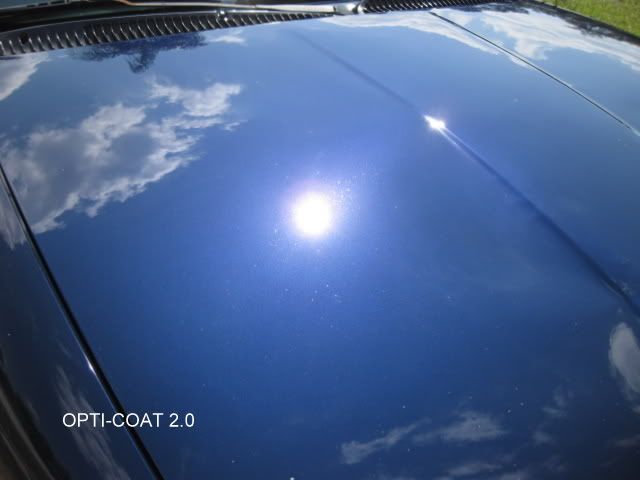
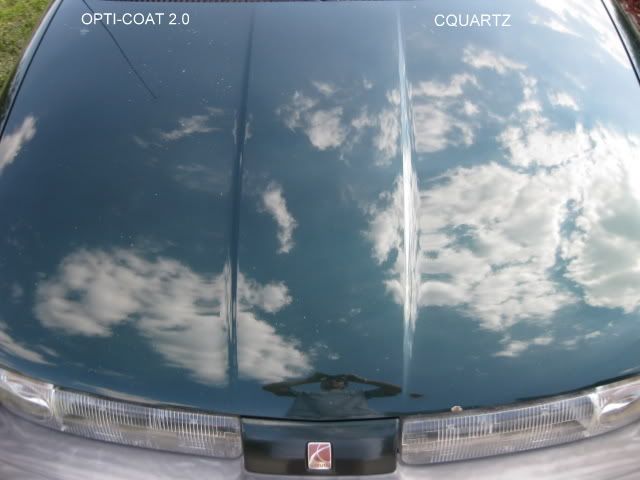
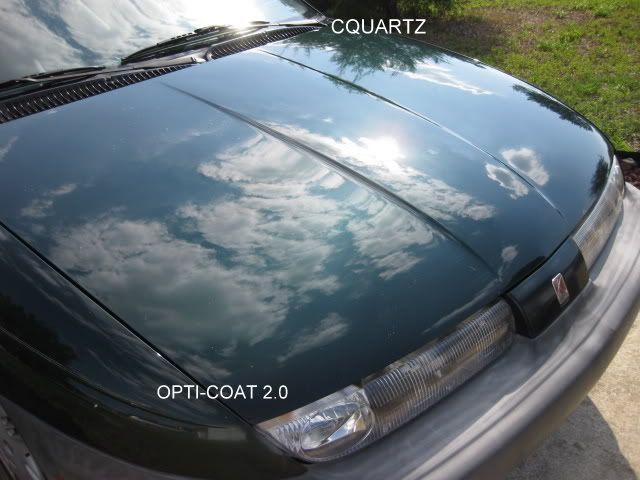
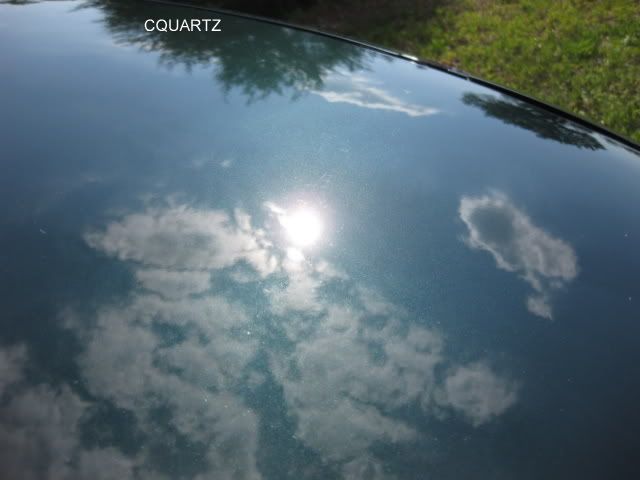
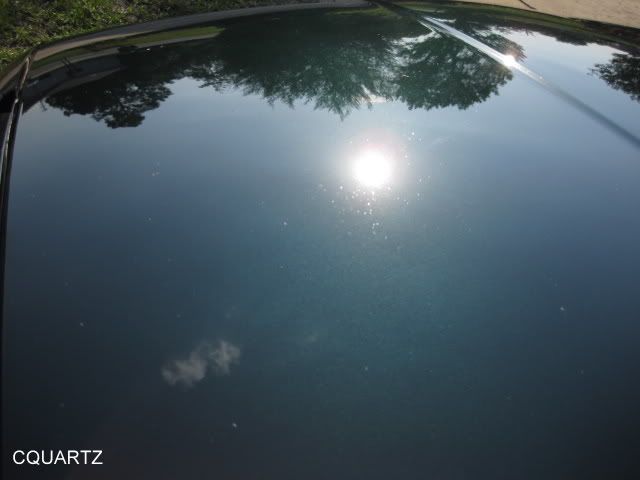
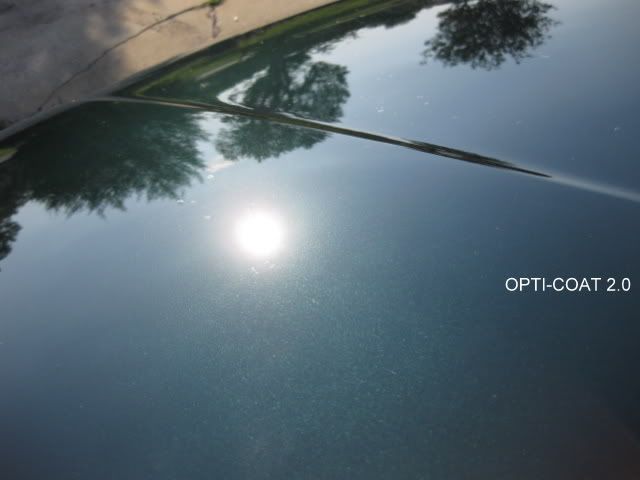
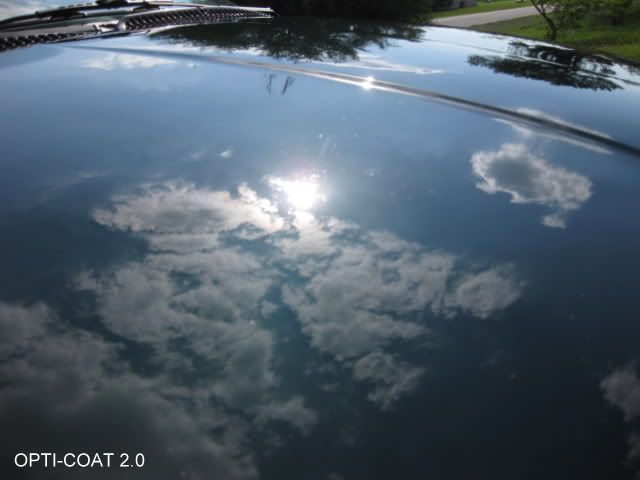
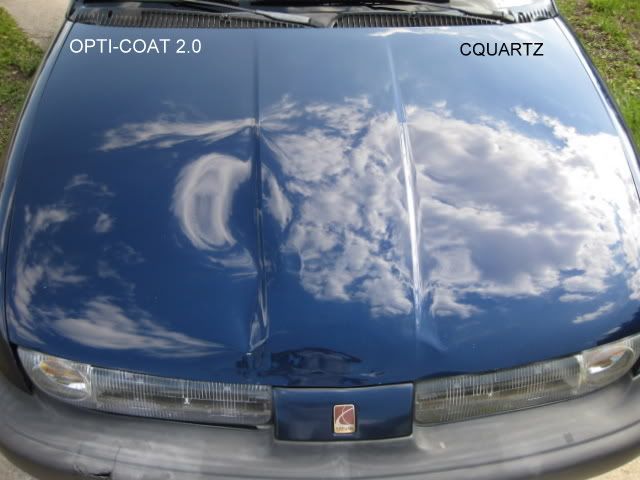
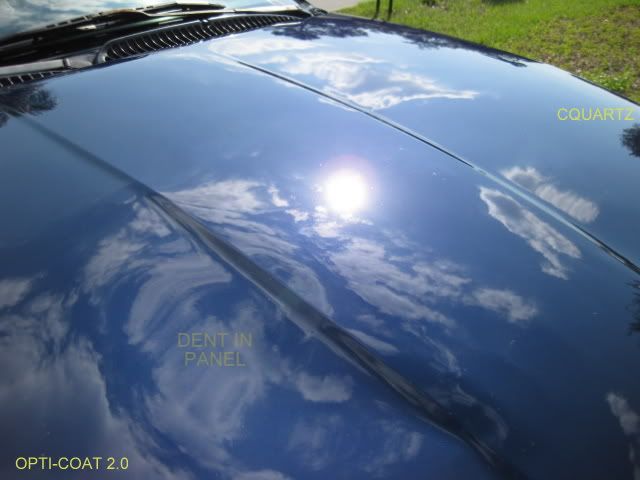
Both products look great. The real question is, how well you clay, polish, and prep the surface for application. Period. The Opti-Coat seems to be slightly darker particularly on black paint. On the black test panel I used it was noticeably darker than the CQuartz. On the blue and green cars this was not nearly as apparent and it seemed to have a slightly different affect. However there was an obvious depth to it.
I may have sniffed too many coating fumes J but I think if you look at these 2 cars long enough the visual effect of the CQ seems to pop out at you a little while the OC seems to have serious depth to it. It maybe that was just the visual affect of the particular cloud arrangement I was looking at when I came to this opinion.
Faded Plastic Trim: The coatings went on dark initially but faded as they dried and in my opinion they are a waste of product on seriously faded plastic. I think some people expected them to restore in the way that C4 does and that just doesn’t seem to be the case. It could be this is just the specific plastic I tried it on and other plastics would find a different result. For new plastic trim I’m sure either coating is an excellent product. I haven’t tested either on newer plastic trim yet.
I preferred the glass drip/stop bottle that is used with CQuartz to the syringe style container from Optimum. It feels very cool to apply with syringe but it isn’t quite as functional. I am however curious if the glass bottle will allow me to remove all its contents when I get down to the last 2-3ml. It looks like that drip/stop nozzle protrudes into the bottle far enough that it could be an issue to get to the last bit of product.
As far as directions on packaging go I’d like to see Opti-Coat 2.0 include a brief list in the packaging that shows the approximate maximum wait times at different temperatures. However I do understand why that might not be possible. There are other variables so it’s hard to tell somebody what to do solely based on ambient temperature. Application is very simple once you know how to do it. However if you were to receive this product and follow the directions word for word (with no other knowledge of application) you would likely end up with some slight ridges. It’s important to buff or even those ridges or high spots out. How soon you need to accomplish this is based on the temperature and conditions.
Less product is needed with Opti-Coat 2.0 than with Cquartz which is a big bonus. I chose the applicators I used based on what I thought would soak up less product. However I did use the same material for application of both products. The next time I use Opti-Coat 2.0 I plan to try the foam applicator, which was recommended. I was impressed that even after I left ridges in OC for too long before leveling (in my opinion) they did a much better job than I expected of self-leveling during the cure time. I love a wipe on walk away sealant like Opti-Seal. The stakes are higher with a WOWA coating but I was impressed.
I found application of CQuartz to be a little easier to apply correctly for a first time user of both products in high temperatures. Clear and specific directions in the packaging would level the playing field some for me. Also, if applied in cooler temperatures than shown here I can see the Opti-coat gaining the advantage in ease of use. To be fair, with hindsight being 20/20 I should have used the foam applicator that was recommended for Opti-Coat 2.0 application. The foam applicator would have distributed the product more evenly and evening out any ridges may have been a non factor.
Q & A with Dr. G of Optimum:
Dr. G, It was great having an opportunity to talk with you at Detail Fest again this year. I have a few questions I was hoping you could answer for everyone. This Q&A will be posted online in my Coatings Review and Extreme Testing article.
Corey, It was a great pleasure seeing you again also and congratulations on the well deserved award you won for your thorough forum reviews. Your questions here are a prime example of your thoroughness which is partly due to your engineering background.
I also want to thank Chris for doing a superb job of explaining how to apply Opti-Coat to make the process easier and more effective for all users.
1.-What would be the consequences of using more than light pressure to buff off high spots or ridges within minutes of application?
When applying Opti-Coat 2.0, the best results are achieved with an even and continuous coat. If you have any high spots, it will be hazy and stays hazy after curing. Using the foam applicator with light pressure helps even out the high spots while using too much pressure can release more product from the sponge and would defeat the purpose. Alternatively a microfiber towel can be used to remove the excess product, however, with this approach there is a possibility of removing all the resins.
2.-Approximately how many microns will Opti-Coat 2.0 add to paint?
By using the contents of the syringe on a large SUV, it will add 2-3 microns of Opti-Coat to the paint. For smaller cars you can achieve the same results with less product.
3.-Can Opti-Coat 2.0 be applied to single stage paints of any age?
Opti-Coat 2.0 was designed for clearcoat paint and it should be applied after the paint defects are removed. We have not done any long term testing with this product on single stage paint.
There are several professional detailers that have applied Opti-Coat to single stage paint after removing all the defects and oxidation with great results. They might be able to provide more information on this application but the main purpose of this product is to protect clearcoat from the elements and premature failure due to over-polishing.
4.-Consider a car with older single stage paint that is badly oxidized and faded and then polished to perfection and brought back to glossy condition. Can Opti-Coat 2.0 lock in the gloss or have any effect stopping the paint from regressing to its faded condition?
Please refer to the previous answer.
5.-Can Opti-Coat 2.0 be used on leather, vinyl, and interior plastics?
Absolutely not. Opti-Coat 2.0 is designed for use on exterior automotive surfaces only. It cross-links and forms a hard clear film therefore it should not be applied to flexible substrates including leather, vinyl, soft tops, tire, etc.
6.-What would be the outcome if Opti-Coat 2.0 was applied to a properly cleaned tire?
Please refer to the previous answer.
7.-I understand using Optimum Poliseal with a foam-finishing pad is the acceptable method of cleaning the coating down the road. Is this correct?
Yes, you can use Poli-Seal by hand or with a foam finishing pad to clean Opti-Coat or to add additional gloss.
8.-Are other Optimum products, such as OptiClean and Optimum No Rinse friendly with Opti-Coat 2.0? If they are friendly do they require any adaptation in their application compared with how they are used on non-coated paint.
Yes, we design all our products to be compatible with each other to make the process easier and that includes the products you mentioned as well as other Optimum products such as Optimum Car Wax, Opti-Seal, Instant Detailer, etc.
9.-What temperatures will cured Opti-Coat 2.0 withstand before failing?
Opti-Coat 2.0 forms ceramic bonds (Si-C) at very high temperatures and will not be damaged by extreme heat. Therefore, it can be used to protect wheels, brake calipers, engine compartments without any issues.
10.-Assuming its kept indoors in 65-78 degrees what is the shelf life of Opti-Coat 2.0 before being opened by the consumer?
Opti-Coat 2.0 has an infinite shelf life as long as moisture is not introduced into the product.
11.-If only some of the syringe is used and it is properly resealed with the cap what will the remaining shelf life be? Assume its kept indoors in 65-78 degrees.
Please refer to the previous answer.
12.-Can a small touchup spot of Opti-Coat 2.0 be applied over a previously Opti-coated panel. For instance: If you get a rock chip in your paint and need to touch it up then want to recoat the touched up area with Opti-coat can you simply apply OC to that one small area? Would there be any negative affects where the touch-up OC overlapped the existing OC?
Once Opti-Coat cures, it will repel most everything even the fresh resin. If you have to recoat a section, you will have to polish the entire panel first with Optimum Polish or Optimum Finish. Then, you will need to wipe the panel down with a damp microfiber towel to remove any residue before reapplying Opti-Coat 2.0 to the entire panel.
Thank you so much for your work on this innovative product and as always thank you for taking the time to answer my questions in such an insightful manner.
Corey, I appreciate the time you put into testing and educating forum members on how to use and benefit from different automotive appearance products. As a paint chemist, I was always puzzled why people over-polish their car paint and cause the paint to fail prematurely (we all have seen examples of clearcoat failure). Opti-Coat 2.0 is the most effective way to avoid premature failure of clearcoats.
Our research team spent over 4 years developing and testing Opti-Coat before it was released for professional use and another 3 years to develop Opti-Coat 2.0 for consumer use. This coating has better scratch and mar resistance, better UV resistance, and better chemical resistance than factory clears. Therefore the effects of the elements on Opti-Coat 2.0 is far less than factory clears and there will be much less need for polishing once this is applied on top of the existing clear. Even if you do remove Opti-Coat 2.0 by polishing, you can easily replace it by adding another coat.
Please let me know if I can be of further assistance. Thanks again.
Best Regards,
David,
------------------------------------------
Q & A with Avi of Carpro:
Avi, I have a few questions I was hoping you could answer for everyone. This Q&A will be posted online in my Coatings Review and Extreme Testing article. I would like to post my article this weekend if possible.
1.-What would be the consequences of buffing the product off too soon?
You will remove some of the coating layer.
2.-You give specific instructions on how long to wait before buffing. Are those “wait times” the minimums? What I’m getting at it is: Are there any consequence to waiting longer before buffing off? If you wait too long will it still buff clear easily?
If you will wait too long it will be little sticky harder to remover, but you need to understand , this is not exact science, there are lots of figures which effect the time and curing, temp. humidity, thickness of layering... normally you wont have troubles, its mostly need minimum time for the solgel procedure reaction to happen.
3.-Approximately how many microns will (1) coating of Cquartz add to paint?
Between 0.7 ~1.5 microns
4.-Approximately how many microns will additional coatings of Cquartz add to paint?
Probably the same
5.-Can Cquartz be applied to single stage paints of any age?
Well, this I'm not sure... If it’s very old it will remove some of the paint. The effect wont be good, we tested on acrylic paint and it didn’t effect so well. Remember this is not to replace clear coat!! Clear coat has 20~30 microns minimum.
6.-Consider a car with older single stage paint that is badly oxidized and faded and then polished to perfection and brought back to glossy condition. Will Cquartz lock in the gloss or have any effect stopping the paint from regressing to its faded condition?
I’m not sure about that and can’t give you an exact answer. We usually use it on normal car painted in Europe.
7.-Should you expect any color transfer from single stage paint onto your applicator if you later apply a second coat?
I think yes, but you need to try yourself.
8.-CQuartz claims it can be used on leather and rubber. Can it be used on interior vinyl and plastics as well?
On rubber yes, on leather not really, interior plastic you can although I think it’s too expensive for that.
9.-What would be the outcome if Cquartz was applied to a properly cleaned tire?
I think it’s a waste of money to use Cquartz on tires.
10.-What temperatures will cured Cquartz withstand before failing?
For this I think you should see our flame retarding video on car paint. I think between 800 to 1000 C it started to peel the paint from the car. See the video on my site. It’s really impressive and show how well Cquartz is bonded to paint.
11.-Assuming its kept indoors in 65-78 degrees what is the shelf life of Cquartz before being opened by the consumer?
1 year minimum, keep away from moister and refrigerator.
12.-If only some of the bottle is used and the cap replaced tightly what would the remaining shelf life be? Assume it is kept indoors in 65-78 degrees.
Maybe 6 months.. that’s why we do it in small bottles, not to store much.. We have 400ml bottles for car polish stations that do lots of cars.
13.-Can Cquartz be clayed a year down the line if any contaminants stick to it?
Yes, soft/light clay wont be a problem. Use the IXSG regularly and you will be surprised how needless clay is after.
14.-Can or should a paint cleaner be used on Cquartz say a year down the line?
Once Cquartz is well dried and cured, no solvent or alcohol can remove it. You can clean it as you want.
Thank you for taking the time to answer my questions on this innovative product. It’s much appreciated by many people.
Any time!
------------------------------------------------------------------------------------------------------
Thank you for taking the time to read, skim, or view this article. As always questions, correction, and added knowledge is appreciated.
Thank you to Dr. David Ghodoussi., Chris Thomas, Avi, Mike from Auto Aesthetica, Jim (Old Tiger), and Richy. Also thanks to Chad (Rasky) for the tip on windows movie maker.
------------------------------------------------------------------------------------
CQuartz Summary of surfaces/test areas:
Blue Car: (Driver Side UON)
Hood (50% of panel) (w/ tape line)
Windshield (50% of panel) (w/ tape line)
Headlight
Faded Plastic Bumper (12”x12” section)
Green Car: (Driver Side UON)
Roof (Clear coat failure major - 65% of panel (w/ tapeline) Note: 15% of passenger side
Hood (Clear coat failure imminent) 50% of panel (no tape line)
Rear lid-Passenger Side (Clear coat failure imminent - 50% (w/ tape line)
Headlight
Black Test Panel (For Extreme Resiliency Testing)
Left side
Last edited by CEE DOG; 04-18-2011 at 09:46 AM.
-
Super Member
Re: Review and Extreme Testing: Opti-Coat 2.0 and CQuartz
Sorry for some of the format issues above guys. Once I pasted from MS Word and submitted the issues popped up and I tried to remove them within the alloted time. (a bit of text size, font problems, and spacing, etc.) Some of them were not corrected in time.
-
Re: Review and Extreme Testing: Opti-Coat 2.0 and CQuartz
Thank you for all your hard work doing the testing but ALSO for taking such great pictures and the investing the time it takes to put together a thread like this with
- Pictures (not to mention how long it takes to process pictures)
- Videos
- Text explaining everything
Until someone does everything you've done to create a thread like this they have no idea how much time is involved and it's a ton of time. So thank you for over the top efforts...

 Originally Posted by CEE DOG

Sorry for some of the format issues above guys. Once I pasted from MS Word and submitted the issues popped up and I tried to remove them within the alloted time. (a bit of text size, font problems, and spacing, etc.) Some of them were not corrected in time.
Somewhere on MOL I have an article about the problems with the "Hidden Code" associated with copying and pasting from MS Word into BB Code like vBulletin uses.

-
Super Member
Re: Review and Extreme Testing: Opti-Coat 2.0 and CQuartz
Avi contacted me and I thought I'd pass on some info.
"the cquartz you used is little older stuff , we changed the carrier oil now, and add more substances to improve it more, it seems your bottle is at least 3 months old i think./...
now cquartz has whitish color liquid, its smoother , has extra UV proof chemicals and i think more hydrophobic.."
Also he mentioned something that made me realize it might not have been clear in the review. I did not polish any surfaces other than the light polishing I mentioned on some of the green car. The Blue car was polished a couple months ago and still looked fairly good. I could have improved it which would have been great... if only I had the time.
Also, the applicator pads I used are a very dense soft foam material in case that isn't apparent.
-
Super Member

Re: Review and Extreme Testing: Opti-Coat 2.0 and CQuartz
Wow! That has to be the best review I've seen to date! Well done Corey! I'm in the process of doing an article on Opti-Coat and now I almost don't want to finish it seeing how good yours is! 
Great job bro! 
-
Super Member

Re: Review and Extreme Testing: Opti-Coat 2.0 and CQuartz
Wow Corey........Right when you think you have seen the best reviews in the world of detailing....you come out with this !!! I cannot imagine the hours spent on this project....You should be nominated as a product reviewer for some of the detailing web sites.......I have both of these products which I will be using on 2 separate cars ( just waiting for a stretch of warm weather with no rain) can't wait to try them out....Again, Your review has taken reviews to a whole new level
Vision Detailing
Richmond,KY.40475
859-623-4435
Similar Threads
-
By kc's in forum Show N' Shine
Replies: 9
Last Post: 09-17-2013, 12:00 AM
-
By pcw25 in forum Auto Detailing 101
Replies: 18
Last Post: 02-05-2012, 12:27 AM
-
By PA DETAILER in forum Auto Detailing 101
Replies: 10
Last Post: 07-25-2011, 07:57 PM
-
By rott3np3anut in forum Auto Detailing 101
Replies: 8
Last Post: 06-16-2011, 09:32 PM
-
By Kristopher1129 in forum Auto Detailing 101
Replies: 19
Last Post: 04-18-2011, 09:04 PM
 Members who have read this thread: 0
There are no members to list at the moment.
Posting Permissions
- You may not post new threads
- You may not post replies
- You may not post attachments
- You may not edit your posts
-
Forum Rules
|
| S |
M |
T |
W |
T |
F |
S |
| 31 |
1
|
2
|
3
|
4
|
5
|
6
|
|
7
|
8
|
9
|
10
|
11
|
12
|
13
|
|
14
|
15
|
16
|
17
|
18
|
19
|
20
|
|
21
|
22
|
23
|
24
|
25
|
26
|
27
|
|
28
|
29
|
30
| 1 | 2 | 3 | 4 |
|


 Reply With Quote
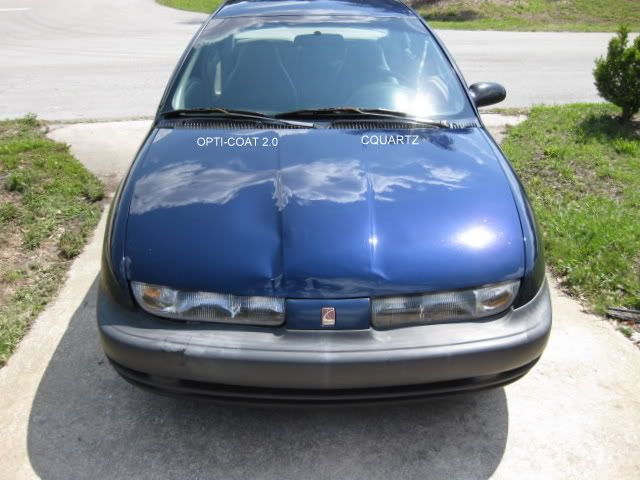


Bookmarks