 Thanks: 0
 Likes: 0
 Dislikes: 0
-
1955 Chevy Bel Air with a $15,000.00 Custom Paint Job - How to remove water spots
1955 Chevy Bel Air with a $15,000.00 Custom Paint Job - How to remove water spots
This is a 1955 Chevy Bel Air
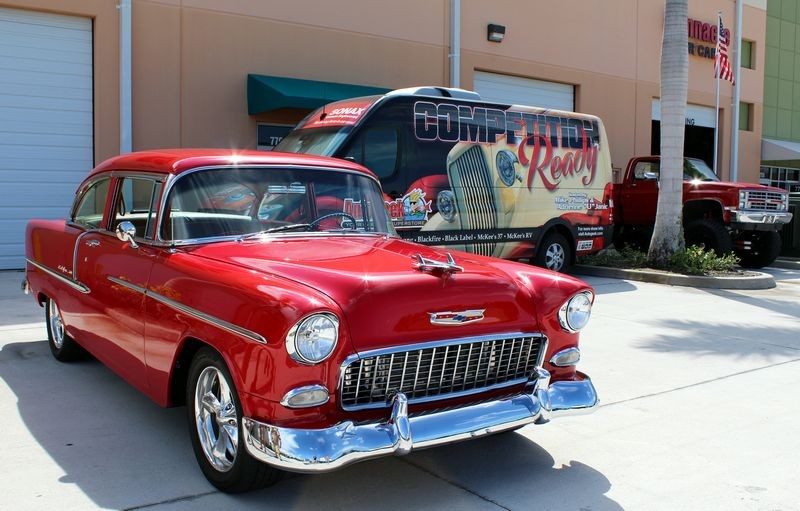
Here's a frame-up shot to show you where on the hood I'm going to zoom in on using the sun to show the water spot damage.
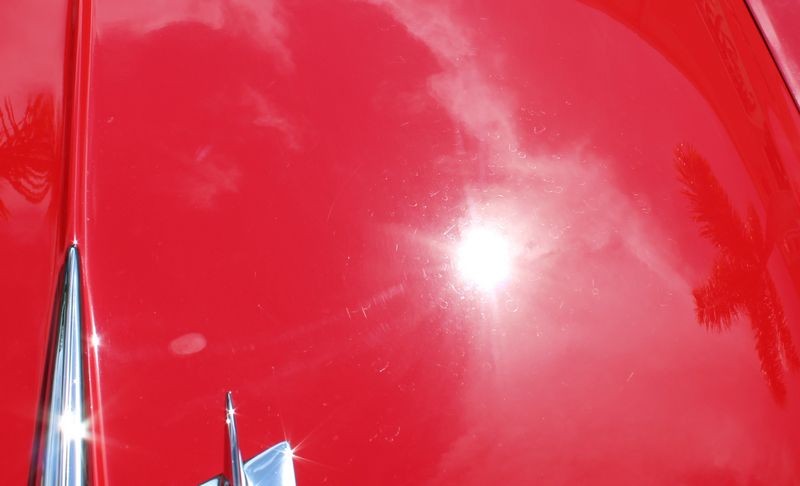
And here's the same spot shown above only I've zoomed in to show the water spot damage.
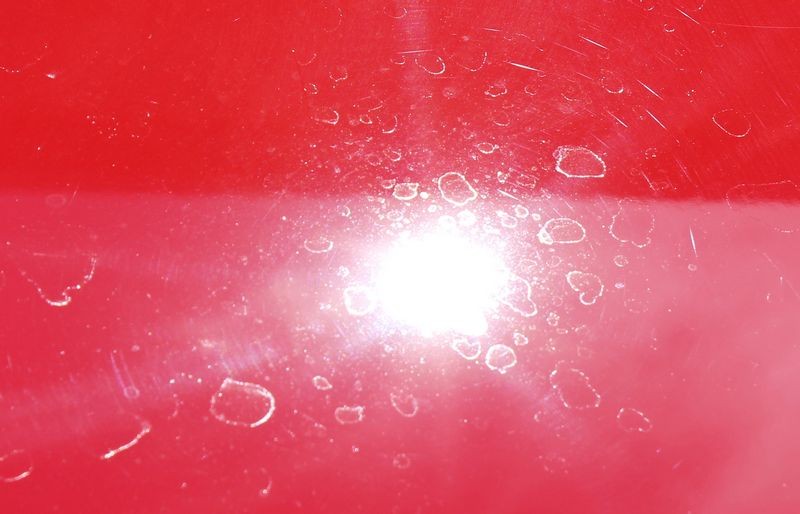
The story behing the water spots...
This $15,000.00 custom basecoat/clearcoat paint job is covered with water spots from a sprinkler. To remove them we're going to use a real simple, very safe as well as effective process.
McKee's 37 Porter Cable 7424XP Intermediate Swirl Remover Kit
This is kit is an introduction to machine polishing kit, that is it has enough top quality products to get you started into machine polishing. Here's what this kit includes,
Kit includes:
Porter Cable 7424XP Variable Speed Polisher
Dual Action 5 Inch Flexible Backing Plate
8 oz. McKee's 37 Fast Compound
8 oz. McKee's 37 Fast Polish
8 oz. McKee's 37 Jeweling Wax
1 Orange Light Cutting Flat 5.5 inch Foam Pad
1 White Polishing Flat 5.5 inch Foam Pad
1 Blue Finessing Flat 5.5 inch Foam Pad
2 Arctic White Edgeless Polishing Cloths, 16 x 16 inches
McKee's 37 Porter Cable 7424XP Intermediate Swirl Remover Kit

Safe and easy - no risk of buring or swirls
Now the Porter Cable is the industry standard for entry level dual action polishers. Everyone knows the Porter Cable name and with a 5" backing plate and Lake Country 5.5" thin foam pads there's nothing you cannot tackle with this time-proven dual action polisher.
The McKee's Fast Compound, Fast Polish and Jeweling wax use the best in abrasive technology so there's no chance of micro-marring the paint like can happen with inexpensive compounds and polishes. In fact, a number of the cars we prepped for our TV show we prepped using McKee's compound, polish and the unique jeweling wax.
You want a lot of buffing pads
Here's the deal though... while this is a GREAT kit to get you started out into the world of machine polishing where you can easily get better results faster and safer than struggling for hours trying to work by hand, the fact of the matter is you need more pads.
Foam pads work best when they are dry and clean. As you work around a car buffing panel by panel, if you try to only use one pad per product, that is one pad for the compound, one pad for the polish and one pad for the wax, the pads will become saturated with the product you're using and the results will be a pad that doesn't rotate very well and the effectivness of the process will be diminished.
I can't emphasis this enough to people new to machine polishing. You need a lot of pads. You want a lot of pads. It is so much more enjoyable and the results are so much better and more easily attained when after buffing out a fender before moving onto a door you can switch to a fresh, clean dry foam pad.
My rule of thumb is one pad per panel for the compounding step as this is the most important step. For this 1955 Chevy Bel Air this would mean 9 foam cutting pads. Because all the major correction is done during the compounding step you'll need less polishing pads and only a few waxing pads if you plan on machine applying the wax.
Teaching people how to polish paint
I've been teaching people how to make the jump from hand polishing to machine polishing for years now. Not as long as some but longer than most people that do this and have a recognizable name in the industry. Besides learning the techniques for machine polishing as well as simple things like the order to do each step, for example,
Step 1: Wash and dry car.
Step 2: Inspect for above surface contaminatin and if found then use detailing clay or some other tool to remove the contamination.
Step 3: Removing the serious defects like swirls, scratches, oxidation and water spots with quality compound and cutting pad.
Step 4: Remove any haze left by the compoounding step while maximizing gloss and clarity with a quality polish and polishign pad.
Step 5: Seal the paint using a car wax or a synthetic paint sealant by hand or machine but in my world this is always done best and done fastest by machine with a soft foam wax pad on your dual action polisher.
Then, as a normal course of the learning curve each new person to machine polshing learns that to do the job correctly and do do it in the least amount of time with the best results - you need plenty of buffing pads.
So if you're reading this and you're ready to make the jump from hand polishing to machine polishing take my word for it... besides getting a safe, easy to use dual action polisher and quality compounds, polishes and waxes you also need lots of buffing pads. The good news is we have lots of buffing pads here at Autogeek and if you call our Customer Care Hotline and tell them you just read this article I'm confident the'll make you a great deal when you buy a polisher kit and extra buffing pads.
1-800-869-3011
And of course, this forum you're reading is a part of our Customer Support. We help you get great results with the products you purchase from Autogeek.
Tonight the owner of this immaculate 1955 Chevy Bel Air will be learning how to machine polish the paint on his own car. Stay tuned for the pictures and share the link to this thread with your friends.

-
-
Super Member

Re: 1955 Chevy Bel Air with a $15,000.00 Custom Paint Job - How to remove water spots
It's to bad I'm going to have to miss tonight. Had something come up last minute and had a job that took longer than expected
-
Super Member

Re: 1955 Chevy Bel Air with a $15,000.00 Custom Paint Job - How to remove water spots
Looks like alot of fun, wish i was there to help Mike!
-
Re: 1955 Chevy Bel Air with a $15,000.00 Custom Paint Job - How to remove water spots
Process
First we wiped the Bel Air down using McKee's 37 Waterless Wash on the Go to remove all loose dirt and dust.
Then we inspected the paint using the Baggie Test - The paint wasn't bad but the horizontal surfaces had some bumps so to follow proper protocols and to make sure everyone at the class tonight knows the proper way to clay we went ahead and clayed the paint.
Next we did s a Test Spot. A test spot is where you test the least aggressive pads and products in order to find out exactly what it's going to take to remove the defects.
Test Spot 1: We started with the McKee's 37 Fast Polish with a Lake Country 5.5" white foam polishing pad. This didn't work fast enough or effectively enough.
Test Spot 2: Next we tested the McKee's 37 Fast Compound with a Lake Country 5.5" orange foam cutting pad. This removed more of the water spot etchings but not 100%.
Test Spot 3: We switched over to the 5.5 inch ThinPro Gray Extreme Cutting Pad while sticking with the McKee's 37 Fast Compound. This did the trick. The thinner, much more aggressive foam cutting pad with the McKee's 37 Fast Compound completely removed the water spot etchings with the normal 8 section passes.
After dialing in the procedure using the test spot technique I gave a demonstration on the correct technique for using the Porter Cable to compound paint. The rest of the team members were given the opportunity to use any dual action polisher they preferred or wanted to test out.
The paint was compounded until all the water spots were removed and then we switched over to the polishing step.
To polish the paint we used the McKee's 37 Jeweling Wax with foam polishing pads on dual action polishers. I kept the owner and his buddies with the Porter Cable 7424XPs to start with but later let them both test out the Flex XFE7 and the RUPES BigFoot 21. So in other words, I let them go from a tool that cost $115.00 to tools that cost right around $400.00.
The rest of the guys continued using the tools they preferred. I'm pretty easy going during our Thursday night classes. I like to introduce newbies to the basics and then step them up to the more advanced tools. The regulars have already used all the tools and pretty much know what they like.
The Jeweling wax refined the results from the Fast Compound since it's both an ultra fine cut polish and a sealing wax in one.
During all of the above Robert DiTerrlizzi used my RUPES Nano iBrid to compound and polish the thin panels and tight areas and we also broke out the RUPES TA50 and used it on the front valance. Frank tested out the new RUPES iBrid too and really seemed to like it. Nick had given me some new ThinPro foam pads to test out so we tested these using the iBrid and the TA50 and they seemed to also work really well.
Then we removed the wax using my favorite, microfiber gloves and the rolled edge, super plush green microfiber towels.
After that it was time for a pizza break and then the beauty shots!
Here the come the pictures....

-
-
-
-
-
Re: 1955 Chevy Bel Air with a $15,000.00 Custom Paint Job - How to remove water spots
Wow! What a transformation! Nicely done gang!
Similar Threads
-
By cheekyage in forum Auto Detailing 101
Replies: 5
Last Post: 02-10-2018, 04:18 PM
-
By benzw205 in forum Auto Detailing 101
Replies: 20
Last Post: 09-20-2017, 04:24 PM
-
By Mike Phillips in forum Competition Ready on Velocity Channel
Replies: 1
Last Post: 05-19-2017, 06:25 AM
-
By arkus in forum Auto Detailing 101
Replies: 4
Last Post: 11-20-2010, 09:41 PM
-
By HotRod in forum Show N' Shine
Replies: 5
Last Post: 07-08-2009, 01:33 PM
 Members who have read this thread: 0
There are no members to list at the moment.
Posting Permissions
- You may not post new threads
- You may not post replies
- You may not post attachments
- You may not edit your posts
-
Forum Rules
|
| S |
M |
T |
W |
T |
F |
S |
| 31 |
1
|
2
|
3
|
4
|
5
|
6
|
|
7
|
8
|
9
|
10
|
11
|
12
|
13
|
|
14
|
15
|
16
|
17
|
18
|
19
|
20
|
|
21
|
22
|
23
|
24
|
25
|
26
|
27
|
|
28
|
29
|
30
| 1 | 2 | 3 | 4 |
|


 Reply With Quote


Bookmarks