 Thanks: 0
 Likes: 0
 Dislikes: 0
-
-
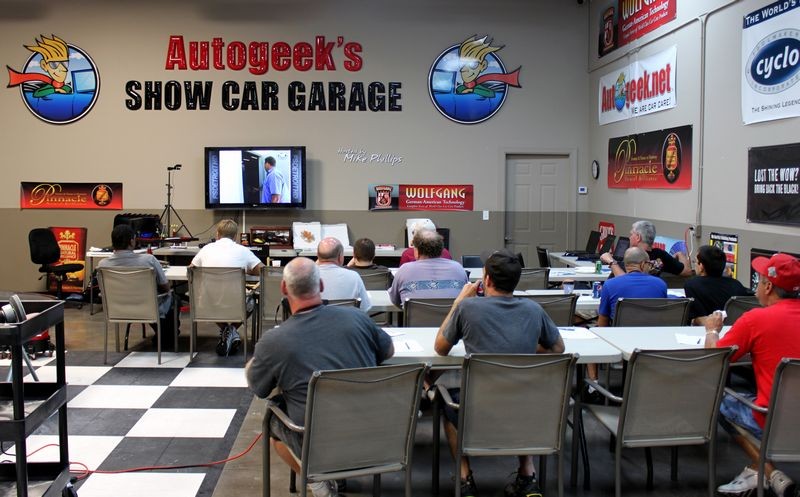
Re: Pictures & Comments from May 15th, 2011 Sunday Detailing 102 - Advanced Class
The 101 Class was a blast yesterday and today we'll be having even more fun as we go over wetsanding and machine buffing for a show car finish!
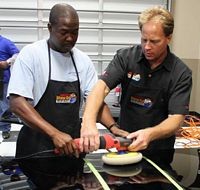
Mmmm... pizza lunch....


-
-
Super Member

Re: Pictures & Comments from May 15th, 2011 Sunday Detailing 102 - Advanced Class
I was invited to be one of the online beta testers for the class. Thanks by the way AG. Unfortunately last nights storm was very wicked. One of my oak trees decided to grace my neighbors living room with its presence. Sorry I missed the class. I look forward to hearing the feedback from the other beta testers.
-
Super Member

Re: Pictures & Comments from May 15th, 2011 Sunday Detailing 102 - Advanced Class
ED - That sounds pretty intense!
I was also beta testing, and I think we found some areas for improvement in the video feed. The information was top notch, and felt like we were there, only my smell-o-vision was not working correctly so I missed out on smelling all of the polishes, and getting wet-sanding splatter everywhere.
-
Super Member
Re: Pictures & Comments from May 15th, 2011 Sunday Detailing 102 - Advanced Class
I cant tell ya how much I wanted to join in Bill. It sounds like some exciting changes are afoot at AG!
-
Re: Pictures & Comments from May 15th, 2011 Sunday Detailing 102 - Advanced Class
I attended both classes, one of the best weekends I've had! This class by far though was quite the experience. well worth it to anyone who would like to add to or completely learn a thorough technique of a show quality paint job. If you missed this weekend, you missed out. make sure to sign up for the next classes, you "won't" be dissapointed. Thanks to everyone who organized and made that class run as smoothly and efficient as it did! I enjoyed every minute of class time! Thanks -Joe
-
Super Member

-
Super Member

Re: Pictures & Comments from May 15th, 2011 Sunday Detailing 102 - Advanced Class
I would like to watch the next 102 class. Will that be available via live feed?
-
Re: Pictures & Comments from May 15th, 2011 Sunday Detailing 102 - Advanced Class
Well I went through all the pictures from the Saturday Class and was able to get them all cropped, resized, uploaded and inserted here...
Pictures from the Saturday Detailing 101 Class
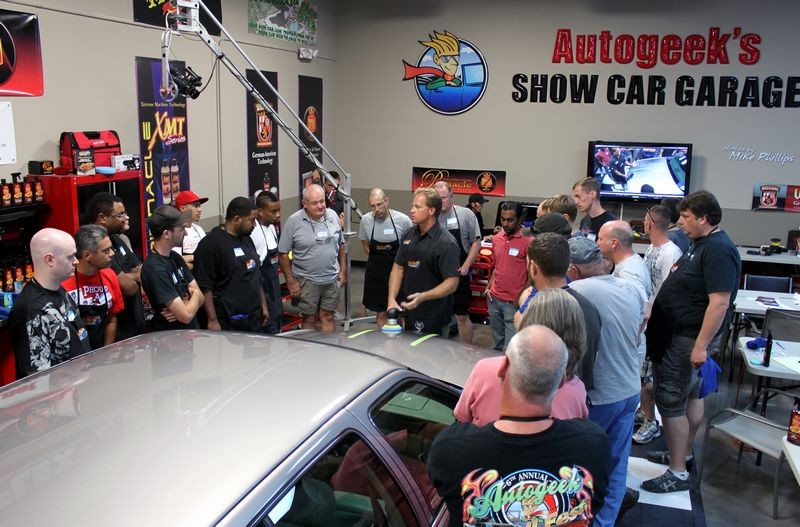
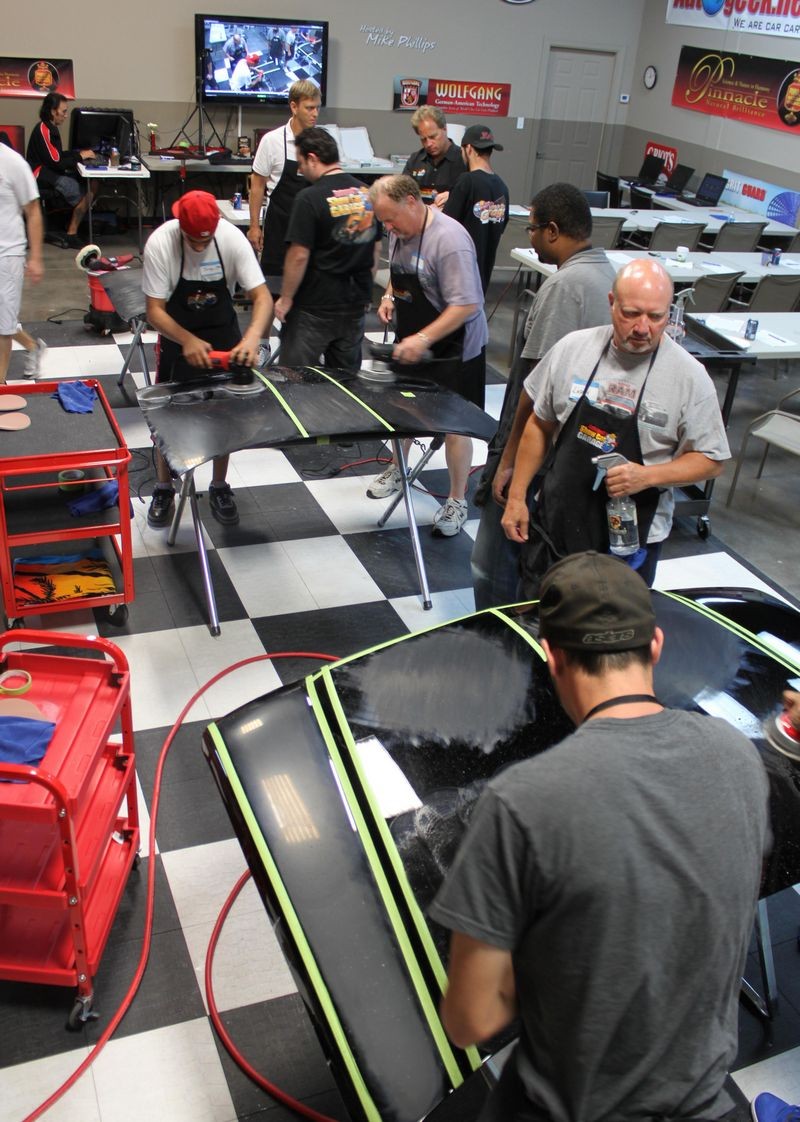
Now for some pictures from our 102 Advanced Class on Wetsanding, Cutting and Buffing. This class goes over hand sanding, two types of machine sanding and then using Rotary Buffers to remove your sanding marks and polish to a high gloss.
There's a lot of questions and confusion about the topic of wetsanding and to try to help answer any questions and clear up any confusion I wrote this article a few years ago... BEFORE you ever even think about doing any type of sanding to your own car or to a customer's car, I highly recommend reading this article,
Wet-sanding - Fresh Paint vs Factory Paint
This is a short article and it clears up any confusion about the terms used in this segment of the painting and detailing world.
Wet-sanding, Color-sanding & Damp-sanding
Now on to the results from the Advanced Class...
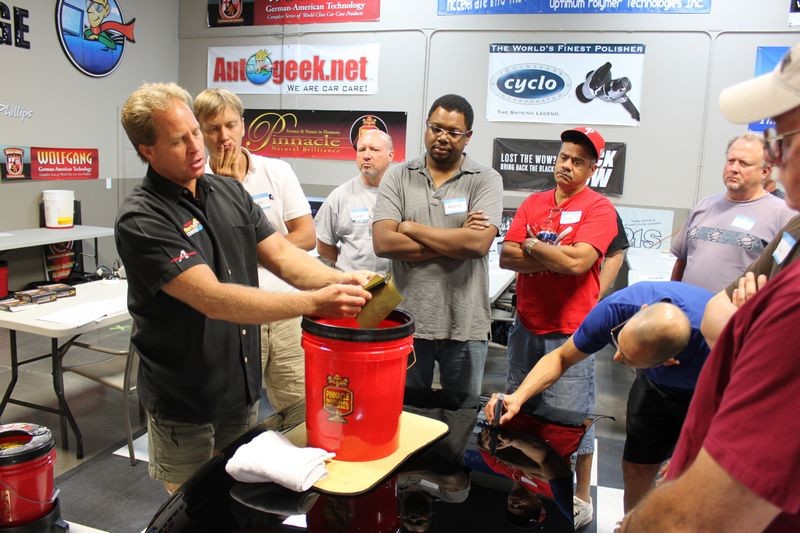
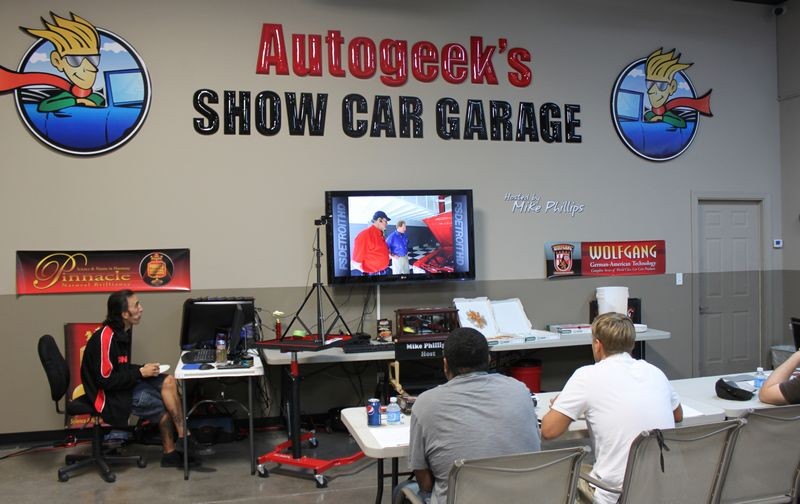
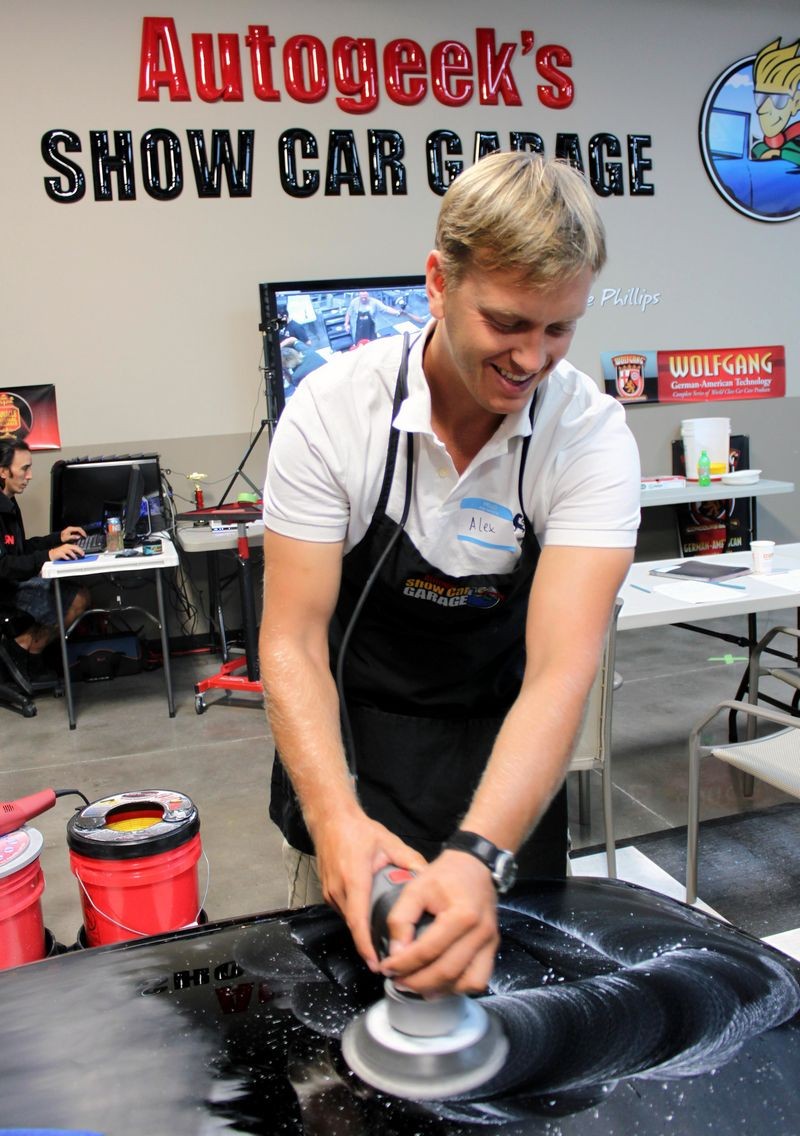
First up we went through about a 60 slide Power Point Presentation to get head knowledge first. After that we take a break and then start in with techniques for hand sanding followed by techniques for machine dampsanding using the 3M Orbital DA Sander, (air-powered).
Here's a few pictures...
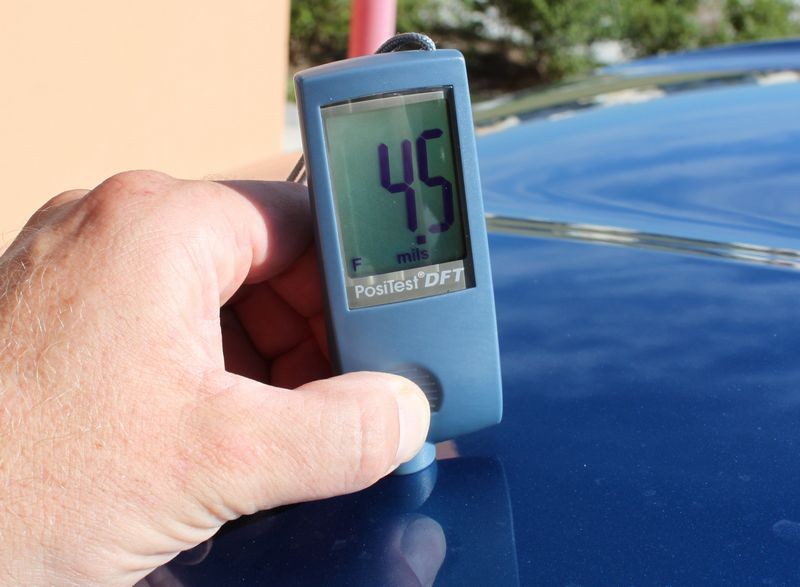
We start by going over how to use a Paint Thickness Gage and how to use the readings to determine and make a Go/No Go decision.

Defelsko PosiTest DFT Combo Electronic Paint Thickness Gauge
Next we went over how to prepare your finishing papers for wetsanding including placing Grit Guard Inserts in the bottom of your buckets to trap particles on the bottom and away from the sanding process to help avoid instilling Tracers into the paint.

I have an article that talks about the different types of "Below Surface Defects" including Tracers here,
Tracers Tracers - RIDS - Pigtails - Cobweb Swirls - Rotary Buffer Swirls - Holograms - Water Spots - Bird Drooping Etchings - Micro-Marring
Tracers
Deeper scratches left by the hand sanding process, usually in straight-lines because most people move their hand in a back and forth motion when wet-sanding. Tracers show up after you machine compound the paint and remove all the shallow scratches. After the shallow scratches or sanding marks are removed what remains in the paint is the deeper sanding marks and these are called tracers. Tracers are usually difficult to remove because they are deeper and removing them means either re-sanding to level the surface or re-compounding to machine buff them out. The problem with re-sanding is that you could remove one group of tracers only to leave behind a new set of tracers, so the problem can be a Catch-22 situation. This is why it's so important to use the highest quality finishing papers you can obtain, at least for your last sanding steps. It is possible to remove tracers using the Feathersanding Technique if there are not too many of them.
Then we went over the two ways to wrap your finishing papers around a rubber backing pad...
All this information is covered in the Power Point Presentation but it really makes a difference as each person that's never wetsanded before gets to try their hand at it and choose the style that works best for them...
Lots of information on this topic here,
Basic Hand Sanding Techniques
For our class we don't use basic wet/dry automotive papers we use a "Finishing" paper where the technology behind how the paper is made has its origins in the electronics industry.
What I'm pointing out is that not only do the Nikken Finishing Papers offer Unigrit particle size but they also offer 100% distribution of the particles over the entire face of the paper. This is just as important as Unigrit particle size.

The next thing we do is go over the 3 different approaches to hand sanding, this is covered in the Power Point Presentation and now demonstrated to re-enforce what is discussed during the classroom portion.
And I have an article on the topic of which direction to move your hand when hand sanding...
Two Schools of Thought when Hand Sanding - Straight-lines or Crosshatch Pattern
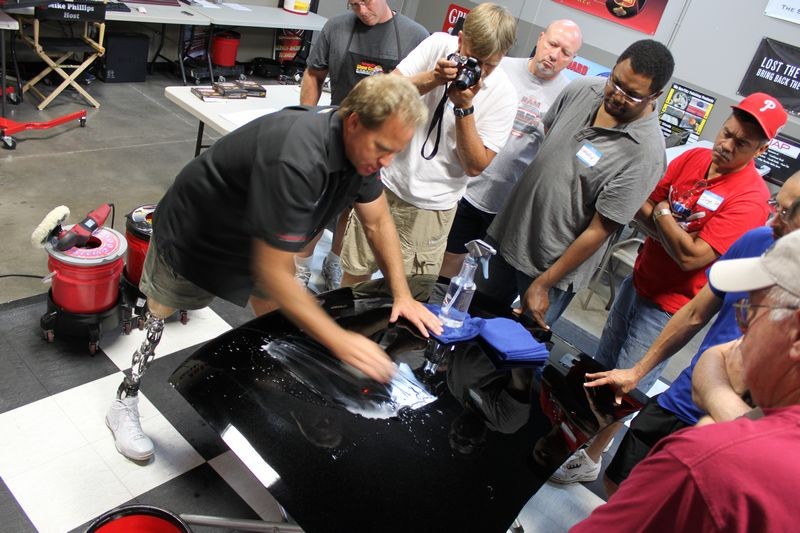
After hand sanding we use a spare rubber backing pad to squeegee off the excess water slurry which not only removes the majority of the water off the paint but helps to expose where the paint is now flat and were Orange Peel yet remains.
One of the goals for sanding paint, whether by hand or machine is to create the flattest surface possible to maximize D.O.I. and if there is any orange peel in the paint then the paint needs to be sanded until it's flat.

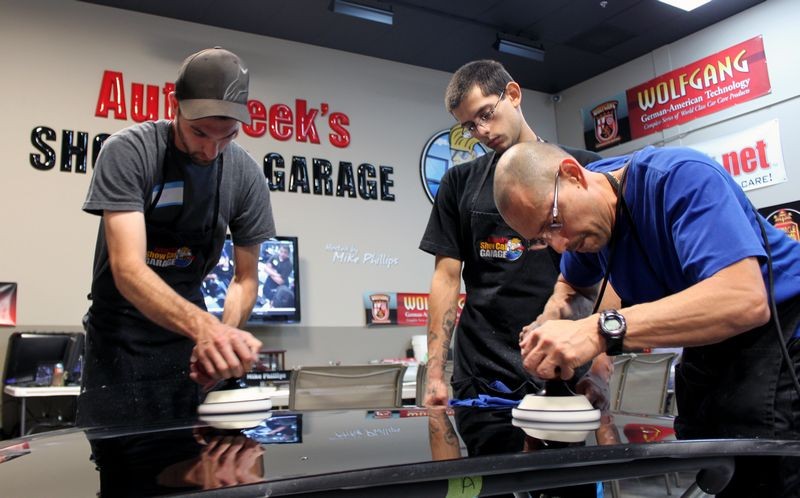
After the different techniques are demonstrated the students are turned loose on the practice hoods to try for themselves the art of hand sanding...

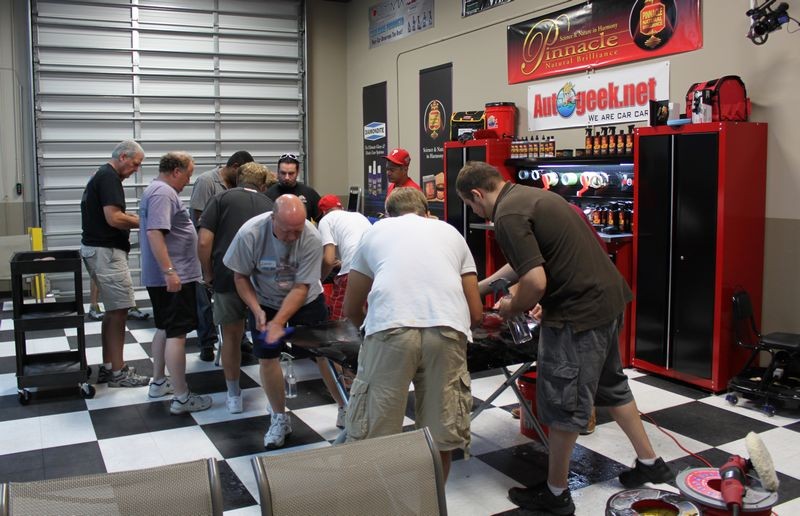
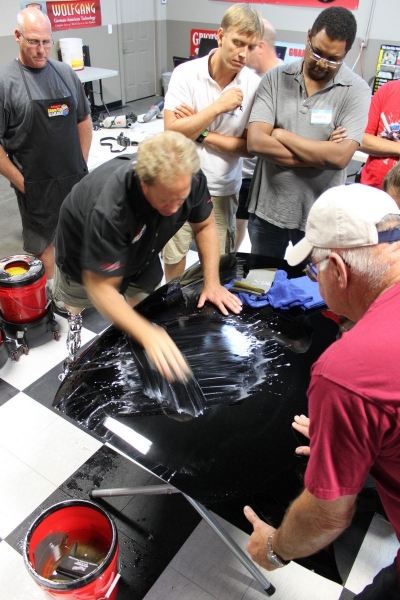
Here's Mel Craig wiping off the water slurry to help one of the students inspect their results...

More pictures to come...

Similar Threads
-
By Meghan in forum PICTURES: 3-Day CAR Detailing Bootcamp Classes
Replies: 24
Last Post: 05-15-2012, 07:11 AM
-
By Meghan in forum PICTURES: 3-Day CAR Detailing Bootcamp Classes
Replies: 30
Last Post: 11-10-2011, 10:58 AM
-
By Mike Phillips in forum PICTURES: 3-Day CAR Detailing Bootcamp Classes
Replies: 30
Last Post: 05-19-2011, 08:03 PM
-
By Mike Phillips in forum PICTURES: 3-Day CAR Detailing Bootcamp Classes
Replies: 27
Last Post: 09-21-2010, 03:41 PM
-
By Mike Phillips in forum 3-Day CAR Detailing Bootcamp Classes - Info & Dates
Replies: 24
Last Post: 09-28-2009, 10:33 AM
 Members who have read this thread: 0
There are no members to list at the moment.
Posting Permissions
- You may not post new threads
- You may not post replies
- You may not post attachments
- You may not edit your posts
-
Forum Rules
|
| S |
M |
T |
W |
T |
F |
S |
| 31 |
1
|
2
|
3
|
4
|
5
|
6
|
|
7
|
8
|
9
|
10
|
11
|
12
|
13
|
|
14
|
15
|
16
|
17
|
18
|
19
|
20
|
|
21
|
22
|
23
|
24
|
25
|
26
|
27
|
|
28
|
29
|
30
| 1 | 2 | 3 | 4 |
|


 Reply With Quote


Bookmarks