 Thanks: 0
 Likes: 0
 Dislikes: 0
-
1970 Superbird Detailing Class - The art of polishing paint - Competition Ready Detailing Classes at Autogeek
1970 Superbird Detailing Class - The art of polishing paint - Competition Ready Detailing Classes at Autogeek
If you want to learn the art of polishing paint so you can offer your customers true show car detailing services, then you need to go to a class that specializes in teaching the art of polishing paint and brings in real show cars for the class to learn and train on. With more classes fully documented with before, during and after pictures, the class you want to attend is,
Mike Phillips Competition Ready 3-Day Detailing Classes
Class schedule for 2017
- February 17th, 18th & 19th with IDA SV testing on Monday February 20th
- May 6th, 7th & 8th with IDA SV testing on Monday May 9th
- September 23rd, 24th & 25th with IDA SV testing on Monday, September 26th
Click this link to sign up online or call 1-800-869-3011 x244 and Andre can help you to sign-up over the phone.
These classes are the real deal. Here's another example of why these are the most hands-on training classes on the planet earth.
Before pictures - full documentation of the true condition
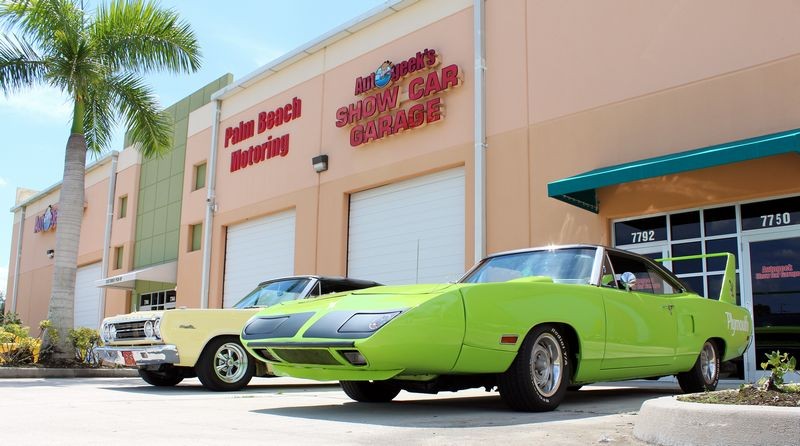
First - here's the car a 1970 Plymouth Superbird with high resolution pictures fully documenting the condition of the car when it arrived on Wednesday, September 21, 2016 for the September 2016 Competition Ready 3-Day Detailing Class.
These pictures were taken with the Superbird parked right outside Autogeek's Show Car Garage with the sun directly overhead.


Next... I took these pictures of the car on August 8th, 2016 while the car was at the Tuesday Night Lew's Crew Cruise-in. Even though the sun was low in the sky as the Tuesday night cruise-in starts at 6:00pm, you can still easily see the hologram scratches caused by the misuse of a rotary buffer in the paint.
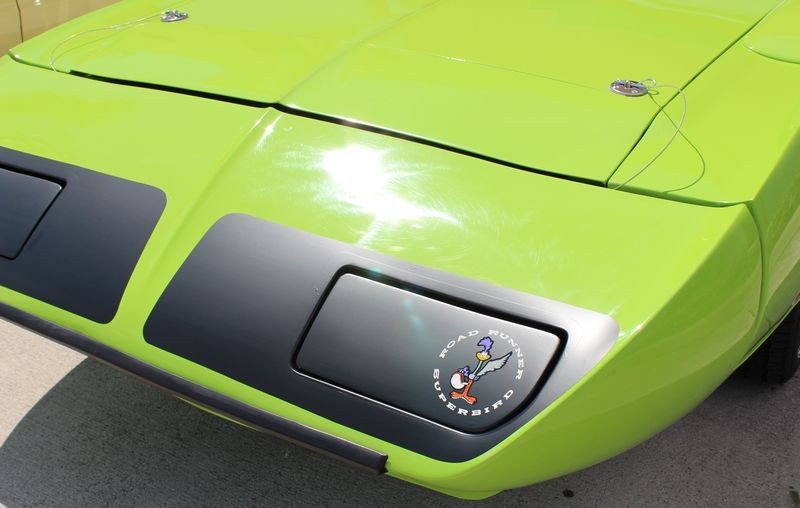
1970 Plymouth Roadrunner Superbird 440 Sixpack Limelight Green - This is going to hurt your eyes!

Here I've zoomed in to focus on the holograms.
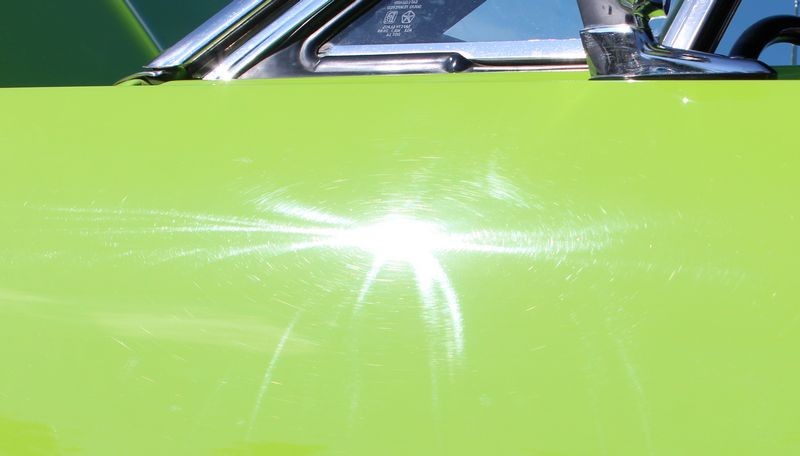
Here's the paint just behind the driver's side hideaway headlight...

Ouch!
Why oh why do some guys still think this is how you buff out a car?


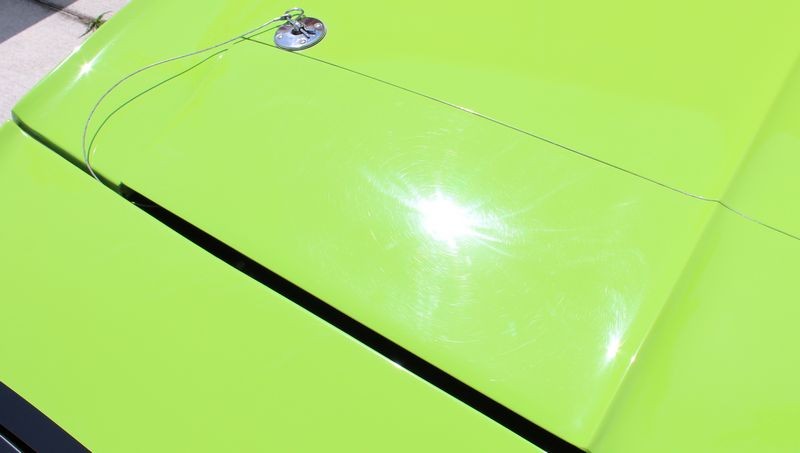
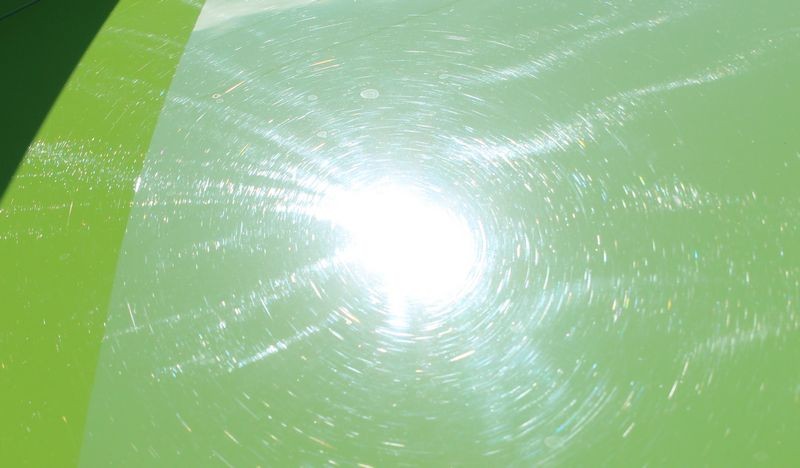
Here's the trunk lid...

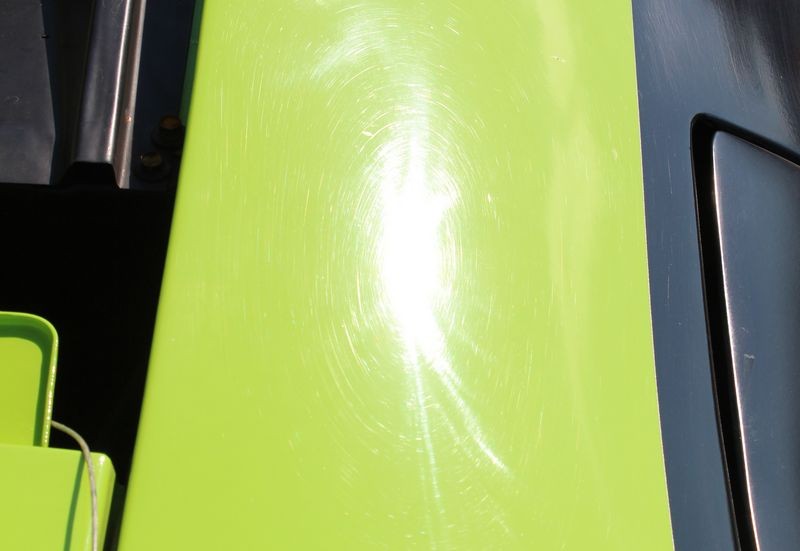
In this shot you can clearly see both round circular scratches that surround the point of light created by the sun reflecting off the paint and you can also see these wispy lines of swirls. It is these 3D-like, holographic lines that shimmer and appear to move when you move your head while inspecting the paint that are the tale-tale signs of holograms.
The lines in the paint mimic the direction the rotary buffer was moved over the paint. The the single rotating direction the pad is spinning together with the product used imparts a scratch pattern called holograms.


You can clearly see where the person that machine polished this car moved the rotary buffer vertically, up and down the door....


NO!!!!!
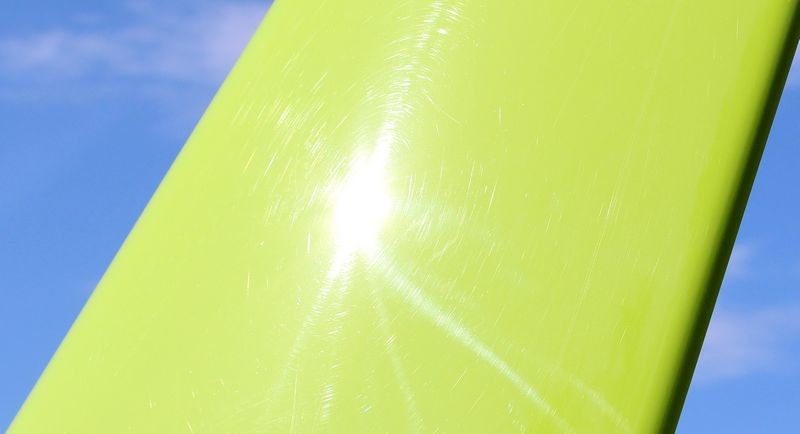
Say it isn't so.... don't tell me they swirled out the wing with holograms?
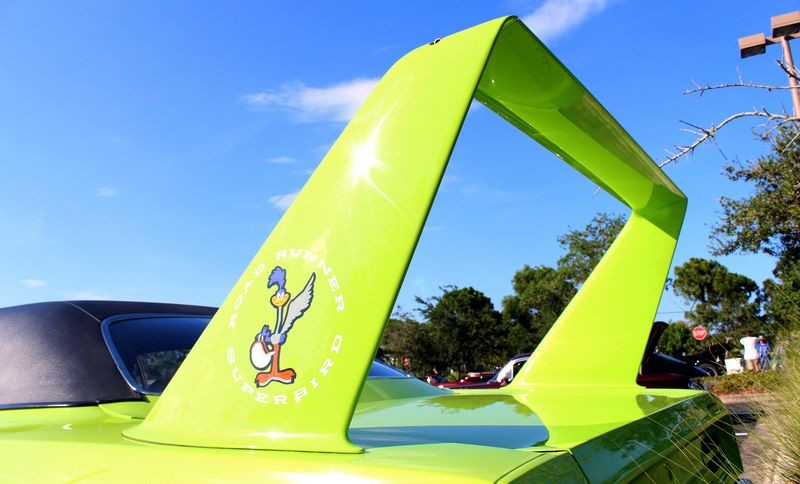
Yep... at least they were thorough.... 
As you can see, as cool as this muscle car is the entire finish is filled with holograms, swirls and scratches and thus makes a perfect training car for learning the art of polishing paint.

-
Re: 1970 Superbird Detailing Class - The art of polishing paint - Competition Ready Detailing Classes at Autogeek
Topics covered at our Competition Ready Detailing Classes
At our classes, you learn everything including,
- Show Car Detailing - Using every popular tool in the detailing industry
- Production Detailing - Using every popular tool in the detailing industry
- Interior Detailing - Leather, vinyl, alcantara, carpet, upholstery, plastics, glass, etc.
- Proper washing and both chemical and mechanical decontamination techniques
- Glass polishing to remove bot scratches in the glass and water spots on the glass
- Engine detailing both traditional (wet), and cosmetic (dry)
- Interior detailing
- Convertible top detailing - both canvas and vinyl
- Hot water extractors
- Steam cleaning machine
- Wet sanding by hand
- Wet sanding by machine
- How to use rotary buffer to remove sanding marks
- Rock chip touch up paint
And lots of other topics related to the major topics listed above.
Speaking from experience, the most popular portions of our class are alwasy the show car detailing classes where we go over all the most popular polishers in the industry and how to use them to create a true show car finish. For each tools set we bring in two cool cars so there's plenty of real-estate for everyone to get lots of real-world, hands-on training.
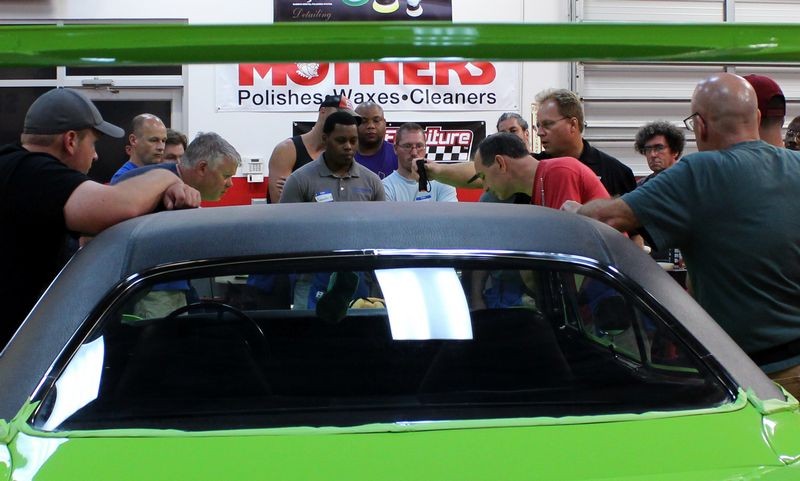
For the FLEX 3401 aka The Beast and for the FLEX XFE7-15 aka The Finisher, we had a 1970 Plymouth Roadrunner Superbird and a 1967 Plymouth Satellite Convertible. This write-up is for the Superbird. You'll see the 1967 Plymouth Satellite Convertible in the background and there will be a separate write-up with full picture documentation for this training car.
Waterless Washing & Mechanical Decontamination
Before doing any work on this car the exterior was cleaned using a waterless wash and the paint was decontaminated using a combination of detailing clay and Nanoskin towels. (students choice).
Using McKee's 37 Waterless Wash on the Go to wipe down body panels...

Using a Nanoskin towel to remove contaminants....
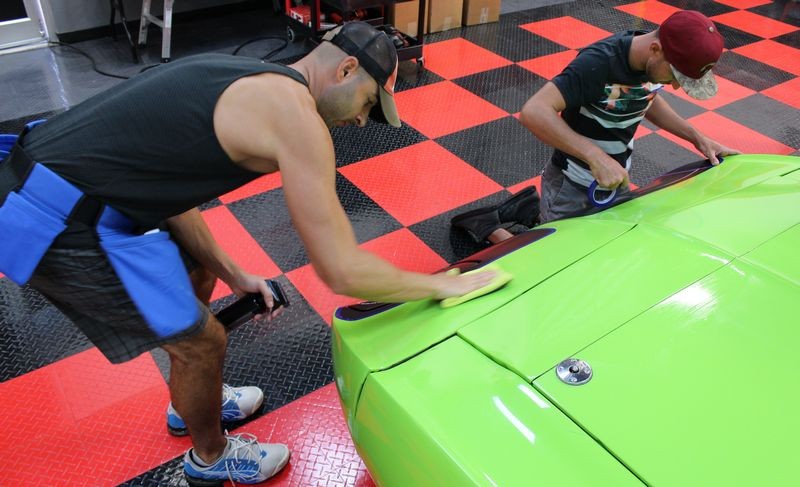
Carefully taping off matte graphics using 3M Blue Vinyl Tape before machine polishing....

Taping off sensitive areas using 3M Painter's Tape before machine buffing...


-
Re: 1970 Superbird Detailing Class - The art of polishing paint - Competition Ready Detailing Classes at Autogeek
Continued....
Test Spot & Proper Technique Demonstration
After the car is cleaned, decontaminated and taped-off it's time to do a Test Spot and demonstrate the correct way to use the FLEX 3401 to remove holograms, swirls and scratches.
The most important thing for anyone to do before buffing out a car is to first do what I call a Test Spot. I coined this term for the detailing industry back in 2004 in a discussion on Autopia.org - here's the link to the first documented use of the term online.
What is a Test Spot and why it's important to do one?
What is a Test Spot
A test spot is where you test out the product, the pad the tool and your technique to a small section of paint, usually on a horizontal surface like the hood or trunk lid.
Why it's important to do a Test Spot
The reason to do a test spot is to test the product, pad, tool and technique you're thinking of using over the entire car to one small area and then inspect the results and make sure you're getting the results you're hoping for and expecting. If the results looks great then you know your process works and this give you the confidence and assurance that if you repeat this process over the rest of the car you'll get the same results over the rest of the car as you produced in the test spot. The only exception would be if the vehicle in question has been in an accident and some body panels have been repainted using a different paint system than the paint on the area you did the test.
If the results from your testing don't look great then first, you'll be glad you didn't proceed to buff out the entire car and second, you can then re-test substituting a different product and/or different product, pad or tool and then dial in a process that does work to your hopes and expectations.
Use the least aggressive product to get the job done
Doing a test spot is also part of testing out less aggressive products to see exactly what it will take to remove the defects you want to remove. Variables like the depth of the defects, the hardness or softness of the paint, the type of tool, pads and products you're using and even your technique can all affect the rate of speed and effectiveness a process is for removing defects to your satisfaction. The goal or idea of testing different products is to try to remove defects in the paint using the least aggressive products so that you remove the defects but also leave the most paint on the car. Remember... paint is thin. This is especially true for OEM factory paint which the clear layer of paint averages around 2 mils thin, that's thinner than a post-it note. So doing a test spot is not only important to first dial-in and prove your system but to also determine how non-aggressive you need to get in order to achieve your expectations for the level of quality you're looking for in the end results.
Techniques for the FLEX 3401
The FLEX 3401 at the time I'm typing this is the only quality gear-driven orbital polisher on the market today. What makes the FLEX 3401 unique and the reason I coined the nickname the BEAST is because it's gear-driven, there's no way to stop the pad from rotating or oscillating. This is not the case with free spinning orbital polishers. While both styles of tools, gear-driven orbitals and free spinning orbitals have their own unique characteristics and benefits, it is the gear-driven feature of the FLEX 3401 that enables you to do as I say,
Power through a detail job
And that's because no matter the shape of the panel, whether it be flat, concave or convex curved, you simply cannot stop the pad on a FLEX 3401 from rotating or oscillating and for this reason in my opinion you can remove defects and finish out faster using the FLEX 3401 than any other orbital polisher.
The techniques for using the FLEX 3401 are things I teach via hands-on training in my classes. The basic technique is to hold the tool in a way that the pad is flat to the surface when buffing. There are times when knowing techniques for going up on edge will enable you to buff out thin panels without buffing on edges. Besides learning all the techniques for using this beast of a tool in my classes you can also read about some of them in my FLEX how-to book.
Adding SONAX EX-O6-O4 to the face of a Lake Country 6.5" white foam polishing pad on a FLEX 3401

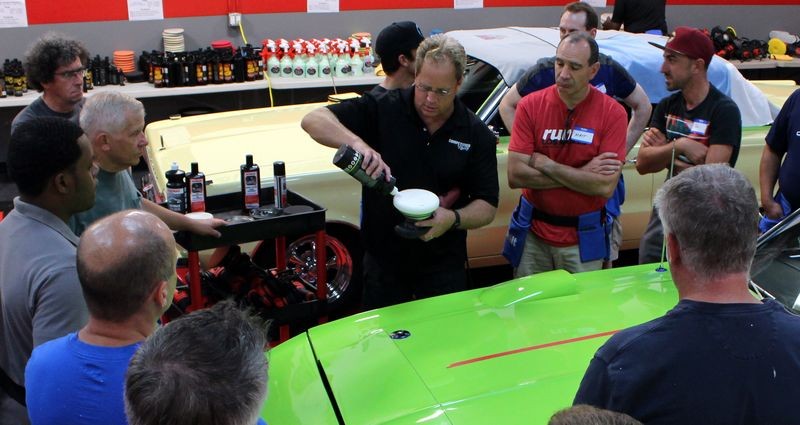
Sharing how large of a section you should do for a test spot and also how large of an area you can buff out at one time when actually buffing out a panel.

Demonstrating proper technique
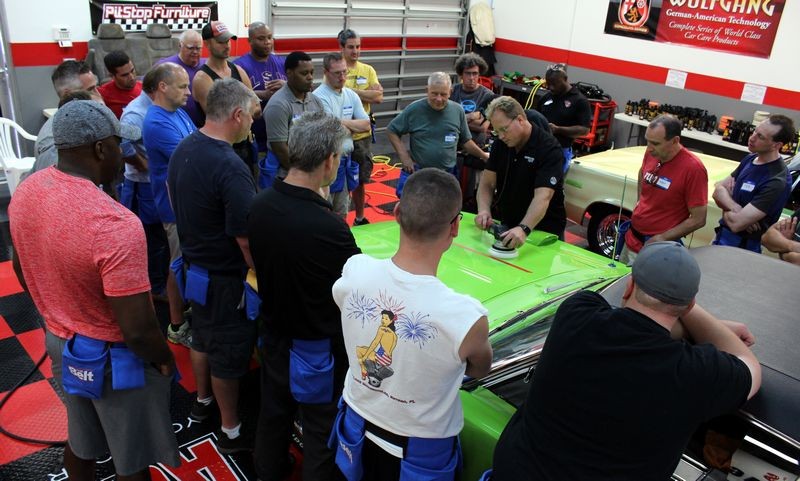

Time to inspect the before and after results from the testing using a FLEX Swirl Finder Light


Results from the test spot?
After inspecting the results everyone agrees the SONAX EX-06-04 with a white foam polishing pad is effectively removing the holograms, swirls and scratches and it's time to get to work!
-
-
-
-
-
-
Re: 1970 Superbird Detailing Class - The art of polishing paint - Competition Ready Detailing Classes at Autogeek
-
Re: 1970 Superbird Detailing Class - The art of polishing paint - Competition Ready Detailing Classes at Autogeek
Beautiful car, looks great. I don't know anyone who doesn't like the Superbird/Daytona cars. I would also like more information on the 67 Belvedere II Convertible in the background.
Similar Threads
-
By Mike Phillips in forum 3-Day CAR Detailing Bootcamp Classes - Info & Dates
Replies: 28
Last Post: 05-01-2017, 06:18 PM
-
By Mike Phillips in forum 3-Day CAR Detailing Bootcamp Classes - Info & Dates
Replies: 1
Last Post: 08-16-2016, 09:20 AM
-
By Nick McKees37 in forum 3-Day CAR Detailing Bootcamp Classes - Info & Dates
Replies: 44
Last Post: 01-19-2016, 09:30 PM
 Members who have read this thread: 0
There are no members to list at the moment.
Posting Permissions
- You may not post new threads
- You may not post replies
- You may not post attachments
- You may not edit your posts
-
Forum Rules
|
| S |
M |
T |
W |
T |
F |
S |
| 31 |
1
|
2
|
3
|
4
|
5
|
6
|
|
7
|
8
|
9
|
10
|
11
|
12
|
13
|
|
14
|
15
|
16
|
17
|
18
|
19
|
20
|
|
21
|
22
|
23
|
24
|
25
|
26
|
27
|
|
28
|
29
|
30
| 1 | 2 | 3 | 4 |
|


 Reply With Quote
Bookmarks