 Thanks: 0
 Likes: 0
 Dislikes: 0
-
Tips & Techniques for using a Spray Detailer to Remove Light Dust, Fingerprints and Smudges
Tips & Techniques for using a Spray Detailer to Remove Light Dust, Fingerprints and Smudges
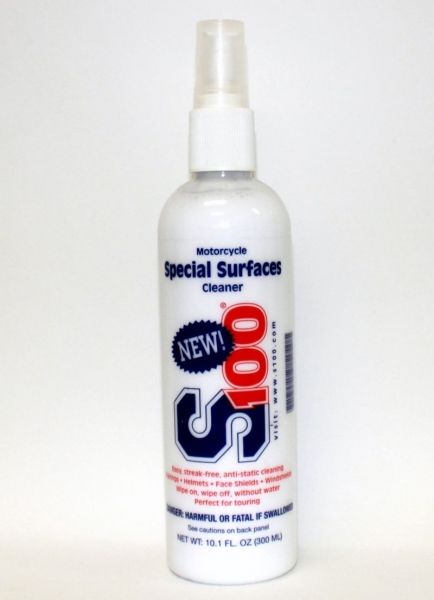
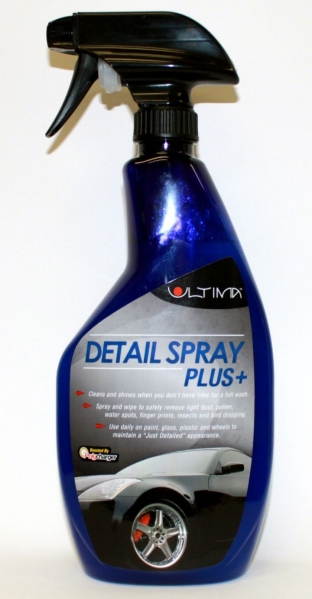
Spray Detailers are for removing,
- Light dust
- Fingerprints
- Smudges
- And most can also be used as a clay lubricant (Read Manufactures Recommendations first)
Spray detailers are wonderful, time-saving products if used correctly on the correct condition of finish. They enable you to restore that "Just Detailed" look quickly and easily without having to wash and wax your car.
The key is evaluating the condition of your car's paint and making the right judgment as to whether it's safe to use a spray detailer or if it would be more intelligent to clean your car using a normal car wash process with a free flowing water source or a Rinseless Wash if you're not in an area where you can perform a normal car wash.
The most common question I see posted on a forum or asked in a detailing class, or more accurately, the most common concern presented in a class or on the forum goes something like this,
How dirty can a car be and you can still safely use a spray detailer to wipe
surface dirt off the car without inflicting swirls and scratches in the process?
The answer is what I typed in the first part of this article and over the years I find myself typing this answer out over and over again because for some reason it either doesn't sink in, or a segment of the car detailing population doesn't like the answer.
So here it is again,
Spray Detailers are for removing,
- Light dust
- Fingerprints
- Smudges
Spray Detailers are NOT for removing caked on mud after you've been 4-wheeling in the mud bogs.
So how dirty can a car be?
The car can have light dust and then if you use a premium quality spray detailer, a premium quality microfiber polishing towel and good technique, then you can wipe the surface clean and not instill any swirls and scratches.
The definition of light dust
Here's what light dust means... if you walk over to the hood of your car and you can see visible light dust, and with a strong breath blow over the hood and see the light dust move, this is light dust.
Light dust is just that, it's a light accumulation of airborne dust and contaminants that have landed primarily on horizontal surfaces and have not in any way bonded to the paint.
Once light dust bonds to the paint it is no longer light dust but is in fact a film of dust or a film of dirt.
For example, if you wash and dry your car on Monday morning and the car sits outside exposed to the elements all day, (dry weather, as in it's not raining or snowing), and by that Monday night you can see an accumulation of light dust on the surface, this is light dust.
Now if you leave your car parked outside overnight and dew forms on the exterior panels, the light dust will mix with the dew moisture and begins to form a film that will no longer simply blow off with air or dust-off using a tool like a California Duster. At least some portion of the previously un-bonded light dust has now become a bonded film.
If this pattern repeats for a few days, a week or a few weeks, that is each day dust settles on the car, the dust mixes with dew moisture over night, then the daytime dust will become a dirt film on the paint.
Again, spray detailers can be used safely to remove light dust. The key word here is safely.
Question: Can spray detailers be used to remove a dirt film that has built up onto the paint?
Answer: Yes.
Question: Can spray detailers be used to safely remove a dirt film that has built up onto the paint?
Answer: What's your definition of safely.
If by safely you mean that there is ZERO chance of inflicting swirls and scratches into the paint and you're going to inspect and measure under the most grueling of light conditions then I would never publicly state it could be done safely and would never recommend it for this person, (this person = the person with the dirt film on the paint), in this application, especially if the car in question has a clear coated black or dark colored finish.
That's because once dust and dirt form into a film onto a scratch-sensitive coating like your car's clear coat finish, you're going to have to rub a little in order to completely loosen this film and remove it and that's not what most people would consider safe if the definition of safe means to not inflict any swirls or scratches.
Once your car's paint has a film of dust built-up on the surface, you can use a spray detailer to clean your car but you've passed the limits and expectations of what a spray detailer is formulated to do safely. It will still clean and remove the dirt film, and you can be as careful as you like, but your expectations should be grounded in reality.
Once your car's finish has more than light dust accumulated on the surface, then it's time to consider using a normal car wash or a Rinseless Wash to remove the dirt if your goal is to maintain a swirl and scratch-free surface.
It could be that you could use a spray detailer on a car with worse than light dust on the paint and work completely safe and cause no marring of any type, but that will have to be your decision and you'll need to access the risk involved and weigh it against your expectations for the quality of finish you expect to see on your car.
In the real world, if you're car is not a garage queen, that is your car is a daily driver and while it has a very nice finish, you understand that through normal wear-n-tear that fine swirls are almost unavoidable when it comes to clear coat finishes that are exposed to the elements 24 hours a day and 7 days a week... if you understand this, then spray detailers are great for removing light dust and even light dust that's accumulated over a few days.
It's just a matter of matching your expectations with reality because reality is that clear coat paints are scratch-sensitive, this means while they tend to be harder than traditional single stage paints, like the paint that originally came on a 1965 Mustang, they can still scratch very easily and because there's a colored basecoat of paint under the clear layer, this basecoat layer of paint acts to magnify any swirls or scratches in the top layer of clear paint and this makes it all too easy for your eyes to see, especially on a sunny day or under bright lights.
Spray detailers are great!
I love using them on my cars in-between a normal wash job and a regular coat of wax; but I fully understand what a spray detailer is formulated for and capable of doing and what is an unreal expectation.
Let's talk about spray detailers...
How a spray detailer works
A quality spray detailer is supposed to lubricate, even HYPER lubricate the surface to help prevent scratching. A quality spray detailer will encapsulate dirt and dust particulates to help prevent scratching the paint during wipe-off. Most spray detailers also smell very nice and that always makes cleaning your car more enjoyable.
Tools Needed
- A premium quality spray detailer
- A collection of premium quality microfiber polishing cloths, each folded 4-ways.
Note: Folding your microfiber polishing cloths 4-ways will, - Give you 8 sides of clean microfiber cloth to wipe with.
- Help spread out the pressure from you hand
How to use a spray detailer
- First mist the spray detailer over a small section of a panel.
- Next spread the spray detailer around gently with one side of a microfiber polishing cloth (folded 4-ways).
- Then quickly turn to the dry side and gently remove the spray detailer and buff the paint in this section to a dry, high shine. You are now finished with this section.
Before moving onto a new section, re-fold your microfiber polishing towel to expose a clean, dry side.
When starting a new section, remember to overlap a little into the previous section.
After you’ve used all 8 sides of a single microfiber polishing towel, switch to a fresh, clean microfiber polishing towel.
Two things you can do to help a spray detailer do its job better...
1. Use PLENTY of premium quality microfiber polishing towels
Don't try to wipe your entire car down using one or two towels if the goal is to maintain a flawless finish.
How many microfiber polishing towels do you need?
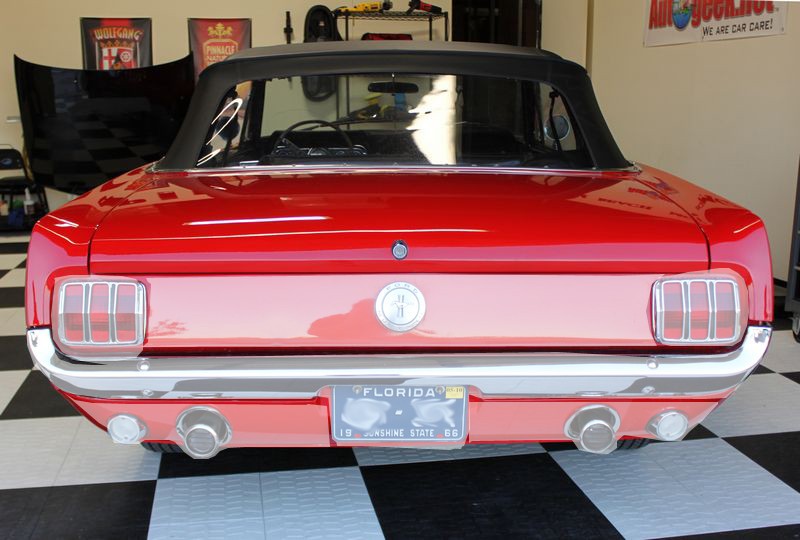
10 to 12 Microfibers for an average size car. This is not a hard rule but an average based upon the pictures showing how I sliced-up the 1966 Mustang below.
If you want to take wiping a car down with a spray detailer to the extreme, then you fold a microfiber 4-ways and this give you 8 clean wiping sides. Do one wiping process one time with one side and then turn or fold to a new side. The more careful you want to be, the smaller you should make the section you wipe.
Assuming you fold to a fresh, clean, dry side of a folded microfiber for each new section, then working small sections will mean only removing small portions of dust which will be gathered onto the working face of the folded microfiber. The larger the section, the more potential dust you will remove and transfer to the working face of the folded microfiber.
Smaller sections = you'll need more microfiber polishing towels.
Larger sections = you'll need less microfiber polishing towels.
Small Vehicles = you'll need less microfiber polishing towels.
Large Vehicles = you'll need more microfiber polishing towels.
Personal comment
I worked in a Class 9000 Clean Room and we used a very strict protocol for wiping down surfaces with clean room wipes. The protocol was to wipe a surface with one side of a wipe one time, turn wipe over and make one new dedicated wipe and then dispose of the wipe. If there is more surface area to be cleaned, you get a new wipe. For wiping down a table or a large manufacturing tool, some as large as a small room, this took a lot of time and used a lot of wipes. The goal was somewhat the same as it is for removing dust off the car and that was to remove the dust, not spread it around. By only wiping with a single working face of a clean room wipe one time, that helped to insure any dust gathered off the surface was not merely transferred to a new section of the item being wiped by either turning to a clean side or disposing of the wipe.
2. Use good technique
Always fold your microfiber polishing towels 4-ways, this will give you 8 wiping sides and this will help to spread out the pressure form your hand. Wipe carefully, not like a Wild Man. Start at the top and work your way down. Horizontal surfaces will accumulate dirt, dust and airborne contaminants more than vertical surfaces. The lower portions of a vertical surface will accumulate more dirt and road grim than the upper portions of a vertical surface.
How large of a section to wipe
You have to use your own judgment when it comes to how-to slice-up the panels on your specific car. Below is an example as to how I would slice up this 1966 Convertible Mustang but it will give you the basic idea for slicing up your own car's panels.
When I look at a car to work on, whether it's sanding, compounding, polishing and even wiping with a spray detailer, I will slice up the car's panels because for most procedures you don't tackle entire panels at one time except when applying a Last Step Product like a finishing wax or finishing paint sealant, (LSP).
Therefore you must slice up each individual panel into smaller sections. Because body styles can vary greatly between vehicles, how you slice-up a car is dependent upon the size and shape of the individual panels that make up the car.
Below are before and after pictures of examples of how I would slice-up a 1966 Mustang with notes for each of the pictures that explain how and why I sliced up the panels the way I did. How you do this on your car will be in part personal preference, feel free to slice up your car any way you want.
Because the panel itself can have a strong influence on how you work on it, the I always follow this practice,
"Let the panel be your guide"
Picture 1 - Hood

I would slice the hood up by dividing it into 4 equal quadrants. The tops of the fenders are their own section and the panel before the windshield with the grill is it's own section.

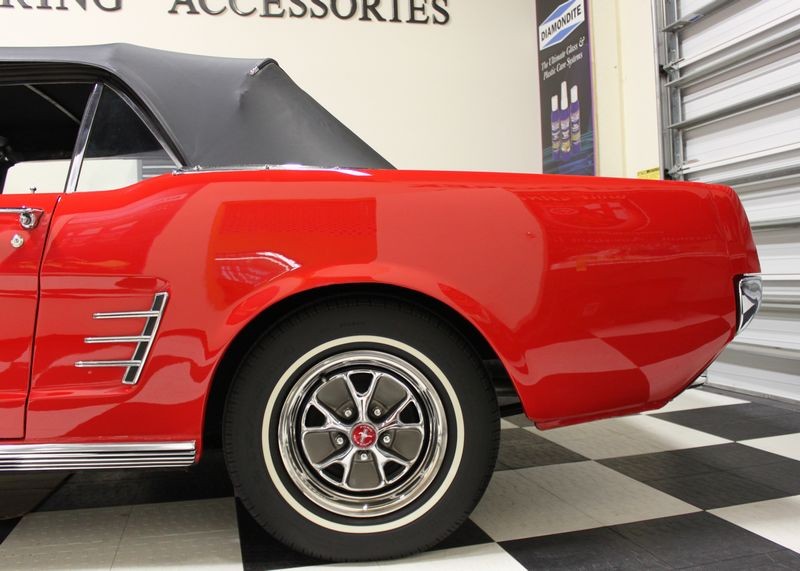
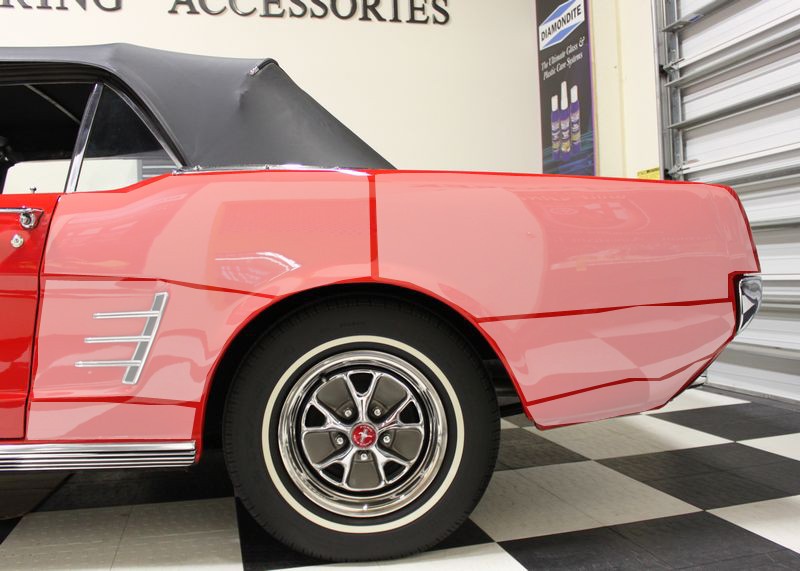
Picture 2 - Vertical Front Fender Panel

I would slice the side of this fender up with an emphasis on upper and lower portions. Typically the lower portions will tend to have more dirt and road grime build-up so I don't want to be wiping from a lower portion of a panel upward. Start at the top and work down. You could even wipe only the top and middle portions of a vertical panel and save all the lowest panels for last as a Best Practice to create a built-in way to insure you never mix dirt on the bottom of the car onto panel section in the middle and top.
Wiping Lower Portions First Technique
Taking wiping with a spray detailer to the extreme
If you really want to get extreme you could wipe all the lower panels first with very defined stop point where you stop wiping towards the middle and upper portions of the vertical panel. After you go all the way around the car wiping only the lowest portions of the panel, then tackle the upper and middle portions. By wiping only the lowest portions first and absolutely stopping before wiping the middle, you insure there's no way to overreach and wipe too far into a lower panel while wiping a middle portion of a panel and accidentally cross-contaminating the dirt on a lower panel to a portion of a panel in the middle. This is very extreme practice but because the nature of online enthusiasts trend towards the extreme I've included this practice in this article.
Applies to car washing too
I do use the above approach when washing some cars. That is wash the wheels and tires first for the reasons outlined here, and then wash and rinse the lower portions of all the vertical panels of a car first before starting at the top of the car and work downward.
If you first remove all the dirt and road grime from the lowest portions of a car there's now way you can accidentally or on purpose wash a lower portion and transfer what is usually a heavier concentration of dirt and road grime onto your wash mitt and the rub it against a middle or upper portion. (Is that too AR?). Of course you'll want to change to new, clean wash solution after washing the lower panels and also switch to a new or clean wash mitt as you shouldn't and wouldn't want to use the wash mitt you used on the lower panels on the upper panels.
Fender Lips
The actual inner portion of all Fender Lips can potentially have more dirt and road grim accumulation built-up than the rest of the car due to dirt slinging off the tires due to centrifugal force. For this reason, the inner portion of all Fender Lips should be wiped off first before tackling the rest of the car to insure there's no possibility of transferring dirt for this small, thin curved panel onto the surrounding exterior panels.
The below panel would take a minimum of 2 microfiber polishing towels. You'll need 10 sides of a average microfiber polishing towel folded to create 8 wiping sides. One side to spread a spray detailer over one section and then one side to wipe the spray detailer off that section. 5 Sections on a single panel requires 10 wiping sides of a microfiber polishing towel, which means you'll need 2 microfiber polishing towels.
If you use the Wiping Lower Portions First Technique listed above for wiping all the lower portions of the car first before tackling the upper and middle portions, then when you returned to this panel you would only need one microfiber as you would only have 3 sections to wipe.

Picture 3 - Vertical Door Panel
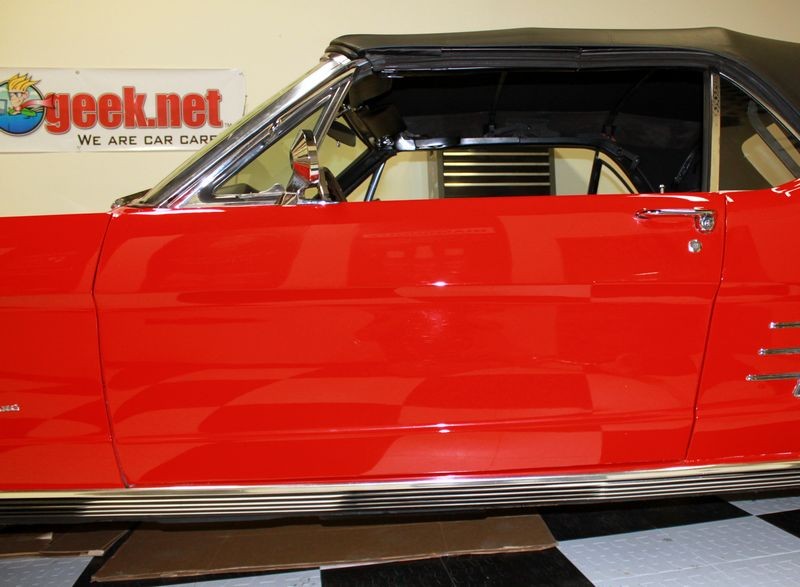
For the vertical door panel, again I break the panel up into 3 levels, upper, middle and lower portions. Wipe the top section and then move downward and with each panel be folding your microfiber polishing towel to a clean, dry side. This panel would take a minimum of 8 sides of a average microfiber polishing towel folded to create 8 wiping sides. One side to spread a spray detailer over one section and then one side to wipe the spray detailer off that section. 4 Sections on a single panel requires 8 wiping sides of a microfiber polishing towel.
If you use the Wiping Lower Portions First Technique listed above for wiping all the lower portions of the car first before tackling the upper and middle portions, then when you returned to this panel you would only need one microfiber as you would only have 3 sections to wipe.

Picture 4 - Vertical Rear Fender Panel
Again, I slice-up this panel into upper, middle and lower section. This panel would take a minimum of 12 sides of a average microfiber polishing towel folded to create 8 wiping sides, which means you would need two microfiber polishing towels. Extra care must be taken around the chrome trim as there may be dirt and/or abrasive particulates lodged between the trim and paint. The actual inner surface of the fender lip should be wiped before wiping any of the exterior surrounding paint.
If you use the Wiping Lower Portions First Technique listed above for wiping all the lower portions of the car first before tackling the upper and middle portions, then when you returned to this panel you would only need one microfiber as you would only have 4 sections to wipe.
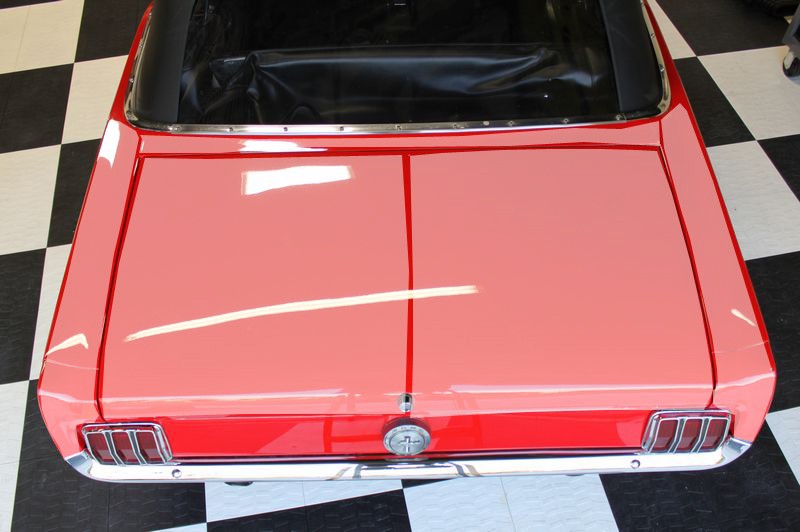
Picture 5 - Rear Trunk Lid

For this panel I would slice up the outer edge panels as dedicated panels and wipe these first, this is called edging. Then slice the horizontal surface into two sections, you could also break this major panel up into 4 sections but it's pretty easy to knock out as two sections.
Picture 6 - Rear Vertical Panels
Note: Rear vertical panels tend to have a lot of road grime and in some cases exhaust pollution built-up on them as the gasses coming out of your exhaust can swirl around in this area in a back-draft and create an oily film that will attract dirt and dust in the air, so be mindful of this and don't use a microfiber used in this section over any other panels, especially the major panels.

This section is basically sliced-up into it's two major sections, the panel between the tail lights, (which should also be wiped), and the panel under the chrome bumper, which will probably be the grungiest panel on the entire car. Modern cars don't have dedicated chrome bumpers and instead the entire back of most modern cars are large bumper/cover panels. These will tend to be covered in road grime too, so don't use a microfiber from this section on any of the major panels.
Hope this this helps show how to slice up a car for wiping with a spray detailer.

-
Re: Tips & Techniques for using a Spray Detailer to Remove Light Dust, Fingerprints and Smudges
-
Re: Tips & Techniques for using a Spray Detailer to Remove Light Dust, Fingerprints and Smudges
-
Super Member

Re: Tips & Techniques for using a Spray Detailer to Remove Light Dust, Fingerprints and Smudges
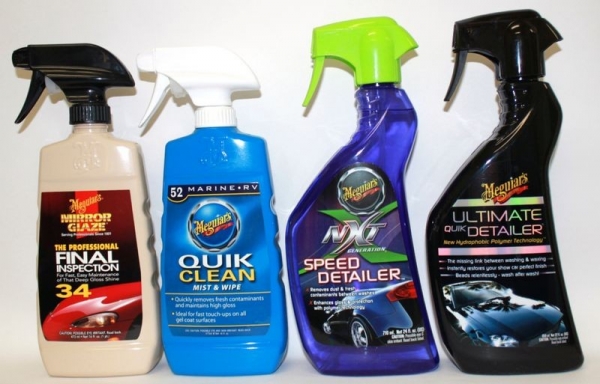
You forgot to mention Meguiar's M135, Last Touch, and Quik Detailer.  Just thought I'd throw that out there. Just thought I'd throw that out there.
BTW, nice job on the writeup! 
Shane
2021 Honda Civic Hatchback EX Lunar Silver
-
Super Member
Re: Tips & Techniques for using a Spray Detailer to Remove Light Dust, Fingerprints and Smudges
Wow, 46 spray detailers. So many to choose from! So hard to decide...
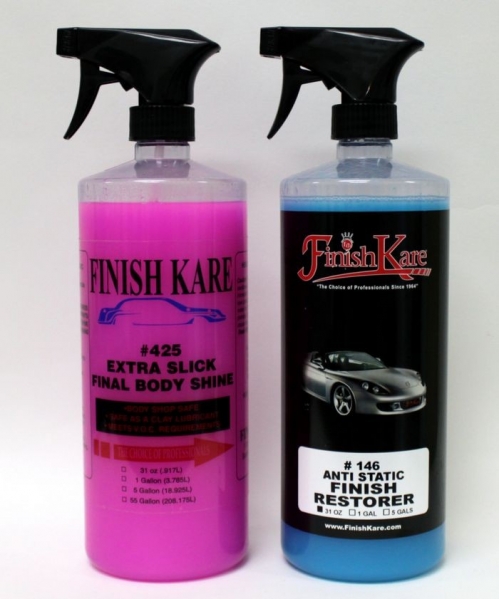
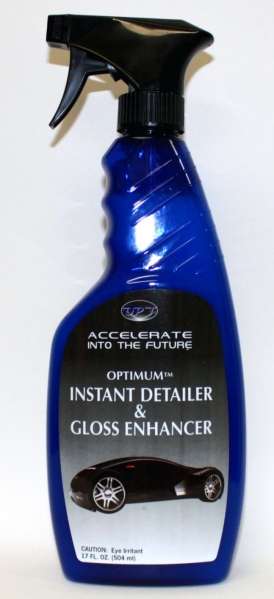
Speaking of spray detailers, what can you tell me about FK-425 and Optimum Instant Detailer? Are they versatile with products from other lines (say Wolfgang or Pinnacle) or is it best to use them with products from their own lines? I was looking at both of these and thinking about getting one but am unsure as to which one would be better. What do you think of these two products?
Shane
2021 Honda Civic Hatchback EX Lunar Silver
-
Re: Tips & Techniques for using a Spray Detailer to Remove Light Dust, Fingerprints and Smudges
 Originally Posted by CieraSL

Wow, 46 spray detailers. So many to choose from! So hard to decide...
Spray Detailers to men are like shoes to women... you can never have too many...

Originally Posted by CieraSL
Speaking of spray detailers, what can you tell me about FK-425 and Optimum Instant Detailer? Are they versatile with products from other lines (say Wolfgang or Pinnacle) or is it best to use them with products from their own lines? I was looking at both of these and thinking about getting one but am unsure as to which one would be better. What do you think of these two products?
They're both great spray detailers, as for using them outside their line there shouldn't be any problems but if you're a "systems" guy or a "purest" then you might like to stay within a line for synergistic chemical compatibility. Spray Detailers usually don't have issues using them with other LSP's.

-
Super Member

Re: Tips & Techniques for using a Spray Detailer to Remove Light Dust, Fingerprints and Smudges
Originally Posted by CieraSL
Wow, 46 spray detailers. So many to choose from! So hard to decide...
Speaking of spray detailers, what can you tell me about FK-425 and Optimum Instant Detailer? Are they versatile with products from other lines (say Wolfgang or Pinnacle) or is it best to use them with products from their own lines? I was looking at both of these and thinking about getting one but am unsure as to which one would be better. What do you think of these two products?
I've used them over various types of LSPs and like them both. No issues and both exhibit anti-static properties and leave the finish very slick. Optimum seems to take the cake for me, but I still have to play with FK425 a bit more.
-
Super Member
Re: Tips & Techniques for using a Spray Detailer to Remove Light Dust, Fingerprints and Smudges
Originally Posted by matt@autogeek.net
I've used them over various types of LSPs and like them both. No issues and both exhibit anti-static properties and leave the finish very slick. Optimum seems to take the cake for me, but I still have to play with FK425 a bit more.
So which one is your go-to spray detailer?
Shane
2021 Honda Civic Hatchback EX Lunar Silver
-
Super Member
Re: Tips & Techniques for using a Spray Detailer to Remove Light Dust, Fingerprints and Smudges
Shane
2021 Honda Civic Hatchback EX Lunar Silver
-
Re: Tips & Techniques for using a Spray Detailer to Remove Light Dust, Fingerprints and Smudges
Originally Posted by CieraSL
and 3M Quik Wax (which I guess is more of a spray detailer, isn't it?). Let's see, am I missing any? Oh well. Can always add more! 
I would place the 3M spray wax directly into the spray wax group. Some products cross over, what I did was read the manufactures directions and if a spray wax is recommended for removing light dust, then it's kind of a gray area but I don't think you'll find that on the 3M product.
Originally Posted by CieraSL
Hey Mike, are you going to do a thread on spray waxes as well? And maybe shampoos? Please?
Sure plan on it, plus some other things coming up real fast that are going to be new to the online detailing forum world...
Similar Threads
-
By Dunkaroo in forum Auto Detailing 101
Replies: 4
Last Post: 09-10-2020, 07:29 AM
-
By patrickcox in forum Auto Detailing 101
Replies: 7
Last Post: 08-05-2019, 09:30 AM
-
By lalojamesliz in forum Auto Detailing 101
Replies: 30
Last Post: 10-14-2016, 12:13 AM
-
By rayhyar in forum Auto Detailing 101
Replies: 5
Last Post: 07-02-2014, 08:07 PM
-
By cls in forum Auto Detailing 101
Replies: 4
Last Post: 06-25-2007, 07:55 PM
 Members who have read this thread: 1
Posting Permissions
- You may not post new threads
- You may not post replies
- You may not post attachments
- You may not edit your posts
-
Forum Rules
|
| S |
M |
T |
W |
T |
F |
S |
| 31 |
1
|
2
|
3
|
4
|
5
|
6
|
|
7
|
8
|
9
|
10
|
11
|
12
|
13
|
|
14
|
15
|
16
|
17
|
18
|
19
|
20
|
|
21
|
22
|
23
|
24
|
25
|
26
|
27
|
|
28
|
29
|
30
| 1 | 2 | 3 | 4 |
|


 Reply With Quote


Bookmarks