 Likes: 0
 Dislikes: 0
-
Considerations for removing paint defects - the BIG PICTURE
Considerations for removing paint defects - the BIG PICTURE
Anytime I get questions via e-mail, a PM or a FB message I prefer to invest my typing time where
A: It's easier for me to share links, pictures and videos.
B: More people can read and thus benefit from the information. (no just one set of eyeballs
So I get an e-mail asking,
Mike,
First let me say what a huge fan I am, forever grateful for your knowledge and insight you have shared throughout the years. I write you regarding an issue I've recently noticed on my personal vehicle, a 2015 Lexus IS. I hand wash my vehicle on a weekly to bi-weekly basis and have started to notice amber colored spots accompanied by a raised clear coat etching.
I have clayed the surface, used Iron-X, cleaner/polish, scratch X, M105 but nothing I have tried seems to remove the color or level the etching. While I have seen almost all types of etching listed in The Art of Detailing, this is a first for me.
After having the dealer look at the concern, they believe the etching and discoloration to be from tree sap, although I respectfully disagree.
Do you have any personal suggestions to safely remove this type of etching? Any wisdom or insight you can offer would be much appreciated.
Thank you,
Andrew
Hi Andrew,
Thank you for reaching out to me for help with the paint defects in the paint on your 2015 Lexus IS. I've taken your car's paint issues and your question and turned it into the below article as an attempt to help you and also help others that may run into a similar issue into the future.
Considerations for removing paint defects - the BIG PICTURE
Paint defects are either,
Topical – that is on the surface
Sub-surface – that is below the surface
For most topical defects you can remove them via claying, polishing or in some cases, compounding followed by polishing and even via the use of a quality cleaner/wax.
Below surfaces defect can be removed IF the are not too deep and below surface defects are removed by removing a measurable amount of paint by abrading it via polishing or in some cases, compounding followed by polishing and even via the use of a quality cleaner/wax.
You never really know what you can do until you try. When you do try, always try using the least aggressive approach in this order,
- Washing and drying
- Claying
- Polishing or using a one-step cleaner/wax
- Compounding if polishing or a cleaner/wax was not aggressive enough followed by polishing or using a one-step cleaner/wax
If none of the above remove the defect then dry sanding or wet sanding would be the last option to try due to the fact that any factory finish the paint is going to be thin. And this is key to remember,
- Sanding removes paint
- Compounding to remove the sanding marks removes paint.
- Polishing after compounding to maximize gloss and clarity removes a little paint
Sanding paint requires you follow up with compounding and polishing and all three of these procedures remove a little paint and because paint is thin to start with these procedures are risky. Sanding a factory finish should only be done by someone with experience. If you DON’T have experience, get some experience on a junk body panel from the salvage yard before learning how to sand (and in so doing get experience), by learning on something that is IMPORTANT to you.
I've Lost Count!
I cannot count how many times I’ve seen someone join the AutogeekOnline.net car detailing discussion forum and share their sad story about how they tried to sand out a defect on the factory paint on their car and in the process sanded or compounded and polished too much and broke through the clearcoat layer of paint.
Once you sand or buff through the clearcoat layer of paint you expose the basecoat or pigmented layer of paint and there is NO REMEDY to undo this type of damage except to repaint the area or repaint the panel.
What will it cost to fix your mistake?
A low-end average to have a hood or trunk lid re-painted by a quality body shop assuming the panel did NOT need any body work, just prep and paint would be $300.00 and my experience that would be extreme low-end and you should expect to pay more especially as the value of the car increases. For example it will probably cost you more to have the hood of a Corvette re-painted than have the hook of a KIA Rio repainted.
So when you discover a defect on or in your car’s finish, always use the least aggressive approach to try to remove it and before going to the extreme of sanding to remove the defect take a moment to consider the BIG PICTURE.
Here's a free tip...
If you're reading this and you're thinking about tackling some type of paint defect on your car. BEFORE you start the project, just for fun - take the car to a few local body shops and simply ask them,
What will it cost me to repaint the hood? (or the blank)
Now let that sink in. Besides the cost and hassle of getting a panel repainted - you'll now have a car that no longer has all the factory paint.
Knowing what it will cost to repaint the panel you've burned through will tend to make you a tick more cautions about going all the way.
The Big Picture
Daily Drivers
If the car in question is a daily driver, a commuter car, a grocery getter, then understanding that the paint is thin to start with and all the UV protection for the entire matrix of paint, (matrix meaning e-coat, primer basecoat and clearcoat), and the more clearcoat you remove the less UV protection you have for the entire matrix of paint, then for deeper defects that are not easily removed, perhaps consider the BIG PICTURE and learning to live with the defect(s) versus risking removing too much paint in an effort to remove the defect(s) and resulting in having to have the affected area or the panel repainted due to sanding or buffing through the clearcoat.
The big picture with daily drivers is they are going to see more paint defects into the future as a normal course of wear-n-tear because they are a daily driver. It's not fun, it's not enjoyable to see your pride and joy get a grocery shopping cart ding or a door ding, or a rock chip or a etching in the paint from a bird dropping, but these are real and normal risks that come with using a car in the real world on a daily basis.
Here's a quote of mine,
Words cannot describe the heart sinking feeling that overcomes you when you discover you have broken through the clearcoat - Mike Phillips
Show Cars and Special Interest Vehicles (SIVs)
If the car in question is a show car, then it’s likely it has a CUSTOM paint job and most custom paint jobs have thicker paint than factory paint jobs – so knowing the paint is thicker and the car is actually put on display for public viewing and perhaps judging, THEN it may be more reasonable in the BIG PICTURE to attempt to remove the defect by sanding. Even so, the sanding should be performed by someone with experience and also someone who has the correct tools to do the entire procedure correctly and safely including,
1: Disclaimer form signed by the car owner excluding the detailer from liability if something goes wrong.
2: Paint Thickness Gauge to accurately measure the paint thickness to help make the Go or No Go decision.
3: A rotary buffer with a wool pad and a quality compound that uses great abrasive technology to remove the sanding marks.
4: Any orbital polisher to re-polish the area to remove the holograms leftover by the rotary buffer and the fibers of the wool pad.
5: A quality LSP to seal the paint in the area worked.
I hope the above considerations help you to determine just how far you want to go to try to remove the raised, amber colored spots on and likely in the clearcoat finish on your car.

-
Post Thanks / Like - 1 Thanks, 0 Likes, 0 Dislikes
-
Re: Considerations for removing paint defects - the BIG PICTURE
To try to help with some specific recommendations to try...
I hand wash my vehicle on a weekly to bi-weekly basis and have started to notice amber colored spots accompanied by a raised clear coat etching.
I have clayed the surface, used Iron-X, cleaner/polish, scratch X, M105 but nothing I have tried seems to remove the color or level the etching.
The M105 is a quality compound that works well by hand or machine. You didn't state how you applied it or the type of buffing pads or applicator pad you used to apply it.
For SMALL defects like you describe, I would try to remove the defect by HAND as you can exert a LOT of pressure with just a few fingertips pushing down on a piece of terry cloth with the M105. If this doesn't positively affect the defect and of course by this I mean if rubbing the M105 aggressively and with downward pressure using a fast hand movement doesn't improve or remove the defect then this would be a bad sign.
The next thing I would try is to LIGHTLY wetsand the defect using a fine grade finishing paper, (not a wet/dry automotive grade paper), like the Griot's Garage
Griot's Garage BOSS Finishing Papers 2500 grit
Cut out a piece about the size of a postage stamp and then using your index finger and some soapy water, sand on just the top of the defect for a few movements. Then remove your sanding marks using the M105 and a fiber applicator like a piece of terry cloth towel or a microfiber applicator pad.
Then inspect.
It's either going to look better or no change at all. If it looks better you can stop and learn to live with it or you can repeat the process. If the amber stain is not too deep a little more sanding may remove it. BUT a little more sanding to a layer of paint thinner than a post-it note is also risky.
That's where it's your call.
While I have seen almost all types of etching listed in The Art of Detailing, this is a first for me.
After having the dealer look at the concern, they believe the etching and discoloration to be from tree sap, although I respectfully disagree.
Do you have any personal suggestions to safely remove this type of etching? Any wisdom or insight you can offer would be much appreciated.
I've seen amber colored discoloration on white paint before. I'm sure it happens to all colors of paint it's just easier for the human eye to see it on white light colored paints. (Technically the clear is discolored and the pigmented basecoat simply works as a background to reveal the discoloration).
Outside of what I listed above in the first post of this thread and then again in this reply, there's not much more you can do.
I would look at the trees that are around the area you park your car be it at home or at work. Tree sap can discolor and because it's a type of solvent it can soften and cause paint to swell.
-
Re: Considerations for removing paint defects - the BIG PICTURE
Further reading....
Click the link, look at the pictures, try this at home...
Clearcoats are thin by Mike Phillips
-
Re: Considerations for removing paint defects - the BIG PICTURE
Also just to add.....
While the two different types of paint defects caused by bird droppings are nothing like the paint defects you're seeing on the paint on your Lexus, I would point out that the first type can usually be removed but the second type can almost never be removed without going through the clear and then requiring the affected area or the entire panel to have to be repainted.
Two Types of Bird Dropping Etchings
-
Super Member

Re: Considerations for removing paint defects - the BIG PICTURE
Regardless the defect(s):
I always go with the "no wet
(or dry) sanding" on any of
my vehicles' OEM CC.
Bob
"Be wary of the man who urges an action in which he himself incurs no risk."
~Joaquin de Setanti
-
Re: Considerations for removing paint defects - the BIG PICTURE
 Originally Posted by FUNX650

Regardless the defect(s):
I always go with the "no wet
(or dry) sanding" on any of
my vehicles' OEM CC.
Bob
And I agree that's a good rule of thumb for most people.
That said, some people will never get on this forum and read my article showing and explaining how thin the clearcloat layer of paint is on their car. The will not "think" much into it. They will sand though and I predict moving into the future we will continue to see people join and create threads on this forum explaining how they sanded and/or sanded and then compounded through the clear layer of paint on their car and then they will ask us
How can I fix this mistake?
And you and I and the rest of our forum community will have the never-any-fun job of telling them the only honest repair will be to have the affected area or the entire panel repainted.
Then they will go to a few body shops and get some estimates for repainting and then they will get to experience a new sensation called sticker shock.
As for me? Here's one of my personal quotes...
I use to live my life on the edge of the razor blade...
Now days I live my life on the blade of the butter knife...

-
Re: Considerations for removing paint defects - the BIG PICTURE
-
Re: Considerations for removing paint defects - the BIG PICTURE

Found this today looking for something else.
TONS of rich info in just this one article plus links to rich info.
-
Super Member

Re: Considerations for removing paint defects - the BIG PICTURE
Originally Posted by FUNX650
Regardless the defect(s):
I always go with the "no wet
(or dry) sanding" on any of
my vehicles' OEM CC.
Bob
Originally Posted by Mike Phillips
And I agree that's a good rule of thumb for most people...
And another reason I also subscribe to this practice of not sanding, although I even go a step further and apply it to ANY finish, not only OEMs...
If you sand a defect out of an existing finish, even if completed successfully, you now have an area where you sanded that is smoother than the surrounding finish. That smooth spot within the surrounding sea of texture drives me crazy and in some cases actually looks worse than the original defect.
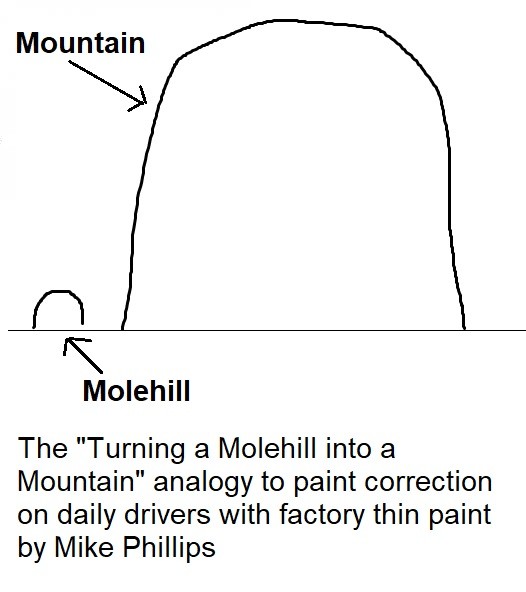
For example, say you had a dust speck in the finish and you sanded it out. Now instead of the very small area that comprised the dust speck, you now have an area of an inch or more where the paint's texture doesn't match. You have essentially created a "mountain out of a molehill" to borrow Mike's analogy. You've created a repair area much larger than the original defect and that is something I try to avoid at all costs, and certainly consider in making any decision relative to "fix it" or "leave it".
Now consider sanding out a three-inch long scratch. The repair area and resulting smooth spot is even more pronounced than the previous example. It's just not an acceptable method of repair to me. I'd rather moderately compound/polish the scratch to simply soften the edges and live with the results.
Sanding should be reserved for entire panels, or vehicles, where appropriate. Not as a regular course of action for isolated blemishes.
Of course, there are exceptions, but my description above is my baseline.
-
Re: Considerations for removing paint defects - the BIG PICTURE
Similar Threads
-
By Hokie335i in forum Auto Detailing 101
Replies: 5
Last Post: 05-15-2020, 11:41 PM
-
By WRAPT C5Z06 in forum Auto Detailing 101
Replies: 40
Last Post: 09-27-2016, 03:55 AM
-
By Crispy in forum Tricks, Tips and Techniques
Replies: 2
Last Post: 05-05-2016, 07:34 AM
-
By Blamettu in forum Ask your detailing questions!
Replies: 4
Last Post: 06-18-2013, 11:00 AM
-
By mcpp66 in forum Ask your detailing questions!
Replies: 4
Last Post: 07-06-2010, 11:45 AM
 Members who have read this thread: 1
Posting Permissions
- You may not post new threads
- You may not post replies
- You may not post attachments
- You may not edit your posts
-
Forum Rules
|
| S |
M |
T |
W |
T |
F |
S |
| 31 |
1
|
2
|
3
|
4
|
5
|
6
|
|
7
|
8
|
9
|
10
|
11
|
12
|
13
|
|
14
|
15
|
16
|
17
|
18
|
19
|
20
|
|
21
|
22
|
23
|
24
|
25
|
26
|
27
|
|
28
|
29
|
30
| 1 | 2 | 3 | 4 |
|


 Thanks:


 Reply With Quote
Bookmarks