 Thanks: 0
 Likes: 0
 Dislikes: 0
-
Junior Member

Chronicles of An Amateur Detailer: The Dawn Wash - A Detailer's MRI
Previously on Chronicles of An Amateur Detailer
http://www.autogeekonline.net/forum/...r-project.html
http://www.autogeekonline.net/forum/...out-order.html
"Note: These posts are meant to explore the steps in detail, so there are going to be lots of pictures and some steps that may seem mundane to you might be a detail someone else overlooks"
So today I started the process and got the few things out of the way that needed to be done while the car is able to move, after this I should be able to park it for the remainder of the detail.
Working clean
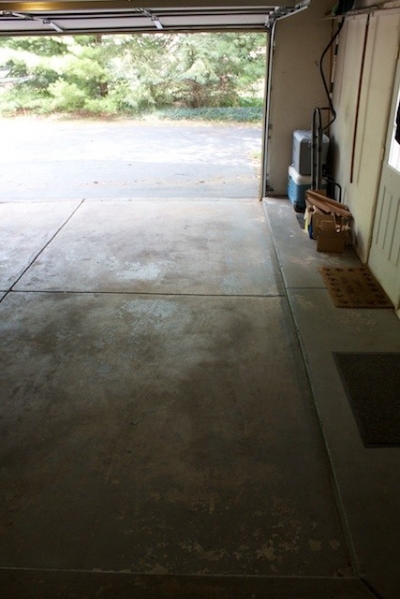
Ok, so to make sure things come out as best as possible we need to make sure the working environment is as clean as possible. So let's see what we got...

Yikes, that's a lot of dirt on the floor in the corners, we can't have that, time to break out the broom...
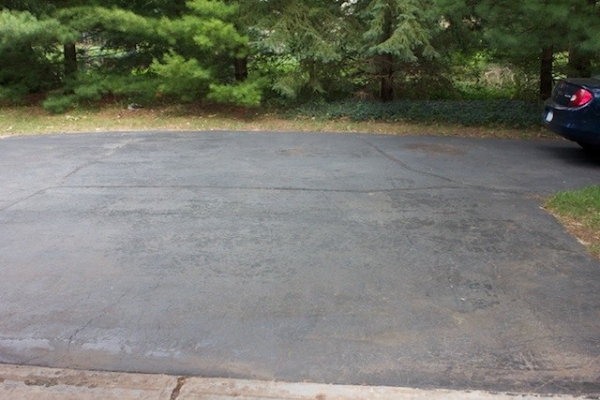
That's better for the garage but what about outside where we're going to be washing? A quick once over with the trusty leaf blower takes this:
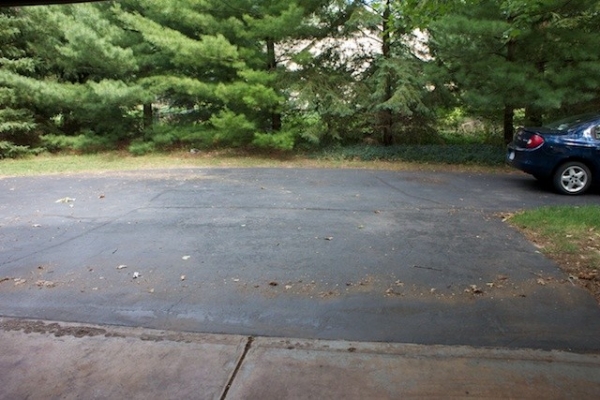
To this:
Ok, so we got the work space clean, let's look at one other thing before we get going.
The Outfit: Dress to Protect
Through my day job I have had the opportunity to spend some time in automotive assembly plants and there hasn't been a single one I have been to that hasn't required you to wear a belt buckle cover, a wristband over your watch and a elastic band over any rings. All of this is done in the name of protecting the paint of the cars in the plant. I tend to think the same so I usually take my rings off (permission from the other half of course).

I also try to wear gym shorts of some kind, no rivets, buttons, or belt required.

The Detailer's MRI: The Dawn Dish Soap Wash
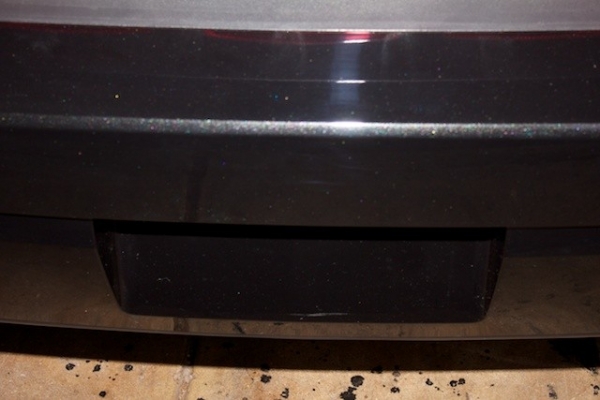
So to remove one nook and cranny for water to hide (and to save photoshop work, I removed the license plate, showing some marring underneath to address later.
And one more thing, because I've NEVER made this mistake before:

Ok, we've gotten the prep out of the way, so let's get this party going with my hard-water special, LSP stripping wash solution. To do this I use my super high tech measuring a device.

The mark in the cup corresponds to 4 fluid ounces and there's a corresponding mark in the bucket. Special thanks to Mr. Phillips for this tip. I then am able to approximate from that mark 2 or 1 ounces for the mixture.
I have never done a LSP removing wash before and after reading through a couple suggestions here decided to come up with my own special home brew. The mixture consists of 4 gallons of water, 4 ounces of Dawn dish soap to strip the LSP, 2 ounces of Meguiar's Gold Class to add lubricity, and 1 oz of ONR to condition my particularly hard well water. Pour in, mix well, add a quick blast from the hose to make some suds and viola (Note the Grit Guard in the bottom of the rinse bucket, there's one in the wash bucket as well)...

A quick spray down of the car with the hose shows the current LSP still holding up well, and it's time to soap this thing up using my trusty Microfiber wash mitt

After picking up some soap solution I do half of the upper half of the car, which is mostly glass.

I put the mitt in the rinse bucket, rub it against the grit guard to loosen up the grime and back to the wash bucket while I rinse the panel off with the hose. I then go back to the wash bucket and do the next panel.
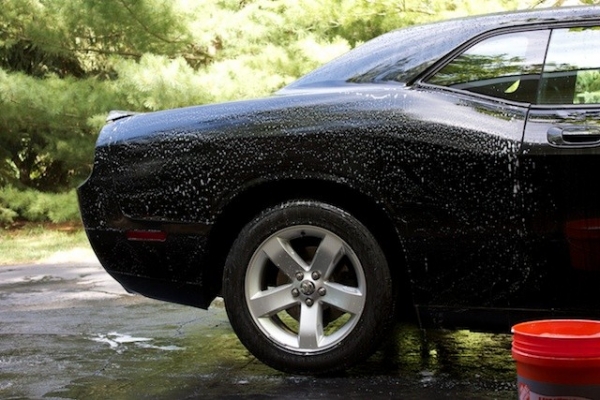
I then proceed around the car, one panel at a time, starting with the passenger side rear, the door, front quarter panel and then half of the hood. Rinsing both the mitt and the panel after each.
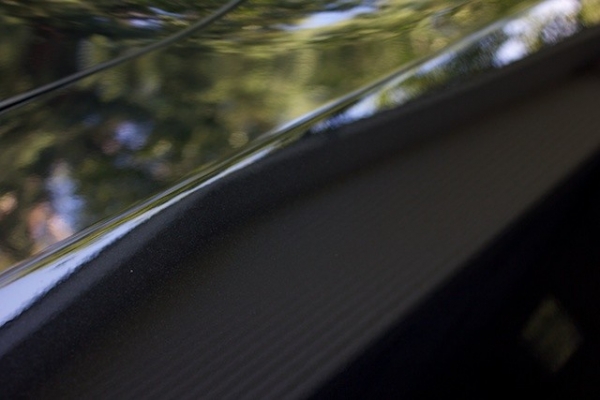
A quick look, at the hood shows a difference in the water beading from the fresh side and the side already washed.

Progress!
I proceeded around the rest of the car the same way. And it was time to give the car a final rinse. When I do this I almost always go back to a tip I found on MOL where you remove the hose nozzle and let sheeting action from the flow of water from the hose end take the water and sheet it right off the car.

The results weren't quite as dramatic since a lot of the LSP had been stripped off, but it still took this:

To this:

To dry I use 2 waffle weave towels, in this case a Sonus Waffle Weave and a Meguiar's Water Magnet. I use one first to soak up most of the water and then another to get the rest.


The first big thing I noticed is that the towels were grabbing a lot more than usual, I guess the home brew worked.
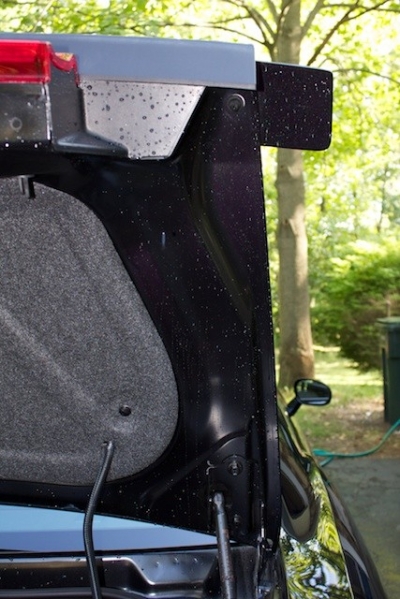
Couple of places to make sure you hit with the drying towel:
The Gas Cap

The Trunk Lid

Under the hood
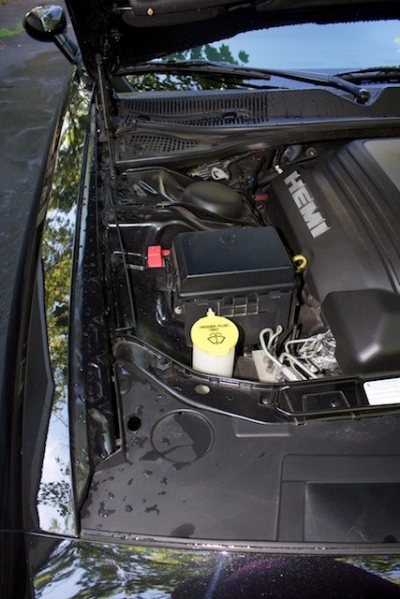
Speaking of under the hood weren't you going to...
Ah Crap! That's right! I was going to...
Cleaning the Engine Compartment
First things first, any boat owner can tell you that water and electricity usually don't play nice together so let's cover that alternator.

I then took some Megs APC to the compartment and agitated with a soft nylon bristle brush that I have. This was followed with a very light rinse from the hose.

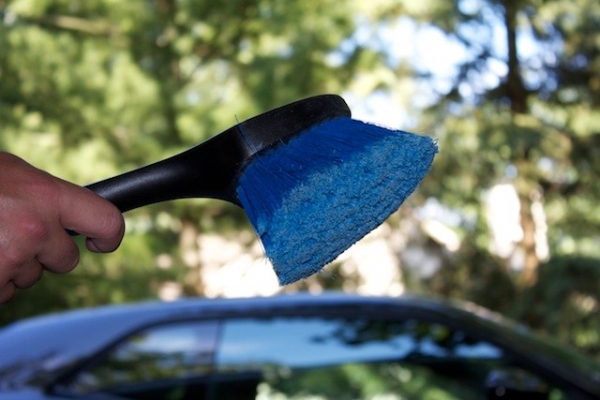
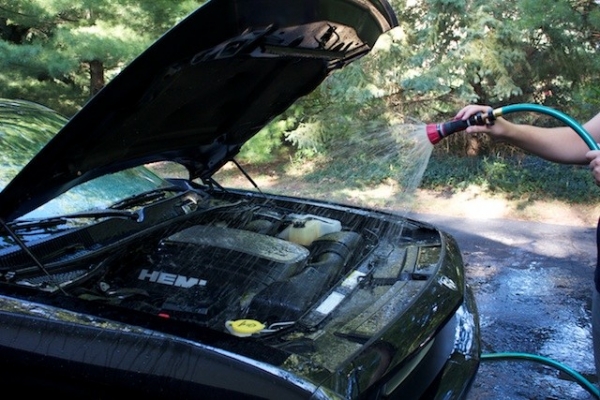
To dry I used an old Meguiars Supreme Shine Microfiber and got as much water as I could out


-
Junior Member
Re: COAAD: What Lies Beneath...
Inspection
Alright, we've done all of this work, let's see what has been hiding under that LSP for 2.5 years.


So there's more swirls than I could see before, good (kinda) that's what I wanted to see out of this.
Wait, what's that? Are those...Holograms? WHAAAAAAAAT????

Wrap up
My general impressions here are that the wash did exactly what I asked of it. The car is clean but there is a complete and total lack of slickness on the paint now telling me the LSP is, in fact, gone. Given that I don't own a rotary buffer I was surprised to see the holograms, but I guess DISO is DISO even if it's been covered for so long. So some questions I have for everyone are:
1.) What can be done to improve the technique?
2.) This car has some large panels, would you have split up more than just the hood.
3.) Since I am doing the interior over the next few days, and have plenty of steps before the finishing polish, is Ultimate Polish really the right product or am I just going to end up covering up mine or the dealers mistakes again? Should I just bite the bullet and buy some SF4500?
As always any feedback is encouraged both on these questions and anything else that you saw. This is meant to be educational after all
Hey idiot, aren't you forgetting something?
"Wow, bold-face alter ego, you're not being very nice today...but no I don't think I'm forgetting anything..."
Do you want to live to finish this detail?
Oh! That's right, I better put my wedding ring back on...
Coming tomorrow
Now that the car is parked we tackle the carpet and upholstery.

-
Super Member

Re: COAAD: What Lies Beneath...
I would change the title of this thread. I thought it was spam at first. You would get more views from a catchy title.
Your process is spot on!
For polishing, do you have a machine? Ultimate Polish would work fine in my opinion. But you could pick up some 106FA.
Great thread!
-
Super Member

Re: COAAD: What Lies Beneath...
ROFL. My wife drove her car around for 3 days with the plates sitting in the garage from when I polished out the paintwork earlier this year. Luckily she didn't get pulled over. I will have to remember a note for next time!
Also, great thread! 
-
Junior Member
Re: COAAD: What Lies Beneath...
 Originally Posted by rider9195

I would change the title of this thread. I thought it was spam at first. You would get more views from a catchy title.
Thanks for the suggestion, I was trying to keep the title short, maybe I'll use the full series title next time to avoid confusion.
Originally Posted by rider9195
For polishing, do you have a machine? Ultimate Polish would work fine in my opinion. But you could pick up some 106FA.
I have a PC7424xp, a griot's 3 in, and miscellaneous pads. I tried this spring to use a polishing pad and the Ult. Polish to get out some very light swirls, but I know Ult. Polish is not only very fine cut but also very rich in polishing oils and I think in that case acted more like a glaze. Maybe the story is different if I use some kind of compound to get rid of the defects first.
-
Junior Member
Re: COAAD: What Lies Beneath...
Mods, if possible could you do me a favor, I finished this post after midnight and was apparently tired enough to miss a few errors even though I proof read twice and I'm obviously past my edit window
"Note: These posts are ment to explore the steps in detail, so there are going to be lots of pictures and some steps that may seem mundane to you might be a detail someone else overlooks"
Ment should be meant
"First things first, any boat owner can tell you that water and electricity usually don't place nice together so let's cover that alternator."
Place should be play
"Wow, you're bold-face alter ego, you're not being very nice today...but no I don't think I'm forgetting anything..."
The first you're should be deleted
"Coming tomorrow"
After that in plain text there should've been the following sentence that must have gotten deleted in my editting:
Now that the car is parked we tackle the carpet and upholstery.
-
Junior Member
Re: COAAD: What Lies Beneath...
One last thing, HUGE thanks to my wife for doing the camera work for this. The majority of the pictures are hers
-
Re: COAAD: What Lies Beneath...
Originally Posted by BrightonRT
Working clean
Ok, so to make sure things come out as best as possible we need to make sure the working environment is as clean as possible. So let's see what we got...
Yikes, that's a lot of dirt on the floor in the corners, we can't have that, time to break out the broom...
Text book example of what it means to work clean. This is especially important if you're working towards a show car finish or just wanting to make sure everything is working in your favor and not against. you.
[quote=BrightonRT;715509]
So to remove one nook and cranny for water to hide (and to save PhotoShop work, I removed the license plate, showing some marring underneath to address later.
And one more thing, because I've NEVER made this mistake before:
Very good.
I have 3M Post-it Note tip similar to this but in my tip you put the post it note where the ignition key goes if you've covered the motor with a bed sheet or blanket to make protect the engine and engine compartment from getting splatter on it.
Originally Posted by BrightonRT
Ok, we've gotten the prep out of the way, so let's get this party going with my hard-water special, LSP stripping wash solution. To do this I use my super high tech measuring a device.
The mark in the cup corresponds to 4 fluid ounces and there's a corresponding mark in the bucket. Special thanks to Mr. Phillips for this tip. I then am able to approximate from that mark 2 or 1 ounces for the mixture.
That's an old tip from a how-to article I posted on MOL years ago, it's over here to if anyone wants to read it...
Measuring Car Wash Solution - The Dixie Cup Method
So far so good Bob, very nice and thorough write-up with lots of detail and excellent photography work.
I for one know how long it takes to do this kind of work let alone stop what you're doing, take some pictures and then later after all the hard work getting the pictures off the memory card, cropping, resizing, uploading and inserting, (not attaching), so everyone can read and "see" what you're talking about.

-
Re: COAAD: What Lies Beneath...
Originally Posted by BrightonRT
Mods, if possible could you do me a favor, I finished this post after midnight and was apparently tired enough to miss a few errors even though I proof read twice and I'm obviously past my edit window
I fixed the typos. I too make them once in a while, not often but with over 27,000 post it's going to happen once in a while.
I also put a little space between your pictures so they don't run together, to do this just hit the enter key after you insert a pic. Also, if you can, it helps to look at the code via the "Editor Mode", see my article here, it really helps a lot when working with a lot of text and pictures.
How to use the "Editor Mode" to break a single quoted message up into smaller quoted sections
The above is in a section of my how to articles called,
Tips, Techniques and How-to Articles for Interacting on Discussion Forums
Originally Posted by BrightonRT
One last thing, HUGE thanks to my wife for doing the camera work for this. The majority of the pictures are hers.
We all thank you and you're doing a great job!

-
Re: COAAD: What Lies Beneath...
Great post(s). Some really simple but great tips...
& by the way, love the car! I'm in Australia & you don't see those here...
Similar Threads
-
By BrightonRT in forum Auto Detailing 101
Replies: 14
Last Post: 11-11-2012, 09:30 PM
-
By BrightonRT in forum Off-Topic
Replies: 8
Last Post: 08-07-2012, 11:06 PM
-
By BrightonRT in forum Auto Detailing 101
Replies: 6
Last Post: 08-03-2012, 10:53 AM
-
By BrightonRT in forum Auto Detailing 101
Replies: 7
Last Post: 07-27-2012, 01:28 PM
-
By Zeers in forum Introduce Yourself
Replies: 6
Last Post: 09-13-2007, 03:58 AM
 Members who have read this thread: 0
There are no members to list at the moment.
Posting Permissions
- You may not post new threads
- You may not post replies
- You may not post attachments
- You may not edit your posts
-
Forum Rules
|
| S |
M |
T |
W |
T |
F |
S |
| 31 |
1
|
2
|
3
|
4
|
5
|
6
|
|
7
|
8
|
9
|
10
|
11
|
12
|
13
|
|
14
|
15
|
16
|
17
|
18
|
19
|
20
|
|
21
|
22
|
23
|
24
|
25
|
26
|
27
|
|
28
|
29
|
30
| 1 | 2 | 3 | 4 |
|


 Reply With Quote
Bookmarks