 Thanks: 0
 Likes: 0
 Dislikes: 0
-
Best Scratch remover that really works ???
Most of us have fine scratches on our cars and its an eye sore that we cannot stand to see so what is the best method to remove the scratches ourselves
-
Re: Best Scratch remover that really works ???
 Originally Posted by SC sid

Most of us have fine scratches on our cars and its an eye sore that we cannot stand to see so what is the best method to remove the scratches ourselves
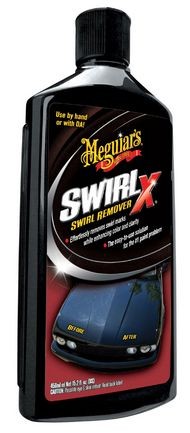
For fine scratches you can use a product like the Wolfgang Total Swirl Remover. See this article and note I removed #2000 grit sanding marks out of black paint by hand.
Removing Scratches By Hand
And also read this article,
How to use a hand applied abrasive polish or paint cleaner by hand
AND NOTE: Working by hand to remove fine scratches out of CLEAR COAT PAINTS is an art form. That is if the goal is to remove fine scratches without leaving scratches at the same time.
I've been teaching people how to do this all my life and to be upfront, most people don't that the skill or patience to do it and get the results they dream about.
For heavy or "deeper" scratches you'll want to use Meguiar's Ultimate Compound and with some paints you'll need to follow it with something less aggressive like the Wolfgang Total Swirl Remover.
As defined by my how-to book, (not other book has ever tried to categorize paint care products), on page 79 you'll find paint care products categorized.
Ultimate Compound = Aggressive Cut Compound
Wolfgang Total Swirl Remover = Medium Cut Polish
The reason most people move to machine polishing is because for the most part it doesn't take any talent, skill or experience to remove fine scratches out of clear coat paint, just pick a good pad, a quality product that uses GOOD ABRASIVE TECHNOLOGY and let the machine do all the work.
I covered that in my book too...
Good luck...

-
Re: Best Scratch remover that really works ???
I had a bad scratch in the roof of my Corvette. I used Meguiars Ultimate Compound, followed the directions for removing scratches and it worked great!
-
Re: Best Scratch remover that really works ???
Originally Posted by KneeDragr
I had a bad scratch in the roof of my Corvette. I used Meguiars Ultimate Compound, followed the directions for removing scratches and it worked great!
Three words...
Amazing abrasive technology...
Depending upon the color of the car and the quality of the application material plus the skill in which you apply it, you might want or need to follow the UC with a less aggressive product before waxing. Also depends upon a person's personal opinion of what a "nice" looking finish looks like.
I'm personally held to pretty high standards and use black paint for proving all products and techniques. Anyone can make light colors look flawless in bright light, working on black paint is an art form.

-
Super Member

Re: Best Scratch remover that really works ???
Mike, do you have a video showing how to round out the edges of a deep scratch to make it less visible? Do you vary your technique for this or just keep the pad flat and do it as usual?
-
Re: Best Scratch remover that really works ???
Originally Posted by richy
Mike, do you have a video showing how to round out the edges of a deep scratch to make it less visible? Do you vary your technique for this or just keep the pad flat and do it as usual?
No video but I use the feather sanding technique for working out RIDS as explained in the below article. By the time you sand deeper scratches at a 90 degree angle against the deeper, isolated scratches and then compound by hand or machine, and then polish once or sometimes twice the rounding effect or smoothing over effect takes place by default.
I think the OP, or Original Poster or thread starter was asking about removing fine swirls, or "shallow swirls" by hand over a car's entire finish, not removing random, isolated deeper scratches.

RIDS and Feathersanding - A Highly Specialized Technique by Mike Phillips
A long time ago when I first started buffing out cars with a rotary buffer it was real noticeable that after compounding a daily driver that of course you would remove all the shallow swirls, scratches and etchings very quickly and usually very easily.
What happened next is all the deeper defects would remain in the paint and now because none of the more shallow swirls and scratches were in the paint to mask or take your focus off the deeper defects that these deeper defects would now stand out like a sore thumb.
This is when I coined the term, RIDS, probably in the 1980's, there weren't any forums back then so I only used the term with the actual customer the same way I used the term LSP with the customer back then.
The first thing to keep in mind is,
What's the goal for your project?
Hate to keep beating a drum since being the new guy here on the AG forum but it's so easy for people to get caught up in trying to remove all the RIDS for a Daily Driver.
Nothing wrong with this but we need to keep the focus on what's best for the customer, not our personal criteria for a show car finish. It's easy for any of us to want all cars to have the type of finish that meets our high expectations but ask yourself,
How did these deeper scratches get into the paint in the first place?
You see, if they were instilled over time by the current owner, for whatever reasons, what will change in the future that this problem won't simply continue to reoccur?
If the answer is,
Well I educated him on how to properly care for and wash his or her car
or
From here on out they've hired me to always wash and wax their car
Then maybe they're a good candidate to remove all the RIDS out of there car's finish. If the answer is nothing will have changed, then it's almost a dis-service to remove the RIDS because removing RIDS means removing more and more paint.
Instead, just remove the light swirls and scratches, explain to the customer what's going on as far why deeper defects now show-up better to your eyes than before and what it means if you continue to remove them. Most people with common sense will be happy to just have you remove the light swirls and scratches.
Also, if you are going to remove all the RIDS then you should be charging more, anywhere from $300.00 to $600. 00 for just the paint only and higher if you can get it. I find people to not understand how much work and how much risk is involved it doing show car quality detailing and thus they are often not willing to pay for what they don't understand. Just ask any of the top level, online detailing personalities what they charge and how long it took to build-up their reputation before they could command high prices. You'll probably also find out that the first time they worked for a customer that didn't know them from a hack detailer that they had to educate them on why their services are worth a higher prices unless they obtained the customer from word-of-mouth-advertising.
Now if you're doing show car work, as in working on special interest cars that are for the most part Garage Queens, or well-taken care of by the owner or you're putting the owner on a maintenance program where you'll personally be washing, wiping and waxing the paint from this day forward, then go for it but make sure you're charging enough money.
When it comes to removing RIDS the method I use is painstakingly laborious and long...
What I do is compound a panel and remove all the light or shallow defects, this will cause all the deeper defects that remain to now show up like a sore thumb.
Now, take and sand each of these deeper defects out carefully with small pieces of sandpaper you cut out of a sheet of sandpaper using some scissors. What you want to do is sand against them at about a 90 degree angle and either sand them out completely or just feather them to look less noticeable.
I call this Feathersanding for no real good reason except that's what I felt I was doing, and that was lightly sanding the scratches out or in other terms, feathering them out. If you look at a feather you can see the the edges are tapered, it doesn't have hard, uniform lines or a rigid design to it but is instead soft...
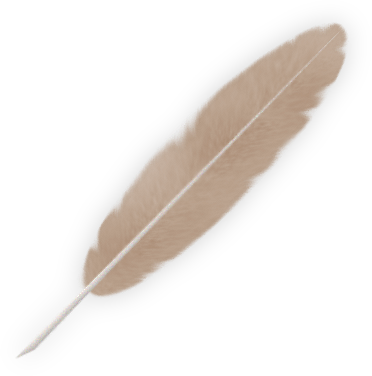
Well that's the idea I was trying to capture with the term Feathersanding. That is you want to sand-out the scratch which would mean removing most of the paint directly near the scratch, which is a void of paint, but feather or taper the depth of your sanding marks as you move away from the scratch as you blend the area with the surrounding paint.
The goal to be to remove the scratch in a way that you can then buff the area back to a high gloss with a uniform appearance and this means trying to keep the surface as level or flat as possible.
The meaty stuff...
It's easy to understand that if you sand directly on top of the scratch you would create a trough or noticeable depression in the surface where you sanded, thus the idea of feathersanding or taper-sanding is to;
- Remove as little paint as possible to get the job done
- Do it in a way so that the surface still has a flat or level appearance
If that makes sense?
Anyway, that's the story behind the term and practice of feathersanding, and this is the first time it's been explained in print anywhere that I'm aware off for whatever that's worth. Sometimes finding the right words to explain an idea can be challenging. It can be easy to show somebody how to do something when you're working with them in person. It can be hard to describe how to do it in Cyberspace with a keyboard.
There's a lot of risk involved with Feathersanding so it's not something I ever do flippantly and without good cause. I would recommend everyone take into consideration the risks involved before attempting to use the Feathersanding Technique on a customer's car.
Remember, sanding removes paint, and then compounding and polishing will remove even more paint. You only have a limited thickness or film-build of paint to work with.
It's hard to explain the sheer terror one feels when you see you've broken through the clearly layer and exposed the basecoat especially when after it hits you and sinks in what you've just done is followed by your next thoughts and that's you're going to have to tell and show your customer.
Without further ado, here's one of the only instances where I've documented the procedure, note this is posted on the MOL forum.
Important Note:
I am a ardent proponent of giving due credit where credit is due. I see work and words copied and pasted all over the Internet via various forums without the proper credit given to the originating author.
I've never seen nor read of anyone explaining, sharing or teaching the Feathersanding Technique before I did the actual work in preparation for the 2002 Bimmerfest. The below pictures and article were originally posted to my own personal forum back in 2002 called ShowCarGarage because at that time MeguiarsOnline didn't exist. I'm sorry to say that the original vBulletin databases for the original ShowCarGarage forum no longer exist, so the oldest documentation from when this work was done is in 2004 after the MOL forum went live.
~~~~~~~~~~~~~~~~~~~~~~
Begin assembled copy and paste
~~~~~~~~~~~~~~~~~~~~~~
Other guys before me may have done this, hard to tell the Internet wasn't around till the mid-1990's but I'm probably the first guy to document it.
No one ever showed me how to do this, I just used common sense and figured it out on my own with the idea being to only remove the paint surrounding the RIDS, not using the Bubba method of compounding and compounding the entire hood, or sanding and then compounding the entire hood.
I prepped this BMW for the 2002 Bimmerfest as a project I just came up with just for fun. I was still the new guy from Oregon at Meguiar's at that time. Now I'm the new guy from California at Autogeek here in 2009. There are still threads about it on the Bimmerfest forums that date back to 2002
Here's one thread on MOL where I go over much of the technique.
Feathersanding
Originally posted by red vette
thanks Mike,
My mistake,yes I have been using scratch X for awhile now on all my vehicles,not having any luck though removing a couple light scratches,cannot be felt with finger nail,but repeated tries with ScratchX still has not removed them,any idea's?
John
Hi John,
If repeated applications of ScratchX is not removing the scratches in your finish, this tell me two things,
- Your paint is very hard.
- It will require a machine applied Professional Line product to remove the scratches.
The way I usually remove is with an advanced technique that I call Feathersanding, which requires the use of Meguiar's Unigrit Finishing Papers and a rotary buffer.

Experience helps a little too! Below are some pictures from a Side-by-side, before & after demonstration I did for the 2002 Bimmerfest in Santa Barbara. First I used a rotary buffer to buff out one half of the car and remove all of the light scratches. Next, I took little postage size stamps of Nikken Finishing Paper and sanded each individual scratch till it had been removed. Next, I used a compound to remove my sanding marks. The results were a scratch-free flawless finish on a 1991 e34 BMW M5.
How To Remove Random Isolated Deeper Scratches using the Feather Sanding Technique
Below Photos Courtesy of MeguiarsOnline.com
Before

I compounded the entire finish before starting the below process to remove the shallow scratches and expose the deep scratches.
Process


Meguiar's Booth at the 2002 Bimmerfest in Santa Barbara, California

Random, Isolated, Deeper Scratches, (RIDS), can be removed, but it is an advanced technique that takes skill, patience and the right products to accomplish successfully. (A little luck helps too!)
~~~~~~~~~~~~~~~~~~~~~~
End assembled copy and paste
~~~~~~~~~~~~~~~~~~~~~~
Then down the road a few years this dramatic before and after was used on the label when SwirlX was introduced...

-
Super Member
Re: Best Scratch remover that really works ???
Mike, thanks for the reply. Yes, I realize I was asking something different than what the OP had asked. Sorry for the hijack.
-
Re: Best Scratch remover that really works ???
-
Re: Best Scratch remover that really works ???
Take a look at this product-
You will sure find it useful.
-
Newbie Member

Similar Threads
-
By Belo in forum Auto Detailing 101
Replies: 15
Last Post: 04-27-2020, 02:32 PM
-
By n8te81 in forum Ask your detailing questions!
Replies: 6
Last Post: 08-31-2015, 10:55 AM
-
By Red97Z28 in forum Auto Detailing 101
Replies: 3
Last Post: 07-02-2013, 10:36 PM
-
By mpkav in forum Auto Detailing 101
Replies: 6
Last Post: 04-14-2013, 08:55 AM
-
By emaxxman in forum Off-Topic
Replies: 4
Last Post: 07-21-2006, 08:53 AM
 Members who have read this thread: 0
There are no members to list at the moment.
Posting Permissions
- You may not post new threads
- You may not post replies
- You may not post attachments
- You may not edit your posts
-
Forum Rules
|
| S |
M |
T |
W |
T |
F |
S |
| 31 |
1
|
2
|
3
|
4
|
5
|
6
|
|
7
|
8
|
9
|
10
|
11
|
12
|
13
|
|
14
|
15
|
16
|
17
|
18
|
19
|
20
|
|
21
|
22
|
23
|
24
|
25
|
26
|
27
|
|
28
|
29
|
30
| 1 | 2 | 3 | 4 |
|


 Reply With Quote


Bookmarks