 Thanks: 0
 Likes: 0
 Dislikes: 0
-
How to polish thin body panels
How to polish thin body panels
This is a question that comes up a lot in the detailing world. That is,
How do you compound and polish thin body panels without at the same time buffing on an edge or a raised body line?
Working by hand
One method is to work by hand. Working by hand will get the job done but believe it or not, more skill is required to work by hand than to work by machine.
Some people believe acquiring the skills to correctly use a machine to polish to perfection without at the same time inducing swirls into the paint or burning through the edges or high points is an art form.
The reason why is because not only does it require skill (which comes from real world hands-on experience plus knowledge), and also the right tools, pads and products to truly get perfect results... but it also requires something each of us as craftsmen bring to the table and that's the human elements of care and passion.
By this I mean if I'm going to hire a so called professional detailer to work on my car I don't want to hire a person that's merely in it for the money.
I want a person that truly has a passion for the craft and cares about their work, their customer's satisfaction and their own reputation. And it's from all of these things, skill, knowledge, the right tools, pads and products plus the human elements of care and passion that I believe polishing paint becomes an art form.
Now let me bring this back to why it requires more skill to work by hand than by machine.
With modern dual action orbital polishers just about anyone can get great results simply by turning on the machine and making a few methodical section passes over the paint. Of course it's also important to use high quality compounds and polishes but as long as a person is doing this then seriously, it's not like the old days when all we had was a rotary buffer or an old fashioned large orbital buffer.

With today’s orbital tools anyone can get high quality results by machine.
Not so when it comes to working by hand and when I say working by hand I mean removing swirls and scratches out of clearcoat paints.
Modern clearcoat paints are much harder than traditional single stage paints and it's this hardness factor that makes it more difficult for the average person to take their hand with their 5 fingers and rub hard enough and fast enough using the right applicator pad and compounds and polishes in order to actually remove swirls and scratches without leaving their own swirls and scratches in the paint at the same time.
I know for a fact from experience after spending most of my life teaching people how to polish paint including teaching both hand techniques and machine techniques and I'm here to tell you most people don't have the necessary skills to remove swirls and scratches by hand. They also don't have the patience nor physical ability to rub out an entire car by hand.
Sure they can hand apply a wax but there's a HUGE difference in spreading out a product and then wiping it off and forcing a compound or polish over the surface in a fast, tight controlled pattern with firm downward pressure to remove defects.
I'll even go as far as to say that when most people attempt to remove swirls and scratches by hand not only do they fail and give up but unless they are using high quality compounds and polishes chances are very good they'll do more damage than good. It is at this point the only way to recover from the damage is in fact to machine polish to correct the defects.
So how can a person compound and polish the thin panels on a car?
By machine of course! Using smaller pads on smaller tools and always using high quality compounds and polishes.
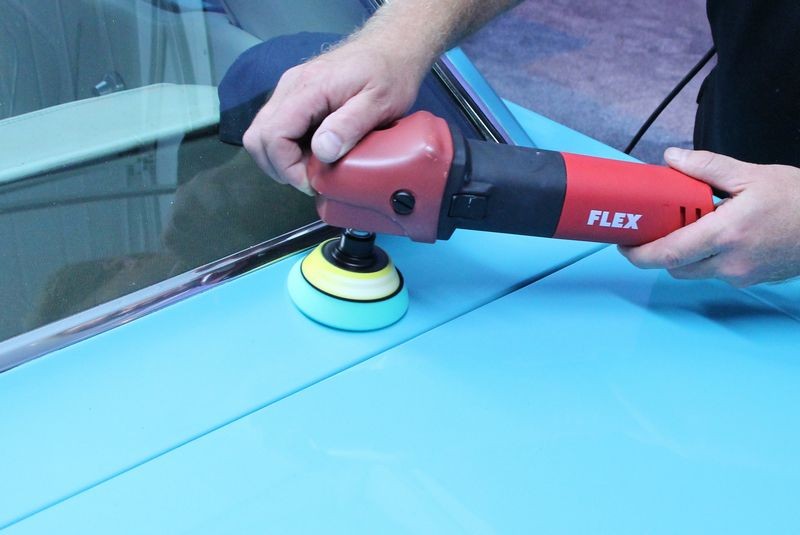
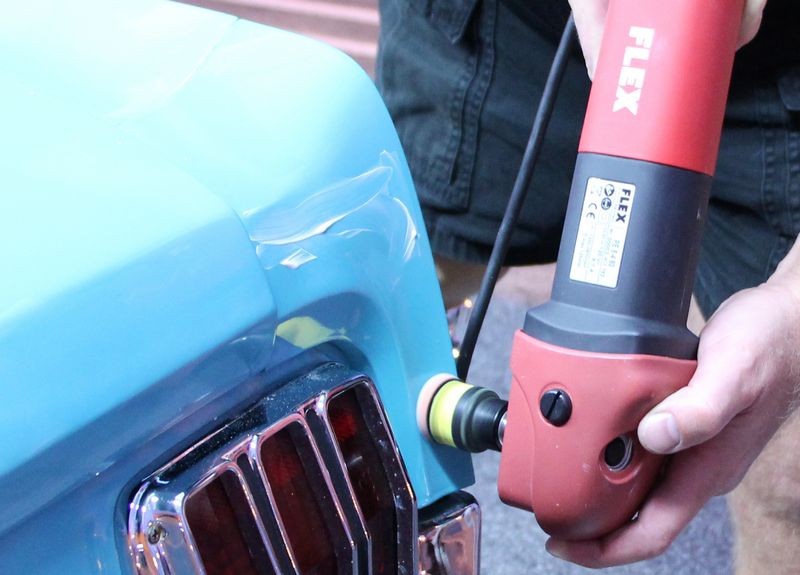
Here are some examples of thin body panels with either edges or raised body lines on either side of the flat thin sections of paint and how to use the Flex PE8 Kompact Rotary Polisher to work these areas safely.

Note how the 1" pad fits this thin body panel perfectly...

Finger Painting
I call this finger painting; it's where you smear some of the product you want to use onto the paint you want to buff when using small pads instead of trying to pick a bead up using the 10 @ 10 Technique.

Edge Priming
Lubricate the sides of your buffing pad anytime you're going to be buffing in tight areas.


Thin body panels
Most cars, both moderns and classics like this 1965 Mustang have thin body panels somewhere in the body design.


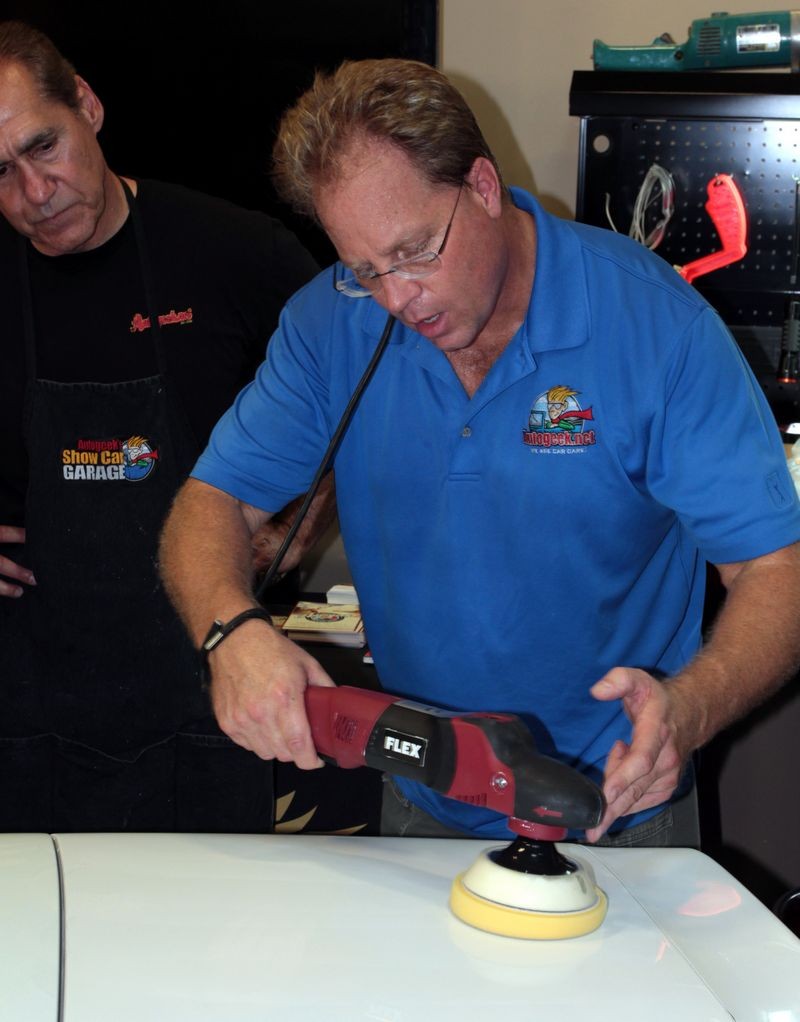
The 10 @ 10 Technique in action using a 3" pad


This is one method of how to polish thin body panels by machine to get the job done without having to be a seasoned expert in the art of hand polishing.
Here's where to get yours....
Flex PE8 Kompact Rotary Polisher
FLEX Rotary Backing Plates – 1, 2, 3 Inch Diameter
FLEX Rotary Foam Pads – 1, 2, 3 Inch Diameter
Rotary Backing Plate Extension

-
Super Member

Re: How to polish thin body panels
Mike, what speeds are you running the PE8 at? I find that non metallic painted surfaces are very susseptible to damage on higher speeds, and am a little scared to use my PE8 on the main body of a car. I'd love a video on what you just illustrated in the pictures. I found your How to book on the 3401 very helpful, but the PE8 is a totally different animal. I have all 3 plate and pad sizes in most colors. Just looking for some guidance on speeds and pressure.
Scott
-
Super Member

Re: How to polish thin body panels
I so want to get this 
Thx for spending my money Mike 
2022 Jeep Gladiator Rubicon 2021 Ford Ranger Lariat 2016 Alfa Romeo 4C Spider 2006 Buell Lightning-Bolt 2004 Jeep Wrangler Rubicon
-
Re: How to polish thin body panels
 Originally Posted by medicscott

Mike, what speeds are you running the PE8 at?
Usually the lower speed settings like on the 1 and 2 speed setting when using foam pads.
It's been a while since I used the 3.5" wool pad for some heavy cutting on this hotrod but if memory serves me correctly I was still on the lower speed settings.
This is a fairly tricky area to get into and buff without having the buffing pad grab the window frame and yank you around. So I'm pretty sure I used the slowest speed settings and took my time.
The NEW FLEX PE8 Kompakt Rotary Polisher Polisher in ACTION!


You have to be very careful when buffing tight areas like the above so as not to heat up the paint.
Originally Posted by medicscott
I find that non metallic painted surfaces are very susceptible to damage on higher speeds,
I think all clearcoats are susceptible to heat damage. In my how-to book I talk about the term given to me by Jason Rose called,
Destructive Polishing
You can find this topic on pages 124 and 125 including temperatures to avoid and 2 ways to check and monitor surface temperature.
Originally Posted by medicscott
and am a little scared to use my PE8 on the main body of a car.
I would never use the Flex PE8 for any large panels, that's not what it's for. For large panels I'd use a full size polisher.
Originally Posted by medicscott
I'd love a video on what you just illustrated in the pictures. I found your How to book on the 3401 very helpful, but the PE8 is a totally different animal. I have all 3 plate and pad sizes in most colors.
Just looking for some guidance on speeds and pressure.
Scott
I'm all for making a video....
As for speeds you really want to stick with the lower speeds on this tool. The lowest RPM is 1300RPM and that's more than enough revolutions per minute to remove paint using the appropriate pad and compound. More speed increases the risk for more heat so stick with the lower speed settings.
As for pressure, you'll find if you apply too much pressure the smallest foam pads simply collapse. That's the nature of foam when you're using very small amounts of it. You want to change your technique for holding the polisher by placing your forward hand UNDER the body of the tool, not on top of the body of the tool and this will give you much better control over the amount of pressure you're applying.
Kind of how you see in this picture from this thread....
Below are some pictures from a section on jeweling from the above thread as this Corvette was a rotary buffer only project. These soft foam jeweling pads compress very easily like the small 1", 2" and 3" pads and even more so as they become wet with product so "you" have to be monitoring the weight of the tool and thus the compression of the pads.
1990 Corvette - Extreme Makeover Pictures & Process
Less than the weight of the machine
This is showing that we're actually using a little bit less than the weight of the machine for the last few passes for this section. The idea being that polishing paint is an art form, not a grinding process. As the pad becomes wet with product it will easily compress with just the weight of the tool. For your last few passes you want light pressure via the pad contact, now heavy pressure and to get light contact you need to watch and prevent pad compression.
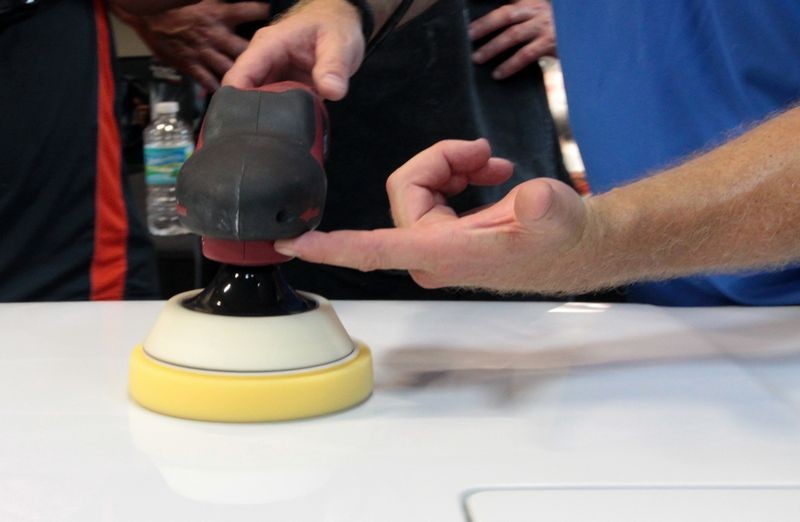
Two fingers up front holding the weight of the tool and guiding it at the same time....

-
Re: How to polish thin body panels
Another great thread Mike, thanks for sharing, just what I need for those thin panels.
-
Re: How to polish thin body panels
Looking good their boss! Thanks for putting it together and sharing.

-
Super Member
Re: How to polish thin body panels
Amazing insight. Thank you for the clarification. And yes, what I meant by the main body of the car was areas that aren't reachable by the 3401 like A posts, etc...Luckilly the damage I caused was with a junker and not a customer. I always like to press the limits of new equipment (train) before I try on the real thing. I really appreciate you taking the time to answer my questions with such detail.
Scott
-
Super Member

Re: How to polish thin body panels
wow you really dont miss any part of da paint.... your the man.. shirts off 2 ya..... sweeeet
-
Super Member

Re: How to polish thin body panels
Nice write up Mike, but are they thin body panels or narrow panels? When I first saw the topic, I thought you were going to show us how to polish thin paint.
-
Super Member

Re: How to polish thin body panels
I'm wondering if anyone who has used a DA to polish out the majority of the car, and then this little rotary on the small parts has had an issues with holograms on the rotary sections???
Similar Threads
-
By Mike Phillips in forum RUPES BigFoot Oribital Polishers
Replies: 22
Last Post: 12-25-2016, 05:37 PM
-
By mthopton in forum Auto Detailing 101
Replies: 13
Last Post: 08-10-2016, 04:29 PM
-
By CC268 in forum Ask your detailing questions!
Replies: 6
Last Post: 05-02-2015, 03:29 PM
-
By aalbs in forum Auto Detailing 101
Replies: 4
Last Post: 08-27-2012, 12:40 PM
-
By hpotter in forum Porter Cable 7424XP Dual Action Orbital Polisher
Replies: 6
Last Post: 07-17-2007, 09:02 AM
 Members who have read this thread: 0
There are no members to list at the moment.
Posting Permissions
- You may not post new threads
- You may not post replies
- You may not post attachments
- You may not edit your posts
-
Forum Rules
|
| S |
M |
T |
W |
T |
F |
S |
| 31 |
1
|
2
|
3
|
4
|
5
|
6
|
|
7
|
8
|
9
|
10
|
11
|
12
|
13
|
|
14
|
15
|
16
|
17
|
18
|
19
|
20
|
|
21
|
22
|
23
|
24
|
25
|
26
|
27
|
|
28
|
29
|
30
| 1 | 2 | 3 | 4 |
|


 Reply With Quote
Bookmarks