 Thanks: 0
 Likes: 0
 Dislikes: 0
-
Detailing a 1954 Chevy Bel Air
Hi all and good evening from the UK.
This is my first post on here and I am looking for some expert advice from you guys. 
So, a friend of mine here in the UK has recently imported a beautiful 1954 Chevy Bel Air and he has asked me to see what I can do with the paintwork. Yesterday I went to have a look at the car and from a distance it looked to be in good condition, however closer inspection unearthed a different story.
Firstly, I am no expert, having only ever detailed my own car, plus those of friends and family, all of which have been relatively new cars, VWs, Audis, Nissans etc. I have never tackled anything like the Chevy and I am at a bit of loss as to how best to treat the paintwork. I have explained to my friend that we have to have realistic expectations, after all the car is 60yrs old.
I am not sure if the paintwork would be a single stage paint or whether it even has/had a clear coat. Some areas appear glossy, whilst others are very dull (oxidisation?) If someone could clarify that it would be appreciated.
The pictures below show the condition of some areas of the body work. As you can see there appear to be contaminants stuck to/within with paint. This covers a large part of the car, especially the side panels. Could these be removed safely with clay. If not how do I treat them?

This picture shows what appears to be a thinning of the paint? It looks like the paint has worn through? Again, any ideas as to how to treat this?


My friend has just asked me to get the car looking the best it can, given the condition of the paint. I am rather worried about machine polishing it (Das6 Pro DA). Would I be best to just do what I can by hand, rather than machine?
What products (available in the UK) & cleaning/polishing procedures should I be using? What should I be avoiding?
I appreciate any help and advice that you guys can give
-
Super Member

Re: Detailing a 1954 Chevy Bel Air
That is the car I want in the future. Nice!
Subscribed, also do you have full shots of the car?
Good luck,
Art
-
-
-
-
Re: Detailing a 1954 Chevy Bel Air
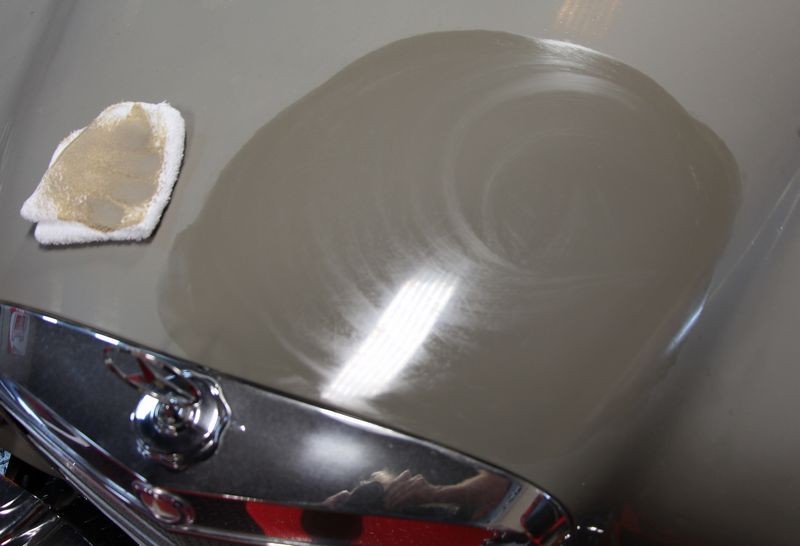
Here's my short version of how to restore antique paint, note the terry cloth wash cloth is key to the process if you want and need to remove oxidation. It is the nap or the tiny cotton loops of cotton fibers that will act as your abrasive.
After you remove the oxidation using terry cloth you then maintain using foam.
I get more people contacting me about how to restore antique paint on classics, muscle cars and antiques than any other topic related to detailing. Since showing this technique on Chasing Classic Cars it's the number one topic I get questions about from people that have seen that episode.
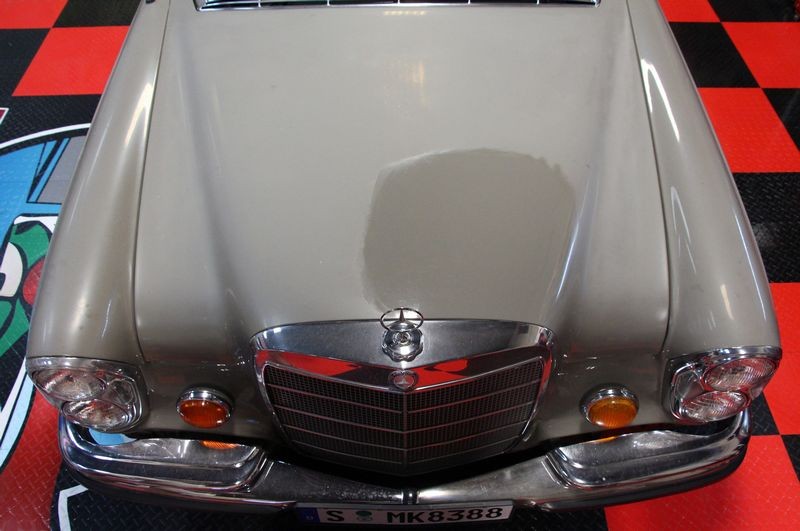
4 Steps to restore single paint paint - 1972 Mercedes-Benz 280 SE
Yesterday, a gentleman named Wayne in West Palm Beach called me to ask me about how to go about saving the ALL ORIGINAL paint on his 1972 Mercedes-Benz 280 SE. He had recently purchased this car with 41,000 original miles.
He told me the paint was oxidized, especially the hood, trunk and roof. He also told me he took it to a local body shop where he was told the paint couldn't be saved but they could repaint it for around $2000.00 but this would not include removing all the chrome and stainless steel trim, nor the bumpers or emblems, basically an entry level paint job.
Wayne Carini "Chasing Classic Cars"
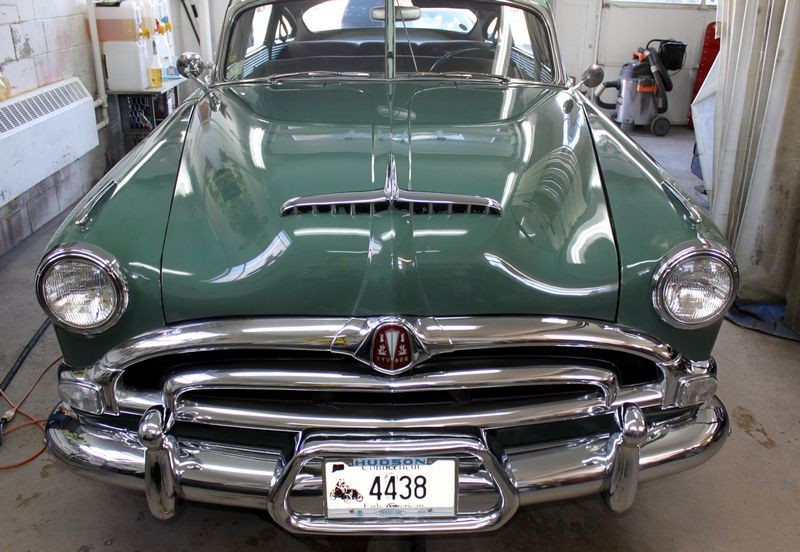
Wayne told me he saw Autogeek on Chasing Classic Cars with Wayne Carini and how I restored the original paint on the 1953 Hudson Hornet for Wayne Carini.
That would be this segment...
I explained that I have an article on how to restore antique single stage paint and not only have I used this technique now for decades, but others have used it very successfully to save an preserve the original paint on antique and classic cars, including the original paint on muscle cars from the 1960's and 1970's.
I invited him to bring his Mercedes-Benz to Autogeek and this morning I shared with him 4-steps to restore the original paint. This is the exact same procedure I used on Wayne Carini's 1953 Hudson.
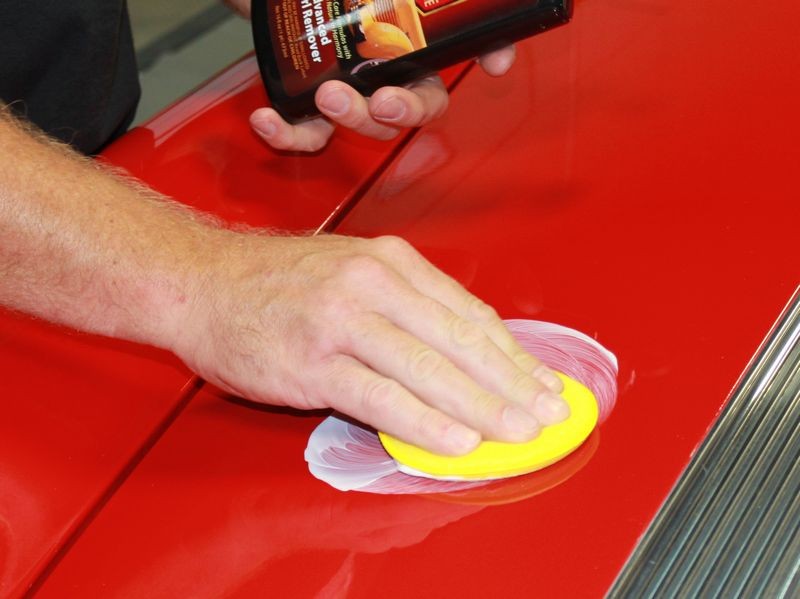
Step 1
Rub the paint down with a heavy, or wet application of Meguiar's #7 Show Car Glaze using a terry cloth wash cloth. Put some passion behind the pad and then let the oils in the #7 soak overnight or for as long as possible so they can migrate "into" the paint. I cover this in my article and show pictures of how it works. #7 is non-abrasive, but it is the unique polishing oils that have been around in this product since the time of the Model T, and thus since the time single stage automotive paints were invented that revive the paint and bring out the original, full richness of color. After the paint has soaked in the #7, remove it.
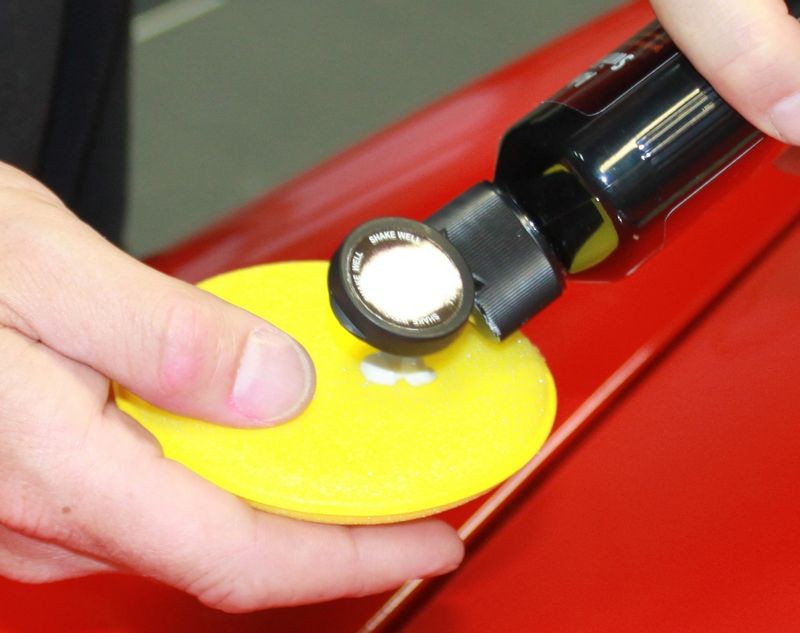
Step 2
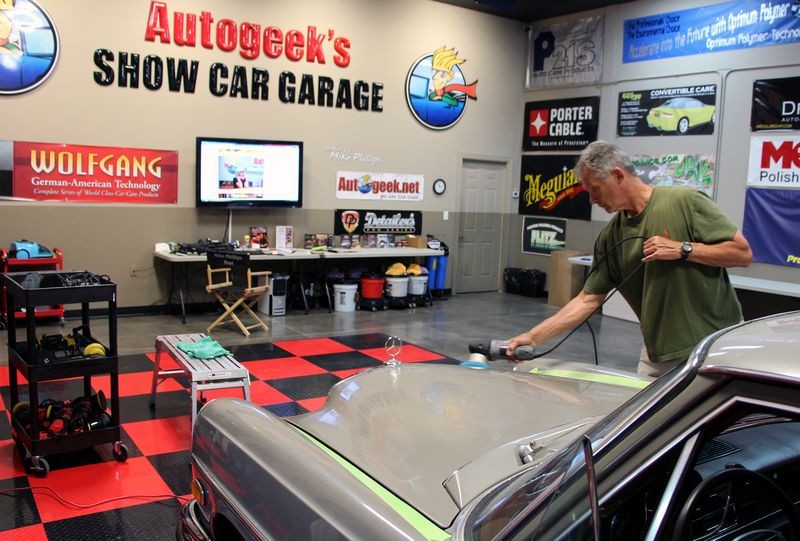
Machine polish the paint using Pinnacle Advanced Swirl Remover. It's key to use the highest quality abrasive technology you can obtain so as to effectively remove all the oxidation, (not removed by the terry cloth while rubbing in the #7), and to also remove or reduce as many of the swirls and scratches as possible. Try to use a foam polishing pad to be extra gentle to the paint but if needed, use a more aggressive pad. Keep in mind, antique, original single stage paints will tend to be brittle and abrade easily, so use the least aggressive pad and/or products to get the job done. We used the Lake Country 5.5" and 6.5" white, flat polishing pads. Wayne used the Porter Cable and I used the Flex 3401. After applying the polish immediately remove using soft microfiber towels.
Step 3
Machine polish the paint using the Pinnacle Advanced Finishing Polish. For this switch to a foam "finishing" pad. We used the Lake Country 5.5" and 6.5" black flat finishing pads. After applying the polish immediately remove using soft microfiber towels.
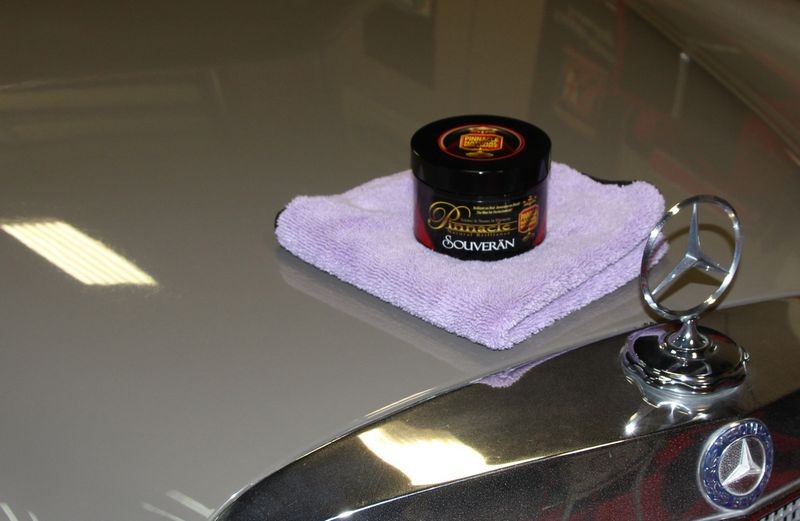
Step 4
Machine apply a show car quality finishing wax like Pinnacle Souveran Paste Wax. It's important to use a non-abrasive finishing wax, not a cleaner/wax of any type. I use Pinnacle Souveran on a lot of the show cars I buff out as you don't have to let it dry before you wipe it off and it always leaves a deep, wet shine. For this we used a 5.5" Lake Country blue flat waxing pad on the Porter Cable on speed setting 4. After applying the wax, use your softest, clean microfiber towels, folded 4-ways t gentle remove the wax. I prefer and show others to wear microfiber gloves for this step as "like attracts like" and the gloves help you to more easily grip the microfiber towel plus you can touch the car without leaving fingerprints.
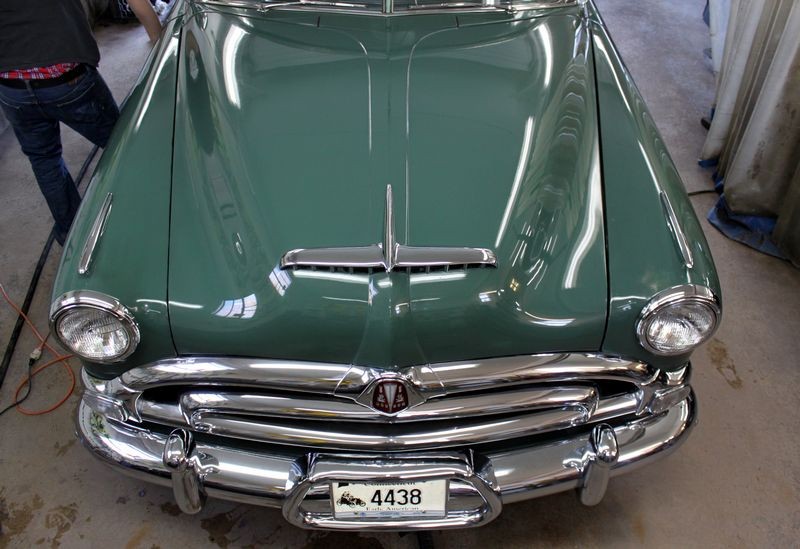
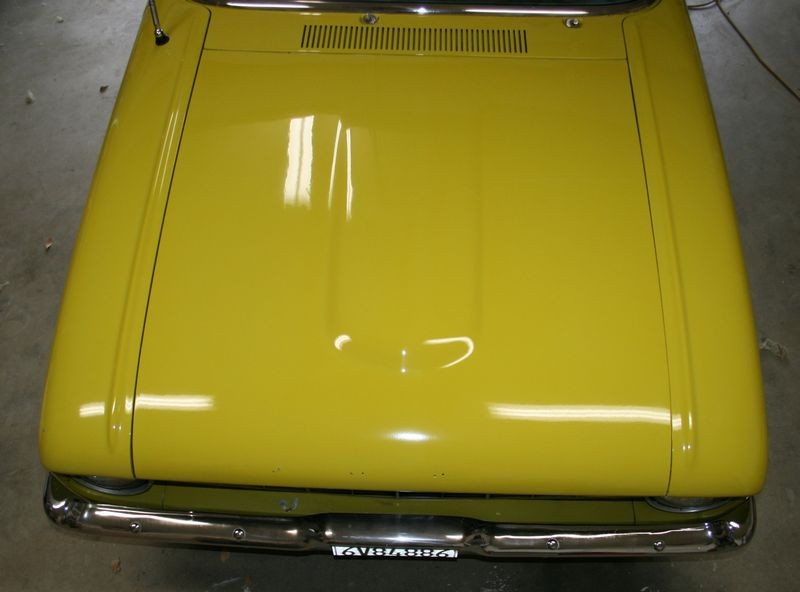
Now I let the pictures do the talking and note, this is the first time Wayne has ever used any of these products or tools, including the Porter Cable 7424XP dual action polisher. Looks like show car results to me....
Before


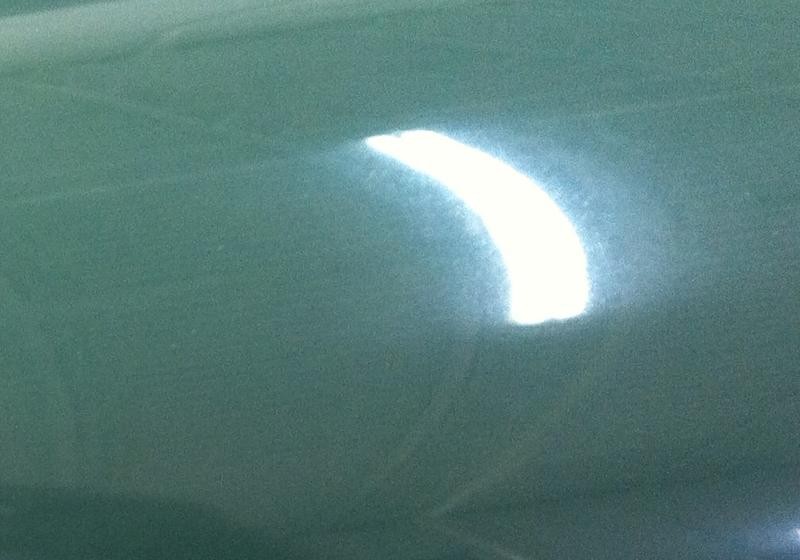
After
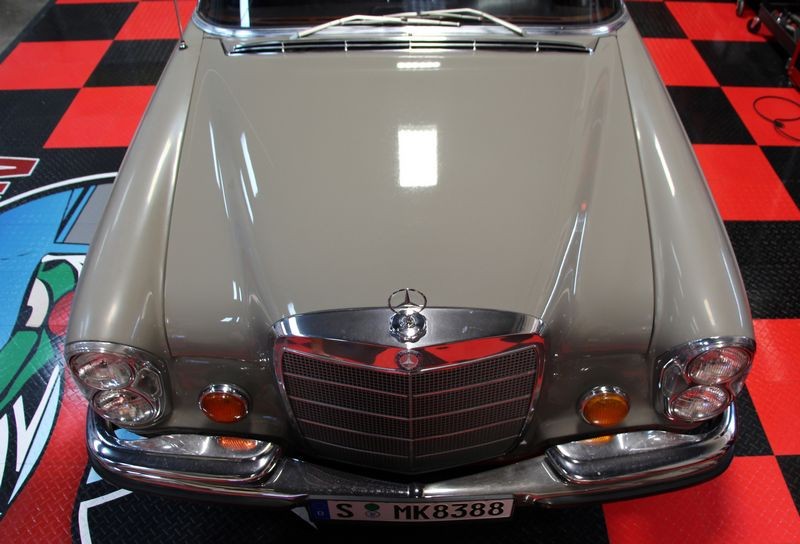

Close up of the same shot above, remember the paint had ZERO reflectivity when it arrived and this is a light color.


On Autogeek.net
Meguiar's #7 Show Car Glaze
Pinnacle Advanced Swirl Remover
Pinnacle Advanced Finishing Polish
Pinnacle Souveran Paste Wax
Lake Country Flat Pads
Porter Cable 7424XP
Flex XC 3401 Forced Rotation Dual Action Polisher
Microfiber Gloves
Thank you!
Thank you Wayne for watching Chasing Classic Cars with Wayne Carini and then following the segment to Autogeek.net and then taking the time to contact us.
Thank you also for trusting us with your classic Mercedes-Benz.
-
Re: Detailing a 1954 Chevy Bel Air
 Originally Posted by CraigUK

The paint in the picture above looks to have bubble or bubbling. This is where the paint is lifting up off the panel below. I see this a lot in antique single stage paint.
Just rub these areas down like the rest of the paint but don't use anything too aggressive. Do not use any type of compound where the compound feels gritty between your fingers. Modern, hi-tech compounds use microscopic and engineered abrasives and feel more like a hand lotion. A gritty compound will tear this paint up. A non-gritty compound will gently remove the dead paint.
I would rub all the paint down with the #7 before using any type of compound or polish. The oils condition dry, old brittle paint making it more workable and thus safer to work on.
Originally Posted by CraigUK
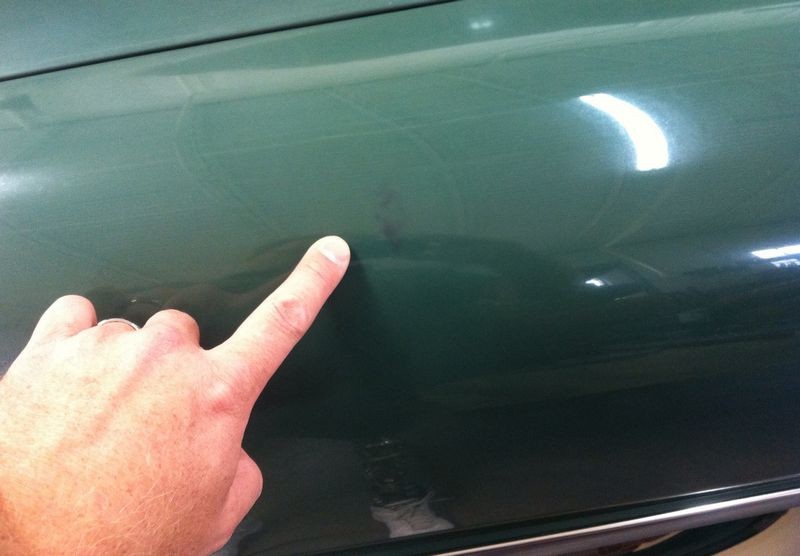
This picture shows what appears to be a thinning of the paint? It looks like the paint has worn through? Again, any ideas as to how to treat this?
In the picture above, you are correct. You are seeing either primer or rusting of the panel. There is no good way to fix the above except to rub it down with the #7 and then maintain with the #7 as long as this car wears it's original paint.
Wayne's Hudson had thin paint too, I had to work very carefully so as not to make any of the thin spots grow.
It's hard to see in this picture here but where the yellow outline box is there's a thin spot showing black primer.

Here's the same spot from a picture I took with my iphone...
Close up cropped out of the original...

Originally Posted by CraigUK
The above shows oxidation and damaged paint. Again, rub down with the #7 and terry cloth and you'll improve it a lot but don't expect miracles.
Originally Posted by CraigUK
Looks like oxidation, scratches, water spots, pooling imprints etc. Same as above. Start by saturating this antique, dry and brittle paint with a heavy saturation of the #7.
If you can't get the #7 locally, Autogeek ships overseas.

-
Re: Detailing a 1954 Chevy Bel Air
-
Re: Detailing a 1954 Chevy Bel Air
Wow Mike, thanks for taking the time to provide such a detailed answer.
The Megs No7 Show glaze is available in the UK so I will purchase some for this job.
The procedure I am now planning is as follows:
Waterless wash
Apply Megs No7 and leave to soak overnight
Remove No7 & reapply if required.
The next stage is the more concerning part for me 
With regards to the bubbles in the paint, when you say "rub them down like the rest of the paint" do you mean by hand (and if so with what?) or do you mean by DA?
I have a selection of pads and can purchase the Lake Country ones you suggest, however the Pinnacle products I cannot get hold of. Is there an alternative I could use, for example Menzerna, Meguires etc?
Once the polishing is carried out I would then be looking at finishing of with a wax/sealant and polishing the chrome work with a chrome polish.
Would my suggested procedure be suitable?
I have already told my friend not to expect miracles but I would still love to be able to surprise him by restoring this beautiful car to something like it's past glory.
Once again, thank you so much for taking the time to reply, your help and knowledge are very much appreciated.
Regards, Craig.
-
Re: Detailing a 1954 Chevy Bel Air
Mike,
Another couple of questions I have just thought of:
Would you advise I use a clay bar on the paintwork & chrome?
Are there any products I should avoid, such as ironX?
Questions, questions, so many questions
Thanks again Mike.
Regards, Craig.
Similar Threads
-
By Sean M at ShowShine in forum Show N' Shine
Replies: 6
Last Post: 06-15-2017, 09:09 PM
-
By JJH in forum Auto Detailing 101
Replies: 9
Last Post: 05-31-2013, 02:09 AM
-
By Mike Phillips in forum PICTURES: Wednesday Night Detailing Classes
Replies: 11
Last Post: 04-25-2013, 03:53 PM
-
By Mike Phillips in forum Wednesday Night Detailing Classes - Info & Dates
Replies: 33
Last Post: 10-21-2011, 06:00 PM
-
By nesto in forum Auto Detailing 101
Replies: 11
Last Post: 10-05-2011, 11:11 AM
 Members who have read this thread: 0
There are no members to list at the moment.
Posting Permissions
- You may not post new threads
- You may not post replies
- You may not post attachments
- You may not edit your posts
-
Forum Rules
|
| S |
M |
T |
W |
T |
F |
S |
| 31 |
1
|
2
|
3
|
4
|
5
|
6
|
|
7
|
8
|
9
|
10
|
11
|
12
|
13
|
|
14
|
15
|
16
|
17
|
18
|
19
|
20
|
|
21
|
22
|
23
|
24
|
25
|
26
|
27
|
|
28
|
29
|
30
| 1 | 2 | 3 | 4 |
|


 Reply With Quote


Bookmarks