 Thanks: 0
 Likes: 0
 Dislikes: 0
-
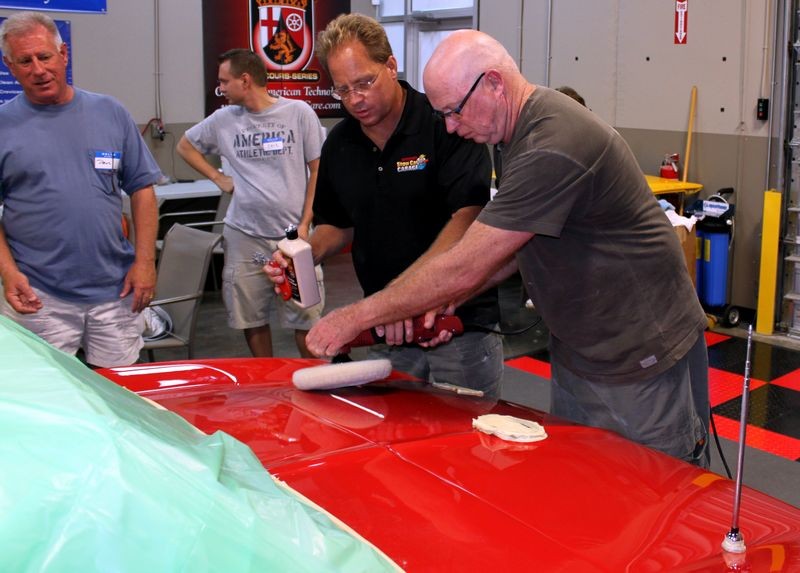
How to use a Rotary Polisher
How to use a Rotary Polisher
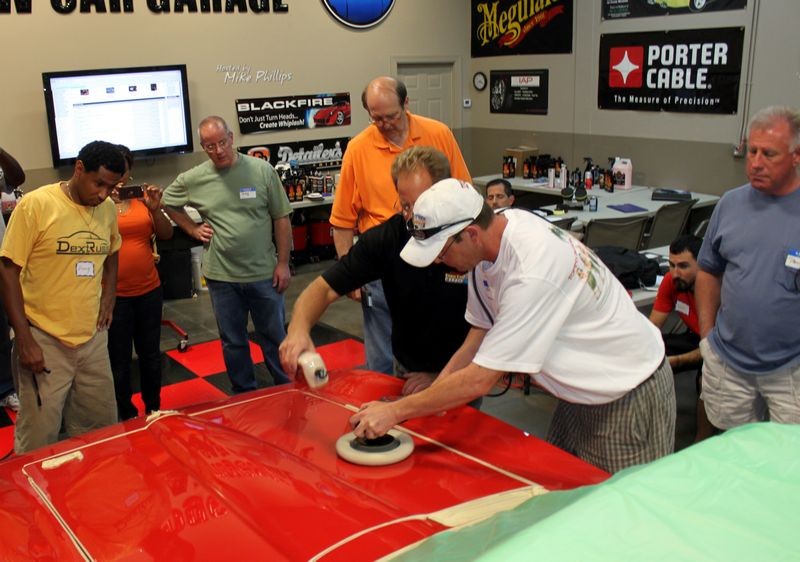
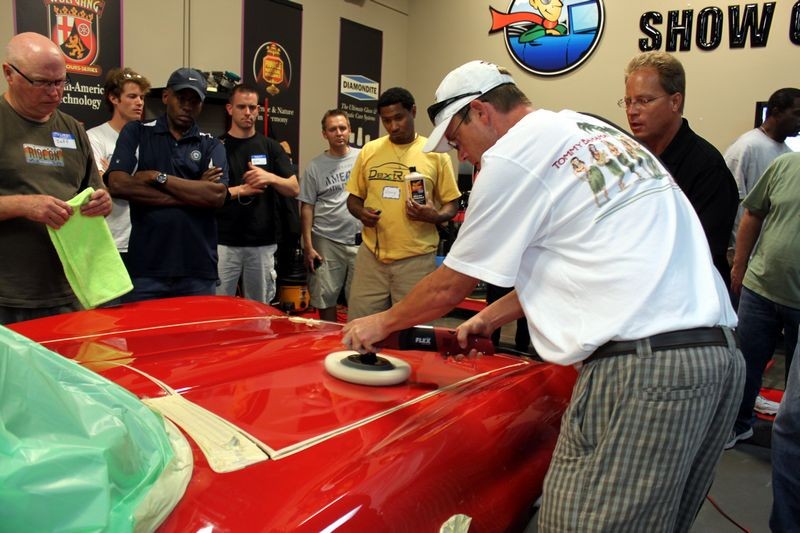
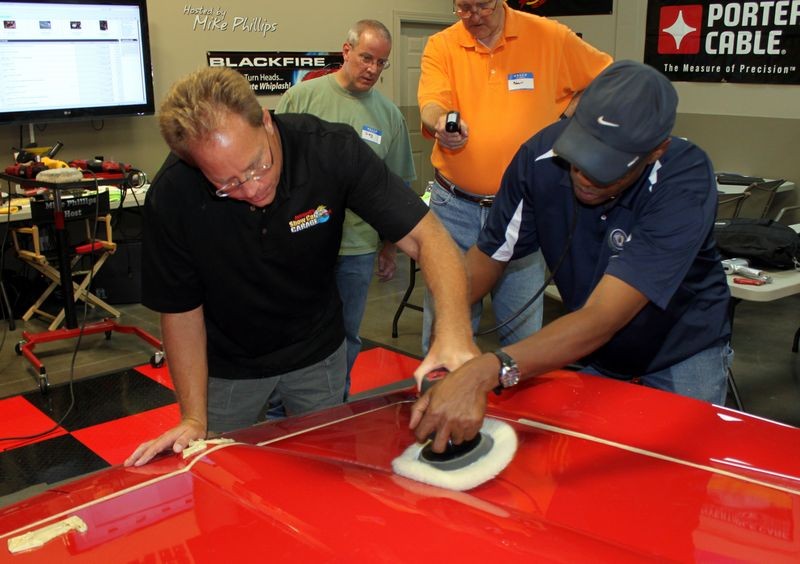
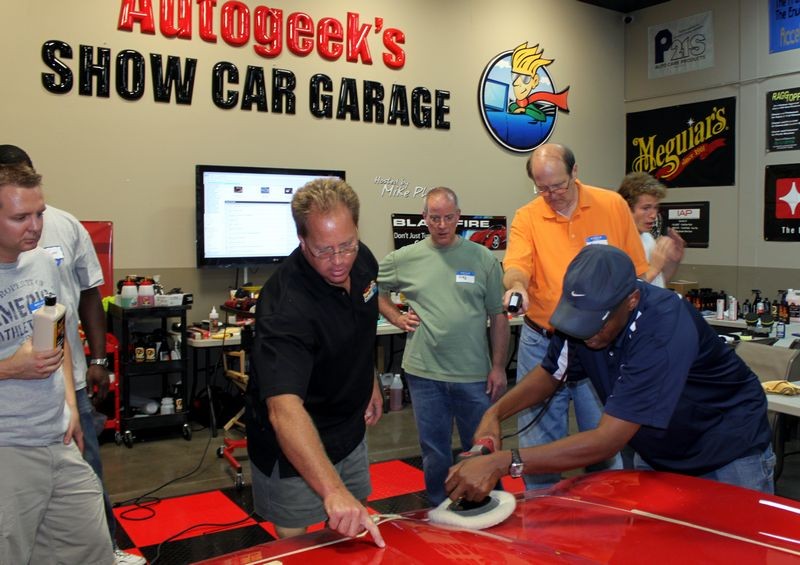
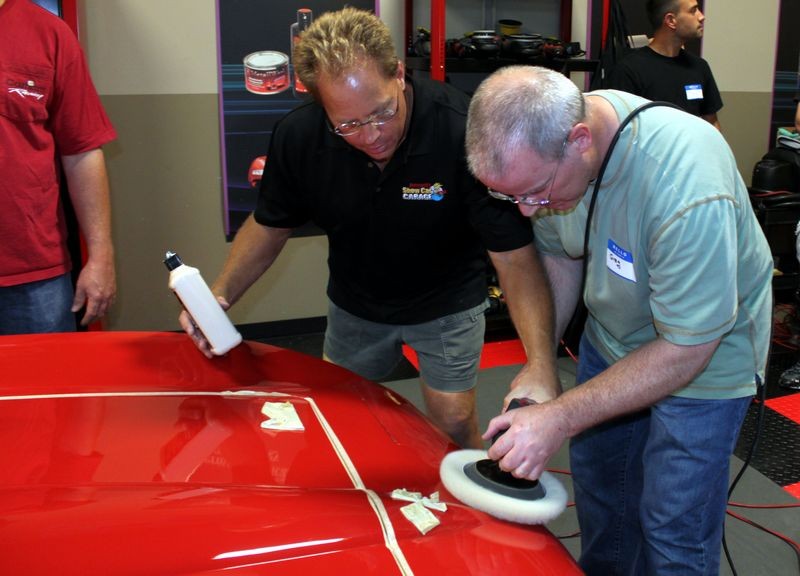
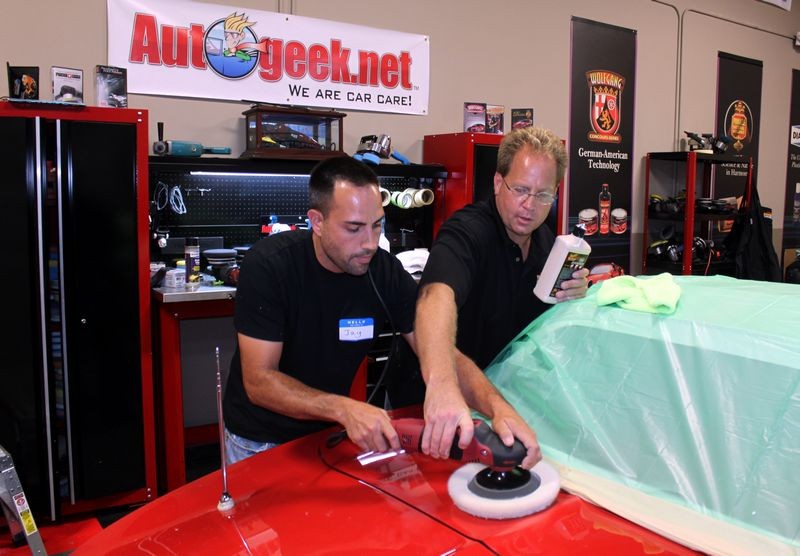
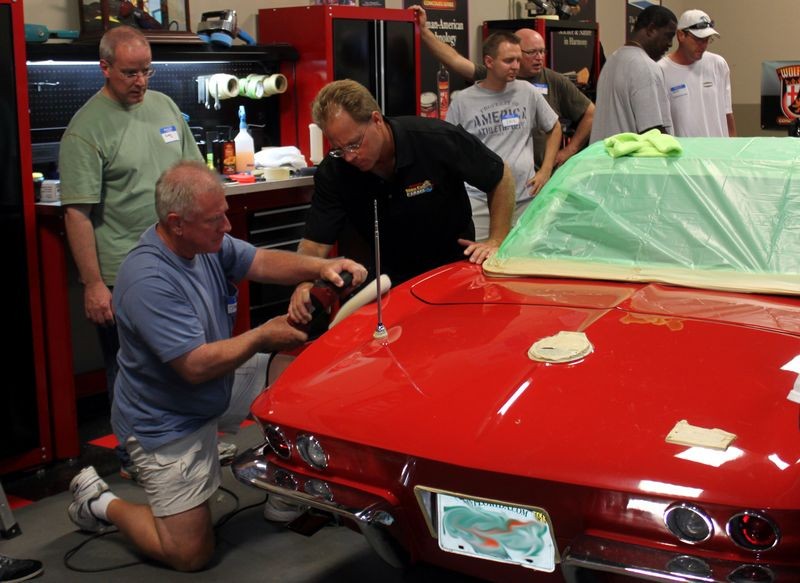
Here's the demo vehicle I used to teach my recent class on how to use a rotary buffer, it's a 1966 Corvette Sting Ray that's filled with millions of swirls and scratches. How you see the paint on the car depends on ho you inspect it.
A swirled-out old 2-door Chevy...

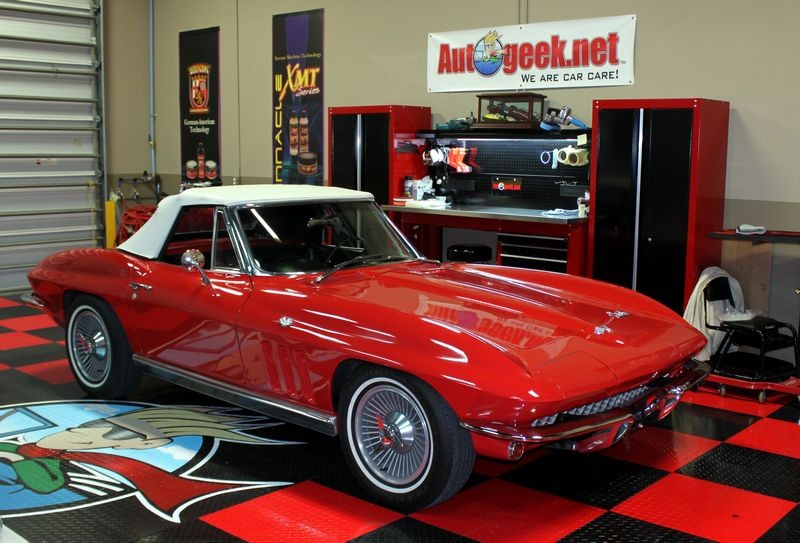

Inspecting the true condition of the paint
In the pictures above the paint looks very good but below is how it actually looked...
This is called, "The Sun Shot", it's when you move the car into full overhead sun and position the reflection of the sun onto the horizontal panels where it will reveal swirls, scratches and water spots.
The Sun Shot

Paint Condition
According to the chapter on paint condition categories in my how-to book, The Art of Detailing this paint fall into category #5 & #6 because it has both sever cobweb swirls and holograms.
5: Severely Neglected
Paint in this condition has deep swirls, scratches, water spots and oxidation. Paint in this condition has normal day-in, day-out wear-n-tear plus no real regular maintenance. Vehicles in this category are rarely washed on a regular basis and when they are washed they are washed improperly or taken through automatic car wash.
Cobweb Swirls and Scratches
Paint that is severely neglected means that when viewed in bright, overhead sunlight, there are so many swirls and scratches that the paint has an overall hazy appearance which blocks your view of the true color.
Water Spots
Paint that is in the severely neglected category can have Type I, Type II and Type III water spots on all horizontal panels and even the vertical panels if caused by a sprinkler or some type of water spray.
Severe Oxidation
Paint in this category has oxidized to the point where the surface has a uniform dull appearance to the horizontal surfaces and to some extent the vertical panels. Clear coats do oxidize but usually slower than single stage paints and don't normally get the whitish, chalky appearance with a rough texture common to old, neglected single stage lacquers and enamels. 6: Horrendous Swirls - Caused by the misuse of a rotary buffer
This category is primarily for cars that have been improperly buffed-out using a rotary buffer leaving the finish inflicted with rotary buffer swirls, holograms or buffer trails.
(Whatever term you like, they all mean the same thing).
The severity of the swirls can range from shallow to deep depending upon the pad and product used with the rotary buffer as well as technique or lack thereof.
The normal three culprits for paint in this condition are,
Dealer Installed Swirl Option
Bodyshop Installed Swirl Option
Detailer Installed Swirl Option Sad but true, the people in this industry that are supposed to know how to properly buff out a car normally either don't know or don't care. The results are the same and that's a swirled out car finish that someone else will have to undo.
Brinkmann Swirl Finder Light
Here's what the paint looks like when lit up with the Brinkmann Swirl Finder Light...

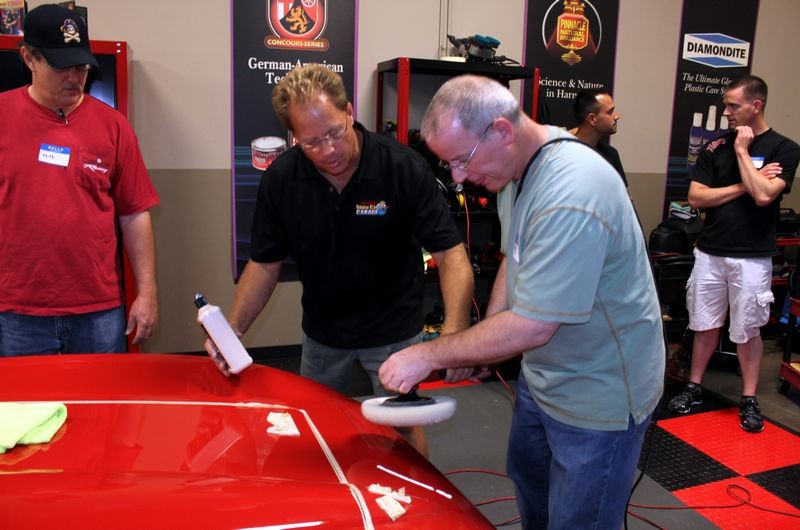
Doing a Test Spot Using a Rotary Buffer
A couple of days before the class I did a Test Spot for a number of reasons,
1. To ensure the paint could be restored.
2. To dial in a process that would undo the damage and restore a swirl-free, show car finish.
3. Get a feel for the paint itself, that is how soft or hard it is and how easy or difficult it would be to correct. The Major Correction or Cutting Step
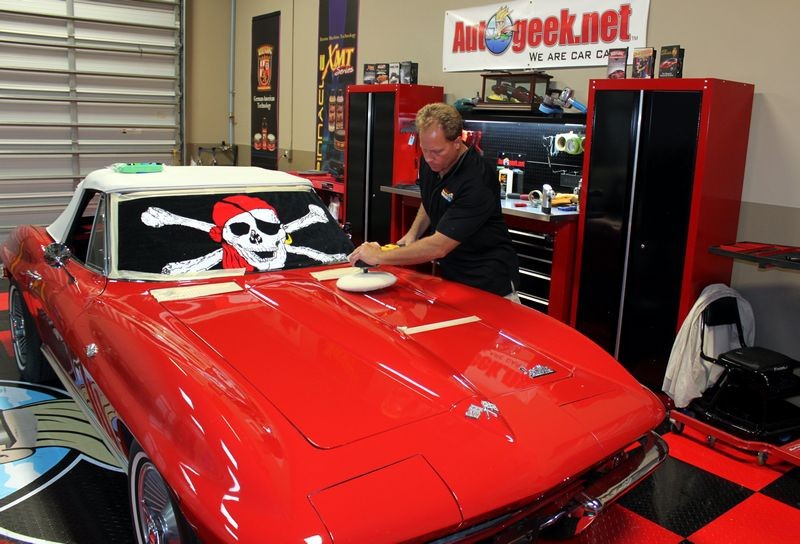
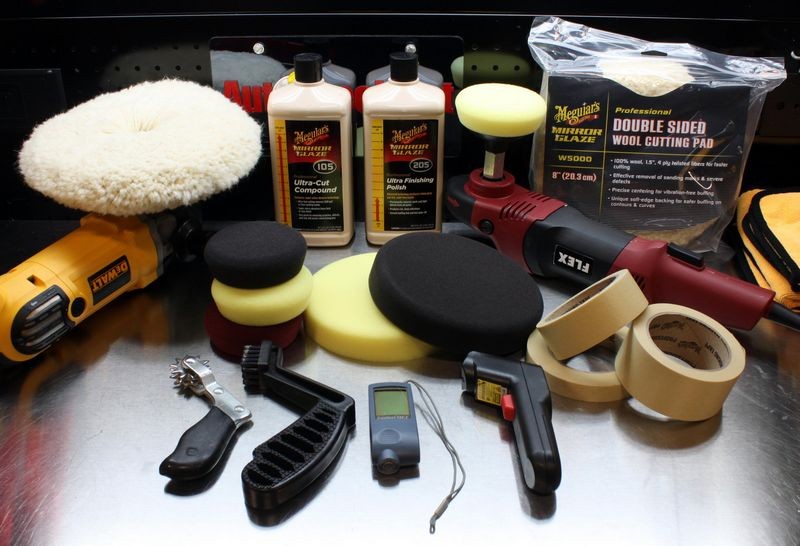
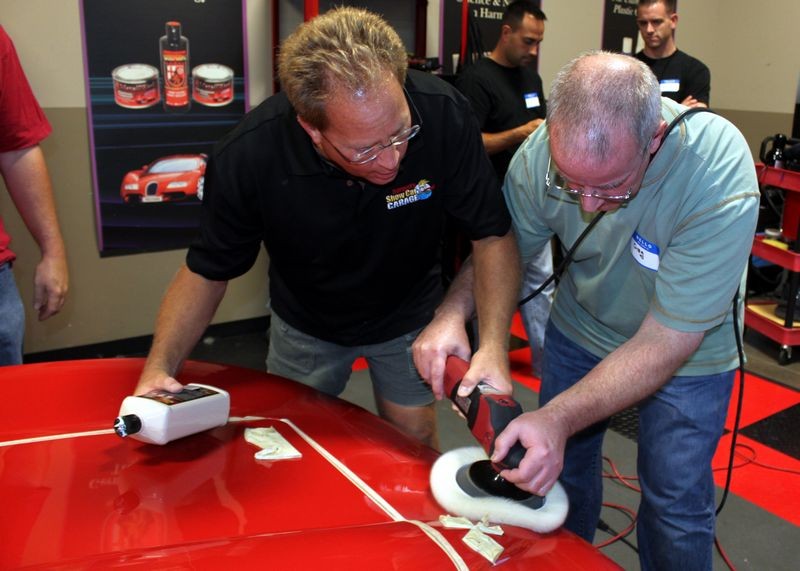
Because every inch of ever body panel was filled with swirls and the goal is to remove as many of the defects as possible I chose to start out with an aggressive compound and a wool pad.
M105 with a W5000 Wool Pad on the DeWALT 849X
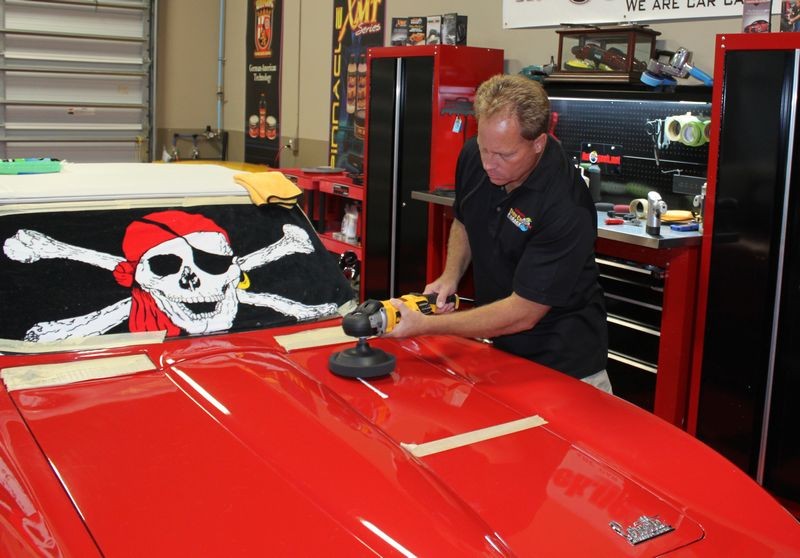
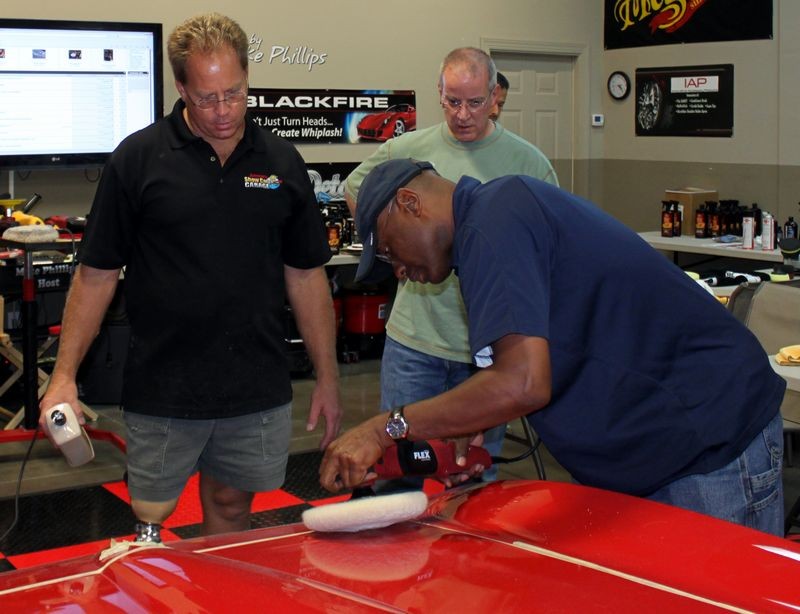
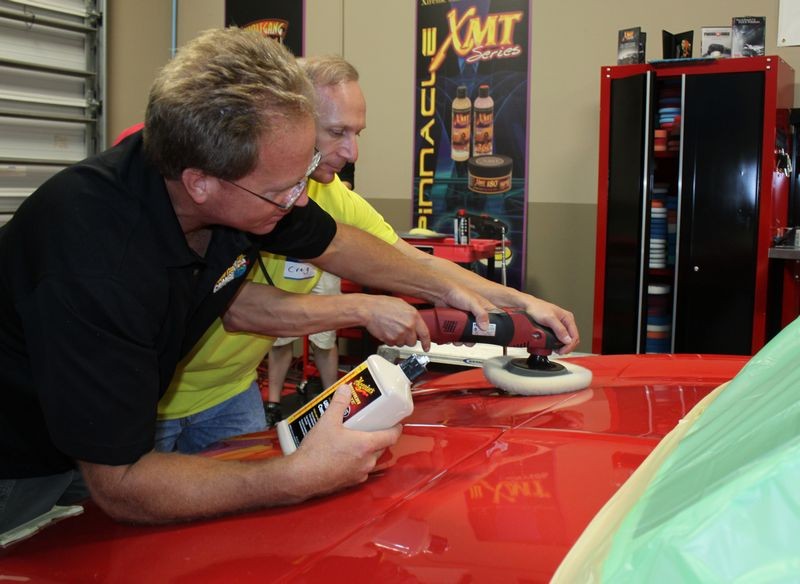
The Minor Correction or Polishing Step
After the cutting step the next thing to do is restore and maximize gloss and clarity by removing any holograms and haze left by the aggressive fibers that make up a wool cutting pad and the cutting action of the abrasives in the compound. Because M105 uses Super Microscopic Abrasive Technology, the majority of any holograms are not from the abrasives but from the individual fibers that make up a wool cutting pad and the downward rotating pressure applied to cut the paint.
Thus the swirls should be very shallow and easily removed with the companion or twin product to the M105 and that's the M205 Ultra Polish. For this I switched over to a foam polishing pad.
M205 with a 7" Softbuff Polishing Pad

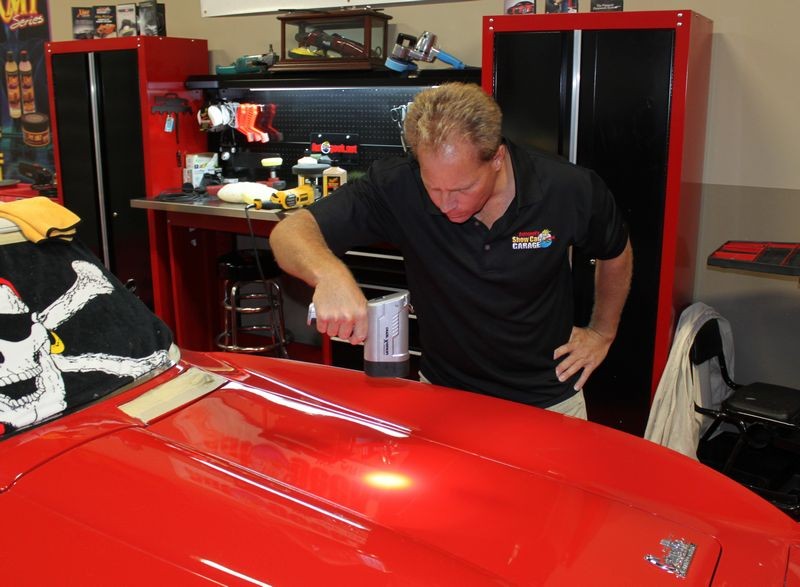
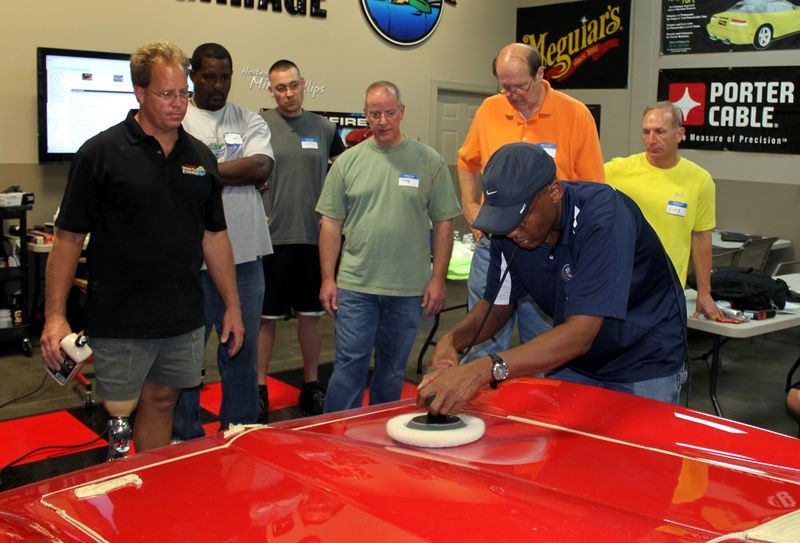
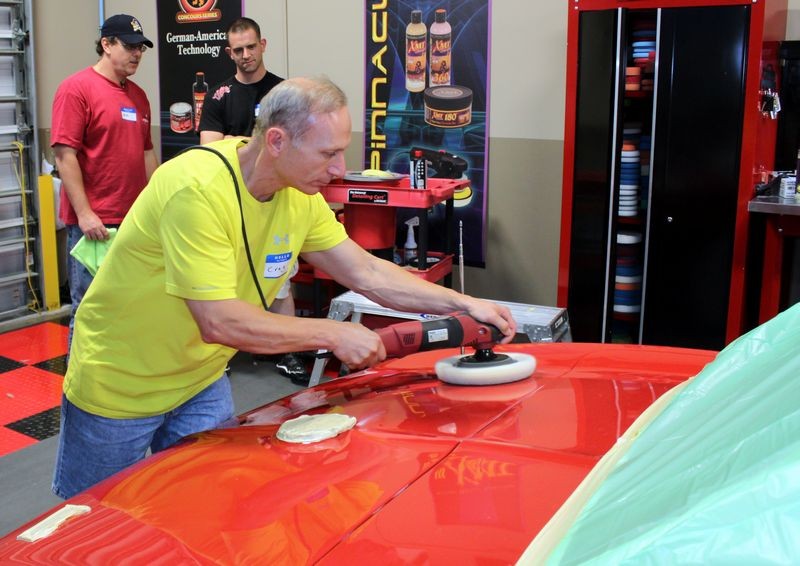
Jeweling with a Rotary Buffer
After removing the holograms and polishing to a high gloss the paint looked flawless and ready to wax but instead I chose to squeeze a little more gloss and shine out of the paint by jewelling it with the same polish but I switched to a much softer foam finishing pad. For this I turned my polisher down to 600 RPM's and slowly moved the rotary buffer over the paint.
M205 with a 7" Softbuff Finishing Pad
Using the Brinkmann to inspect the results...
Inspection Results
Here are the results after doing the above three steps using the Brinkmann Swirl Finder Light and then overhead florescent lights.
Before

After

Overhead Florescent Lights
Here I've stood back and taken a picture from an angle lower, and flatter to the hood of the car with the overhead florescent lights placed over the tape-line.

Close-up
The below picture is the same exact picture above except I've cropped out the specific area to show before and after results.

Here's some of the tools I used for this test spot...
Conclusion
I performed the above test spot to answer 3 questions.
1. Can the paint be restored?
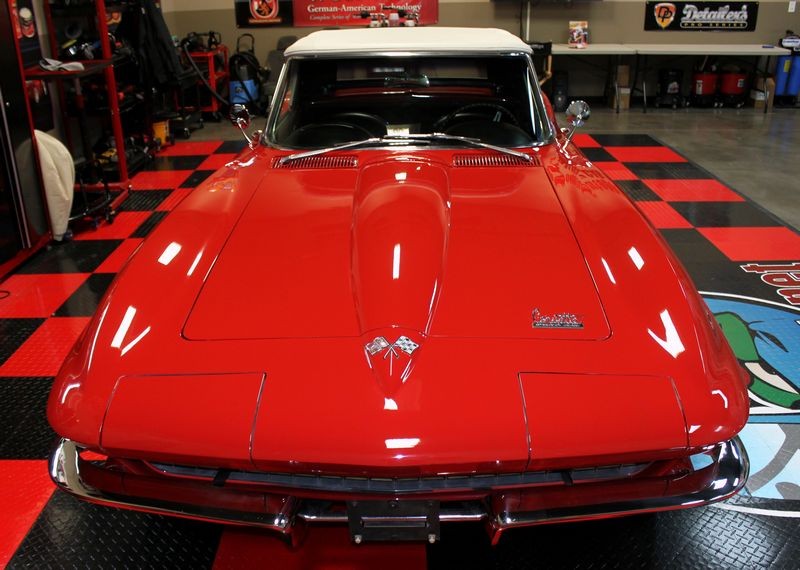
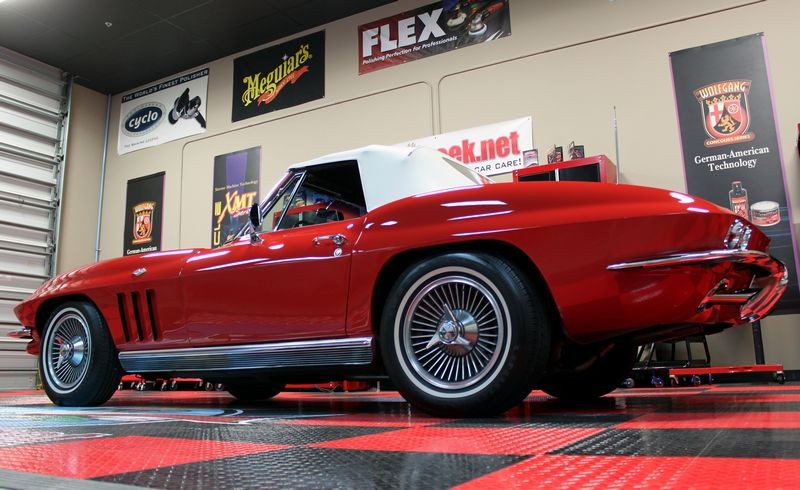
The answer to this question is a resounding "yes"
The paint was in severely neglected condition and the age of this paint job is not known but from my testing I proved the paint could be successfully restored. There are some paints that are past the point of no return and nothing you pour out of a bottle or scoop out of a can will fix them. That is not the case with the paint on this Corvette.
2. Can a process be dialed-in to restore a swirl-free, show car finish.
The answer to this question is "yes"
The Meguiar's Twins M105 and M205 provided all the cut we needed to remove the defects and using only two polishing steps restore the car to a swirl-free, show car finish.
3. Determine if the paint is on the soft side or the had side?
The answer to this was somewhere in the middle of soft and hard. Actually, it's in the sweet spot which not to had and not to soft and that's exactly where you want your car's paint to be.
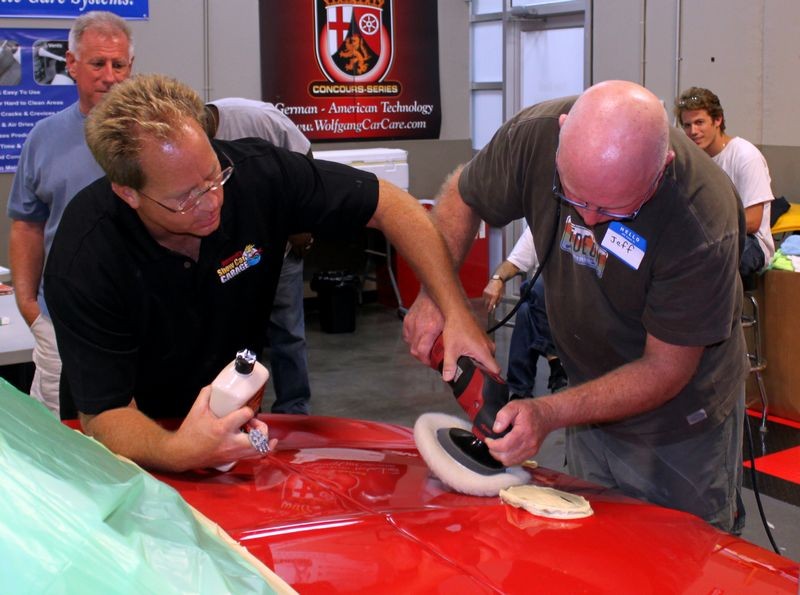
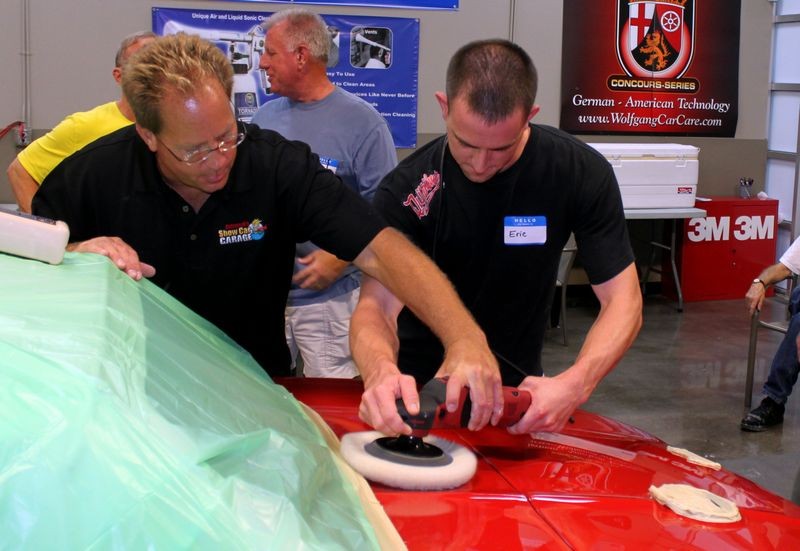
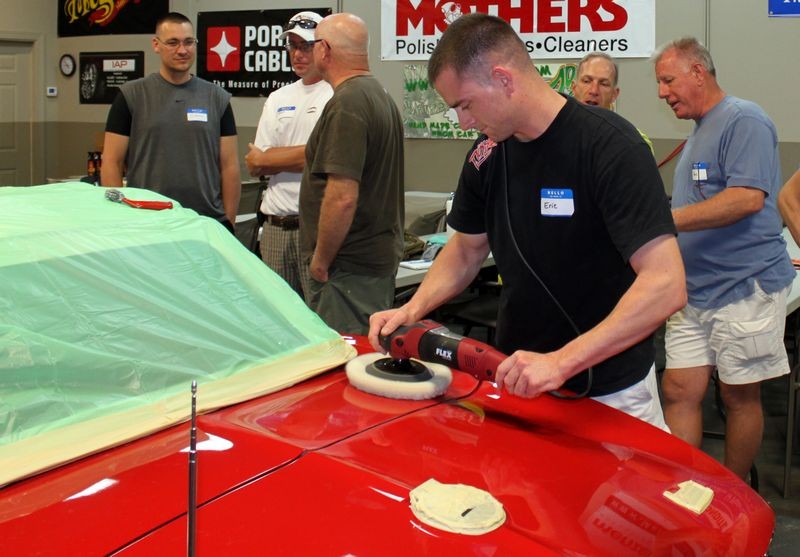
Next up it's hands-on training time...

-
-
-
-
Re: How to use a Rotary Buffer
-
Re: How to use a Rotary Buffer
Incredible Mike. What were your speeds on the 849x for each of the three steps?
-
Re: How to use a Rotary Buffer
 Originally Posted by smack

Incredible Mike. What were your speeds on the 849x for each of the three steps?
For cutting with the wool pad I was at 1500 RPM for the second polishing step probably around 1200 RPM and for the final polishing step on the 600 RPM speed setting.

-
-
Re: How to use a Rotary Buffer
-
Re: How to use a Rotary Buffer
I'll tell you what it is...it's gorgeous!!!!!!!
Mr. Phillips,
How long were your beads of products?
Were you still trying to work in a 2x2 area where possible?
What was the amount of product used when edgeing?
How long did you work each product?
(I have some idea what the answers may be, but I'd rather not guess. Plus, others reading may want to know as well.)
Working with the rotary is a goal of mine and I've had some experience on gel-coat, but haven't gotten to use it on paint. I feel much more confident now after seeing proper technique. I wish this had been on video.
Similar Threads
-
By Mike Phillips in forum Ask your detailing questions!
Replies: 2
Last Post: 08-20-2018, 08:00 AM
-
By Strat in forum Auto Detailing 101
Replies: 8
Last Post: 02-18-2018, 12:06 PM
-
By buckeye24 in forum Ask your detailing questions!
Replies: 6
Last Post: 05-01-2017, 09:34 AM
-
By Mike Phillips in forum Ask your detailing questions!
Replies: 10
Last Post: 09-08-2015, 11:48 AM
-
By Qusai in forum Auto Detailing 101
Replies: 10
Last Post: 10-24-2012, 04:59 PM
 Members who have read this thread: 0
There are no members to list at the moment.
Posting Permissions
- You may not post new threads
- You may not post replies
- You may not post attachments
- You may not edit your posts
-
Forum Rules
|
| S |
M |
T |
W |
T |
F |
S |
| 31 |
1
|
2
|
3
|
4
|
5
|
6
|
|
7
|
8
|
9
|
10
|
11
|
12
|
13
|
|
14
|
15
|
16
|
17
|
18
|
19
|
20
|
|
21
|
22
|
23
|
24
|
25
|
26
|
27
|
|
28
|
29
|
30
| 1 | 2 | 3 | 4 |
|


 Reply With Quote


Bookmarks