So my mom has this 2003 Dark Metallic Blue GMC Yukon that on it's best day was ran through a drive through car wash I took a picture of the hood in the Sun to give you all an idea of what the total paint job looks like. It has swirls. RIDS, small dents, rock chips, dried on car wash soap, water spots, you name it it has it and it's a dark color. I think this may be hard for me to have total success on being a noob and all but I'm looking at it like, no way can I make it worse!
I have the new redesigned Griot's RO, an assortment of LC pads (6.5" and 4") in Orange, White, Black, & Red. About all I have for polishes are Menzerna IP PO91E and Menzerna FP PO85U. I have on order some PBW Black hole to help with this.
So my plan is IP PO91E on Orange first (I'll try white but I'm not thinking that will even come close), IPA wipe down, then FP 85U on White, then another IPA wipe, then PBW Black hole with a black pad (or should I use white for this?), then top it off first with a coat of Finish Kare 2180, with a LSP of Max Wax.
What do you all think? Will I need a more aggressive polish than the IP PO91E? I do have a source for some MEG Ultimate Compound would this be a better first cut? What you see above is pretty much what I have available to tackle this...Do I have a chance with what I have. This will be a fun before and after post...I plan on lots of pictures to let other noobs we can do it.........I THINK!
Any Advice is greatly appreciated! Thanks!
Last edited by Buckskincolt; 08-30-2009 at 12:51 AM.
"Labor is prior to, and independent of, capital. Capital is only the fruit of labor, and could never have existed if labor had not first existed. Labor is the superior of capital, and deserves much the higher consideration." Lincoln's First Annual Message to Congress, December 3, 1861.
Anybody? Maybe this needs to be moved to detailing 101?
"Labor is prior to, and independent of, capital. Capital is only the fruit of labor, and could never have existed if labor had not first existed. Labor is the superior of capital, and deserves much the higher consideration." Lincoln's First Annual Message to Congress, December 3, 1861.
So my mom has this 2003 Dark Metallic Blue GMC Yukon that on it's best day was ran through a drive through car wash I took a picture of the hood in the Sun to give you all an idea of what the total paint job looks like. It has swirls. RIDS, small dents, rock chips, dried on car wash soap, water spots, you name it it has it and it's a dark color. I think this may be hard for me to have total success on being a noob and all but I'm looking at it like, no way can I make it worse!
Here's a larger size picture, if I were buffing this out I would definitely run a tape line down the middle and get a great before and after shot.
Ouch! This hurts my eyes just to look at it!
If she's going to continue to take it to a car wash then any swirls and scratches you remove are just going to be put back into the paint only now the paint will be thinner.
If it's a daily driver and going to see a car wash over and over again, then wash it, clay it and use a cleaner/wax on it. It will still look great and there will be more paint on the car for the service life of the car and you're mom will think it looks great.
If you want to use this for training purposes then go for it!
Originally Posted by Buckskincolt
What do you all think? Will I need a more aggressive polish than the IP PO91E?
The first thing to do is a Test Spot with the pads and chemicals you already own.
"You don't know what you can do until you try"
So wash and dry the car and then clay the paint if needed and now you're ready to do a Test Spot.
Note: YOU DON"T HAVE TO GET AS ELABORATE AS I DO IN THIS EXAMPLE BUT INSTEAD, JUST PLACE A SINGLE STRIP OF PAINTER'S TAPE ON THE HOOD TO SEPARATE BEFORE FROM AFTER, THIS WILL MAKE IT REAL EASY FOR YOUR EYES TO SEE THE DIFFERENCE.
Doing a Test Spot by Machine
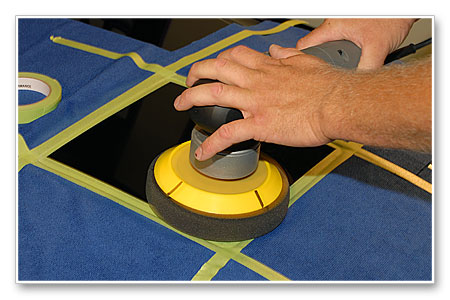
Next we're going to do a Test Spot by machine using the new Porter Cable 7424XP. Again, in keeping with the philosophy of,
"Use the least aggressive product to get the job done"
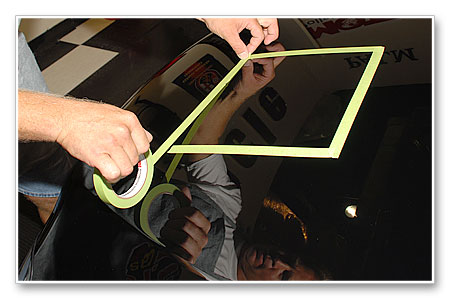
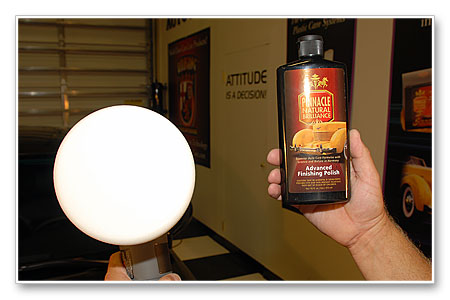
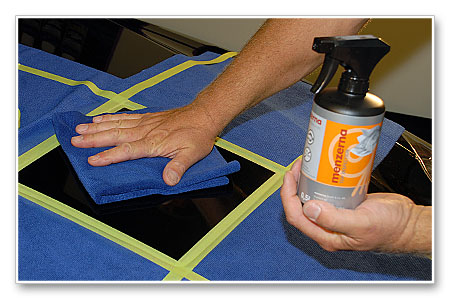
We'll first tape off a small section on the hood and try using a light finishing polish with foam finishing pad and check to see if this combination with good technique will get the finish to where we want it, if not then we'll try again using a more aggressive pad and product combination.
Now when you do a Test Spot, by hand or machine, you don't have to get this elaborate, if fact you don't even have to tape off a section. We do this because we're as D.O. as anyone and often times more D.O. than most.
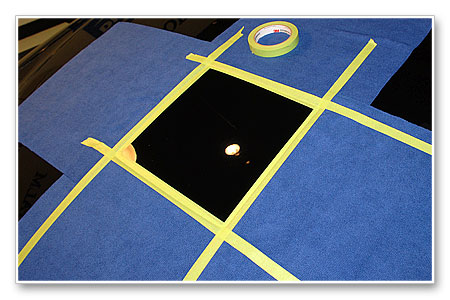
If you do decide to use painters tape then just one strip of tape on the hood to separate the before side from the test section is more than enough. For those of you wondering why we used microfibers to cover the surrounding paint that's because we want to preserve the original condition of the paint to compare our test section too and if we were to get any splatter on the surrounding paint, sometimes just the act of wiping off the splatter can improve the paint appearance and our goal is to preserve the ugly, that is preserve the original condition of the paint before we do our test section.
Sometimes you will end up with some very dramatic before and after shots, for example if you're doing a bonafide Extreme Makeover. In our case this finish is actually in pretty good shape overall in that the worst portions have light water etchings as the swirls and scratches are pretty minimal. So afterwards we didn't get any dramatic before and after shots but again, we're starting off with finish in good condition. Just to note, most of our project cars will follow this same routine as matter of consistent testing and documentation.
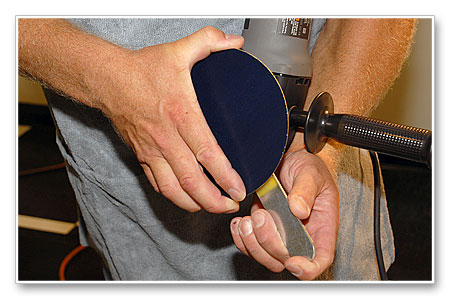
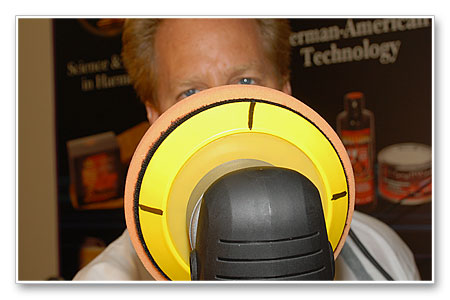
Mark your backing plates
If you're new to machine polishing with a DA polisher that uses a clutch, here's a tip that will help you to monitor your technique as well as what's happening at the surface level with your buffing pad.
Take your backing plates and mark them with a permanent black marker like a Sharpie; by doing this it will be easy to see if your pad is rotating or just jiggling or vibrating against the paint.
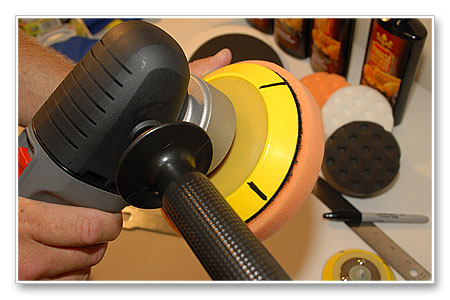
Attaching the backing plate to the 5/16" spindle using the PC Spanner Wrench
Removing Below Surface Paint Defects
Anytime you're doing correction work the goal is to remove a little paint from the surface surrounding the defects in an effort to level or smooth-out the surface. More specifically you want to level the upper most surface of the paint with the lowest depths of the defects you're trying to remove as discussed in this article.
When you attach the foam pad to the backing plate the goal is to center it as best as you can.
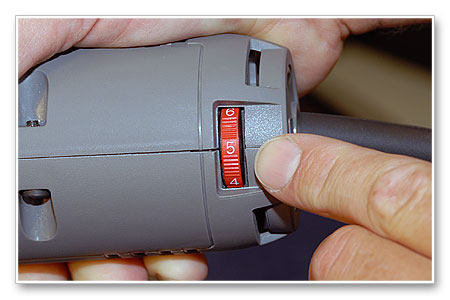
Set the speed setting to the 5.0 on the variable speed dial. If you prefer you can bump it up to the 6.0 setting for even more power but for our test spot we're going to use the 5.0 speed setting.
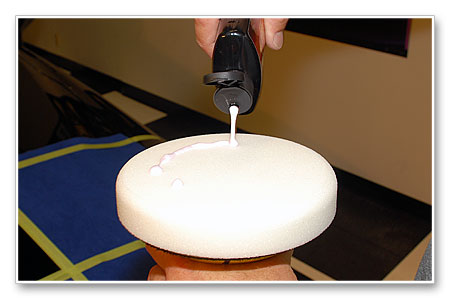
Apply some product to the face of the pad. For your test spot you don't need a lot of product so don't overdo it but take into mind that if your pad is new and/or used but clean and dry, then some of your product will penetrate into the pad. If you like you can take a little extra time to work the product over the entire face of the pad as this will insure the entire surface of the pad is working. For our test spot we're going to skip this procedure as we're pretty confident we're going to find out if this combination of pad and product is going to remove the defects after 6 to 8 passes over this small test section.
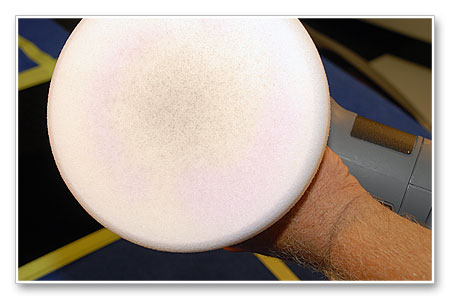
After only buffing for a few passes you can see a little pigment coming off the tinted clearcoat. This is normal for a tinted clear and nothing to worry about.
After wiping the test spot off and inspecting the results, we didn't feel this combination of product was working fast enough or effectively enough to meet our expectations.
While the paint was greatly improved, we felt we would need to substitute a more aggressive pad and product to produce the quality of finish we and our customer expects. If the car in question is a daily driver, keep in mind it's going to see everyday wear-and-tear and for this reason don't try to remove each and every one of the deeper defects as this means removing more and more paint. Remember, this is a daily driver, not a show car.
Best Practice
Anytime you're removing a buffing pad from off the backing plate, do your best to pull the pad back at an angle, not straight off as this can loosen the Velcro on the pad and the backing plate over time.
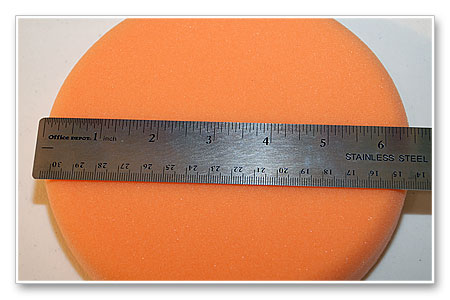
Like the LC White Finishing Pad we tested first, this is a 6.5" diameter pad and while some will say larger size pads like these are too large to do any substantial corrective work with a dual action polisher, the new PC 7424XP has ample power to keep the pad rotating under pressure as long as you hold the pad flat against the surface.
Do you best to center the pad onto the backing plate.
Using the handle is an option, the new PC 7424XP has new body design that's smaller and more rounded making the head of the unit easier to grasp and hold onto for extended periods of time. Most people that I've met that have tried their polisher without the handle never look back. If you use the handle be careful as on some cars when buffing out an angled panel you may find the handle coming precariously close to an adjacent panel where it could possibly mar or scratch the paint. My personal preference is to use this polisher without the handle.
Ready to go...
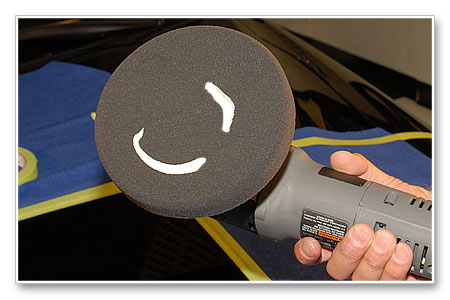
Place some product directly onto the face of the pad, because the pad is brand new we have applied a little extra product as some of the product is going to seep into the pad itself.
Spread your product out first
To start, place the face of the buffing pad with the product on it flat against the paint. Then turn the polisher on and quickly spread the product out over the entire section you're going to work. You can do this rather quickly because at this point you're not trying to remove defects youre just trying to spread the product out over the paint so that you have a uniform film of product spread out over that section.
Overlap your passes by 50%
After you spread the product out, now it's time to slow your Arm Speed down and begin making overlapping passes usually in a back and forth, side-to-side pattern.
The goal is UMR, that is Uniform Material Removal.
The reason for this is so that you remove an equal amount of paint over each section and in turn over the entire car. In order to do this you need a method that you can control and duplicate and for most people following a back and forth, side-to-side pattern works because its easy to remember, easy to do and easy to duplicate over and over again.
The definition of a pass
There are two definitions of the word pass as it relates to machine polishing with any type of machine.
Single Pass
A single pass is just that, it's when you move the polisher from one side of the section you're buffing to the other side of the section you're buffing. That's a single pass.
Section Pass
A section pass is when you move the polisher back and forth, or front to back with enough single overlapping passes to cover the entire section one time. That's a section pass.
After making 6 to 8 section passes we could again see a little pigment transferring onto our pad indicating a tinted clearcoat finish.
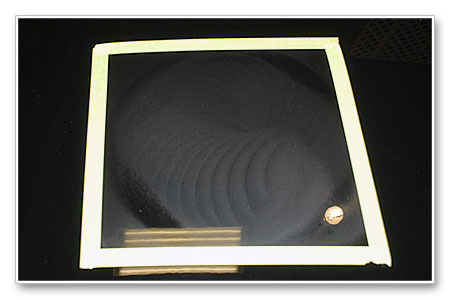
Next we wiped the polish residue off our test spot
Then we chemically stripped the paint using Menzerna Top Inspection. before inspecting the results using a Brinkman Flashlight. In this picture we're actually using a Brinkman Halogen Flashlight which doesn't actually work as good as the Brinkman Xenon Flashlight but at the time we didn't have the Xenon light handy. (We do now, we have two of them for the AG Garage).
The water spots, swirls and scratches were for the most part completely removed which meets our expectations. Next we switched back to the less aggressive Pinnacle Advanced Finishing Polish with a Lake Country Flat 6.5" Orange Light Cutting Foam we did our first test spot with to re-polish the section and maximize the gloss and clarity.
When it comes to applying a finishing wax or paint sealant the goal is to spread the product out and then work the product into the paint to whatever degree is possible. For this the 3.0 to 4.0 speed setting works best. Anything slower than 3.0 is just to slow and your buffing pad will tend to feel like its dragging across the paint as you move the polisher forward.
When applying a finishing wax or paint sealant, a good rule of thumb is to make 2-3 passes over each square inch.
After applying the Souveran, we're going to give it some to to let it set-up. In the mean we'll start taping-off any plastic or rubber trim on the car.
Once you dial in a system that woks to one small area then simply duplicate that process over the rest of the car and you've already guaranteed yourself success.
Originally Posted by Buckskincolt
I do have a source for some MEG Ultimate Compound would this be a better first cut? What you see above is pretty much what I have available to tackle this...Do I have a chance with what I have. This will be a fun before and after post...I plan on lots of pictures to let other noobs we can do it.........I THINK!
Any Advice is greatly appreciated! Thanks!
Test out the product you already have and check your results. If you run into problems, post what you're seeing and we'll do our best to see you through to success.
So do your Test Spot first before trying to buff out the entire Yukon because as you titled your thread,
First BIG Project
p.s.
I've spent a lot of time in Newport Beach as I lived in Albany for about 30 years. Very beautiful place to live if you can find work.
Thank You Mike!!
I really didn't think you would be working on Sunday. After reading my post I just thought I had placed it in the wrong forum.
I'll try my test spot with what I have and see how it goes. This is a daily driver but I'm going to try to be the one who cares for it most of the time to keep it out of the auto car washes. The main reason for doing it though is to use it as a Ginny pig test subject just to see what I and the products I have can do.
I have read all you posed above and it all makes sense. I'm pretty clear so as soon as the weather clears I'll jump in.
Yeah, Newport is a great place but not many good jobs. I'm one of the lucky ones and have a great job so all is good.
Do you know Ron and Dave from Car Colors here in Newport? They are Maguires dealers and deal mostly to professional body shops. Good Guys for sure.
Thanks for all your help, I'll post my results. I'll try to take pictures before and after and try give my experience as a noob, for other to learn from if at all possible.
Thanks Again Mike! I didn't mean I thought you should be working on Sunday, just the opposite, you should be Marlin Fishing down there and drinking a cold one. I just thought maybe it should be moved to Detailing 101?
"Labor is prior to, and independent of, capital. Capital is only the fruit of labor, and could never have existed if labor had not first existed. Labor is the superior of capital, and deserves much the higher consideration." Lincoln's First Annual Message to Congress, December 3, 1861.


 Thanks:
  Likes:
  Dislikes:


I took a picture of the hood in the Sun to give you all an idea of what the total paint job looks like. It has swirls. RIDS, small dents, rock chips, dried on car wash soap, water spots, you name it it has it and it's a dark color. I think this may be hard for me to have total success on being a noob and all but I'm looking at it like, no way can I make it worse!

Thanks!


 Reply With Quote


 I just thought maybe it should be moved to Detailing 101?
Bookmarks