 Thanks: 0
 Likes: 0
 Dislikes: 0
-
Pock Marks
I am looking for suggestions on how to fix this.
The linked photo of my hood shows tiny pock marks both by the graphics and on the bottom part of the photo. In-person, the marks in both locations look essentially the same.
I think this happened as a result of my re-painting a tool box (red, of course) and failing to notice the overspray. The car wasn't even in the garage when I did this! In fact, I wouldn't have noticed it if I hadn't started claying and noticed the red coming off.
I've tried 3M Rubbing Compound (not the more aggressive perfect it variety, just the regular Rubbing Compound) with a Lake Country orange pad. That created some minor marring that was easily correctable with a green pad and Pinnacle Swirl Remover. But it did not remove the etching/pock marks. Altogether, I did several passes with that combo with the same results.
Should I try M105? Or is that too aggressive?
The image is too large to upload because it's 108 mp. I figured this was the best way to capture the defects in a photo:
https://i.imgur.com/PuOY3g0.jpg
The car is a 2019 Camaro, for what that's worth.
-
Re: Pock Marks
 Originally Posted by EJR8402

I am looking for suggestions on how to fix this.
Thanks for bringing this to the forum, you'll get more eyes and ideas than just mine via an e-mail. 
Originally Posted by EJR8402
The linked photo of my hood shows tiny pock marks both by the graphics and on the bottom part of the photo. In-person, the marks in both locations look essentially the same.
Here's your pictures, I cropped out the two pertinent areas from the original.

Originally Posted by EJR8402
I think this happened as a result of my re-painting a tool box (red, of course) and failing to notice the overspray. The car wasn't even in the garage when I did this! In fact, I wouldn't have noticed it if I hadn't started claying and noticed the red coming off.
Just goes to show how far air-borne contaminants can travel.
I have an article on this, it talks about the two most common places to get overspray paint,
1: A body shop - Think about - they're spraying paint all the time.
2: A "Car Guys" garage. Think about it - cars guys are always spraying paint - usually from a Rattle Can. 
Here's the article. Ding dang, I think I have an article on everything... 
The most common place to get overspray on your car is a body shop by Mike Phillips
Originally Posted by EJR8402
I've tried 3M Rubbing Compound (not the more aggressive perfect it variety, just the regular Rubbing Compound) with a Lake Country orange pad. That created some minor marring that was easily correctable with a green pad and Pinnacle Swirl Remover. But it did not remove the etching/pock marks. Altogether, I did several passes with that combo with the same results.
Should I try M105? Or is that too aggressive?
Yes. Give the M105 a try. After spreading the product around, make 8 sold section passes to a section of paint about the size of a microfiber towel - 16" x 16". Then wipe off and inspect the results.
Originally Posted by EJR8402
The image is too large to upload because it's 108 mp.
Yes. We must all resize our pictures to a SANE size in order to upload to the AG Gallery. I do it all the time. Did it with your pictures above.
Try the M105 and tell us what you see. Besides this and what I shared in my e-mail, I'm not sure what else to tell you. Defects are either ON the paint or IN the paint and both usually require abrading the paint to remove some of it in order to remove the defect. And that's were we all get into trouble because car manufacturers only put the MINIMUM amount of clear on their cars to enable the paint to hold up over time and keep consumers from complaining.

-
Re: Pock Marks
Thank you Mike- I've just ordered the M105.
I usually keep my paint in good enough condition that going this aggressive is just not necessarily, so I'm a little out of my comfort zone.
For reasons you said, I'm hesitant to start removing clear this aggressively. But I can't stand this anymore, it's really bugging me.
Will post results here when done.
-
Re: Pock Marks
Thank you Mike. I ordered the M105 and will post results when done.
When looking into the subject of paint thickness a little I came upon this post:
TECH TIP: How polishing impacts clear coat thickness | GMC Truck Forum
My takeaway: most defects are no deeper than 4 microns, and a typical clear coat is about 50.
I use a two-bucket wash method with grit guards, good microfibers, and a pre-rinse with foam cannon. So I figure that 46 or so microns left over will last a long time. It's infuriating that I put roughly 2 hours into my ROUTINE washing/detailing process from setting up, to washing, drying, etc., cleaning up, all with good methods to prevent defects, and something like this happens.
-
Re: Pock Marks
Originally Posted by EJR8402
That's a well written post on the topic by Dylan Von Kleist over at RUPES. It's always rewarding reading things like this,
[quote Dylan VK]
HOW MUCH CLEAR COAT DOES POLISHING REMOVE?
Just as the depth of scratch or swirl mark you're working to remove can vary so will the amount of clear coat you'll need to 'remove' in order to correct it. Most imperfections will be removed somewhere in the 1µ to 4µ range. Average swirls and light imperfections will fall in the 1-2µ range and deeper RIDS and scratches will fall in the 3-4µ range in terms of how much surface will need to be removed.
[/quote]
Here's where the term RIDS came from.
RIDS - The Definition of RIDS and the story behind the term...
And when doing a search via Skynet, I found this,
RIDS - The Free Dictionary
Acronym Definition
RIDS Rules in Database Systems (conference)
RIDS Random Isolated Deep Scratch (automobile cosmetic maintenance)
RIDS Records Inventory and Disposition Schedule
RIDS Reaction-Induced Difference Spectroscopy
RIDS Record Inventory Destruction Schedule
RIDS Review Item Disposition System
RIDS Reaction-Induced Difference Spectra
Pretty cool. An term and acronym I came up with is recognized by a dictionary and used all over the car detailing world by my peers.
Originally Posted by EJR8402
My takeaway: most defects are no deeper than 4 microns, and a typical clear coat is about 50.
Yeah, President Gerald Ford tried to get the U.S.A. to switch over to the Metric System back in 1975 and it never took. While I'm all for using metric where needed, what I like to do is talk to people and type to people in terms they can EASILY UNDERSTAND and that's why when I wrote the below article and also included it in my how-to book, I used MILS not MICRONS and I used something that almost anyone in the world knows about and likely has access to - a simple Post-it Note.
Clearcoats are thin by Mike Phillips
The factory clearcoat on a new or modern car measures approximately 2 mils thin.
The average Post-it Note is around 3 mils thin.
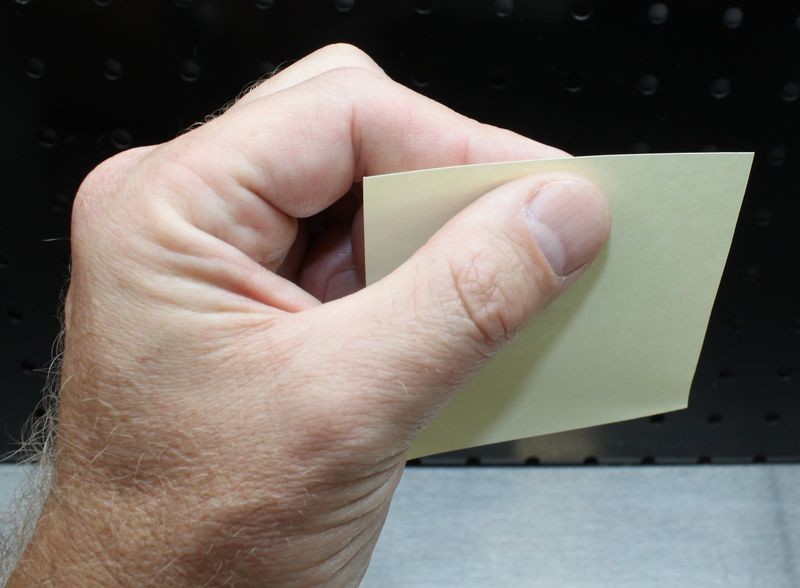
The next time you have a post-it note in front of you, feel a single post-it note between your fingers. Like this...
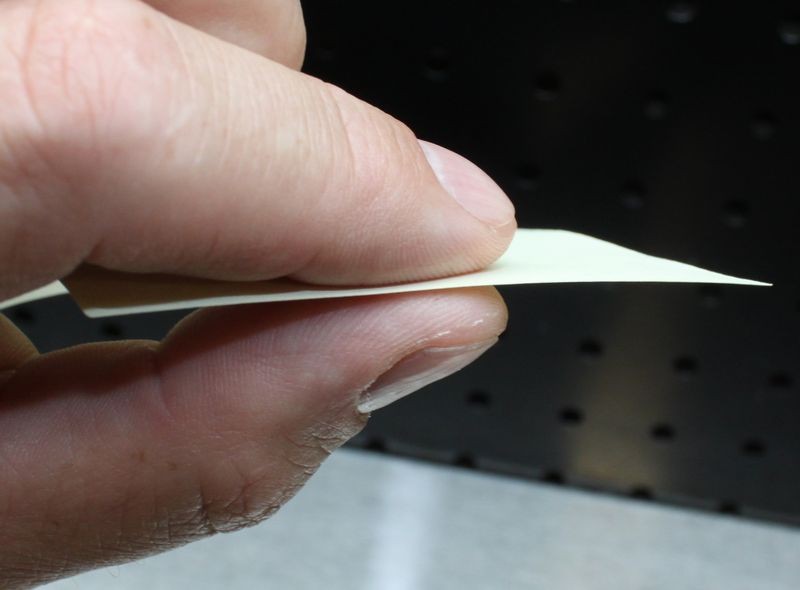
You can easily feel how thin this piece of paper is correct?
And now you can EASILY WRAP YOUR BRAIN AROUND HOW THIN the clear layer of paint on your car is.
A Post-it Note is THIN. And the clear layer of paint on your car is THINNER. Pretty easy to wrap your brain around mils using this example. I couldn't do this with microns. I know some guys like to use microns but I like to keep it a LOT more simple.
Back to you and your paint
There's a lot of guys on YouTube and all over the Net telling everyone how thick the clear layer of paint is on modern cars and I'm the only one I know of that has documented this information and also given due credit where credit is due.
In post #14 of this article I wrote in 2010,
Beginning Clearcoat Failure
I share the information I obtained from Dr. David Ghodoussi - NOTE the text I turned RED
From post #14
There's only three people that I've ever spoken to that are knowledgeable about clear coat paint technology and what causes them to fail, these would be,
- Dr. David Ghodoussi
- Claude Sevigny
- Prefers to remain anonymous
The primary causes of clear coat failure are,
- Exposure to UV light, the closer to the sun the more damaging the effects, this means geographical locations nearest the equator.
- Too thin of a top coat - Top Coat = the clear layer of paint.
- Neglect and extreme neglect of the top coat.
- Using harsh chemicals and incorrectly using abrasive products.
- Swirled and scratched paint - Swirls and scratches in the paint open the paint up allowing corrosive elements to more easily deteriorate the paint faster.
You can only control a few of the above factors so do the best you can with what you do have control over.
When it comes to item #2, I spoke with Dr. David Ghodoussi about this and he shared some VERY INTERESTING information.
First, some of you probably don't know this but Dr. G as a part of his work background has worked for a number of Paint Manufacturers. These would be the paint companies that provide paint for the OEM and Refinishing industries.
He told me when he was working on creating clearcoat paint technology, this would be back in either the late 1970s or into the 1980s, they of course did TESTING. They found that less than 2 mils of clear paint over the basecoat would lead to pre-mature paint failure.
Simply put, with less than 2 mils of clear, there wouldn't be enough paint overall to hold-up over time. It's simply not enough "substance" to withstand exposure to sun rays and the elements.
They found that at least 2 mils were needed to provide enough substance to create the final matrix of paint, that is the e-coat, primer, basecoat and clearcoat - that this amount of film build could and would hold up to the elements.
THIS IS WHY CARS GET AT LEAST 2 mils OF CLEARCOAT AT THE FACTORY. NO MORE. NO LESS
Now I'm not an expert at car manufacturing, but I know that to spray MORE PAINT on a GRAND SCALE (that's what car manufacturing plants do, build cars on a huge scale), that spraying more paint means more gallons or tons of paint being sprayed and this equates to more money and also more time for the paint application process.
So my educated guess is, car manufactures could spray more paint but they don't, the spray "enough" paint for the paint to hold up for normal wear-n-tear and that's it.
Paint the car and send it on down the line for further assembly.
This is why it's safe to say, when it comes to the factory finish on a modern car, the clear layer of paint is approximately 2 mils. It might be more... hopefully not less. But when we the detailing community work on our own cars or someone else's car, we should be knowledgeable about the thin aspect of factory paint and this is the reason for the sage advice,
Use the least aggressive product to get the job done
That's the backstory to the word RIDS and also why the factory clearcoat is only 2 mils thin and the reason I use mils instead of microns to help people figure this stuff out.
Originally Posted by EJR8402
I use a two-bucket wash method with grit guards, good microfibers, and a pre-rinse with foam cannon. So I figure that 46 or so microns left over will last a long time. It's infuriating that I put roughly 2 hours into my ROUTINE washing/detailing process from setting up, to washing, drying, etc., cleaning up, all with good methods to prevent defects, and something like this happens.
I feel your pain -Bill Clinton
I feel your paint -Mike Phiilps
I feel your pain man. Here's the good news...
Meguiar's M105 is very safe. You're not going to have any problems.
So give it a go and let us know how it turns out.
Similar Threads
-
By zmcnulty in forum Auto Detailing 101
Replies: 7
Last Post: 09-02-2020, 10:07 AM
-
By banjo73 in forum Auto Detailing 101
Replies: 5
Last Post: 06-11-2016, 04:46 PM
-
By flyboylr45 in forum Auto Detailing 101
Replies: 34
Last Post: 06-01-2016, 04:48 PM
-
By frankprozzoly in forum Auto Detailing 101
Replies: 1
Last Post: 07-09-2014, 05:36 PM
-
By RaznStatic in forum Auto Detailing 101
Replies: 59
Last Post: 01-22-2011, 03:06 PM
 Members who have read this thread: 1
Posting Permissions
- You may not post new threads
- You may not post replies
- You may not post attachments
- You may not edit your posts
-
Forum Rules
|
| S |
M |
T |
W |
T |
F |
S |
| 31 |
1
|
2
|
3
|
4
|
5
|
6
|
|
7
|
8
|
9
|
10
|
11
|
12
|
13
|
|
14
|
15
|
16
|
17
|
18
|
19
|
20
|
|
21
|
22
|
23
|
24
|
25
|
26
|
27
|
|
28
|
29
|
30
| 1 | 2 | 3 | 4 |
|


 Reply With Quote
Bookmarks