 Thanks: 0
 Likes: 0
 Dislikes: 0
-
How to photograph and capture swirls in the sun
How to photograph and capture swirls in the sun
Here are some tips and technique you can use to take pictures of the before condition of a detailing project and also the after condition. As you look at these pictures, note how,
First I frame up the shot so you have a good idea what it is I'm taking a photograph, (type of car), or the section of the car.
Second, I zoom in on just the topic of the picture, in this example it will be swirls
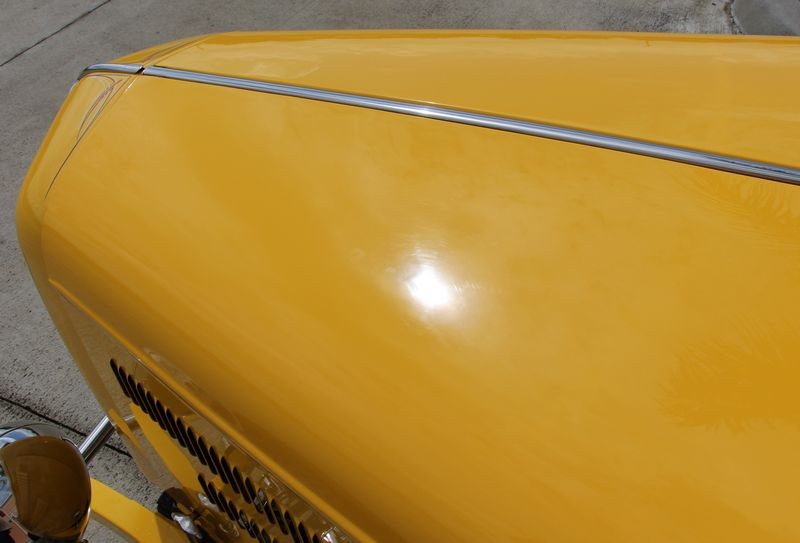
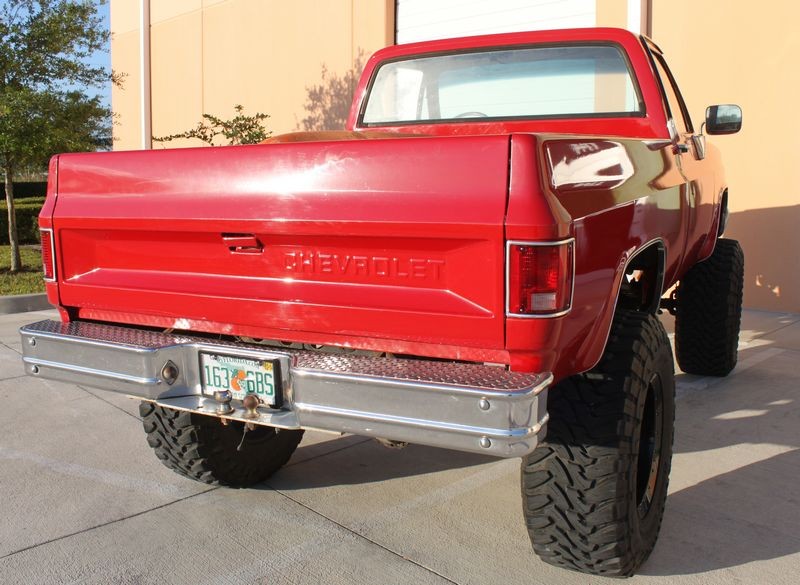
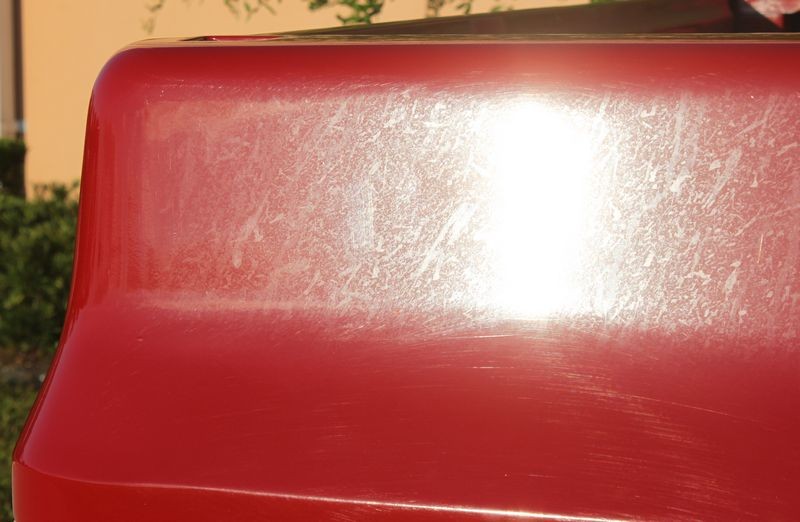
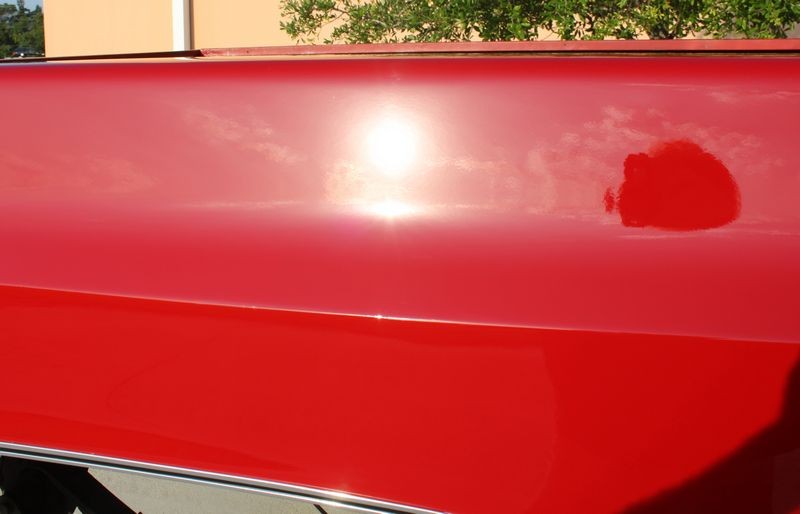
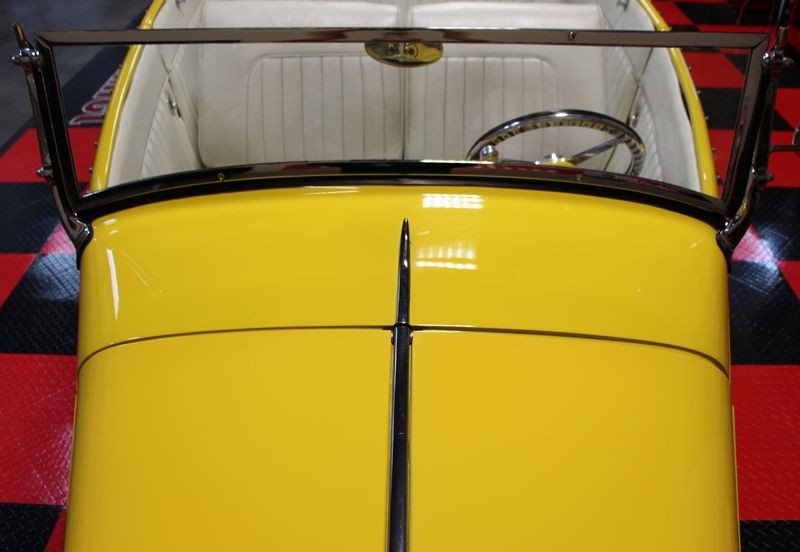
Sun on hood shot
Here I'm zoomed out and holding the camera way over my head while pointing the lens at the hood.
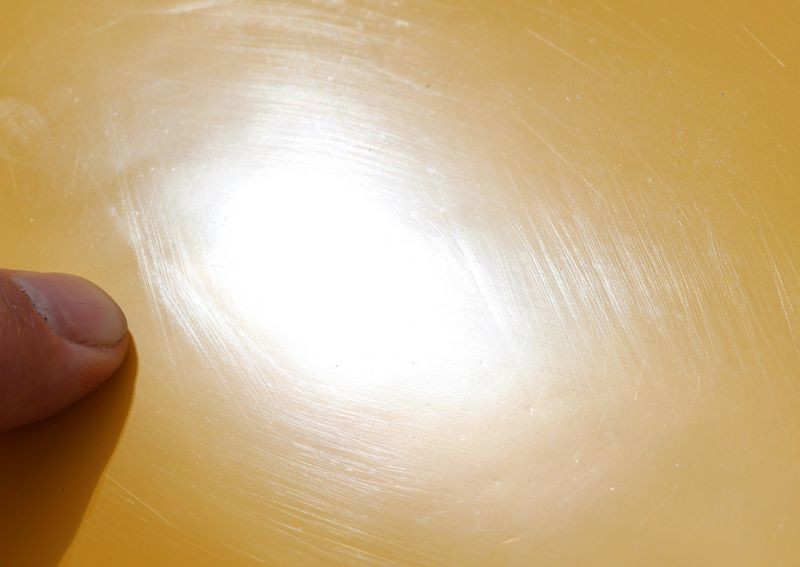
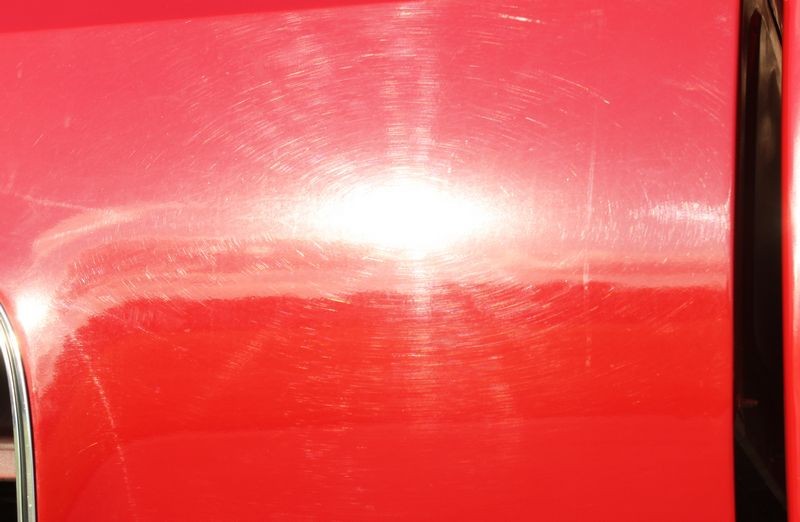
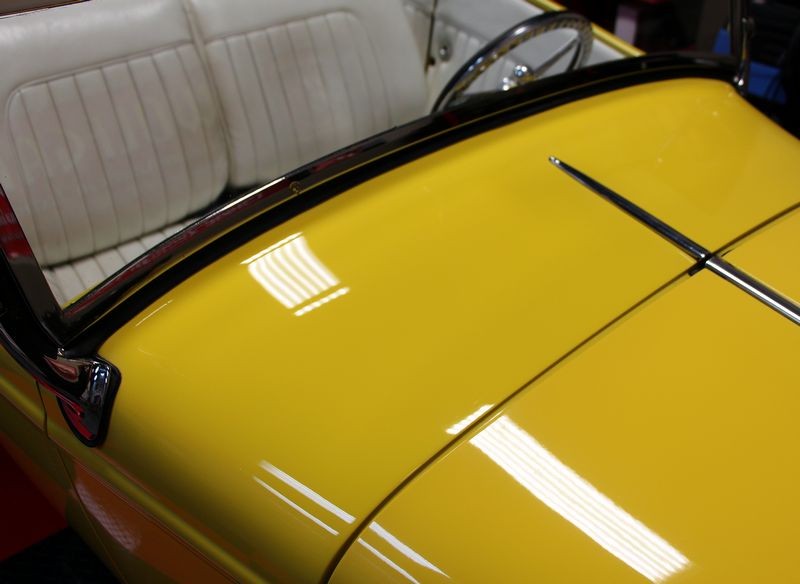
Close-up shot of swirls
Note my finger on the paint? While it looks like I'm pointing to the swirls and I am, the real reason my finger is in the shot is to give the camera a focus point on the hood. By focusing on my finger, the camera also focuses on the "surface" of the paint to capture the swirls and scratches on the surface. I have an article about this photography technique here.
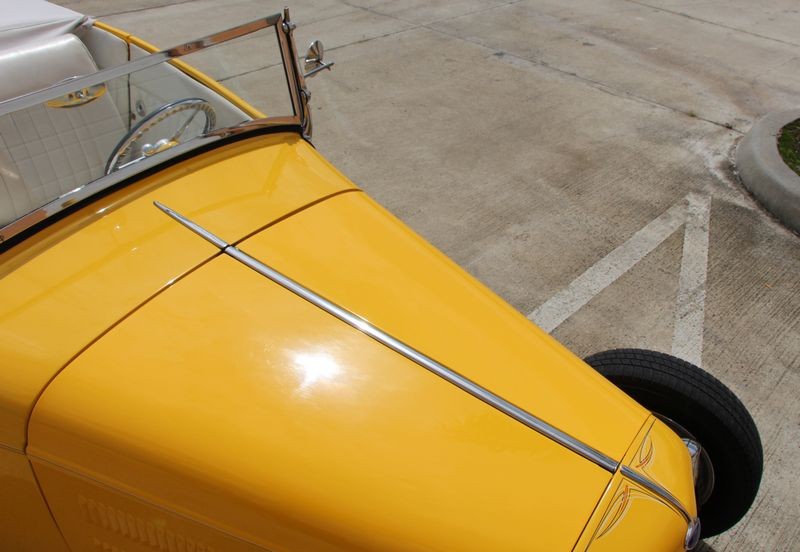
Sun on hood shot
In this pictures we've actually turned the hot rod around as we were getting ready to move it into the garage when all of a sudden, the sun poked his head out of the clouds a little better than in the above pictures. So I took a few more shots...
Hood framed up...
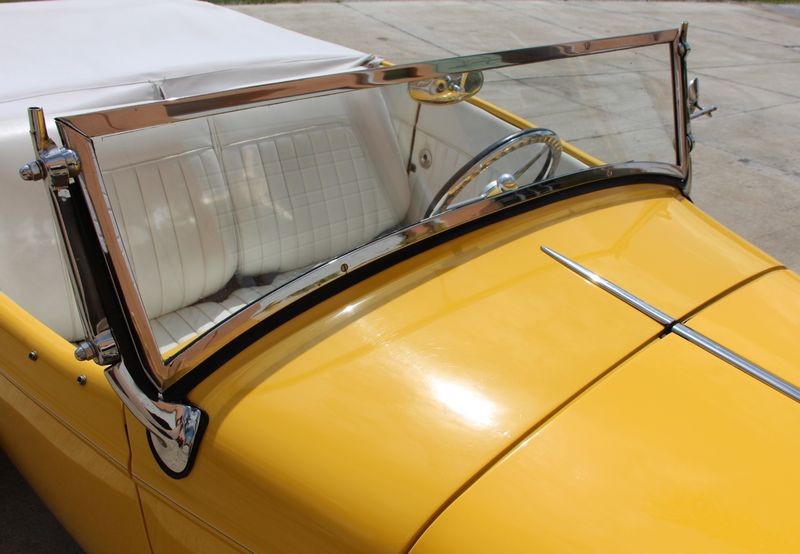
Giving the camera a focus point
Here I'm about still zoomed all the way out but holding the camera a lot close to the hood now and I've moved my finger into position.

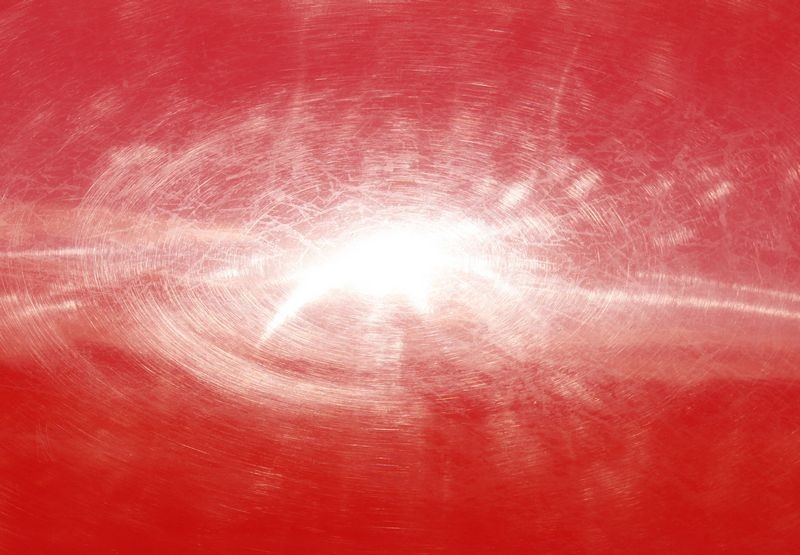
Close-up Shot
Now I'm zoomed all the way in...

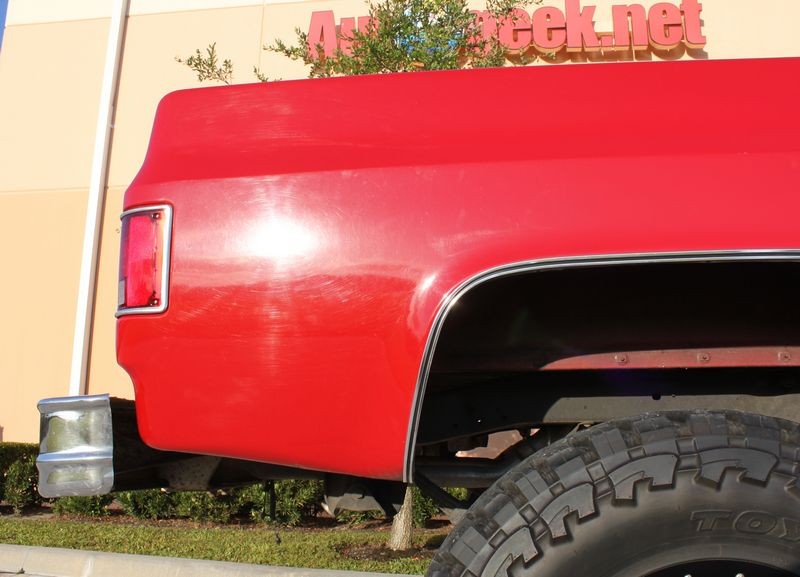
Framing-up the shot
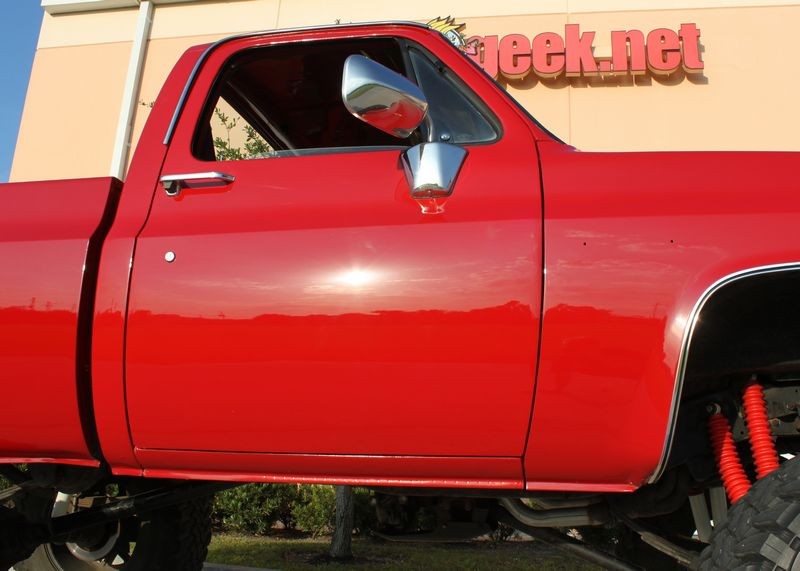
Here I wanted to show the swirls and scratches are equally distributed throughout the body panels.

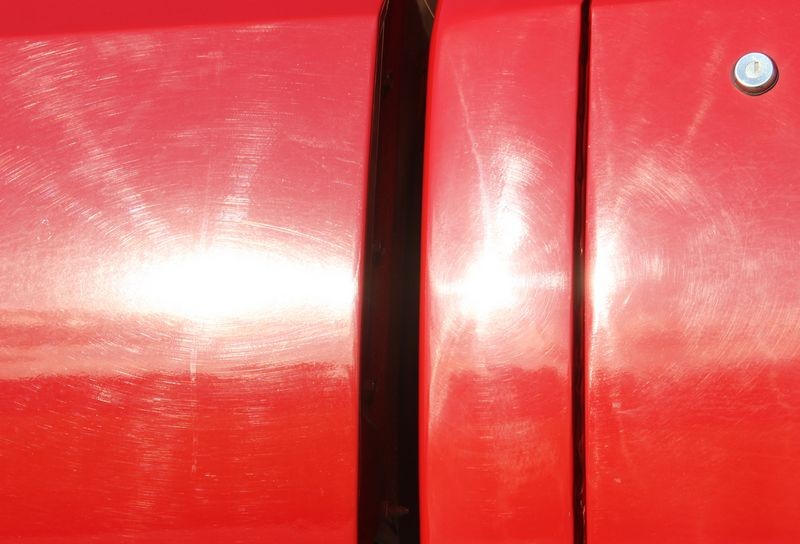
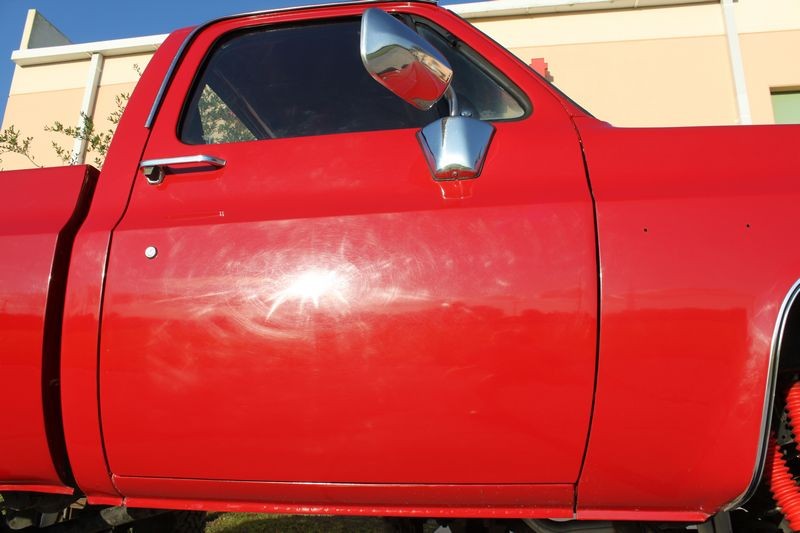
Close-up Shot
For this picture, my camera is able to use the edge of the hood and the radiator shell to focus on so I don't need to use my finger for this shot.

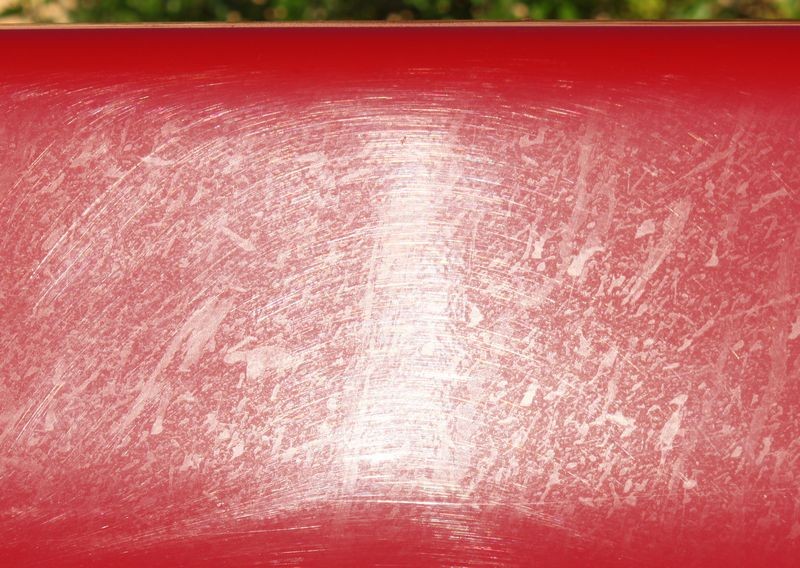
Framing-up the shot
Close-up shot

And there you go. That's how to use your camera to take pictures to show the before condition of the paint by framing up a shot and then getting the close-up shot.
By doing this I've also documented the true condition of the paint when the car arrived.

-
Re: How to photograph and capture swirls in the sun
Thanks for putting this together mike. This will help people get an understanding on capturing swirls in paint.
-
-
Re: How to photograph and capture swirls in the sun
And here's the article reference above on how to capture defects in the paint...
How-To capture swirls, scratches, etchings and other surface defects with your camera
Due credit where credit is due
This article was originally written by me, (Mike Phillips), and posted to MeguiarsOnline on May 28th, 2006 and it can be found here,
How-To capture swirls, scratches, etchings and other surface defects with your camera
Sometimes I will try to re-write articles I have written on the Internet and sometimes it's really hard to re-write what I've already written, in these cases it's easier to share the original article and provide a link back to the originating site out of respect for the other site and the law, and for good reasons of good Netiquette. I don't like seeing my articles stolen or re-written by others and then seeing my worked presented as someone else's and wouldn't do that to anyone else.
-Mike Phillips
A few tips and techniques for helping your camera to focus on the surface so you can capture the defects in the paint you're hoping to remove.
Finger Pointing Focus Technique
Besides figuring out the right camera setting for your specific camera, another quick, simple way to help your camera focus on a defect you're trying to capture with a picture is to simply place your index finger close to the defect on or hovering over the finish then carefully captures a few pictures and in most cases you'll get a couple you can use on the Internet. This works for Swirls, Scratches, Etchings, Water Spots both Type I and Type II, Stains, Oxidation, etc. Basically anything on the surface. The reason you need to give the camera something to focus on is because often times when taking shots of a large, uniform, flat surface, once any focus points are zoomed out of the picture your camera has nothing to sense and focus on.
Detailing Clay
You can also use a little piece of detailing clay because in most cases you have some detailing clay around. If the paint is clean and it should when trying to capture pictures of surface defects, then when you're done taking your pictures you should be okay to put the little piece of clay back into the large piece you took it from or just through it away. A small piece will work fine. (See picture below).
Coin
A coin can also be used if the surface is flat and horizontal like the hood. Place the coin carefully onto the paint so as not to instill a scratch. If you already have a flawless, swirl-free finish then maybe stick with the finger or clay technique. If you're getting ready to buff the car out then as long as you're careful you'll be okay; remember you're going to be buffing out the paint and likely the defect you're trying to capture with a picture.
Cobweb Swirls or Cobweb-Effect

Cobweb Swirls or Cobweb-Effect

Cobweb Swirls or Cobweb-Effect

Detailing Clay
Another way to help your camera focus on a surface defect is to place something on the surface of the paint, for example in the below picture we placed a small piece of detailing clay on the paint, then let the camera auto focus and wa-la, perfectly captured swirls, scratches and a bird dropping etching in the paint.

Random, Isolated Deeper Scratch
Scratch Removed using Ultimate Compound

An Isolated Bird Dropping Etching
How To Remove a Bird Dropping Etching by Hand using M105 Ultra Cut Compound

Photos courtesy of MeguiarsOnline.com

-
Re: How to photograph and capture swirls in the sun
Thanks for all the info Mike.
-
-
Super Member

Re: How to photograph and capture swirls in the sun
Manual focus is also a great thing to learn to use when photographing defects on cars.
The camera's auto focus system uses contrast to find focus - this can be a difficult task when you are shooting a uniform scene such as a body flat body panel... hence why Mike often puts his finger into the shot (contrast against the relative uniform color of the paint) or uses a gap in between panels... but you can simply use manual focus to ensure you are focused on the surface instead of relying on the auto focus system. This is easiest when you have a tripod so the camera remains still as you focus.
 Retired Professional Detailer
-
Re: How to photograph and capture swirls in the sun
I've been trying some of your tips when taking photos of my black car outside in the driveway, and I get some really great shots of the clouds overhead when I photograph the hood, and of the garage door when I shoot the sides. The paint or the swirls themselves? Not so much. How do you cut down on the reflections?
Thanks.
-
Re: How to photograph and capture swirls in the sun
 Originally Posted by zmcgovern45

Manual focus is also a great thing to learn to use when photographing defects on cars.
The camera's auto focus system uses contrast to find focus - this can be a difficult task when you are shooting a uniform scene such as a body flat body panel...
I was just about to ask Mike if he's tried manual focus.
Will a camera with phase detect auto focus have no issues focusing the swirls if the entire frame is filled with a single color?
-
Re: How to photograph and capture swirls in the sun
Originally Posted by SR99
I was just about to ask Mike if he's tried manual focus.
Yes. I wear glasses and using manual focus with glasses, without glasses requires the view finder also be dead on. Instead, I have my own technique called,
Fast and Furious
That is, I get in, get the shot and get out.
And I don't have all day for the volume of pictures I take so I don't want to be switching the auto focus switch back and forth and fiddling around, I've already worn out three cameras in my life in this industry.
My system works for me so that's what I share but I do agree for others, using the manual focus is an option.
I get a lot of pictures up on the Internet in linear fashion all cropped to 800 pixels wide. They never disappear and I think most of the time they tell a story.
So I'm just sharing what I do and what I know and what works for me...
Similar Threads
-
By Charlieboy1 in forum Tips, Techniques and How-to Articles for Interacting on Discussion Forums
Replies: 11
Last Post: 04-24-2018, 02:46 PM
-
By Mike Phillips in forum Tips, Techniques and How-to Articles for Interacting on Discussion Forums
Replies: 18
Last Post: 04-19-2018, 10:26 AM
-
By Nick McKees37 in forum Product Reviews
Replies: 22
Last Post: 02-03-2014, 07:00 PM
-
By swanicyouth in forum Product Reviews
Replies: 29
Last Post: 10-23-2013, 05:52 PM
-
By SR99 in forum Auto Detailing 101
Replies: 6
Last Post: 06-10-2012, 07:22 AM
 Members who have read this thread: 0
There are no members to list at the moment.
Posting Permissions
- You may not post new threads
- You may not post replies
- You may not post attachments
- You may not edit your posts
-
Forum Rules
|
| S |
M |
T |
W |
T |
F |
S |
| 31 |
1
|
2
|
3
|
4
|
5
|
6
|
|
7
|
8
|
9
|
10
|
11
|
12
|
13
|
|
14
|
15
|
16
|
17
|
18
|
19
|
20
|
|
21
|
22
|
23
|
24
|
25
|
26
|
27
|
|
28
|
29
|
30
| 1 | 2 | 3 | 4 |
|


 Reply With Quote


Bookmarks