 Thanks: 0
 Likes: 0
 Dislikes: 0
-
-
-
Re: 2008 Lexus IS 250 - Pinnacle Detail
Continued...
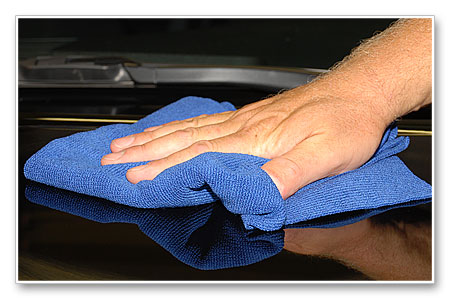
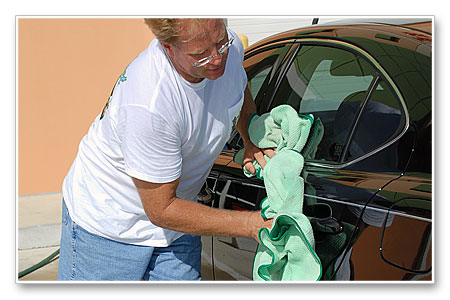
The Lexus is now perfectly cleaned and dry and ready to pull into the garage.


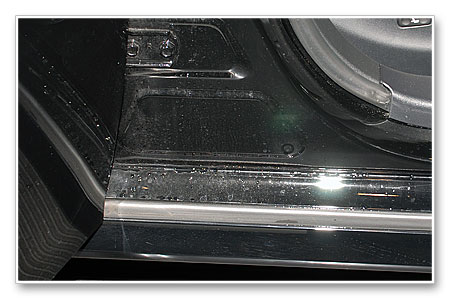
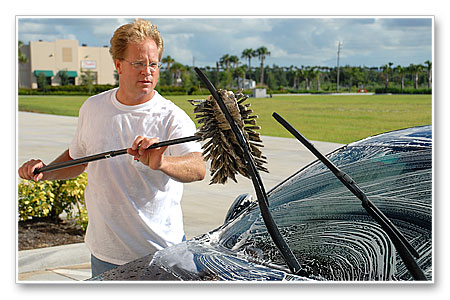
After pulling the Lexus into the garage out of the heat we then opened all the doors, hood and trunk lid so we could wipe-off any excess water out of the door jambs as well as remove any critters, leaves and sticks that accumulated over time in the channels around the rubber gaskets.
Stretching! (That's what it's called when everything's opened up)


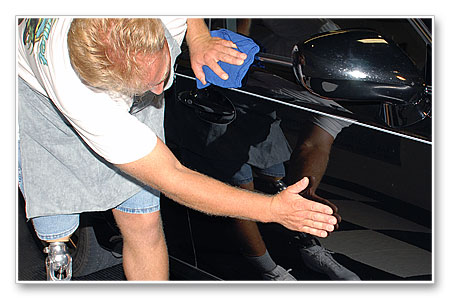
Now that the car is clean and dry we can inspect the paint by feeling the horizontal surfaces for above surface bonded contaminants as well as inspect it visually for defects like swirls, scratches and etchings.
Usually only the horizontal surfaces need to be clayed because that's where air-borne contaminants will land and accumulate over time and if not removed within a day or two, at least some contaminants will bond to the surface.

You can if you like inspect the vertical surfaces too as it is possible to accumulate contaminants like air-borne paint overspray, highway paint, tar and tree sap on these panels.
Inspection Results
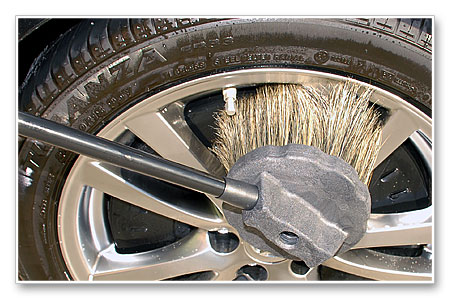
After feeling all the major panels, our inspection revealed that there was only light contaminants bonded to the surface and nothing real noticeable on the vertical panels so we'll clay the horizontal panels using the Pinnacle Ultra Poly-Clay which is a very mild clay completely safe for frequent use on cars that are well kept and parked inside or under cover at least part of each day.
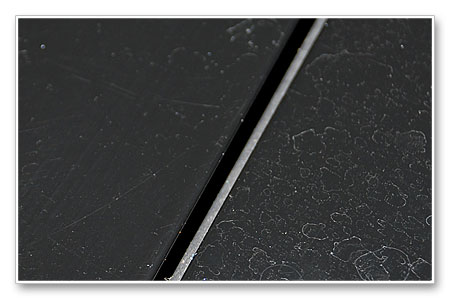
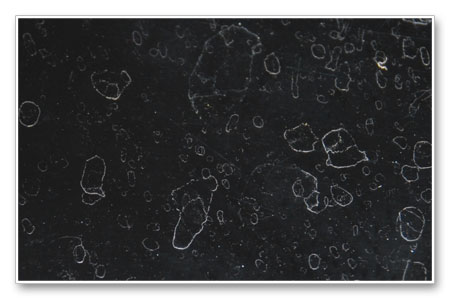
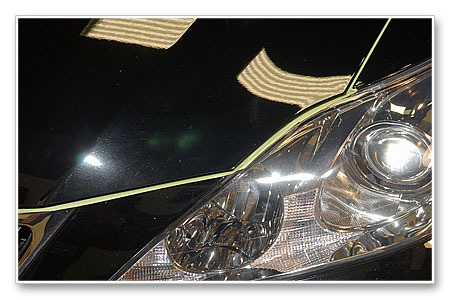
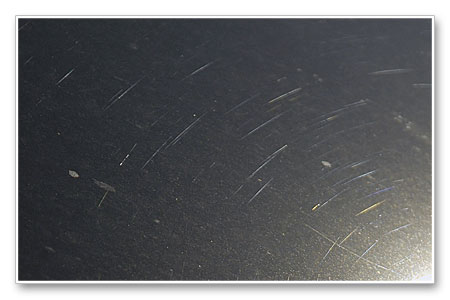
After inspecting the paint for above surface bonded contaminants we visually inspected the paint for swirls, scratches and etchings. These two photos were taken before the car was washed and most of the spots you see on the paint are mineral deposits sitting on the surface as well as some scratches (RIDS), and light swirls.

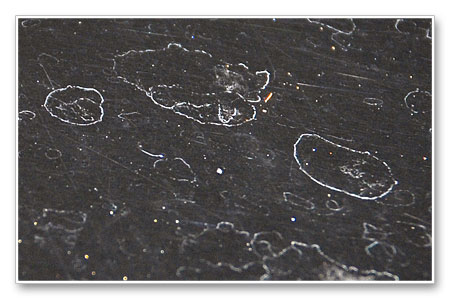
(Down below I'll post what this area looked like after claying)
After washing the car, most of the mineral deposits washed off but some did remain and claying will remove any mineral deposits still sitting on top the surface. If after claying you still see the outline of where the spots were this means the water spots actually etched the surface which means the spots are also a Type II water spot and you'll have to use a compound or swirl mark remover to remove a little paint surrounding the etchings or spots to level the surface smooth again.
See this article for more information
What it means to remove swirls, scratches and water spots out of automotive clear coats
Last edited by Mike Phillips; 08-19-2009 at 02:31 PM.
-
Re: 2008 Lexus IS 250 - Pinnacle Detail
Continued...
Now that we have a good understanding of what we're going to need to do to restore the finish on this Lexus we're going to take moment to prepare for the job.
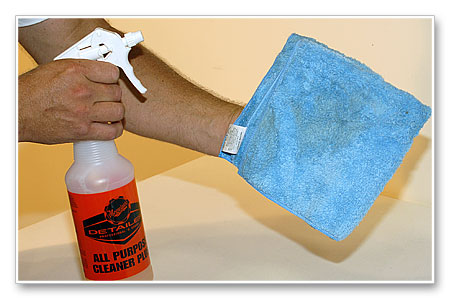
We can't stress enough the importance of working clean. I can get as D.O. as the next guy and usually more so and that starts with a clean table to hold my products, pads and microfibers. It doesn't do any good to use clean microfiber polishing cloths, applicator pads and buffing pads if you're setting them on a dirty surface.
This is pretty basic but just the same, we're using Meguiar's All Purpose Cleaner Plus with a microfiber to wipe the top of our work table clean before placing anything onto it. Not only is APC+ great for cleaning multiple surfaces on the car, it's also really handy for all kinds of cleaning jobs in the garage as well as inside the house. Be sure to get the matching OSHA approved Spray Bottle as they are pre-marked for the correct dilution levels and the hand pump to dispense the product into the bottle.

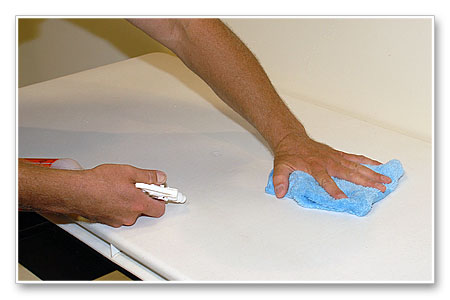
The table actually looked pretty clean but APC+ proved otherwise.
Anytime you're using new microfibers be sure to remove the tags from the edge first.

Now we're ready to assemble our products for this project.

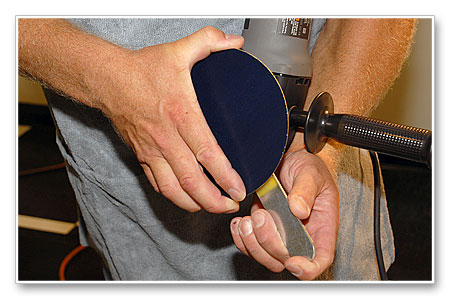
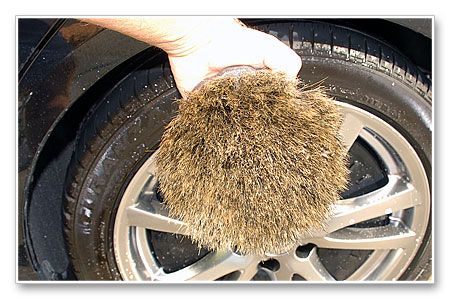
Now that are work area is clean and stocked up, we're ready to get to work. First up we'll clay the paint. Pinnacle Ultra Fine Detailing Clay can be purchased as a single 4 ounce clay bar or two 4 ounce clay bars. 4 ounces is approximately 114 grams which is very healthy chunk of clay that you can easily break into two pieces. Use one piece and save the other for another project.
Remove the cellophane wrapper

Tear the clay bar into two pieces
You can store your clay in the plastic container it comes in or some people like to squirt a little quick detailer into a Zip-lock baggie and store it this way as the clay can stick to the plastic container over time.
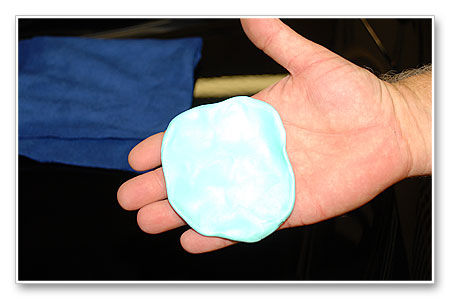
Knead the clay into a flat patty kind of like a small pancake
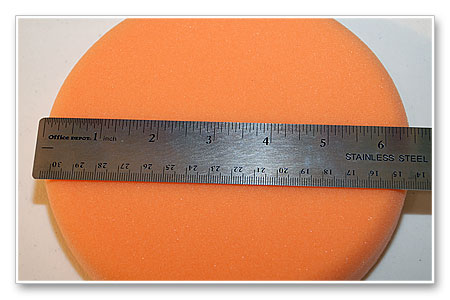
Usually a round patty of clay about 4 to 4.5 inches in diameter works well for most people.

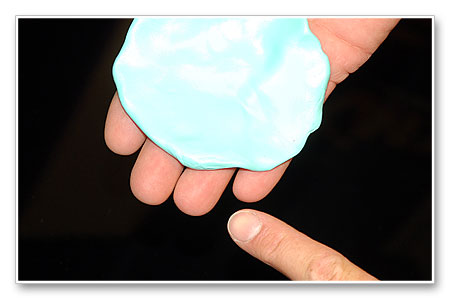
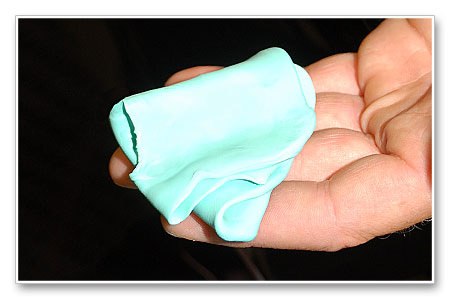
Here's a tip, place the clay patty in you hand with your fingertips extended past the edge of the patty like, I'll explain why down below.
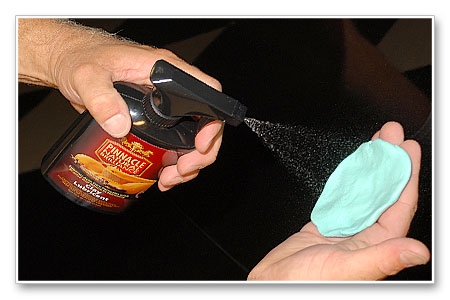
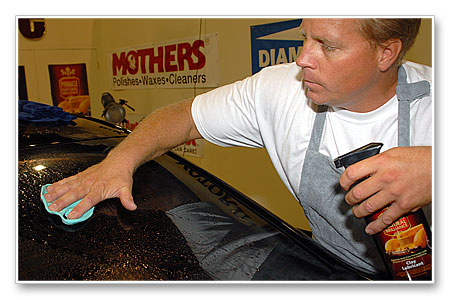
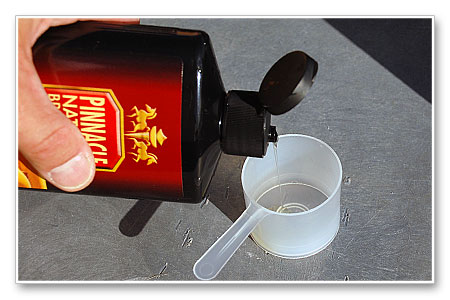
When you're ready to start claying, first mist your clay lubricant onto the face of the clay patty, in this example we're using Pinnacle Clay Lubricant.
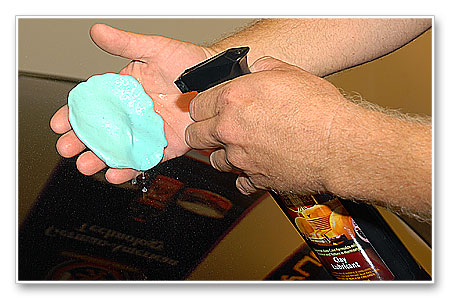
Next, spray the section you're going to clay, this is usually a section about 16" to 20" squarish in size, you don't want to tackle too large of an area at one time because you want to be thorough in your claying passes, so stick with a manageable section.
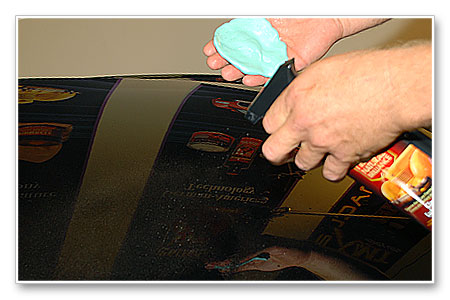
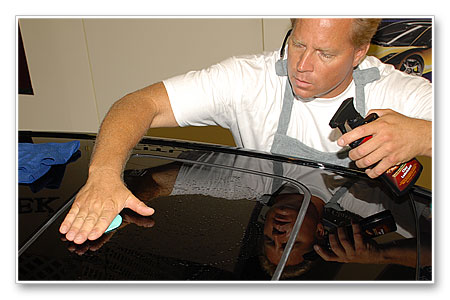
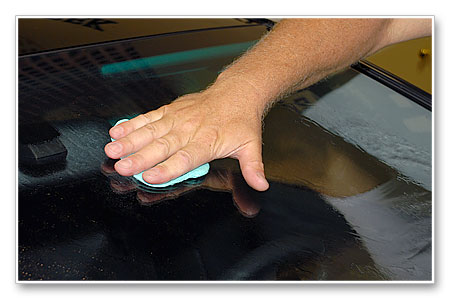
Next, using light pressure for a light light build-up of contaminants, begin moving the clay patty over the paint. You can move your hand in straight-lines or circles or a combination of both if you like. Because this detailing clay is non-abrasive to the paint, as long as everything is clean, it doesn't matter which way you move your hand because you're not instilling scratches into the paint.
In some cases you will feel the clay try to drag as you move the clay patty over the surface, this is and indicator of the clay abrading the contaminants. As the clay removes the bonded contaminants you'll notice a decrease in drag and the clay will begin to glide effortlessly over the paint. This is an indicator that this section of paint is now clean and smooth and you can stop at this time.
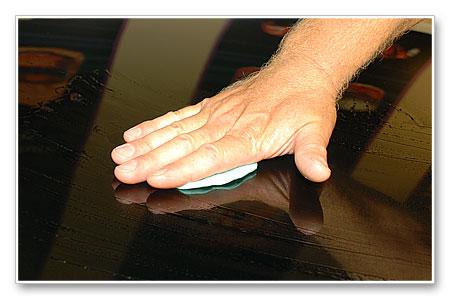
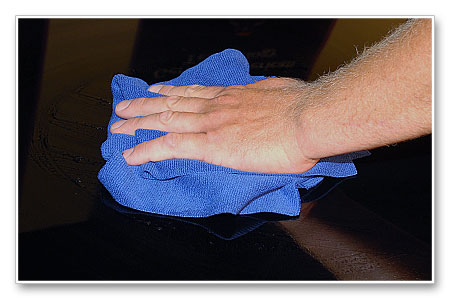
After you're finished claying this section, wipe-off the excess residue from the surface before moving on to new territory. This means having a few clean microfibers on hand and someplace clean and accessible next to the car.
After you wipe the section clean and it's dry, check the surface with a clean dry hand to insure it is in fact smooth and glassy feeling, if it is, try to remember how long you clayed the section or approximately how many strokes you used and then lock this into your memory and duplicate this to each new section you clay. Keep in mind that some bonded contaminants are more stubborn than others and may take more effort to remove or a more aggressive clay formula.
Repeat the above until you've clayed all the panels that felt contaminated wiping the clay lube residue off after claying each section.
Last edited by Mike Phillips; 08-19-2009 at 02:32 PM.
-
Re: 2008 Lexus IS 250 - Pinnacle Detail
Continued...
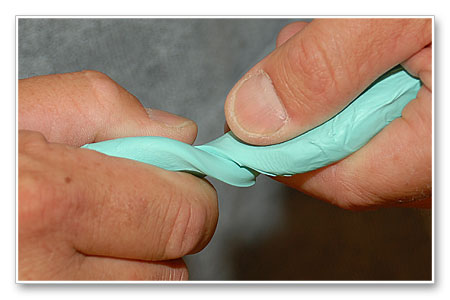
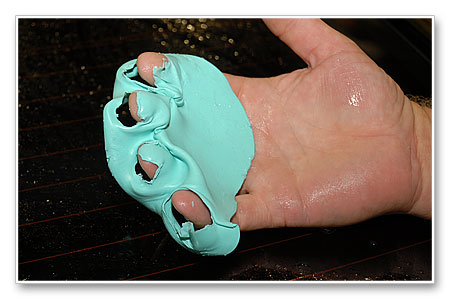
After claying each section turn your clay patty over and inspect the clay for contaminants.
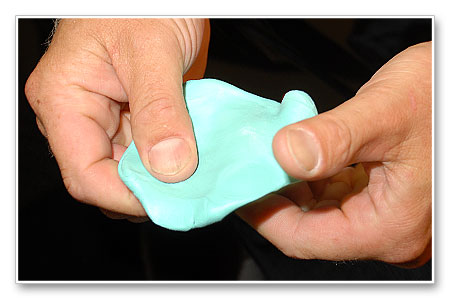
If contaminants are discovered, fold your clay in half and re-knead it to expose a fresh surface.
Most people come up with their own personal way to knead the clay back into a flat patty; after folding the clay in half and then in half again I like to form a ball of clay and the place the clay between my palms and then use my fingers to grab my opposing hand and then squeeze the clay ball back out into a starter patty that's small and still somewhat thick.
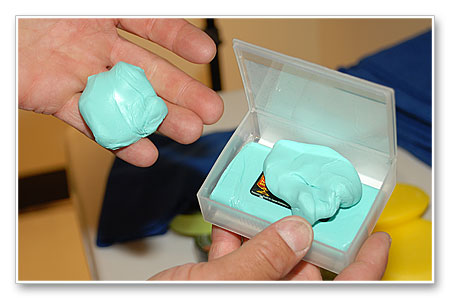
Now that I have the clay patty started I will hold the small, thick patty between my fingers and thumbs and begin methodically kneading it to again create a round patty about 4.5" in diameter.
You want it to fit across the distance of your hand with your fingers next to one another like this and with your fingertips extending past the edge of the patty.
Then get back to work, the car isn't' going to clay itself. Spray some clay lubricant onto the face of the clay and then onto the section to be clayed.
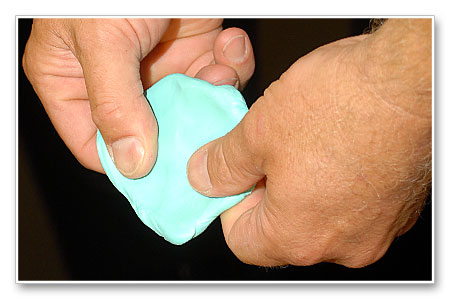
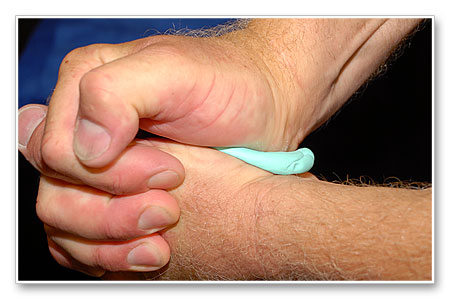
Now here's why to place the clay in your hand with your fingertips extended past the edge of the clay patty. If you position the clay like this you'll apply equal pressure over the entire surface of the face of your fingers without really thinking about it and this will help to place equal pressure over the surface of the clay patty. By doing it this way you can use the patty until you decide to stop, fold the clay over and re-knead it. In other words, you're in control.
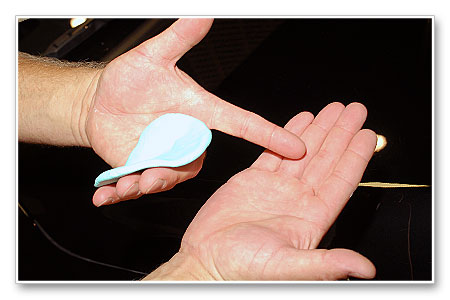
If you place your fingertips inside and on top of the clay patty, without thinking about it you tend to exert more pressure on your fingertips and you'll tend to push holes into and all the way through the clay patty.
Now you have to stop, fold the clay and re-knead it whether you were ready to re-knead it or not. Now the clay is in control.
It's just a little tip but I like to be in control of each process; you can try this technique and then make up your own mind.
If the car you're working on has any kind of vinyl graphics, stickers or pinstripes, avoid claying over them as you can easily cause the tips to lift and once the tips of any graphic has lifted it's never going to lay flat against the surface again and usually the edges will lift more and more. So be careful around graphics when claying. This also applies when working with paint care products. (Avoid rubbing paint care products over graphics)
Key Point
Claying removes Above Surface Bonded Contaminants. Claying does not remove Below Surface Defects like etchings, swirls and scratches. After claying we can see the water spots were not only mineral deposits on the surface, but they also left etchings in the paint. Luckily for this car they were very shallow and as our Test Spot will prove, easily removed with a light swirl mark remover.
Before washing
After washing
After claying
Last edited by Mike Phillips; 08-19-2009 at 02:32 PM.
-
Re: 2008 Lexus IS 250 - Pinnacle Detail
Continued...
Test Spot
Now that we have washed and dried the car and then clayed all the horizontal surfaces we a have a spotlessly clean car ready to start working on. The first thing we're going to do is a Test Spot. A Test Spot is where after you have evaluated the surface condition of the paint and decided on a plan of attack, you first test out your products of choice to a small area to see if your choice of products will work to make one small area or spot look good.
If you're happy with the results then you should be able to duplicate this process over the rest of the car and get the same results. The purpose of a Test Spot is to insure you're not wasting your time by checking first to see if your products of choice do in fact get the job done.
If you're not getting the results you're hoping for and expecting then you simply tweak your process by substituting different products, pads and in some cases different machines, (if you're working by machine), until you dial-in a system that proves itself to one small area. Once a successful system of products and application methods are dialed-in you can simply duplicate this system over the rest of the car.
Anytime you run into problems you can always post what your seeing to the Autogeek Online and the forum members will go above and beyond the call of duty to see you through to success!
Whenever you work on a car you're unfamiliar with, you want to follow the philosophy of,
"Use the least aggressive product to get the job done"
Note the word used in the above statement is aggressive, not abrasive. People remember the saying but sometimes type it out wrong like this,
"Use the least abrasive product to get the job done"
Fact is sometimes you can restore a clean, shiny, defect-free finish using something that's very gentle and not abrasive at all. The trick is to test first to see what you can do.
"You don't know what you can do until try"
Or as it relates to detailing cars,
"You don't know what you can do until you go out into your garage and do some testing and then inspect your results"
Let your results be your guide as to continue with the first products of choice or if you're not seeing the results you're looking for then it might be that you need to substitute a more aggressive product for the first step or possibly stick with the same product but change your application material or process. Application material can be anything you're using to apply your liquid product. Application process is the manner in which you're applying the product, this can be by hand or machine and if by machine your choice of machine.
In keeping with the above philosophy we're going to first try a test spot by hand and if we're not getting the results we're looking for then we'll do a test spot by machine.
Test Spot by Hand
For this first Test Spot by hand we're going to use a non-abrasive paint cleaner with a clean, soft foam applicator pad and then check our results. I've never worked on this car before so I don't know if the paint is hard or soft, or a better way to describe the paint is actually workable or polishable.
For this step we're going to test Pinnacle Paintwork Cleansing Lotion by applying it to a small section of a panel we can look down on to inspect our results like the hood.

Pour a quarter size dollop of product onto the face of your applicator pad.

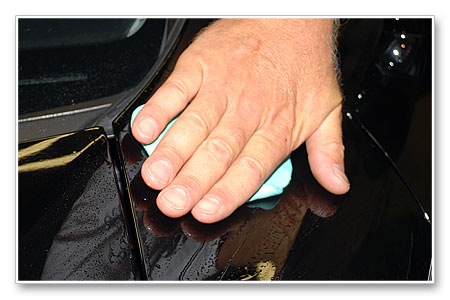
Then sandwiching the applicator pad between your 4 fingers and your thumb, spread the product out over a section about a foot squared and after first spreading it out, (so you have a uniform layer of the paint cleanser on the surface), then begin working the product using firm, even pressure. You want to try to hold the pad as flat as you can against the paint and then try to use as much of the face of your fingers as you can to apply pressure, not just your fingertips or you can accidentally induce what's called fingermarks.
Correct Technique - Hand flat to the panel, helps to spread pressure over the entire face of your fingers.

Wrong Technique - Hand to high, places too much pressure on your fingertips, this can lead to fingermarks.
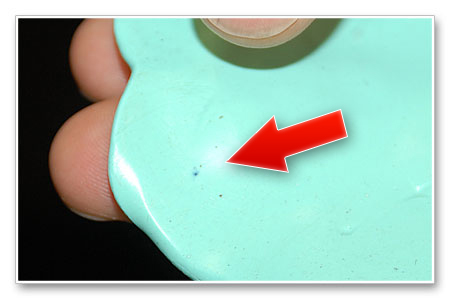
This is also a way you can inspect to see if a car has a clearcoat finish, a single stage finish or even a tinted clearcoat finish. You can't see from this picture any pigment on the pad but in fact there was some very light black pigment on the pad and that leads us to believe this is a tinted clear coat finish. Had it been a single stage finish we would have see a lot of black pigment on the pad.
After working the product for 45 seconds to a minute, wipe the residue off and inspect to see if the product is working fast enough and effectively enough to meet your expectation. In this case, there was much improvement but we could tell that in order to get the paint to our level of satisfaction we were going to want to use a machine for the cleaning step.
Machine cleaning and polishing will work faster and more effectively to remove below surface defects and restore a clear, high gloss finish.
~~~~~~~~~~~~~~~
Note: According to this thread on ClubLexus.com some Lexus models do in fact come with tinted clear coats. This thread was posted on 07-30-03, so it's somewhat dated. Maybe we can get a Lexus aficionado to post some current information on the paint systems being sprayed at the factory level.
(I could do the research but I have a to-do list longer than the Gold Gate Bridge)
Nine Types of Lexus Paint -- Interesting
 Originally Posted by squarehat

The nine types listed:
I. Solid Color-no clearcoat (202 Black Onyx)
II. Metallic/Mica Color-clearcoat
III. MIO color-two clearcoats
IV. PIO color-two clearcoats
V. Pearl Mica color-one clearcoat (color coat, pearl base, clear)--(i.e. Diamond White Pearl)
VI. Flake Pthalocyanine color--two clearcoats
VII. Solid Color--tinted clearcoat
VIII. Solid Color--no clearcoat (again lists 202 Black Onyx, not sure how it differs from type I.)
IX. Metallic Mica Color--clearcoat (the chart show all of the primer and substrate layers, too, this must differentiate it from type II).
Last edited by Mike Phillips; 08-19-2009 at 02:30 PM.
-
Re: 2008 Lexus IS 250 - Pinnacle Detail
Continued...
Doing a Test Spot by Machine
Next we're going to do a Test Spot by machine using the new Porter Cable 7424XP. Again, in keeping with the philosophy of,
"Use the least aggressive product to get the job done"
We'll first tape off a small section on the hood and try using a light finishing polish with foam finishing pad and check to see if this combination with good technique will get the finish to where we want it, if not then we'll try again using a more aggressive pad and product combination.

Now when you do a Test Spot, by hand or machine, you don't have to get this elaborate, if fact you don't even have to tape off a section. We do this because we're as D.O. as anyone and often times more D.O. than most.
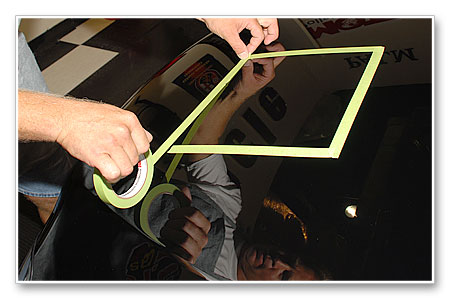
If you do decide to use painters tape then just one strip of tape on the hood to separate the before side from the test section is more than enough. For those of you wondering why we used microfibers to cover the surrounding paint that's because we want to preserve the original condition of the paint to compare our test section too and if we were to get any splatter on the surrounding paint, sometimes just the act of wiping off the splatter can improve the paint appearance and our goal is to preserve the ugly, that is preserve the original condition of the paint before we do our test section.
Sometimes you will end up with some very dramatic before and after shots, for example if you're doing a bonafide Extreme Makeover. In our case this finish is actually in pretty good shape overall in that the worst portions have light water etchings as the swirls and scratches are pretty minimal. So afterwards we didn't get any dramatic before and after shots but again, we're starting off with finish in good condition. Just to note, most of our project cars will follow this same routine as matter of consistent testing and documentation.
Mark your backing plates
If you're new to machine polishing with a DA polisher that uses a clutch, here's a tip that will help you to monitor your technique as well as what's happening at the surface level with your buffing pad.
Take your backing plates and mark them with a permanent black marker like a Sharpie; by doing this it will be easy to see if your pad is rotating or just jiggling or vibrating against the paint.
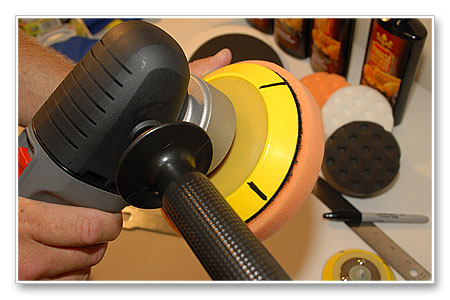
Marking the 6" Lake Country Dual-Action Hook & Loop Flexible Backing Plate

Marking the 3.5" Lake Country 3.5" Dual Action Flexible Backing Plate

Attaching the backing plate to the 5/16" spindle using the PC Spanner Wrench


Removing Below Surface Paint Defects
Anytime you're doing correction work the goal is to remove a little paint from the surface surrounding the defects in an effort to level or smooth-out the surface. More specifically you want to level the upper most surface of the paint with the lowest depths of the defects you're trying to remove as discussed in this article.
What it means to remove swirls, scratches and water spots out of automotive clear coats
For an in-depth article on how to use the PC 7424XP Dual Action Polisher check out this thread,
Tips and Techniques for using the PC 7424XP Dual Action Polisher to remove Below Surface Defects
When you attach the foam pad to the backing plate the goal is to center it as best as you can.

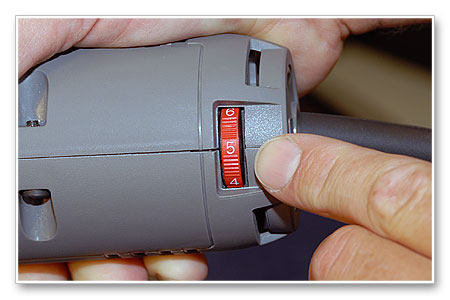
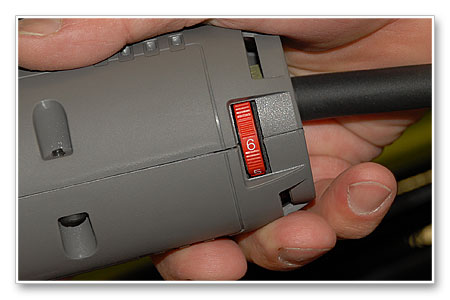
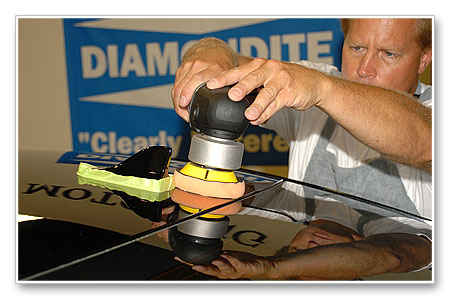
Set the speed setting to the 5.0 on the variable speed dial. If you prefer you can bump it up to the 6.0 setting for even more power but for our test spot we're going to use the 5.0 speed setting.
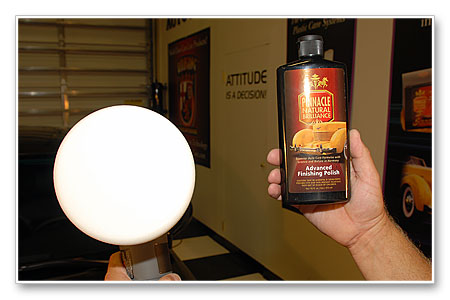
For this first test we'll be using the Pinnacle Advanced Finishing Polish with a LC Flat 6.5" White Light Cutting Foam Pad
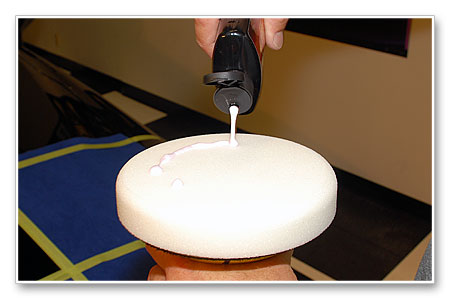
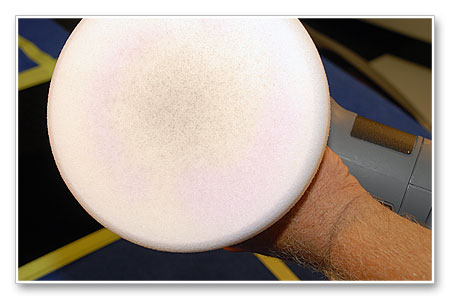
Apply some product to the face of the pad. For your test spot you don't need a lot of product so don't overdo it but take into mind that if your pad is new and/or used but clean and dry, then some of your product will penetrate into the pad. If you like you can take a little extra time to work the product over the entire face of the pad as this will insure the entire surface of the pad is working. For our test spot we're going to skip this procedure as we're pretty confident we're going to find out if this combination of pad and product is going to remove the defects after 6 to 8 passes over this small test section.

After only buffing for a few passes you can see a little pigment coming off the tinted clearcoat. This is normal for a tinted clear and nothing to worry about.
After wiping the test spot off and inspecting the results, we didn't feel this combination of product was working fast enough or effectively enough to meet our expectations.

While the paint was greatly improved, we felt we would need to substitute a more aggressive pad and product to produce the quality of finish we and our customer expects. If the car in question is a daily driver, keep in mind it's going to see everyday wear-and-tear and for this reason don't try to remove each and every one of the deeper defects as this means removing more and more paint. Remember, this is a daily driver, not a show car.

Best Practice
Anytime you're removing a buffing pad from off the backing plate, do your best to pull the pad back at an angle, not straight off as this can loosen the Velcro on the pad and the backing plate over time.

Last edited by Mike Phillips; 08-19-2009 at 02:33 PM.
-
Re: 2008 Lexus IS 250 - Pinnacle Detail
Continued...
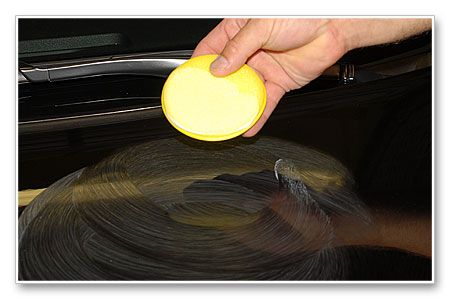
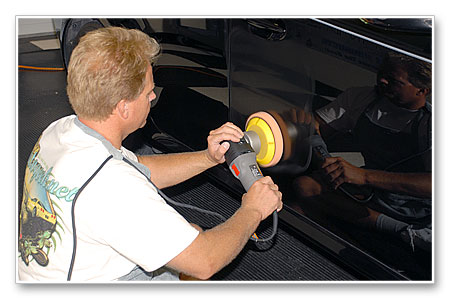
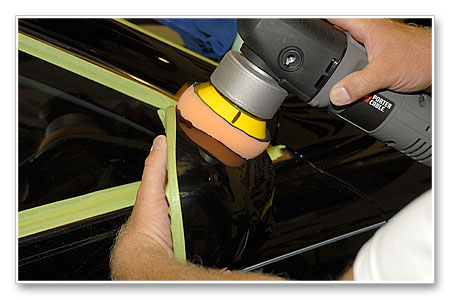
For our next Test Spot we're going to use the Lake Country 6" Orange Foam Flat Cutting Pad and for our swirl remover we're going to test the Pinnacle Advanced Swirl Remover.
Like the LC White Finishing Pad we tested first, this is a 6.5" diameter pad and while some will say larger size pads like these are too large to do any substantial corrective work with a dual action polisher, the new PC 7424XP has ample power to keep the pad rotating under pressure as long as you hold the pad flat against the surface.
Do you best to center the pad onto the backing plate.
Using the handle is an option, the new PC 7424XP has new body design that's smaller and more rounded making the head of the unit easier to grasp and hold onto for extended periods of time. Most people that I've met that have tried their polisher without the handle never look back. If you use the handle be careful as on some cars when buffing out an angled panel you may find the handle coming precariously close to an adjacent panel where it could possibly mar or scratch the paint. My personal preference is to use this polisher without the handle.

Ready to go...

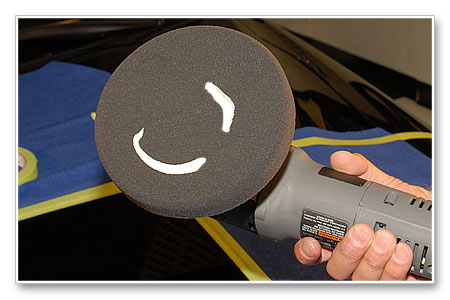
Place some product directly onto the face of the pad, because the pad is brand new we have applied a little extra product as some of the product is going to seep into the pad itself.

Spread your product out first
To start, place the face of the buffing pad with the product on it flat against the paint. Then turn the polisher on and quickly spread the product out over the entire section you're going to work. You can do this rather quickly because at this point you're not trying to remove defects youre just trying to spread the product out over the paint so that you have a uniform film of product spread out over that section.
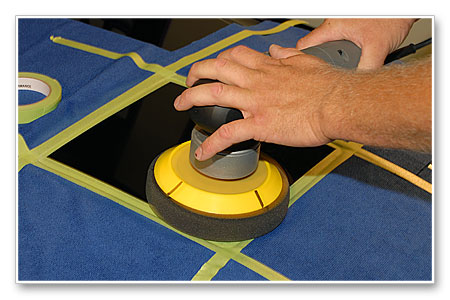
Overlap your passes by 50%
After you spread the product out, now it's time to slow your Arm Speed down and begin making overlapping passes usually in a back and forth, side-to-side pattern.
The goal is UMR, that is Uniform Material Removal.
The reason for this is so that you remove an equal amount of paint over each section and in turn over the entire car. In order to do this you need a method that you can control and duplicate and for most people following a back and forth, side-to-side pattern works because its easy to remember, easy to do and easy to duplicate over and over again.
The definition of a pass
There are two definitions of the word pass as it relates to machine polishing with any type of machine.
Single Pass
A single pass is just that. It's when you move the polisher from one side of the section you're buffing to the other side of the section you're buffing. That's a single pass.
Section Pass
A section pass is when you move the polisher back and forth, or front to back with enough single overlapping passes to cover the entire section one time. That's a section pass.
How many section passes to make to one area of paint
In most cases if you're removing any substantial below surface defects you're going to make 6-8 section passes to the section youre working before you either feel comfortable you've removed the defects or you're at the end of the buffing cycle for the product you're using.
Years ago, when trying to figure out how to teach a person how to buff out a car using a keyboard I came up with the term Section Pass or Section Passes.
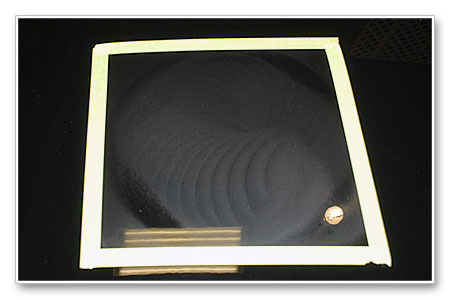
A section pass or passes is the way you move a polisher to buff out a section of paint. You can't buff out entire panels at a time as paint is too hard and many panels are too large to actually buff out an entire panel at one time. So you take larger panels and divide them up into smaller section like you see in this picture.

After making 6 to 8 section passes we could again see a little pigment transferring onto our pad indicating a tinted clearcoat finish.

Next we wiped the polish residue off our test spot

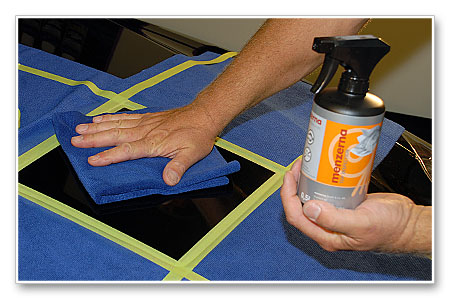
Then we chemically stripped the paint using Menzerna Top Inspection. before inspecting the results using a Brinkman Flashlight. In this picture we're actually using a Brinkman Halogen Flashlight which doesn't actually work as good as the Brinkman Xenon Flashlight but at the time we didn't have the Xenon light handy. (We do now, we have two of them for the AG Garage).


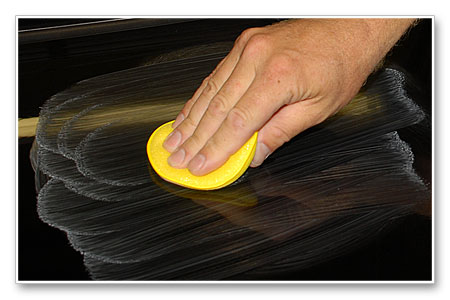
The water spots, swirls and scratches were for the most part completely removed which meets our expectations. Next we switched back to the less aggressive Pinnacle Advanced Finishing Polish with a Lake Country Flat 6.5" White Polishing Foam Pad we did our first test spot with to re-polish the section and maximize the gloss and clarity.


After wiping off the finishing polish residue we applied Pinnacle Liquid Souveran using a Lake Country 6.5" Charcoal Gray Finishing Pad.

When it comes to applying a finishing wax or paint sealant the goal is to spread the product out and then work the product into the paint to whatever degree is possible. For this the 3.0 to 4.0 speed setting works best. Anything slower than 3.0 is just to slow and your buffing pad will tend to feel like its dragging across the paint as you move the polisher forward.

When applying a finishing wax or paint sealant, a good rule of thumb is to make 2-3 passes over each square inch.
After applying the Souveran, we're going to give it some to to let it set-up. In the mean we'll start taping-off any plastic or rubber trim on the car.
Last edited by Mike Phillips; 08-19-2009 at 02:33 PM.
-
Re: 2008 Lexus IS 250 - Pinnacle Detail
Continued...
Taping off trim isn't an excuse to be sloppy or work faster than you should, it's a form of cheap insurance to save you time cleaning up after the detail job. We used 3M Scotch 233+ Premium Automotive Masking Tape and lucky for us there wasn't too much rubber or plastic trim to have to cover up.

Often times the plastic surrounding the windshield wipers is black pebble textured plastic and this type of plastic is very difficult to remove splatter off of not that I plan on throwing any splatter but an ounce of prevention is worth a couple hours of painstaking clean-up work.
I usually use a beach towel because they're fairly long and work well to cover the plastic between the lower part of the windshield that leads to the engine compartment. Since I didn't have a beach towel handy we used two Cobra Guzzler Waffle Weave Microfiber Drying towels.
These are the same 16 x 24 size we used to dry the car, (not the same towels though), and two were long enough to completely cover the plastic surrounding the windshield wipers. It's important to make sure that whatever you use to cover the plastic, as well as the windshield wipers, doesn't bind anywhere around the hood hinge or with the hood so you can safely close the hood without doing and damage.
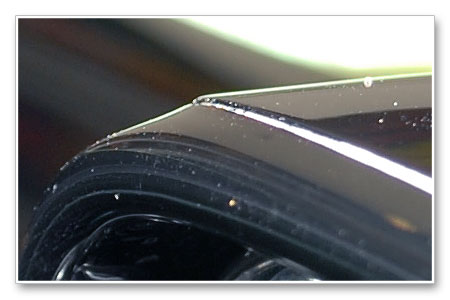
The Lexus IS 250 has a rubber gasket that runs all the way around the hood and is exposed, so if you don't tape this off be careful not to run your polisher over it. We're going to tape it off.


The gasket is taped-off and the hood is now closed.
This is why I tape-off everything I detail, it's cheap insurance to prevent dried polish and wax residue from getting into cracks and crevices like you see in the two pictures below. This residue was left by the detailer who detailed this car before we got it. We'll do our best to remove this so the owner doesn't blame us.
Anytime you're detailing cars for customers and you find dried residue like this, it's a good idea to take a picture of it to document you didn't do it and also show the owner. Doesn't even hurt to have them see you documenting it as it shows them you're paying close attention to their car and you take your job seriously.
Ugh... someone else's wax in the cracks...
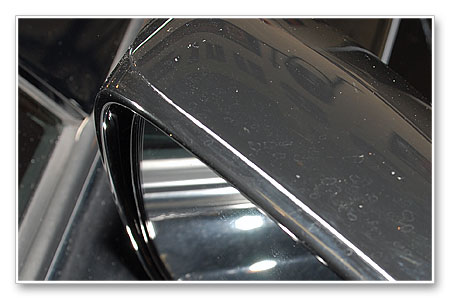
This rear view mirror housing also has a very sharp edge between the seams where the dried wax is stuck and if you run a buffer over this edge you'll burn right through it and expose whatever's under the black paint, (probably black plastic but you never know).

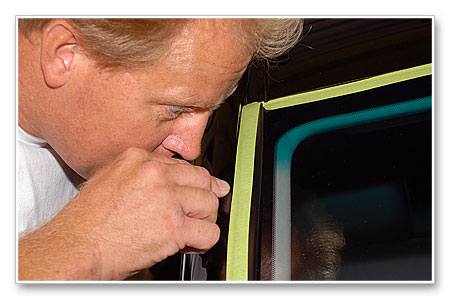
Here we've taped-off the rubber gasket between the glass and the window frame and I'm pointing to show that there's about an 1/8th of an inch of paint that's not going to get buffed with either of the two polishing steps. After the correction steps we'll remove the tape and carefully wax these areas for a uniform look that will match the polished areas next to the tape line. While not perfectionist detailing in some eyes, remember this is a daily driver, not a show car. You can invest more time and just run the tape down the rubber and get it close to the edge of the panel if you want or just overhang a little like I did here. It's your choice based upon what you're trying to accomplish and how much time you want to invest.
Custom hand applied pinstripes look cool but they are sure a pain to buff around. You never want to buff on top of them as it's pretty easy to remove quite a bit of the pinstripe paint very quickly and that's not going to be any fun to show the owner. In cases like this, carefully buff up to the stripe but don't buff on the stripe.

We did tape off the emblems to keep splatter from getting in-between the letters and later we just hand waxed them as best as we could.

Ready to buff. If I were using a rotary buffer on this car I would also cover the wheels and tires up as a rotary buffer can throw splatter quite a distance. Not that I would ever throw splatter with a rotary buffer.

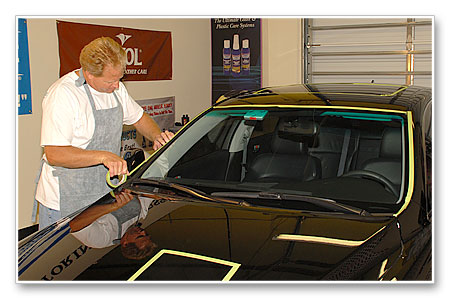
Now that we've taped-off the car it's time to remove the tape surrounding our Test Spot and then carefully wipe-off the Souveran wax.


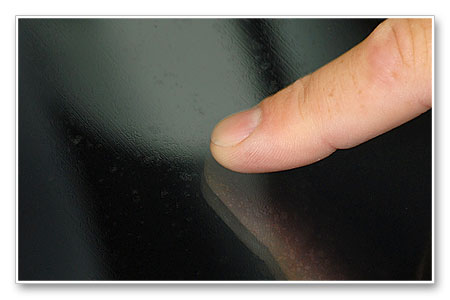
The Swipe Test
The directions on most labels for the various waxes and paint sealants on the market will state to allow the product to dry for 15 to 20 minutes or allow the product to dry to a haze. These are general indicators. A more specific indicator is called the Swipe Test.
The Swipe Test is where you take your clean finger and give a waxed panel a brisk swipe with your clean fingertip. Then you inspect the swiped area to see if it's clear and glossy or if it looks smeary. If it's clear and glossy then this indicates the wax or paint sealant is ready to remove. If the swiped area looks smeary then this indicates wax or paint sealant is still wet and it needs more time to dry. Simple and accurate.
Removing the dried wax or paint sealant
When the Swipe Test indicates the wax or paint sealant is ready to remove, you can remove it the traditional way by hand or you can use a microfiber bonnet on a foam cutting pad on your DA Polisher to remove it.
Removing Wax by Hand
Removing wax by hand is pretty basic but here's a few tips to help insure you remove the wax in gentle manner so as not to instill any swirls or scratches back into the paint.
First, fold your microfiber polishing cloth 4-ways to provide you with a thick, plush wiping cloth with 8 dedicated sides for removing wax. The thickness of a folded polishing cloth will also help to spread out the pressure from your hand.
Next, and this is key, place the microfiber onto a panel and then place your hand on top of the microfiber polishing cloth and then gently twist the microfiber a few times like this,

This is called breaking the wax or breaking the wax open.
Once you have a shiny spot, turn the microfiber over to a clean side and place it back onto the shiny spot. Now from here, take your hand and do the Pac Man, which means start taking little bites out of the wax coating using overlapping circular motions.
Re-fold your microfiber to a new, clean side often and also shake your microfiber polishing cloth before re-folding to allow dried wax to fall off of it.
The idea is to break open the continuous layer of wax and then once you've broke open a spot, start to creep-out. No, I don't mean get weird on us, I mean move-out from the shiny spot by taking little bites out of the dried wax. This is a very gentle way to remove wax and there are two key things to keep in mind,
- Always use your best, softest microfiber polishing cloths.
- Taking little bites, not big bites.
A 16" microfiber folded 4-ways gives you a surface area for your hand that is 8" square with plenty of cushion to spread out the pressure from your hand.
As long as you're only taking off little bites or swipes, the microfiber cloth will have more leverage over the bond the wax has on the paint and thus the wax will wipe off easy. This assumes you have a stronger arm than my elderly Grandma bless her soul.
Continue this method and work your way around the car. Have plenty of premium quality microfiber polishing cloths on hand and switch to a new, clean microfiber as the current one loads up with dried residue. I like to have a cloth in each hand as often times I'll use one hand to support myself while I'm removing wax from off lower panels. This way I don't get dirt or finger oils on the freshly wiped-off paint.

The after results were more than satisfactory.

Our Test Spot with the Pinnacle Brilliance System produced the results we were looking for and gave us the confidence to duplicate this process over the rest of the car.
Now the work step begins. The work step is usually the first correction step as that's the step that takes the longest and has to be executed perfectly as it will determine your end-results.
This first correction step takes the longest of all the steps and if you don't have 4-6 hours minimum to invest into this first polishing step then you might consider breaking the car up into sections and only tackle specific section at a time.
For example, on one Saturday maybe just tackle the roof and A and B pillars. The next Saturday tackle the hood or maybe the hood and front fenders. Make sure you set aside enough time to complete each panel you polish all the way through to the waxing or sealing step so you can put the car back into service.
Last edited by Mike Phillips; 08-19-2009 at 02:35 PM.
-
Re: 2008 Lexus IS 250 - Pinnacle Detail
Continued...
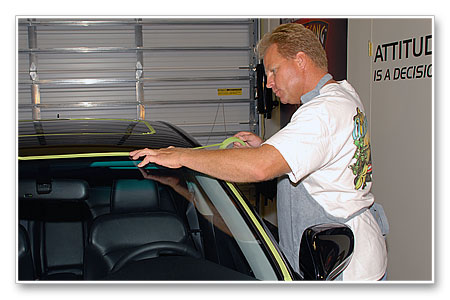
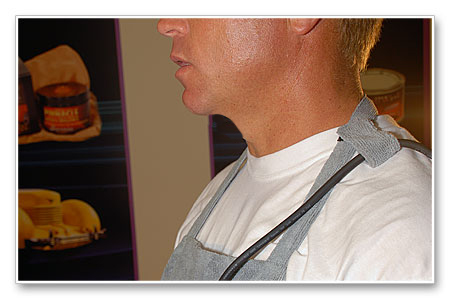
Microfiber Detailing Apron
I've never been on Mr. Blackwell's Worst Dressed List but with this smock made by the Edge Company, I'm probably in the running. Forget how it looks however because what's more important is that it's made with a very soft and plush microfiber and when buffing out a customer's car there are times when it's going to be hard not to lean against some portions of the car.
Most smocks are made out of a cotton fabric with a flat sheen which doesn't offer any cushion and is a lot less gentle to paint if by accident you should rub against it. While a good quality cotton smock is better than nothing, they just don't compare to the plushness of microfiber.
When I buff out cars it's not about how I look, it's about how the paint looks, that is how the paint looks after it's polished to perfection. So say what you want about the smock and how it looks when someone's wearing it as you're entitled to your opinion but once you get past how it looks I'm here to tell you this is the best smock on the market when it comes to working safely around thin, delicate clear coats. Maybe we can get a black one in the future that looks better?
This smock also includes ties on the shoulder and hips to connect your electrical cord to so that the cord doesn't come into contact with the paint where it could potentially mar or scratch it.

Remember to keep the size of your work area to no larger than around 16" to 18" inches square or smaller, don't tackle to large of an area at one time.

Ergonomics
Good technique includes incorporating good ergonomic practices. When buffing out horizontal panels, dont stand with your feet together because if you bend forward that will place a lot of weight and stress on you lower back. Instead, try to place one foot in front of the other about a foot or so in distance and keep your feet spread apart about the distance of your shoulders for good stability.

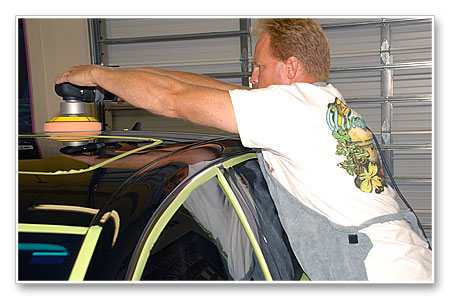
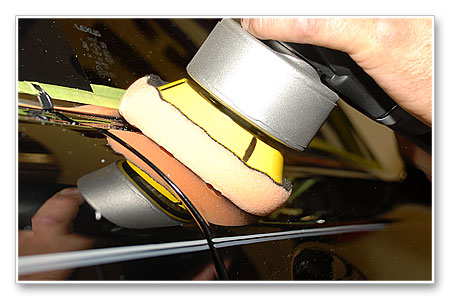
After buffing out the major panels we then moved onto the minor panels and for this we switched over to the CCS 4 Inch Spot Buffs Foam Pads and a 3.5" Dual Action Flexible Backing Plate
We're going to duplicate the same process we did using the 6.5" pads and products, just step it down a notch to tackle all the thin panels. Smaller pads enable you to avoid buffing on top of hard body lines. They also fit better for panels like the A-Pillars and B-Pillars in the front and rear of the car.
Center the pad as best as you can on the backing plate.

Apply an ample amount of product to the face of the pad. Next we'll use the Kissing the Finish Technique, or the lazy man's method of applying wax to the paint when machine waxing, only in this situation we're not applying a wax but using the technique to apply a finishing polish. Different products, same technique. (See this page for more information on the kissing the finish technique)

The Kissing the Finish Technique is where you place a strip or bead of product onto the face of your pad and then instead of laying the pad against the paint where pressure will force most of the wax into the inside of the pad you just dab the pad down onto the surface at an angle and deposit a little bit of the product onto that section of the paint.
In other words you use the pad to lightly kiss the finish.
Continue this until you've deposited most/all of the product that was on the face of the pad onto the car panels. It doesn't look pretty but this method works well and is easy to do on the fly.

Now with the pad flat against the paint, turn the polisher on and begin working the product still on the pad over the car's panels.

When you come up to a small dab of product on the paint simply tilt the polisher a little and snag the product and pull it under the pad and then lay the pad flat and continue working the product against the paint. Repeat this as you work your way around the car. Not a perfect system but the fast, lazy man's method.


We used the 5.0 Speed setting for most of the panels but for any stubborn defects we amped up to the the 6.0 speed setting.

As you come up to a dab of product, tilt the polisher but keep a portion of the pad against the paint at all times or the polisher will speed up very quickly and your pad may go flying across the room.

After you get the product under the pad, lay the pad flat against the paint with the product now trapped beneath the pad and the paint and continue working the panel. With this method you won't have any splatter problems.
For components like the mirrors, brace them with one hand while polishing them with the other hand. The new smaller, ergonomic shape of the PC 7424XP makes doing this kind of work easy.
Small pads come in hand for tight areas and enable you to avoid buffing right on top of hard, sharp body lines as well as rubber and plastic trim.
Lots of tight areas around the license plate, rear emblems and bumper.

More thin panels at the front of the car.

Last edited by Mike Phillips; 08-21-2009 at 12:16 PM.
Similar Threads
-
By Mike Phillips in forum How to articles
Replies: 9
Last Post: 08-20-2019, 10:25 AM
-
By prateek07 in forum How to make money detailing cars
Replies: 1
Last Post: 11-21-2016, 07:31 PM
-
By kc's in forum Show N' Shine
Replies: 4
Last Post: 07-16-2010, 01:19 PM
-
By maxisiri in forum Auto Detailing 101
Replies: 0
Last Post: 07-31-2009, 05:33 PM
-
By Thejoyofdriving in forum Auto Detailing 101
Replies: 28
Last Post: 08-06-2007, 12:16 AM
 Members who have read this thread: 0
There are no members to list at the moment.
Posting Permissions
- You may not post new threads
- You may not post replies
- You may not post attachments
- You may not edit your posts
-
Forum Rules
|
| S |
M |
T |
W |
T |
F |
S |
| 31 |
1
|
2
|
3
|
4
|
5
|
6
|
|
7
|
8
|
9
|
10
|
11
|
12
|
13
|
|
14
|
15
|
16
|
17
|
18
|
19
|
20
|
|
21
|
22
|
23
|
24
|
25
|
26
|
27
|
|
28
|
29
|
30
| 1 | 2 | 3 | 4 |
|


 Reply With Quote


Bookmarks