 Thanks: 0
 Likes: 0
 Dislikes: 0
-
How to do a Test Spot using the Flex 3401
Video: How to do a Test Spot using the Flex 3401
The below is a portion taken from this write-up,
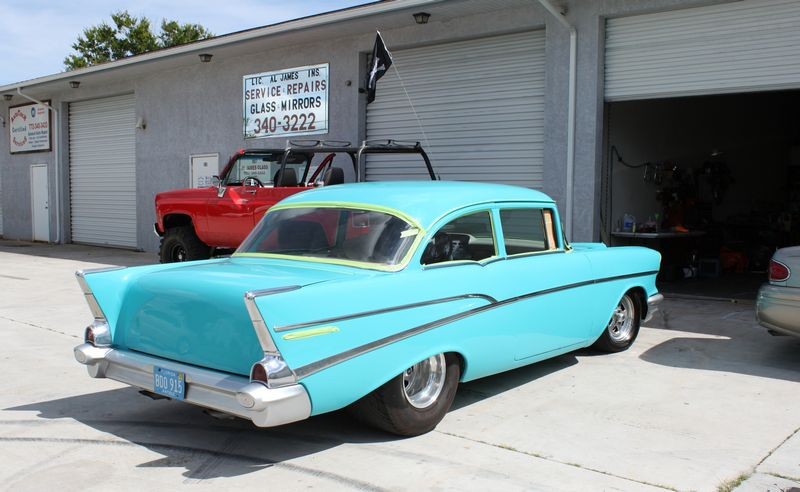
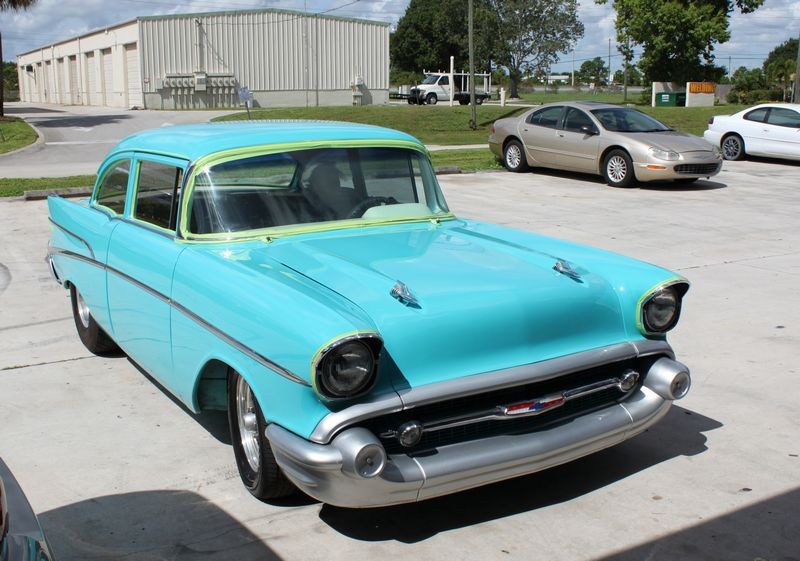
1957 Chevrolet Belair Extreme Makeover - Flex 3401 & Wolfgang Smackdown!
Note: You can swap out different pads and chemicals for your test spot, the important point is to test the products, pads, tools and your technique to one small area first, and then check your results before attempting to buff out the entire car.
It does help to actually lay down a strip of tape of tape and then just work on one side of the tape, this will help you to better see the changes taking place.
Make sure the results from your Test Spot meet your expectations, if they don't then start a thread on this forum and let us know what you're seeing and our online community will do their best to help you tweak your technique and see you through to success!
~~~~~~~~~~~~~
Begin Copy & Paste
~~~~~~~~~~~~~
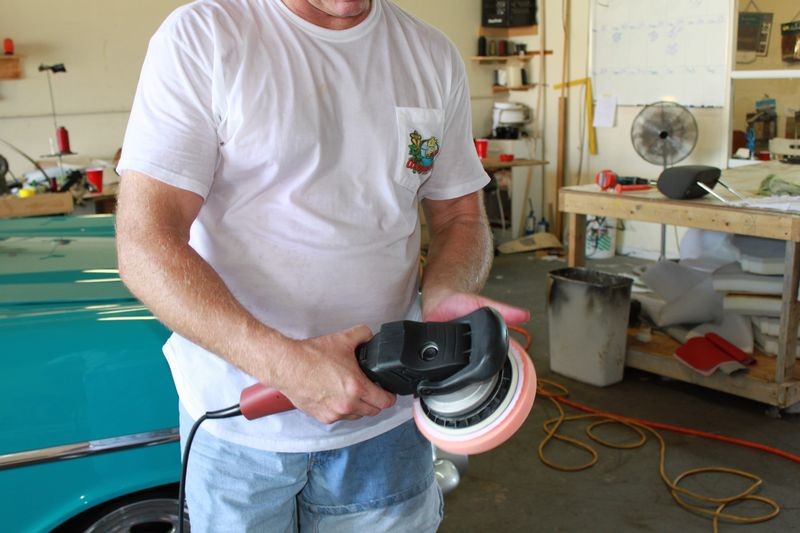
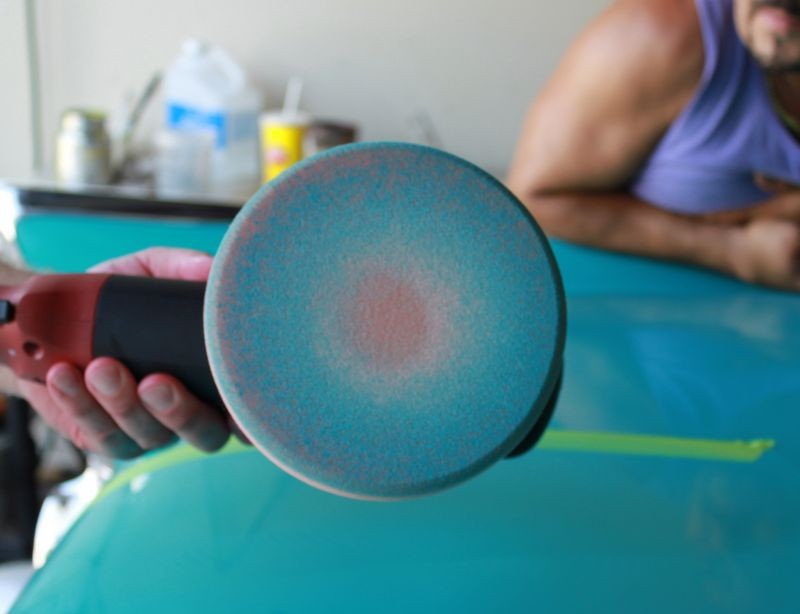
We're ready to do our test spot and for this we're going to use the Wolfgang Total Swirl Remover 3.0 with the LC Hydro-Tech foam polishing pad with the Flex 3401 If this isn't removing the swirls fast enough or effectively enough then will stick with the same product but try the more aggressive LC Hydro-Tech Cutting pad.
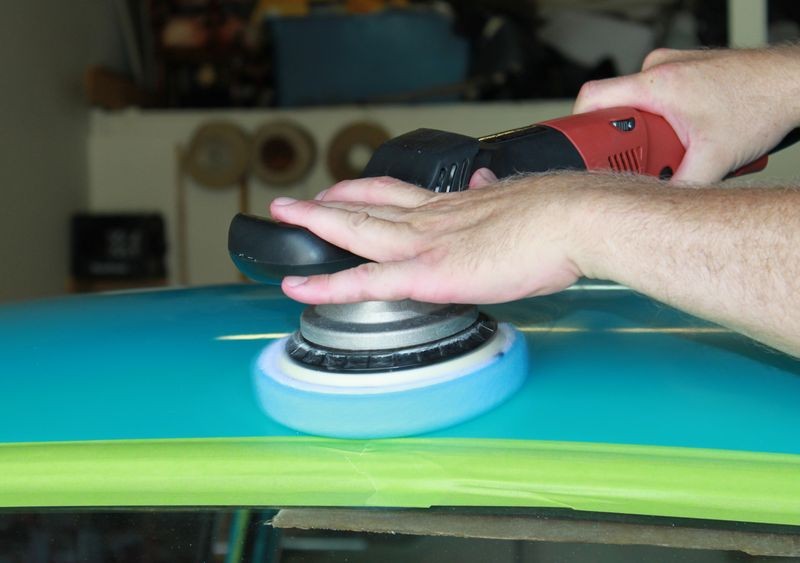
Center the pad onto the backing plate...

And then press the pad firmly against the backing plate to fully engage the Velcro.
__________________
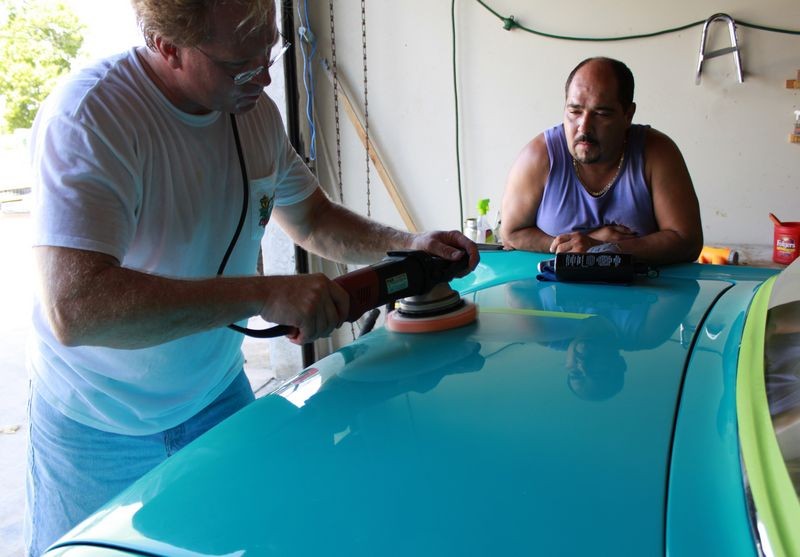
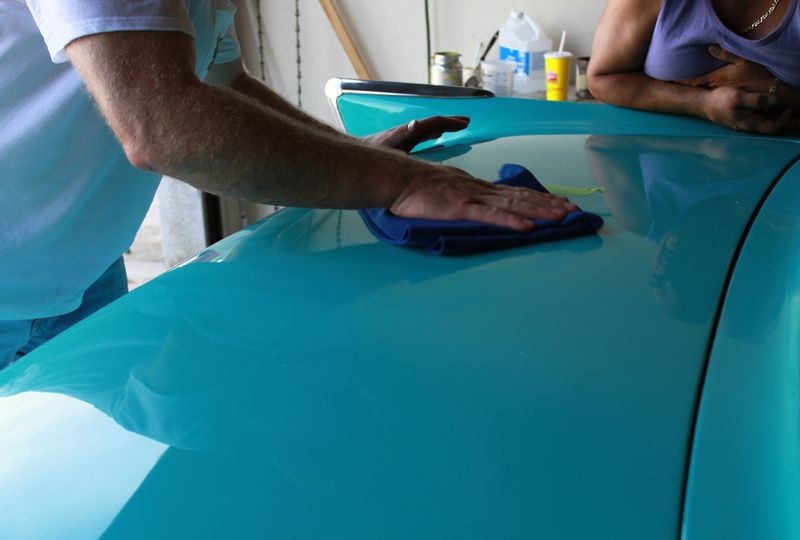
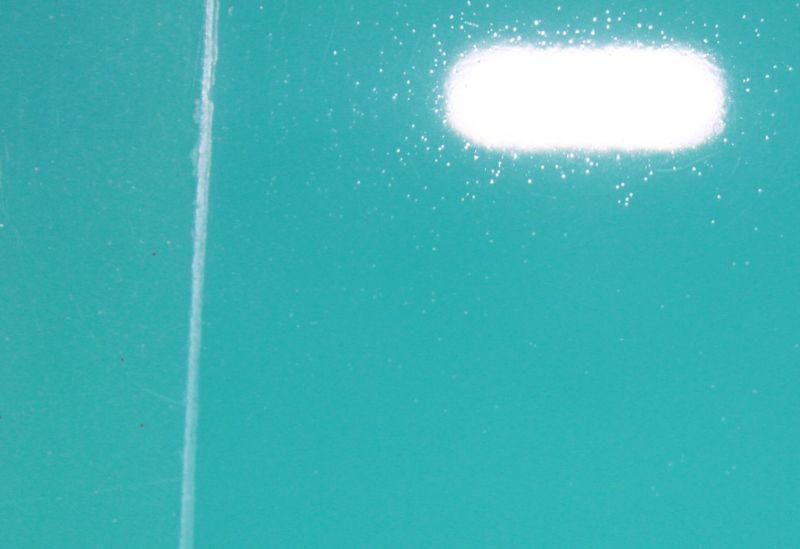
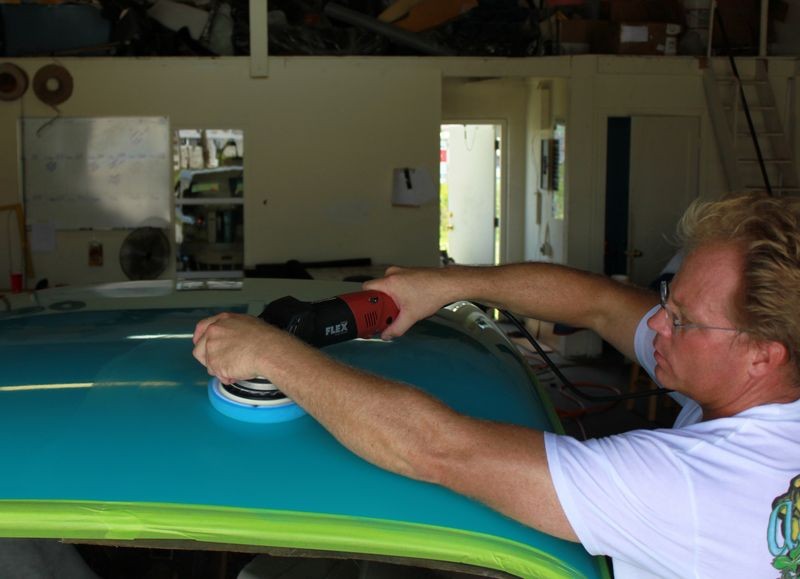
Horizontal surfaces like the hood or the trunk lid always work best for the Test Spot. Here we're using the trunk lid and we've applied a piece of painter's tape to separate between the before and after sides for easier and more accurate evaluation.

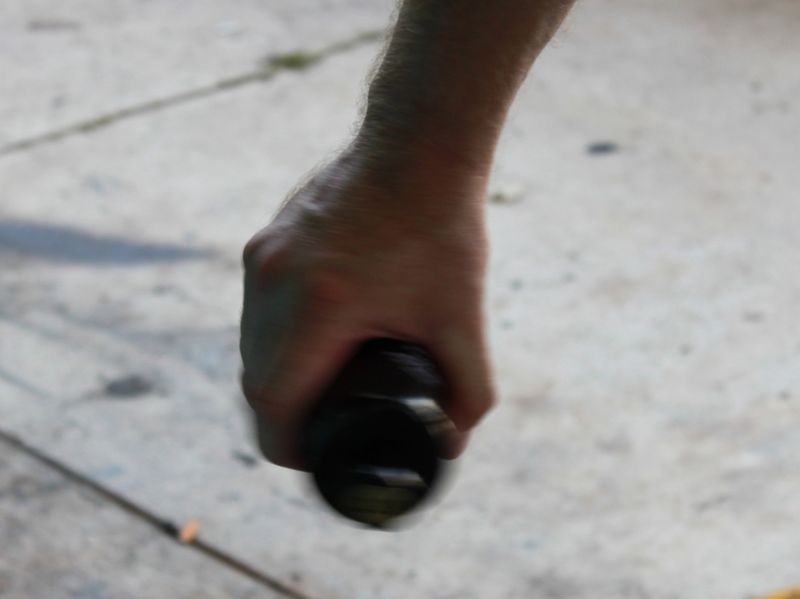
Always shake your products well before using them... I like to twist them back in forth at my side...
Lay down a thin strip of product about 6" to 8" long. You'll tend to use less product as you move around the car and your pad becomes more wet with product so it's less likely to absorb product into itself.


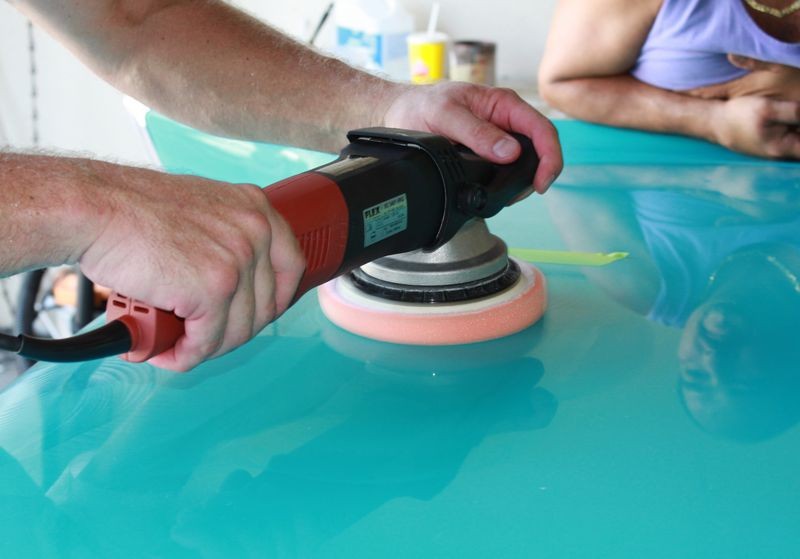
Unlike a true Rotary Buffer which the pad would rotate clockwise as you look down on it from behind the buffer, the Flex 3401 rotates counterclockwise and as such we're going to pick up our strip of product running the pad across the panel from left to right and running the strip into the pad at the 4 O'Clock position.
(See the YouTube Video below).
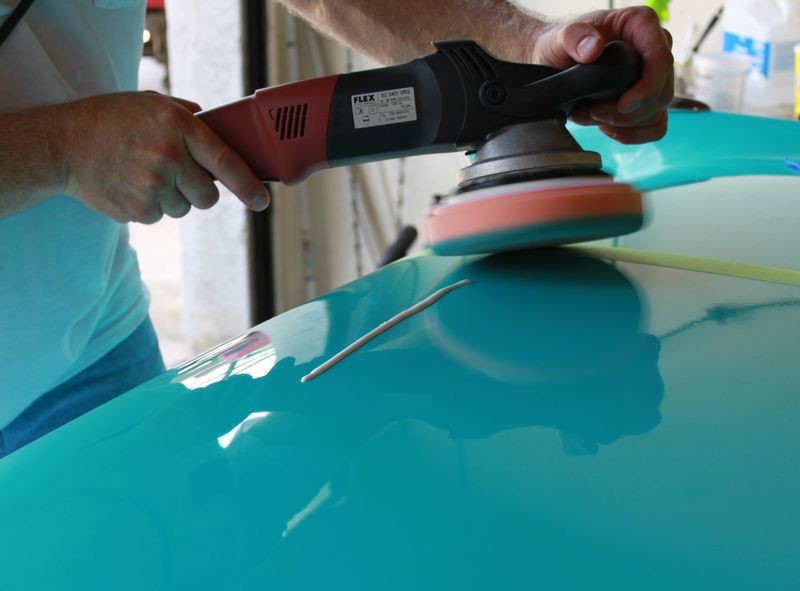

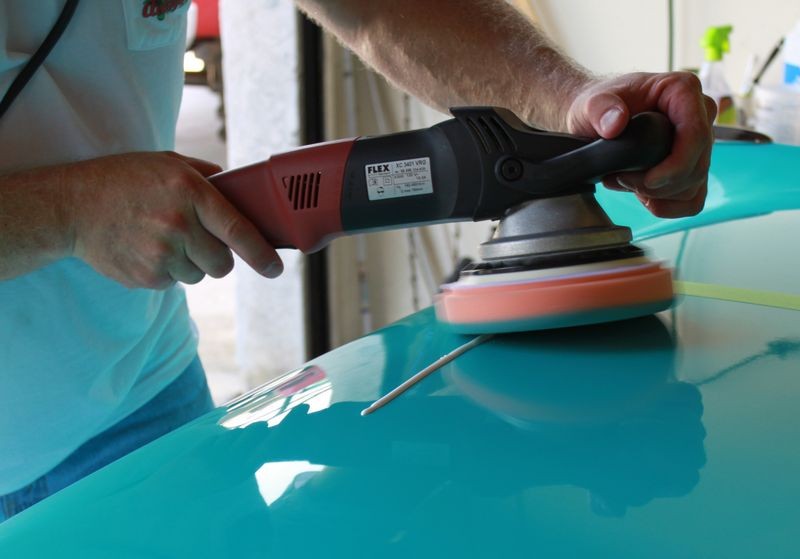

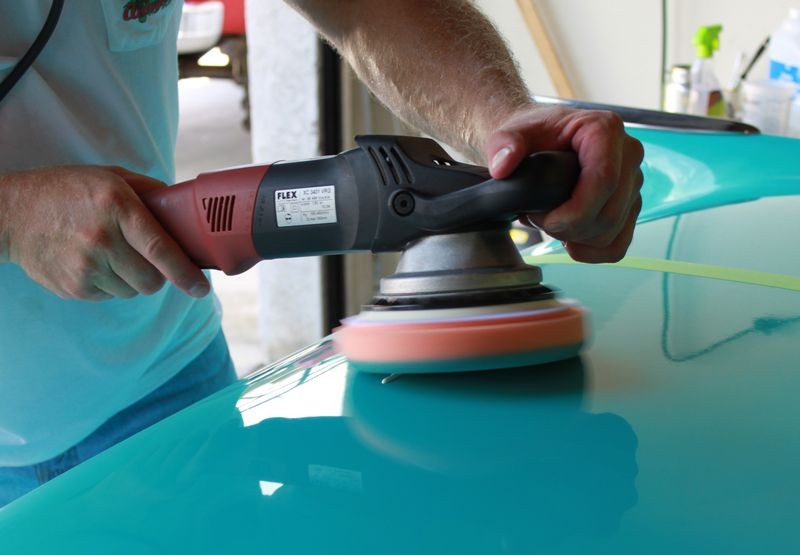
After picking up our bead, we lay the pad flat against the paint and begin making slow, overlapping passes over our test section.

Try to always have a wet film of product at the end of the buffing cycle as buffing to a complete dry buff might lead to hazing if you lose all lubricity on the surface.
YouTube Video Performing A Test Spot using the Flex VRG 3401
Turning the pad over reveals we're working on a single stage paint job, not a basecoat/clear coat finish. Single stage paints are generally softer and easier to work on than clear coat finishes with the exception of white single stage paints as the pigment type for white paint is Titanium Dioxide Powder and the pigment alone will make the paint, (resin), very unworkable or hard-to-polish.
Next we'll wipe the residue off using a Cobra Indigo Microfiber Polishing Cloth and inspect the results both in the shop and outside in full sun.
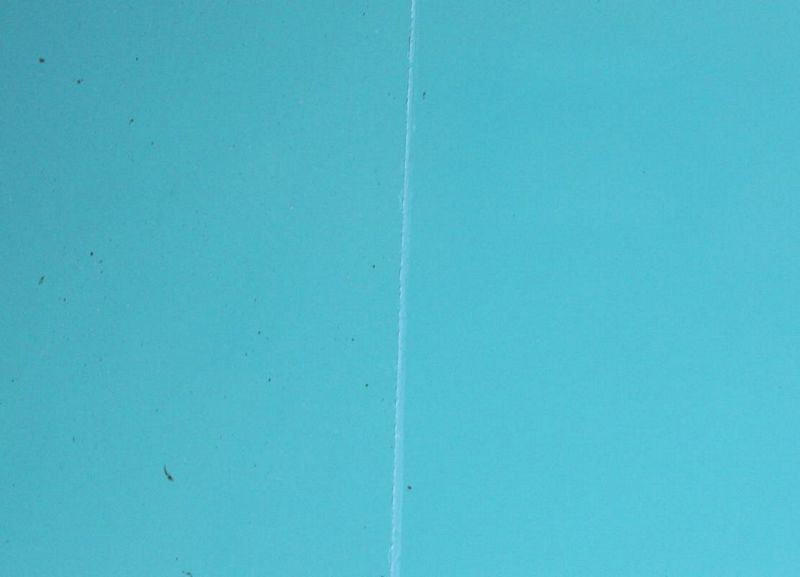
This is with the before side being lit up using the flash of the Rebel T1i
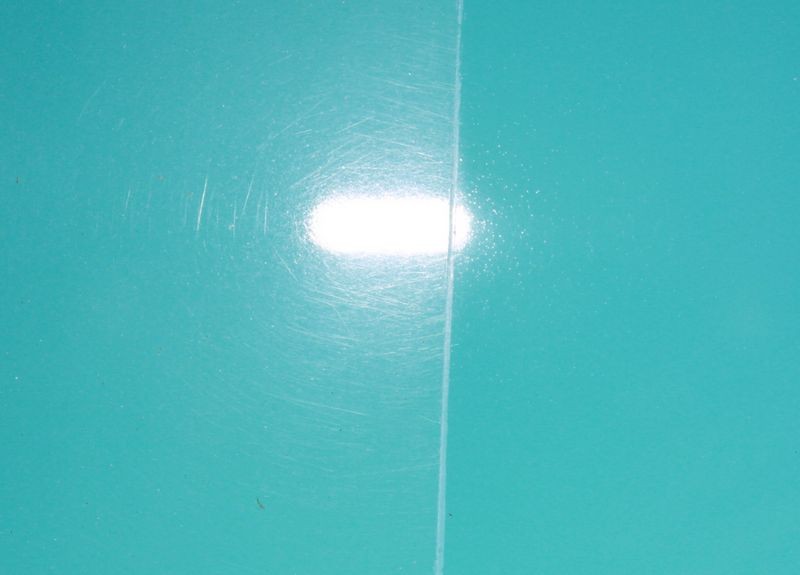
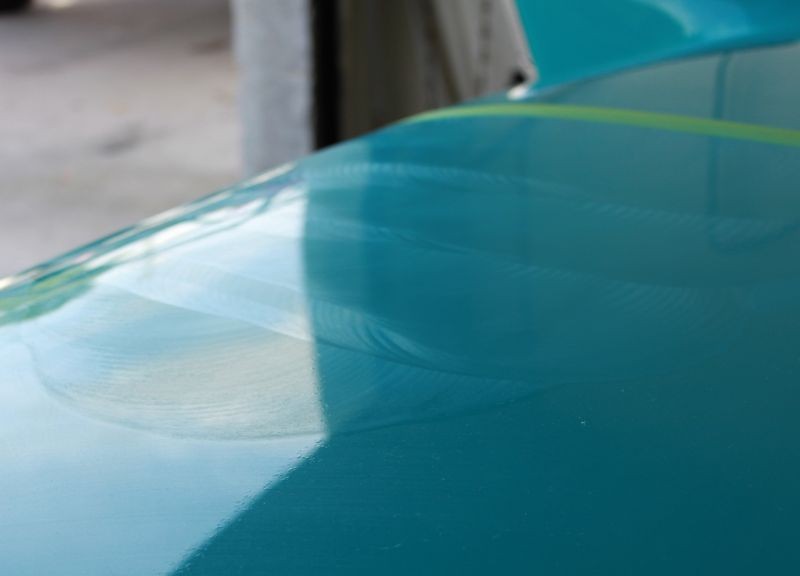
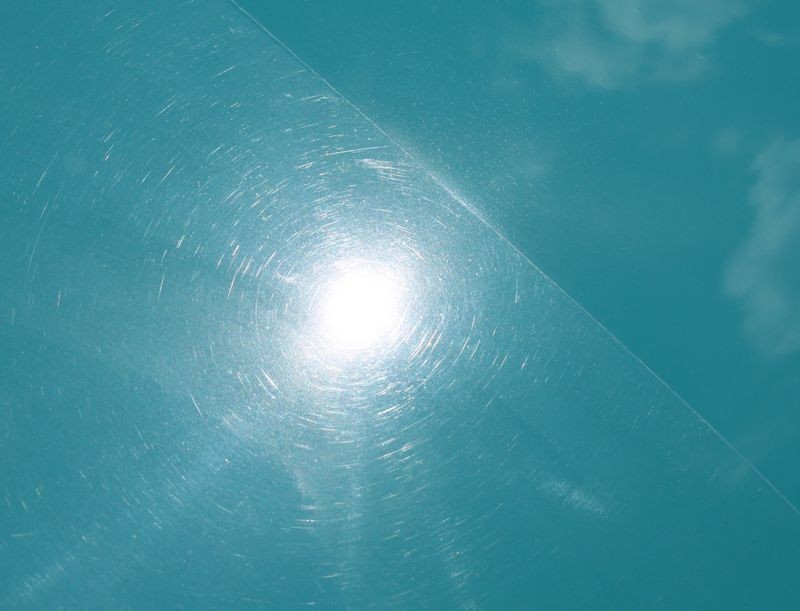
This is the after side. The tiny craters or pin holes you see are more than likely what' called Solvent Popping, which occurred when the paint was sprayed. These pin holes are actually present on the before side except because there are so many swirls in the before side, the swirls hide the solvent popping pin holes.
No amount of buffing will remove solvent popping because the holes are throughout the layer of paint, not just on the surface. Compounding and polishing more and more will just remove more paint and reveal a greater depth of the pin holes, it won't make the problem go away.
Keep in mind this is a very high resolution camera and it's being held very close to the paint. After polishing and waxing and then looking at the paint from a normal distance you don't really see them. The only fix is to repaint the entire car or the affected panels.
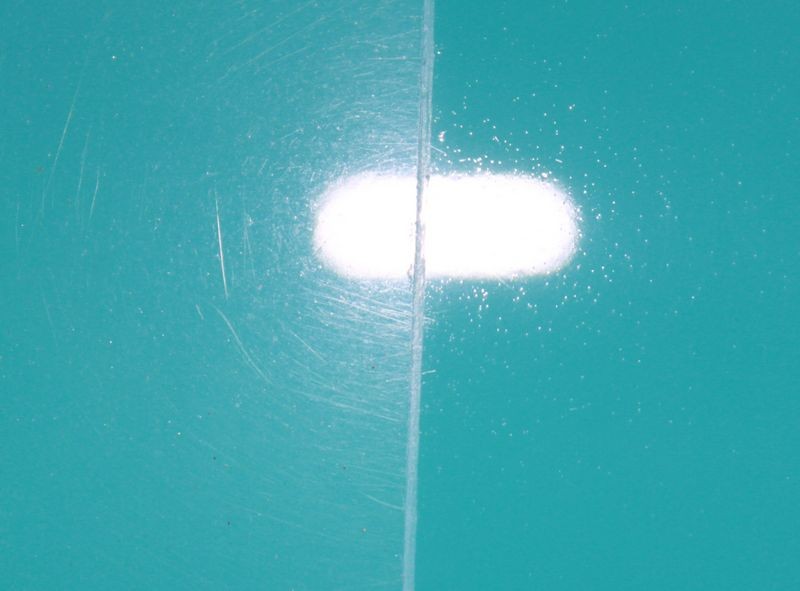
And a shot right on the tape-line...

-
Re: How to do a Test Spot using the Flex 3401
-
Super Member

Re: How to do a Test Spot using the Flex 3401
I have to believe Max will be selling the Brinkman before long with polishing kits, etc.
-
Junior Member

Re: How to do a Test Spot using the Flex 3401
-
Super Member
Re: How to do a Test Spot using the Flex 3401
Mike, do you recommend using the picking up the bead method with the Flex DA?
-
Regular Member

Re: How to do a Test Spot using the Flex 3401
welp. looks like i have a bright light to buy
-
Re: How to do a Test Spot using the Flex 3401
 Originally Posted by Bunky

Mike, do you recommend using the picking up the bead method with the Flex DA?
Personal preference; you can apply some product to the face of the pad or lay down a bead of product, since my background is using a rotary buffer that's my preference and habit.
Either way will work, once I just wanted to show that you could pick up a bead of product like you can with a rotary buffer for other's to test for themselves.
-
Junior Member

Re: How to do a Test Spot using the Flex 3401
Is the Flex your go to polisher now?
-
Super Member

Re: How to do a Test Spot using the Flex 3401
Originally Posted by Mike.Phillips@Autogeek
__________________
This is the after side. The tiny craters or pin holes you see are more than likely what' called Solvent Popping, which occurred when the paint was sprayed. These pin holes are actually present on the before side except because there are so many swirls in the before side, the swirls hide the solvent popping pin holes.
No amount of buffing will remove solvent popping because the holes are throughout the layer of paint, not just on the surface. Compounding and polishing more and more will just remove more paint and reveal a greater depth of the pin holes, it won't make the problem go away.
Keep in mind this is a very high resolution camera and it's being held very close to the paint. After polishing and waxing and then looking at the paint from a normal distance you don't really see them. The only fix is to repaint the entire car or the affected panels.
I found this to be very interesting information! It reminded me of a detail job I did on a friends 57 Ford F-100 that had the same pin holes in the paint. It was apparently painted in someone's garage..
Here is one of the "after" pics that shows the pin holes:

1957 Ford F-100 Detailed
Similar Threads
-
By Mike Phillips in forum How to articles
Replies: 21
Last Post: 09-24-2019, 08:41 AM
-
By JustJesus in forum Product Reviews
Replies: 5
Last Post: 09-11-2018, 11:02 AM
-
By Carlito12200 in forum Auto Detailing 101
Replies: 3
Last Post: 04-29-2016, 08:43 AM
-
By runrun411 in forum Auto Detailing 101
Replies: 2
Last Post: 08-04-2015, 04:54 PM
-
By bwatereagleman in forum Ask your detailing questions!
Replies: 13
Last Post: 06-09-2014, 03:49 PM
 Members who have read this thread: 0
There are no members to list at the moment.
Posting Permissions
- You may not post new threads
- You may not post replies
- You may not post attachments
- You may not edit your posts
-
Forum Rules
|
| S |
M |
T |
W |
T |
F |
S |
| 31 |
1
|
2
|
3
|
4
|
5
|
6
|
|
7
|
8
|
9
|
10
|
11
|
12
|
13
|
|
14
|
15
|
16
|
17
|
18
|
19
|
20
|
|
21
|
22
|
23
|
24
|
25
|
26
|
27
|
|
28
|
29
|
30
| 1 | 2 | 3 | 4 |
|


 Reply With Quote


Bookmarks