 Thanks: 0
 Likes: 0
 Dislikes: 0
-
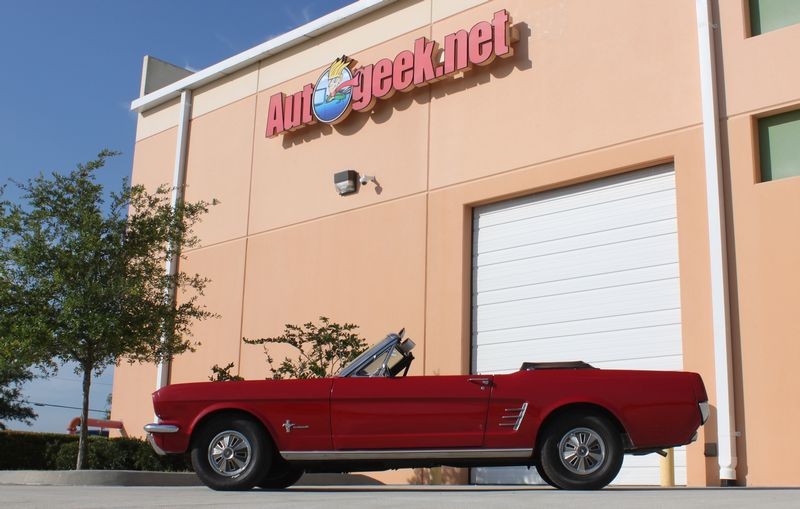
1966 Mustang - Last Chance to Dance Extreme Makeover!
1966 Mustang - Last Chance to Dance Extreme Makeover!
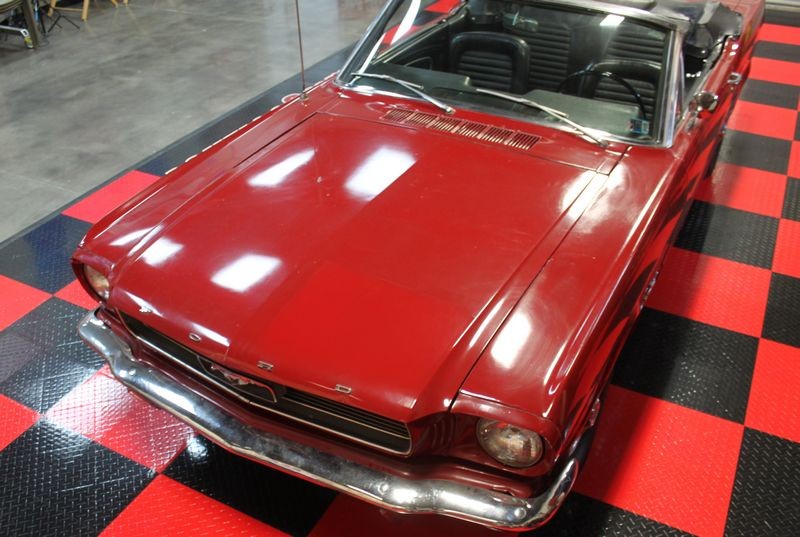
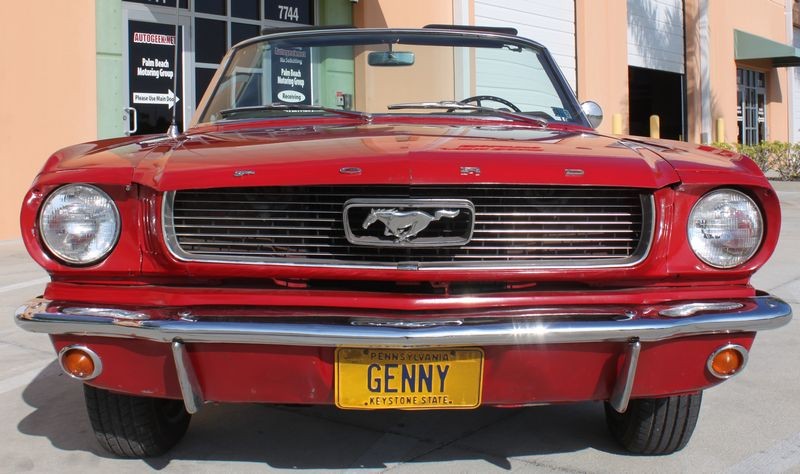
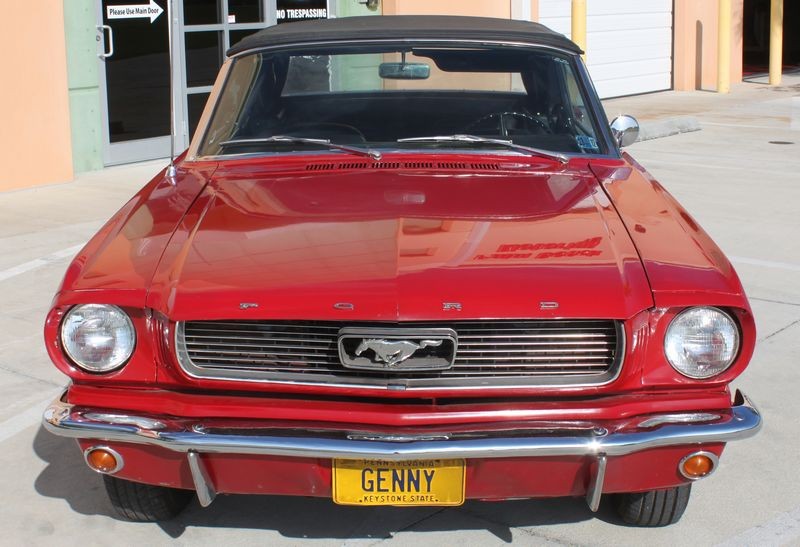
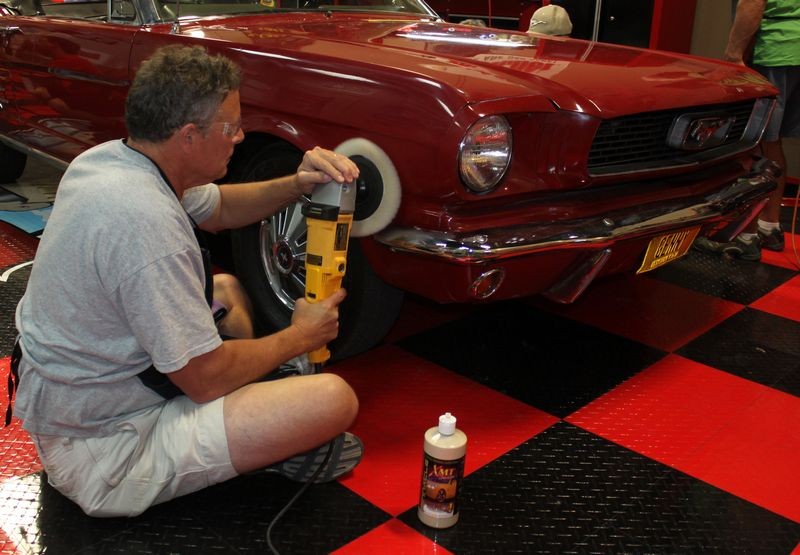
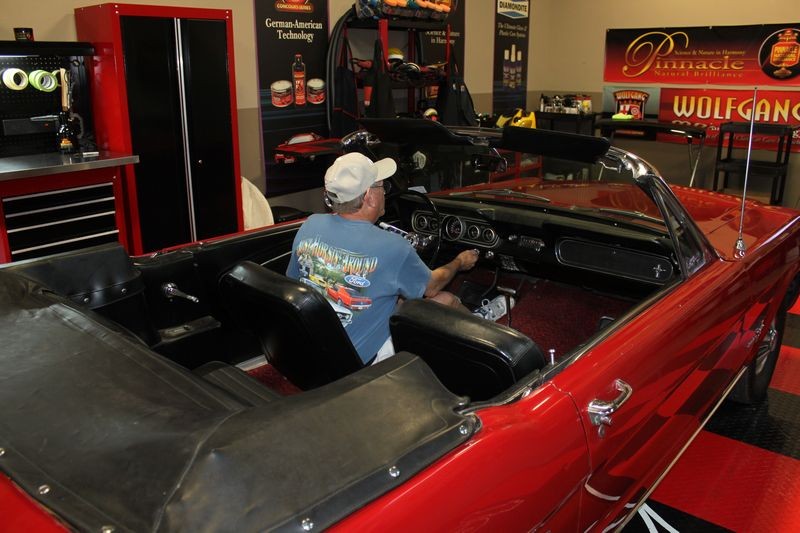
Man the paint on this Mustang is bad. How bad?
Bad, bad bad...
It is not only stained and oxidized but it also has what is called shrink back, this is where the solvent in the paint softens the primer and then evaporates and then the primer shrinks back into the sanding marks the primer was previously "filling in". The results is you see all kinds of sanding marks that are in the paint but the are not on the surface, they are throughout the layer of paint. This is how it works for single stage lacquers and enamels but it also can happen to modern clear coats.
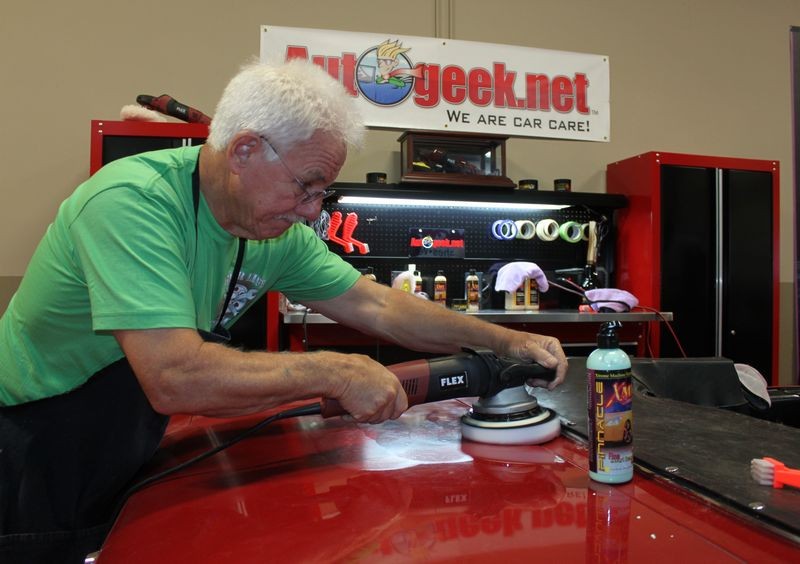
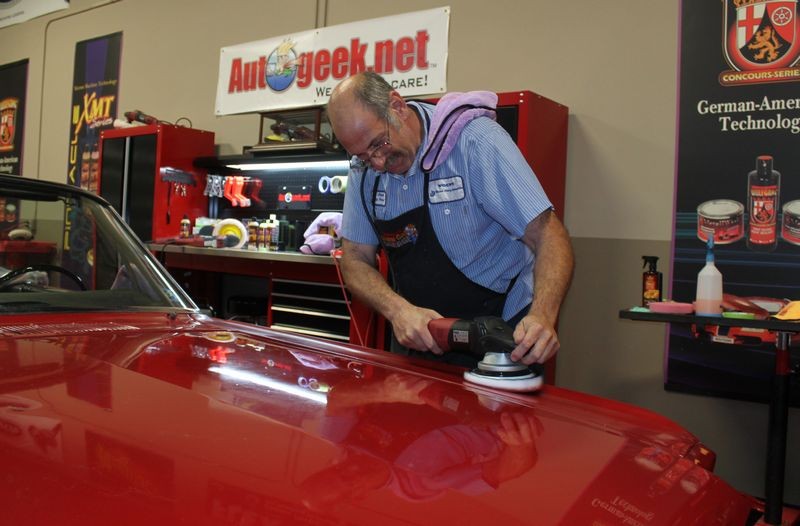
The paint on this Mustang by the way is a single stage paint. One thing I find with some older single stage lacquers and enamels is they like wool pads with aggressive compounds and higher speeds than normally used with clear coats.
That all said, our job tonight is to try to bring back some shine, clarity and gloss to the paint as well as restore the original full richness of color.
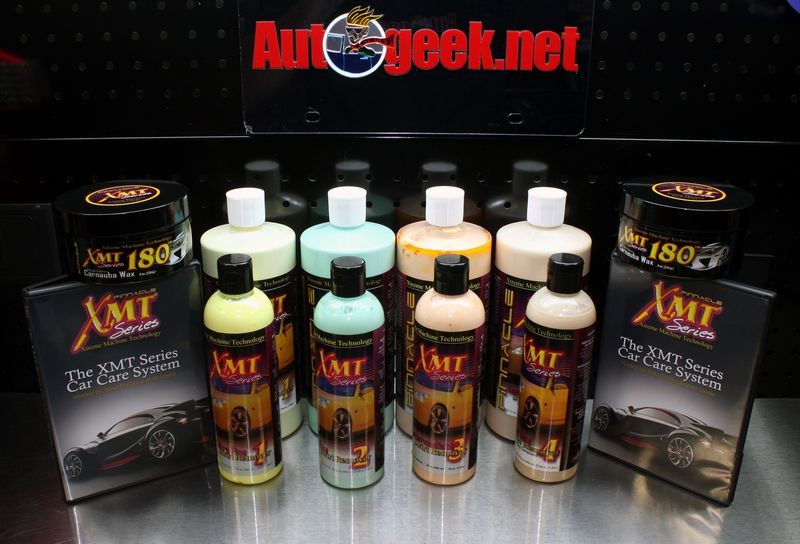
Here's what we'll be using...
Special Sale
Nick says there will be a sales special for any of the products we use tonight on this car, which includes Pinnacle XMT polishes #!, #2, #3, and #4 and the Pinnacle XMT 180
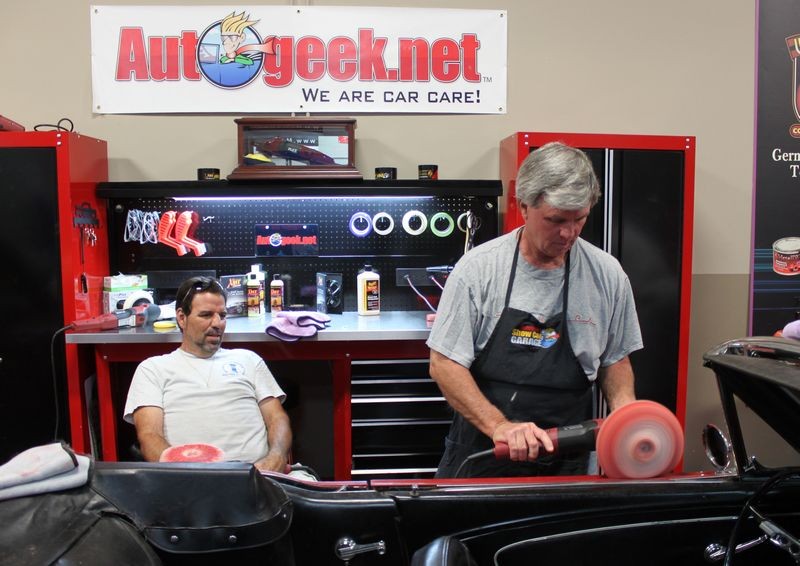
Learn to use the rotary buffer at Autogeek's Thursday Night Hot Car Projects
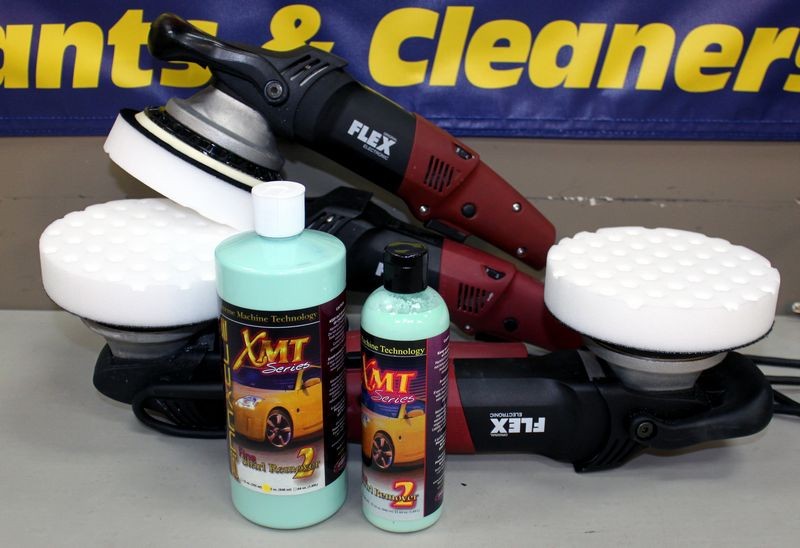
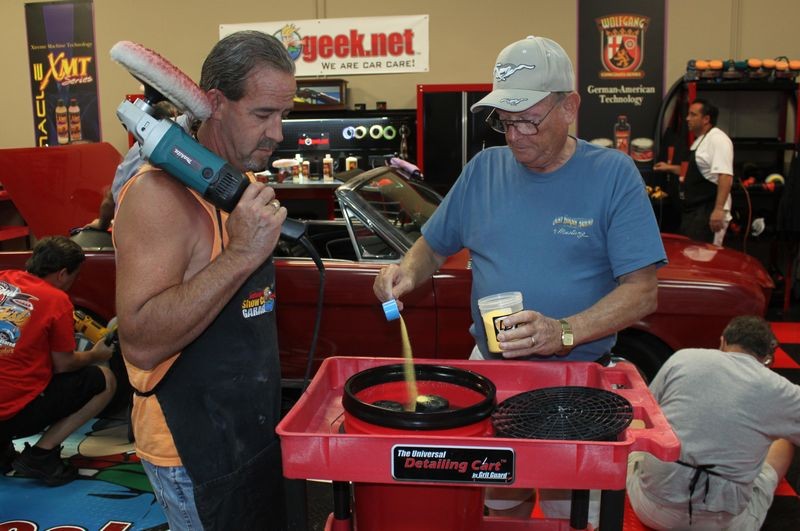
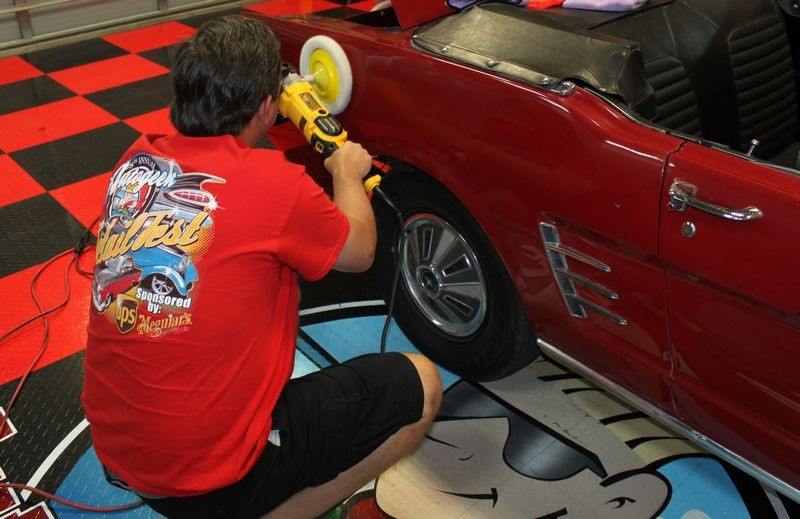
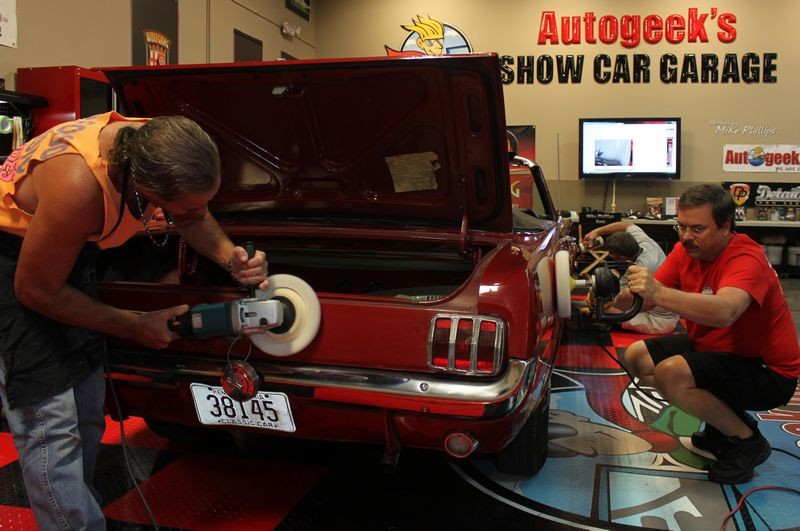
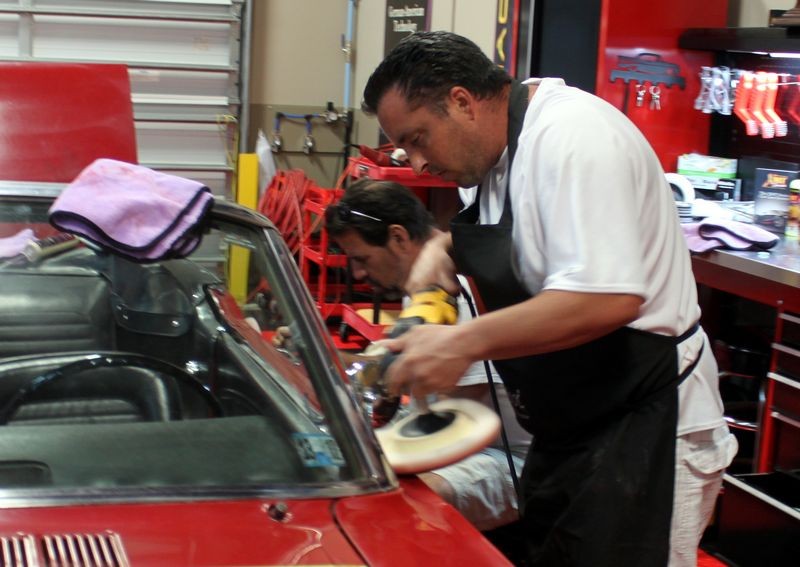
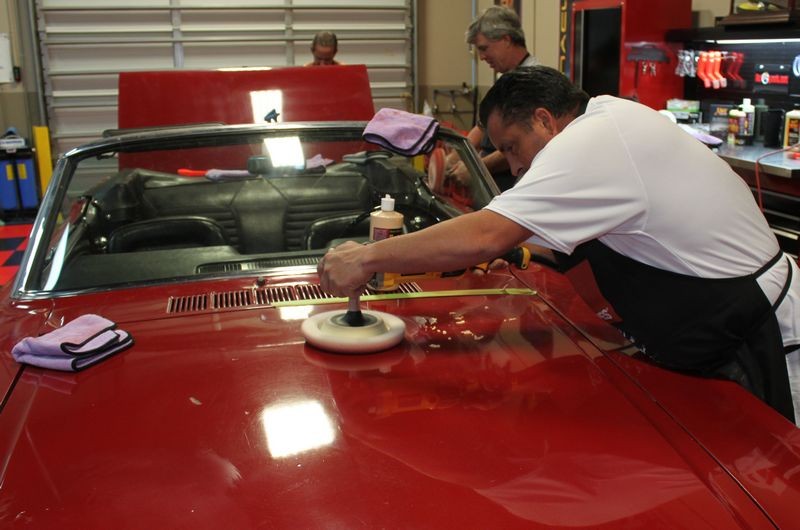
I have a number of new guys attending tonight so to teach them how to use the rotary buffer with wool pads and compounds I'll be using the Flex PE14 with Lake Country 6.5" wool cutting pads. The light weight and compact size of this rotary buffer plus the smaller size of these 6.5" wool pads makes it easy for even an absolute newbie to learn how to use a rotary buffer.

After the heavy cutting step we're going to use the Flex 3401 to apply the #2 Fine Swirl Remover with with Lake Country 6.5" CCS Foam Polishing Pads.
After polishing we'll be machine applying the Pinnacle XMT 180 High Gloss Carnauba Paste Wax

To take advantage of the sale, contact Customer Care at
1-800-869-3011
And here's our challenge...
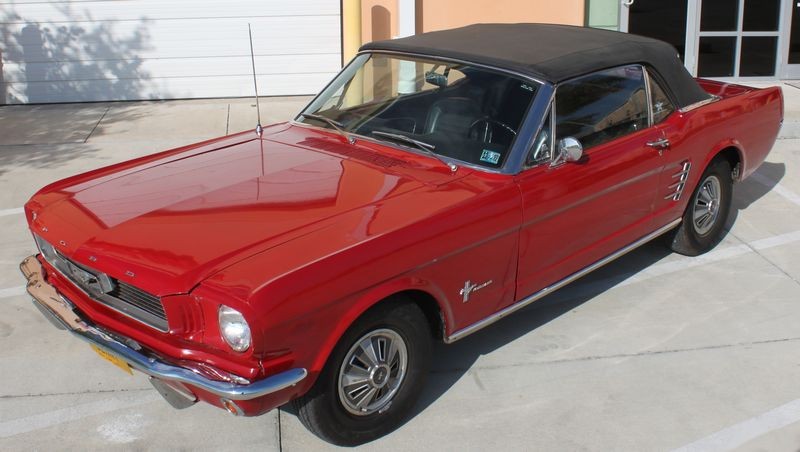
1966 Mustang Convertible

And the paint has no gloss, shine or reflectivity...


Test Spot
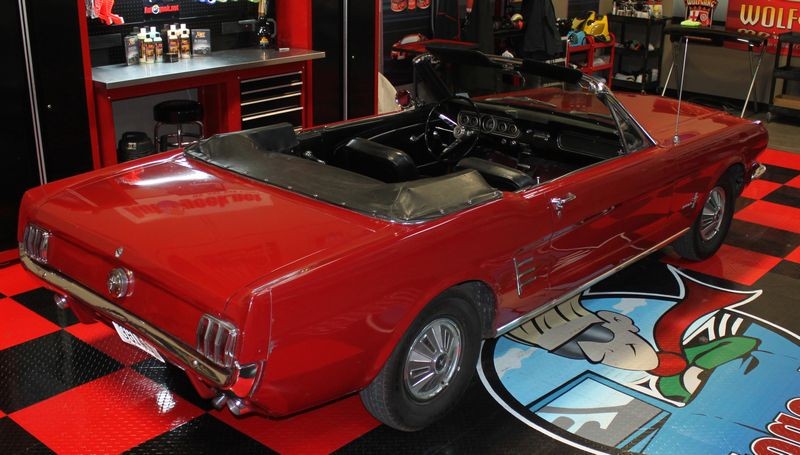
I did a little testing using Pinnacle XMT #4 with a wool pad on a rotary buffer followed by XMT #2 with a foam pad on a Flex 3401 and if you look at the lower right hand corner you can see it removed enough oxidation and embedded dirt that the section I buffed now looks like a totally new color of red paint!
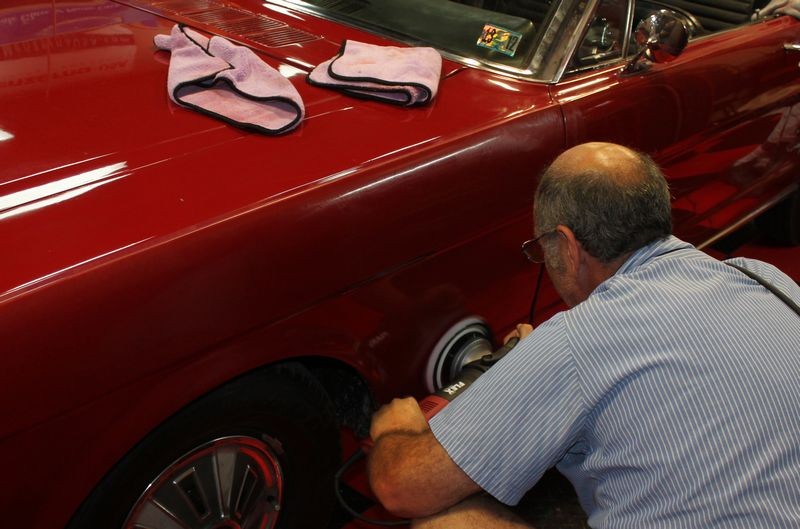
When compounding with wool pads and rotary buffers, it's very helpful to have a Pad Washer to clean your pads and they are going to gunk up a LOT and you want to remove the dead paint and the used-up product after buffing a section so you don't simply grind the old dead paint into the next section you start buffing.

-
Junior Member

Re: 1966 Mustang Convertible Project
Mike, my second project and again learned by doing new things, watching others, asking questions and soliciting their advise. Also, I'm gaining the knowledge reference all the products and their application so I can make an educated decision ref what I want to use on my car when it's done. And, I got some goods tips on where to find the chrome rims I'm looking for. Thanks, and I'll see you at the next project.
-
Re: 1966 Mustang Convertible Project
 Originally Posted by boomer1649

Mike, my second project and again learned by doing new things, watching others, asking questions and soliciting their advise. Also, I'm gaining the knowledge reference all the products and their application so I can make an educated decision ref what I want to use on my car when it's done. And, I got some goods tips on where to find the chrome rims I'm looking for. Thanks, and I'll see you at the next project.
Hi Den,
Thanks for joining us again for another project car, I like guys that show up ready to roll up their sleeves and work hard and you fit that description!
Our next project car coming up will be wetsanding, cutting and buffing a 1971 Plymouth Fury New York Police Department Patrol Car.
Not too many places here in the U.S. where you get to actually learn how to wetsand and use rotary buffers on the real deal...


-
-
Re: 1966 Mustang - Last Chance to Dance Extreme Makeover!
Mike,
Thanks for showing me how to use the buffer and wool pad. This was the first time that I used a wool pad. With a little persistance and plenty of help, the Mustang paint looks pretty good.
Craig
-
-
Re: 1966 Mustang - Last Chance to Dance Extreme Makeover!
Looks great Mike. Much better than before!
Nice work Gentlemen.
-
-
Re: 1966 Mustang - Last Chance to Dance Extreme Makeover!
Here's a tip for using a Pad Washer to clean you pads when using a rotary buffer.
Note that anytime you're using a rotary buffer to remove,
- Heavy paint oxidation
- Heavy Gel-Coat Oxidation
- Sanding marks after wetsanding
You're going to have a lot of paint and/or gel-coat building up on the face of your pads PLUS the spent product residue.
You WANT and NEED to remove this because it will make buffing the next section a lot easier and faster plus you'll get better cutting action from whatever compound you're using as you won't be added in fresh compound to a dirty, junked up pad. Another benefit is you'll leave a nicer, low swirl finish behind.
First, add a good pad cleaner to the water like the Detailer's Polishing Pad Rejuvenator to the water. Use anywhere from a half scoop to a scoop. For heavy compounding of anything I use a full scoop.
Here's Bill adding the pad cleaner...

Then press up and down on the grit guard insert a few times to mix the cleaner with the water. You can also remove the Vortex Base and stir the water using the handle of one of your brushes or something else that's clean...

See the water squirting up as I press the pumps down?
That's what you need to be doing with your pad, that is press your buffing pad against the grit guard insert up and down and this will pump the cleaning solution up and into the face of your pad to clean it as the pad is spinning.

Replace the Grit Guard Insert and the small insert and then replace the splash guard lid.

Next, if you don't have an adapter like shown below for using with double sided pads... GET ONE!
I use these as EXTENSIONS, not ADAPTERS to extend the backing plate away from the body of the rotary buffer for two reasons,
1. For doing Surgical or Precision Buffing into tight or complicated areas
2. For cleaning pads in the pad washer with a rotary buffer.
Lake Country Double-Sided Pad Rotary Buffer Adapter
Optimum Double-Sided Pad Rotary Buffer Adapter
When you use a pad washer the idea is to PUMP your buffing pad up and down against the Grit Guard Insert which causes the spring loaded water pumps inside the pad washer to inject the face of your pad with the cleaning solution.
Without the extension, it's hard to pump your pad against the grit guard insert and activate the pumps because the body of the rotary buffer bangs into the splash guard lid.
With the extension, you can easily pump the pad up and down against the grit guard insert and clean your pads faster and easier.
Here's Robert trying to clean a pad without the extension between the backing plate and the spindle. This will work, but not as well nor as easy as it is with the extension...

This is the up position, when he presses the buffing pad against the grit guard insert by the time he depresses it to activate the pumps the body of the buffer will be banging into the lid.

Here's Louie using a buffer with an extension...

Here's the pad all the way pressed down against the insert and depressing the pumps and there's still room between the body of the buffer and the lid. Much easier and you get a cleaner pad faster.

Here's a video I made with Bryan Fuller from Two Guys Garage showing how to use a pad washer...
Video: Tip for cleaning pads in a pad washer
How to use a Grit Guard Universal Pad Washer

-
Re: 1966 Mustang - Last Chance to Dance Extreme Makeover!
I hope you dont mind if I piggy back with your thoughts with the pad washing Mike as I wanted to share a mini review I did as well showing how effective these really are.
These really are a must for detailers and serious hobbyist.
http://www.autogeekonline.net/forum/...ue-review.html
Similar Threads
-
By Mike Phillips in forum PICTURES: 2-Day ROADSHOW Car Detailing Classes
Replies: 34
Last Post: 07-15-2020, 10:19 AM
-
By Mike Phillips in forum PICTURES: Wednesday Night Detailing Classes
Replies: 24
Last Post: 05-21-2014, 07:23 AM
-
By Mike Phillips in forum PICTURES: Wednesday Night Detailing Classes
Replies: 33
Last Post: 04-21-2014, 06:09 AM
-
By Mike Phillips in forum PICTURES: Wednesday Night Detailing Classes
Replies: 161
Last Post: 09-07-2012, 10:47 AM
-
By civichatch97 in forum Show N' Shine
Replies: 6
Last Post: 07-29-2009, 03:45 PM
 Members who have read this thread: 0
There are no members to list at the moment.
Posting Permissions
- You may not post new threads
- You may not post replies
- You may not post attachments
- You may not edit your posts
-
Forum Rules
|
| S |
M |
T |
W |
T |
F |
S |
| 31 |
1
|
2
|
3
|
4
|
5
|
6
|
|
7
|
8
|
9
|
10
|
11
|
12
|
13
|
|
14
|
15
|
16
|
17
|
18
|
19
|
20
|
|
21
|
22
|
23
|
24
|
25
|
26
|
27
|
|
28
|
29
|
30
| 1 | 2 | 3 | 4 |
|


 Reply With Quote


Bookmarks