 Thanks: 0
 Likes: 0
 Dislikes: 0
-
Super Member

Autowerx CeriGlass Guide
Autowerx CeriGlass Guide
I have seen a lot of threads with horror stories of people trying to polish their windshield with different product/pad combinations and decided to make this guide to set the record straight on a few things about polishing glass.
Here are some of the common trends I have noticed:
1. Most FREAK OUT when they use the LC glass polishing pads due to how aggressive they are. Most windshields will not need this aggressive of a pad. Also, it is IMPOSSIBLE to finish out the glass with no defects with just these polishing pads, they simply leave too much marring as you will see in the pictures to follow.
2. People assume they can use a DA and get amazing results. I'm just going to say it: You can't. You can get decent results with a DA but nowhere near what you can achieve with a rotary. You simply need to be able to apply A LOT of pressure AND keep the pad spinning to level deep scratches. With a DA you can't do that (exception: forced rotation Flex 3401 VRG).
On to the tutorial...
Products Used:
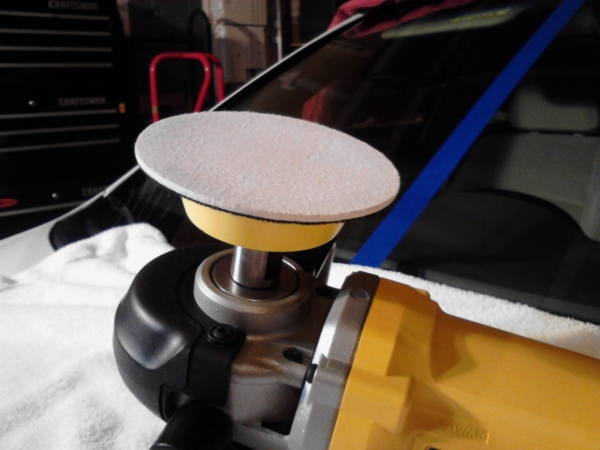
- PC 7424XP
- Dewalt 849X
- CeriGlass polish
- H2O
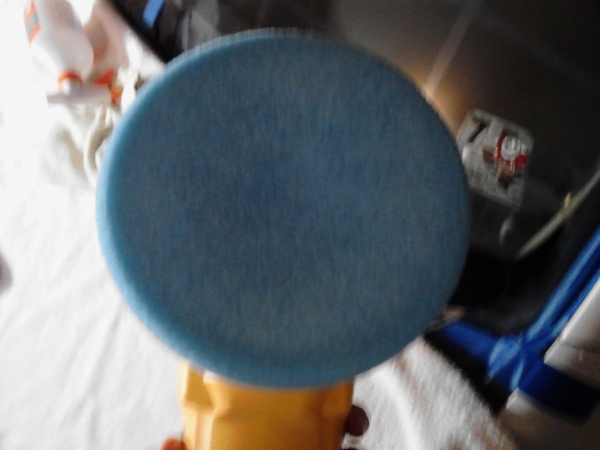
- 4" LC glass cutting pad
- 5.5" LC Hydro Tech cyan pad
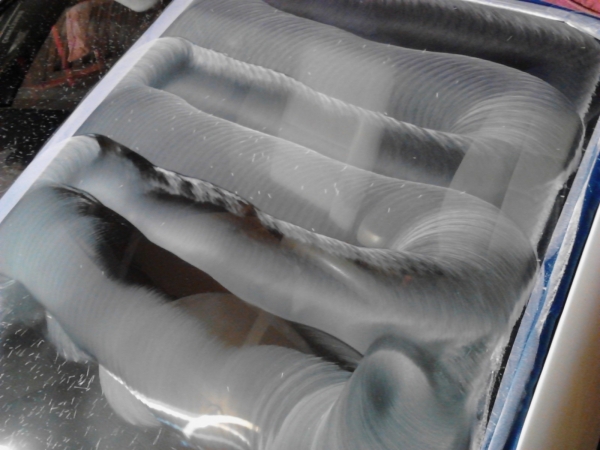
This windshield is from my Wife's 2004 Kia Spectra. I have NO idea how it got so messed up. I originally thought that I had scratched it up one time when I was scrubbing some bugs off after a long road trip but the more I look at the scratches they are in so many different directions they had to have built up from years of abuse.
The entire windshield looks like this:

First let's try what most people try: PC 7424XP + CeriGlass + LC glass cutting pad.


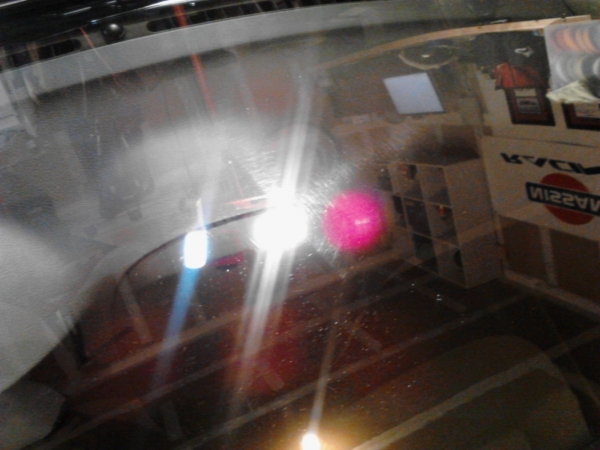
Heck, let's even do a test spot...
Before:
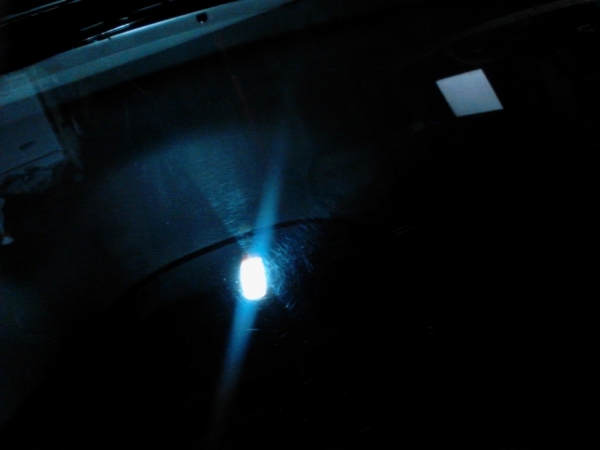
After (Yikes!!! It's 10x worse now OMG what should I do???):

As you can see, the glass cutting pads are VERY aggressive. Their only purpose is to level deep scratches. In my case I probably could have gone without them and still corrected the glass 75% leaving some of the deeper scratches... but, that's not how I roll. So just keep in mind. If you use these pads things will look MUCH WORSE before they start to look better.
After IDK... 50? section passes passes with the PCXP and a cyan HT pad here is what most of the glass still looked like:

Some of the shallow scratches are gone but the glass is still nowhere near where I want it to be.
Next, instead of pretending to polish the glass we will learn how to REALLY polish the glass.
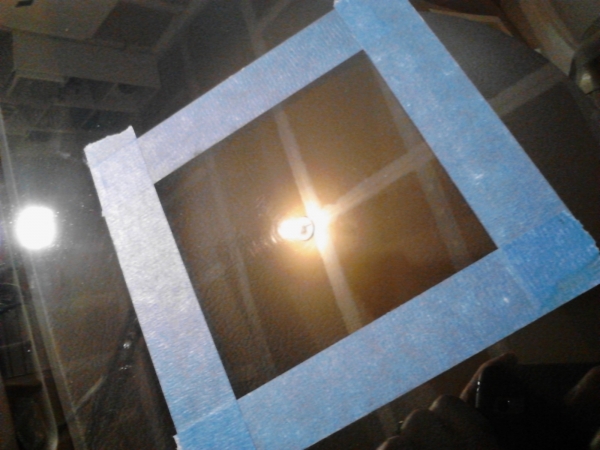
Step one: Tape off your working area and cover the paint and anything else you don't want to get polish splatter all over. You will be working the product very wet and it will sling no matter what you do.

Step two: Select the appropriate tool for the job. Any forced rotation rotary or DA should work fine. You don't need speed, you need forced rotation (more on that later).
Step three: Dedicate some time for this process. Polishing glass takes much longer than polishing paint and depending on the condition of your glass it might take a while. My glass was particularly jacked up and it took me about 2 hours just to polish half the windshield. I'm assuming for just water spots and light etching from wipers should be able to polish out much faster.
Let's get to it shall we?
Work in small 2x2 sections. You need to do this so the polish does not dry out so fast.

Alternate the direction of your polisher with each section pass just like when polishing paint.

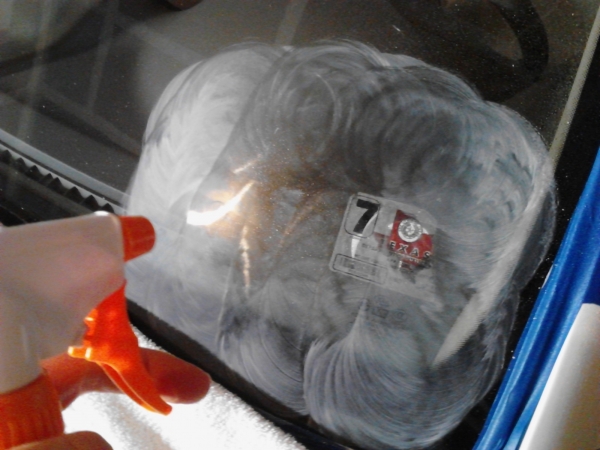
When the polish starts to dry spray with water to reactivate and continue working the polish. This allows the polish to fully break down and will give you the best results.
Inspect your results, always, before proceeding to the next area. You need to know that you are getting out the defects. In this case with the glass cutting pads it almost looks worse; however, you can notice that the direction of the swirls and marring have changed and they are only light marring caused by the pads. This tells me that I have leveled the deep scratches and now only need to buff out the light scratches from this initial polishing step.
Repeat your initial "abrasive" polishing step over the entire windshield until it is uniformly, lightly scratched to hell. Next we will polish all this mess out with a finer pad.
Grab your HT Cyan and your rotary and let's get to work. This step takes the longest time.
Checking my work as I go. As you can see most of the initial swirls from the glass cutting pads is already gone.

Working the rotary at about 1000-1200rpm keep about 10-15lbs of pressure over the pad and work with a moderately slow arm speed. Too high of rpms or too slow arm speed will heat the glass up too fast and cause the polish to dry up prematurely. It's hard to explain but you sort of have to play with it to get a feel for the correct rpm/arm speed combo to keep the polish wet for as long as possible. Make about 15-20 section passes with the same polish, re-wetting it as needed and then inspect your work. This should polish out all of the swirls and marring created by the glass cutting pads and most other defects already in the glass.
With the HT pad I widened my working area out a bit and kept the polish wet with sprays of water as it dried (which happens after about every 3 to 4 section passes. I kept the speed at about 1000rpm for this entire phase. More speed and the polish dries to fast and the glass gets too hot. If the glass ever gets too hot to touch you need to IMMEDIATELY STOP and wait for it to cool off. You will notice if the glass is starting to heat up because the polish will clear up in spots where the glass is too hot as you see here near the bottom of the section I was polishing.
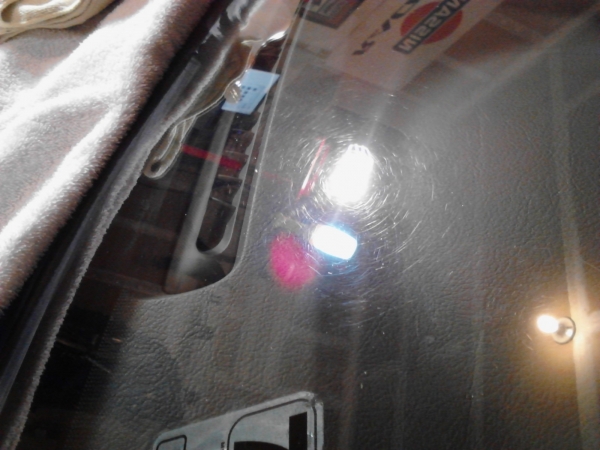
Here are some 50/50's of the finished results under different lighting:


Final:

As you can see with the right tools, technique and enough time to complete the process properly you can have amazing results polishing even the most scratch & swirl laden glass. Thanks for looking!
-
Re: Autowerx CeriGlass Guide
 Originally Posted by Nicholas@Autowerx

Also, it is IMPOSSIBLE to finish out the glass with no defects with just these polishing pads, they simply leave too much marring as you will see in the pictures to follow.
Possibly, but I've finished out using only the glass pads using only a rotary buffer with no marring. There's a couple of variables involved so always test first.
Originally Posted by Nicholas@Autowerx
2. People assume they can use a DA and get amazing results. I'm just going to say it:
You can't.
I agree, you need a rotary buffer.
Originally Posted by Nicholas@Autowerx
You simply need to be able to apply A LOT of pressure AND keep the pad spinning to level deep scratches. With a DA you can't do that (exception: forced rotation Flex 3401 VRG).
I agree and have written the same thing elsewhere on this forum.
[/QUOTE]
And I would strongly agree and recommend to anyone attempting to machine polish glass to completely cover everything else surrounding the glass with some type of cover because machine polishing with a glass polish is very messy. The potential to scratch the paint wiping glass polish splatter dots exists also.
How to remove tiny pinhole pits in glass windows using a rotary buffer

Great write-up Nicholas!
Just one tip for anyone reading this planning on machine polishing glass,
Test your pads, products, tools and "your technique" anywhere except where the driver looks through the windshield just in case something goes wrong.

-
Super Member

-
Super Member

Re: Autowerx CeriGlass Guide
Nicolas
Thank you for the thorough write up, it explain very well how to polish a glass! ,
good job!
-
Super Member
Re: Autowerx CeriGlass Guide
Thanks Mike! I agree with your advice about NOT trying this for the first time on the driver side portion of your windshield!
Thanks for the props Bobby!
Also, I would like to give a special shout out to Cee Dog for his original CeriGlass review which helped me plan my course of action for this tutorial without too much trial and error.
-
Super Member

Re: Autowerx CeriGlass Guide
Thanks for great review and explanation Nicholas! When I polished my glass I used CeriGlass with my PCXP and a LC Glass Polishing Pad, not the cutting pad. It surprisingly cut through the light wiper marks and left a very nice finish. But I do agree that a rotary polisher is the way to go for glass polishing.
-
Re: Autowerx CeriGlass Guide
-
Super Member
Re: Autowerx CeriGlass Guide
Originally Posted by Avi@CarPro
Nicolas
Thank you for the thorough write up, it explain very well how to polish a glass! ,
good job!
Thanks Avi! You guys make a great product!
-
Super Member

Re: Autowerx CeriGlass Guide
First time with a rotary buffer and already creating tutorials. Impressive! 
-
Super Member
Re: Autowerx CeriGlass Guide
Originally Posted by Y2KSVT
First time with a rotary buffer and already creating tutorials. Impressive!
LOL! Hey what can I say, I'm a quick learner. And, technically this was my 2nd time using my new rotary. 
Honestly, I was just so impressed with the results that I wanted to share it with everyone. I hope anyone that has a glass polishing project coming up will find this information helpful.
Similar Threads
-
By VISITOR in forum Off-Topic
Replies: 9
Last Post: 05-20-2017, 01:58 AM
-
By Mike@DedicatedPerfection in forum Off-Topic
Replies: 14
Last Post: 05-19-2014, 08:00 PM
-
By AutowerxDetailing in forum Show N' Shine
Replies: 31
Last Post: 01-08-2013, 12:00 AM
-
By AutowerxDetailing in forum Show N' Shine
Replies: 5
Last Post: 11-27-2012, 04:24 PM
 Members who have read this thread: 0
There are no members to list at the moment.
Posting Permissions
- You may not post new threads
- You may not post replies
- You may not post attachments
- You may not edit your posts
-
Forum Rules
|
| S |
M |
T |
W |
T |
F |
S |
| 31 |
1
|
2
|
3
|
4
|
5
|
6
|
|
7
|
8
|
9
|
10
|
11
|
12
|
13
|
|
14
|
15
|
16
|
17
|
18
|
19
|
20
|
|
21
|
22
|
23
|
24
|
25
|
26
|
27
|
|
28
|
29
|
30
| 1 | 2 | 3 | 4 |
|


 Reply With Quote
Bookmarks